
Bring autumn witch aesthetics to your fingertips with nail designs inspired by falling leaves, candlelit colors, moonlit details, and rich botanical shades. These wearable ideas range from simple accent nails to layered finishes, with practical tips for creating each look at home or sharing it with a nail technician.
Smoky Plum Nails with Crescent Moon Accents
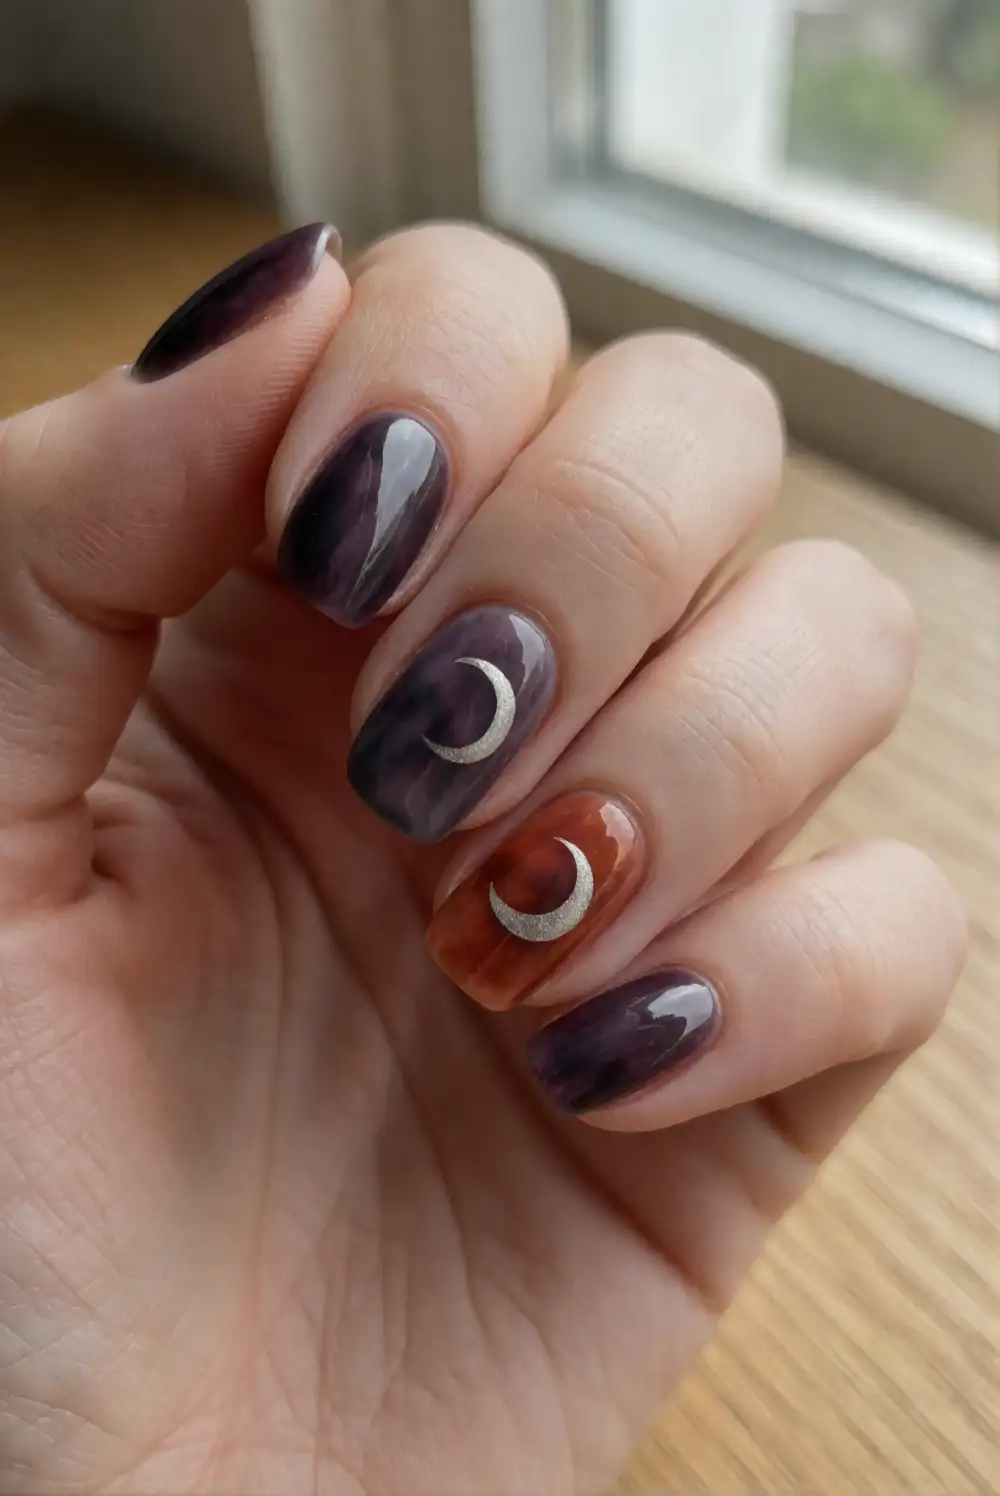
Start with a smoky plum polish across the nails, then choose one or two accent nails for a small crescent moon. A fine nail-art brush and muted silver polish make a delicate moon shape; a metallic decal is another option. Apply a clear base coat first, let each layer dry, and finish with a glossy top coat. Keep the crescent near the cuticle or along one side for a subtle celestial detail that still feels polished.
For a softer effect, use dusty mauve instead of deep plum and choose a pale champagne accent. A matte top coat makes the design feel velvety, while a glossy finish emphasizes the moon. If freehand painting feels tricky, place a small stencil over the dry base color and fill it carefully. Pair this manicure with silver rings, a warm knit, or an autumn outfit in charcoal and brown for an easy witchy touch.
Matte Black Nails with Copper Leaf Accents
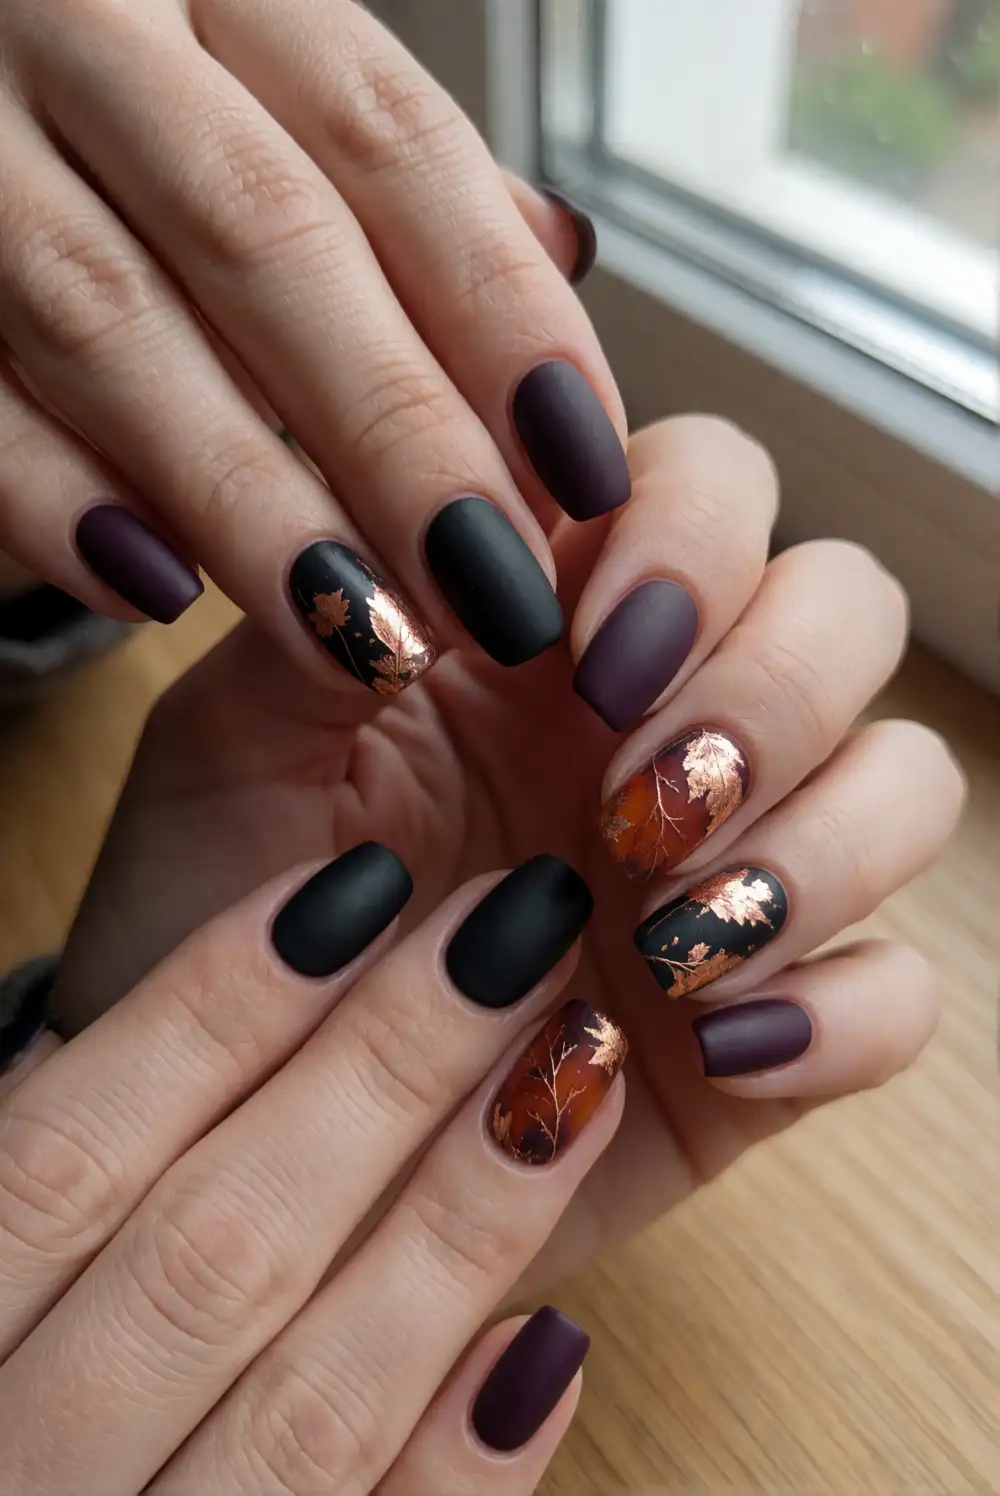
Paint the nails with opaque black polish and allow the color to dry fully before adding copper leaf details. Use a fine brush to paint simple stems and tapered leaf shapes on an accent nail, or apply small metallic nail decals for a cleaner finish. Keep the leaves concentrated near the tips or sides rather than covering every nail. Seal the design with a matte top coat, applying it carefully so the copper remains crisp and reflective.
Deep bronze or antique gold can replace copper for a warmer variation, while a single leaf on each hand keeps the manicure understated. Short, softly rounded nails work especially well with this graphic contrast, but the design also suits longer almond shapes. For a tidy result, let the metallic details dry before top coating and avoid brushing repeatedly over the same area. The black base pairs beautifully with rust sweaters, dark denim, and simple metal jewelry.
Amber Cat-Eye Nails with a Golden Glow
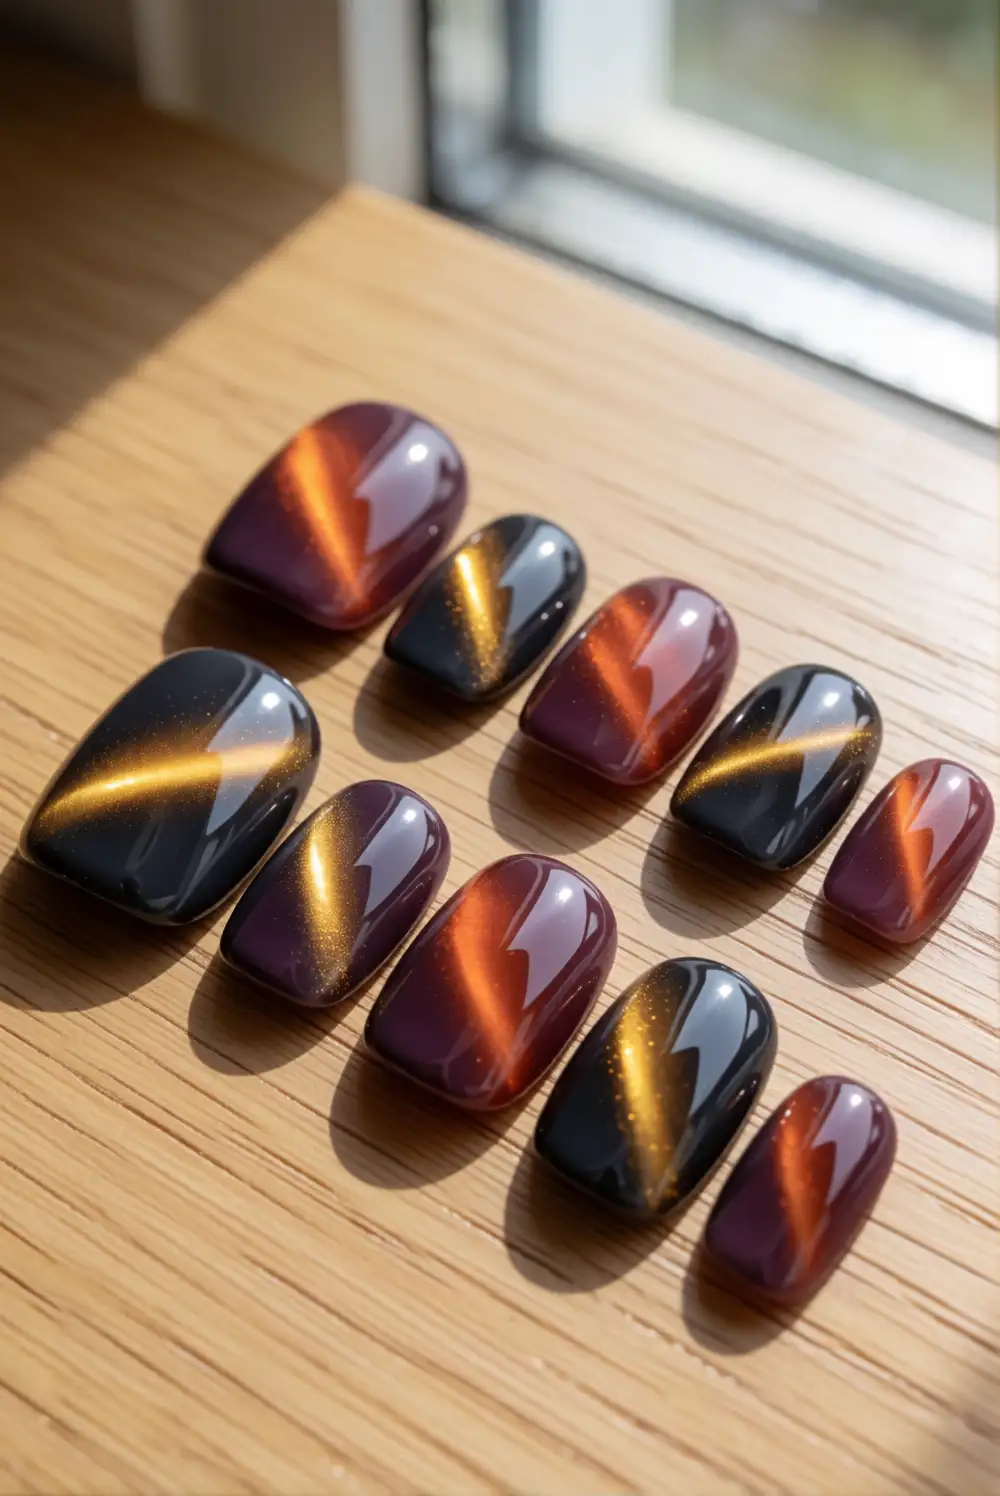
Choose a translucent amber magnetic polish for a warm, glassy manicure with a shifting golden line. Apply a thin base layer, then hold the polish’s magnet above each freshly painted nail according to the product directions. Move the magnet slightly to guide the reflective stripe, and cure or dry the polish as directed. A glossy top coat enhances the dimensional finish. If magnetic polish is unavailable, layer a sheer amber shade over fine gold shimmer for a similar autumn glow.
Keep the magnetic line centered for a classic cat-eye effect, or angle it diagonally for a more dramatic look. The color stands out against short, neat nails and feels especially rich on longer shapes. Add a sheer brown accent nail if you want a gentler contrast, or wear amber across every nail for a cohesive finish. Because this polish catches light, simple rings and clothing in cream, chocolate, or olive let the manicure remain the focal point.
Rust Ombre Nails with a Velvet Finish
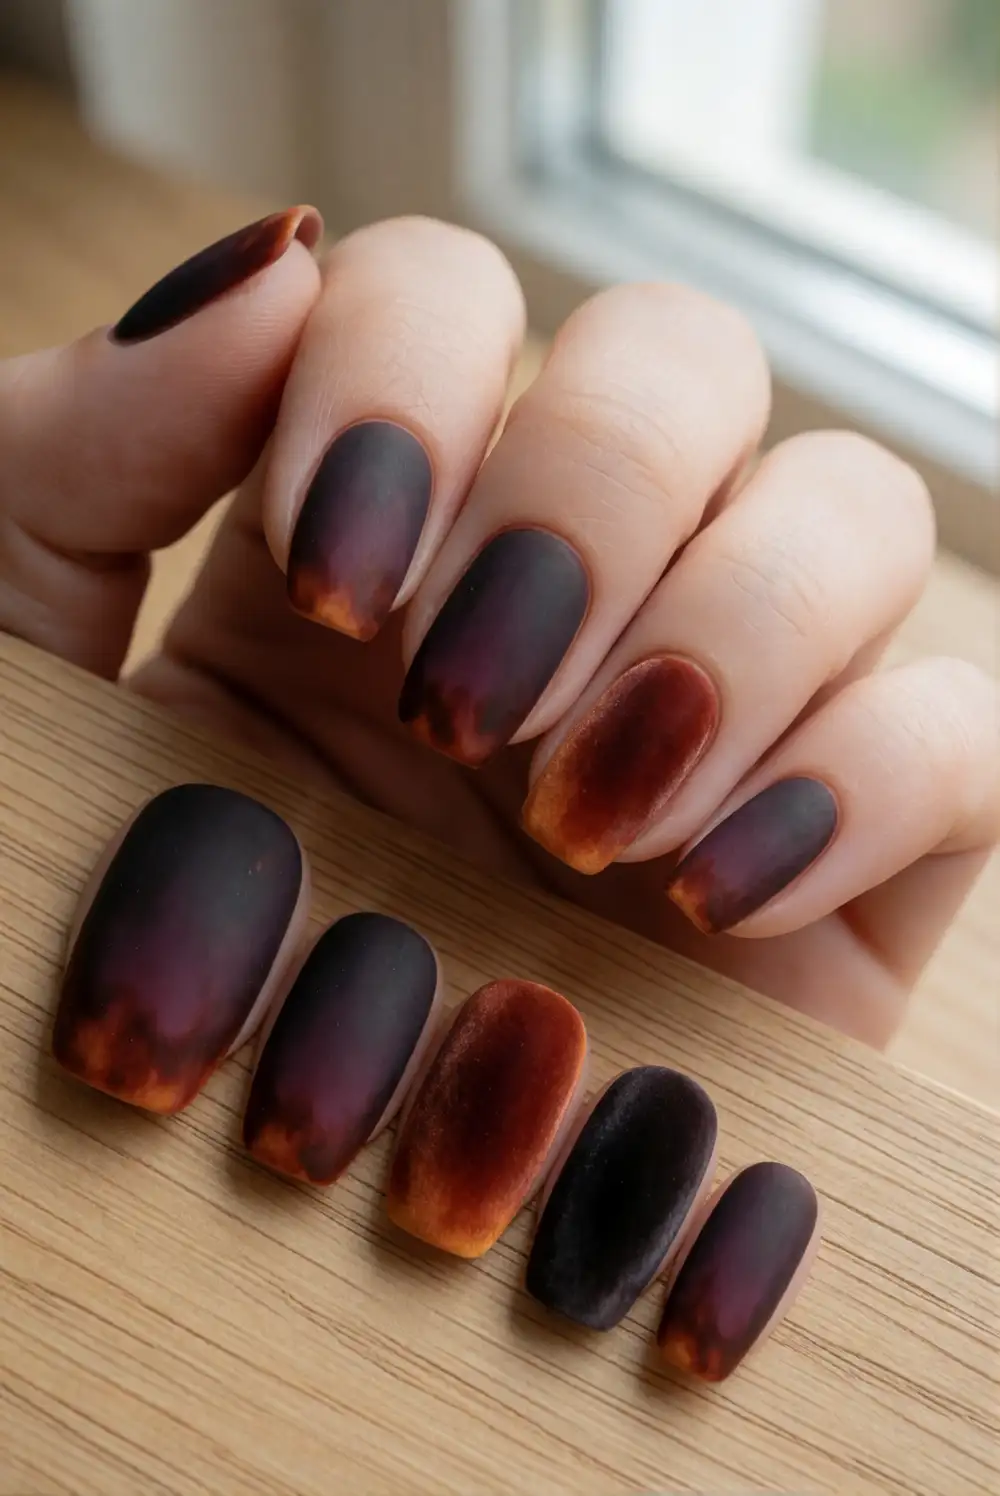
Create a soft autumn gradient by blending deep brown at the cuticle into burnt rust toward the tips. Paint both colors onto a small makeup sponge in overlapping bands, then gently dab the sponge over a dry base coat. Repeat with light layers until the transition looks smooth, cleaning any polish from the skin between passes. Finish with a matte top coat for a soft, fabric-like appearance, or choose gloss to bring out the warmth of the rust shade.
Try terracotta fading into muted plum for a more colorful take, or keep the gradient close to the natural nail with a sheer nude base. Sponge texture can look a little uneven before top coat, so use thin layers and allow each pass to settle. A fine brush dipped in remover helps sharpen the edges. This manicure works nicely with cozy knits and warm-toned makeup, and its blended color makes regrowth less noticeable than a solid dark polish.
Moss Green Nails with Delicate Botanical Vines
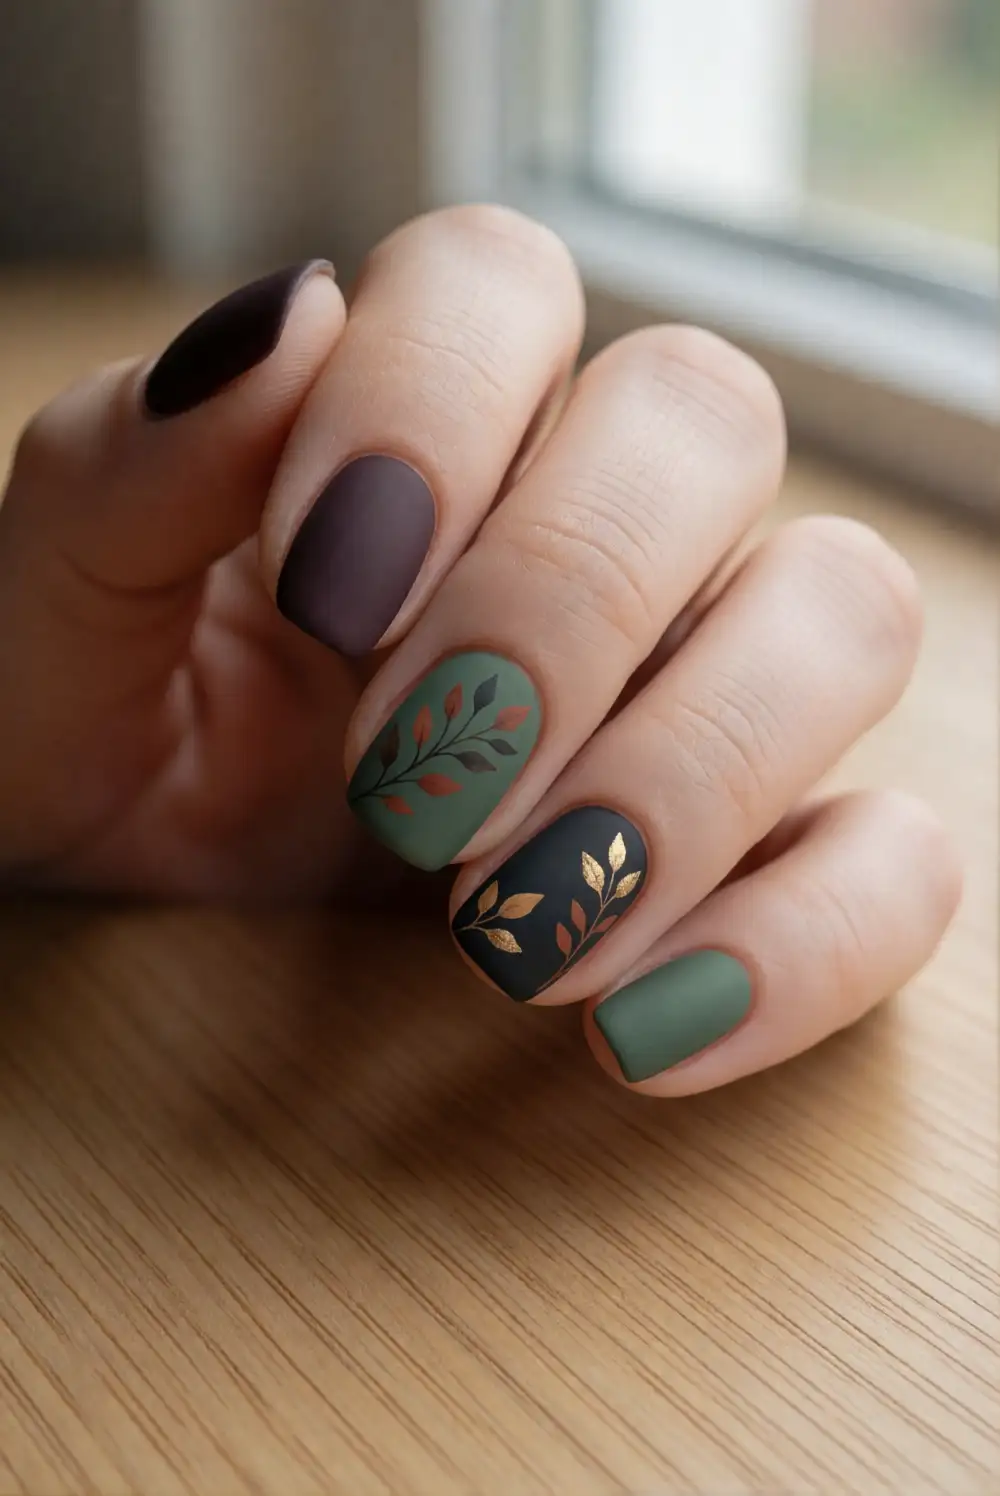
Apply a moss green polish as the base, then add a fine botanical vine to one or two nails using a detail brush. A thin curved line in muted gold or deep forest green gives the design its stem; tiny paired strokes create simple leaves. Let the base dry before painting, and use a light hand so the accents stay delicate. Finish with a clear top coat to smooth the surface and protect the painted details from everyday wear.
For a quieter manicure, paint the vine only on a single accent nail and leave the rest in solid moss green. A sheer beige base with green foliage offers a lighter variation, while bronze details add a subtle metallic glint. Keep the shapes airy rather than filling the nail with dense foliage, especially on shorter nails. This botanical look feels at home beside autumn layers, natural fabrics, and understated rings, bringing a garden-inspired note to a witchy color palette.
Black Lace Tips over a Sheer Nude Base
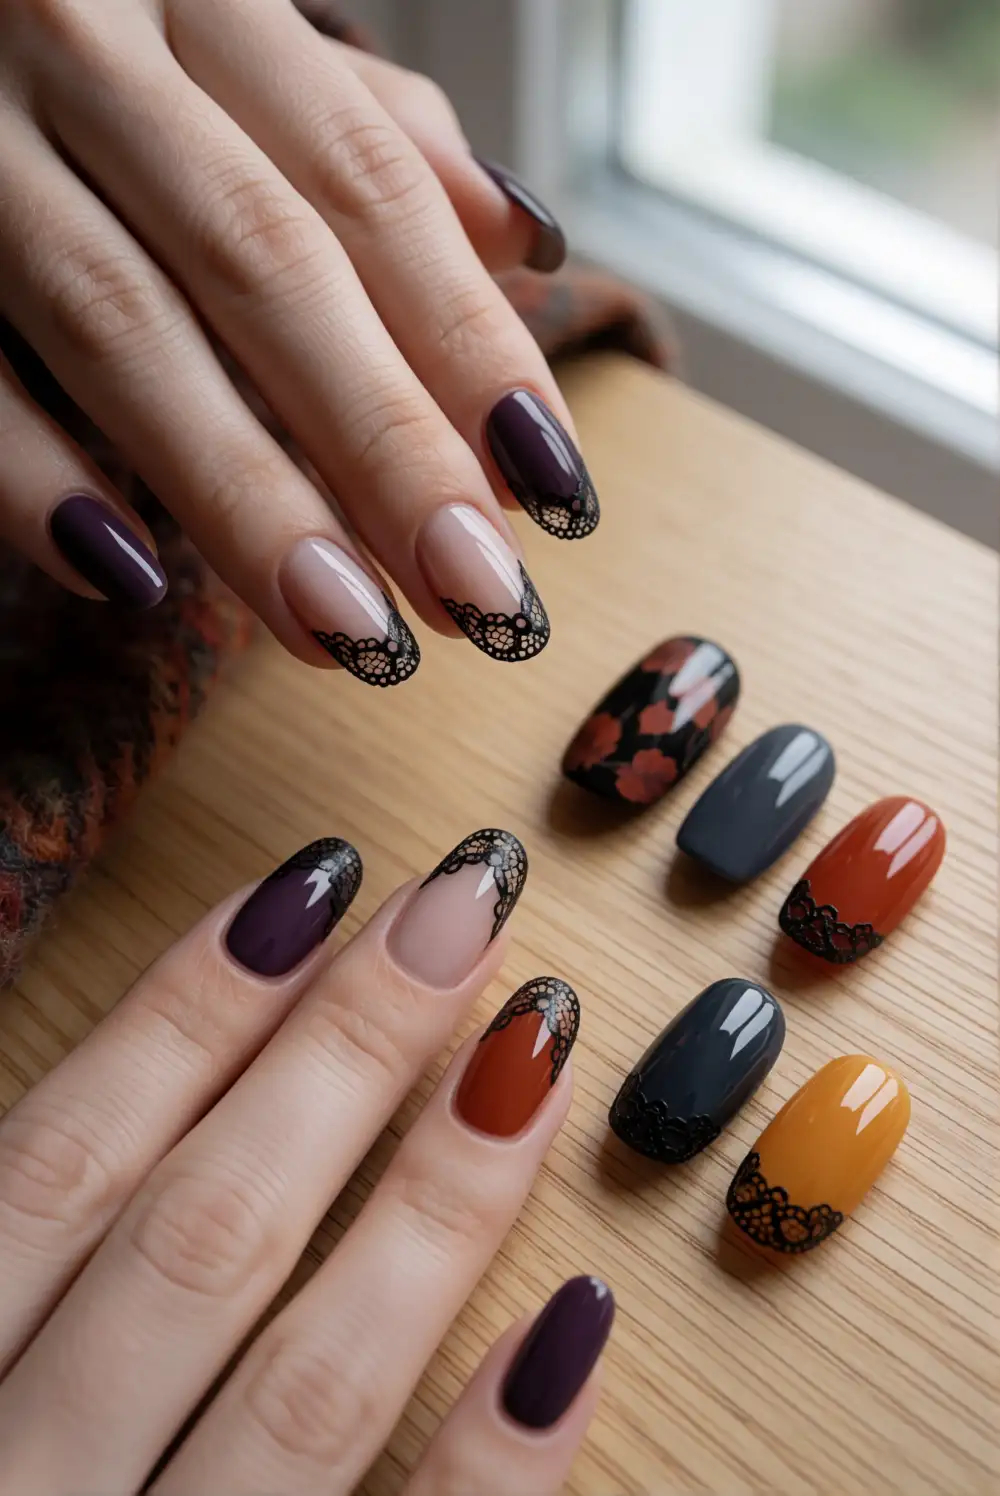
Begin with a sheer nude or blush base and allow it to dry completely. Using a fine nail-art brush, paint a narrow black tip, then add small scallops along its edge to suggest delicate lace. Keep the pattern near the free edge so the natural-looking base remains visible. A stamping plate or lace-pattern decal can simplify the detail if you prefer consistent shapes. Seal the finished nails with a glossy top coat, taking care not to smudge the fine lines.
Try charcoal instead of black for a softer finish, or add a tiny copper accent at the center of one lace edge. The design looks refined on almond or oval nails, though a slim lace border also suits shorter shapes. Work one nail at a time and pause between fine details to prevent dragging the brush through wet polish. Pair the manicure with a dark blouse or a textured autumn dress when you want a polished look with a quietly dramatic edge.
Charcoal Nails with Moonlit Silver Speckles
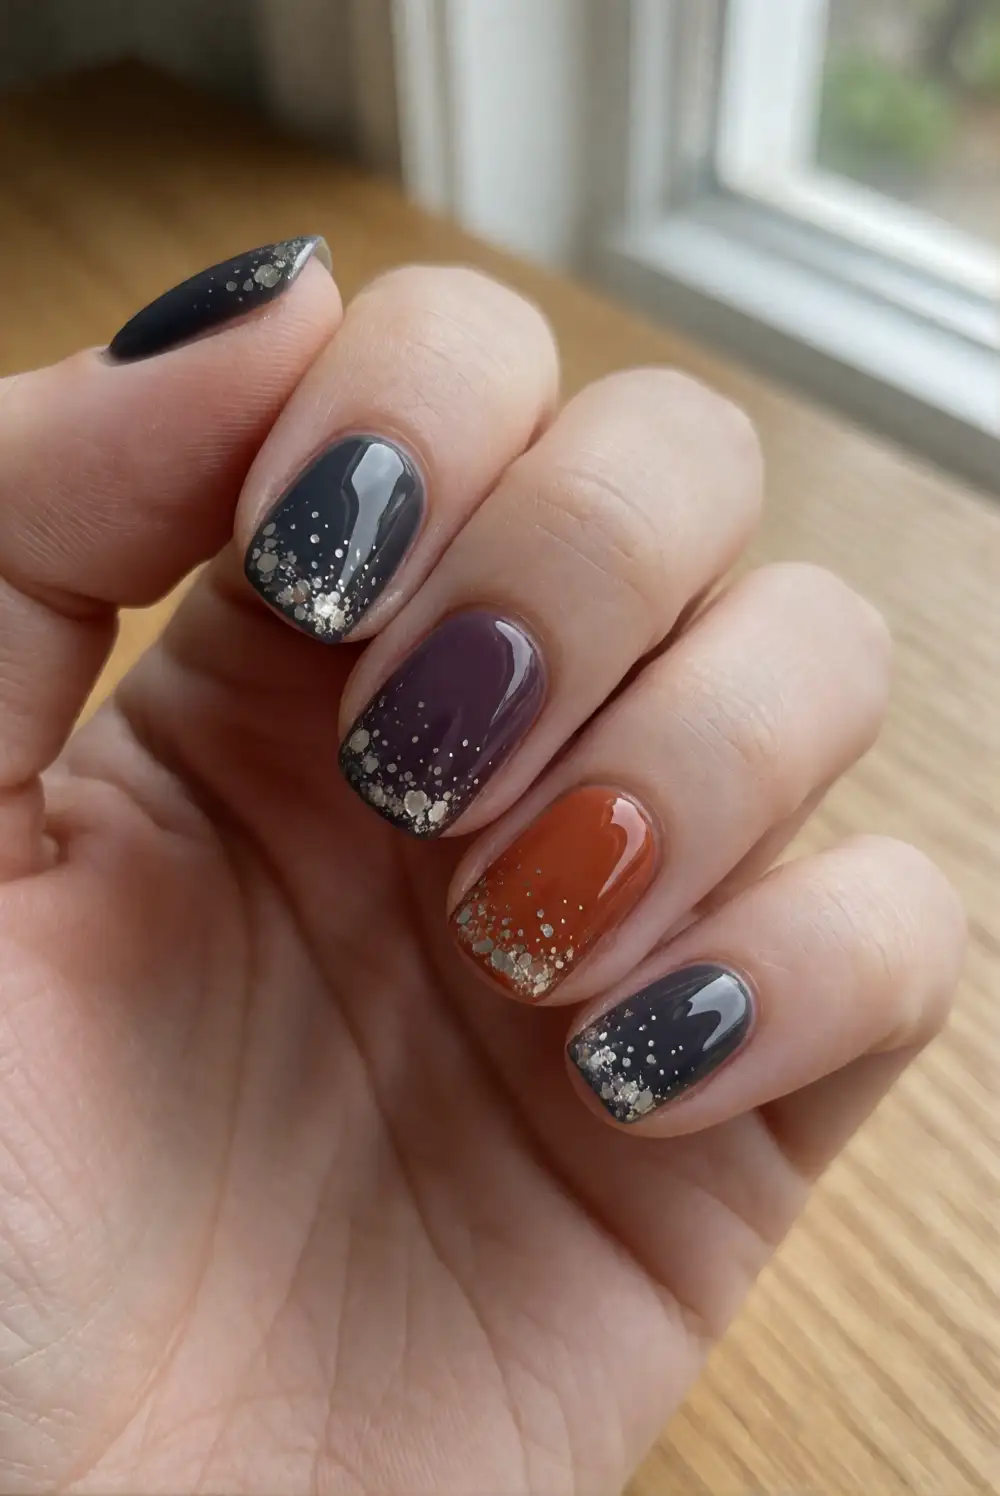
Coat the nails in charcoal polish, then add a sparse scatter of fine silver dots to suggest a clear night sky. A dotting tool or the rounded end of a fine brush gives more control than a large applicator. Vary the spacing and keep the speckles concentrated near one corner of each nail for a graceful, uncluttered finish. Once the dots are dry, apply a glossy top coat to make the silver glimmer against the dark base.
For a more muted look, swap silver for soft pewter or use a matte charcoal base beneath glossy accents. Leave several nails plain and decorate only the ring fingers if you prefer a minimal arrangement. The speckles can be placed in a loose arc to complement a moon-themed accent elsewhere, or kept entirely abstract. This design is easy to refresh with a dotting tool and suits both short and long nails, especially alongside silver jewelry and cool-toned autumn layers.
Cinnamon Tortoiseshell Nails with Warm Amber Layers
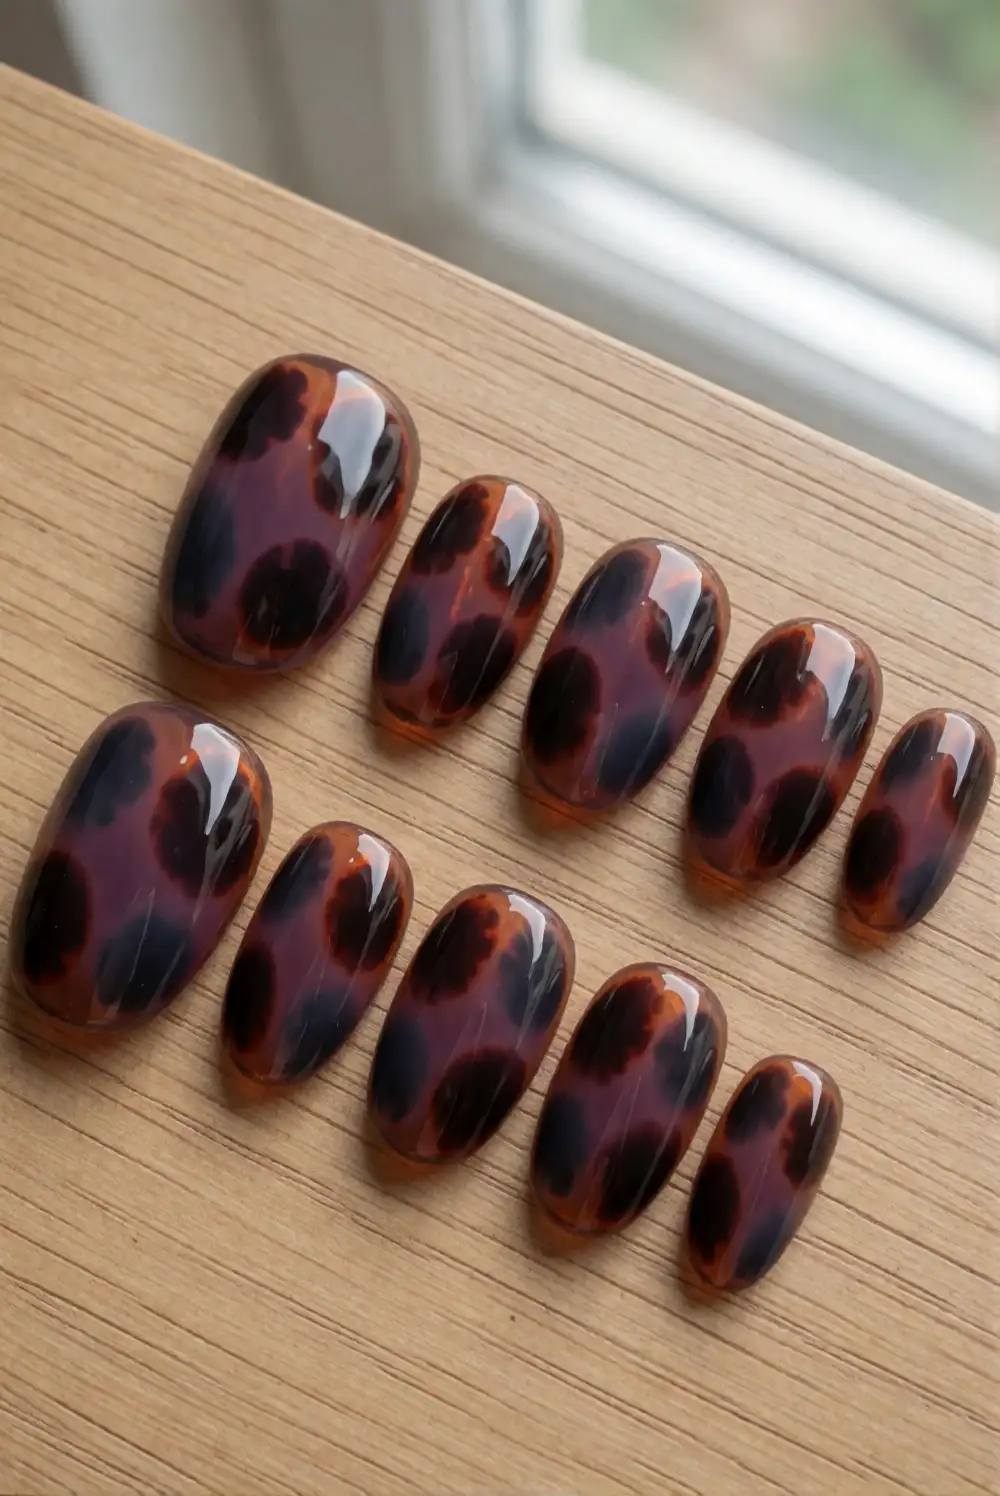
Build a cinnamon tortoiseshell effect with a translucent amber base and irregular patches of dark brown polish. Let the base dry, dab on a few loose brown shapes, then soften their edges with another thin layer of amber. Keep the patches varied in size and spacing so the pattern feels organic rather than repeated. A glossy top coat brings depth to the layered colors. If working by hand, decorate one or two nails and use solid cinnamon polish on the others.
For a deeper palette, add a small amount of black-brown to a few patches, keeping the warm amber visible between them. A sheer caramel base creates a lighter version, while a single patterned accent nail gives the look a subtle finish. Use a small detail brush or the tip of a sponge to form uneven shapes, and allow each layer to dry before adding the next. These warm, polished tones complement gold jewelry, cream knits, and other cozy fall textures.
Pressed Leaf Accent Nails in Burnt Orange
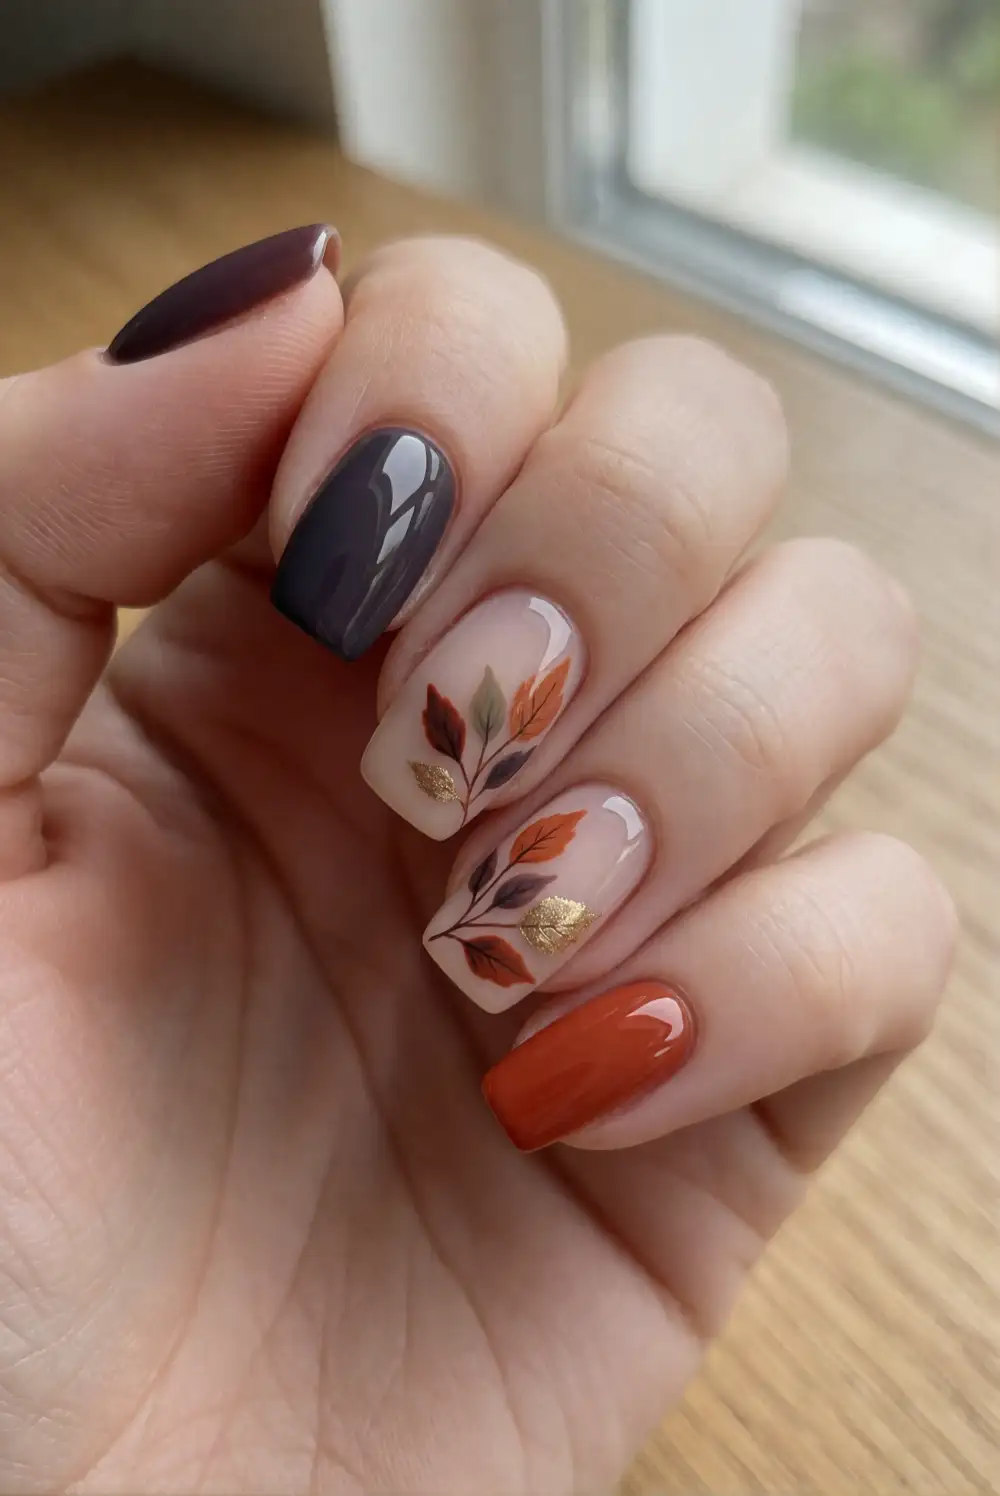
Paint most nails in burnt orange and leave one or two accent nails in a sheer beige shade. On each pale accent, place a small dried botanical nail decal or paint a simple leaf silhouette in brown and muted gold. Keep the artwork contained within the nail and choose a fine, flat design that can be sealed smoothly. After the details dry, add a generous clear top coat. A simple leaf shape gives the manicure an autumn feel without making the design overly busy.
Rust, terracotta, and deep wine make lovely alternatives to burnt orange, while a cream base helps metallic leaf details stand out. If using a real pressed botanical piece, choose a very thin nail-art inclusion made for manicures and seal it completely beneath suitable top coat. Otherwise, painted or commercially prepared decals are easier to work with. This accent style pairs well with natural textures and warm scarves, and the plain coordinating nails keep the botanical detail easy to wear.
Deep Berry Nails with Antique Gold Cuticle Arcs
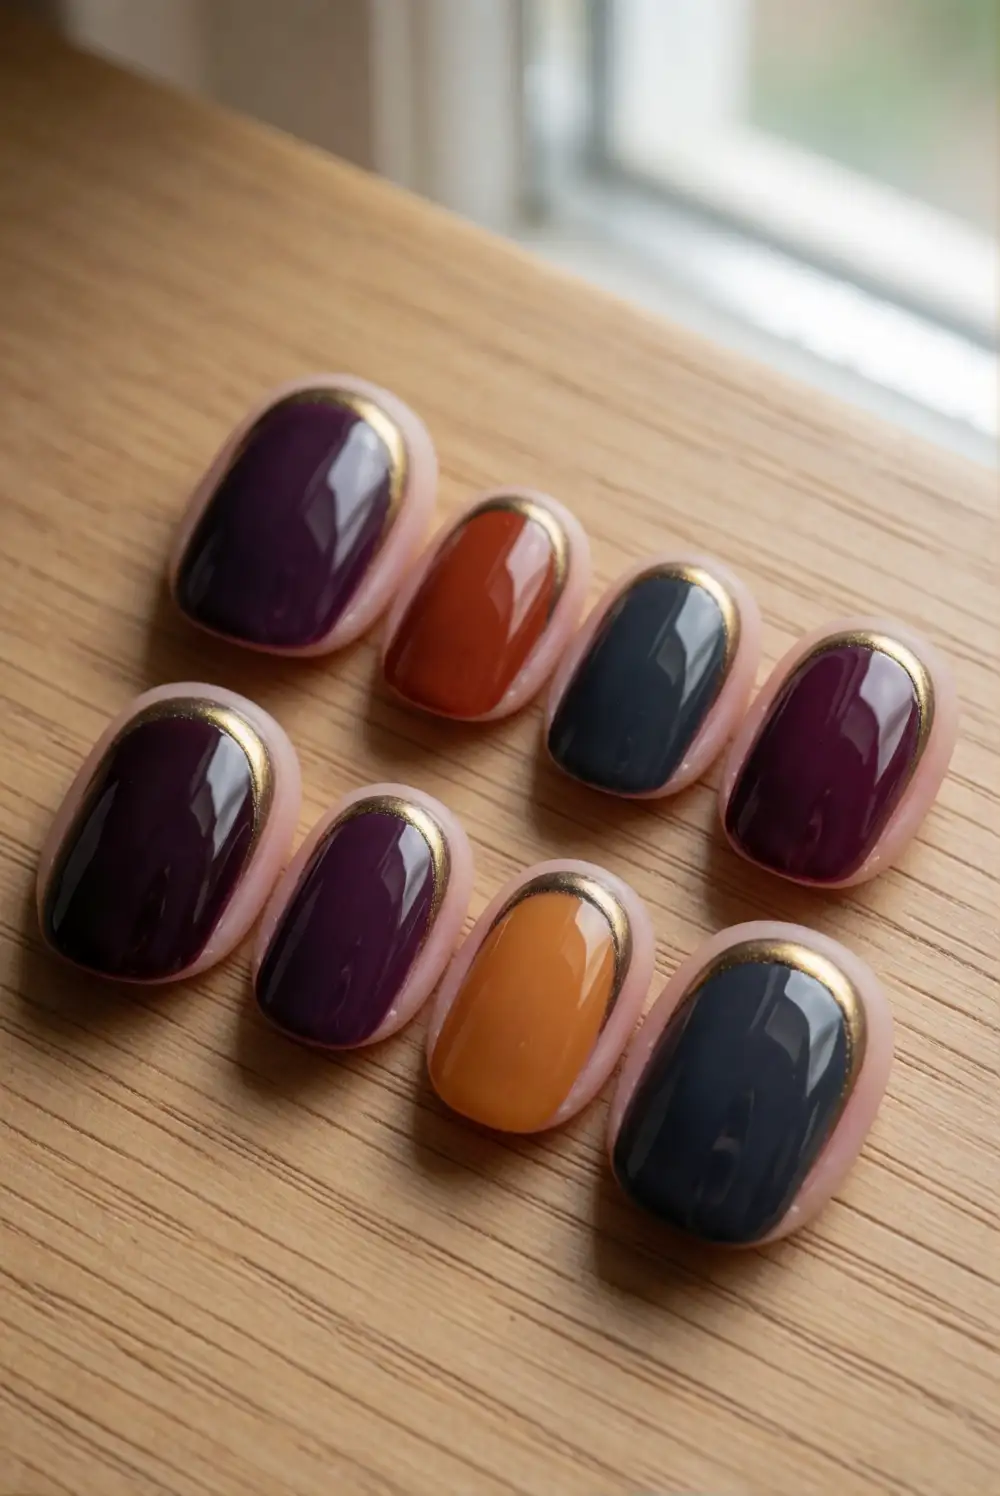
Apply a deep berry polish to each nail and let it dry before adding a fine antique-gold arc near the cuticle. A striping brush helps create a smooth curve; a delicate metallic decal offers a simpler alternative. Keep the arc narrow and leave a small gap from the skin for a clean, comfortable finish. Seal the manicure with a clear top coat, smoothing over the metallic detail without pressing hard enough to distort its shape.
Black cherry, mulberry, or dark wine can stand in for berry, depending on how dramatic you want the result. Use the gold arc on every nail for a coordinated look or reserve it for a pair of accents. Rounded and almond shapes show off the curved detail especially well, while shorter nails benefit from a very slim line. This rich color combination feels polished for evening plans and adds a refined autumn witch note to simple clothing.
These autumn witch nail ideas make it easy to choose a manicure that suits your mood, from subtle botanical accents to glossy celestial details. Start with one design element you love, adapt the colors to your favorite fall shades, and finish with a top coat that gives the look the right amount of shine or softness.








