
Find Halloween nail ideas for every kind of manicure, from subtle seasonal accents to bold, playful designs. These wearable looks use approachable colors, simple patterns, and a mix of finishes, so you can choose a style that feels right for your plans and personality.
Glossy Black French Tips
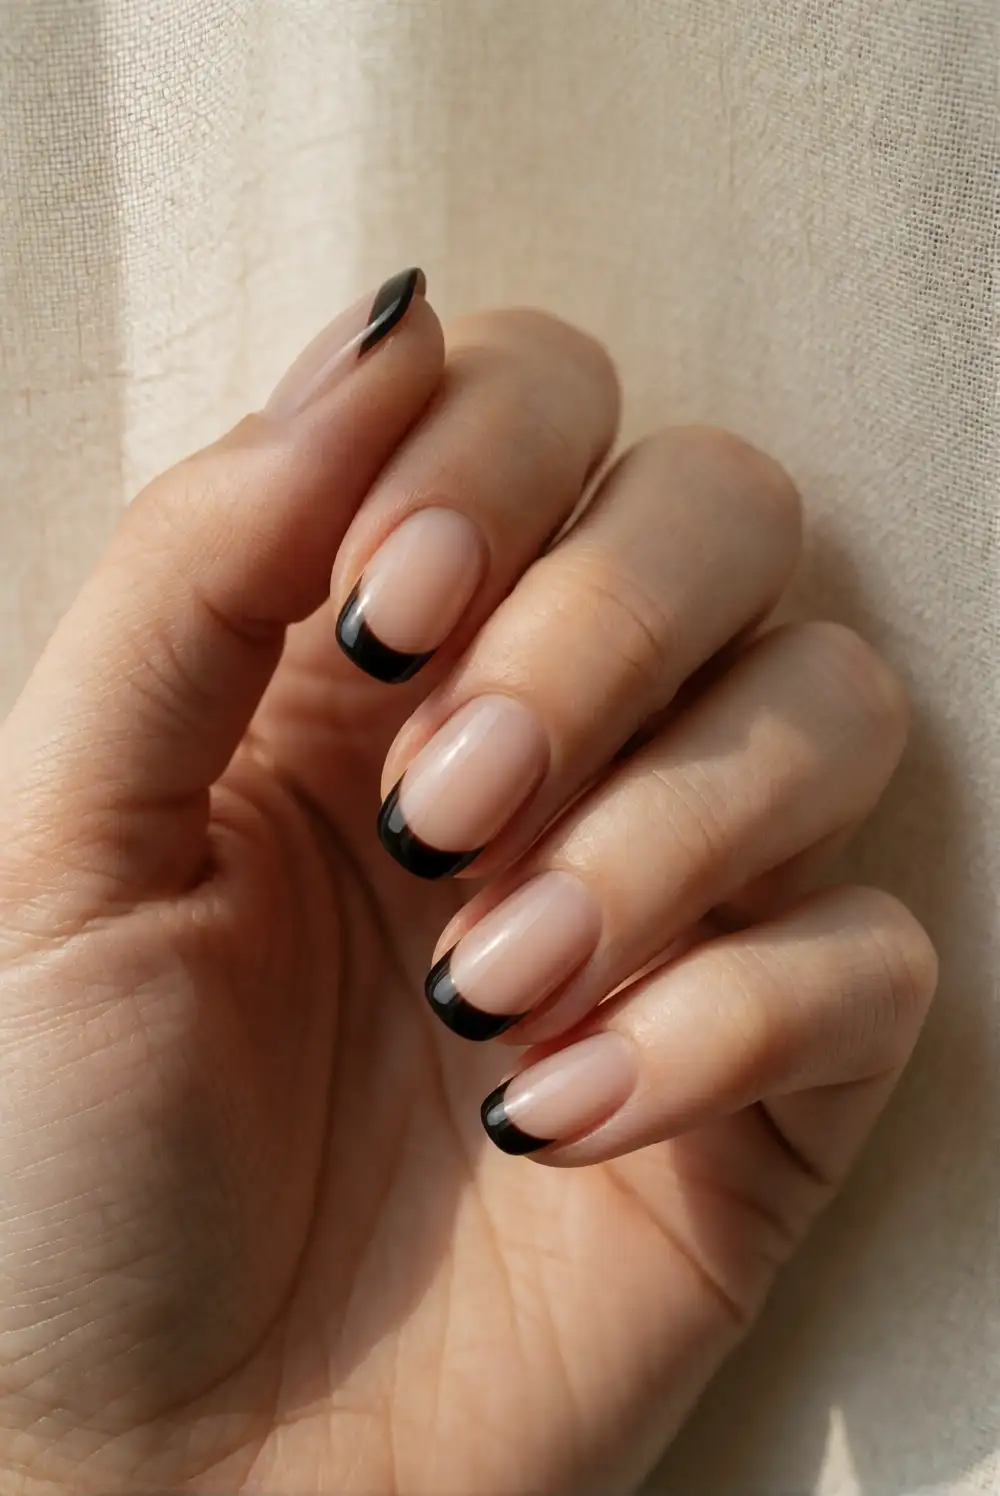
Give a classic French manicure a Halloween-ready edge with glossy black tips over a sheer nude or milky base. Apply a thin base coat, then paint the free edge of each nail black, following its natural curve. A fine nail-art brush helps make the smile line neat, while a French-tip guide can help if you prefer a crisp boundary. Finish with a clear top coat to smooth the design and add shine.
Keep the black tips narrow for an understated look, or make them deeper for a more dramatic finish. This design works especially well on almond and oval nails, though a straight tip suits square nails too. For a little extra seasonal contrast, add a tiny orange dot to one accent nail. Let each coat dry thoroughly before adding top coat, and use a small brush dipped in remover to tidy any uneven edges.
Pumpkin Orange Micro French Nails
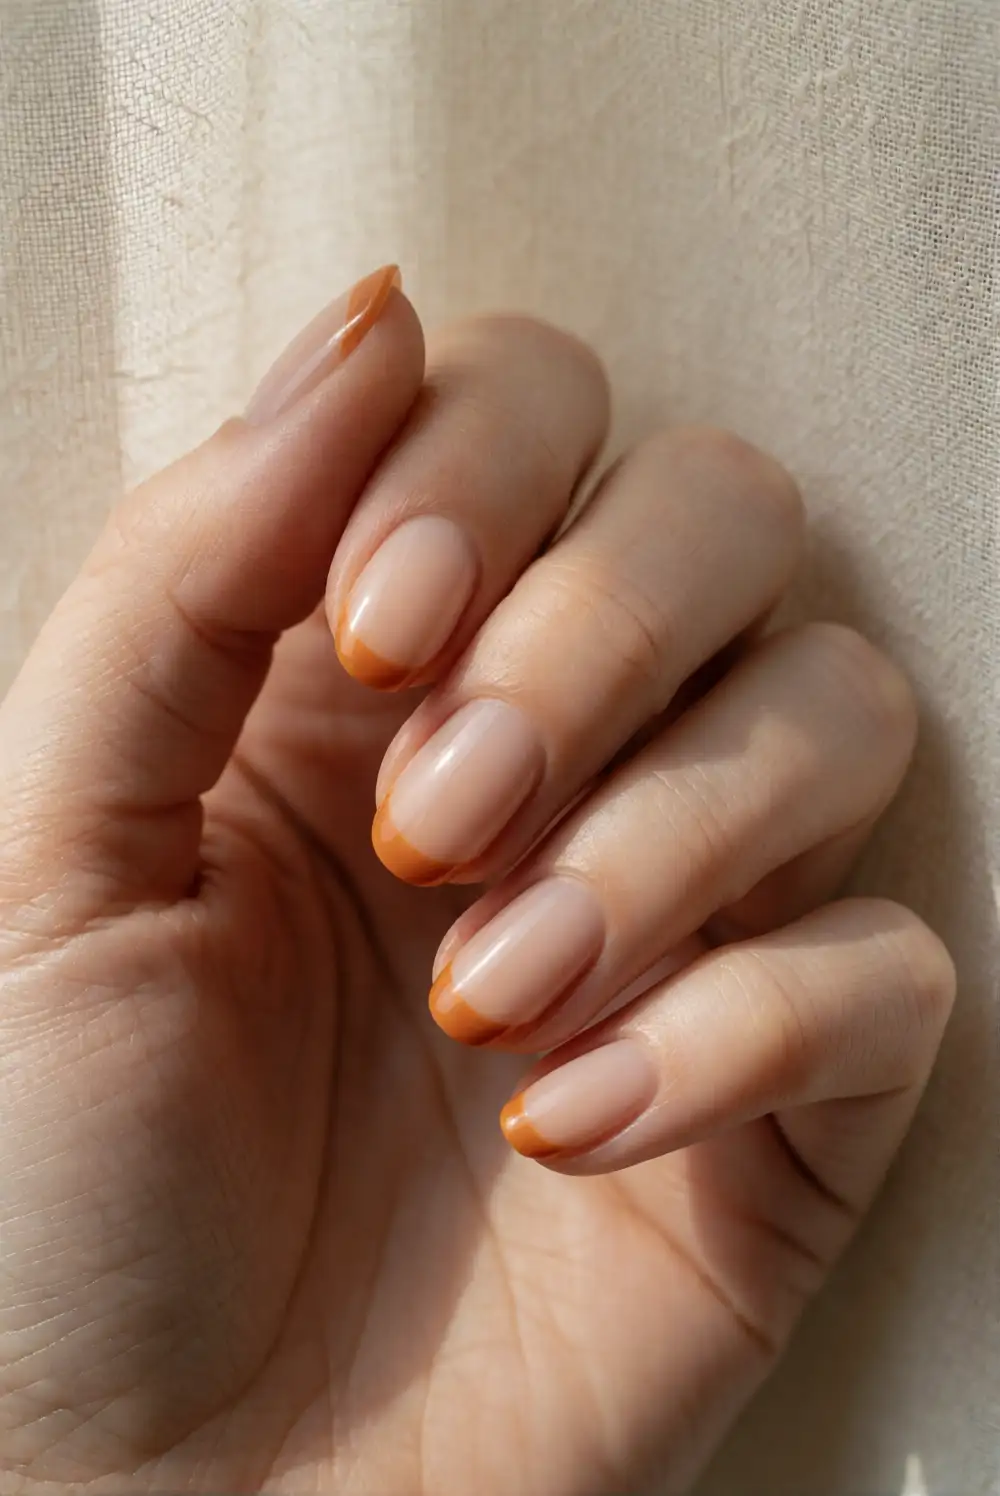
Paint a slim pumpkin-orange line along the tips of sheer pink or beige nails for a bright but delicate seasonal manicure. Start with a base coat and two thin layers of neutral polish, allowing them to dry before adding color. Use a fine liner brush to draw the orange tips, keeping the stripe narrow and consistent. Seal the finished nails with a glossy top coat so the color looks smooth and lasts longer.
Choose a vivid pumpkin shade for a lively pop, or a softer terracotta orange for a more muted effect. The small amount of color makes this an easy way to wear a seasonal manicure with everyday outfits. If painting every tip feels tricky, use orange on just two nails and leave the others neutral. A rounded brush can soften the line, while a cleanup brush helps define the curved tips.
Little Ghost Accent Nails
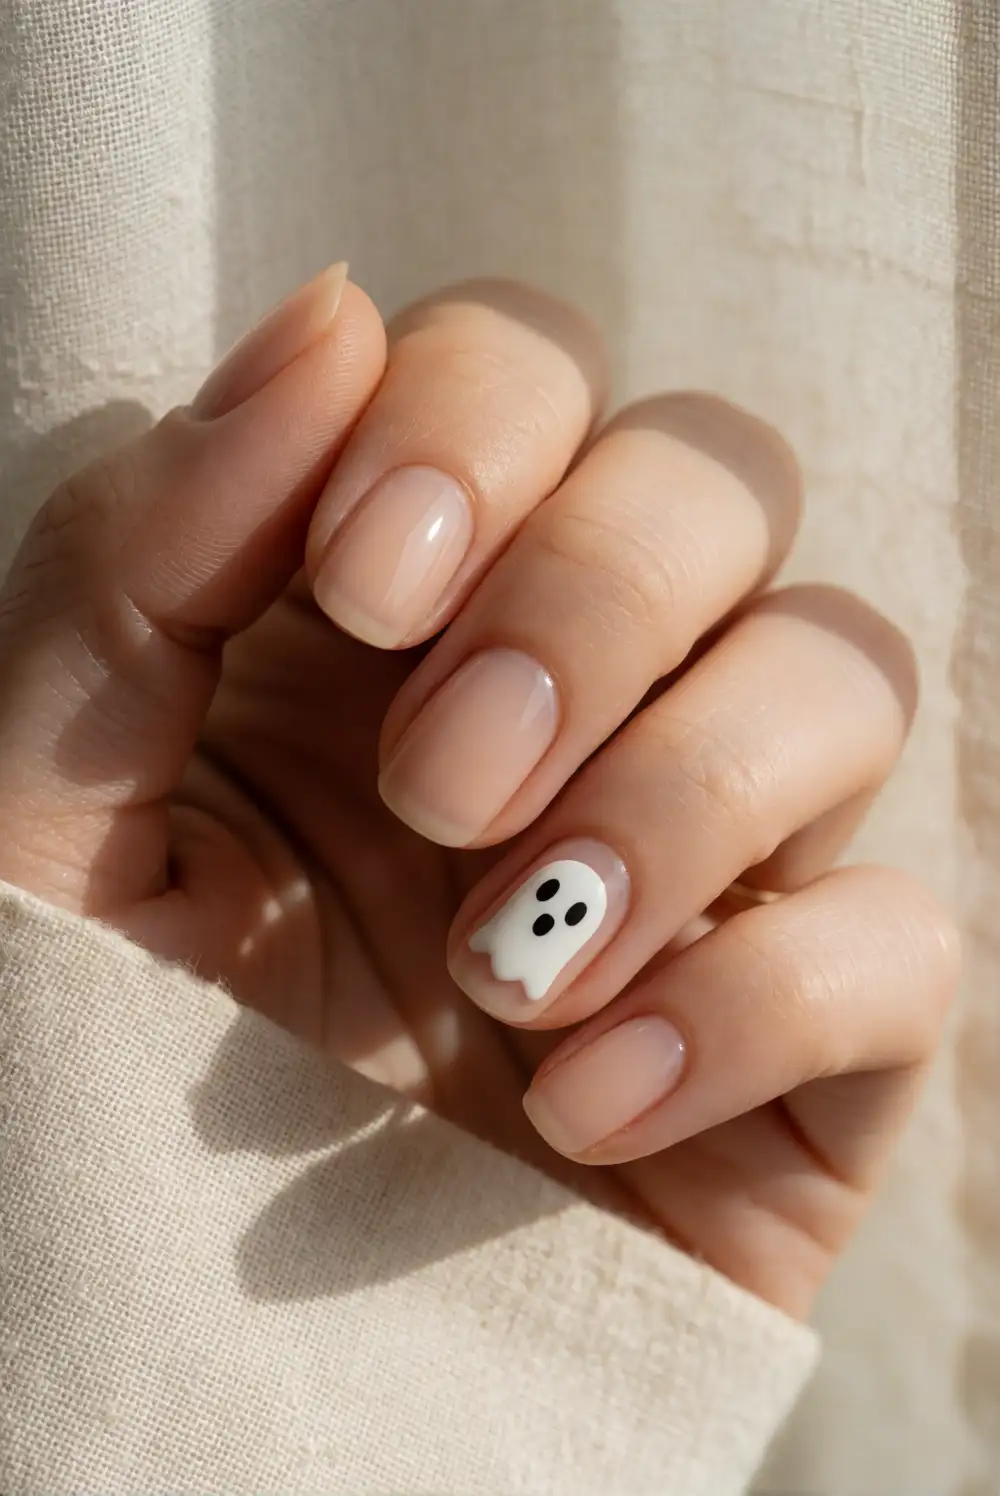
Create a cheerful ghost manicure with a sheer base, white polish, and a fine nail-art brush. Paint a small white dome on an accent nail, then pull the polish downward into a gently wavy shape to suggest a floating sheet. After it dries, add two tiny black eyes with a dotting tool or the tip of a fine brush. Leave the remaining nails in a glossy nude shade, and seal everything with clear top coat.
Keep the ghost simple and small so the design remains clean rather than crowded. A pale lavender or soft gray base gives the white shape a subtle contrast, while a peachy nude feels more classic. Place the ghost on a single ring-finger nail for a restrained manicure, or repeat it across several nails for a playful finish. Use thin layers of polish, since thick white paint can take longer to dry and may smudge.
Deep Plum Velvet Nails
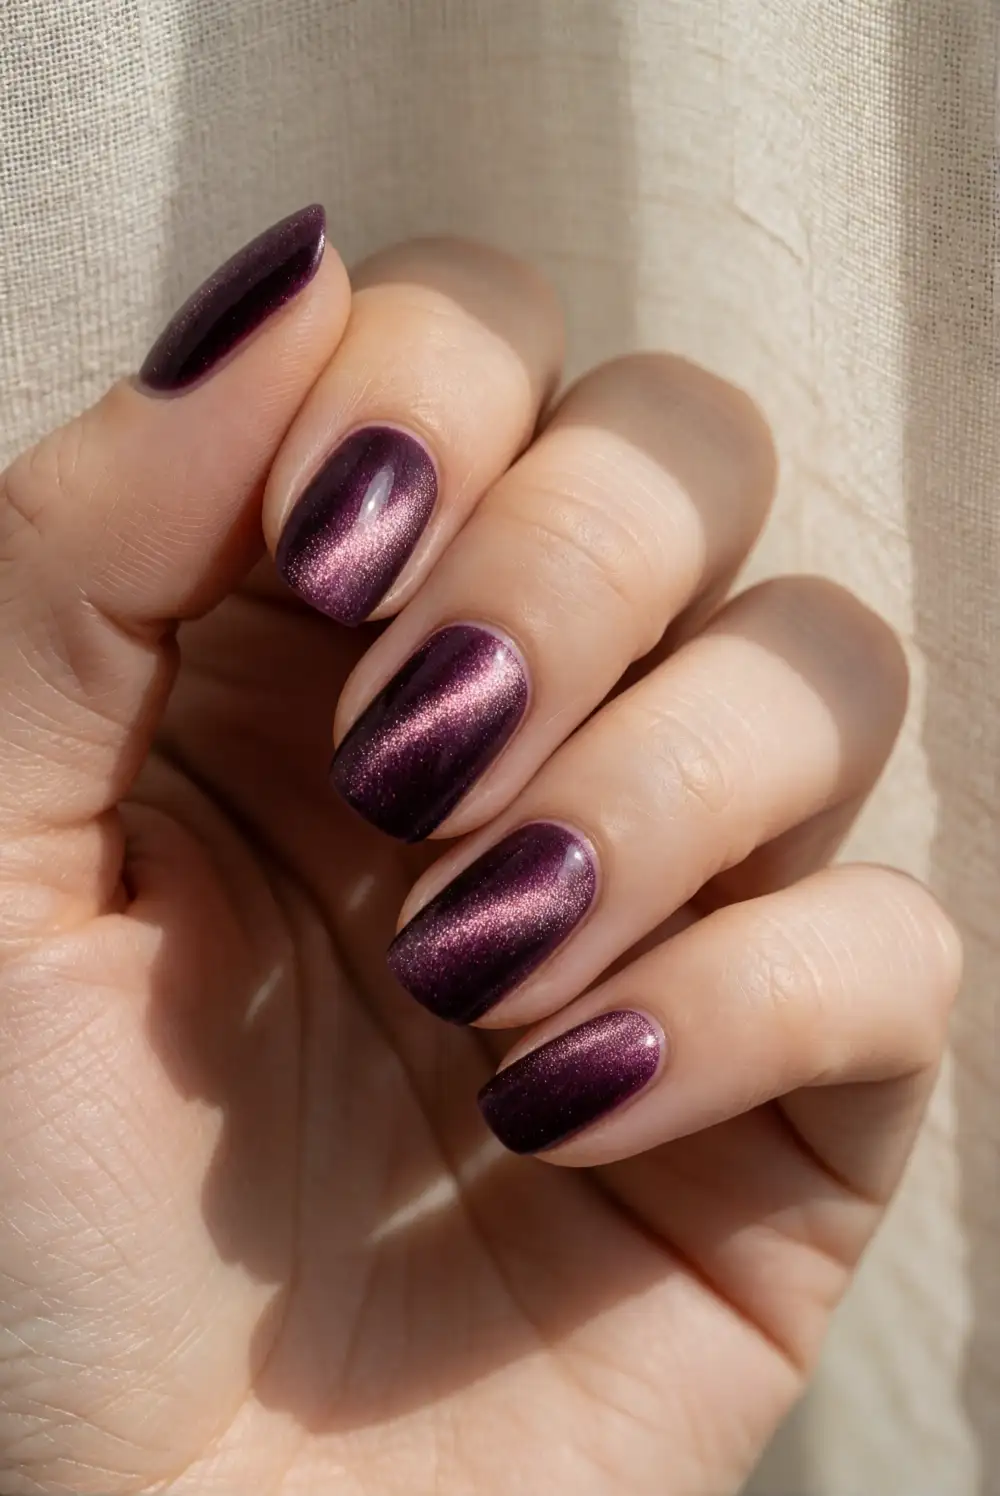
Bring a rich, dressy mood to your manicure with deep plum polish and a velvety magnetic finish. Apply a dark plum magnetic polish over a compatible base coat, working on one nail at a time. Hold the magnet close to the wet polish according to the product directions to draw the shimmer into a glowing band, then let the nail dry before moving on. Finish with the recommended top coat to preserve the reflective effect.
For a softer result, angle the magnet so the shimmer sits diagonally across each nail; for a jewel-like look, center the glow. Plum velvet polish pairs beautifully with simple black clothing, metallic jewelry, and cozy autumn knits. If you do not have magnetic polish, a deep plum lacquer with a fine shimmer gives a similar evening-ready feel. Keep the surrounding nails free of extra art so the luminous finish remains the focus.
Candy Corn Ombre Nails
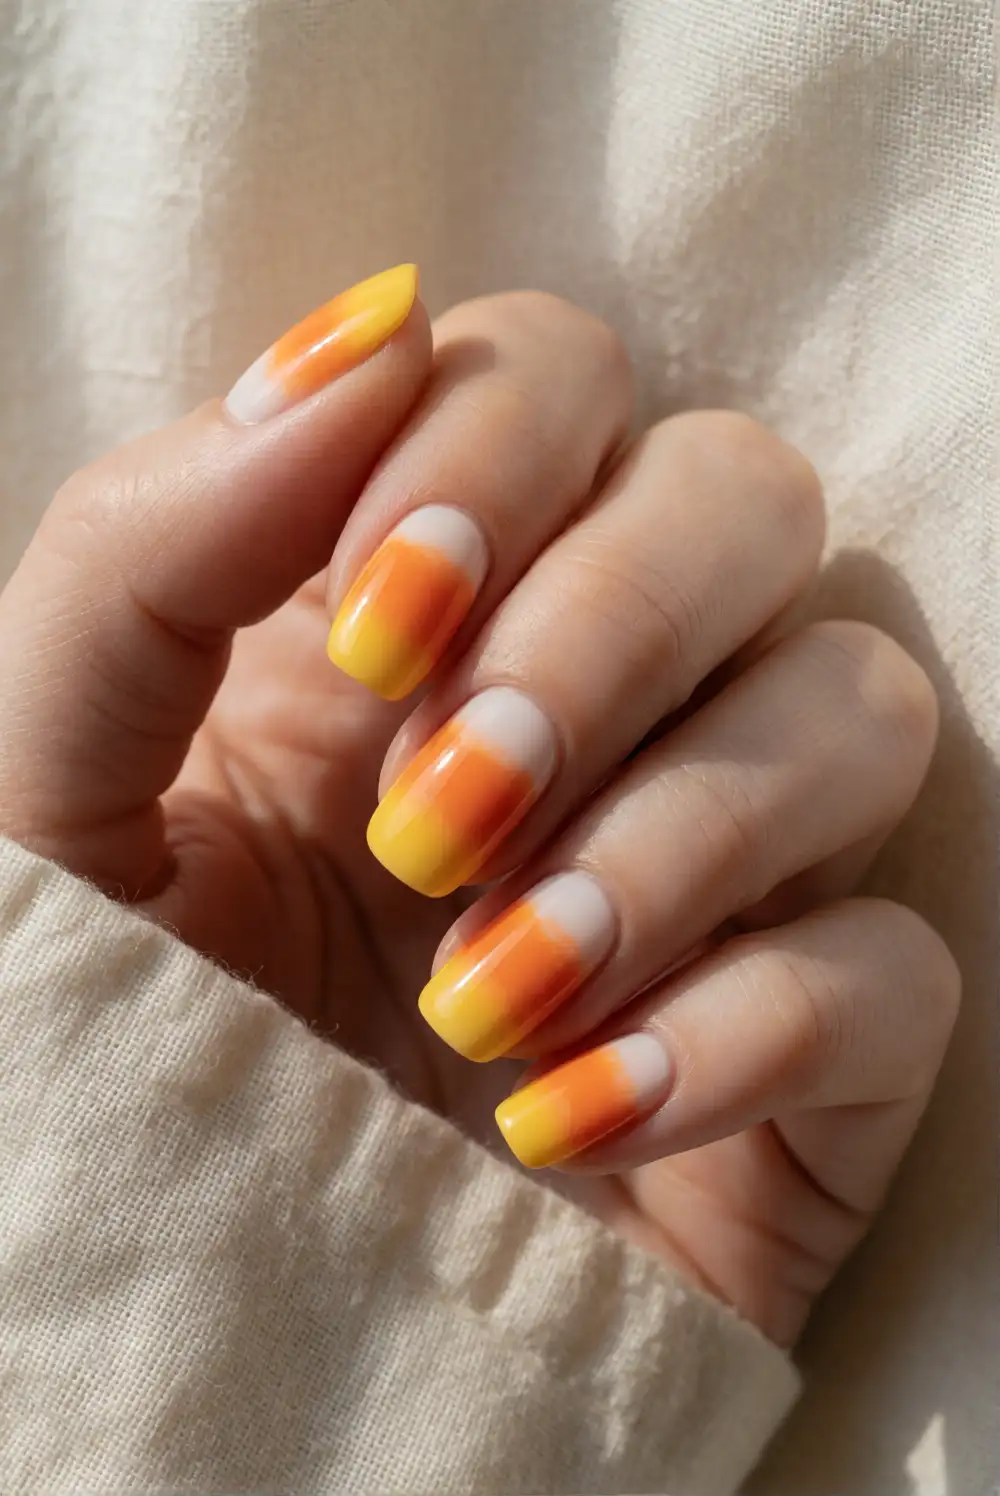
Blend yellow, orange, and white polish into a soft candy-corn gradient using a small makeup sponge. Paint the three colors in adjoining stripes on the sponge, then gently press it onto a white or pale base-coated nail. Repeat the application with fresh polish until the colors look blended, letting each layer dry before adding another. Clean polish from the skin with a small brush and remover, then finish with a glossy top coat.
Try the gradient on every nail for a bright statement, or use it on one accent nail alongside solid cream polish. A sponge with a fine texture creates a smoother fade, while dabbing lightly helps prevent a bulky finish. The colors can run from yellow near the cuticle to white at the tip, or reverse for a fresh variation. Apply liquid barrier around the nails if you have it, making cleanup easier after sponging.
Black and Cream Checkerboard Nails
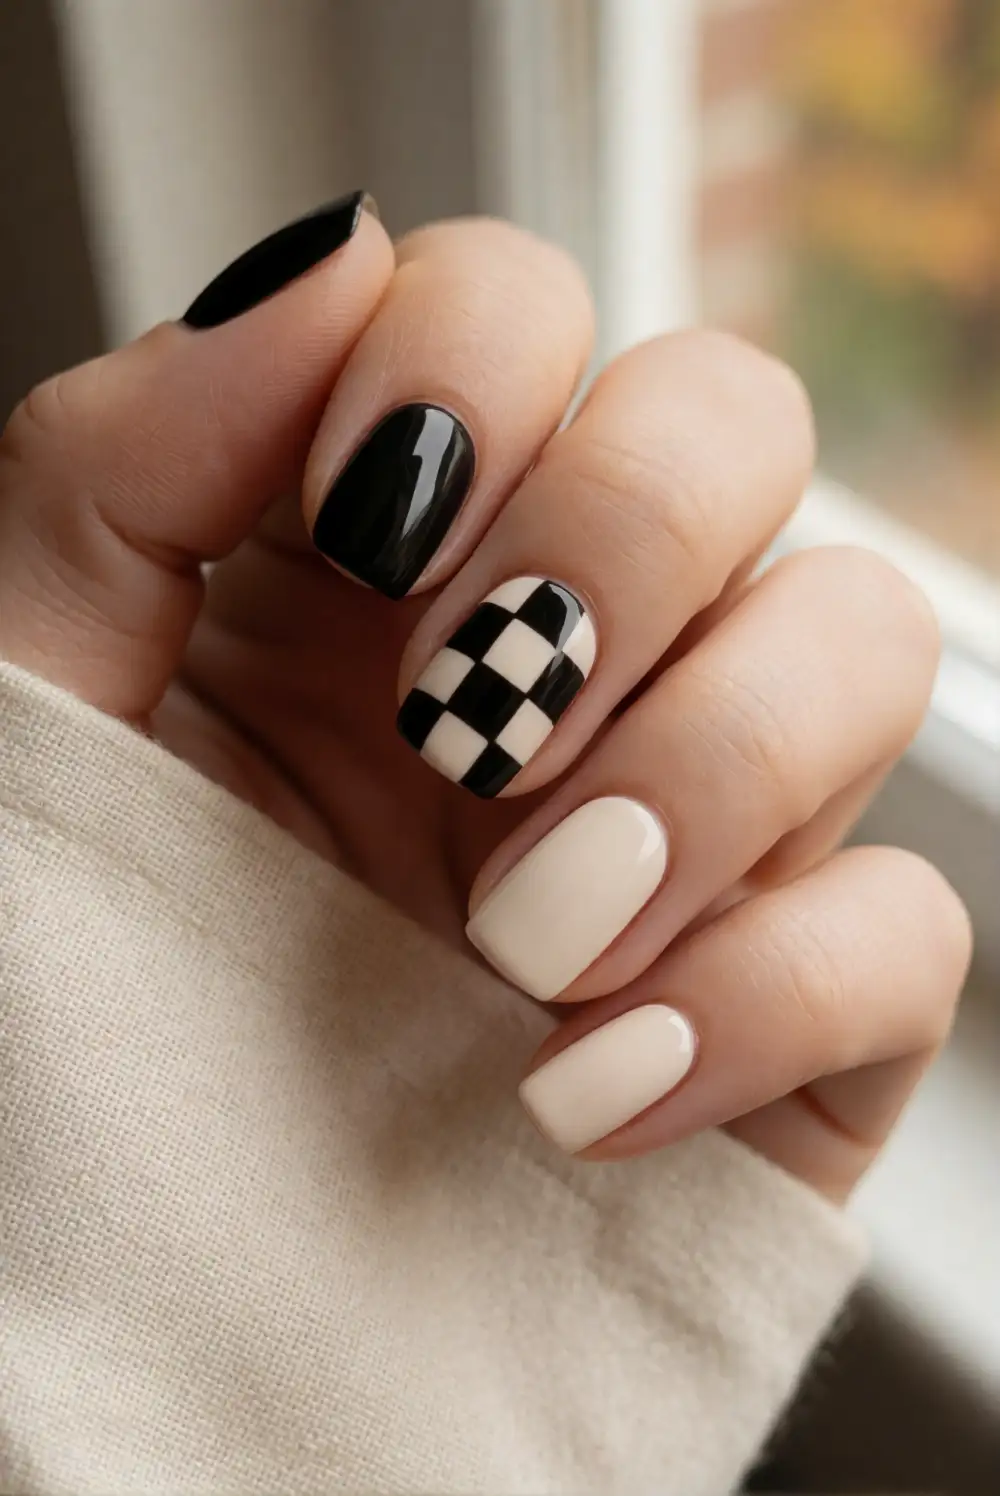
Make a graphic manicure with alternating black and cream squares on one or two accent nails. Begin with a fully dry cream base, then use thin strips of nail tape to map a small grid. Paint selected squares black with a detail brush, remove the tape while the polish is still slightly wet, and let the pattern dry before applying top coat. On the other nails, use a coordinating solid shade to keep the overall design balanced.
Use larger squares for a bold, easy-to-read pattern or smaller ones for a more detailed finish. A slightly imperfect hand-painted grid can feel relaxed and playful, so the lines do not need to look machine-made. If tape feels fiddly, paint a few black squares by hand over the cream base instead. Keep each layer thin and allow ample drying time before sealing, which helps prevent the dark polish from dragging across the light squares.
Silver Moon and Star Nails
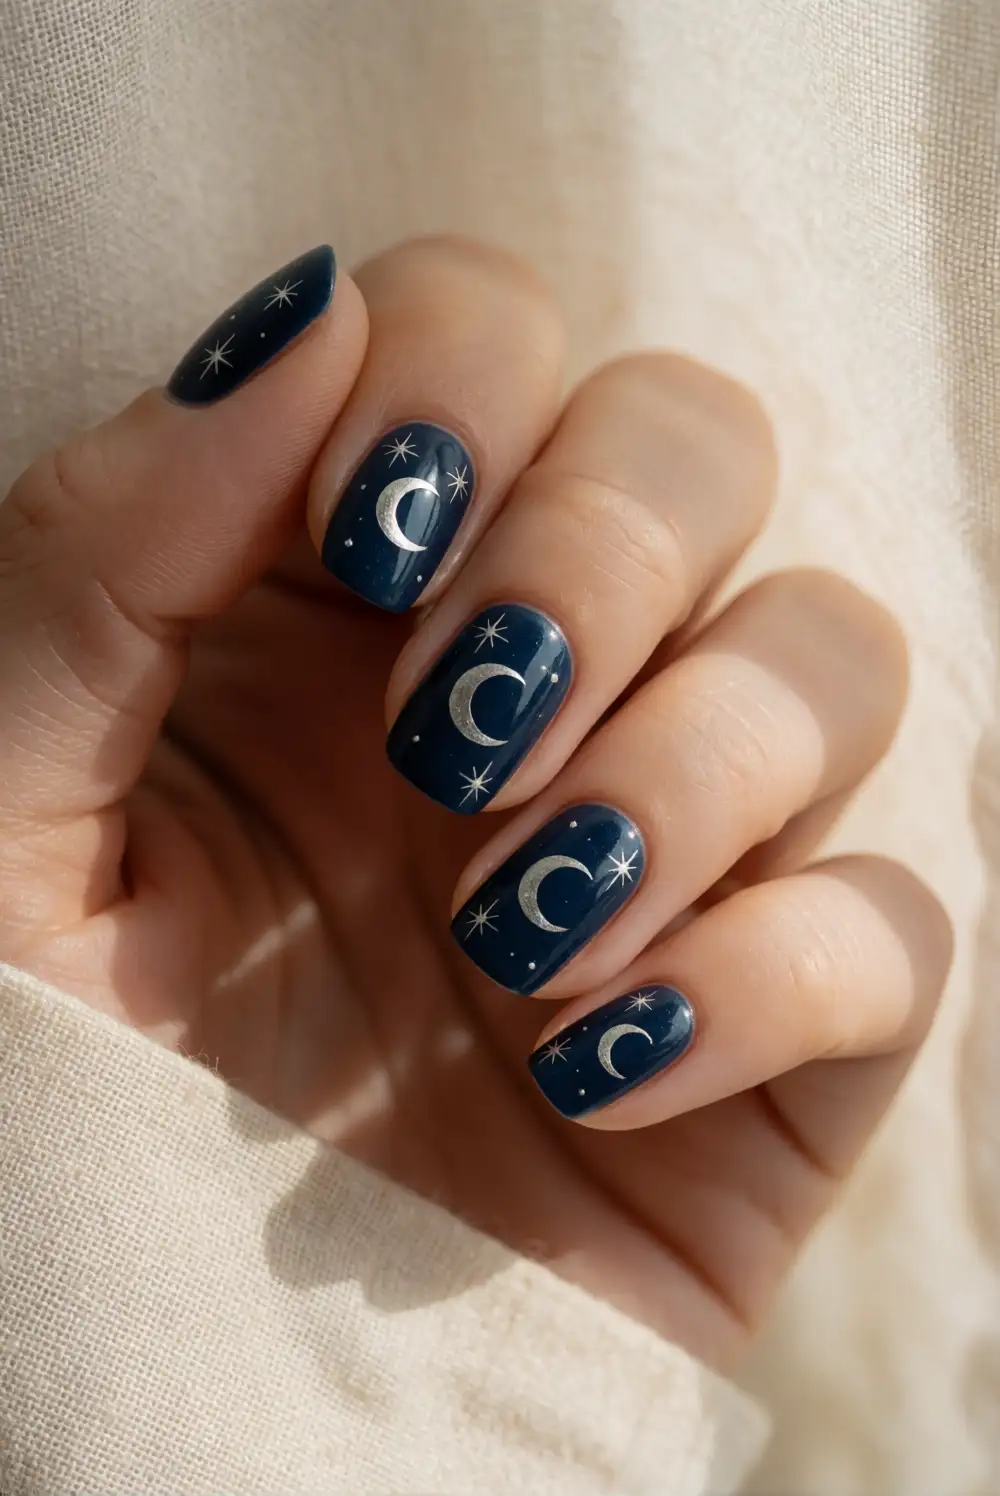
Pair a midnight navy base with delicate silver moons and stars for a celestial Halloween manicure. Apply two thin coats of navy polish and let them dry completely. Use silver nail polish and a fine detail brush to draw small crescent shapes, adding a few simple dots or tiny starbursts nearby. A metallic nail-art pen can make the details easier to control. Finish with clear top coat once the design is dry to protect the fine lines.
Leave generous space between the motifs so the design feels airy rather than crowded. You can place a moon on each accent nail and keep the rest of the manicure solid navy, or scatter a few small stars across every nail. A deep plum base creates a softer, more romantic variation, while a sheer smoky shade gives the silver extra contrast. Keep the metallic details light-handed, since a few precise marks look more polished than a dense pattern.
Soft Nude Bat Silhouette Nails
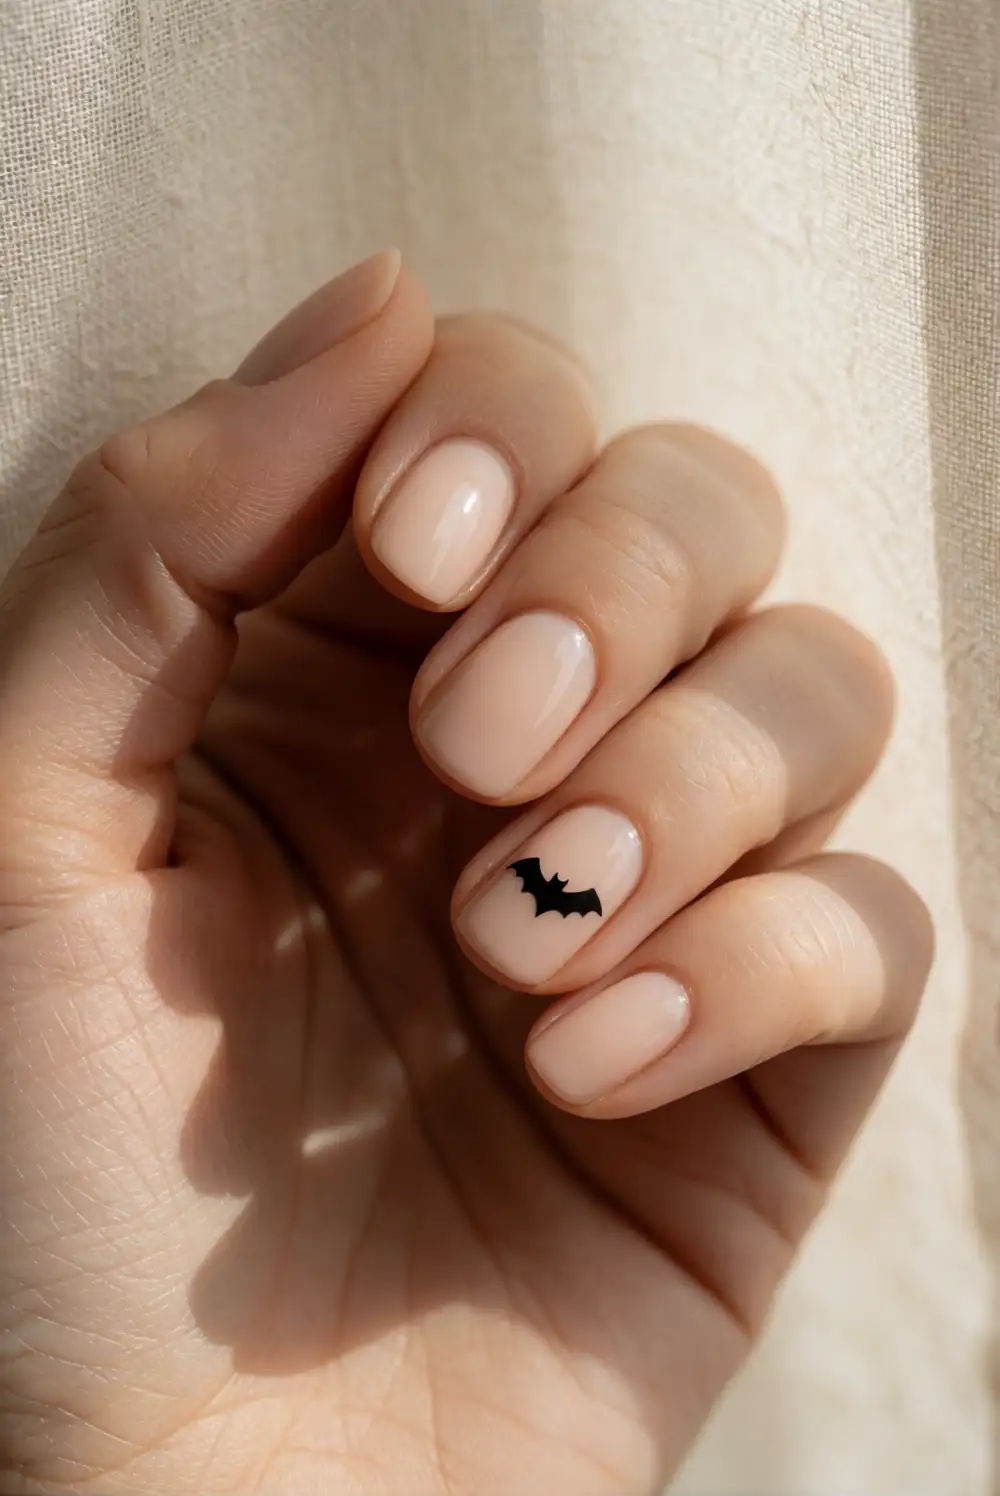
For a subtle seasonal manicure, paint a small black bat silhouette over a soft nude base. Apply a sheer beige or pink polish, let it dry, and use a fine brush to make a tiny central body with two simple curved wings. Keep the shape compact so the design reads clearly without taking over the nail. Add the bat to one accent nail, then apply a smooth clear top coat after the artwork has dried.
Choose a warm nude shade for a soft contrast or a milky pink for a brighter background. A single bat on each ring finger gives the manicure a quiet seasonal detail, while solid black nails on the remaining fingers create a bolder variation. If freehand wings are difficult, sketch the shape first on a practice surface and use short brush strokes. Avoid adding too many tiny details; a clean silhouette is easier to paint and more visible.
Neon Green Accent Swirls
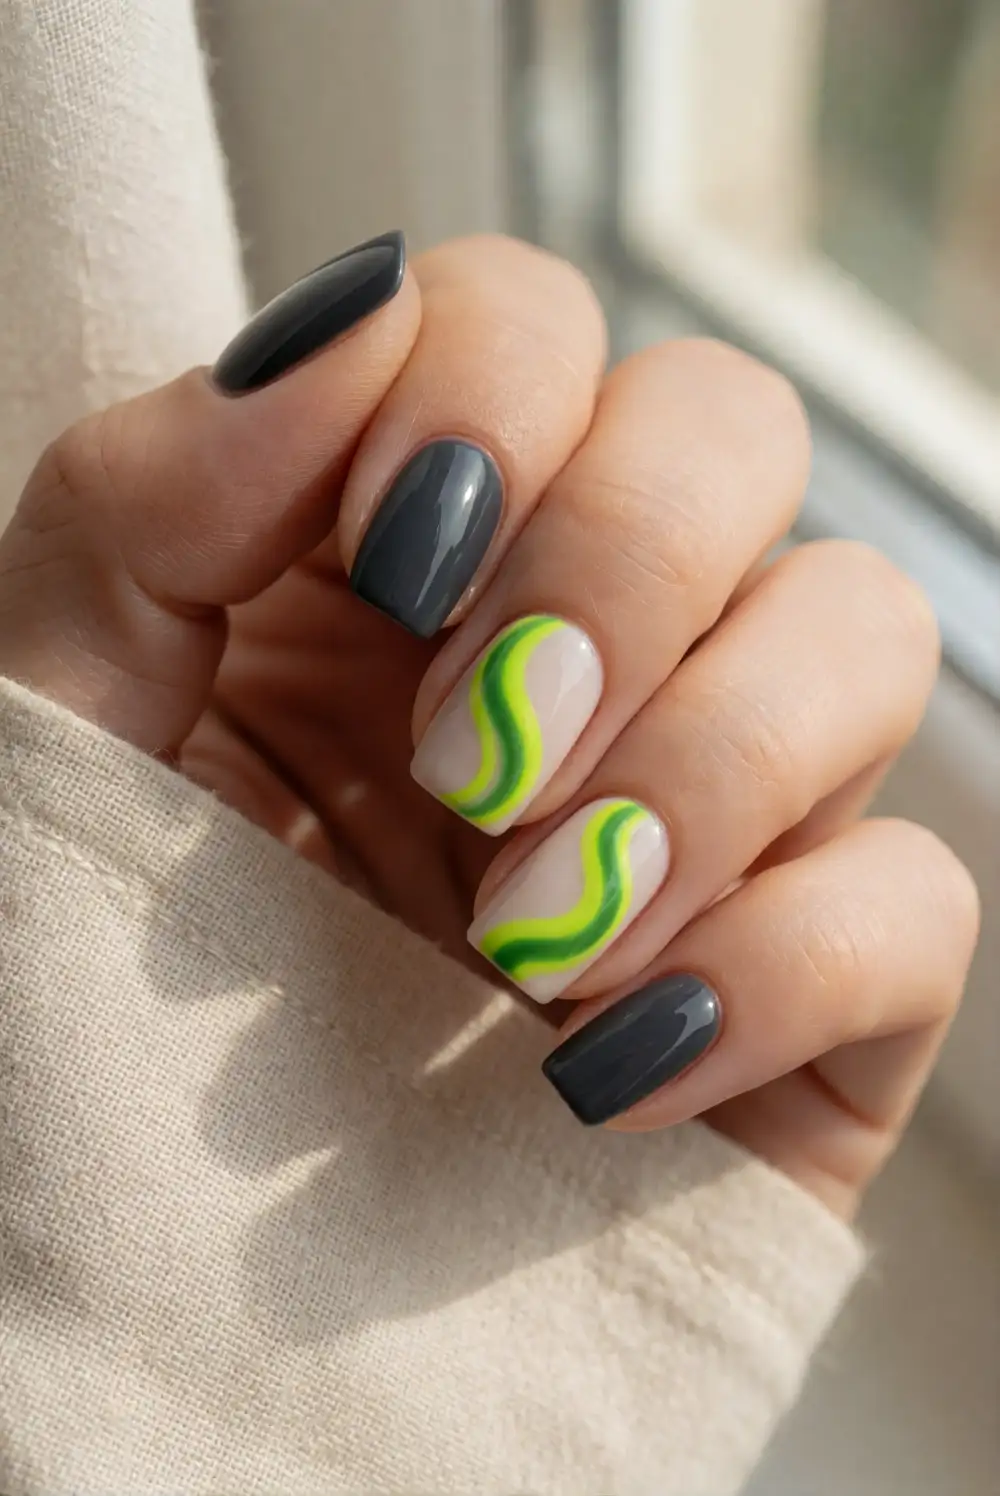
Make a punchy accent manicure by pairing glossy charcoal nails with flowing neon-green swirls. Paint most nails charcoal or near-black, and leave one or two nails in a pale neutral shade for contrast. Once the base is dry, use a fine liner brush to draw a curved green line across each accent nail, adding a second parallel curve if desired. Work slowly with a small amount of polish, then seal the finished design with clear top coat.
Keep the swirls loose and asymmetrical for an artistic finish, or repeat the same curve on each accent nail for a coordinated look. A muted lime shade feels more wearable, while vivid neon green brings extra energy to a party outfit. You can also reverse the colors by painting green nails with charcoal swirls. Wipe the liner brush between strokes, and allow the design to dry fully before applying top coat to avoid smearing.
Matte Black Nails with Gold Flecks
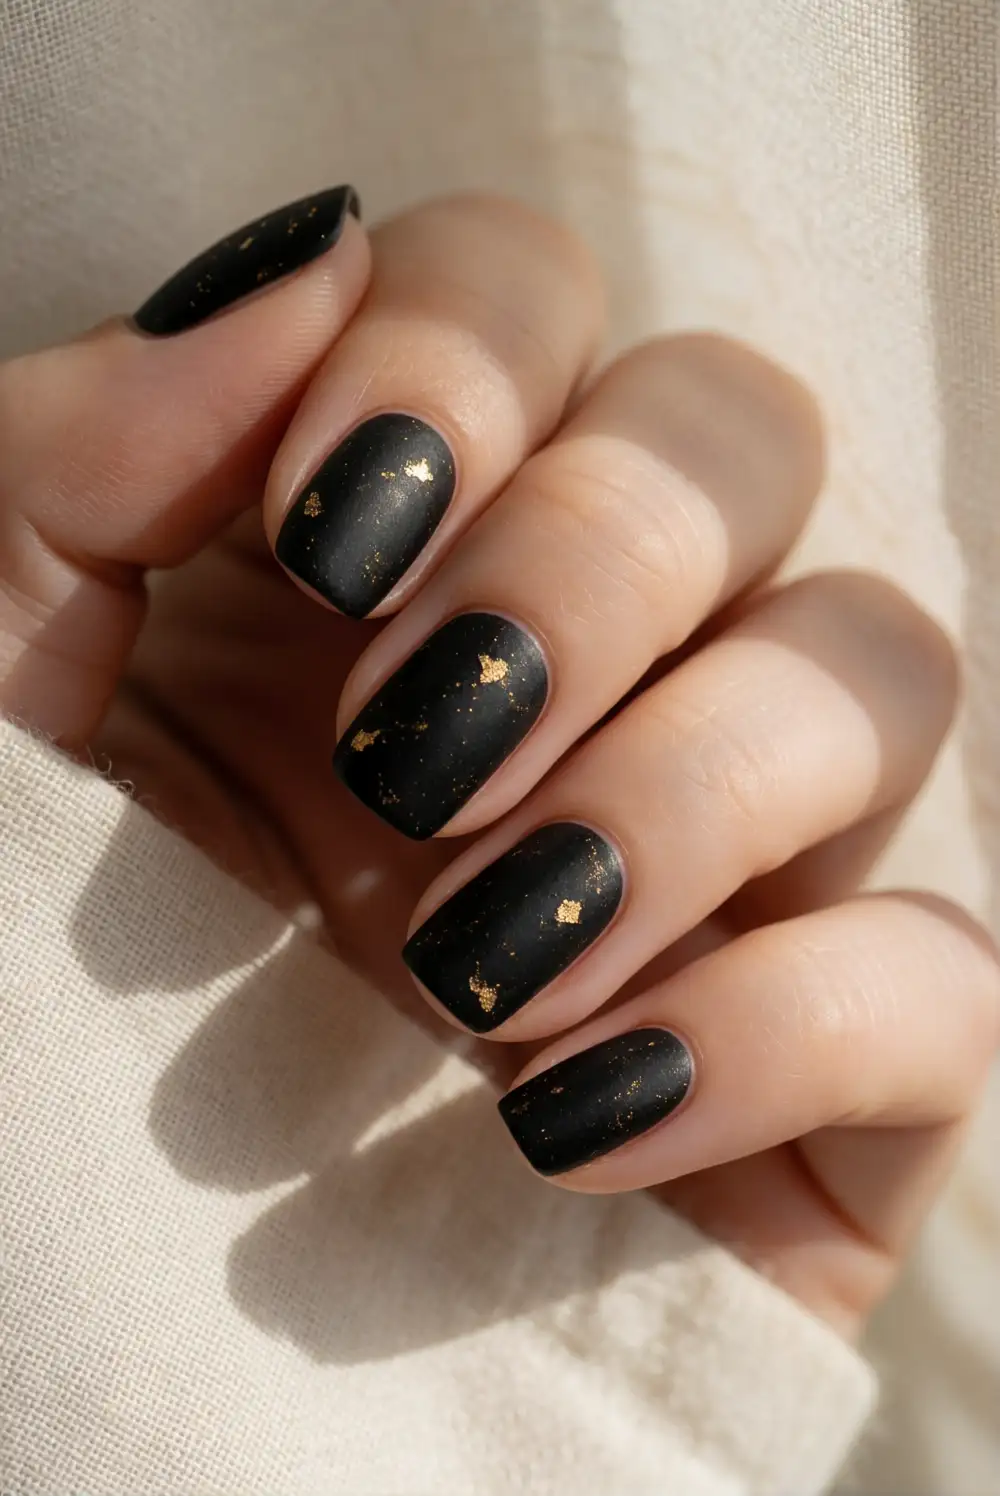
Combine a smooth matte black base with scattered gold foil for a polished, evening-ready manicure. Apply black polish in thin coats and let it dry completely, then press a few small pieces of nail foil onto selected areas with a silicone tool or clean fingertip. Keep the foil sparse so the dark base remains visible. Finish with a matte top coat formulated for nail art, following its directions to protect the design without dulling the golden accents.
Place the foil near the tips for a subtle fade, or cluster it around the cuticle for a small flash of metallic color. One gold-flecked accent nail is a quieter option, while scattered details across every nail make the look more striking. If foil is unavailable, a fine gold glitter polish can create a similar effect with less precision. Avoid rubbing the foil after application, and let the top coat settle before handling fabrics.
Whether you prefer a barely-there seasonal detail or a manicure that stands out, these Halloween nail ideas offer a style for different moods and plans. Choose a design that suits your comfort with nail art, gather a few complementary shades, and make the look your own with a finish and color combination you enjoy wearing.








