
Ghost nails paired with stars, moons, and bats make a playful Halloween manicure that can be adapted for short nails, long tips, or a simple accent nail. Explore easy design ideas, from tiny celestial details to a full moonlit scene, plus practical tips for creating crisp shapes with polish and a fine nail-art brush.
Ghost and Star Accent Nails
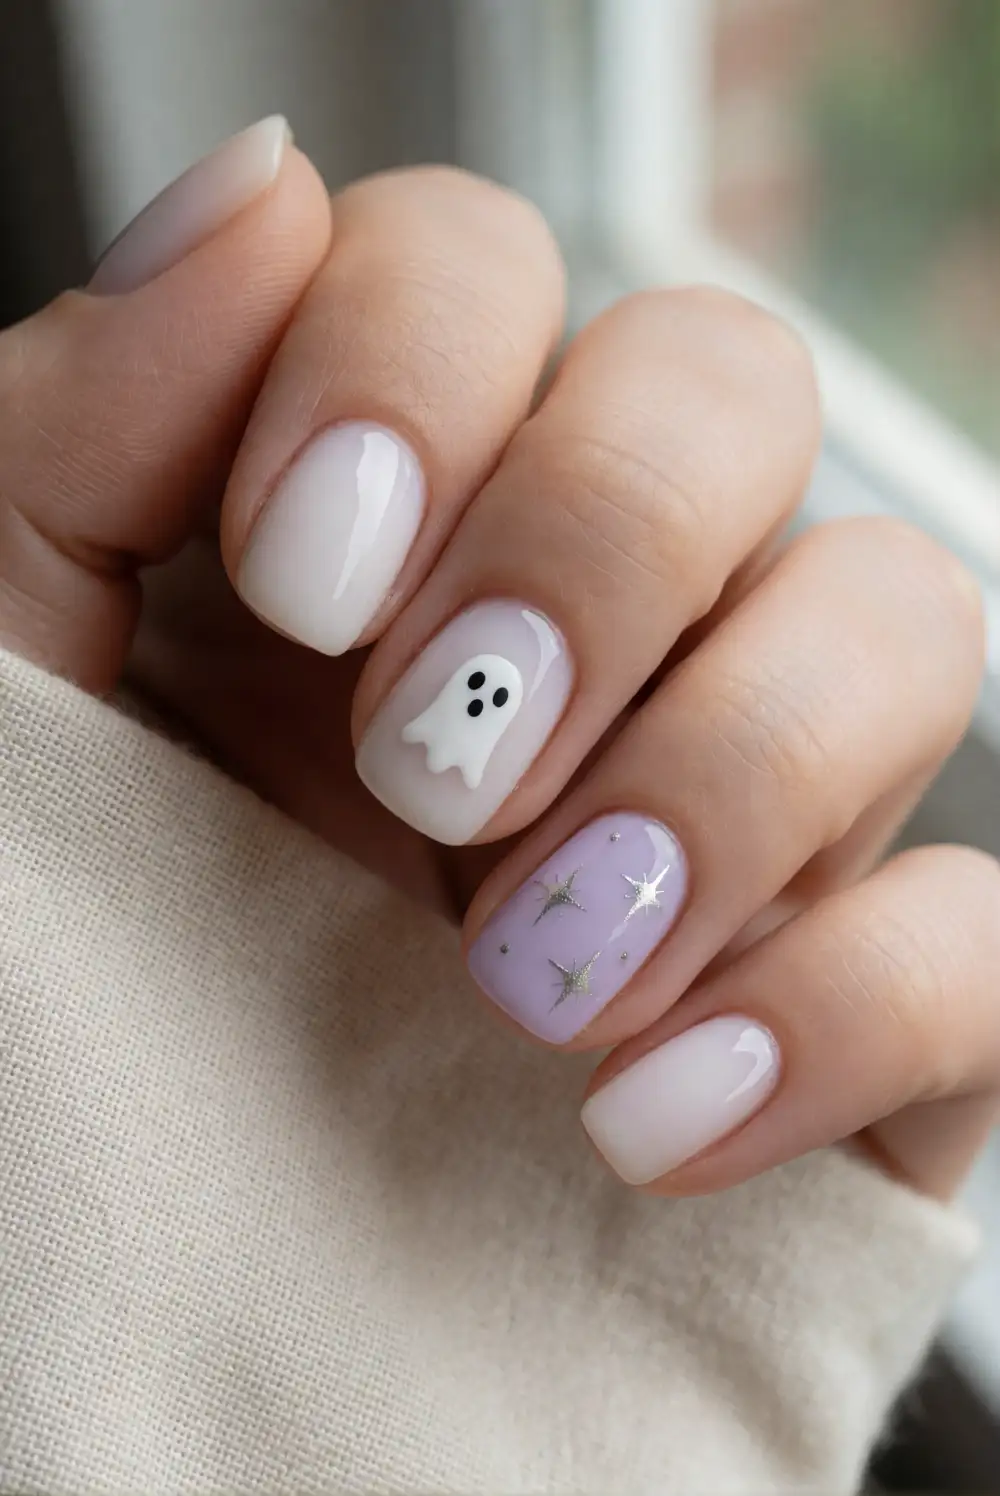
Paint most nails a sheer milky white or soft lavender, then reserve one accent nail on each hand for a small ghost among scattered stars. Apply a smooth base color and let it dry fully. Use a fine nail-art brush or a dotting tool to shape the ghost in white polish, adding tiny black eyes only after the shape has set. Finish the other nails with a few simple starbursts in silver or pale yellow.
Keep the ghost and stars small so the design stays airy, especially on short nails. A sheer top coat over the base and a glossy coat over each finished nail help even the surface and protect the details. For a subtle variation, use just one ghost accent and repeat the stars across the remaining nails. Choose metallic polish for a delicate shimmer, or use cream shades for a softer, less reflective finish.
Moon Phase Ghost Manicure
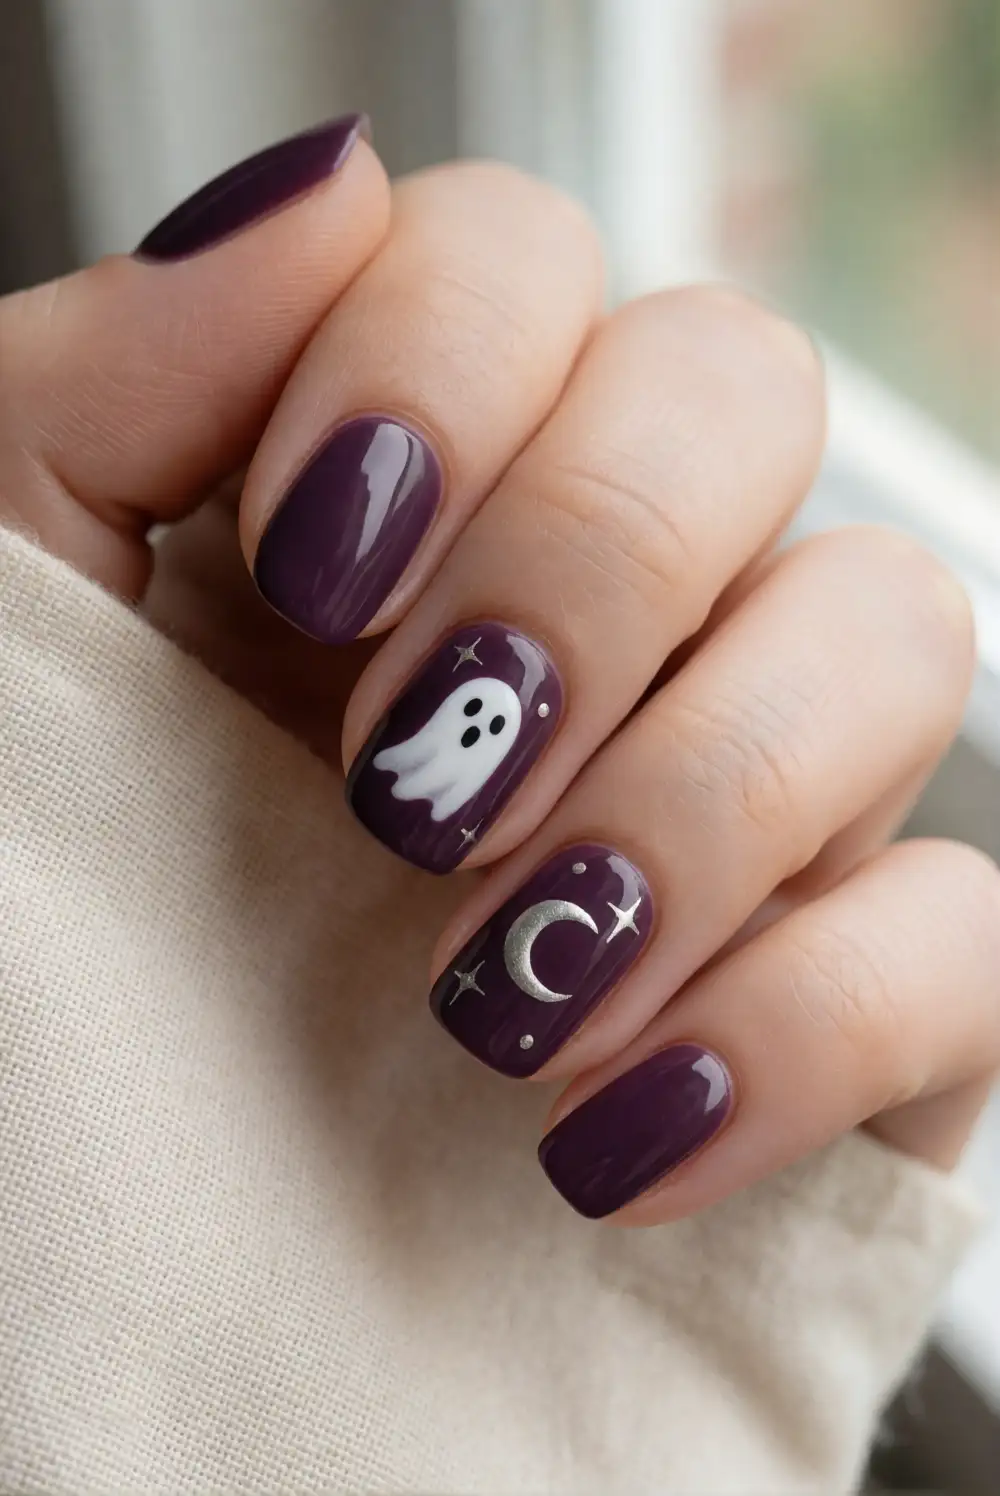
Create a quiet celestial design by pairing a tiny ghost with a crescent moon and a few dots on a deep plum or midnight-blue base. Apply two thin coats of polish, allowing each to dry before adding the details. Paint a small white ghost near the lower edge of one nail, then use a fine brush to add a curved crescent on another. Place a few tiny dots nearby to suggest distant stars without crowding the design.
Arrange the moon, ghost, and dots across neighboring nails so each detail has room to read clearly. A sheer shimmer top coat can add a moonlit finish, while a plain glossy coat keeps the contrast crisp. If painting curved moons feels tricky, use a small nail-art stencil or carefully layer two curved strokes. On shorter nails, simplify the look to one crescent and one ghost, leaving the other nails a solid coordinating shade.
Bat Silhouettes Beneath Tiny Stars
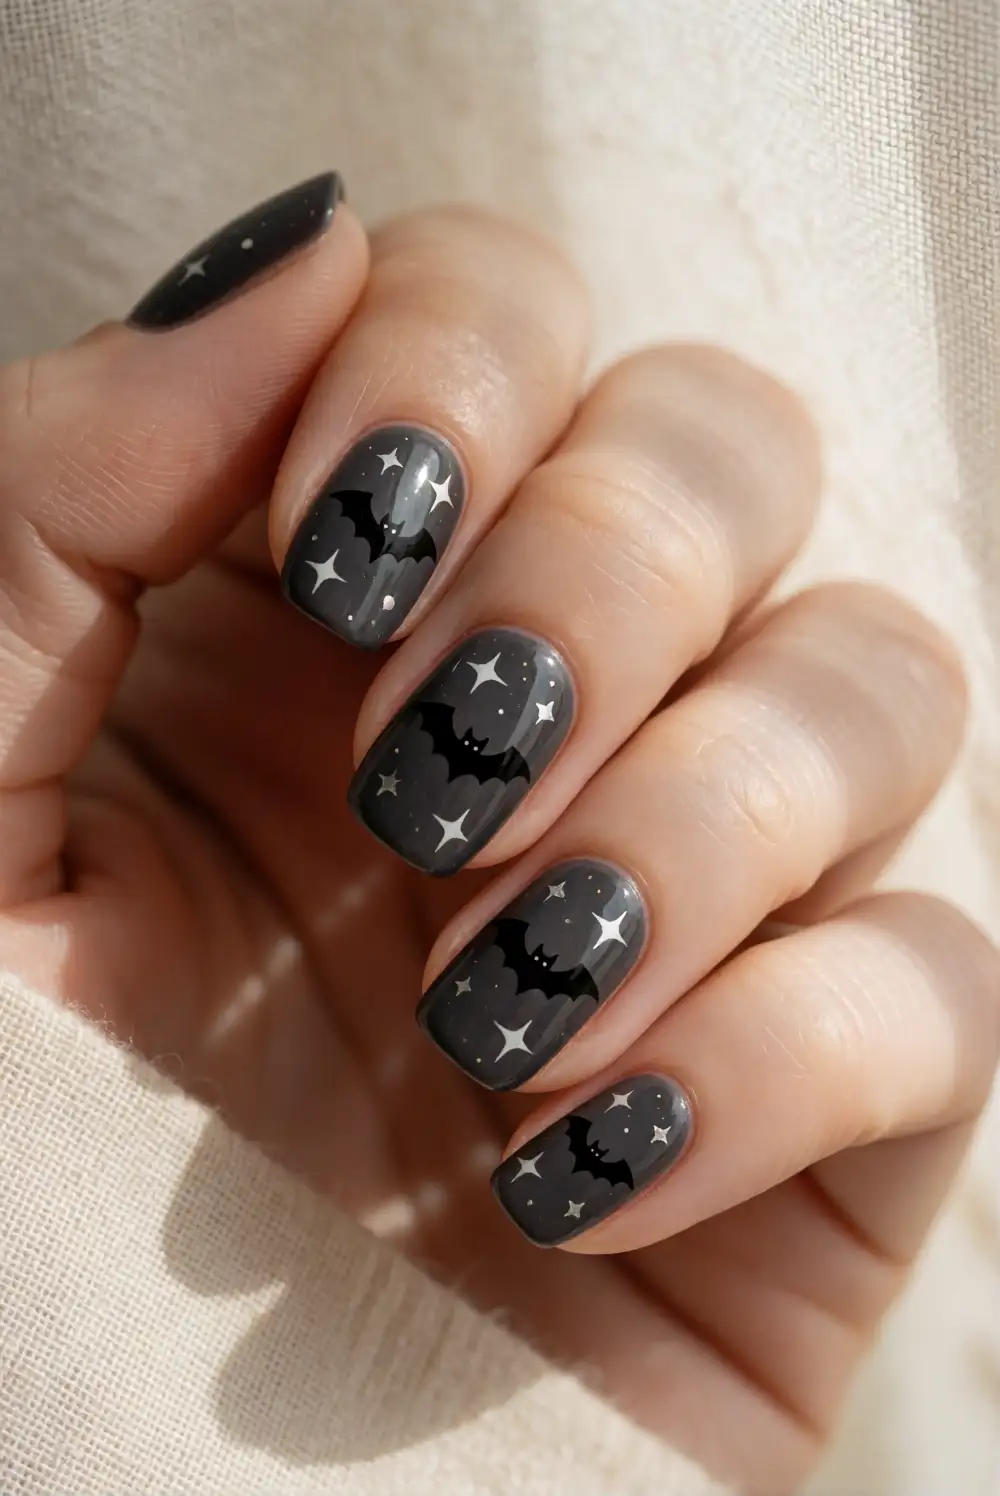
Give a dark manicure a playful lift with small bat silhouettes set beneath tiny stars. Start with a charcoal, navy, or black base and let it dry completely. With a fine brush, paint each bat as a small central body with two curved wings, keeping the shape simple rather than adding intricate lines. Add a few white or silver stars nearby using a dotting tool or the tip of a fine brush, then seal the artwork with a clear top coat.
Use one bat on each accent nail and keep the remaining nails glossy and dark for a balanced look. A contrasting cream base creates a softer, more graphic version, while muted plum polish gives the design a gentler Halloween mood. Vary the bats’ placement slightly so they appear to flutter across the hand. If freehand wings are difficult, practice the silhouette on paper first, then work with a small amount of polish.
Ghost French Tips with Starbursts
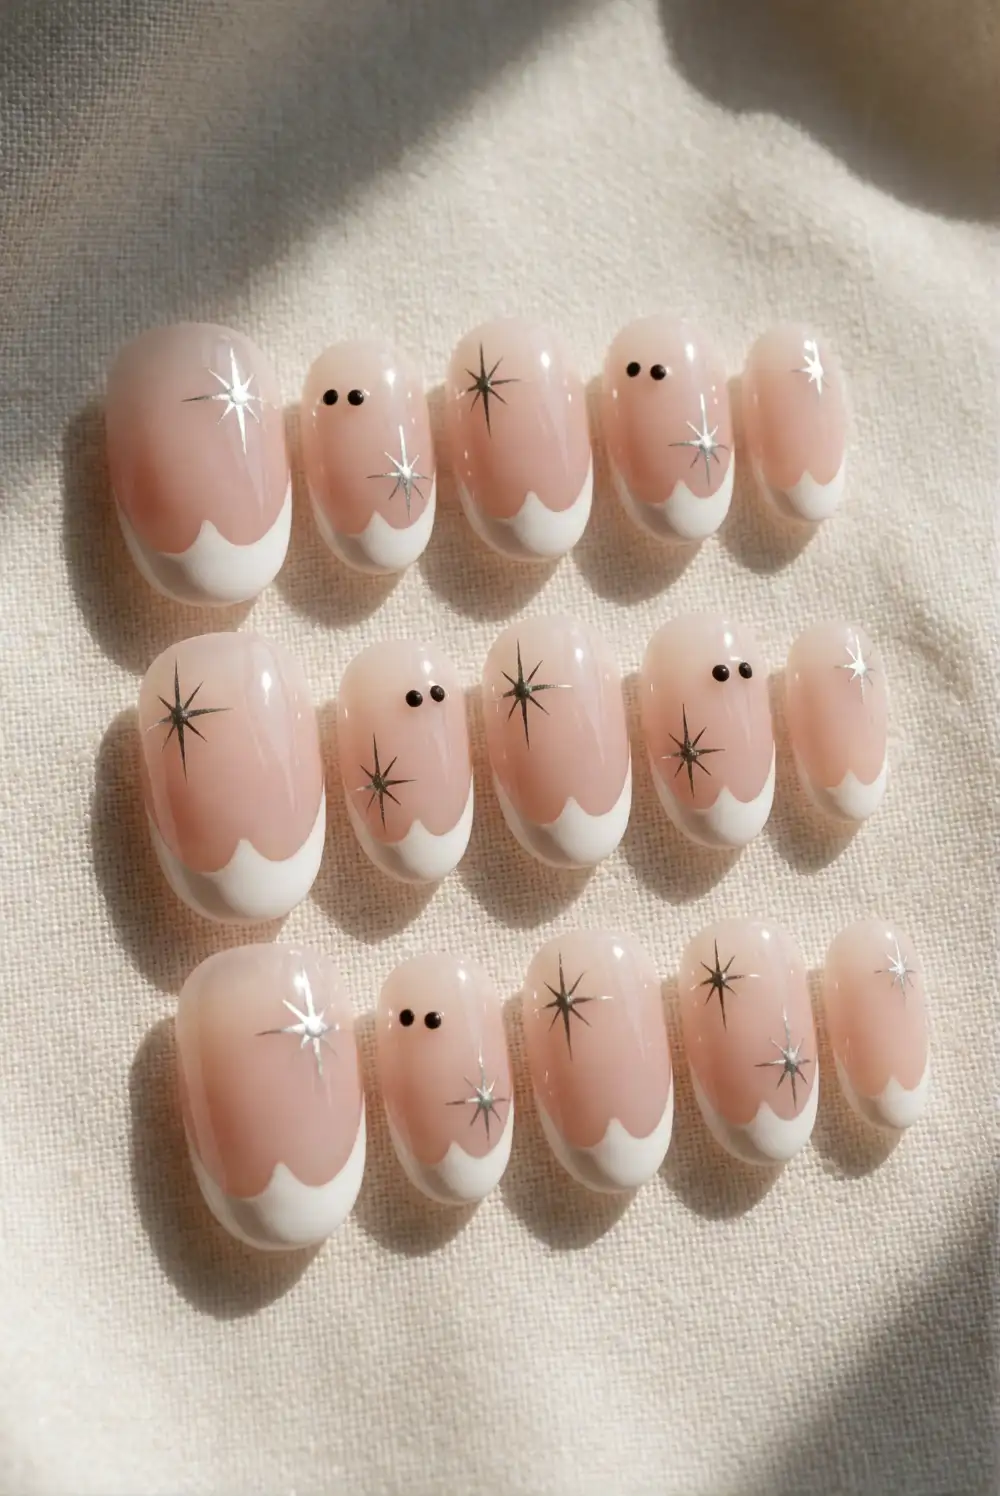
For a Halloween take on a French manicure, paint ghost shapes along the tips of a sheer nude or pale pink base. After the base coat dries, use white polish to form soft rounded tips, extending a few into simple ghost-like curves. Add tiny black eyes to selected tips once the white polish is dry. Finish with small silver starbursts placed near the cuticle or along the side of the nail for a light celestial accent.
Keep the tips varied but not crowded; a ghost on two or three nails can stand out more than repeating the detail everywhere. Short nails work well with simple white curves and just one tiny face, while longer nails offer extra room for stars. A fine liner brush helps create cleaner edges, and a glossy top coat smooths the layered design. For a softer finish, swap the nude base for sheer lilac or milky beige.
Midnight Gradient with White Ghosts
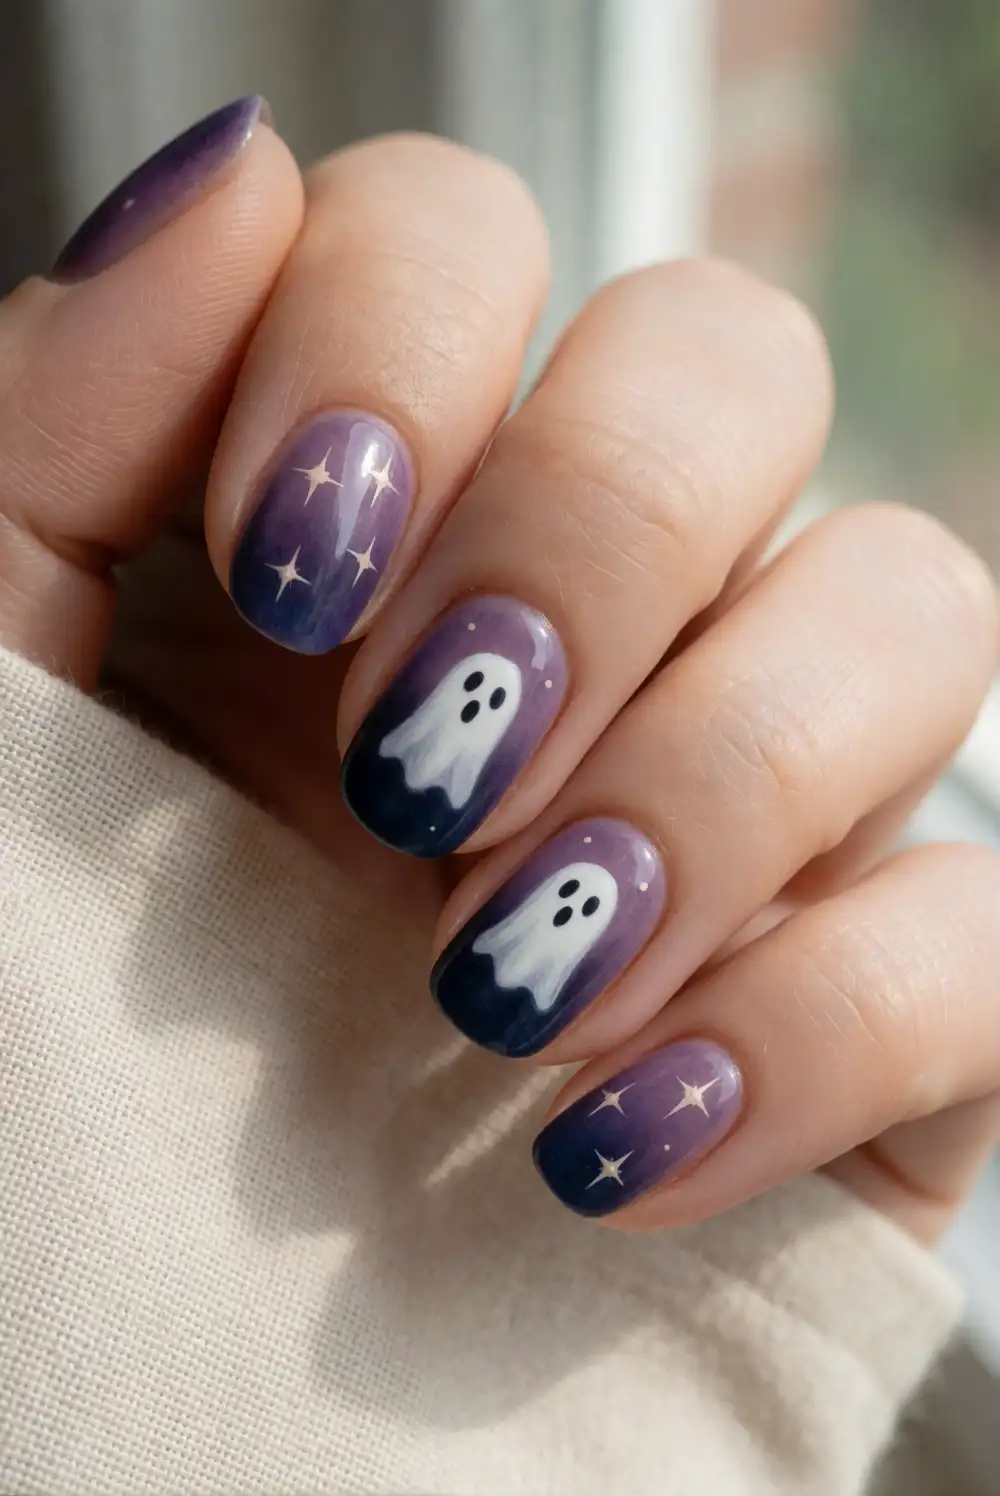
Blend a dusky purple into deep navy for a night-sky background, then add a little white ghost and scattered stars. Apply the lighter polish near the cuticle and the darker shade toward the tip, blending the boundary with a makeup sponge while the colors are still workable. Let the gradient dry before painting a small white ghost on one accent nail. Add a few pale star dots with a fine brush, then finish with clear top coat.
Use thin layers of polish on the sponge and dab gently to build a gradual fade without making the nail bulky. A peel-off barrier around the nail can make cleanup easier. Keep the ghost prominent by leaving open space around it, and vary the star placement across the other nails. For a subtler option, use lavender and slate instead of navy. A fine shimmer layered over the gradient can suggest a starry sky without adding more painted details.
Matte Black Nails with Cream Ghosts
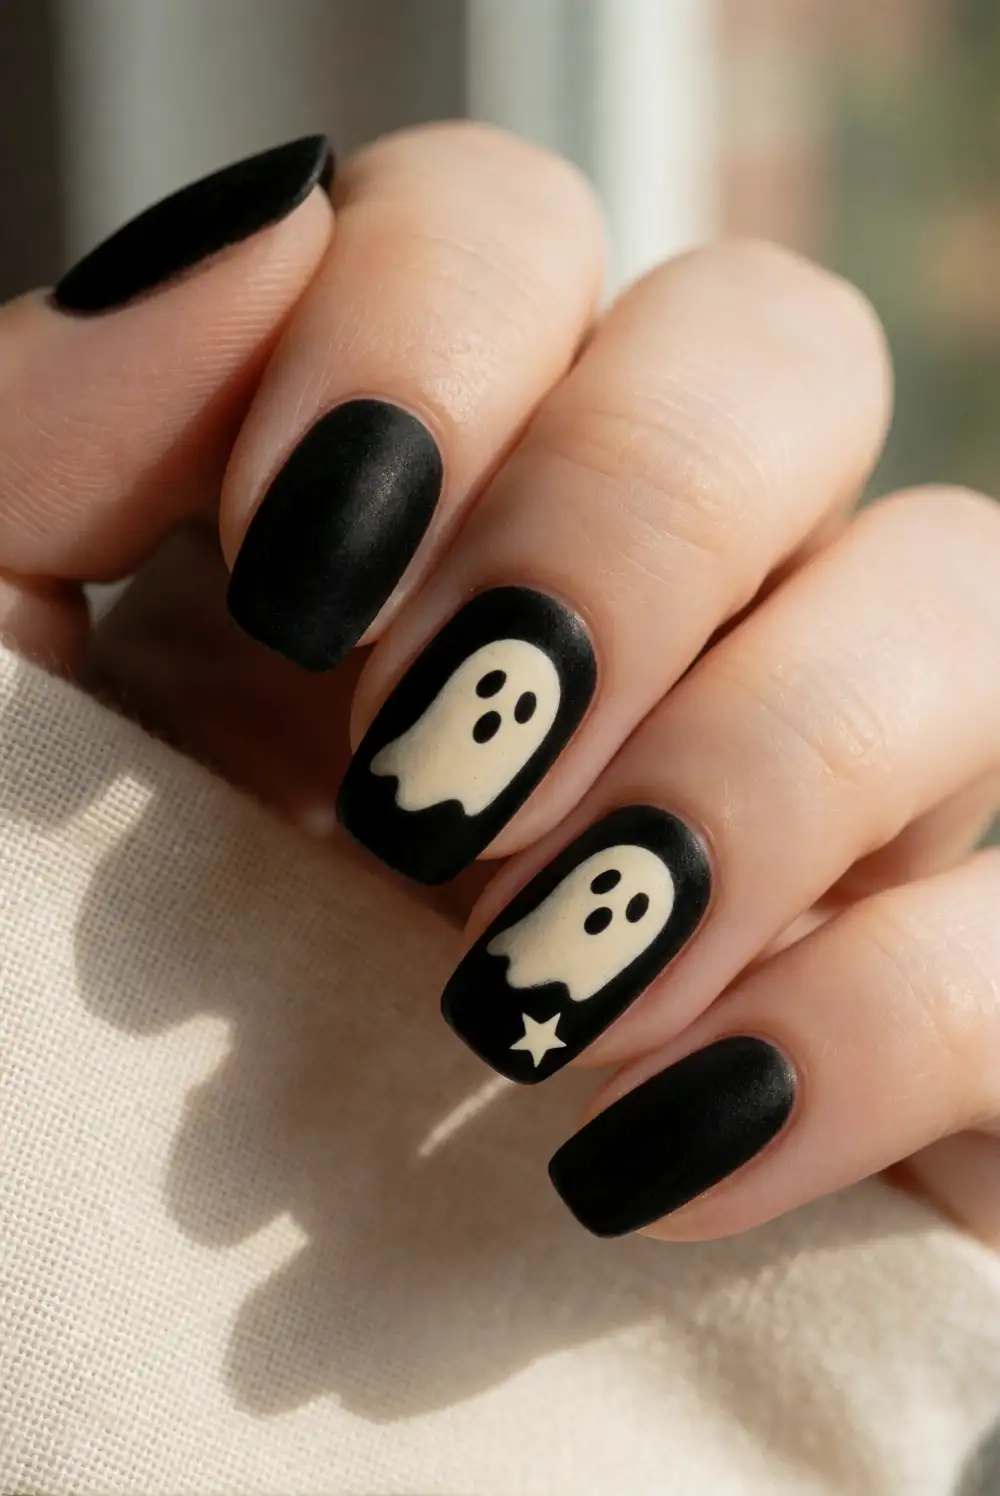
Pair a velvety black manicure with warm cream ghosts for a graphic design that feels polished rather than busy. Apply black polish in thin coats and allow it to dry before adding the ghost shapes in cream or opaque white. Use a small brush to paint a rounded top and softly waved lower edge, then add tiny eyes with a dotting tool. Apply a matte top coat over the dark nails, keeping the ghost details glossy if you want a subtle contrast.
Try placing one ghost on each ring finger and leaving the other nails solid black for a clean arrangement. Alternatively, add a small cream star beside each ghost to tie the design into a celestial theme. A matte finish can show brush marks, so apply it evenly and avoid repeated strokes as it dries. If you prefer a softer contrast, choose charcoal polish and ivory details. Let every layer dry fully before adding the next.
Silver Stars Around a Crescent Moon
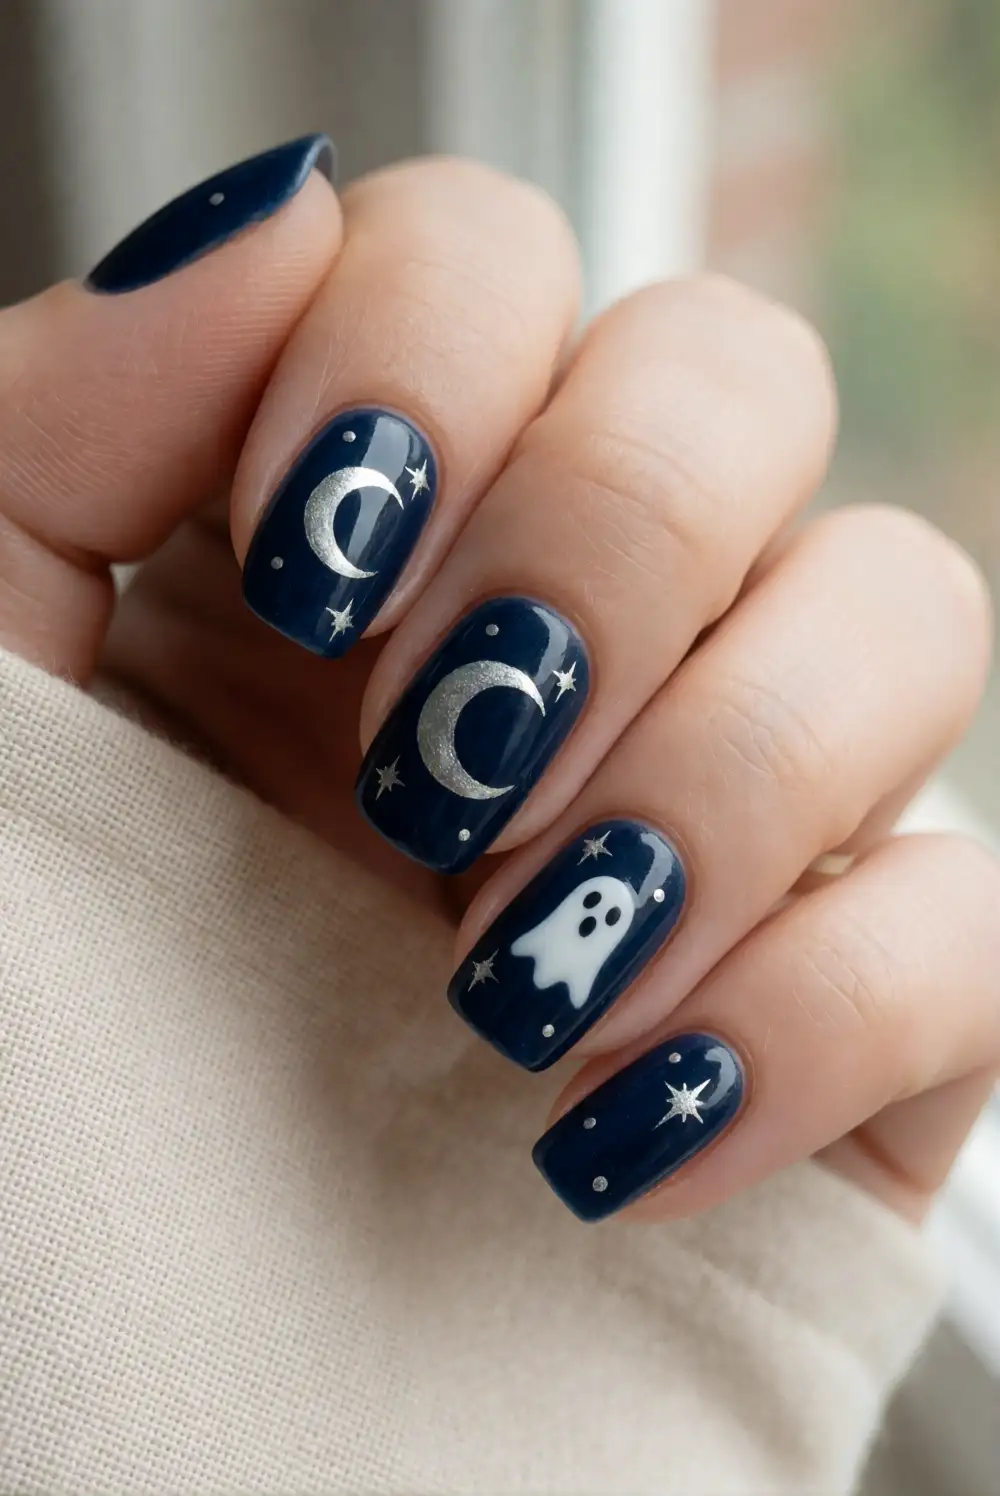
Make the moon the focal point with a silver crescent on a sheer charcoal, plum, or midnight-blue base. After the base color dries, paint a curved silver outline and fill it in with a fine brush, or place a crescent-shaped nail sticker carefully on the nail. Add a few tiny silver stars around the moon and finish with a clear top coat. Keep a separate accent nail available for a miniature white ghost to connect the manicure to the theme.
Choose fine metallic polish for a soft glimmer or a brighter silver for stronger contrast against a dark base. Place the crescent at different angles across the nails to create a loose, balanced arrangement rather than a repeated stamp effect. On shorter nails, one moon and a couple of dots are enough to keep the design legible. If using stickers, press down the edges before sealing them so they lie smoothly beneath the top coat.
Mix-and-Match Ghost Moon and Bat Nails
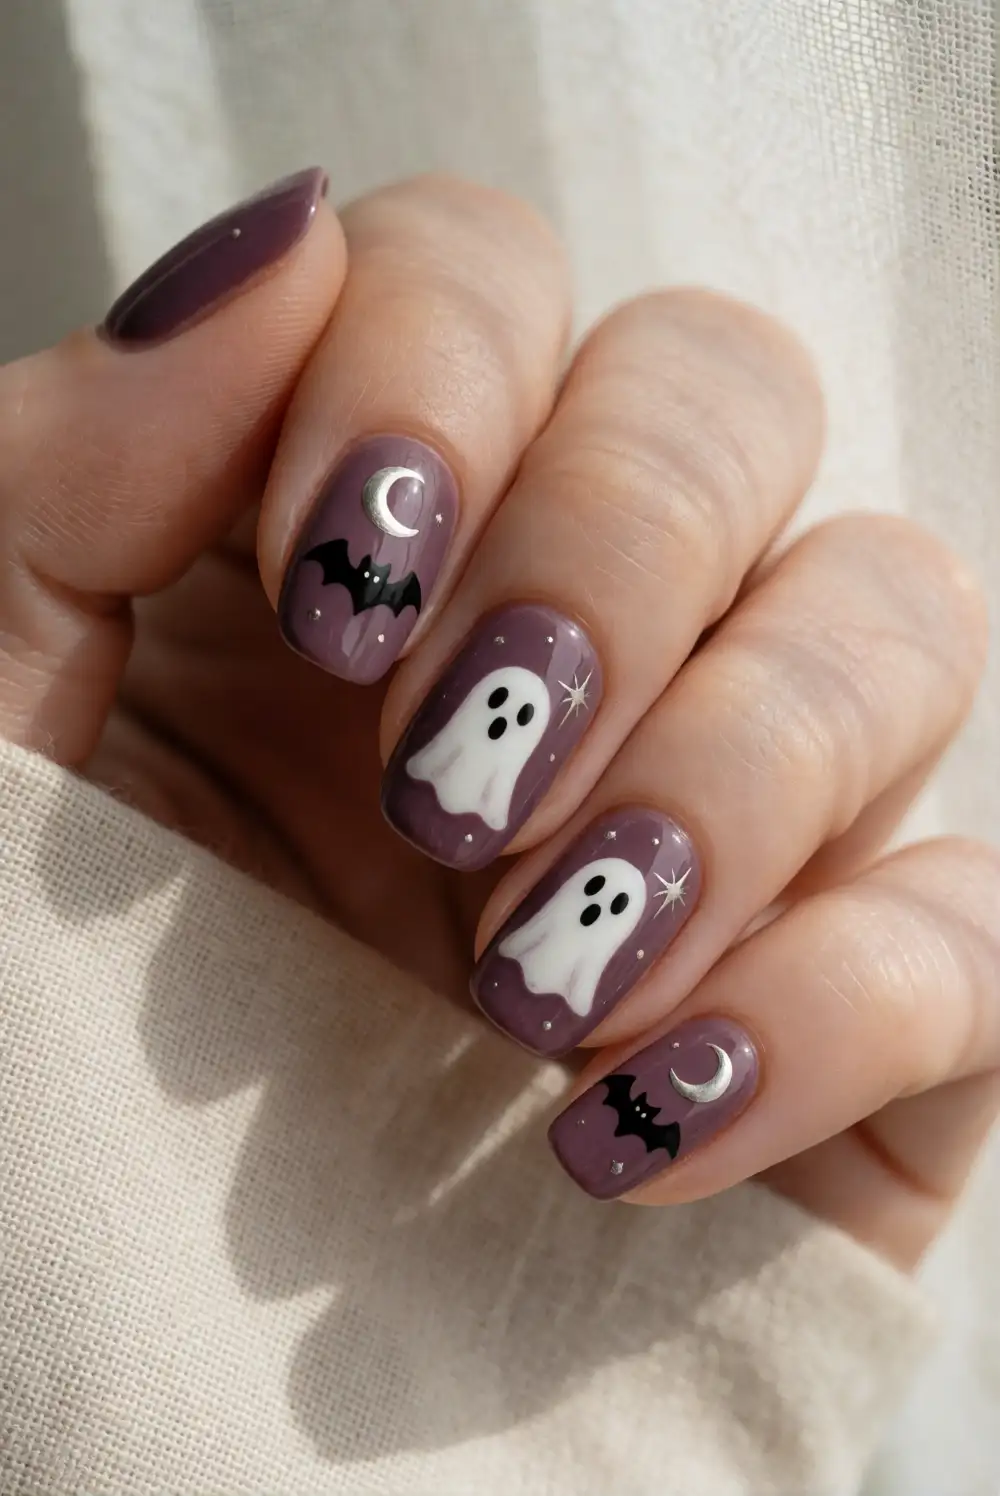
Give each nail a related detail by choosing a ghost, crescent moon, bat, or starburst for a coordinated mix-and-match set. Begin with the same pale lavender or deep plum base across the nails to unify the designs. Paint each motif on a different nail using a fine brush, keeping the palette to white, charcoal, and a small metallic accent. Leave some nails mostly plain so the miniature shapes have breathing room and the overall manicure feels intentional.
Plan the motifs before painting so the strongest shapes are spaced across the hand instead of clustered together. A ghost can sit beside a moon, while small stars fill only the open gaps. For a simpler version, use two designs and repeat them once rather than painting every motif. Use a glossy top coat to bring the colors together, or finish a few solid nails with matte polish for varied texture. Keep the artwork near the center of each nail.
Negative-Space Ghosts with Star Details
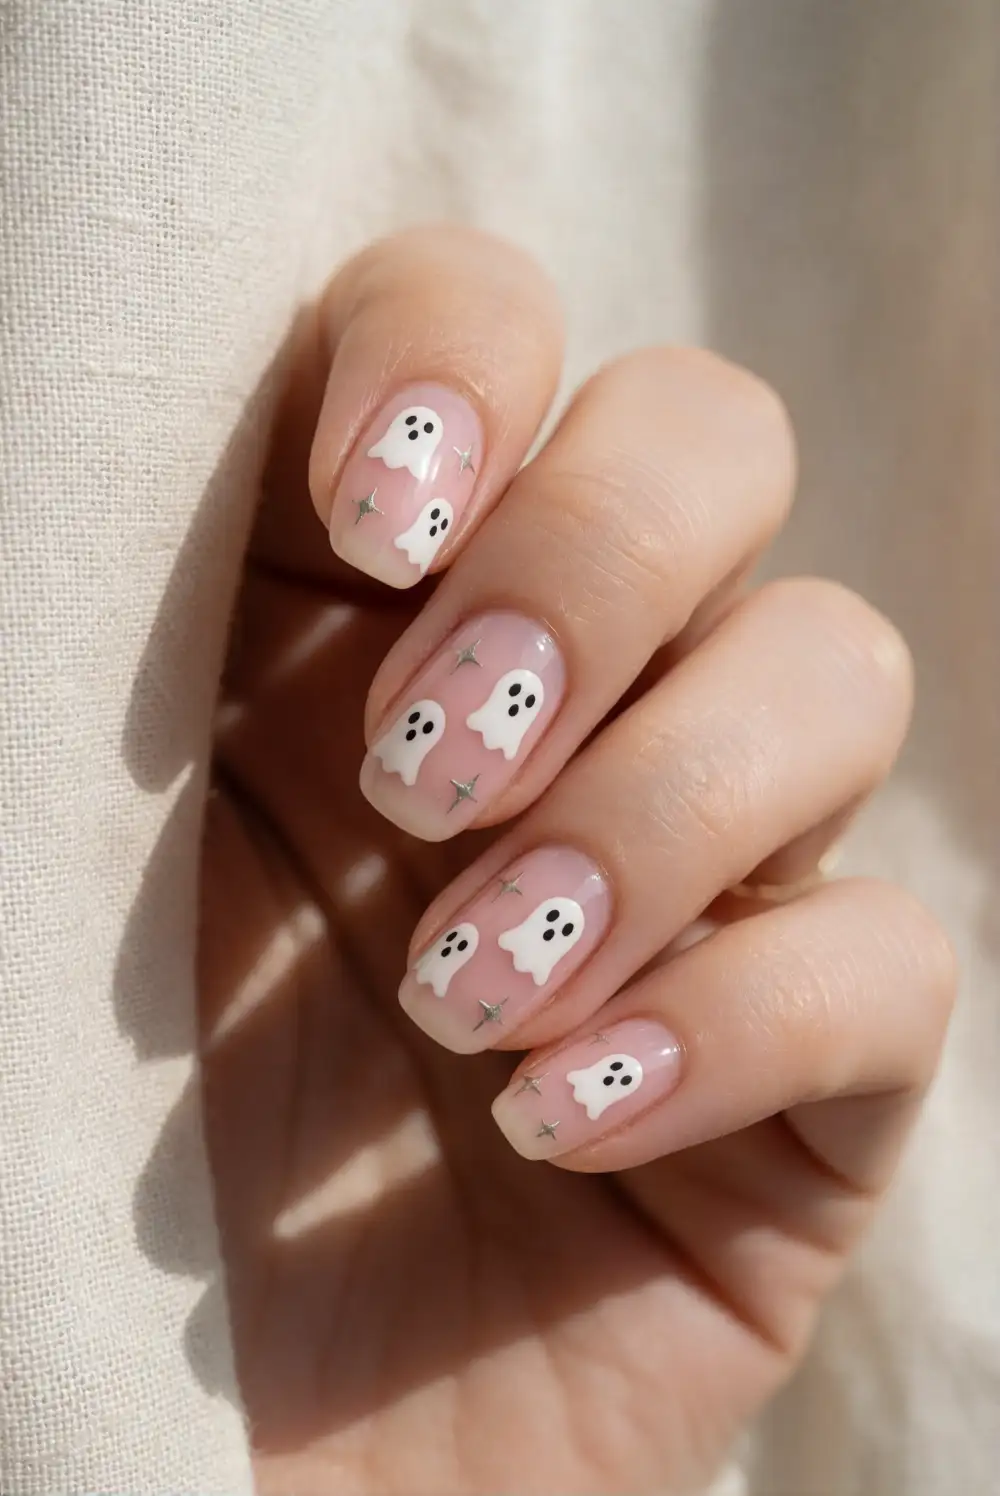
Let the natural nail show through around small white ghost shapes for a light, modern manicure. Apply a clear or sheer pink base, then use white polish to draw a simple rounded ghost outline and fill it in, leaving plenty of uncovered space around the design. Once the white polish dries, add tiny dark eyes and a few delicate starbursts. A fine liner brush makes it easier to keep the edges neat on the bare-looking background.
This airy approach suits short nails because the open space keeps each design from feeling crowded. Use just one ghost on an accent nail, then add a single star on a neighboring nail. For a little extra color, paint the stars pale silver or muted lavender while keeping the ghost white. A smooth top coat protects the small details and blends the finish. If the sheer base is uneven, apply another thin coat before adding any artwork.
Pastel Ghost Bats with Tiny Moons
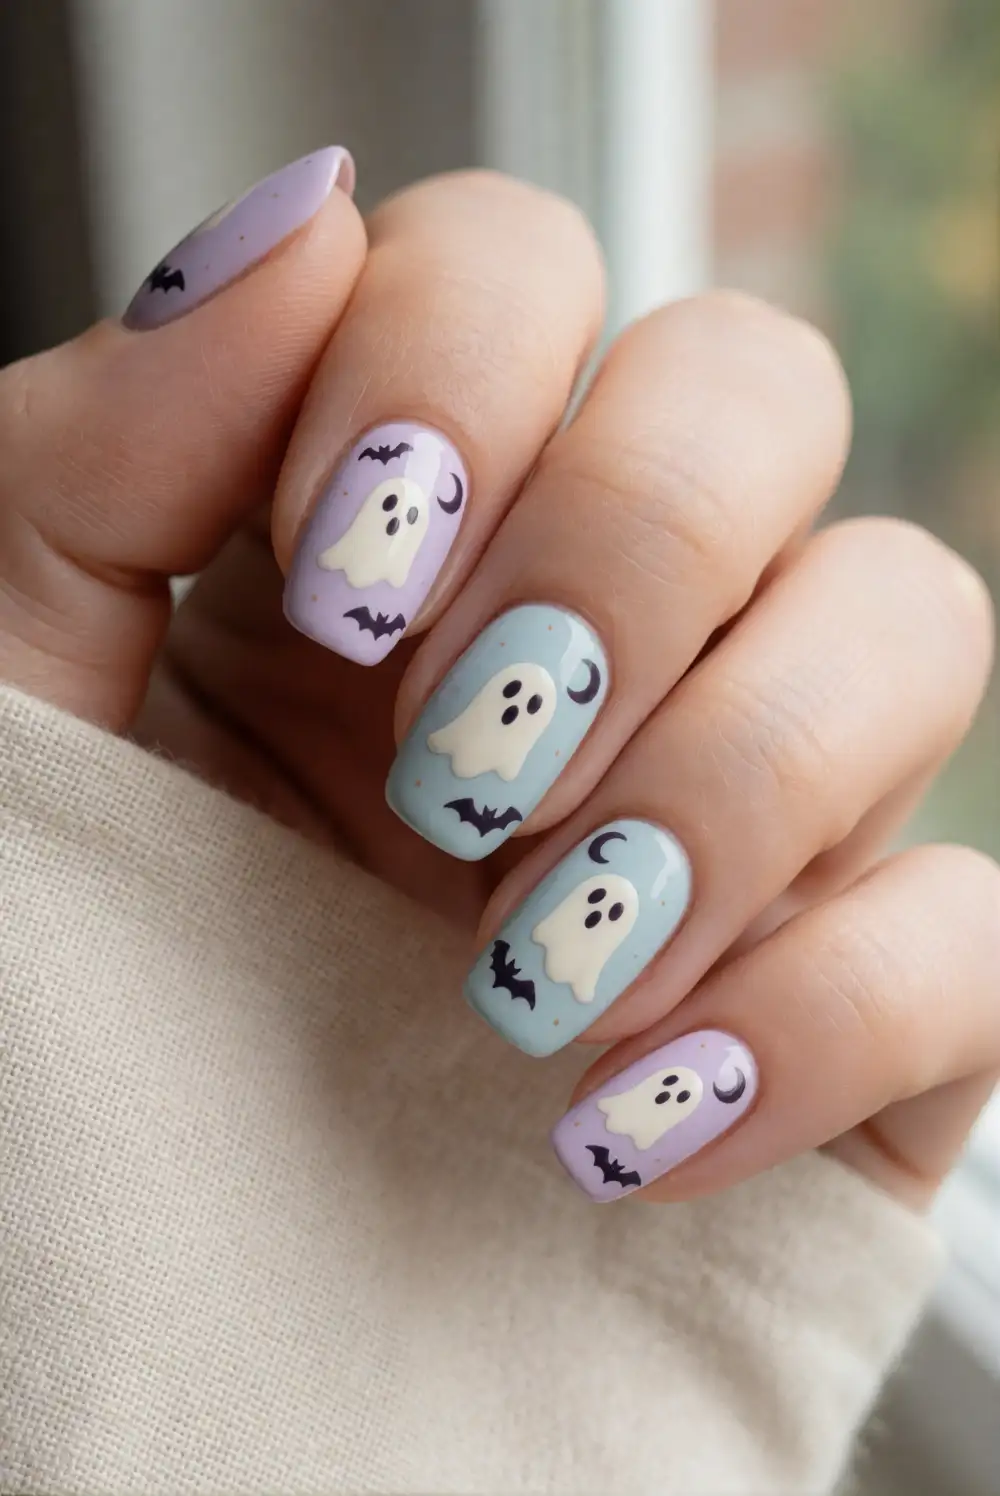
Build a softer Halloween manicure with pastel lavender, pale blue, and creamy white. Paint each nail with a solid pastel base, then choose a few accent nails for small white ghosts, simple charcoal bats, or tiny crescent moons. Use a fine brush for the silhouettes and a dotting tool for small star accents. Keep the motifs uncomplicated, with rounded ghost shapes and clean bat wings, so the gentle palette remains the main feature.
Choose colors with enough contrast for every motif to remain visible: charcoal bats show up clearly on pale polish, while white ghosts stand out against lavender or blue. Repeat one shade across all nails to make the varied designs feel connected. A glossy top coat gives the pastels a smooth finish, while a pearly top coat adds a delicate glow. If your nails are short, place one small motif near the center and skip extra decoration on that nail.
Whether you prefer a minimal ghost accent or a full celestial mix, these nail ideas combine ghosts, stars, moons, and bats in ways that are easy to adapt. Choose a design that suits your nail length, gather a fine brush and coordinating polish, and finish with a smooth top coat for a playful Halloween manicure.








