
Bring the colors and textures of autumn into your home with these fresh fall craft ideas. From pressed-leaf art to a simple wreath, each seasonal project uses approachable materials and offers a finished piece worth displaying, gifting, or sharing. Find inspiration for a cozy afternoon of making, with practical tips to help each craft look polished and feel right at home in your fall decor.
Pressed Leaf Suncatcher
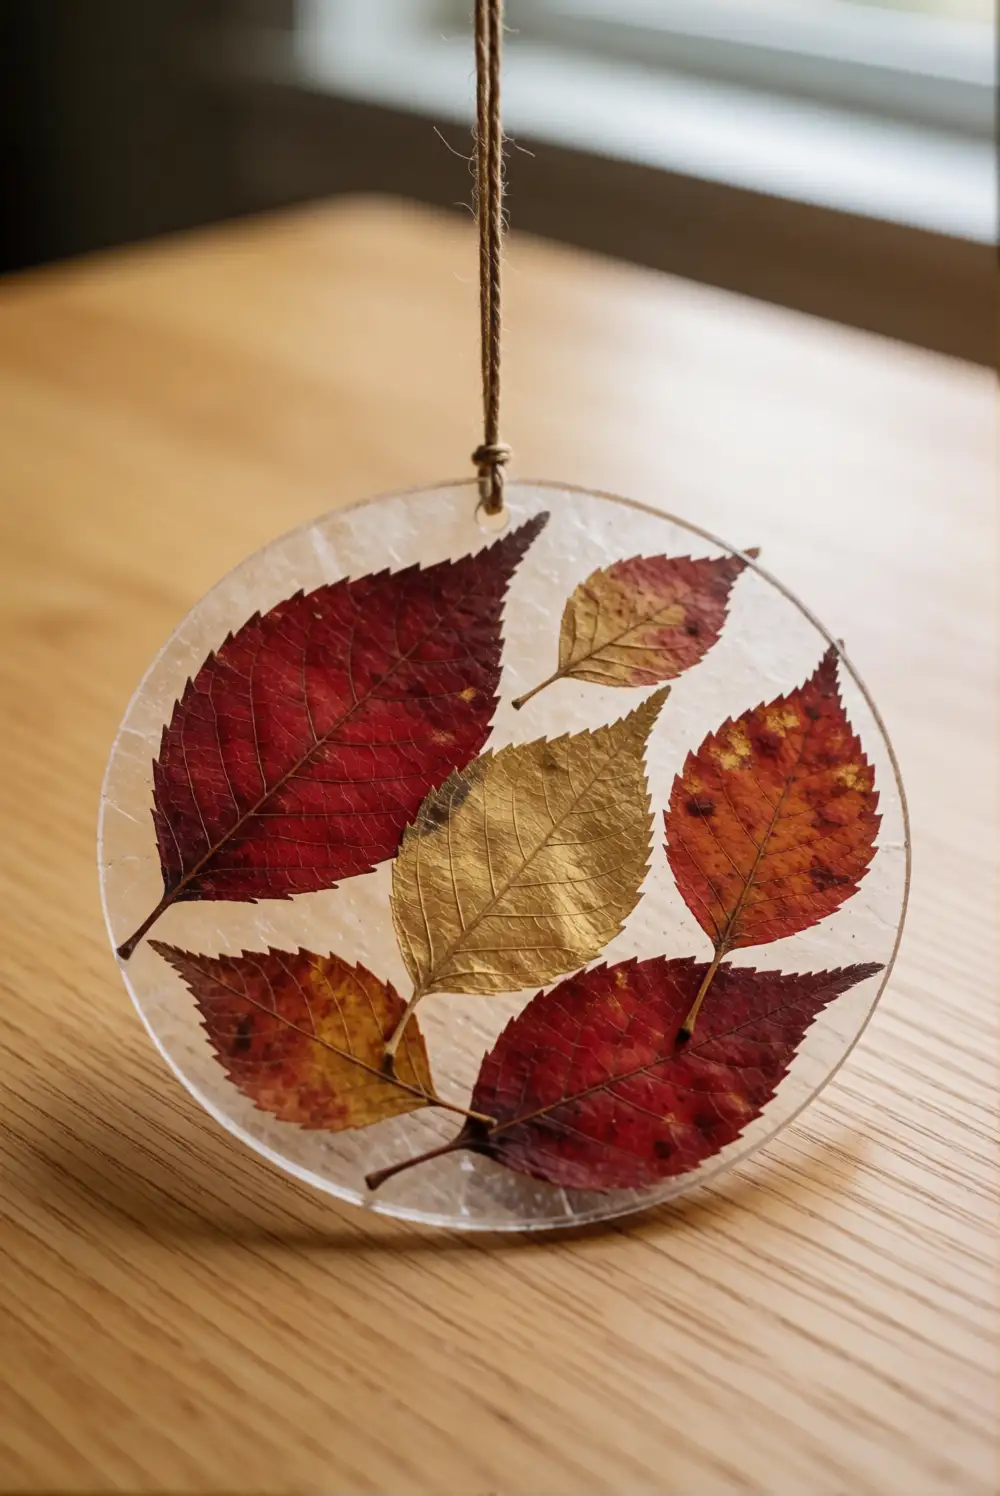
Gather flat, colorful leaves and press them between heavy books until they are dry and smooth. Cut two matching circles from clear contact paper, peel the backing from one, and arrange the leaves across its sticky surface with small gaps between them. Press the second circle over the arrangement, smoothing outward to seal the leaves inside. Trim the edges neatly, then punch a hole near the top and add a hanging loop made from ribbon or twine.
Choose translucent leaves in warm reds, golds, and rust tones so window light can shine through the finished piece. Keep the arrangement airy rather than overlapping every leaf, and trim any stems that extend past the circle. Hang the suncatcher where it catches soft daylight, or make a few in different shapes to group together. If a leaf is especially crisp, place it near the center to make its veins and natural silhouette easy to see.
Painted Acorn Place Cards
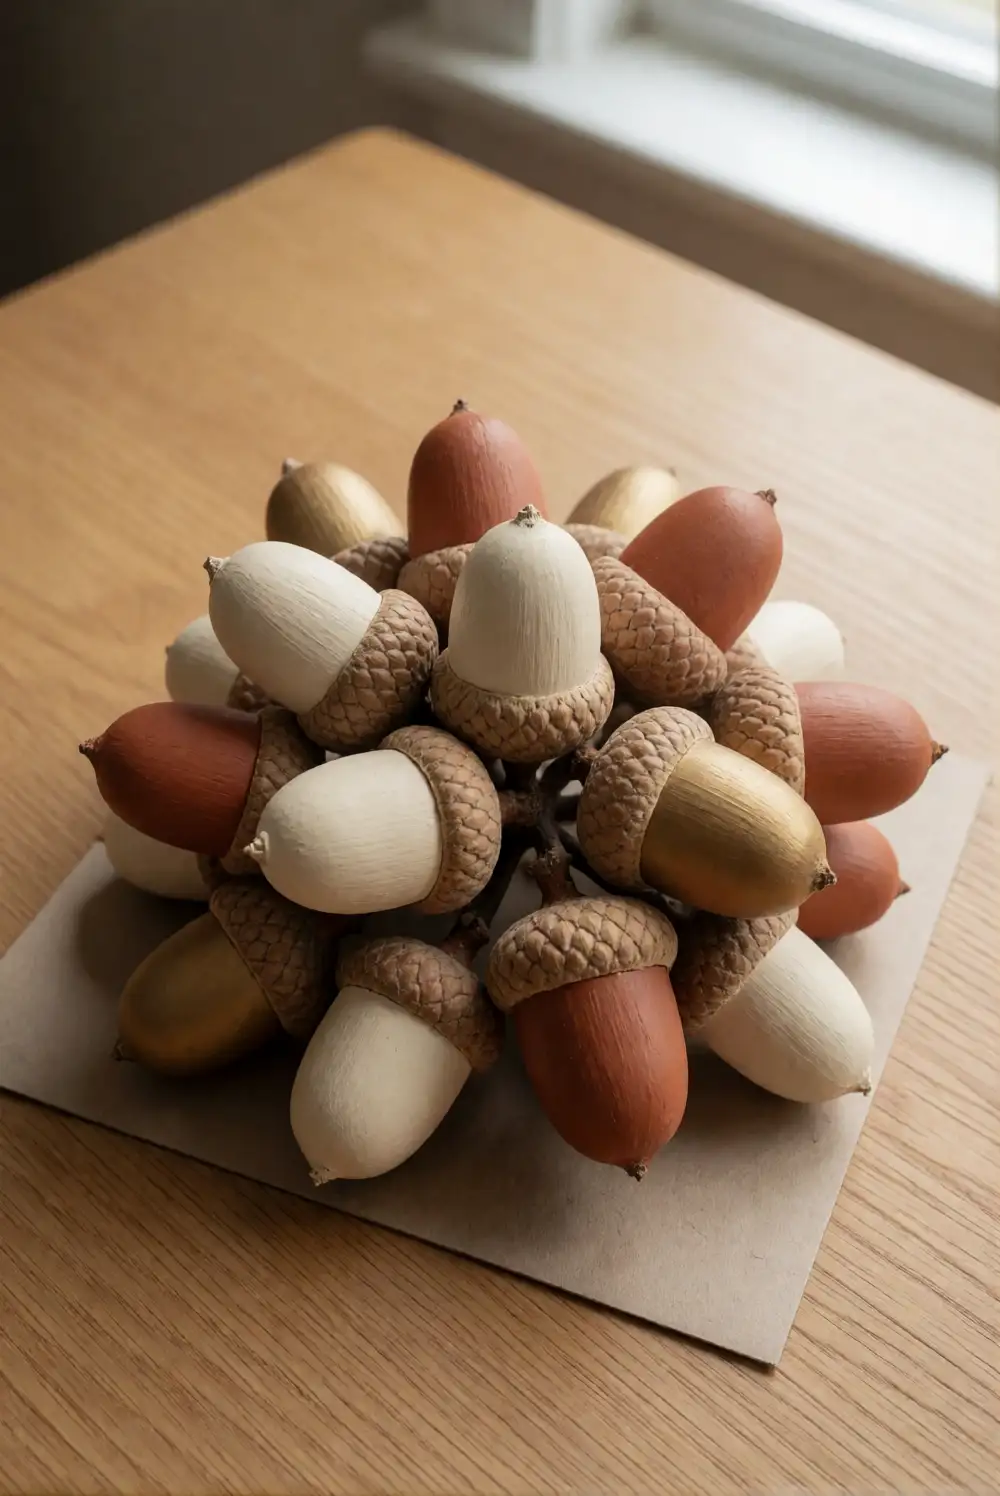
Collect a handful of large, clean acorns and let them dry fully before decorating. Brush each shell with a thin coat of craft paint in shades such as cream, terracotta, or muted gold, leaving the caps natural or painting them in a contrasting color. Once dry, arrange the acorns in small clusters on a sturdy cardstock base or set them beside each place setting. Keep the finished project purely decorative rather than adding names or lettering.
Use a restrained palette that echoes the dishes and linens on your table, or paint a few acorns in complementary shades for a gathered look. A shallow dish or a folded cloth napkin can help keep each cluster in place. For a centerpiece, combine the painted acorns with natural leaves and small branches on a tray. Let the paint dry completely before setting the pieces near food, and avoid placing them where they could roll off the table.
Layered Paper Leaf Garland
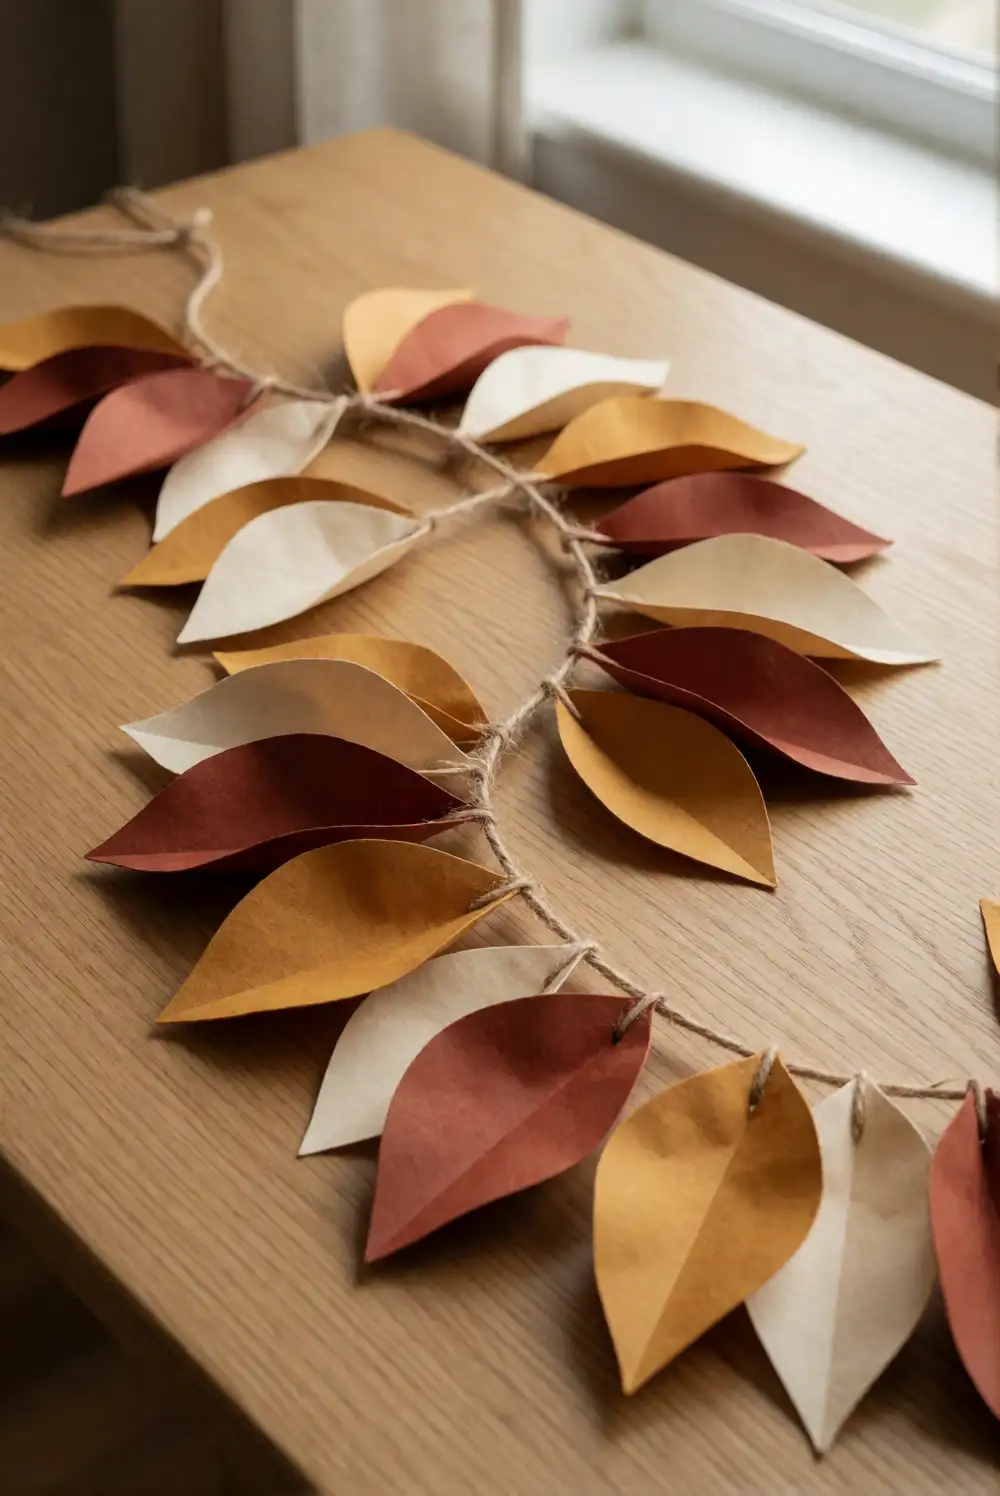
Cut leaf shapes from heavyweight paper in a mix of autumn colors, using real leaves as simple templates if helpful. Fold each paper leaf lightly down its center to give it dimension, then layer several colors together in small groups. Attach the shapes along a length of twine with small pieces of tape on the back or a few careful stitches. Space the clusters evenly, leaving enough twine at both ends to tie the garland to hooks or a mantel.
Vary the leaf sizes and color combinations so the garland feels collected rather than uniform. For a softer look, choose muted rust, ochre, and cream paper; deeper burgundy and brown create a richer seasonal palette. Drape the finished garland across a shelf, doorway, or dining table backdrop, keeping it away from heat sources. If you want a fuller effect, layer smaller leaves over larger ones and gently lift their folded centers after hanging.
Mini Pumpkin Yarn Wraps
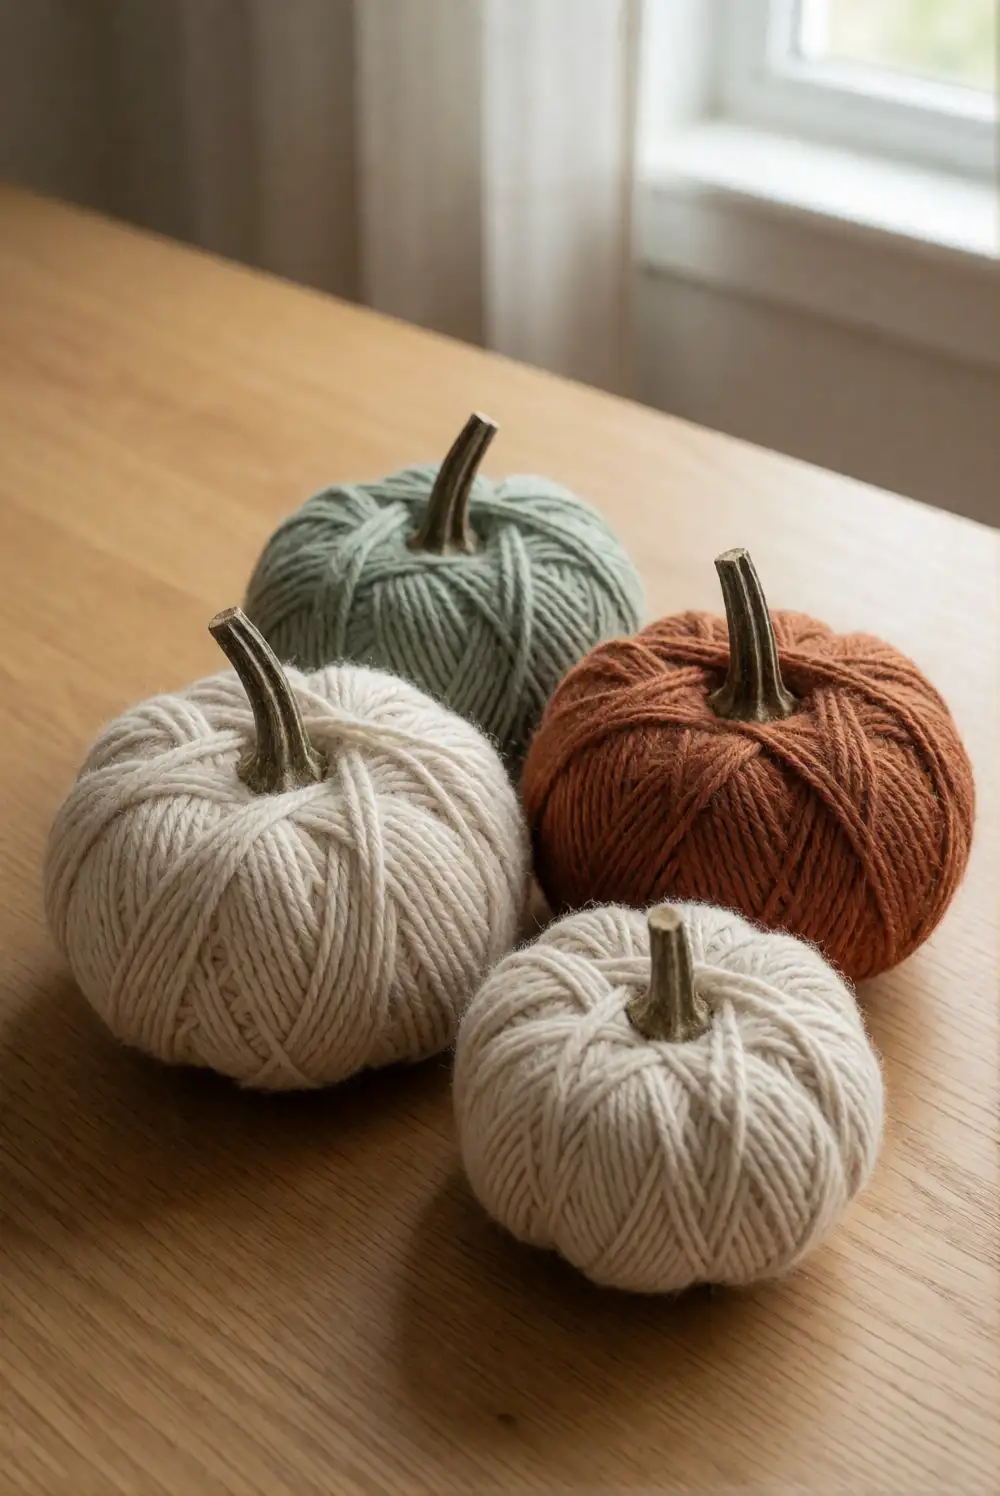
Choose small decorative pumpkins with firm stems and wipe their surfaces clean. Tie a strand of soft yarn near the base of a stem, then wrap it around the pumpkin in a relaxed crisscross pattern, guiding the yarn through the natural grooves. Secure the end with a discreet knot beneath the pumpkin or tuck it under a wrapped strand. Use one color for a clean finish or change colors midway to create a simple striped effect.
Warm cream, rust, and sage yarns pair especially well with natural pumpkin skins, while a single bold shade can make a small pumpkin stand out on a shelf. Keep the wrapping loose enough to show the pumpkin’s shape and color underneath. Arrange a few wrapped pumpkins in a wooden bowl or along a mantel with dried leaves. Since these are decorative, handle them gently and remove the yarn before composting the pumpkin.
Dried Orange Slice Wreath
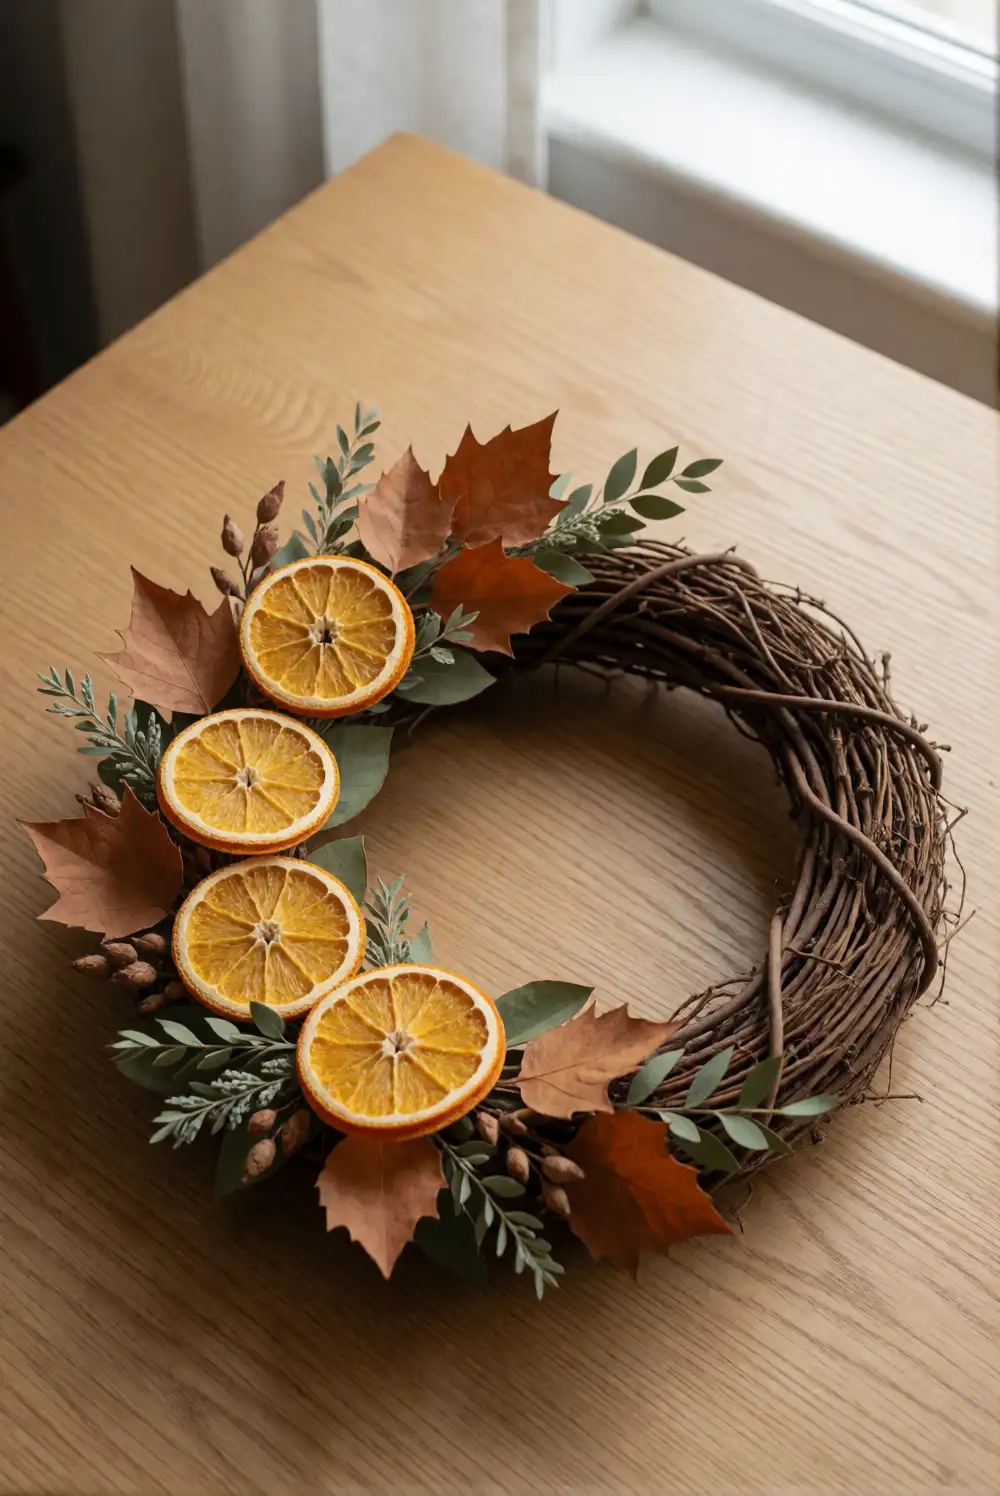
Slice oranges into thin, even rounds and dry them slowly in a low oven until they are firm and no longer moist. Let the slices cool completely, then attach them around a plain grapevine or wire wreath form using craft wire. Fill gaps with small sprigs of dried foliage, arranging the oranges so their jewel-like centers face forward. Secure each piece firmly at the back, and add a simple ribbon loop if you want to hang the wreath on a door.
Choose oranges with bright interiors for a vivid focal point, and mix in cinnamon-colored leaves or preserved greenery for texture. Keep the design balanced by distributing the citrus slices around the wreath rather than crowding them all on one side. Display it indoors or on a sheltered door where it stays dry. A smaller wreath can sit flat as a table accent, but keep it clear of flames and food-contact surfaces.
Fabric Scrap Pumpkin
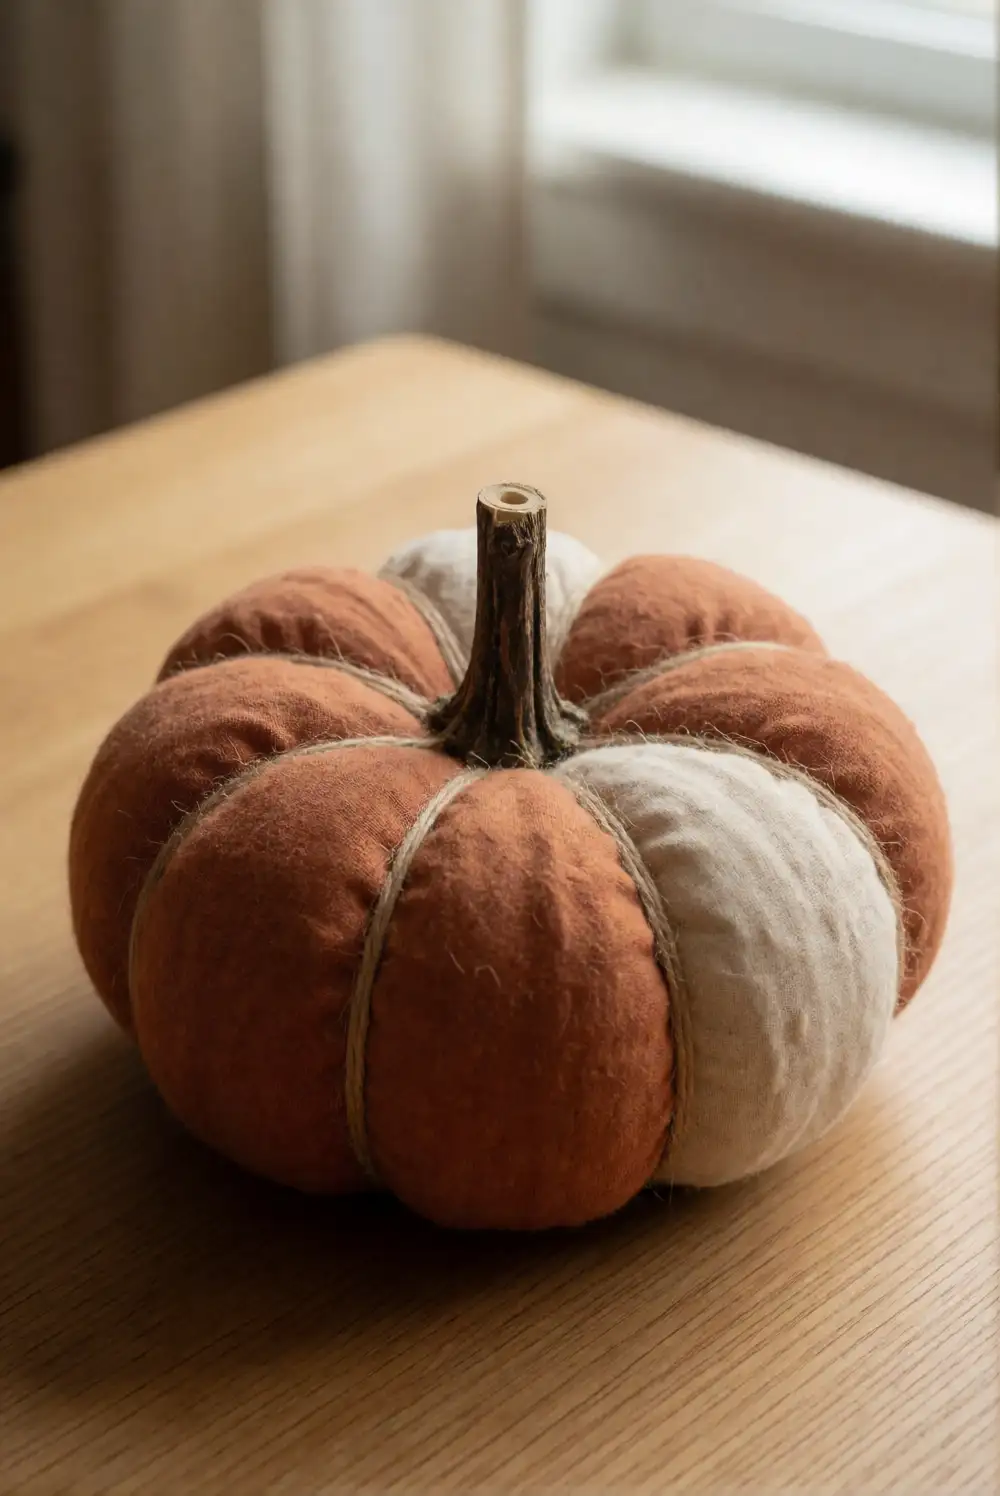
Cut a rectangle of soft fabric from a fall-colored scrap and place it flat with the patterned side down. Set a small amount of stuffing in the center, gather the fabric edges around it, and tie them securely with twine to form a rounded pumpkin shape. Wrap additional twine around the gathered fabric to create gentle segments, then tuck a short cinnamon stick or a small piece of dried branch into the top as a stem.
Lightweight cotton, linen, and flannel scraps all work well, and mixing prints can give a group of fabric pumpkins a collected feel. Adjust the stuffing before tying so the shape looks plump without being lumpy. Set one on a bookshelf or gather several in a shallow basket with natural leaves. If the fabric frays, fold the edges inward before gathering. Keep the finished decoration dry and away from open flames or other heat sources.
Pressed Leaf Clay Trinket Dish
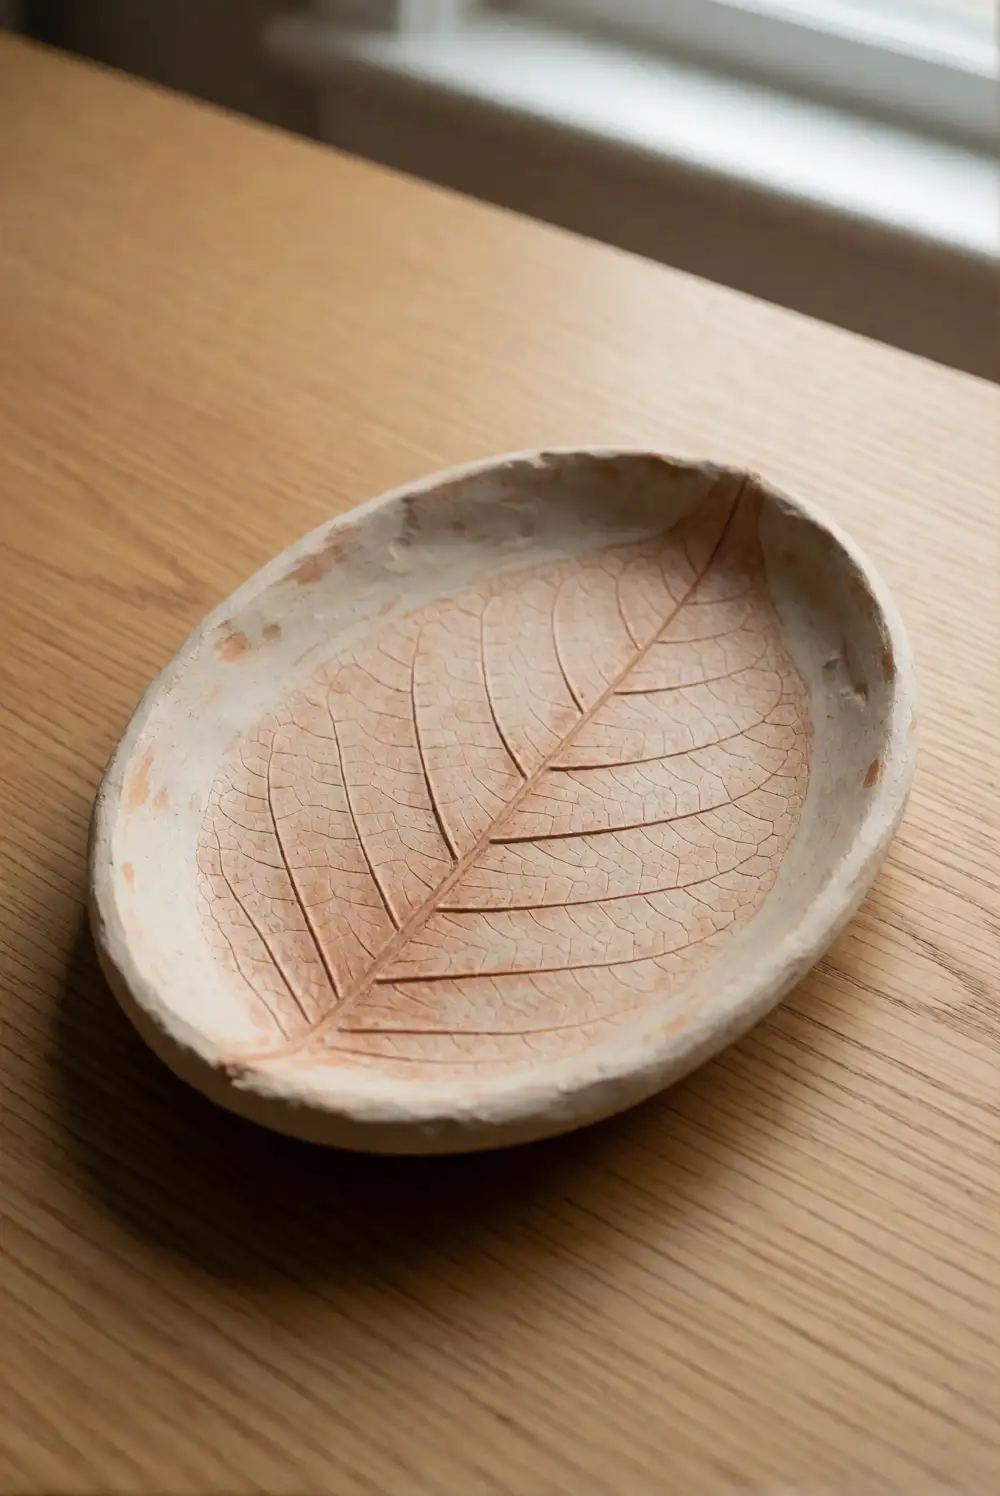
Roll air-dry clay into an even sheet on a clean work surface, then press a sturdy leaf gently into it to leave a clear impression. Lift the leaf away and cut a soft-edged circle or oval around the design. Place the clay shape inside a shallow bowl so the edges curve upward, then leave it to dry according to the package directions. Once fully dry, smooth any rough edges with fine sandpaper and brush on a light coat of sealant if desired.
Leaves with pronounced veins make the clearest impressions, while smooth clay keeps the finished dish looking simple and modern. Paint only the raised edges or the leaf imprint if you want a little color without hiding the detail. Use the dish for wrapped candies, hair clips, or small keepsakes, not for direct food contact. A grouping of different shapes looks lovely on an entry table, especially beside a small vase of dried stems.
Woven Paper Pumpkin Basket
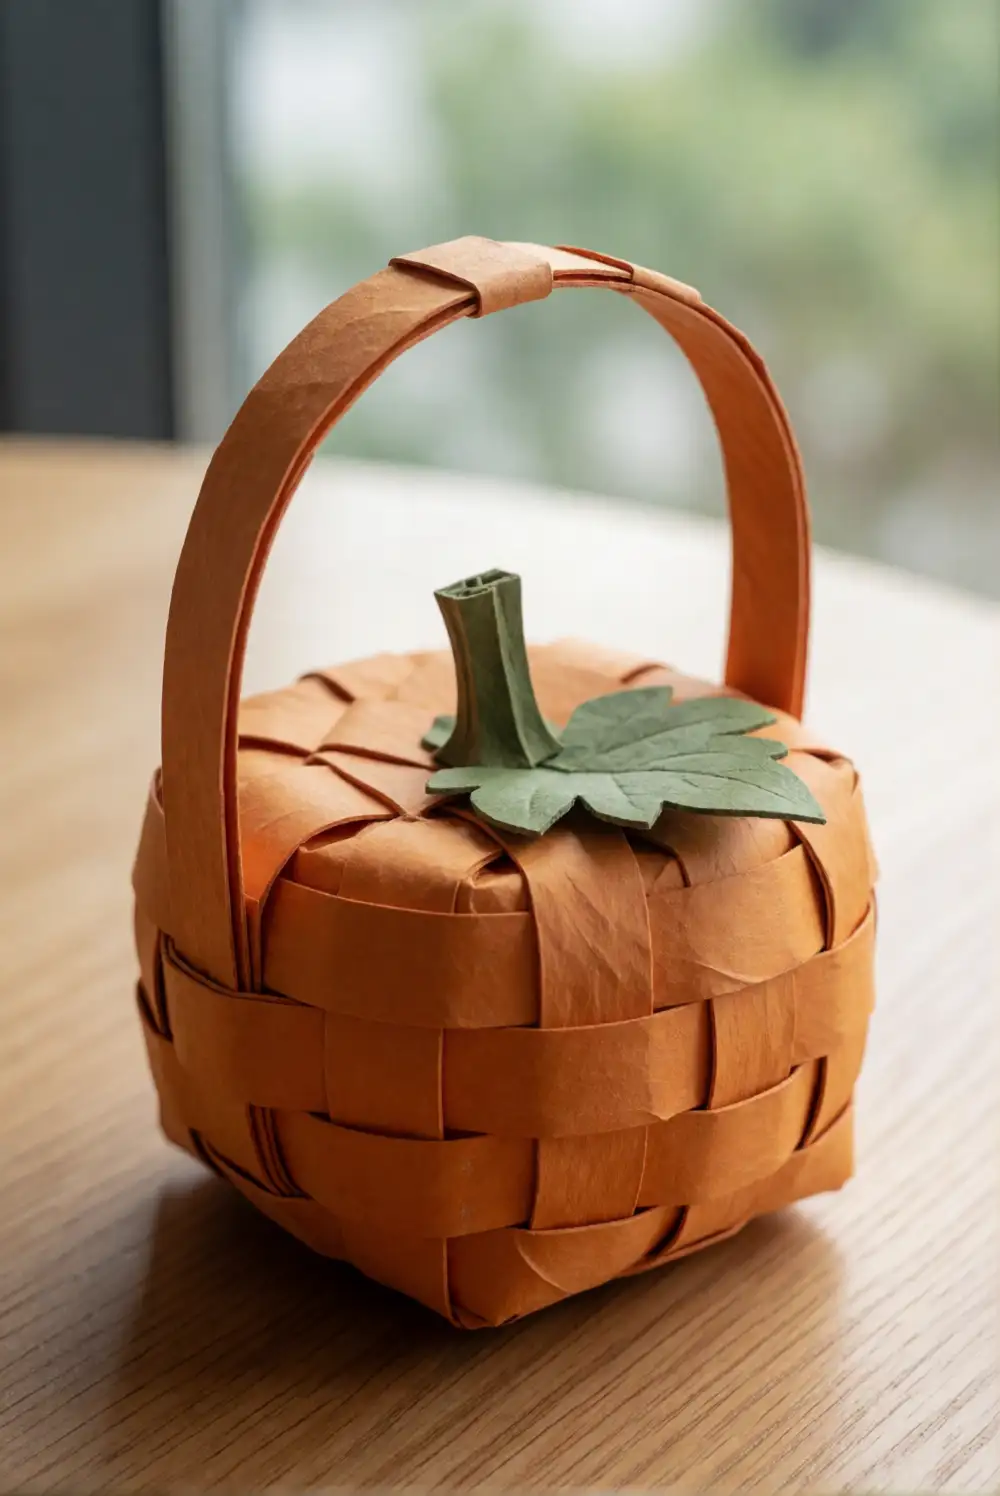
Cut wide strips of sturdy orange paper and weave them over and under one another to form a small square base. Bring the loose ends upward and continue weaving additional strips around the sides, keeping the rows snug but not bent. Trim the tops to an even height, fold them inward, and tuck them between the woven layers. Add a curved paper handle and a green paper leaf, attaching each securely with craft glue to create a lightweight pumpkin-shaped basket.
Use two close shades of orange to make the woven pattern more visible, or add a strip of brown paper near the top for a natural-looking rim. Keep the basket small and fill it with fabric leaves or wrapped treats rather than heavy objects. It makes a cheerful accent on a shelf or a seasonal holder for napkins. If the paper begins to buckle, weave more loosely and support the base while shaping the sides.
Autumn Leaf Candle Holder
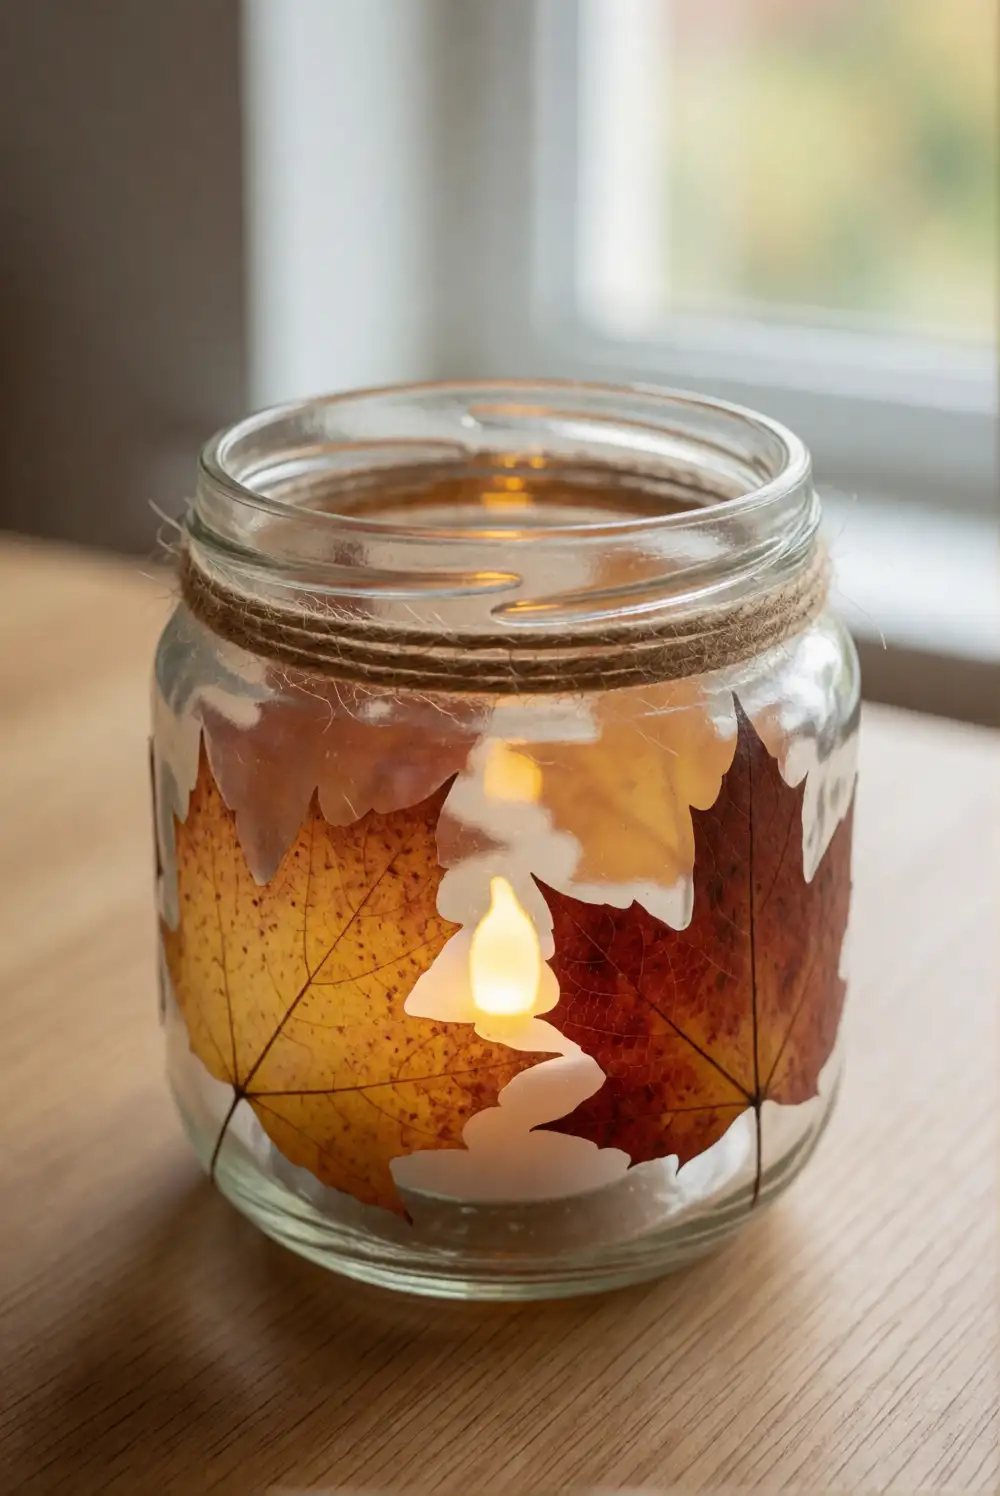
Wash and dry a clear glass jar, then brush a thin layer of decoupage medium onto its outside surface. Press small, dry leaves onto the glass, smoothing them carefully from the center toward the edges. Add a light topcoat over the leaves and let the jar dry completely. Tie a length of twine around the rim for a simple finish, trimming the ends neatly. Place an LED tea light inside to create a gentle glow through the colorful leaf shapes.
Choose thin leaves with warm colors so the light can filter through their edges and veins. Leave some glass uncovered to keep the finished holder bright, and make sure the jar’s rim stays clear of glue and decorations. Arrange several jars together on a tray with a few loose leaves for a cozy tabletop display. Use only an LED light, and keep the finished jar away from water so the paper-like leaves remain firmly attached.
Rustic Twig Photo Frame
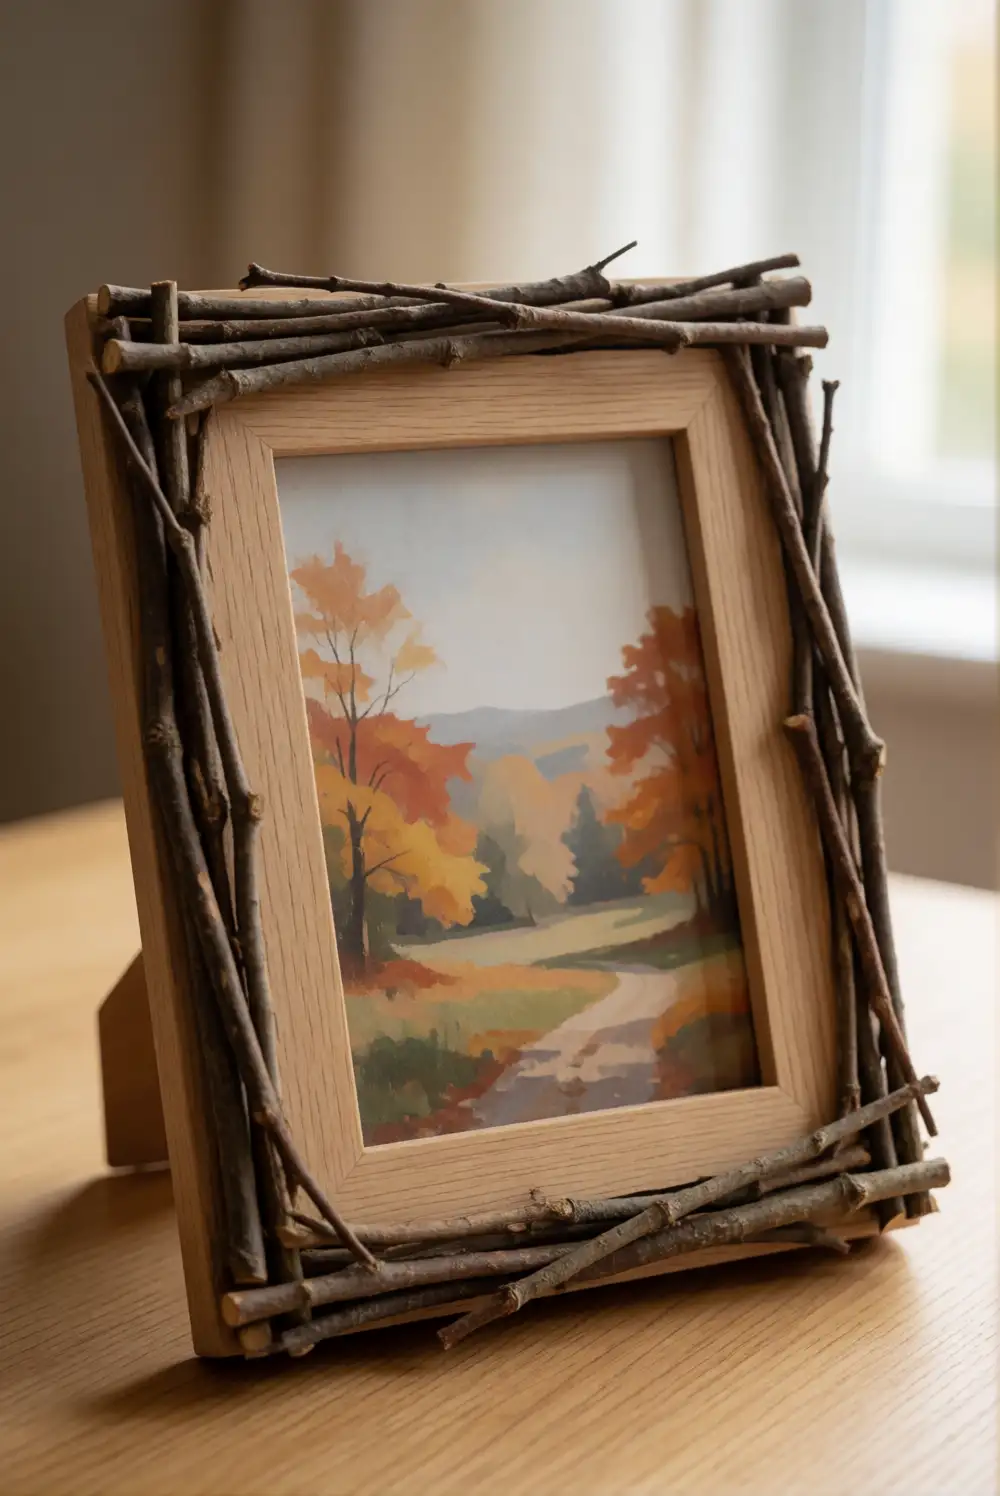
Gather short, dry twigs of similar thickness and trim them to fit along the edges of a plain wooden frame. Arrange the twigs in a tidy row, changing their lengths slightly for a natural outline. Attach them one at a time with craft glue, holding each until it stays in place. Let the frame dry fully, then add a favorite seasonal photograph behind the glass. Keep the twig layer thin so the frame remains balanced and can stand or hang securely.
For a polished finish, select twigs with similar tones and remove loose bark before attaching them. A few tiny sprigs of dried foliage can add softness at the corners without making the frame feel crowded. Display it on a mantel with a small pumpkin or use it to make a thoughtful autumn gift. If the frame is meant to hang, check that the added twigs do not cover the hanging hardware or make one side noticeably heavier.
With natural textures, warm colors, and simple materials, these fall crafts make it easy to add a handmade seasonal touch to your home. Choose a project that suits the supplies you have, then display the finished piece on a shelf, table, window, or mantel. Save your favorite ideas for a relaxed crafting afternoon, or share them with someone looking for fresh inspiration for fall.