
Give your Halloween manicure a playful seasonal touch with these simple nail designs featuring a standout accent nail. From glossy pumpkins and tiny ghosts to candy-corn stripes and delicate spiderwebs, each idea pairs festive detail with an easy-to-wear look. Choose a design that suits your style, then use the practical painting tips to create a polished manicure at home.
Glossy Pumpkin French Tips
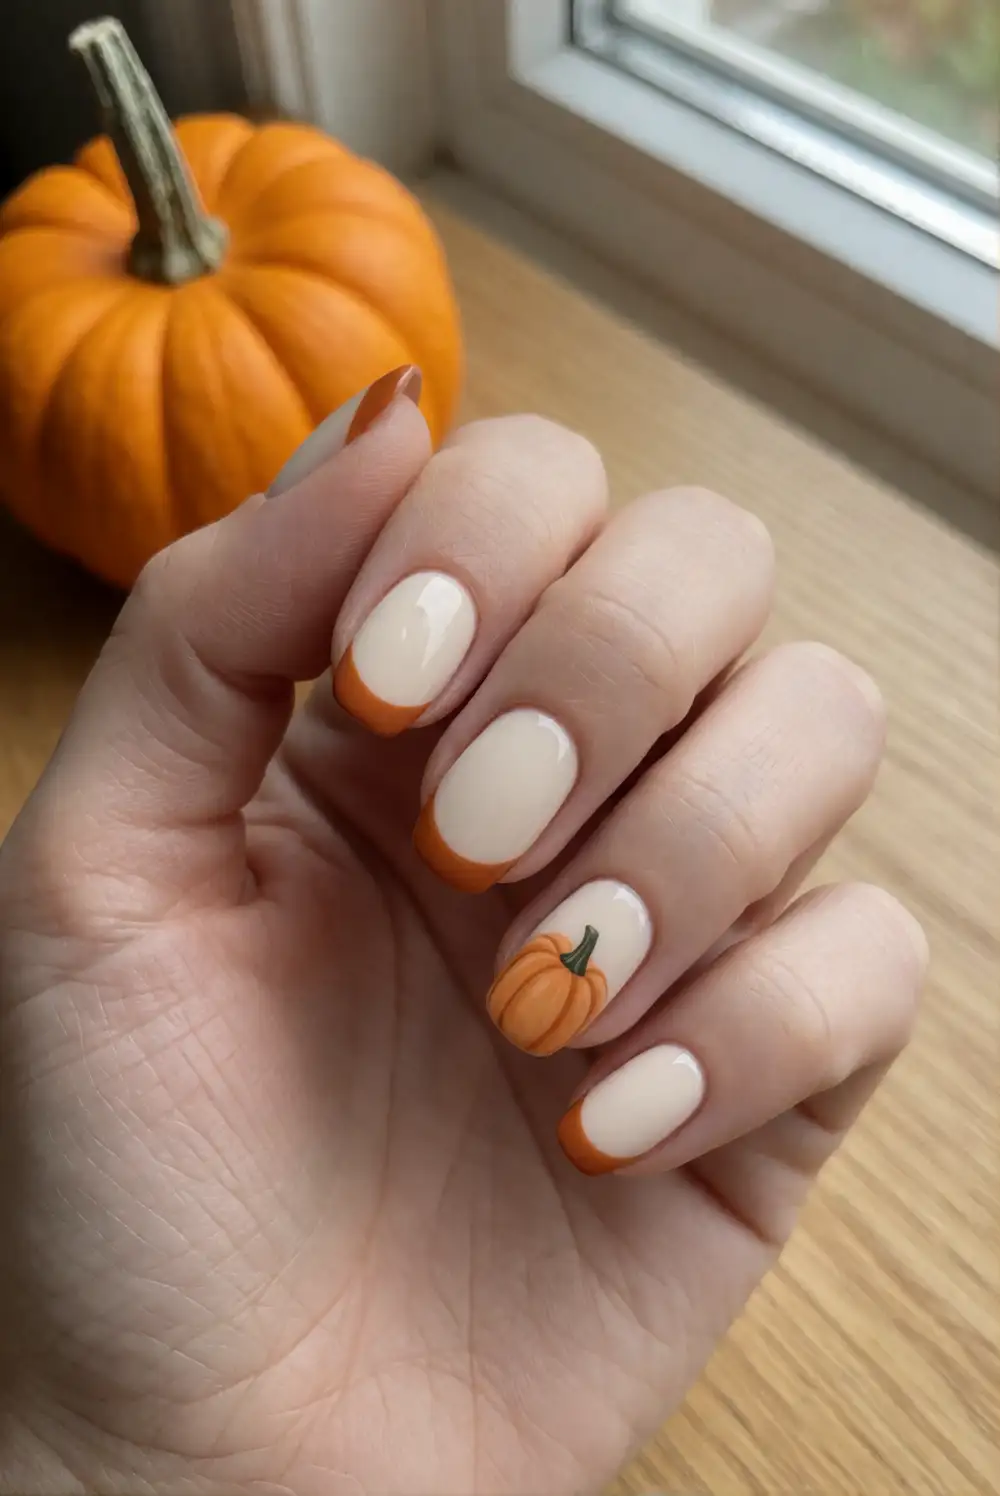
Paint most nails a warm cream or sheer nude, then brush a curved pumpkin-orange tip along each free edge. On the accent nail, use a fine nail-art brush to paint a rounded orange pumpkin with a short green stem over the same neutral base. Work in thin coats and let each layer dry before adding the next. A glossy top coat smooths the design and gives the bright orange a fresh, lacquered finish.
Keep the pumpkin shape simple by making it from a few rounded strokes rather than trying to draw fine grooves. A muted sage stem makes a softer alternative to bright green, while a deeper burnt orange feels especially autumnal. For a coordinated look, repeat the French tips across the manicure and reserve the pumpkin for the accent nail. This design pairs nicely with cozy sweaters and works well on short, rounded nails.
Tiny Ghost Accent Nail
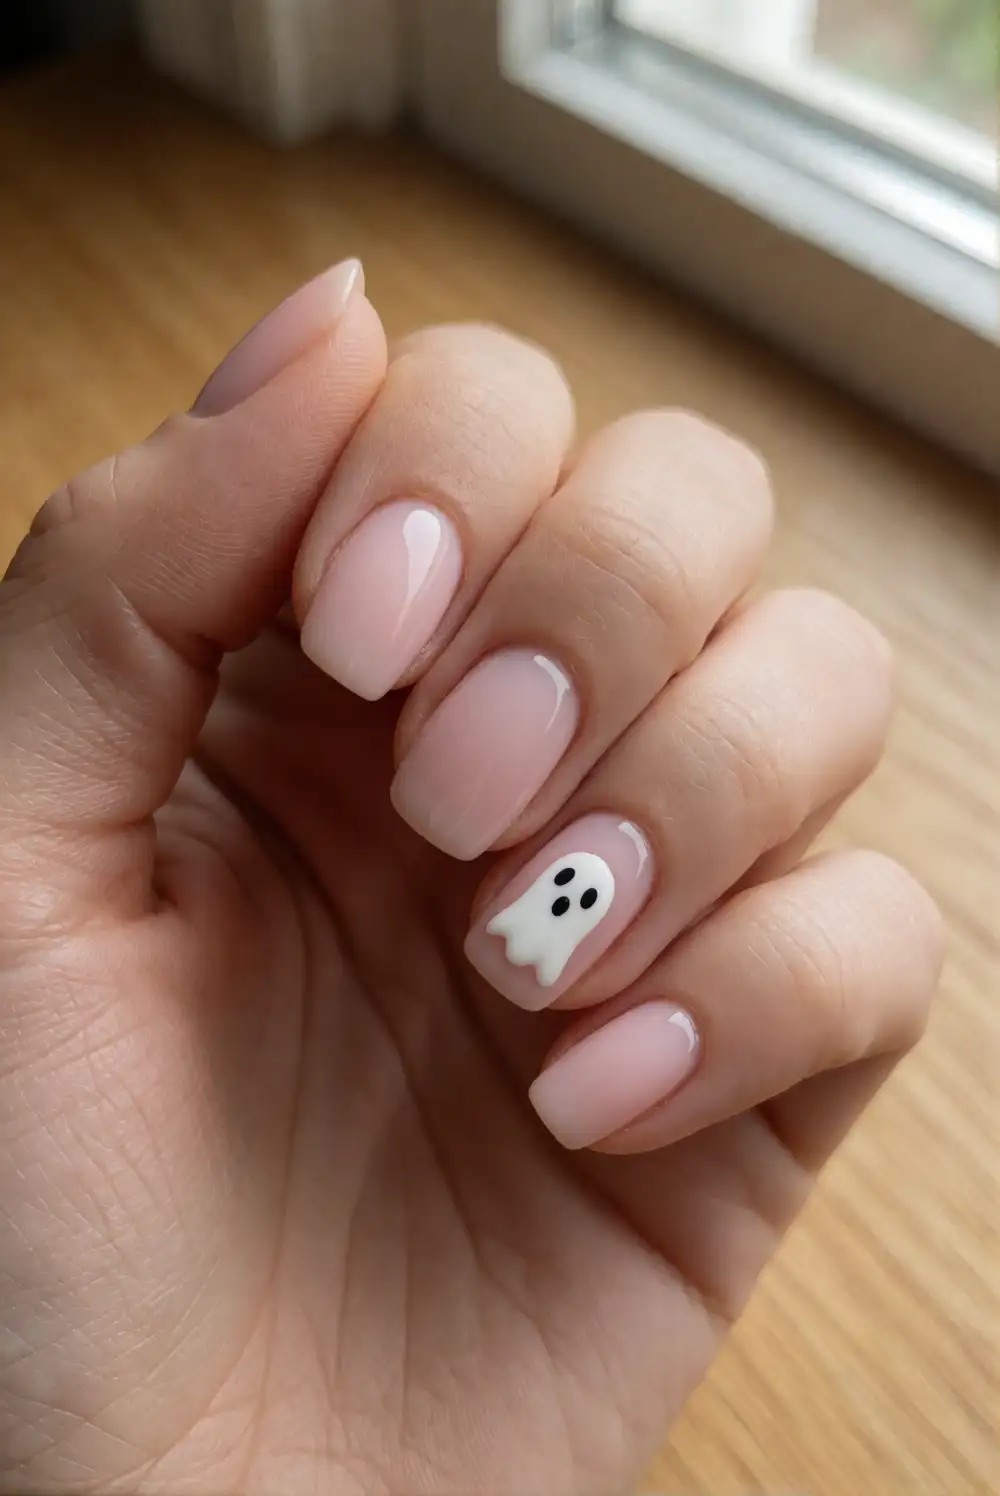
Start with a sheer pink or milky white base across the nails. On the accent nail, paint a small white ghost with a rounded top and a gently wavy bottom edge, using a detail brush or the tip of a polish brush. Once the shape is completely dry, add two tiny black eyes with a fine nail-art tool. Keep the surrounding nails plain and glossy so the little ghost remains the clear focal point.
Use a soft lavender or pale peach base if you want a hint of color without competing with the ghost. Make the design feel extra neat by placing the figure near the center of the nail and leaving a generous border around it. A quick-dry top coat helps protect the artwork, but apply it gently to avoid dragging the dark details. The result is cute, understated, and easy to wear beyond a Halloween gathering.
Candy-Corn Color Block
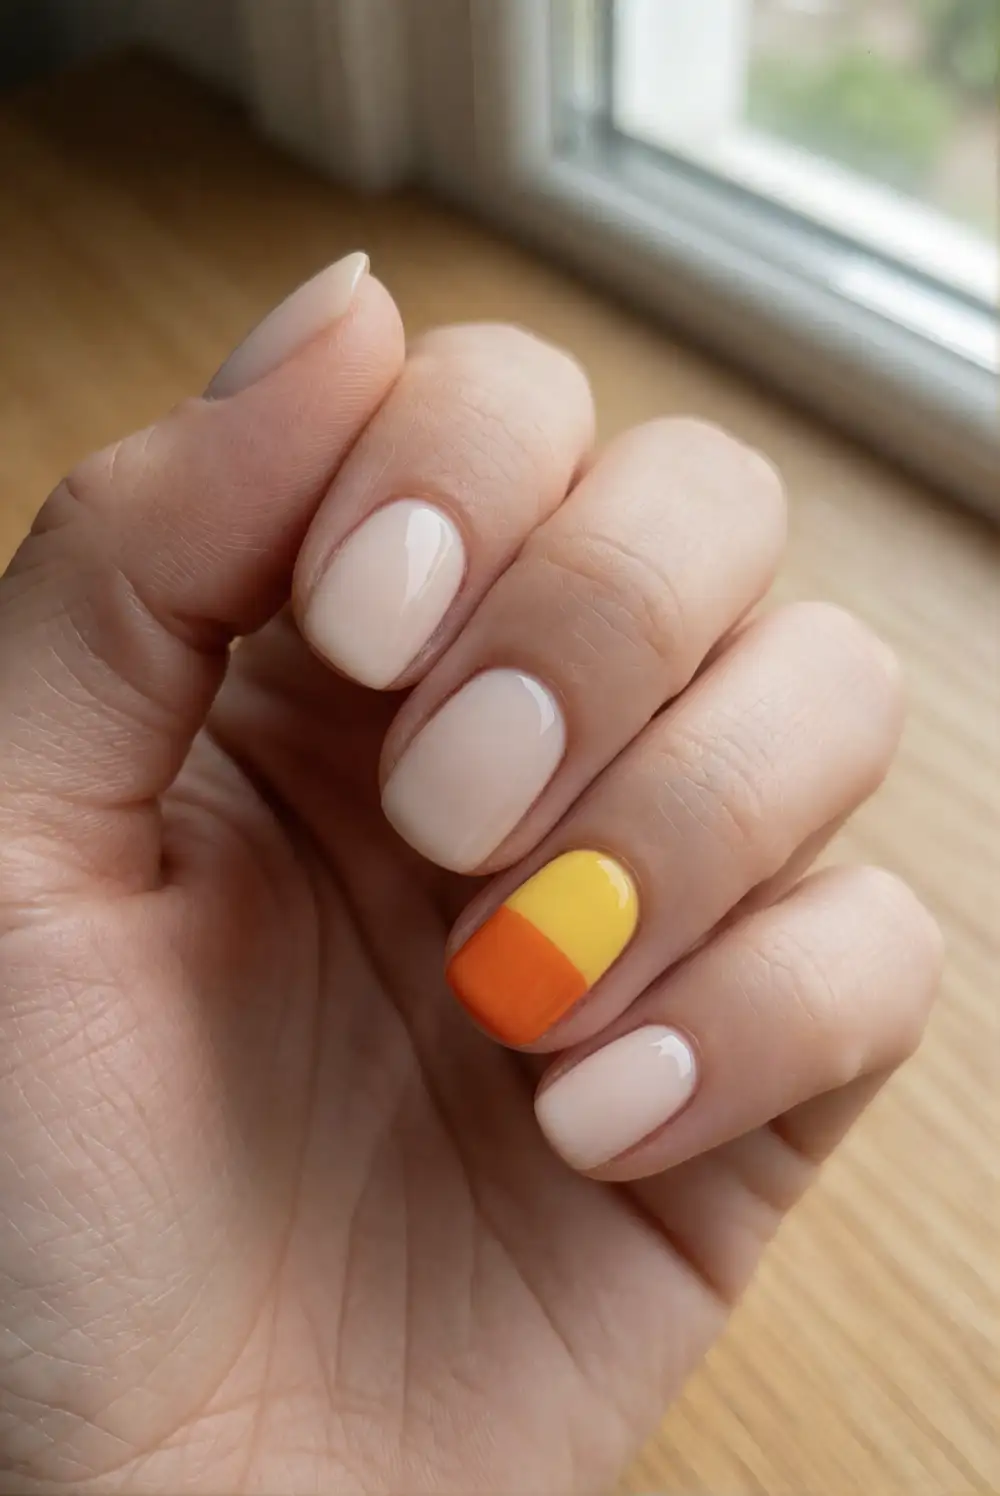
Choose a creamy white base, then paint slim blocks of sunny yellow and vivid orange near the tip of the accent nail to evoke classic candy-corn colors. A striping brush can help keep the bands crisp; let each shade dry before applying the next. Keep the rest of the manicure a sheer nude or pale cream. Finish with a clear top coat to bring the contrasting colors together and create a smooth, glossy surface.
For a softer take, use butter yellow and muted apricot instead of saturated shades. The color bands can follow the natural curve of the nail tip, or sit diagonally for a more modern finish. A small detail brush and patient, thin layers help prevent the polish from becoming bulky. This cheerful design looks especially polished on a short oval manicure and pairs easily with simple gold jewelry or a warm-toned outfit.
Fine Spiderweb Accent
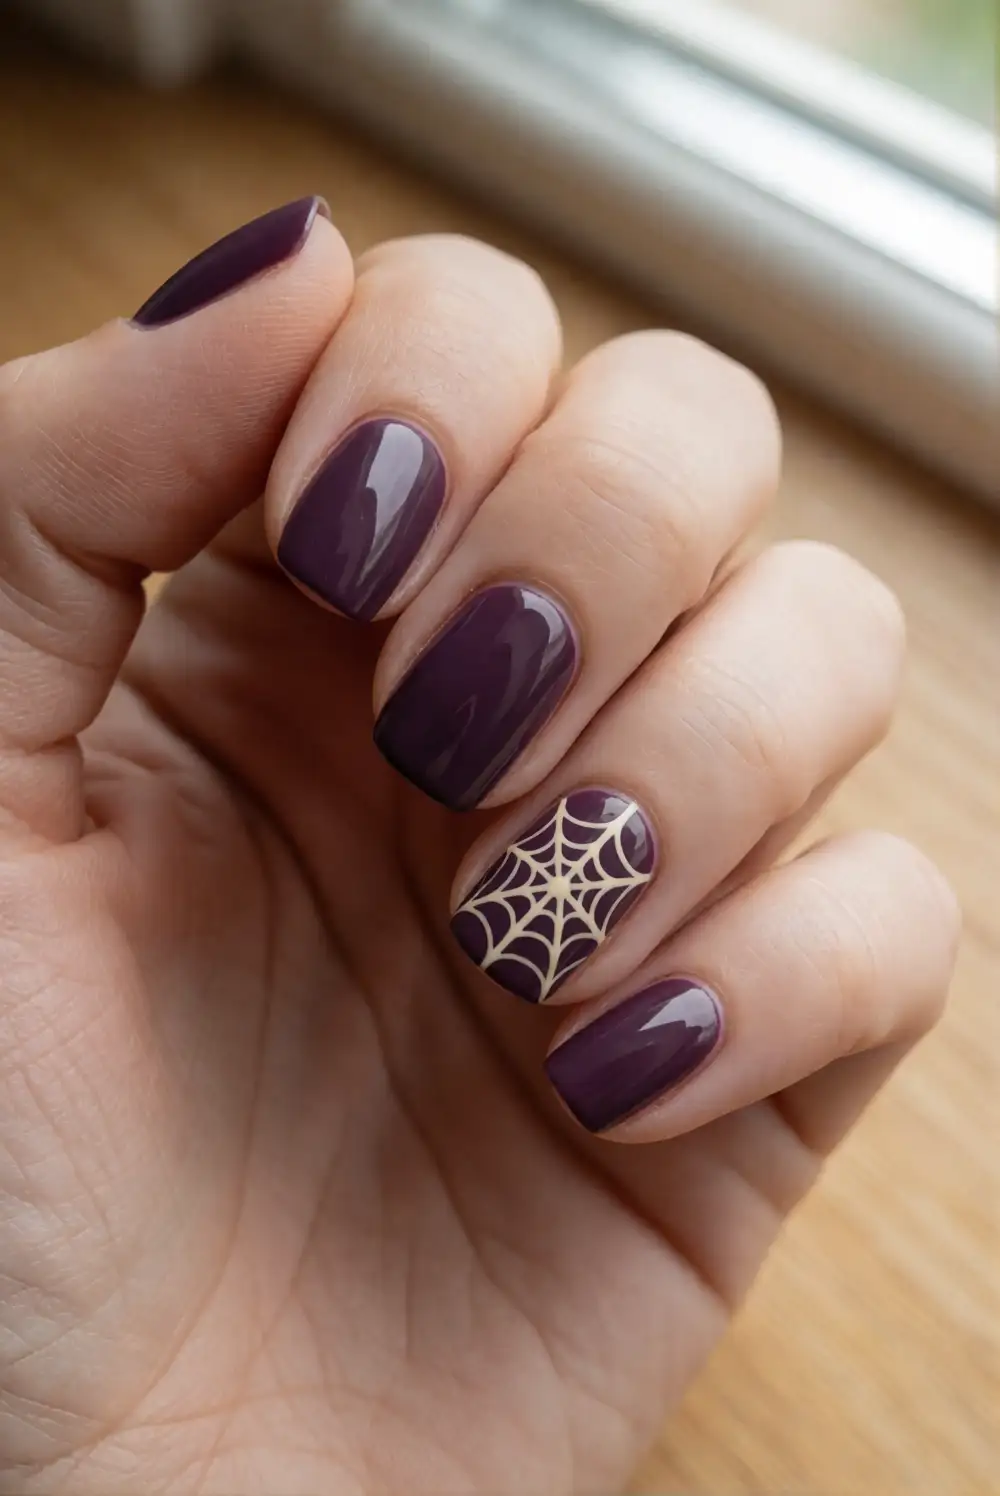
Apply a deep plum, charcoal, or glossy black base to the accent nail and let it dry thoroughly. With a fine liner brush and a pale cream polish, draw delicate lines that meet near a corner, then connect them with small curved arcs to form a spiderweb. Keep the other nails in the same dark shade or choose a sheer neutral for contrast. Seal everything with a thin clear top coat once the artwork is dry.
A soft silver polish can replace cream for a subtle glimmer, while a muted lilac base makes the web feel lighter. Work from the corner outward and use very little polish on the brush to keep the lines fine. If freehand drawing feels tricky, practice the web on a piece of paper first. The finished accent is graphic without taking over the manicure, making it a good fit for a simple evening look.
Playful Black Cat Silhouette
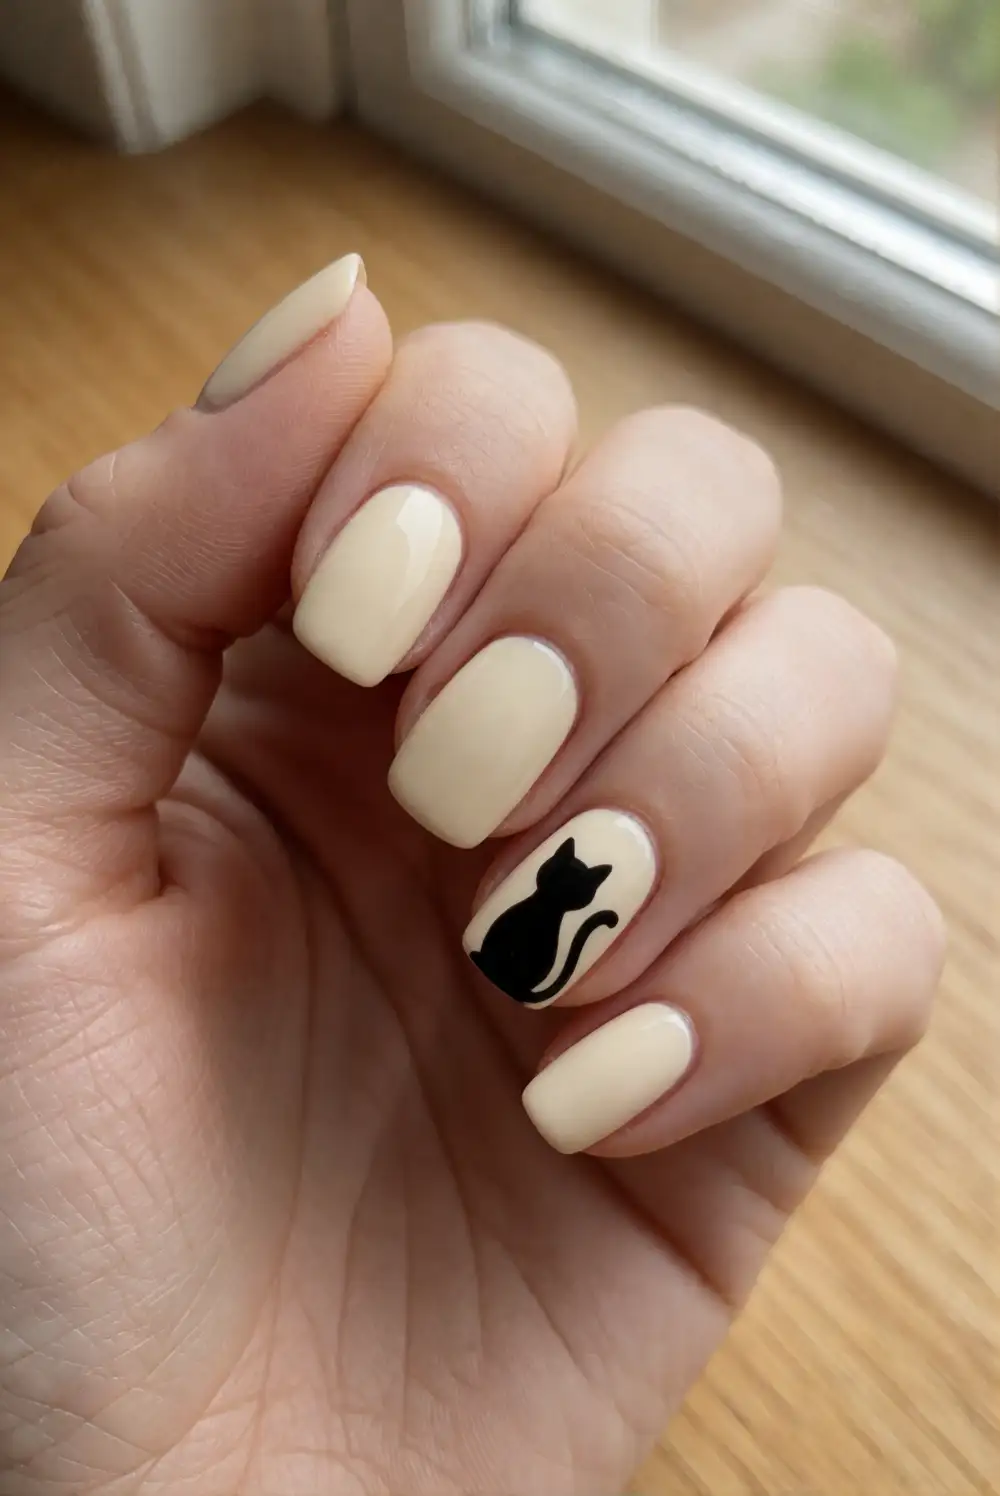
Paint the accent nail a pale cream or dusty pink and allow it to dry. Use black polish and a fine brush to create a small rounded cat head, two pointed ears, and a curved tail that sweeps across the nail. Keep the shape bold and uncomplicated so the silhouette stays clear at a small scale. Finish the remaining nails in the same base color, then seal the design with a glossy top coat.
A warm beige base gives the black silhouette a softer vintage feel, while a muted orange background leans into classic Halloween colors. Place the cat slightly off center if you want the curved tail to have room to flow. Make sure the black polish is fully dry before applying top coat to avoid smudging the outline. This simple design works on short nails and looks charming alongside understated rings or a cozy dark outfit.
Moonlit Star Accent
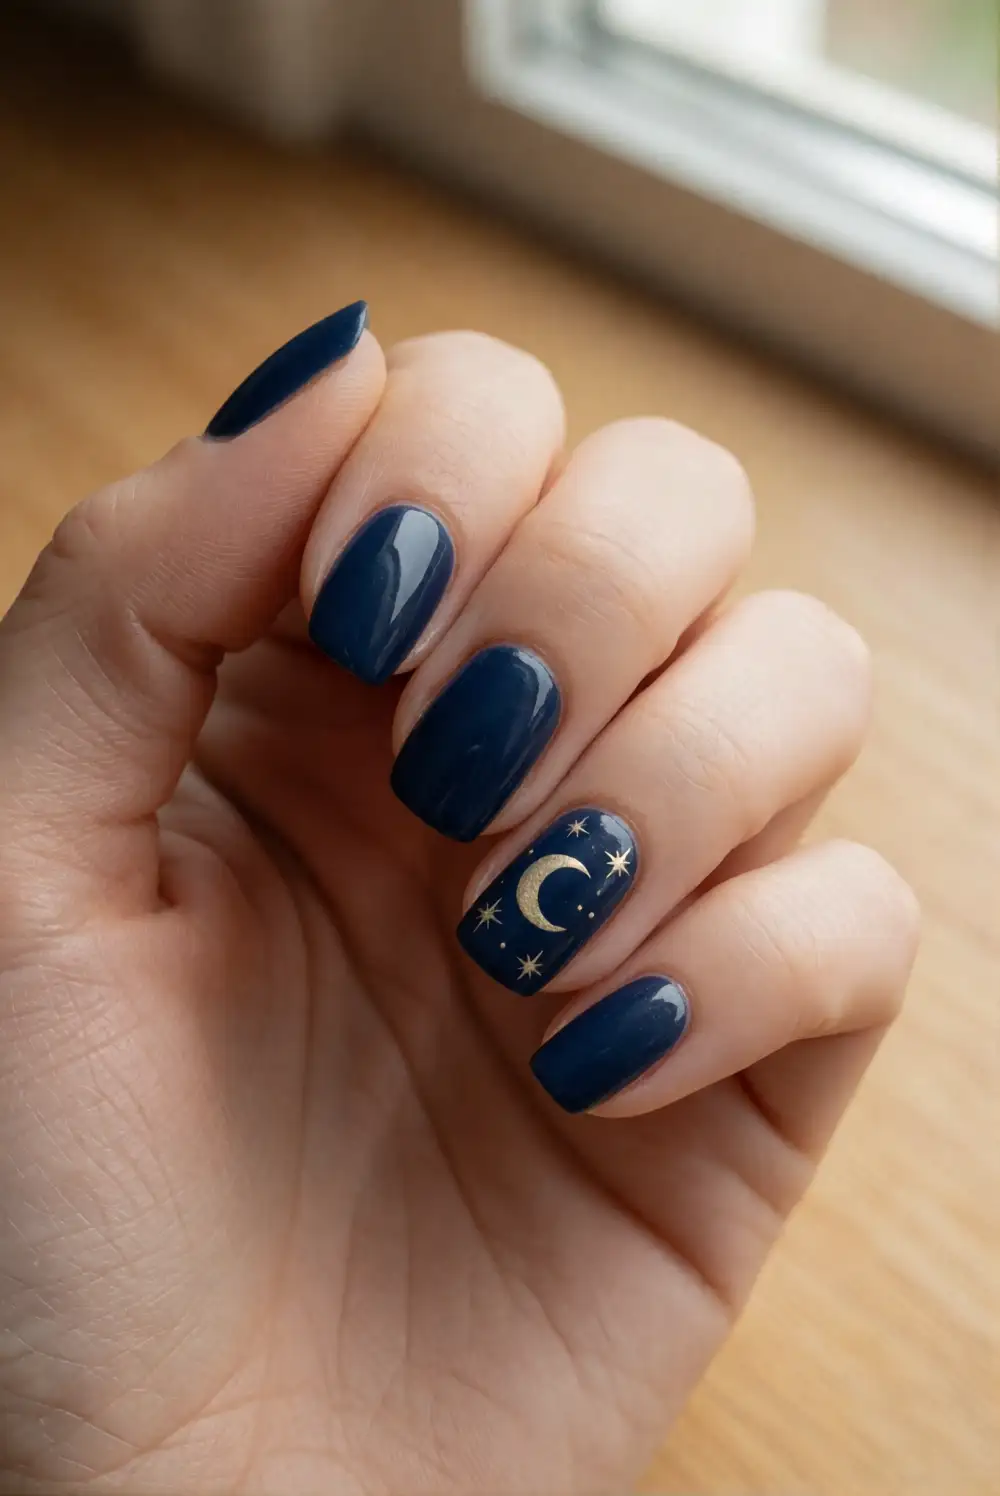
Coat the nails in a midnight-blue or deep plum polish, leaving the accent nail ready for a small crescent moon and scattered stars. Use a fine brush with pale gold or creamy white polish to paint the crescent, then add a few tiny starbursts with short intersecting strokes. Keep the shapes spaced apart and the lines delicate. Once dry, apply a glossy top coat to give the dark background a smooth, night-sky finish.
For a more subdued manicure, swap the dark polish for smoky lavender and choose a soft champagne shade for the celestial details. A metallic polish catches the light nicely, but a flat cream creates a more graphic look. Keep the stars small so the moon remains the main feature on the accent nail. This design suits both rounded and almond-shaped nails, and its dark, polished palette transitions easily from daytime plans to an evening event.
Terracotta Checkerboard Accent
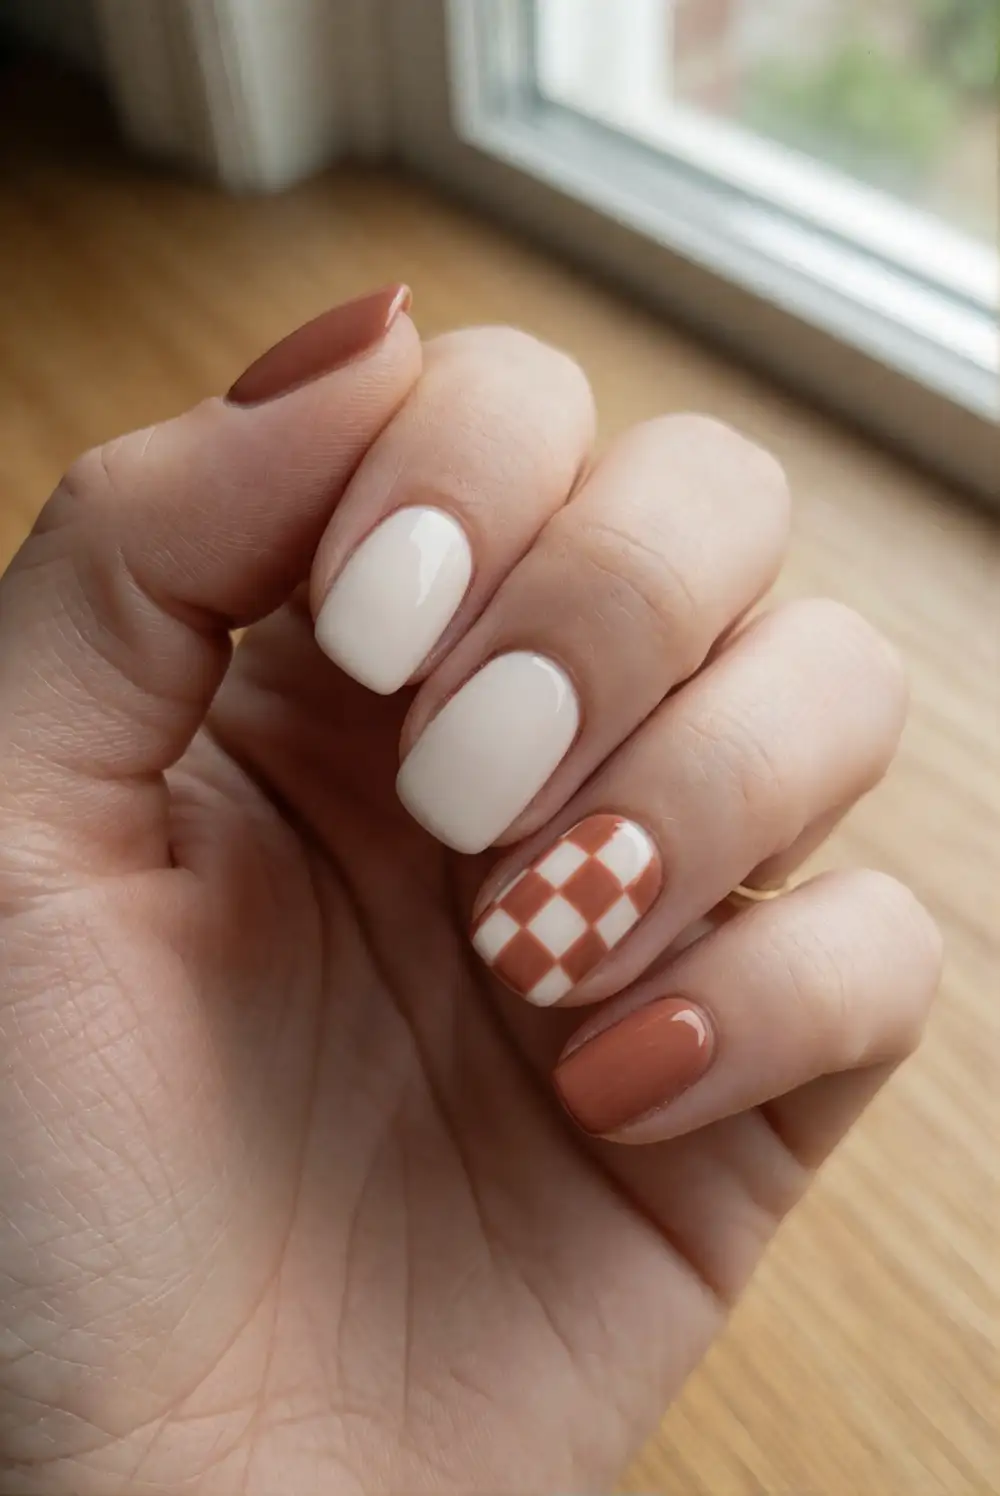
Begin with an ivory base on the accent nail and let it dry completely. Use a fine brush to paint a neat checkerboard in alternating terracotta and cream squares, keeping the blocks small enough to fit comfortably on the nail. The remaining nails can be painted a solid terracotta, warm beige, or soft brown. Apply the colors in thin layers, then finish with a glossy top coat for a smooth surface and a tidy, graphic look.
Freehand squares do not need to be perfectly uniform; a relaxed, hand-painted pattern gives the manicure a charming feel. If you prefer a quieter result, use dusty rose or muted rust instead of a brighter orange. Keep the accent pattern centered and leave a slim border of ivory around it to make the checks stand out. This earthy design feels festive without relying on familiar Halloween icons and pairs well with warm knits and neutral clothing.
Violet Drip Accent
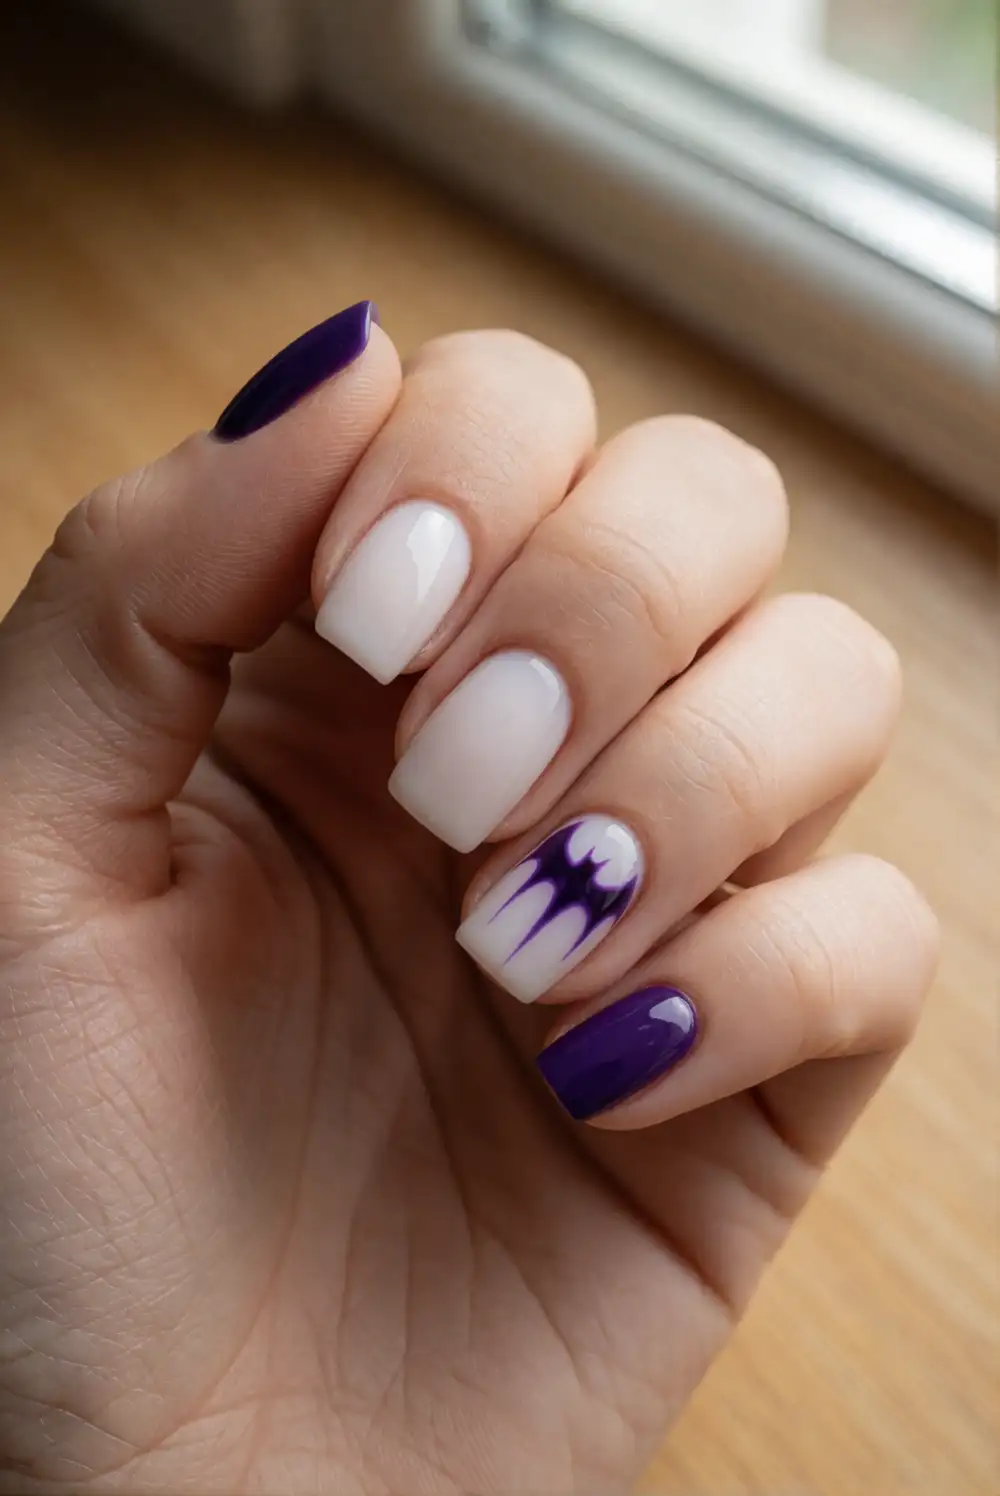
Paint the accent nail a pale nude or milky white, then choose a deep violet polish for the dripping detail. Starting at the top edge, draw a wavy line and extend a few rounded drips downward with a fine brush. Keep the shapes varied but simple, and leave enough base color visible to keep the design readable. Paint the other nails in a matching violet or a complementary sheer shade, then seal the dry manicure with clear top coat.
For a softer palette, use berry purple over a blush base; for a bolder look, switch to black over cream. Keep the polish on the brush light so the drips do not spread or become thick. Placing the wavy edge near the cuticle creates a different effect from starting at the tip, so choose the direction that best suits your nail shape. The glossy contrast gives this manicure a playful seasonal finish without complicated artwork.
Rust-and-Cream Gingham Accent
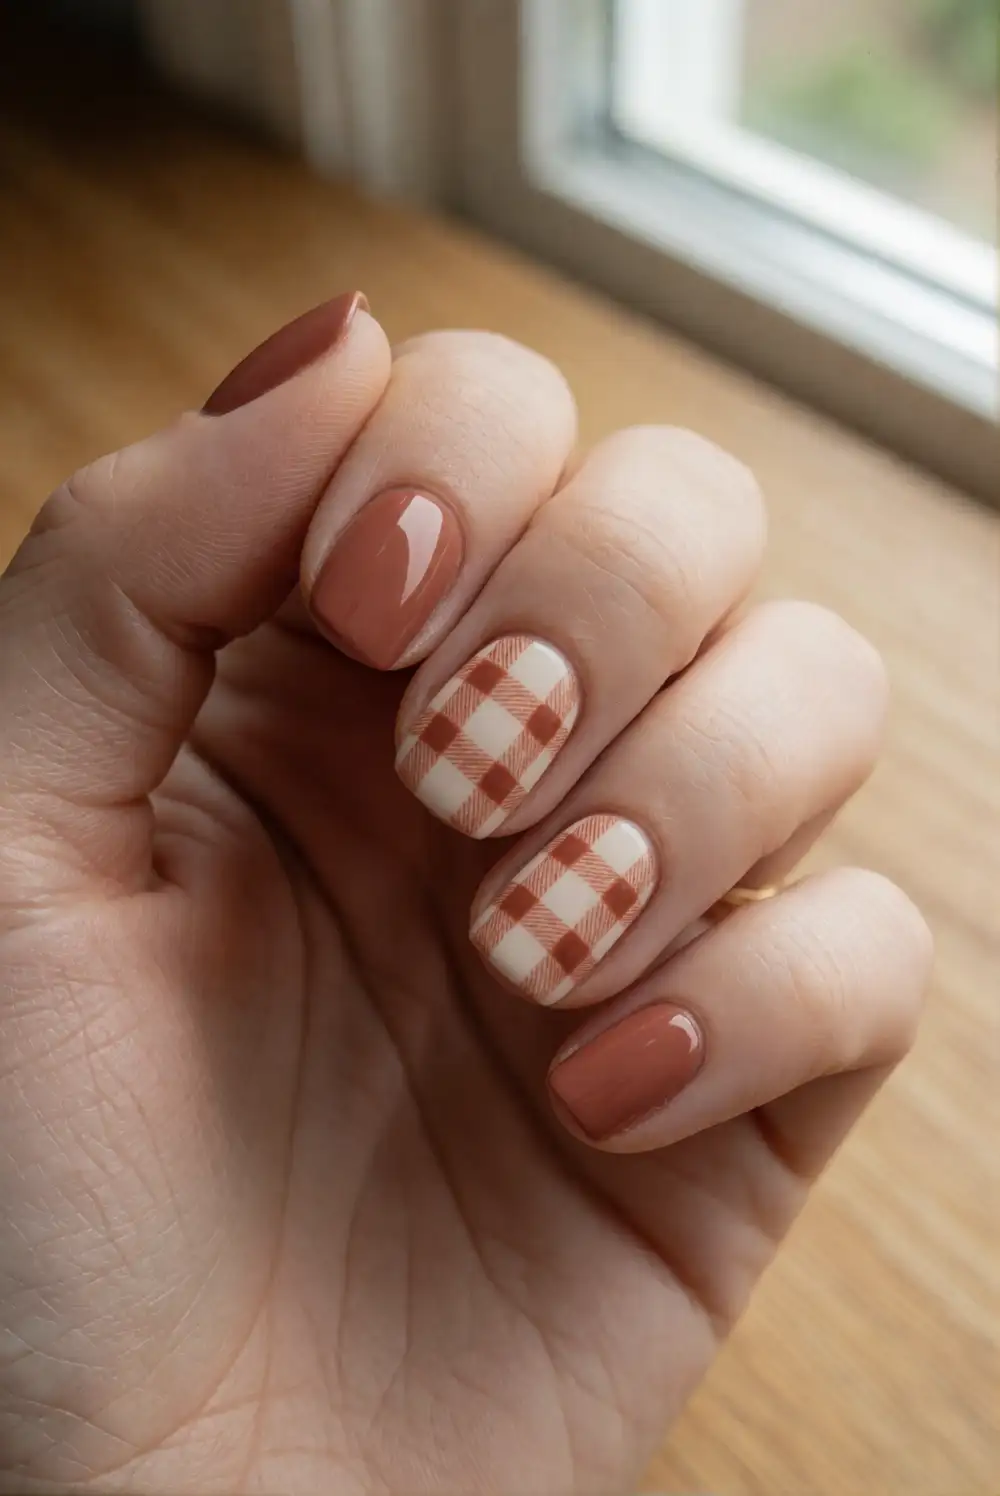
Apply a creamy base to the accent nail and let it dry before adding a gingham pattern in muted rust. Paint thin vertical lines, then add horizontal lines that cross them, using a fine striping brush and steady strokes. A little overlap creates the woven check effect without requiring every line to be identical. Keep the rest of the nails a solid rust, beige, or soft brown, and protect the finished design with a clear top coat.
Choose a sheer base for a lighter pattern or a more opaque cream for stronger contrast. Use a restrained amount of polish on the brush to keep the crossing lines from becoming heavy, and allow the pattern to dry before sealing it. The warm checks have a cozy, autumn-inspired feel that works beyond Halloween. Pair the manicure with textured knits, denim, or simple gold accessories for an easy seasonal look.
Matte Black and Copper Flecks
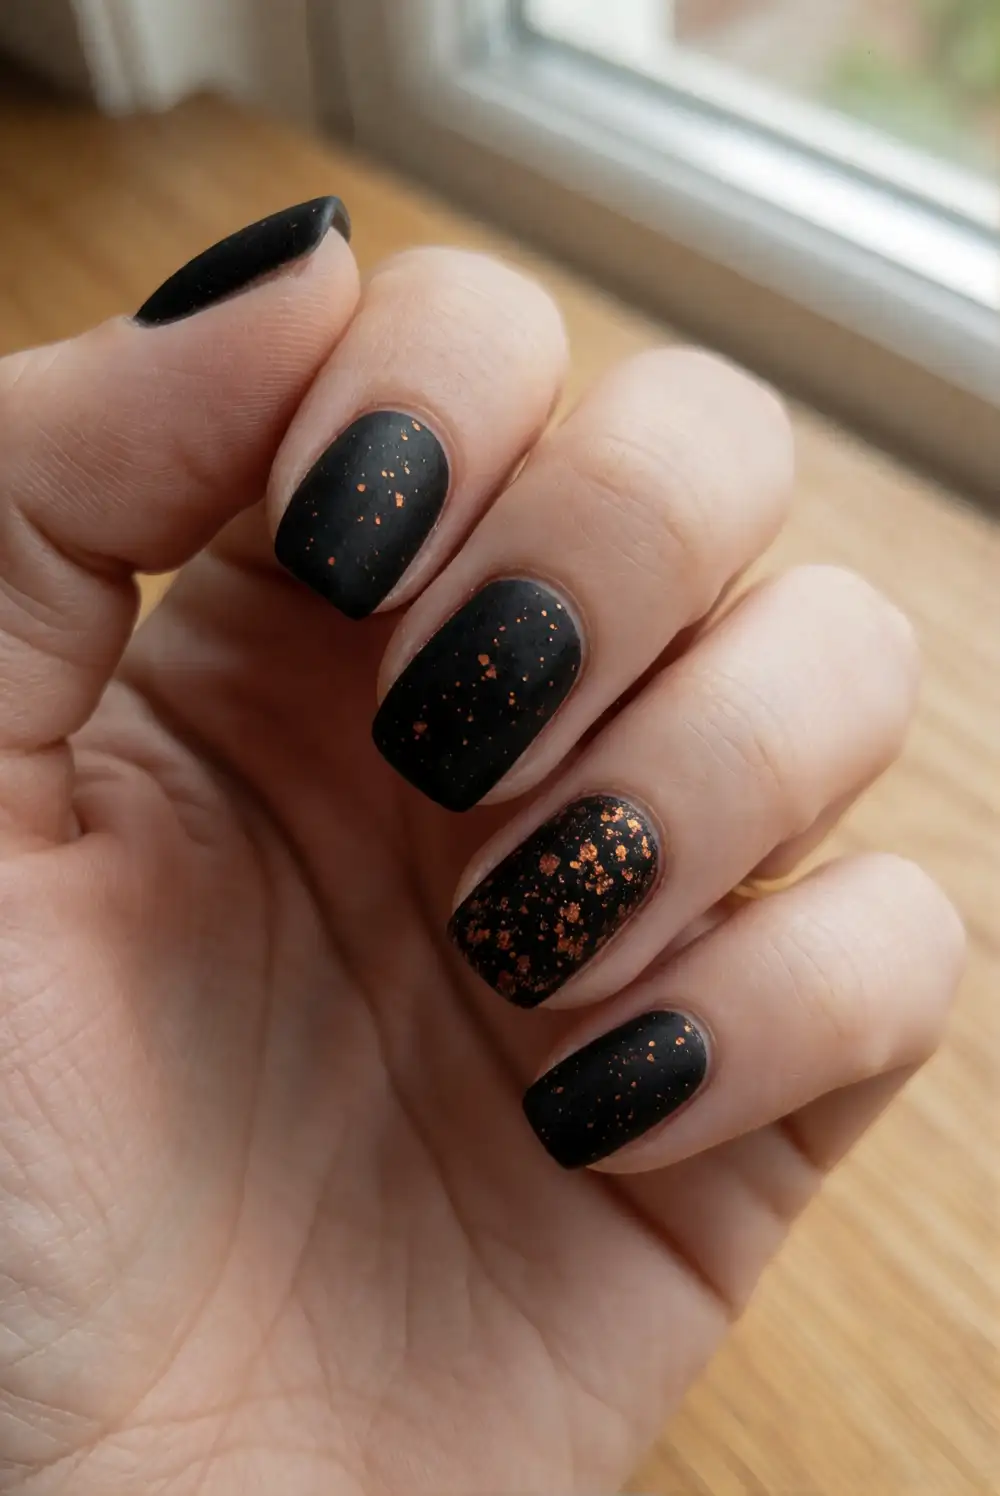
Paint the nails a rich black and let the polish dry. On the accent nail, add a scattering of small copper flecks with a fine brush or a polish that contains delicate metallic pieces. Concentrate the flecks near one side of the nail, leaving plenty of black visible. Once the design is dry, apply a matte top coat over the manicure for a velvety finish, or use gloss on the accent nail for a reflective contrast.
Bronze or muted gold can stand in for copper, while a deep plum base offers a softer alternative to black. Keep the metallic details sparse so they read as a subtle shimmer rather than a full glitter coat. A fine brush gives you more control over where the flecks land, and careful drying helps prevent smears under the top coat. This polished design suits a dressier Halloween outfit and remains versatile for other autumn occasions.
These simple Halloween nail designs make it easy to add seasonal character without covering every nail in detailed art. Choose a favorite accent, keep the surrounding manicure coordinated, and finish with a top coat for a smooth, lasting look. Whether you prefer cute ghosts, warm gingham, or a sleek celestial palette, there is a style here to make your Halloween manicure feel personal and polished.








