
Give your manicure a cheerful Halloween twist with sweet designs that feel playful rather than spooky. These cute Halloween nail ideas use familiar seasonal colors, simple shapes, and wearable details, from smiling ghosts to tiny pumpkins. Whether you enjoy painting your own nails or want inspiration to share with a nail artist, you’ll find looks that can be adapted to short or long nails and finished with your favorite glossy top coat.
Smiling Ghost French Tips
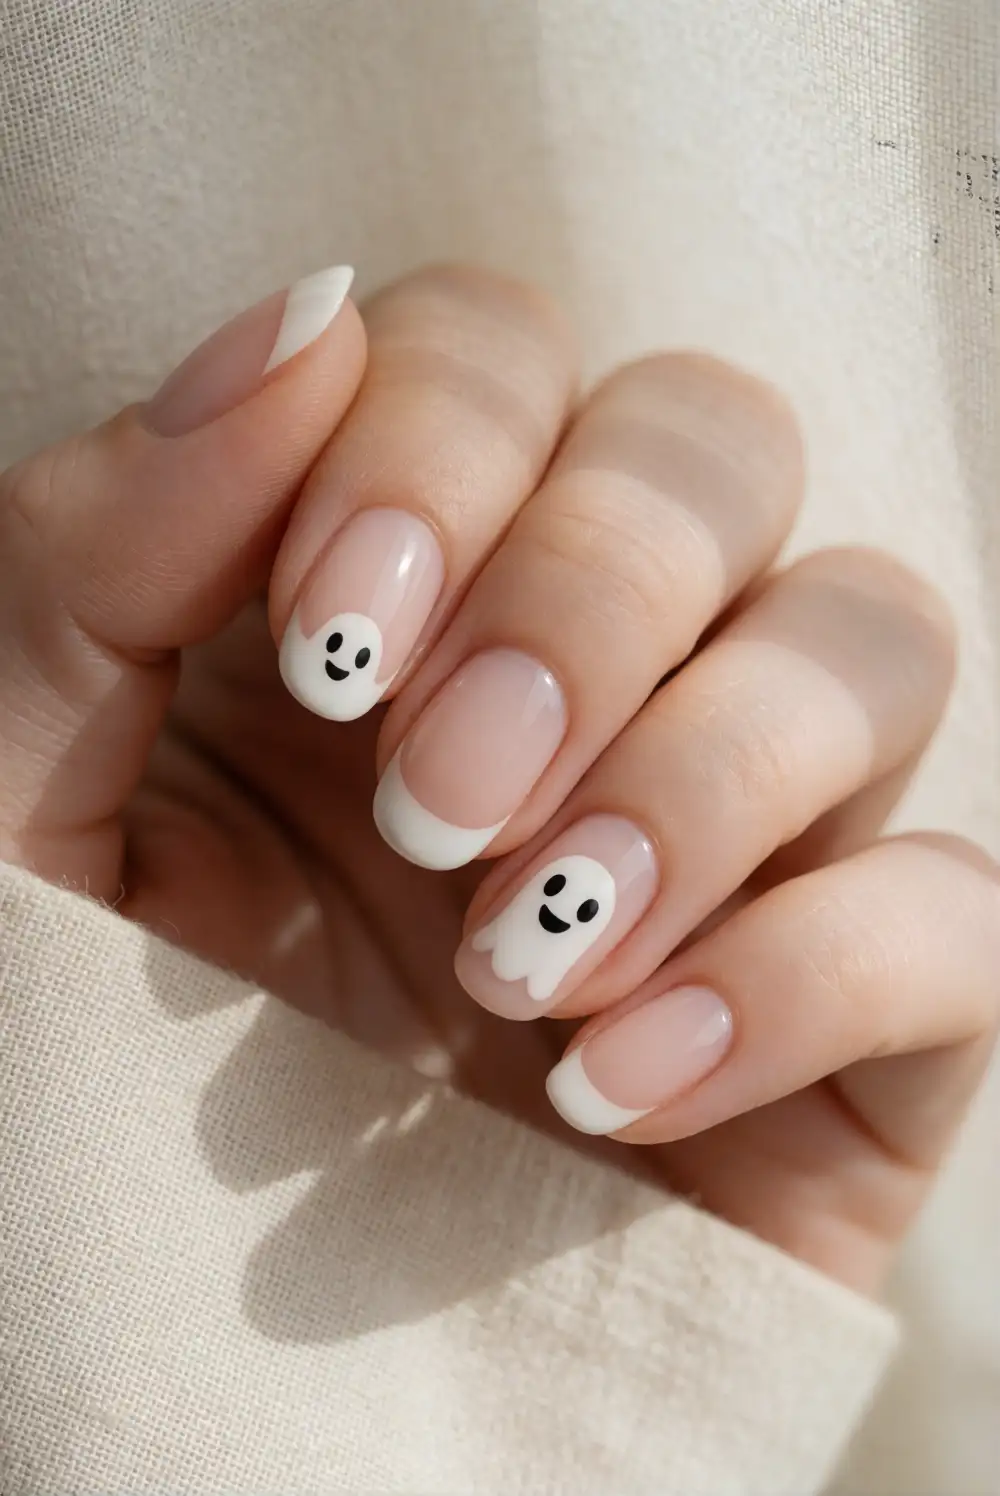
Start with a sheer blush or milky cream base coat and let it dry completely. Use a fine nail-art brush to paint a soft white tip on each nail, shaping some tips into small rounded ghost silhouettes. Add two tiny black eyes and a curved smile with a dotting tool or the tip of a fine brush. Keep the faces near the nail edges so the design stays visible, then seal the finished manicure with a clear top coat.
Make the ghosts different sizes for a relaxed, hand-painted look, or place one little ghost on an accent nail and leave the rest as simple white French tips. A pale pink base keeps the design especially sweet, while a sheer nude shade gives it a more understated feel. Let each layer dry before adding the next, and use a fine brush dipped in polish remover to tidy any uneven edges around the cuticles.
Pastel Pumpkin Accent Nails
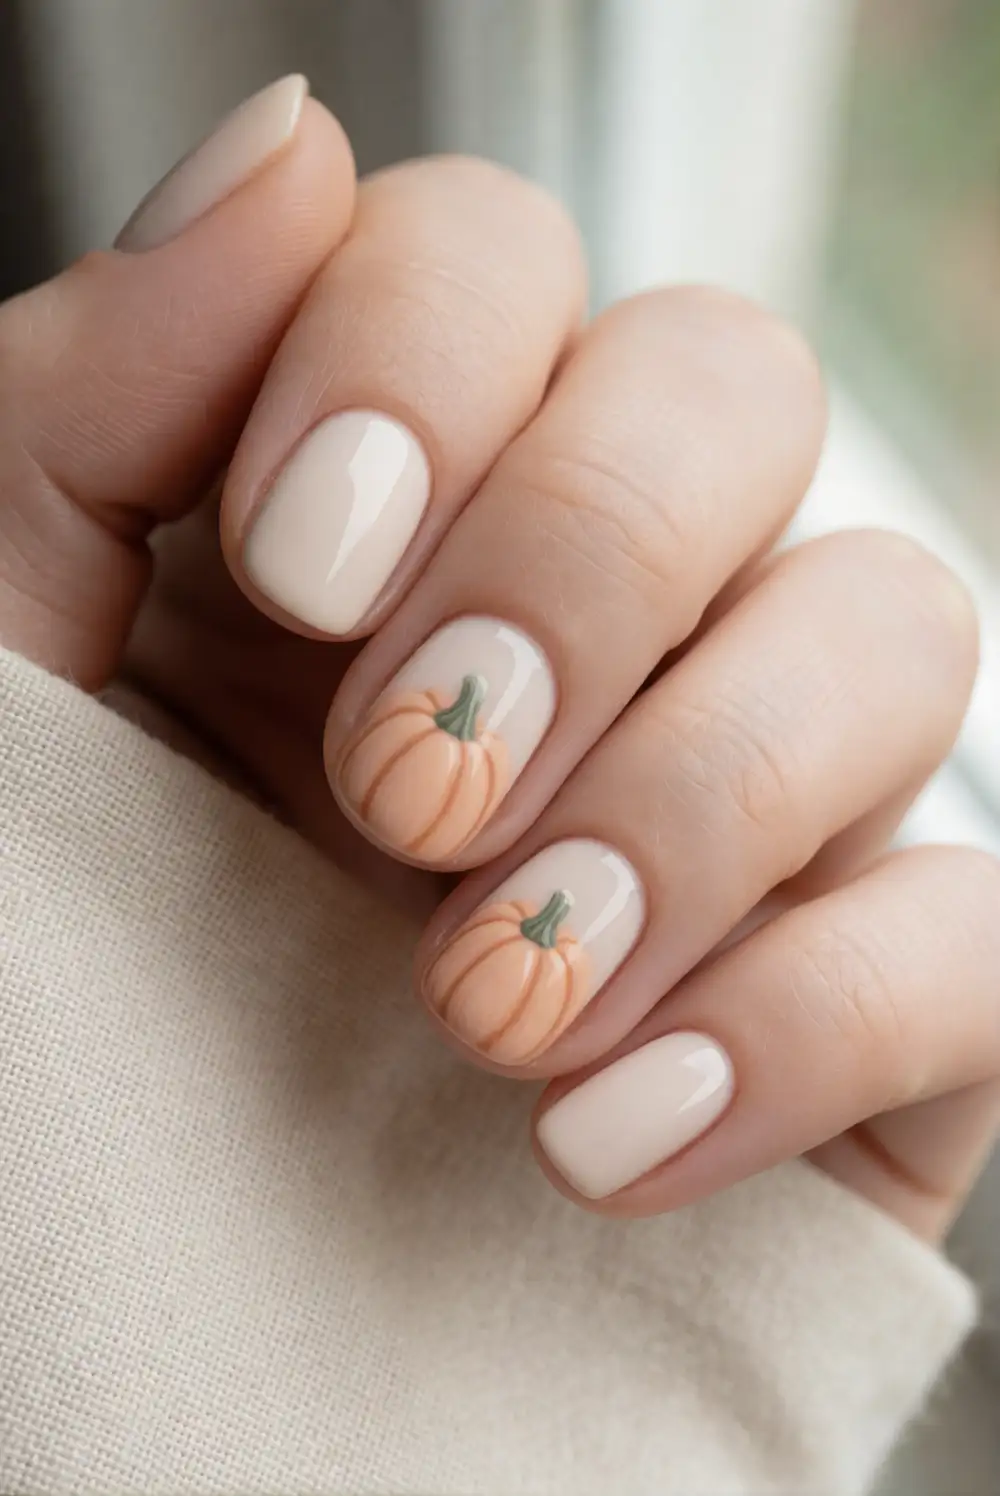
Paint nails with a warm cream or pale peach polish, leaving one or two accent nails for tiny pumpkins. With a small brush, make each pumpkin from a few rounded strokes of soft orange polish, then add a short sage-green stem. A darker orange line along one side can suggest a gentle curve without making the design complicated. Allow the polish to dry between colors and finish with a glossy top coat to smooth the surface.
Try a different pastel background on each hand, such as dusty pink or butter yellow, while keeping the pumpkin accents in a coordinated orange. For a simpler version, paint one larger pumpkin on a single accent nail and leave the remaining nails in a solid cream shade. The design looks lovely with cozy knit sleeves and works well on short nails; keep the pumpkin shapes small enough to leave a clean border around each nail.
Candy Corn Color Fade
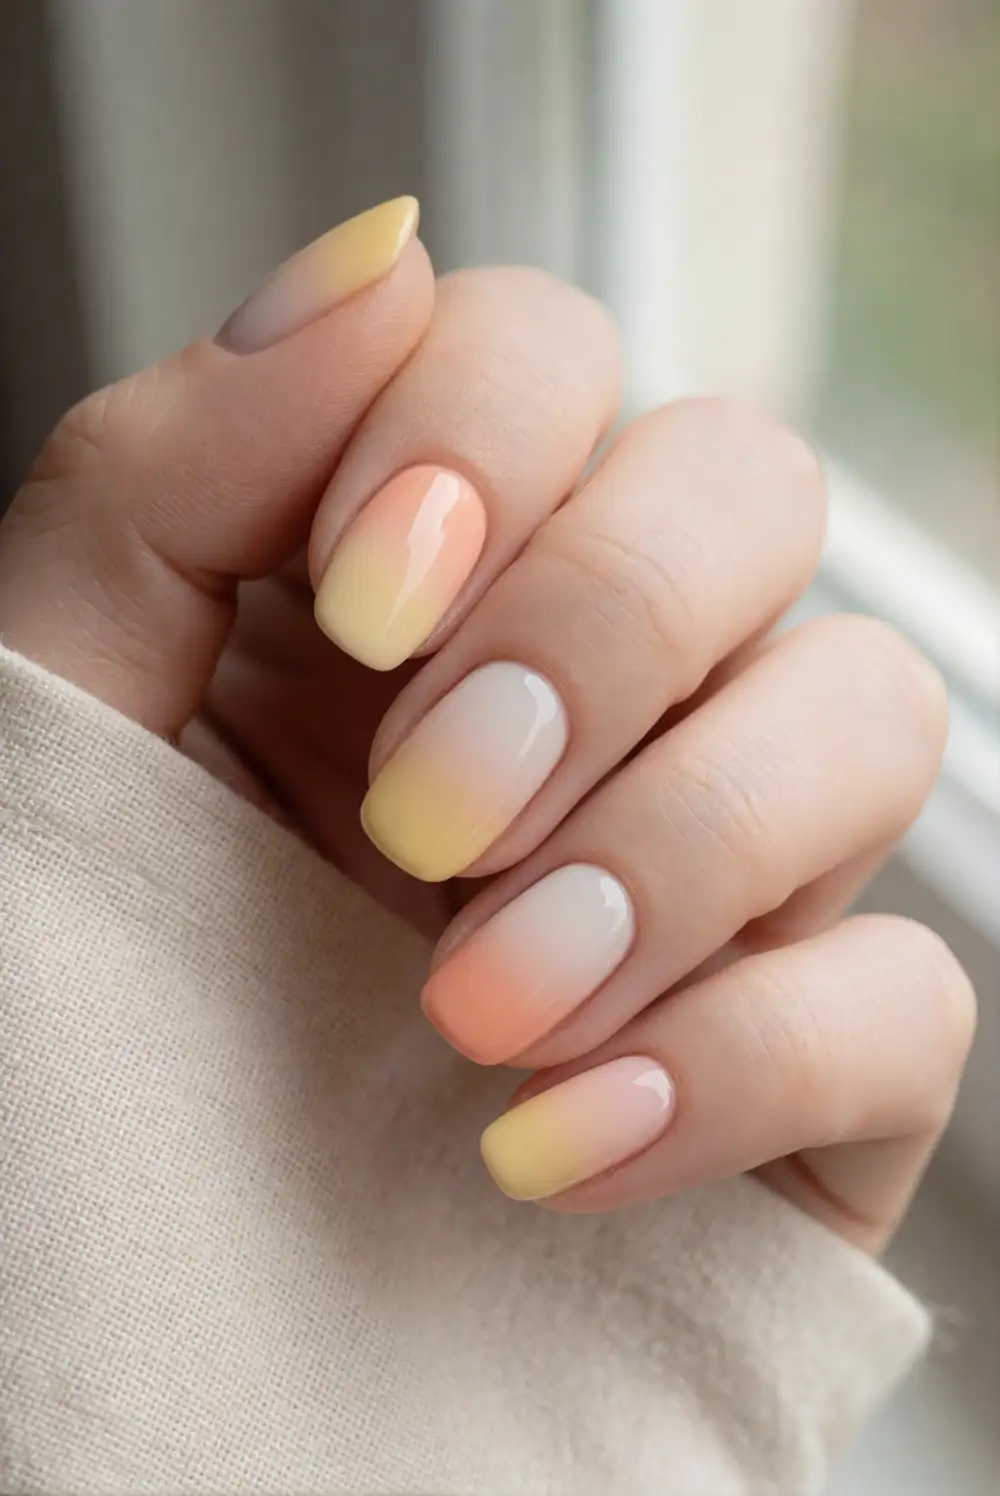
Apply a pale base coat, then create a candy-corn-inspired fade using soft yellow, creamy white, and peachy orange polish. Place the colors in small bands on a makeup sponge, slightly overlapping their edges, and gently dab the sponge onto each nail. Repeat with a fresh layer if you want stronger color, allowing the polish to dry between applications. Use a brush dipped in remover to clean the skin around the nails, then finish with a smooth clear top coat.
For crisp color blocks instead of a gradient, paint each nail in three rounded horizontal sections using a striping brush. Keep the tones pastel for a softer look, or choose brighter orange and yellow for a more vivid seasonal manicure. An accent nail with the full color fade pairs nicely with nails painted in a single matching shade. Apply a thin layer of petroleum jelly around the nail before sponging to make cleanup easier.
Friendly Bat Silhouette Nails
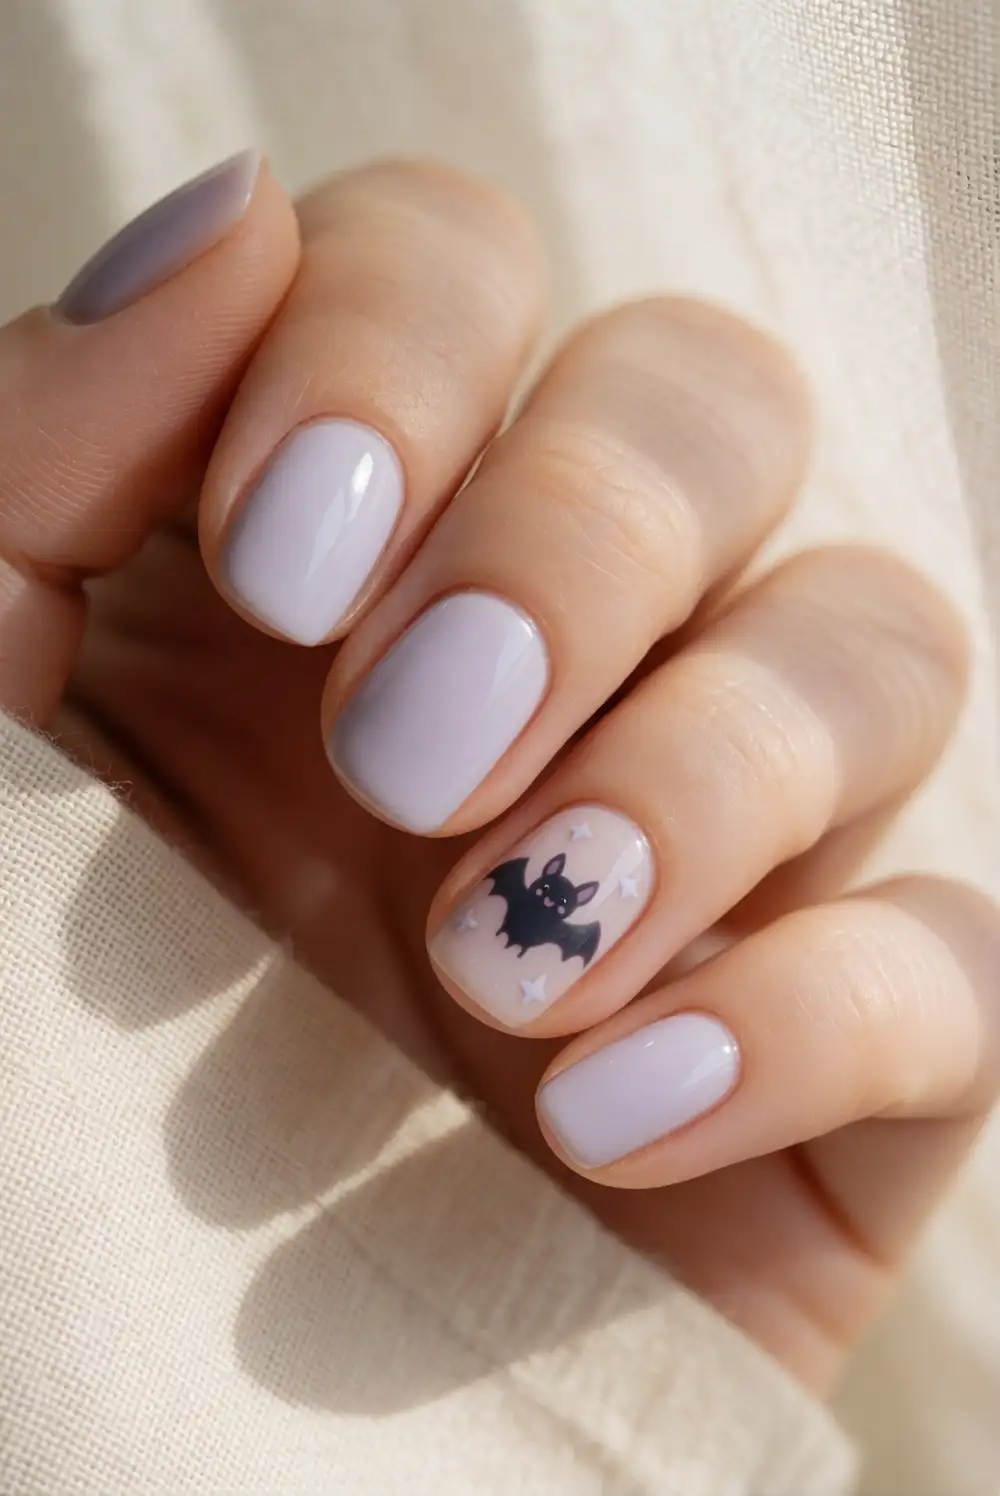
Choose a light lavender or pale pink base and let it dry before adding a simple bat on an accent nail. Use a small brush and charcoal polish to paint a rounded body, then add two short wings with softly scalloped edges. Tiny pale eyes or a small pink nose can give the bat a friendly expression. Keep the shapes simple and leave the other nails in the base color, then protect the finished artwork with a clear top coat.
Use one bat on each ring finger for a balanced manicure, or scatter miniature silhouettes across a few nails if you enjoy detailed painting. A cream base makes the dark shape stand out, while a muted lilac background feels extra playful. If freehand wings feel tricky, make a small oval body first and build each wing from two short strokes. A fine detail brush and a steady hand help keep the silhouette crisp.
Pink Spiderweb Corner Details
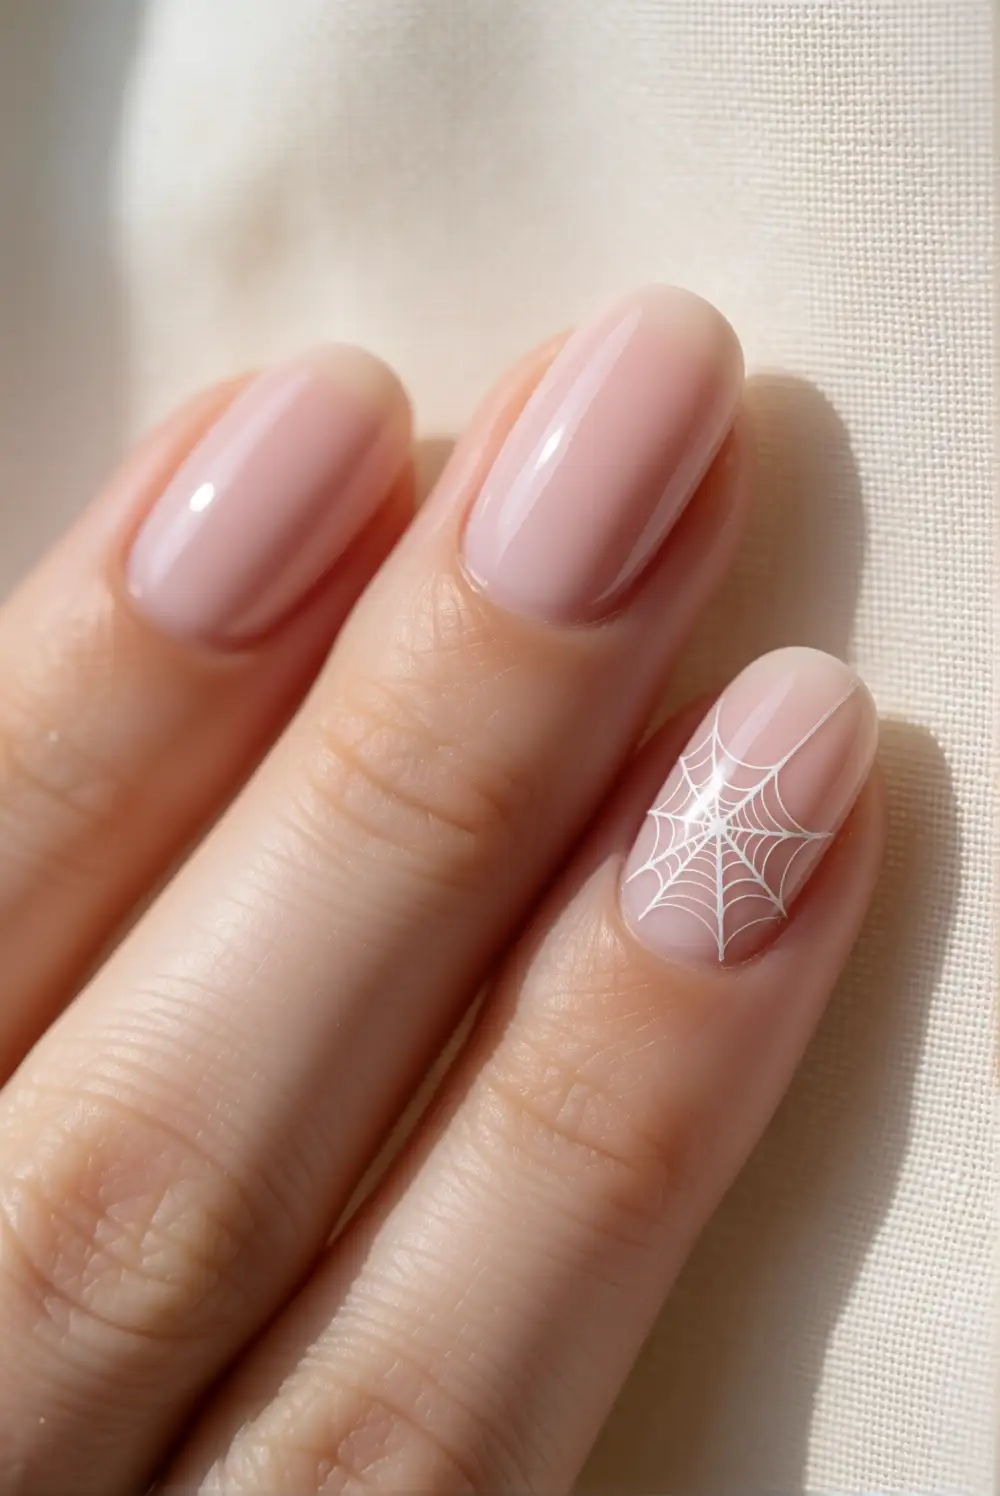
Begin with a glossy pale pink or sheer nude base. With a fine nail-art brush, draw three thin white lines from one corner of an accent nail, then connect them with small curved strokes to form a delicate web. Keep the web tucked into one corner rather than covering the whole nail. Add a tiny blush-pink heart nearby if you like, and allow the design to dry fully before applying a clear top coat with a light touch.
Repeat the web on just one nail for a subtle look, or alternate web corners across several nails so the lines feel varied. A white web looks soft against pink, while a pale lilac base gives the design a cool, dreamy finish. You can also use a fine striping brush for longer lines and a toothpick for the little curved connectors. Avoid dragging the top-coat brush through wet polish to keep the web neat.
Cute Black Cat Faces
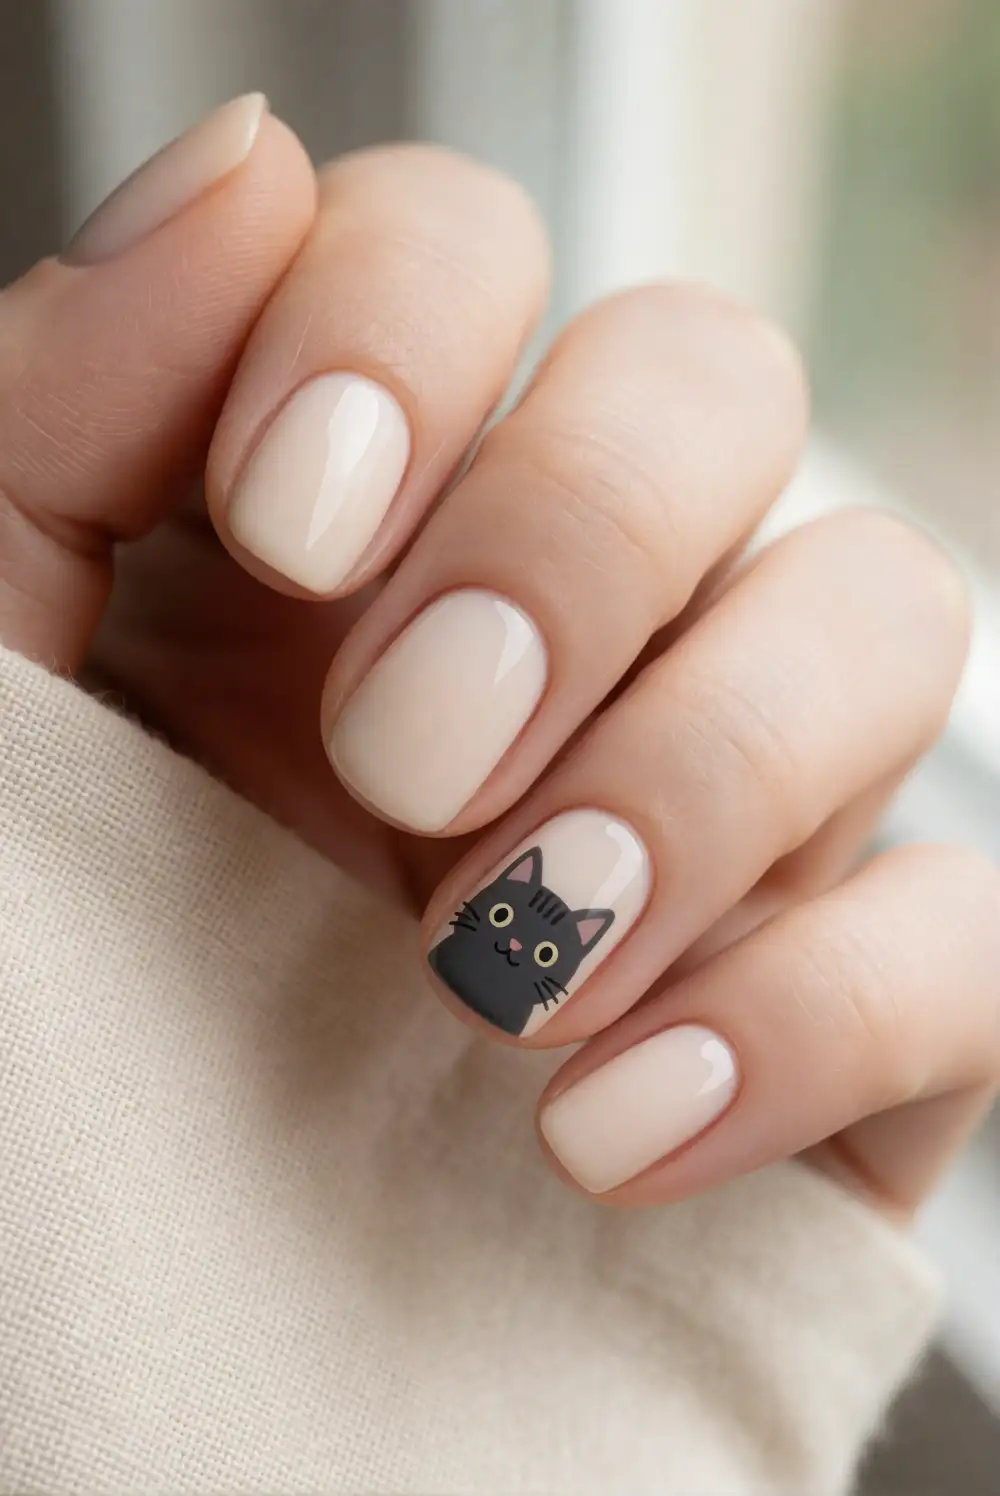
Paint a soft cream, peach, or muted pink base coat and choose one nail for a little cat face. Make a rounded black head with a small brush, then add two pointed ears using short strokes at the top. Once the polish dries, dot on tiny cream eyes and a small pink nose. Add fine whiskers with a detail brush if there is room, and seal the design with clear top coat to give the manicure an even, glossy finish.
For an especially gentle look, use charcoal instead of black and keep the expression simple with closed eyes or small cream dots. A single cat accent nail feels polished beside solid neutral nails, while tiny cat silhouettes on alternating nails create a more playful set. Short nails work beautifully because the face can be kept compact. Wait until the dark polish is fully dry before adding the lighter features to prevent the colors from smudging together.
Caramel Apple Red Tips
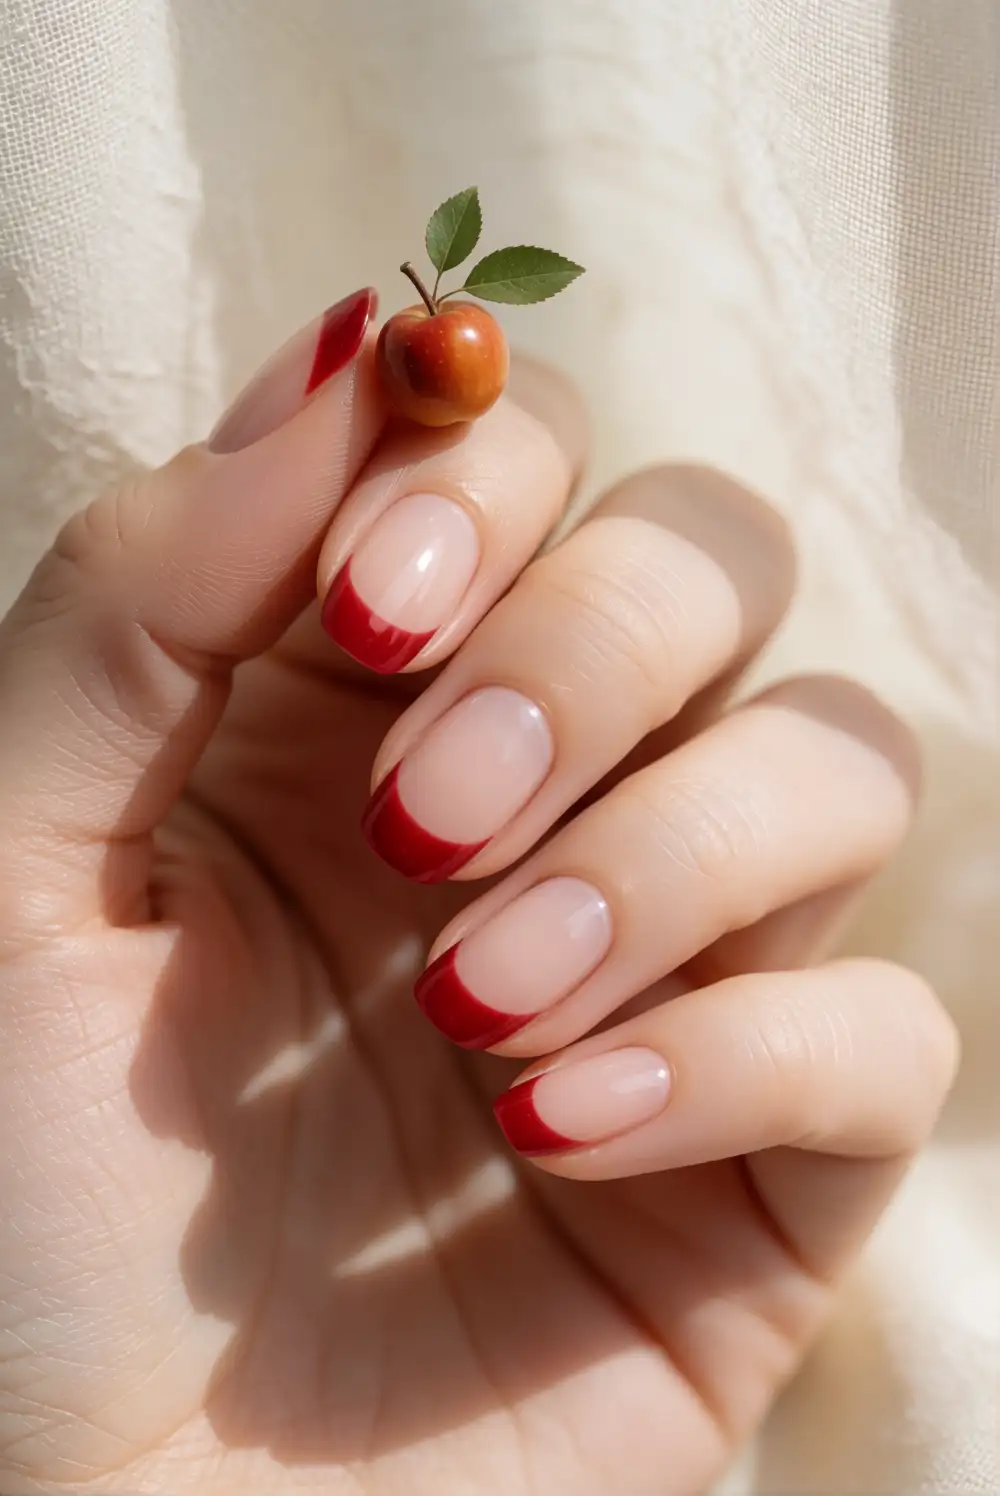
Apply a sheer nude base and shape the free edges with a rich candy-apple red polish, creating a rounded French tip. On one accent nail, add a tiny caramel-colored apple using a small rounded brush, then paint a short green leaf at the top. A narrow cream highlight along one side gives the apple a shiny finish. Let the details dry before applying a clear top coat, keeping the overall design simple, glossy, and inspired by autumn treats.
Pair the red tips with a single apple accent for an easy-to-wear manicure, or switch to a warm beige tip for a softer caramel effect. A deep cherry red feels classic, while a brighter tomato shade makes the look more playful. If painting a tiny apple feels difficult, use a small red dot with a green leaf instead. This design looks especially polished with a glossy finish and a warm neutral outfit.
Moon and Starry Night Nails
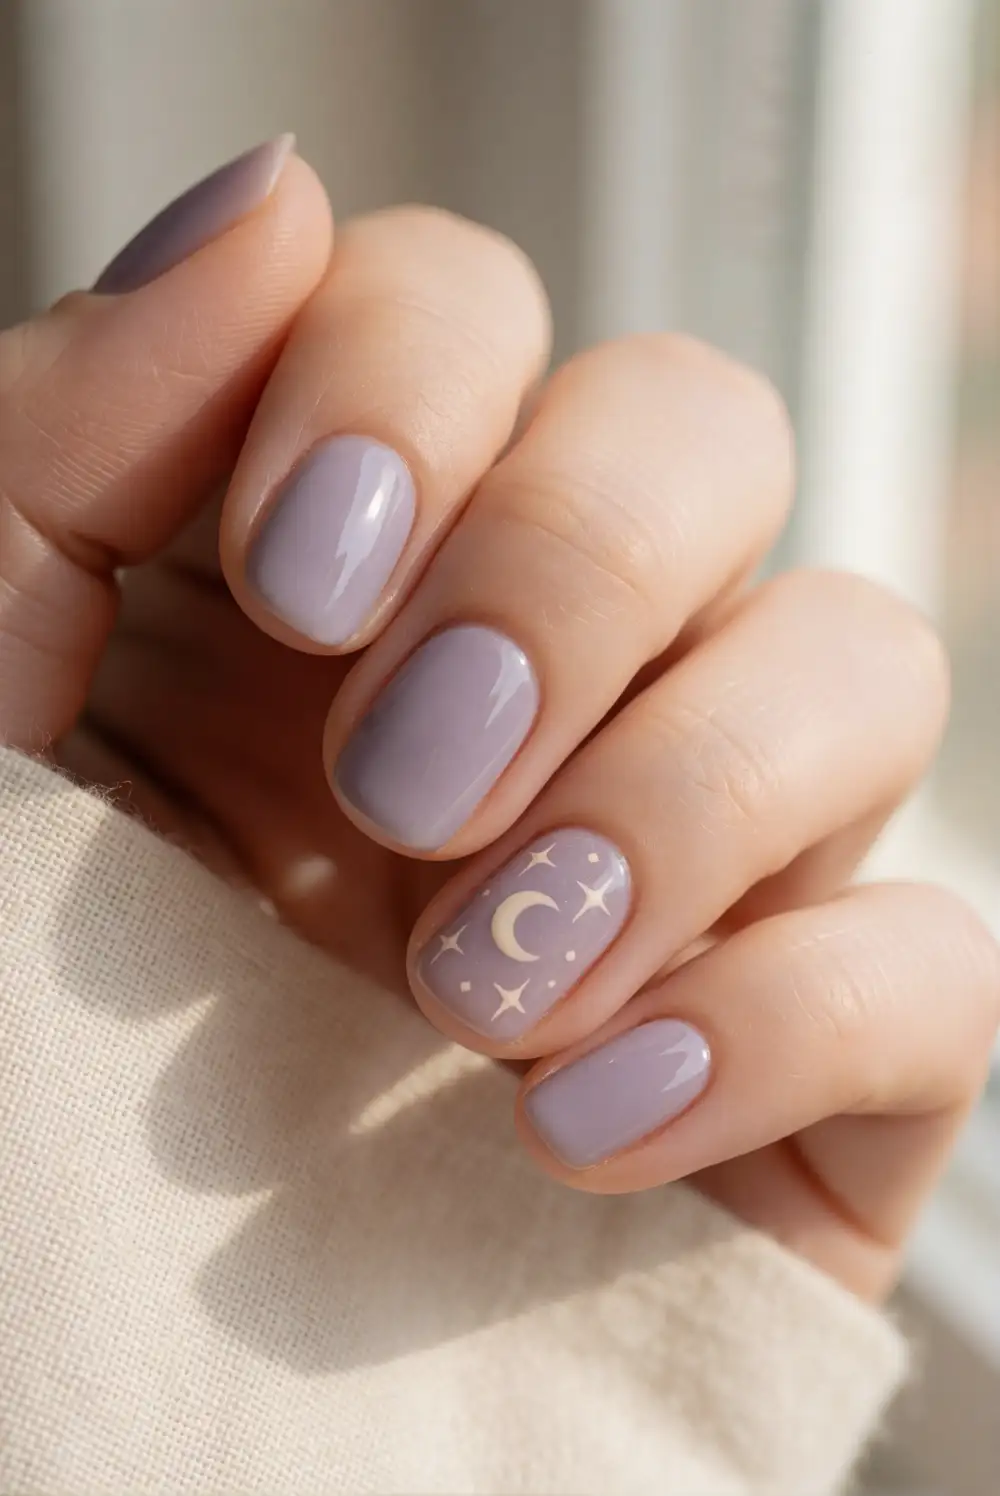
Cover each nail with a muted midnight-blue or dusty lavender polish and let the color dry. On an accent nail, paint a small crescent moon in creamy white or pale yellow using a fine brush. Add a few tiny stars with a dotting tool, placing them loosely around the moon rather than in a dense pattern. Keep the other nails a solid shade or add just a couple of small dots, then finish the design with a clear glossy top coat.
For a softer daytime version, choose a pale blue base and use warm cream for the moon and stars. A single decorated accent nail makes the manicure understated, while a crescent on each nail creates a more coordinated look. Vary the moon placement so the set feels hand-painted and natural. If detailed stars are challenging, use tiny dots and short lines to suggest a twinkling sky without crowding the nail.
Orange and Cream Checkerboard Nails
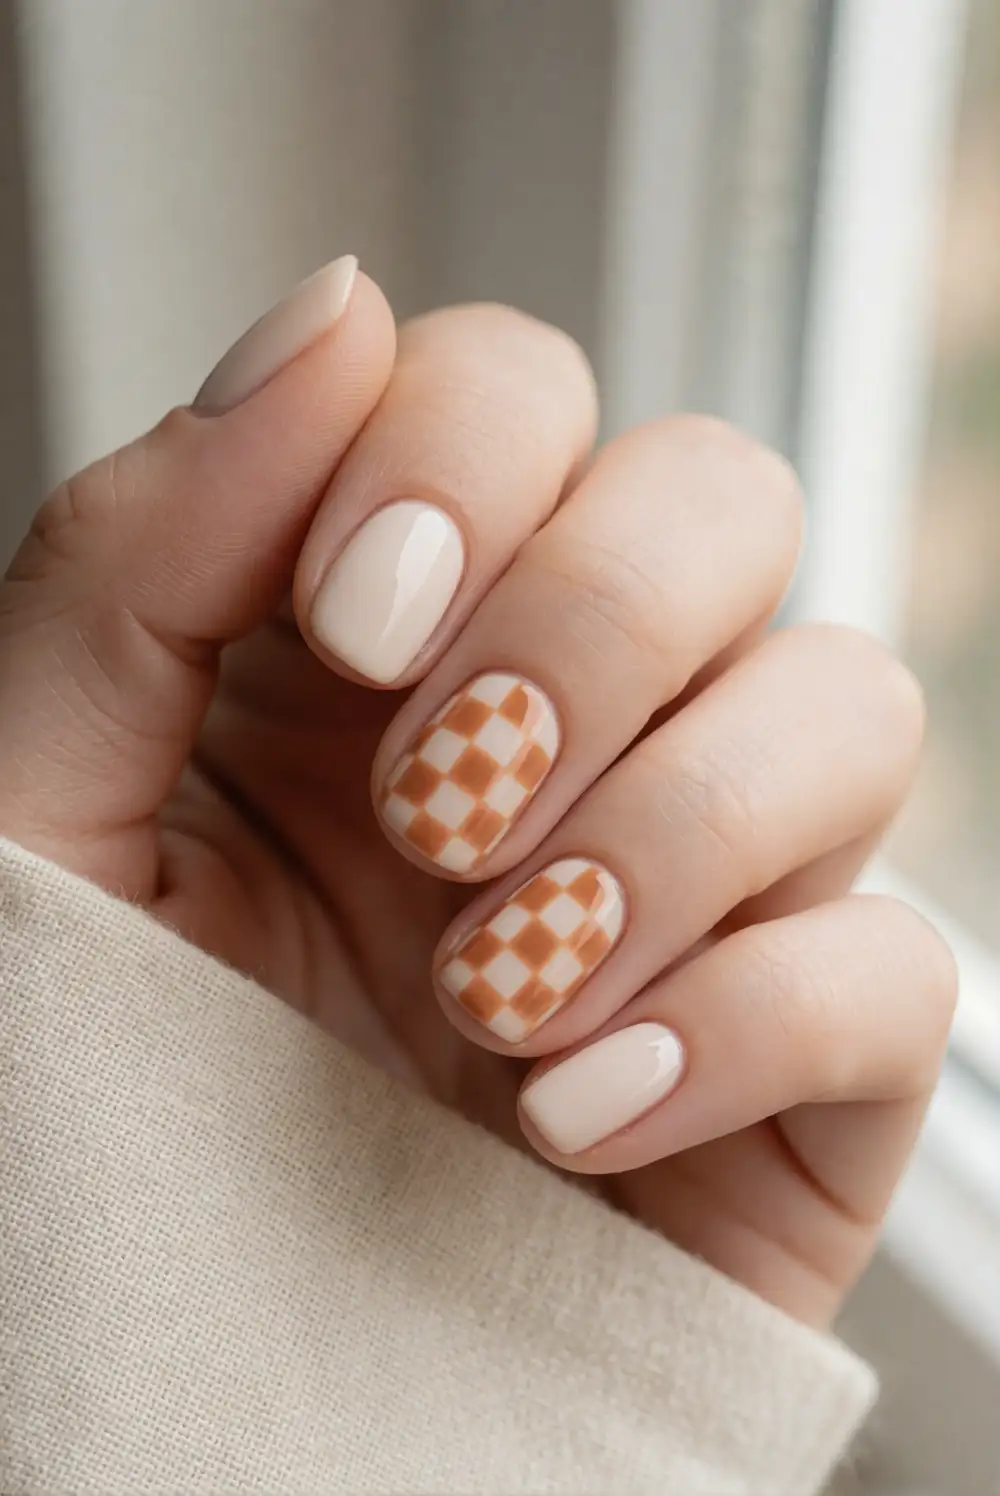
Paint nails with a pale cream base and allow it to dry thoroughly. Use a fine brush to add small orange squares in alternating positions, leaving cream squares between them to create a relaxed checkerboard pattern. The squares do not need to be perfectly uniform; slightly rounded corners give the design a softer feel. Try the pattern on one or two accent nails first, then apply a clear top coat once the orange polish is dry.
Use muted pumpkin orange for a gentle seasonal palette, or choose peach for an even lighter finish. A checkerboard accent looks balanced with plain cream nails and pairs well with a matching solid orange nail. For more precise squares, work in thin layers and turn the finger as needed rather than stretching your brush across the nail. Keep the checks fairly small so the pattern remains clear on short nails.
Tiny Pumpkin French Tips
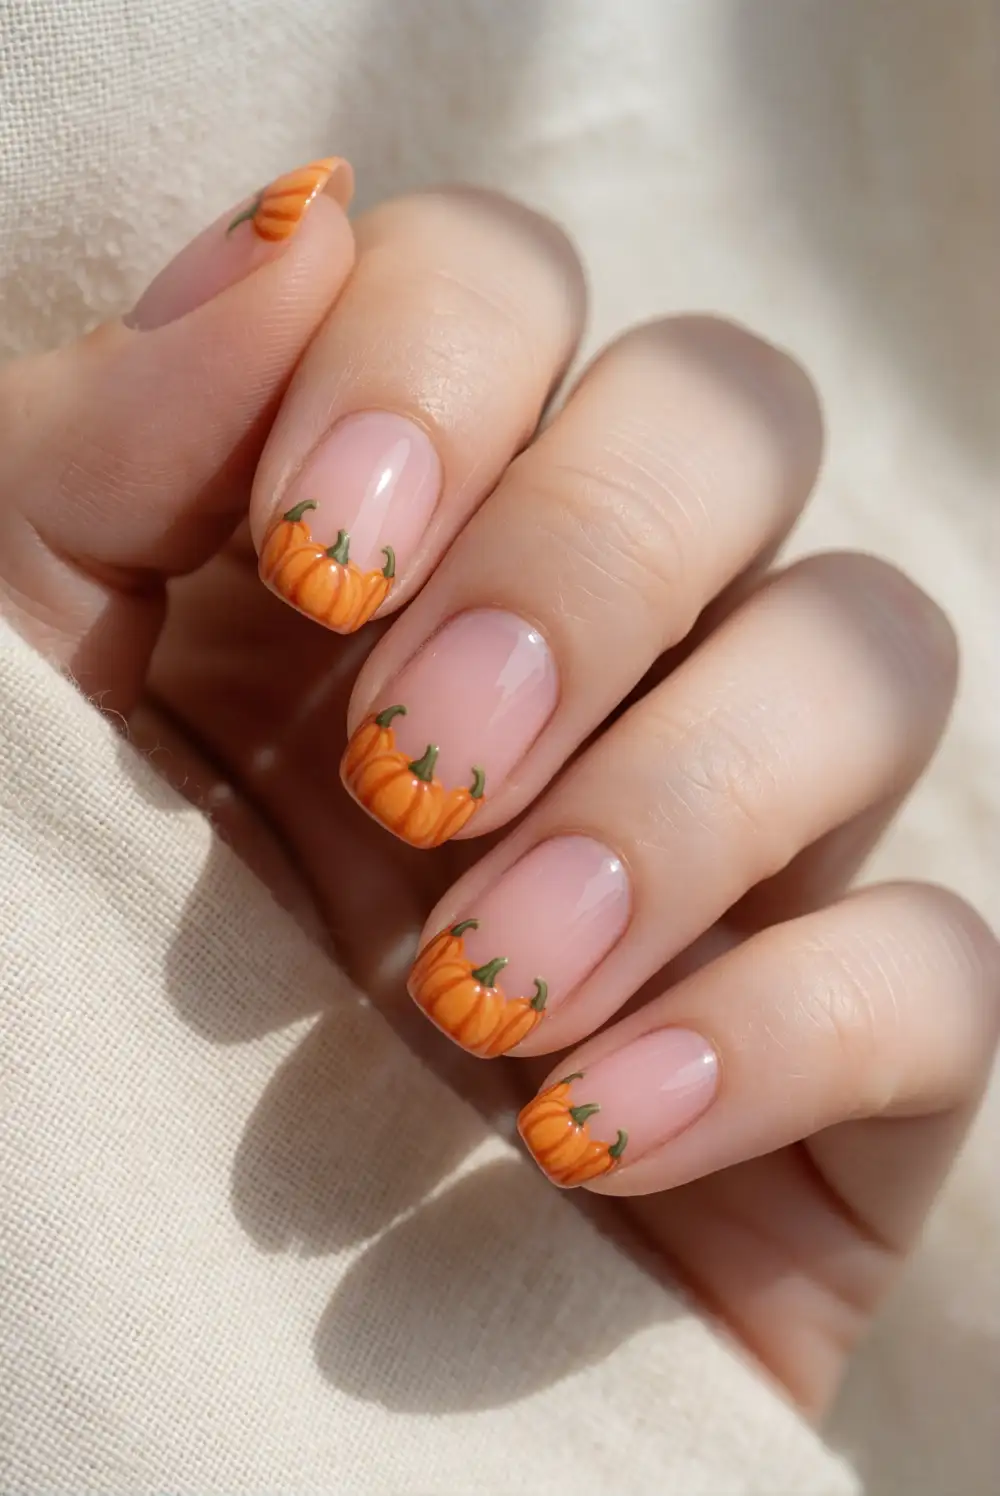
Begin with a sheer nude or pale pink base coat. Along the tips, paint a row of miniature orange pumpkins using small rounded brushstrokes, leaving a little space between each shape. Add short green stems with a fine brush and use a deeper orange line to suggest gentle grooves. You can place pumpkins across every nail or decorate just the ring fingers. Let the details dry completely before sealing the manicure with a glossy top coat.
Keep the pumpkins close to the nail edge so the design reads like a seasonal French manicure without covering the entire nail. On shorter nails, use a single pumpkin at the center of each tip or choose one accent nail for the full row. A cream base makes the orange pop, while a soft blush base gives the manicure a romantic finish. Pair the look with simple jewelry and warm-toned accessories.
These sweet Halloween nail designs bring seasonal color and playful details to your manicure without leaning into spooky imagery. Choose a single accent nail for an understated finish, or combine coordinating shades and tiny motifs for a more expressive look. With a few fine brushes, patient drying time, and a glossy top coat, you can create a cheerful design that suits your personal style.








