
Give your Halloween manicure a little moonlit magic with witchy celestial nail art inspired by crescent moons, starry skies, smoky colors, and shimmering details. These wearable designs range from subtle midnight accents to dramatic galaxy-inspired tips, with practical ideas for creating each look at home. Choose a favorite motif, gather your polish and fine-detail tools, and make a manicure that feels celestial, mysterious, and perfectly suited to the season.
Midnight Moon Phase Manicure
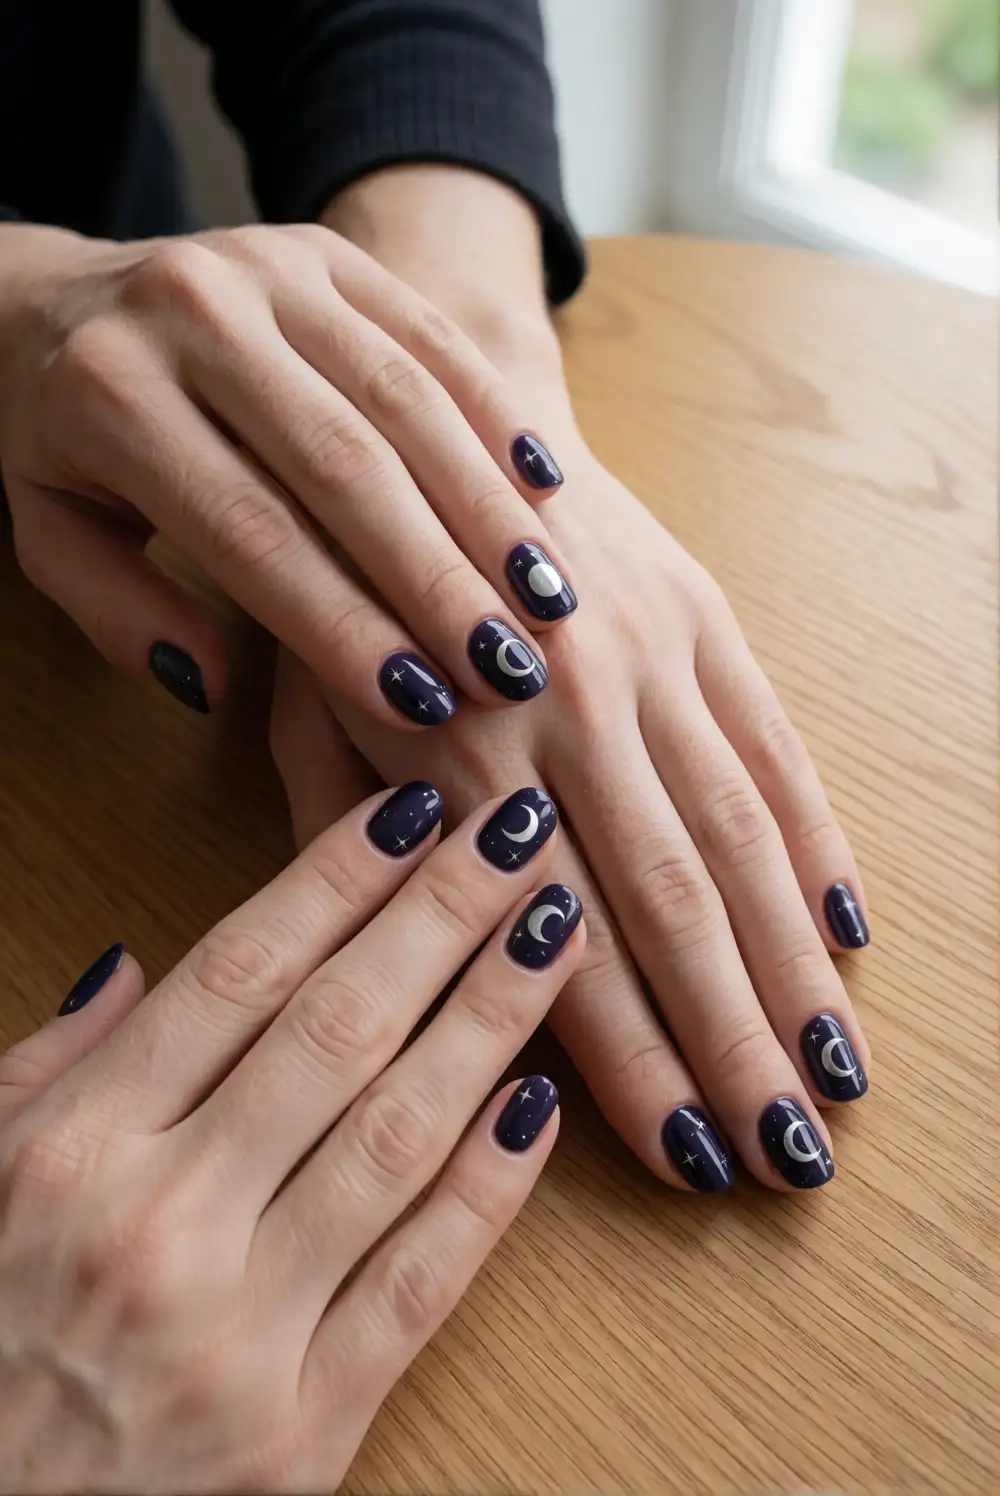
Paint each nail with a deep navy or inky black polish, then let the base dry completely. Using a fine nail-art brush or a small dotting tool, add tiny silver stars and a sequence of crescent shapes across a few accent nails. A metallic polish gives the moon phases a luminous finish, while a sheer layer of glitter can suggest distant starlight. Keep the shapes simple and leave a little dark space around them so the celestial details stay crisp.
Try placing the moon phases on one feature nail and scattering small stars across the rest for a more understated set. A pale lilac or smoky gray base softens the look without losing its nighttime character. Work in thin layers and allow each detail to dry before applying a glossy topcoat. This design pairs beautifully with silver rings and dark outfits, and the moon motifs look especially striking against a neat, short or almond-shaped manicure.
Silver Starry Night Nails
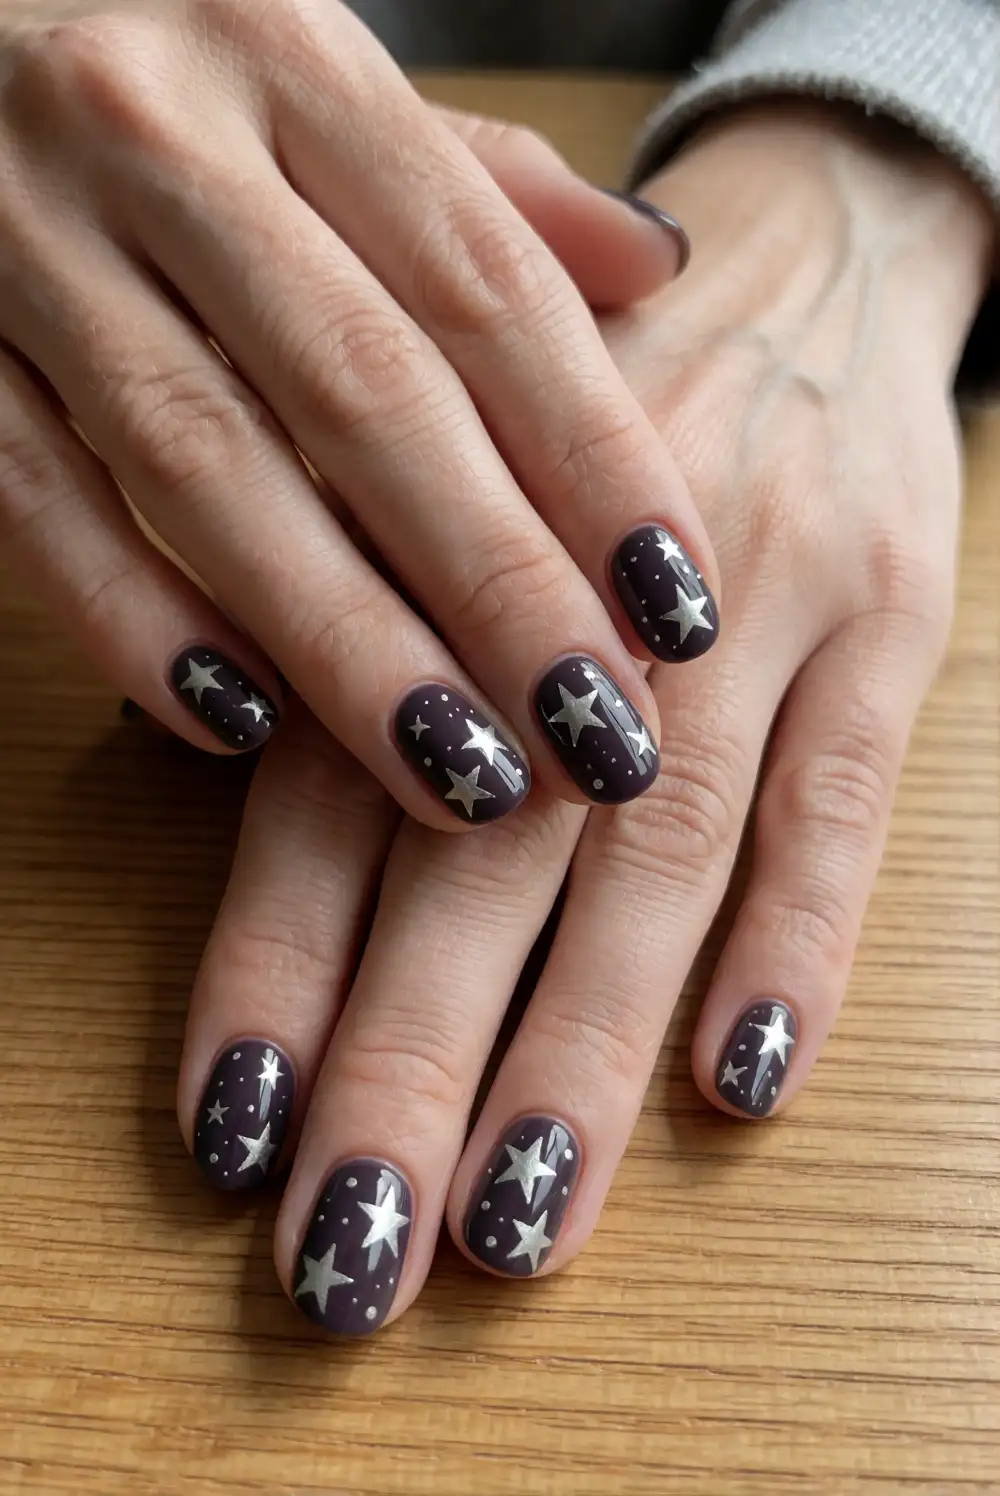
Start with a glossy charcoal, black, or midnight-blue base and let it dry. Use a fine brush to paint scattered silver stars, mixing tiny dots with a few larger four-point shapes. For an easier version, place small metallic star decals over the polish and seal them with topcoat. Concentrate the brightest details near the tips or along one side of each nail, leaving open dark areas that make the manicure feel like a clear night sky.
Choose chrome silver for a bold glint or a softer pewter polish for a more muted finish. Varying the star sizes keeps the pattern from looking too uniform, while repeating a similar placement across the nails helps the set feel cohesive. If you want a quick accent, decorate just the ring fingers and wear a solid dark polish elsewhere. A glossy topcoat enhances the starry effect; a matte finish gives the same design a velvety, night-sky feel.
Emerald Crescent Moon Tips
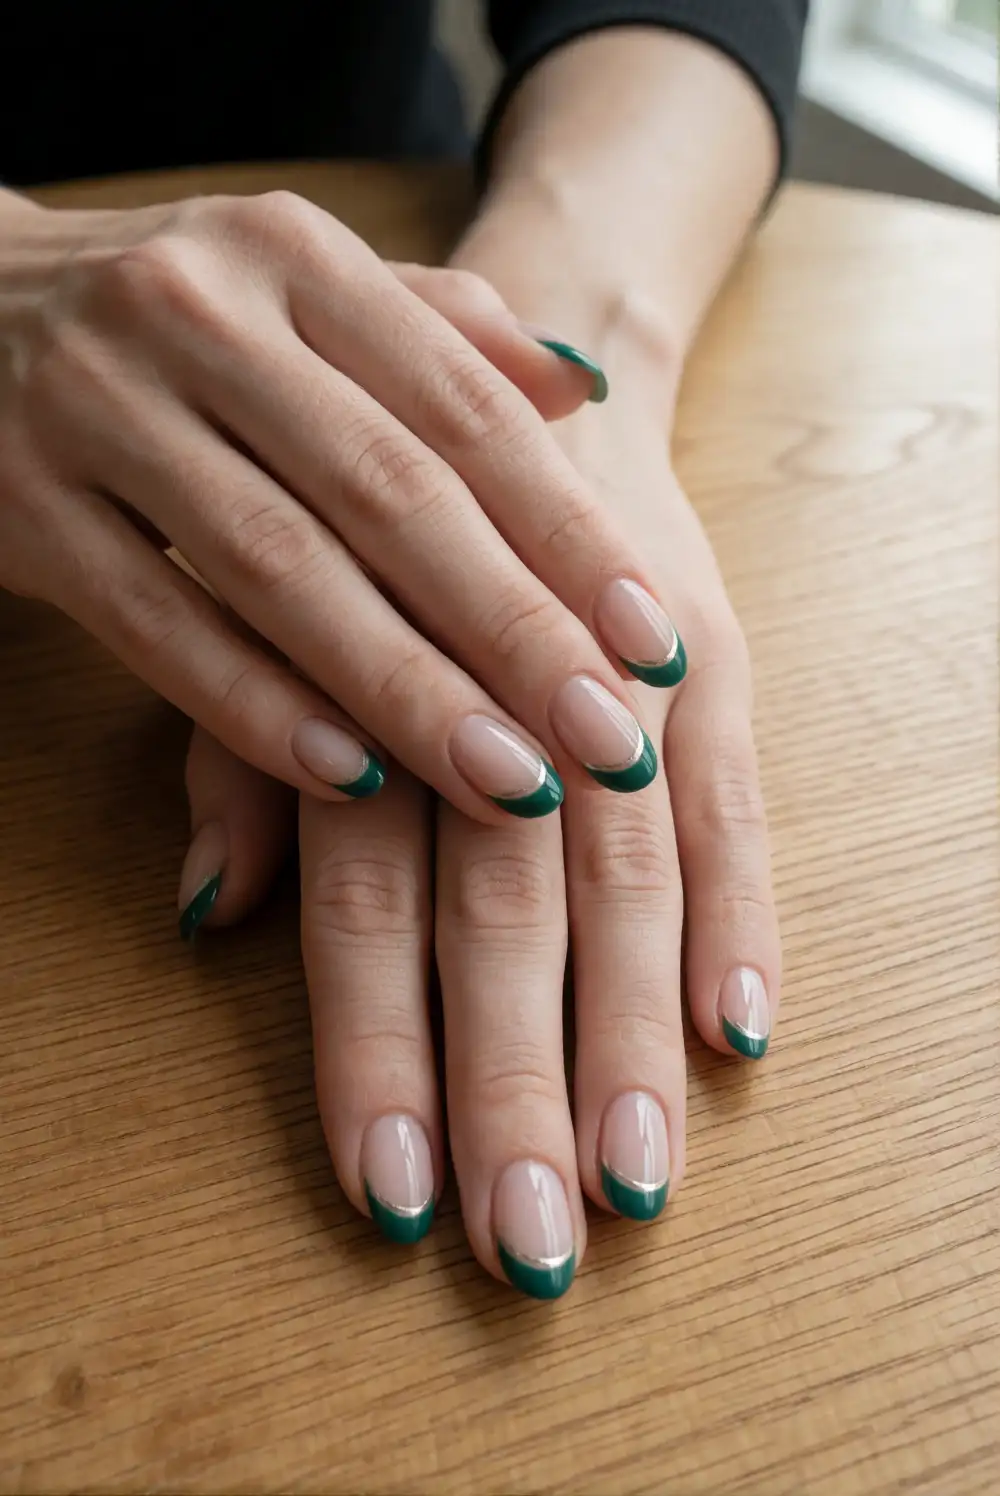
Apply a sheer nude or pale beige base and let it dry before shaping emerald green tips with a fine brush. Instead of a straight French manicure edge, curve each green section into a crescent that follows one side of the nail tip. Add a delicate gold or silver outline if desired, then place a tiny dot near the curve for a polished celestial accent. A striping brush helps keep the arcs smooth, but small imperfections can be tidied with a cleanup brush.
Use deep forest green for a dramatic Halloween mood or choose a brighter emerald that catches the light. Keeping the base neutral makes the curved tips the focus and helps the design work with everyday outfits. You can add a small crescent detail to one additional nail, or leave the remaining nails simple for a clean, balanced set. Finish with a glossy topcoat, carefully sealing the free edge so the curved color stays neat for longer wear.
Smoky Purple Galaxy Nails
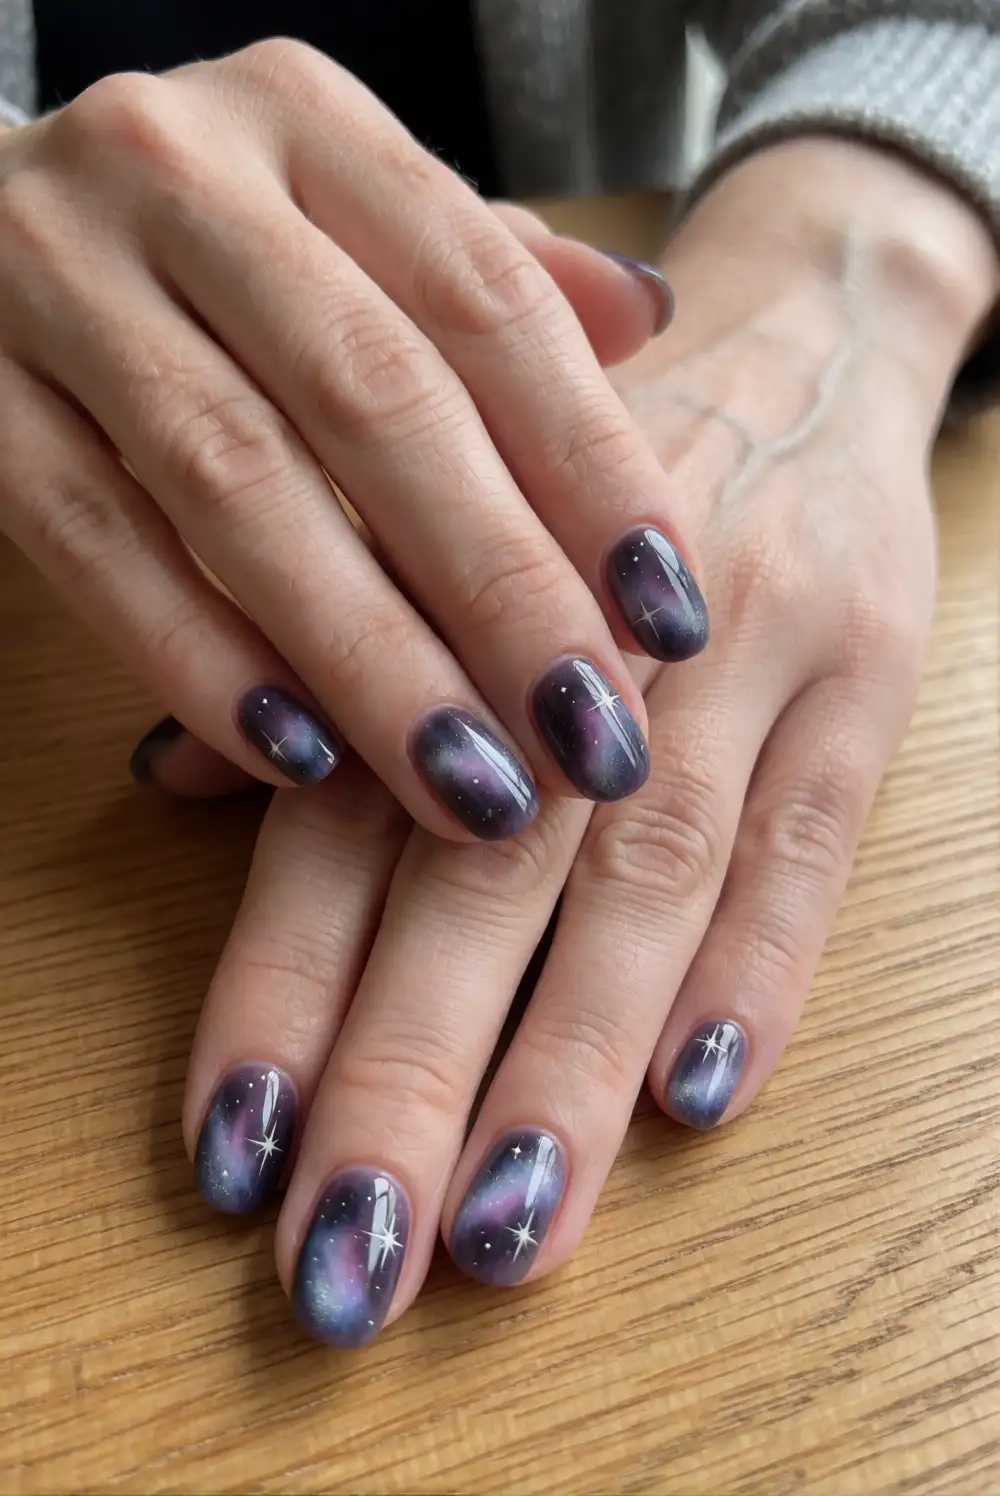
Begin with a black or deep plum base coat and allow it to dry. Dab small patches of violet and indigo polish onto a makeup sponge, then gently tap the color onto each nail to create cloudy, galaxy-like layers. Add a few touches of iridescent shimmer while the polish is slightly tacky, and use a fine brush or dotting tool for tiny white stars. Build the color gradually so the dark base remains visible around the glowing patches.
For a softer look, blend lilac into the plum and keep the shimmer concentrated near the center of each nail. A deep blue accent can make the galaxy feel cooler, while a little copper sparkle warms it up. Sponge in thin layers to avoid a bulky finish, and let the design dry thoroughly before applying topcoat. The scattered stars do not need to match exactly; varied placement gives each nail its own night-sky pattern while keeping the overall manicure coordinated.
Celestial Gold Foil Accents
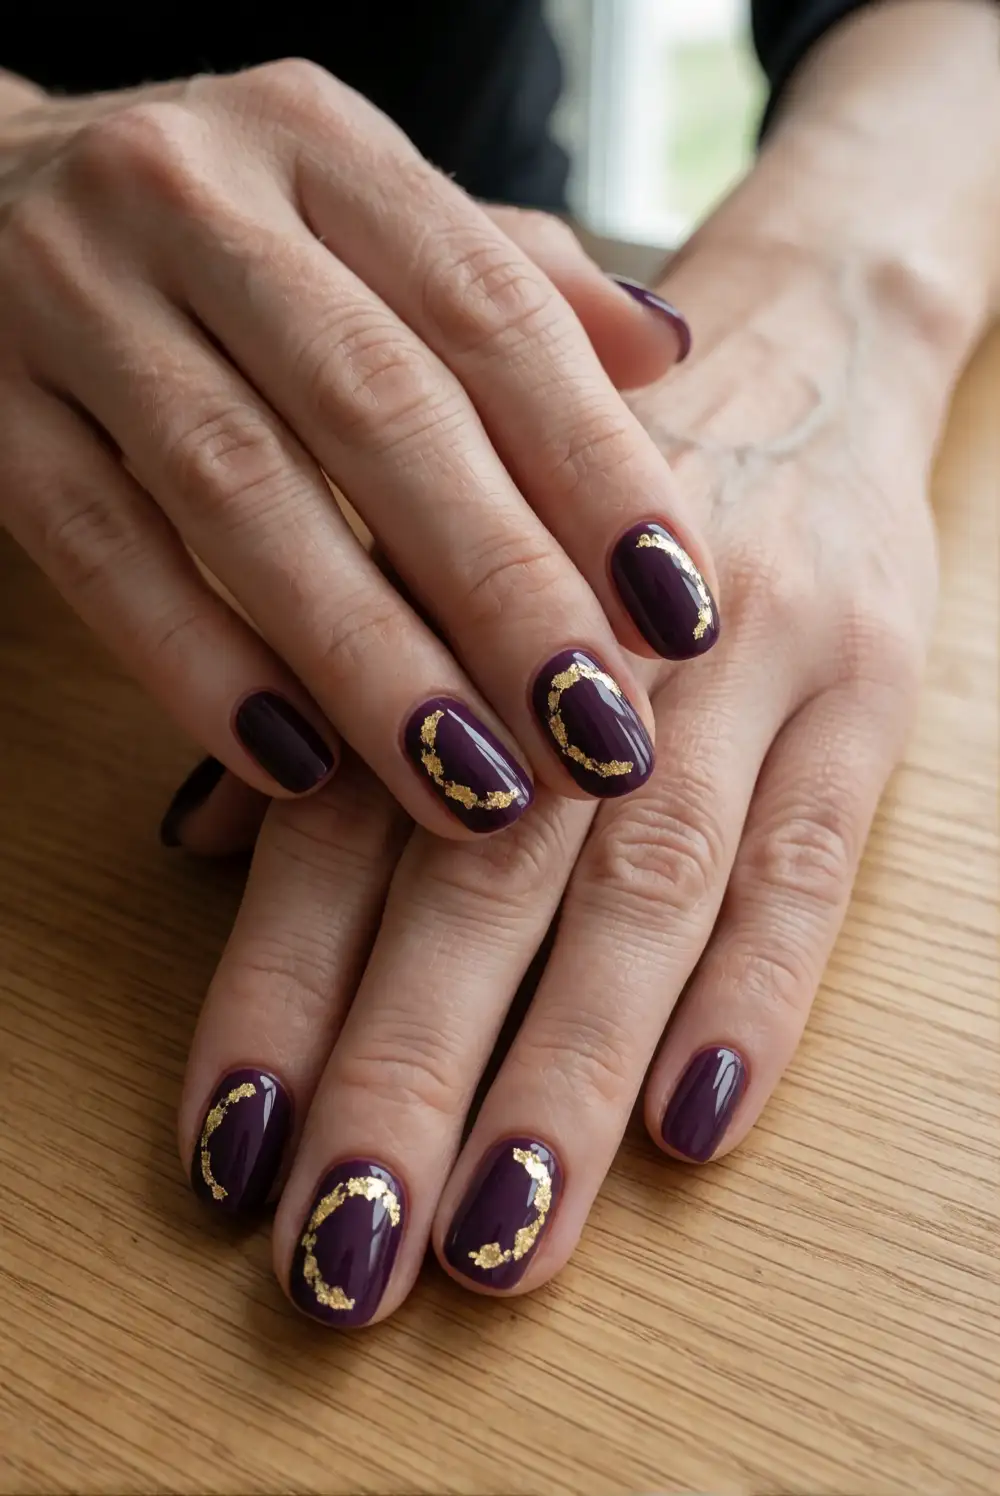
Choose a dark plum, black, or sheer nude polish as the base, then apply small pieces of nail foil over a tacky layer or foil adhesive. Use tweezers to position the flakes in delicate arcs, broken rings, or scattered clusters that suggest orbiting stars. Leave plenty of unadorned polish around each accent so the foil catches the eye. Press the pieces gently into place and smooth any lifted edges before sealing the design with a topcoat made for foil or metallic nail art.
Gold foil looks especially rich over burgundy and deep violet, while a sheer base gives it a lighter, jewelry-like effect. Try foil on just one or two nails if you prefer a subtle manicure, or repeat a small accent across every finger for a more coordinated finish. Irregular fragments are part of the charm, so the pattern can stay loose rather than perfectly symmetrical. Pair the nails with gold rings, and avoid thick topcoat strokes that might drag the delicate foil.
Black Cat Moon Accent Nails
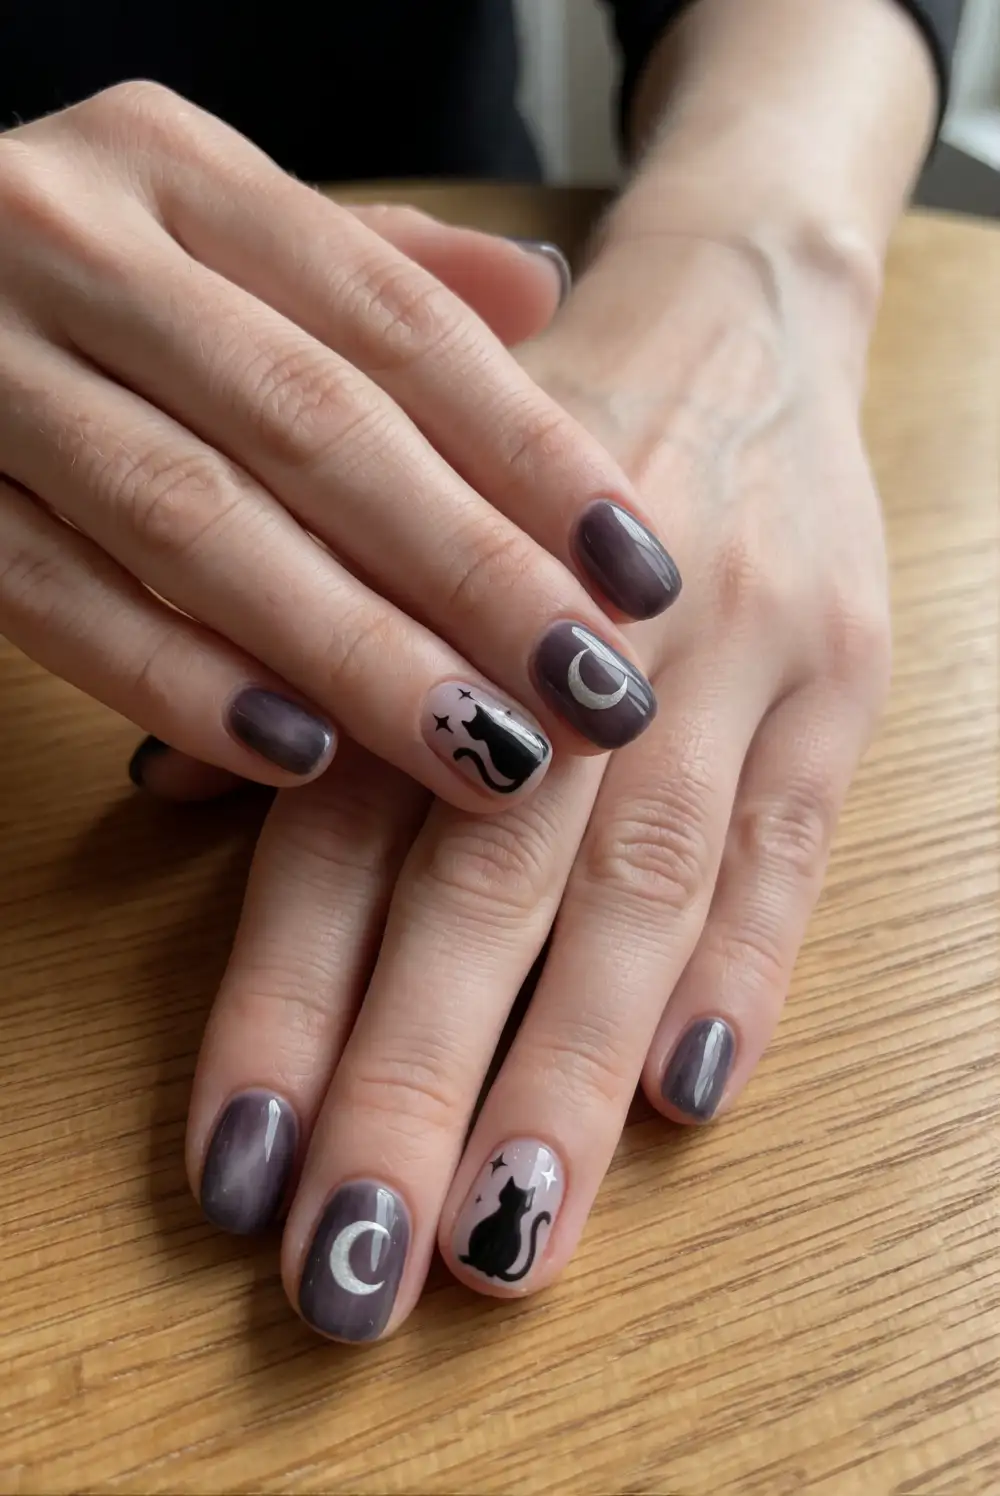
Paint the nails a soft smoky gray, deep plum, or muted mauve, reserving one accent nail for the cat motif. Over a pale crescent moon, use black polish and a fine brush to create a simple seated-cat silhouette with pointed ears and a curved tail. Keep the shape graphic rather than detailed, and add a few tiny stars nearby with a dotting tool. A stencil can help with the moon, while a small brush makes it easier to refine the silhouette.
For a subtle version, place the cat and moon on a single nail and leave the others in a coordinating solid color. A dark base with a pale cat silhouette reverses the contrast for a bolder Halloween look. Make the moon large enough to read clearly, and let each layer dry before adding the next detail. A glossy topcoat brings out the contrast, while a satin finish gives the illustration a softer, illustrated quality that pairs nicely with silver accessories.
Witch Hat Silhouette Manicure
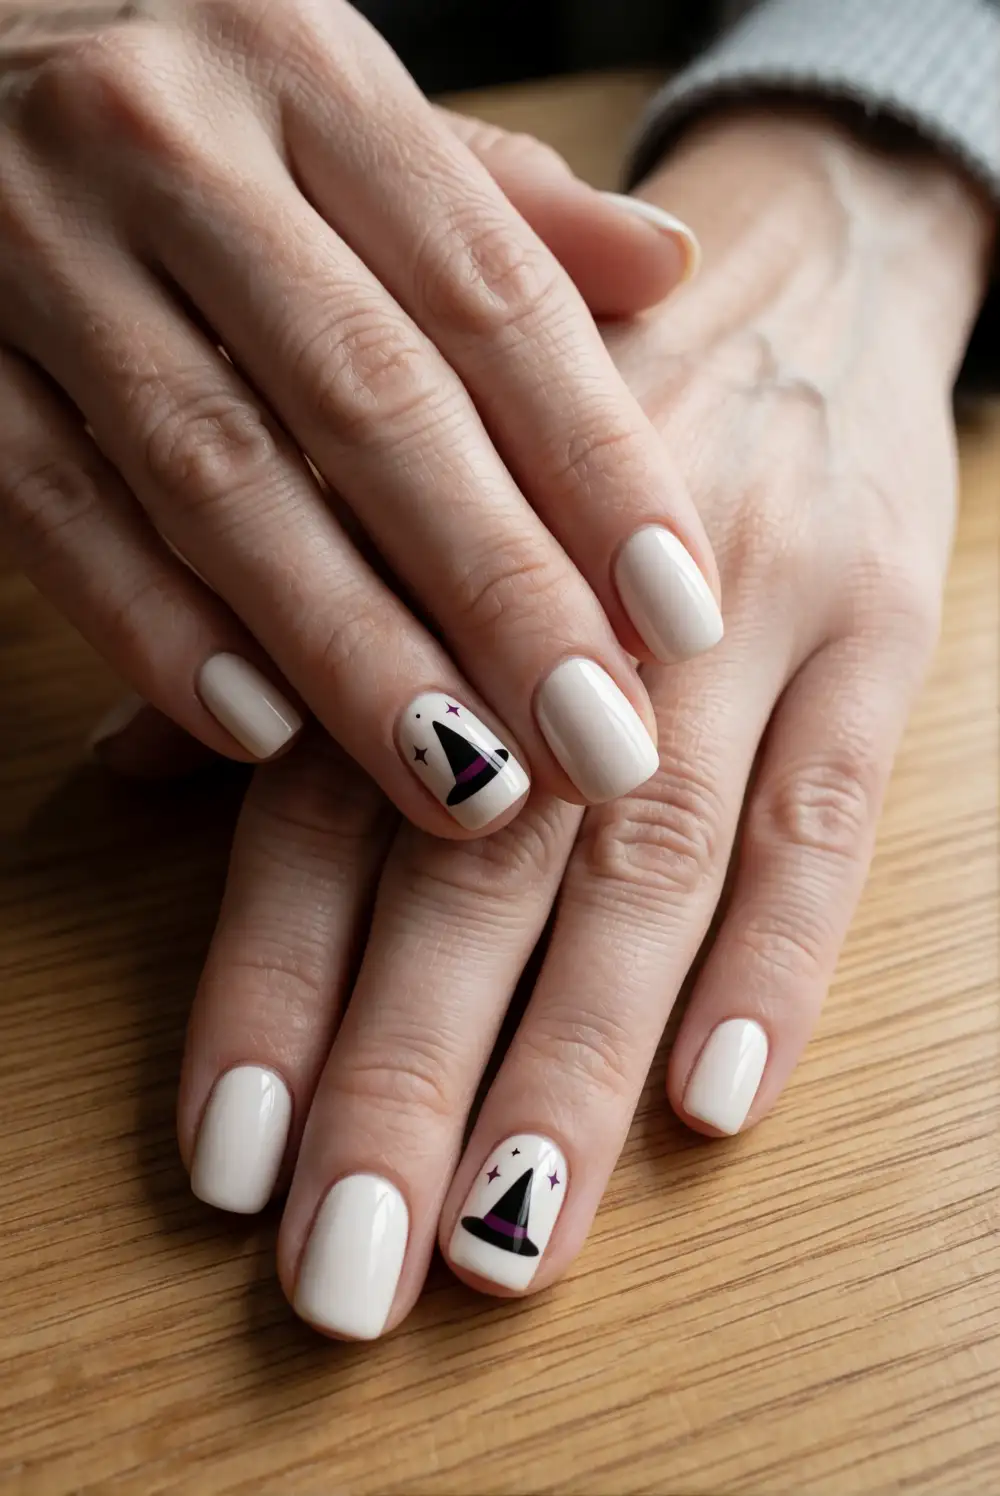
Apply a creamy ivory, dusty lavender, or muted green base and select one or two nails for a simple witch-hat silhouette. With black polish and a fine nail-art brush, paint a small triangle for the crown and a curved line for the brim. Add a narrow band in deep plum or metallic gold if you want a little extra detail. Keep the other nails in a coordinating solid shade, or scatter a few tiny stars near the hat for a celestial touch.
A single hat accent keeps the manicure wearable, while repeating the silhouette across multiple nails creates a more playful seasonal set. Choose a light base so the dark shape remains easy to see, and sketch the hat with thin strokes before filling it in. If freehand painting feels tricky, a small stencil can help create a clean outline. Seal the finished art with topcoat and add a moon or star on an adjacent nail to connect the motif with the witchy sky theme.
Sheer Black Lace Star Nails
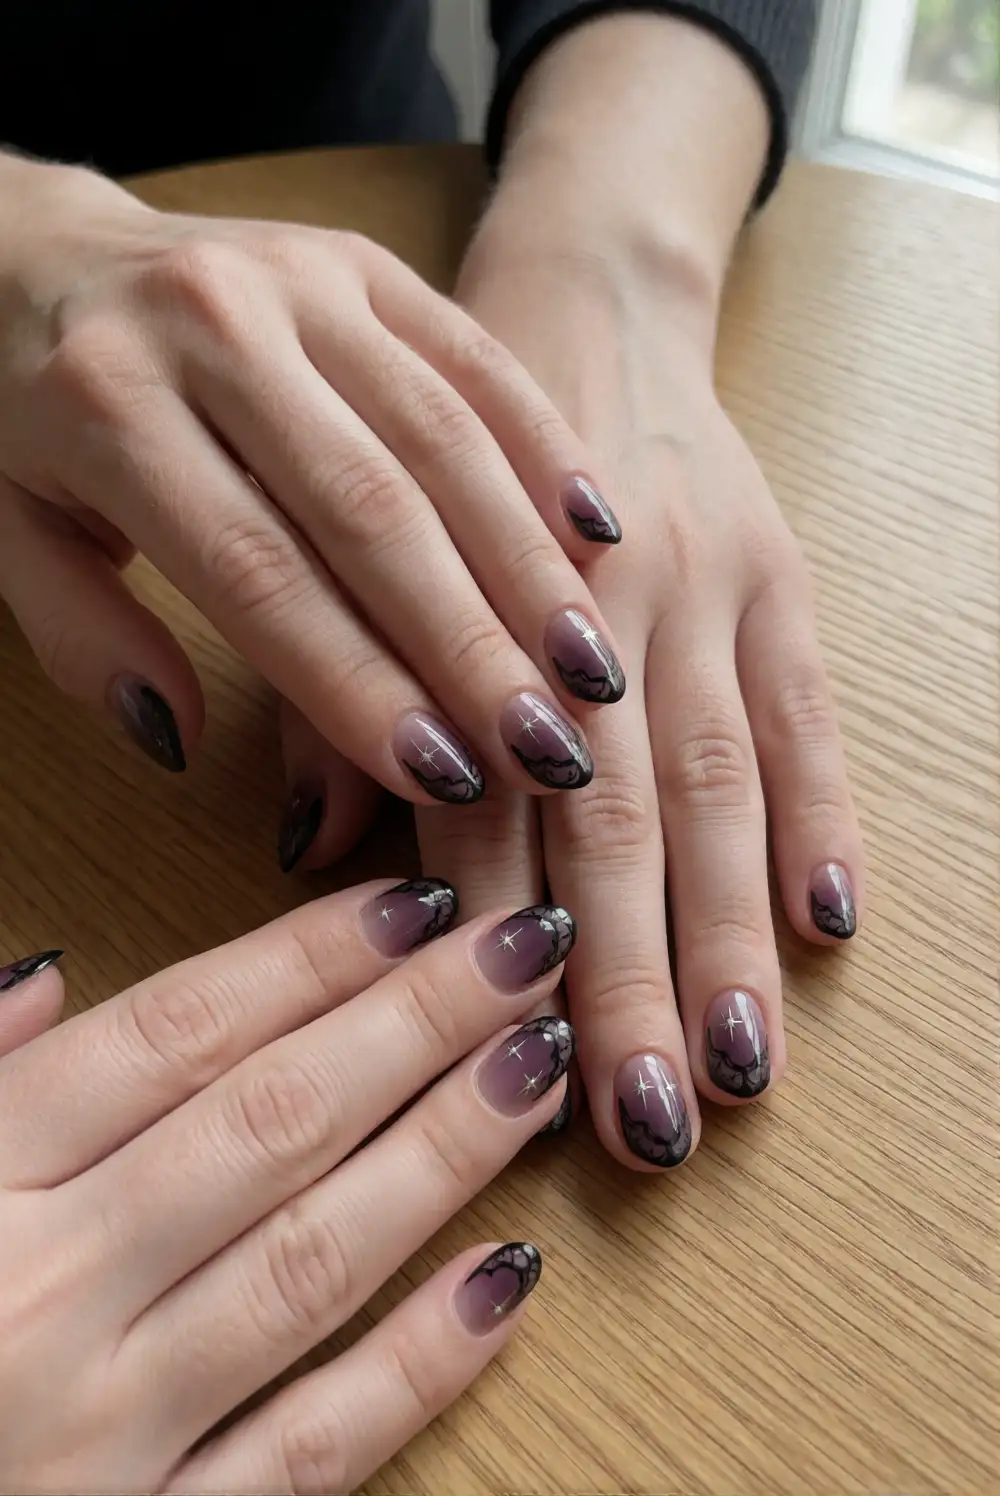
Brush on a sheer blush, beige, or smoky mauve base and allow it to dry. Use a fine brush with black polish to draw delicate curved lines near the tips, then add small leaf-like loops that suggest lace without covering the whole nail. Finish with tiny silver stars or dots placed between the dark lines. For greater control, work on one nail at a time and keep the brush lightly loaded so the lace pattern stays airy rather than thick.
Let the lace trail along one side of each nail for an elegant asymmetrical look, or reserve the pattern for accent fingers. A sheer base keeps the design refined, while a charcoal base gives the black details a more dramatic layered effect. If the line work is new to you, practice the curves on a palette first and simplify the pattern to a few arches. Apply a glossy topcoat gently to avoid smudging the fine strokes, and pair the finished nails with understated jewelry.
Opal Witchy Aura Nails
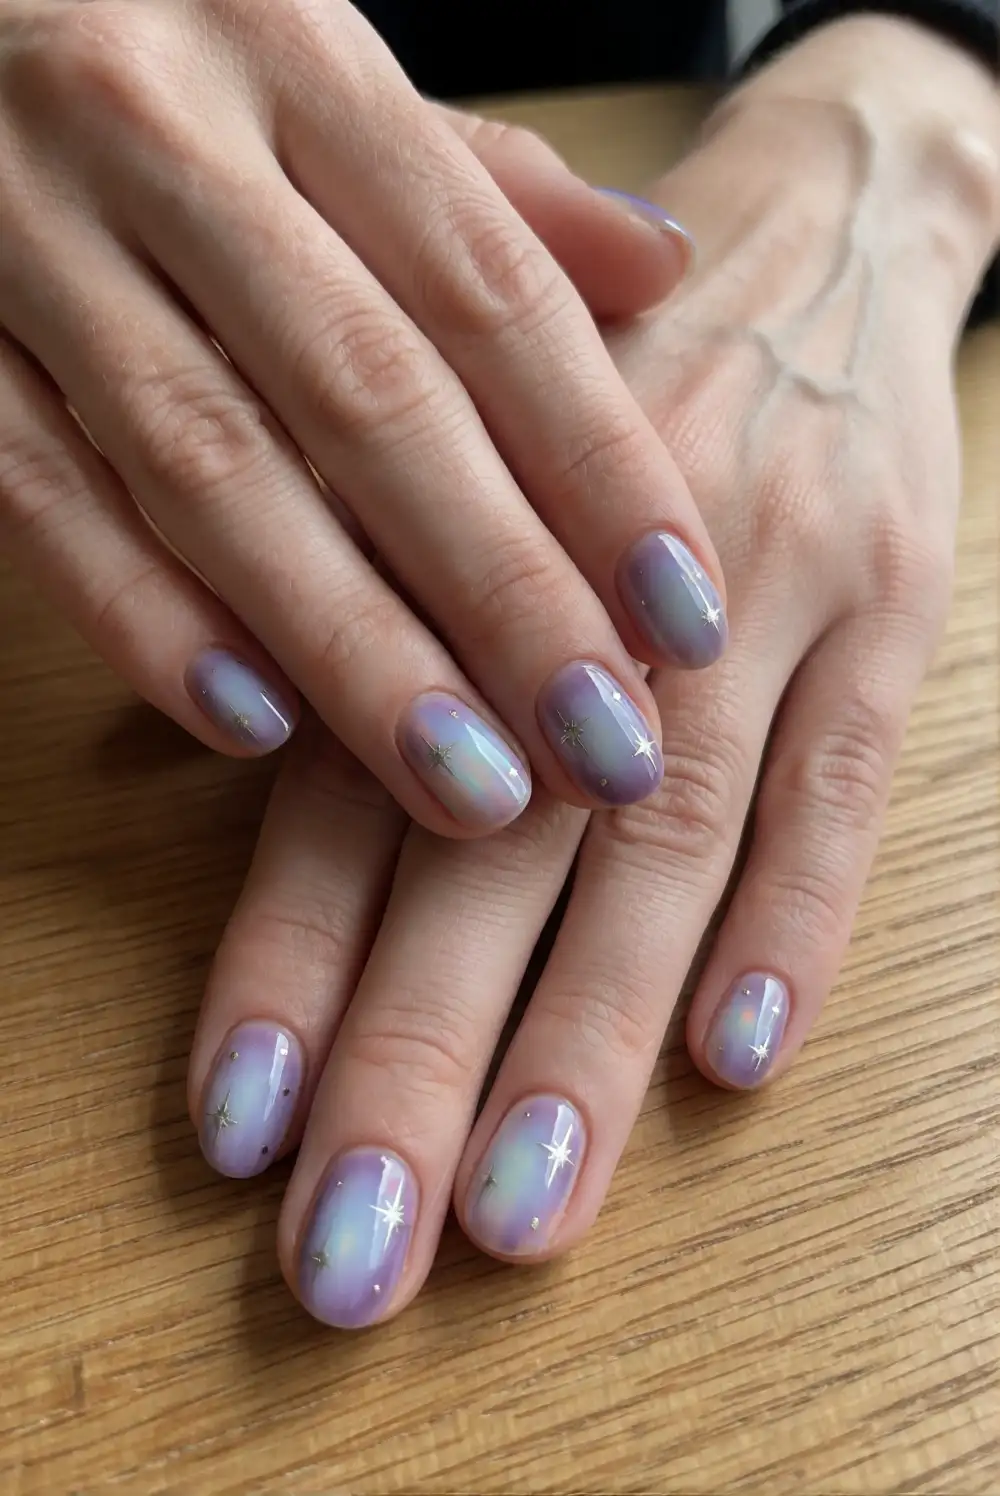
Paint a translucent milky base and let it dry before blending a soft halo of lavender, pale blue, or dusty rose into the center of each nail. A small sponge works well for tapping on the color in thin layers; keep the edges diffused so the aura fades naturally into the base. Add a fine silver crescent or a few tiny stars to one or two nails. Finish with a glossy topcoat to bring out the opalescent look and smooth the layered color.
Choose a single pastel shade for a delicate glow, or blend two neighboring colors for a richer, shifting effect. A whisper of iridescent powder can add a pearly sheen without hiding the soft gradient. Keep the celestial details sparse so the aura remains the main feature, and use a clean sponge corner for gentle blending around the edges. This manicure suits both short and long nails and offers a lighter alternative to all-black Halloween designs while still feeling dreamy and witchy.
Midnight French Tips with Stars
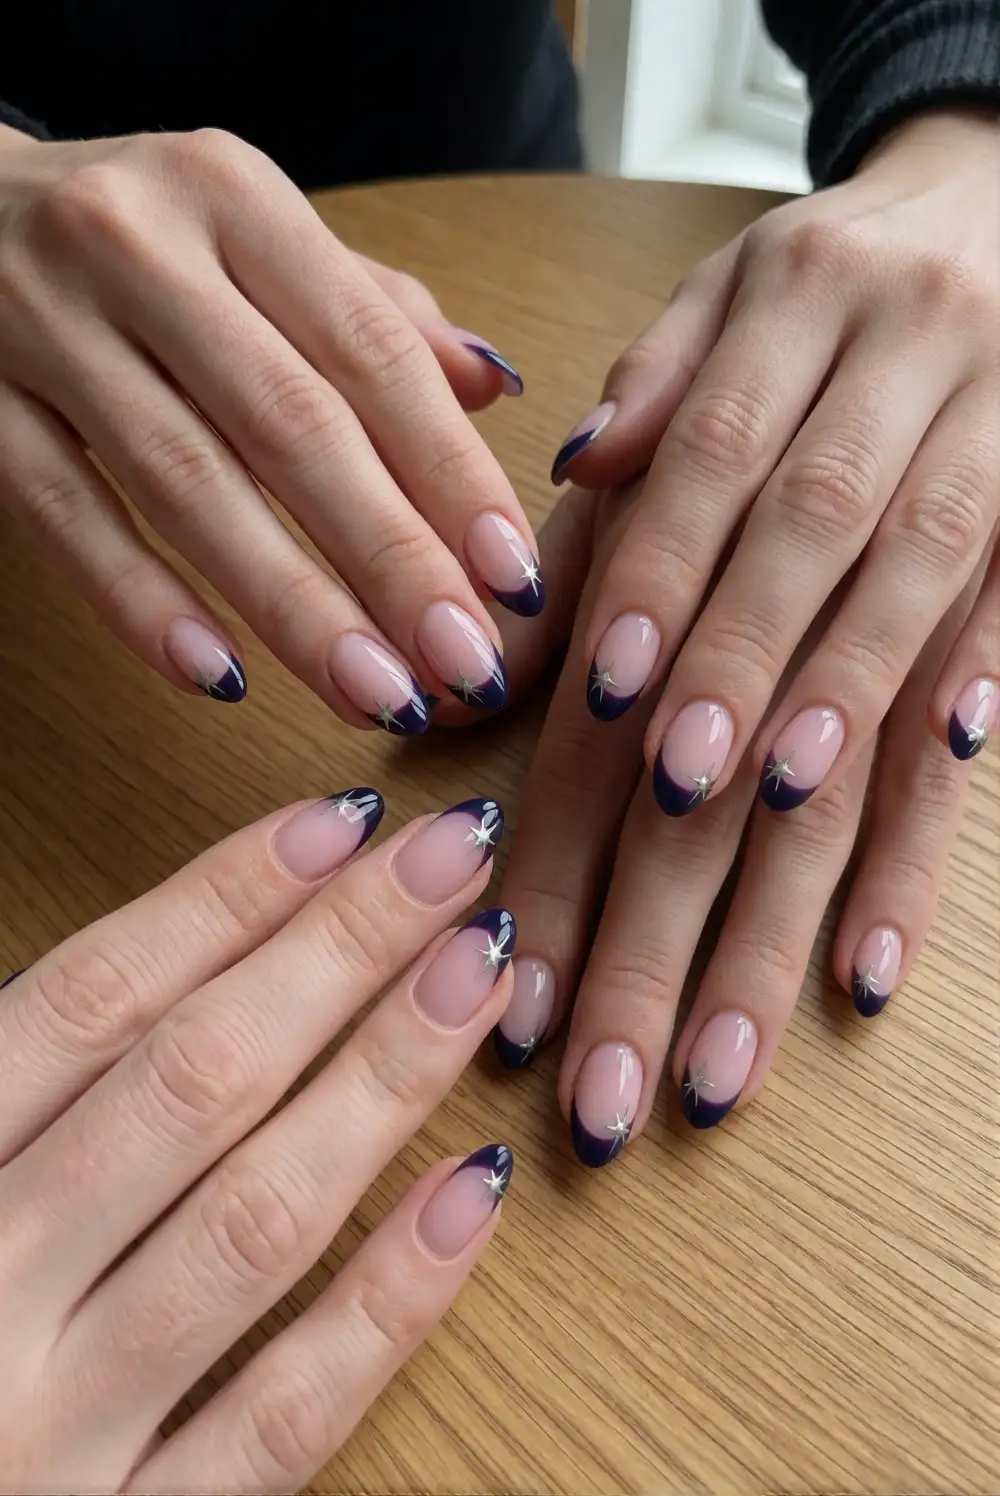
Start with a sheer pink or neutral base and let it dry fully. Paint the tips in deep navy or black, following the natural curve of each nail with a fine brush or French-tip guide. Once the dark polish is dry, add a few small silver stars and pinprick dots near the border between the tip and base. Keep the star placement light so the clean French shape stays visible, then finish with a glossy topcoat for a smooth, luminous surface.
Try a diagonal tip for a more modern look, or switch the dark polish to plum for a softer Halloween palette. A single star on each tip creates a tidy repeating detail, while scattered dots make the manicure feel more like a night sky. If your natural nail edge is short, keep the colored tips narrow so they do not overwhelm the shape. This design balances celestial decoration with a classic silhouette and works well with both casual outfits and dressier seasonal looks.
Whether you prefer delicate silver stars, moody galaxy color, or a tiny witchy illustration, these Halloween nail ideas make it easy to bring celestial detail to your manicure. Start with the design that suits your polish collection, adapt the colors to your personal style, and finish with a protective topcoat for a polished seasonal look.








