
Want a festive manicure that still feels polished and easy to wear? These chic Halloween nails pair understated colors, delicate details, and wearable finishes for a seasonal look that works beyond a costume party. Try a sleek black French tip, a hint of copper, or a tiny moon accent for a manicure that feels Halloween-inspired without taking over your style.
Sheer Nude Nails With Tiny Bat Accents
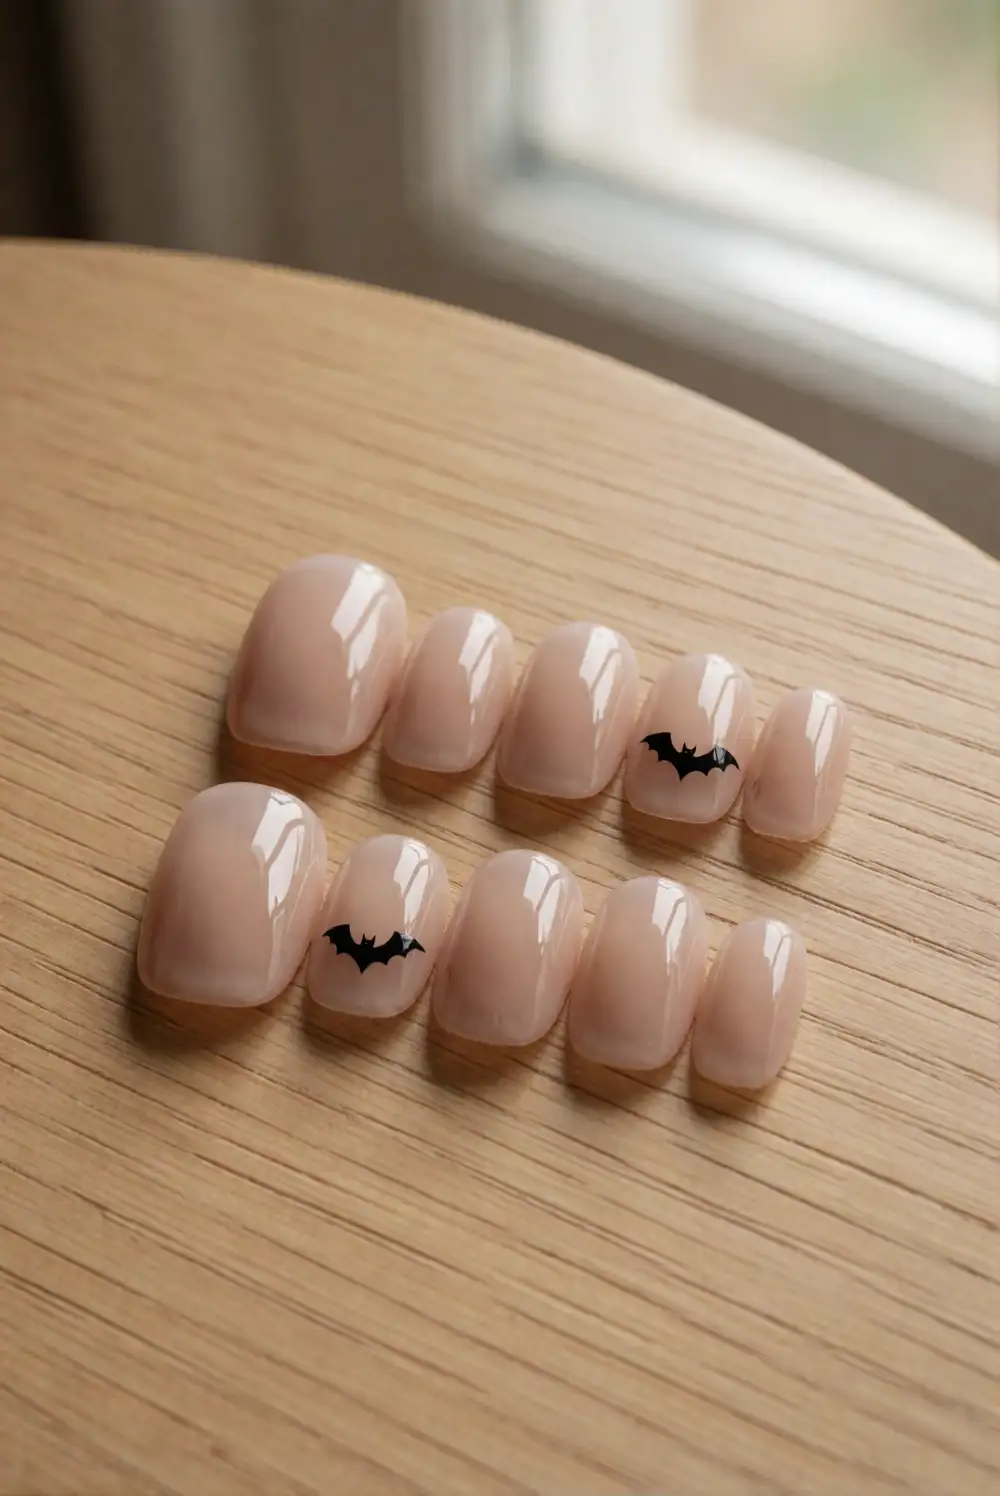
Start with a sheer beige or pink-toned base coat and let it dry completely. Use a fine nail-art brush and black polish to paint a small bat silhouette near the tip of one or two nails, keeping the shape simple with a rounded center and tiny wings. Finish with a clear top coat to smooth the design and add shine. The translucent base keeps the seasonal detail light rather than making the manicure feel like a costume.
Keep the bats small and place them asymmetrically so they read as subtle accents. For a softer variation, use deep plum or charcoal polish instead of black, or add a single bat to just one nail. Pair the manicure with gold rings and neutral sleeves to keep the overall look refined. If painting tiny shapes feels tricky, use a nail-art stamping plate and carefully remove excess polish before applying the design.
Black Micro French Tips on Burnt Orange
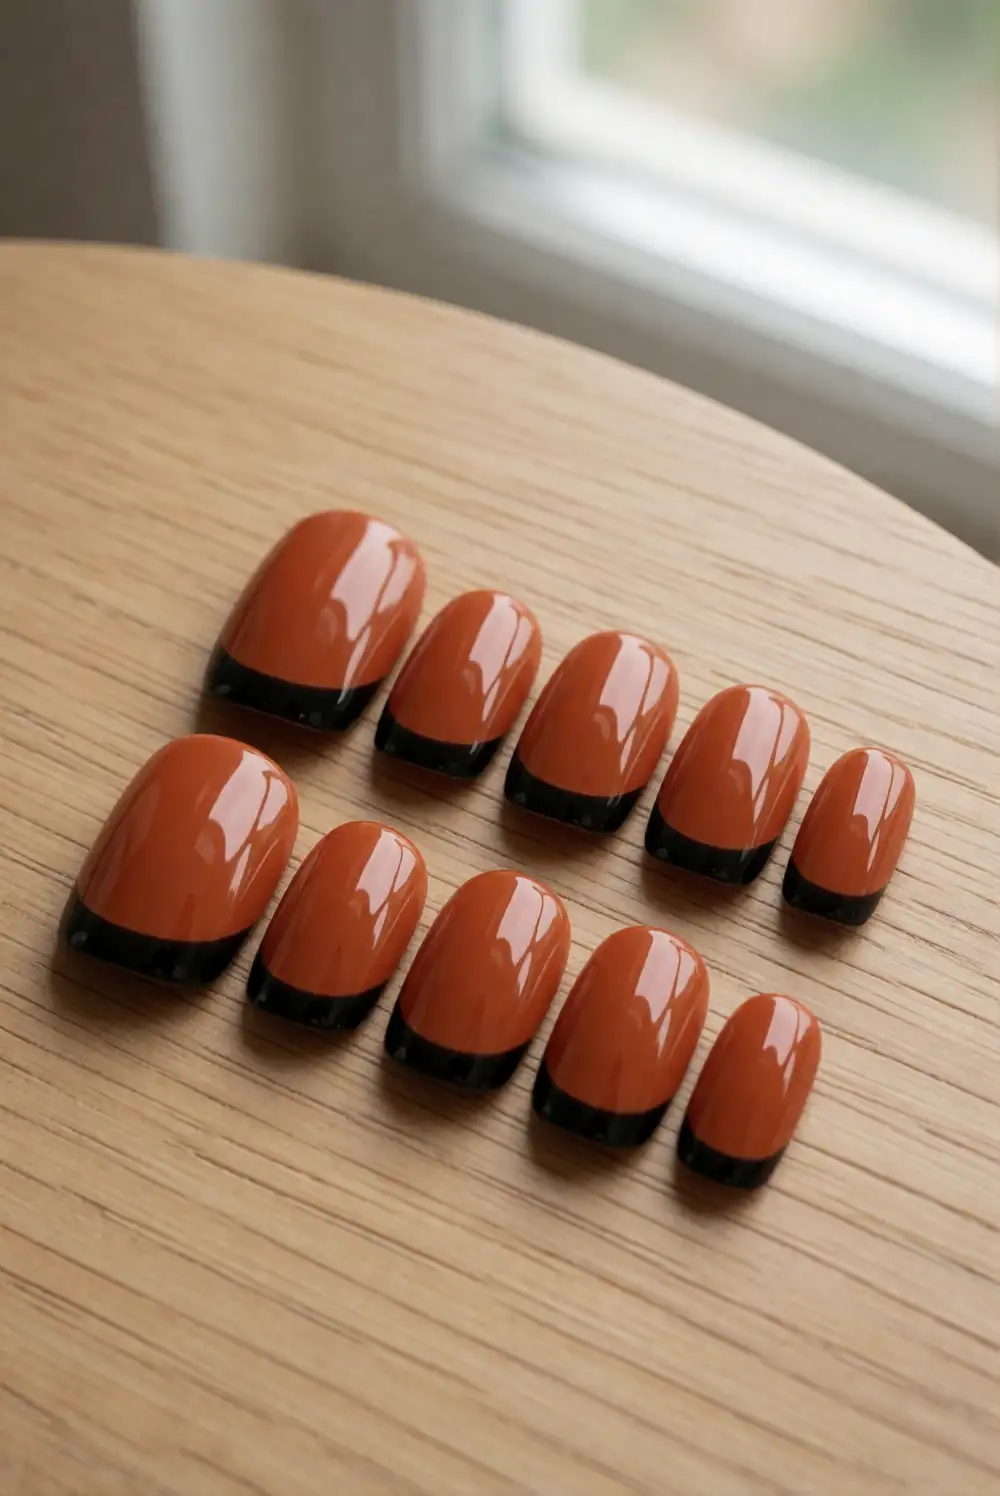
Apply a smooth burnt-orange polish across each nail and allow it to dry before adding the tips. With a fine liner brush, trace a slim curved line of black polish along each free edge, following the natural shape of the nail. Keep the stripe narrow for a clean micro-French finish, then seal everything with a glossy top coat. A rounded or squoval nail shape works especially well because the fine tip follows its curve without looking heavy.
Choose a muted pumpkin or terracotta orange if you want a softer everyday effect, or reach for a brighter orange for a bolder seasonal pop. A steady hand is easier to manage when the brush is lightly loaded and the nail is supported on a flat surface. Wear this design across every nail for a coordinated manicure, or use the orange-and-black tips on alternating nails with a sheer neutral base.
Minimal Crescent Moon Accent Nails
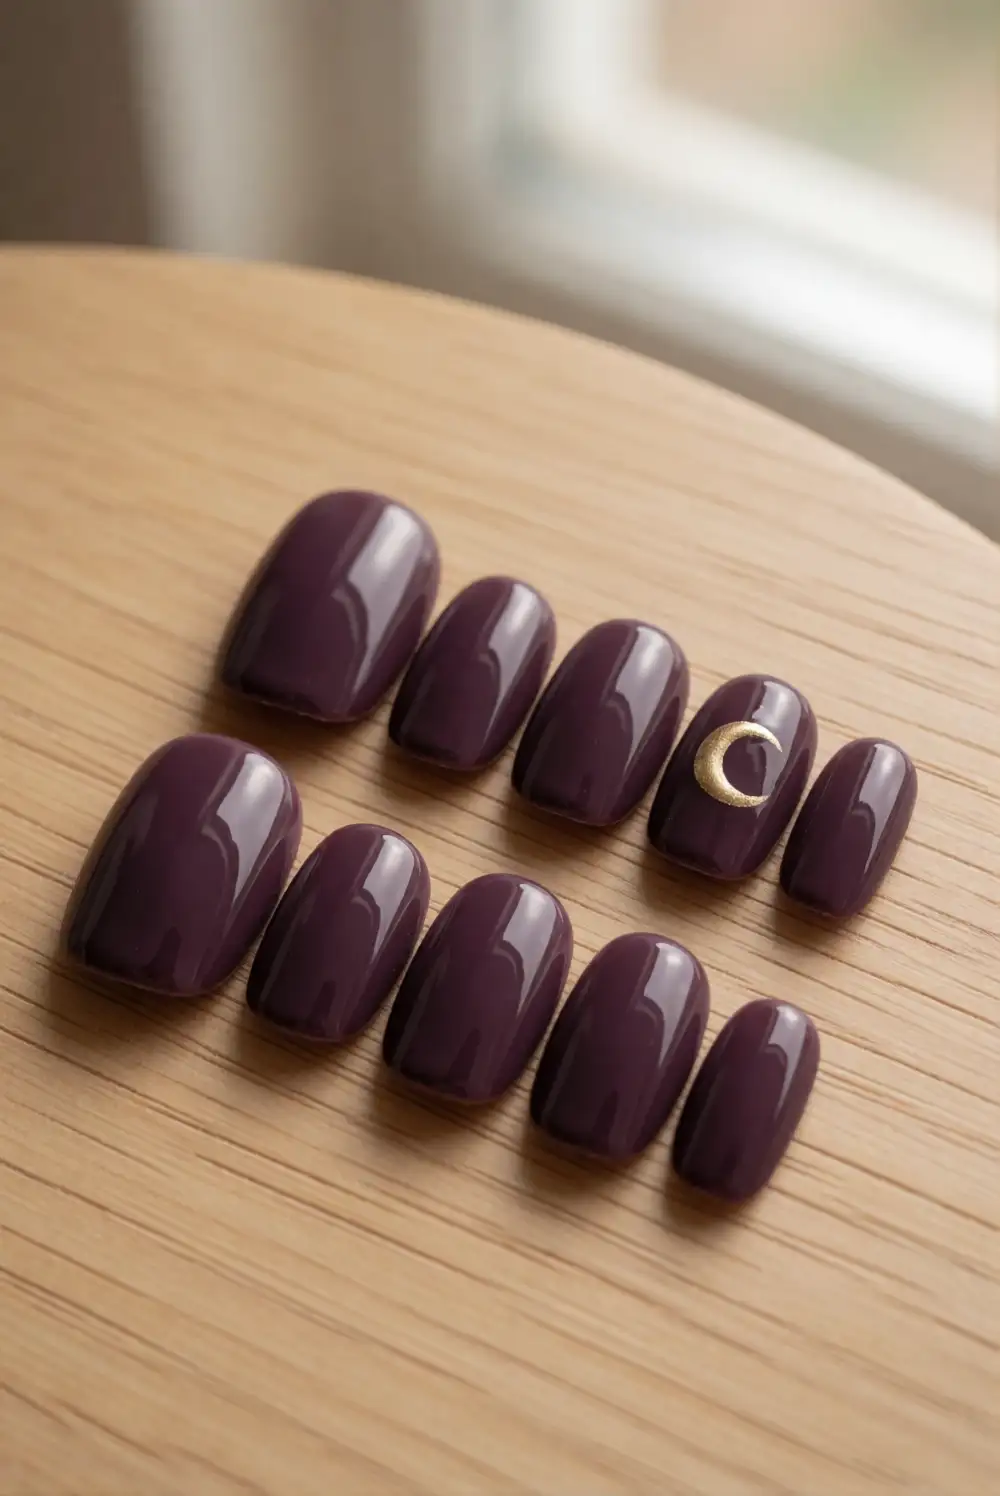
Paint the nails with a sheer milky base or a deep plum shade, depending on how much contrast you like. Once the base is dry, place a small crescent moon near the cuticle of one accent nail using a fine brush and metallic gold polish. Make the curve with two delicate strokes that meet in a point, then add a clear top coat. Keep the remaining nails plain so the moon feels intentional and the design stays easy to wear.
For a quieter version, use a warm champagne polish instead of bright gold, or choose a tiny black crescent over a pale base. You can move the accent toward a side edge for a more modern, off-center composition. Almond and oval nail shapes give the moon a graceful backdrop, while short nails look lovely with an especially petite design. Pair the manicure with simple jewelry so the small metallic detail has room to stand out.
Warm Copper Foil on Glossy Espresso Nails
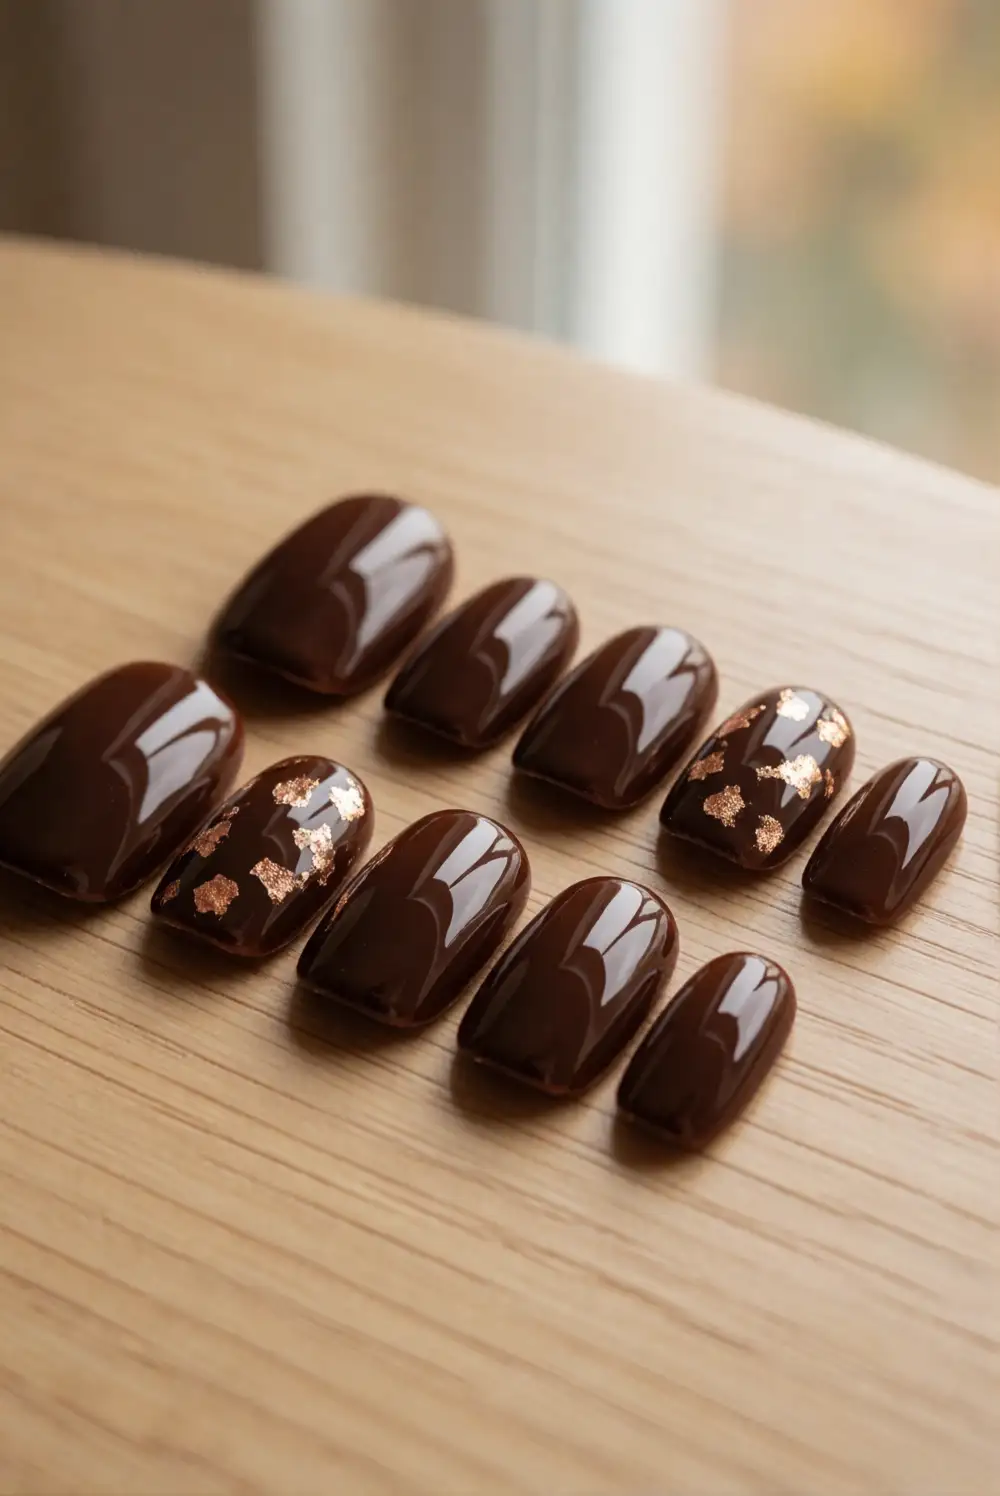
Begin with two thin coats of glossy espresso or chocolate-brown polish, allowing each layer to dry well. Dab a small amount of nail foil adhesive onto one corner of a nail, wait until it turns tacky, and press on a tiny piece of copper foil with a silicone tool. Lift the tool gently to leave an irregular metallic fragment, then seal the nail with a generous clear top coat. Repeat on a few nails rather than covering every surface.
Small foil pieces create a more elegant effect than full metallic coverage, and their uneven edges give the manicure a handcrafted finish. Try copper over burgundy or deep plum for another rich combination, or keep the foil on just one accent nail for understated styling. Avoid placing foil too close to the nail edge, where it may catch or lift. The warm sheen looks especially striking beside cream knits and simple gold accessories.
Deep Cherry Nails With One Glossy Black Accent
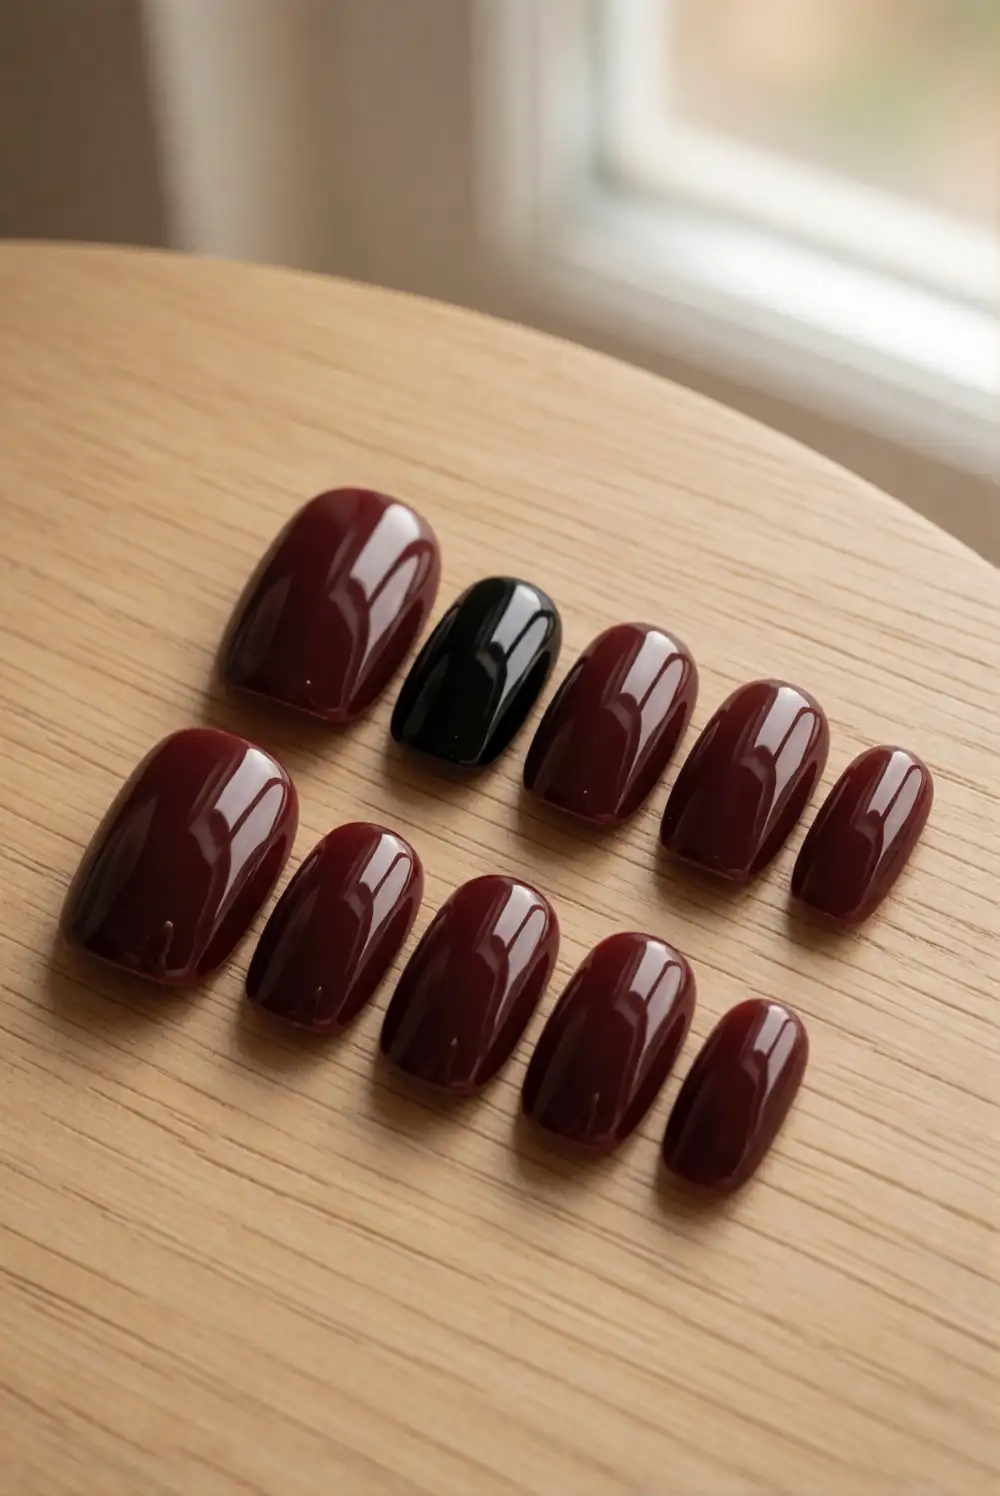
Apply two thin coats of deep cherry or oxblood polish to most nails, using a base coat first to help prevent staining. Paint one accent nail in glossy black, keeping the finish smooth and even. Let the color dry before adding a high-shine top coat to every nail. The dark palette nods to Halloween through rich, dramatic color rather than obvious seasonal symbols, making this manicure a good choice for anyone who prefers a classic look.
For a softer contrast, choose a blackened plum accent instead of true black, or reverse the balance with one cherry nail among dark nails. A short, rounded shape makes the deep shades feel neat and wearable, while almond nails create a more elongated finish. Apply thin polish layers to reduce smudging and allow enough drying time between coats. This color pairing works beautifully with neutral outfits, dark denim, and understated silver jewelry.
Matte Charcoal Nails With Glossy Tips
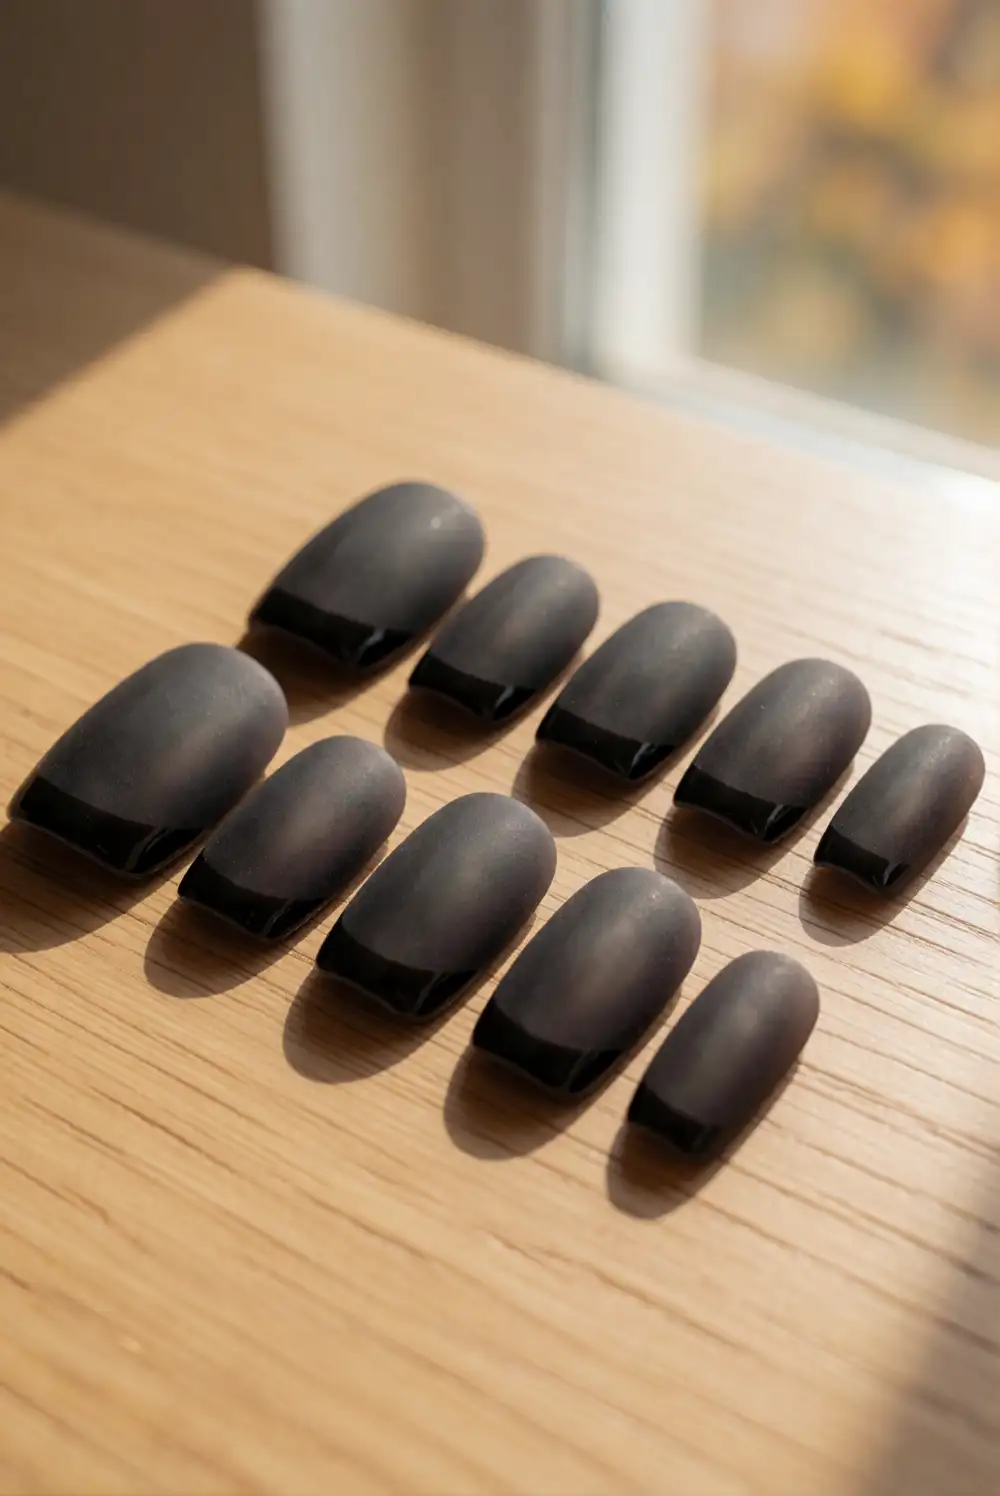
Coat each nail with charcoal polish and let it dry fully before applying a matte top coat. Once the matte finish has set, use a fine brush to trace a narrow line of glossy black polish across each tip. The finish contrast creates a subtle design that is visible in the light without adding extra colors or illustrations. Keep the glossy line close to the edge and follow the nail’s natural curve for a crisp, tailored result.
A matte top coat can make dark polish look softer and more modern, while glossy tips add just enough dimension. If you prefer a little color, paint the tips in muted burnt orange or deep berry instead of black. A short square or squoval shape gives the lines a graphic look, and an oval shape makes them more delicate. Refresh the clear matte layer as it wears, taking care not to cover the glossy tips.
Milky White Nails With Delicate Ghost Silhouettes
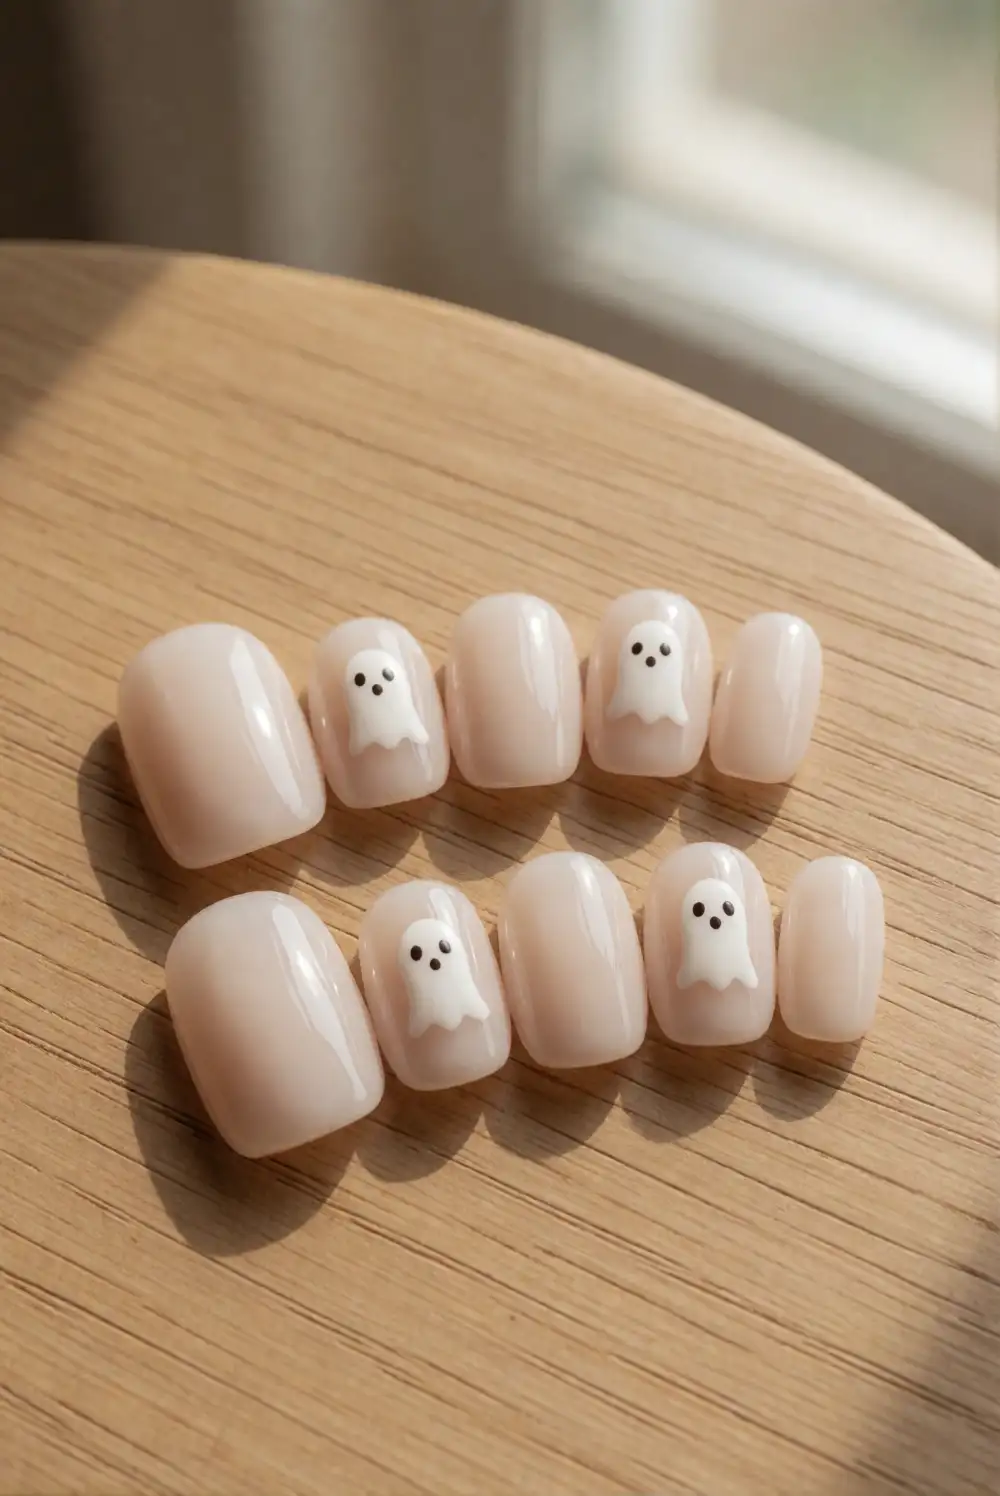
Apply a milky white or sheer ivory base to each nail and let it dry. On one or two accent nails, paint a small rounded ghost shape with opaque white polish, then use a fine brush to add a short wavy hem in the same shade. Add two tiny charcoal dots for a simple face and finish with a clear top coat. Keep the figures petite and the rest of the manicure plain for a sweet seasonal detail that remains polished.
For an even subtler version, use a pale gray outline instead of filling in the shape, or place just one ghost near the side of a nail. A translucent base lets the design feel airy, while a creamy opaque background gives it more contrast. Use a dotting tool or the tip of a fine brush for neat facial details. This playful manicure pairs nicely with cozy sweaters and soft neutral clothing without requiring a full Halloween-themed outfit.
Amber Tortoiseshell Accent Nails
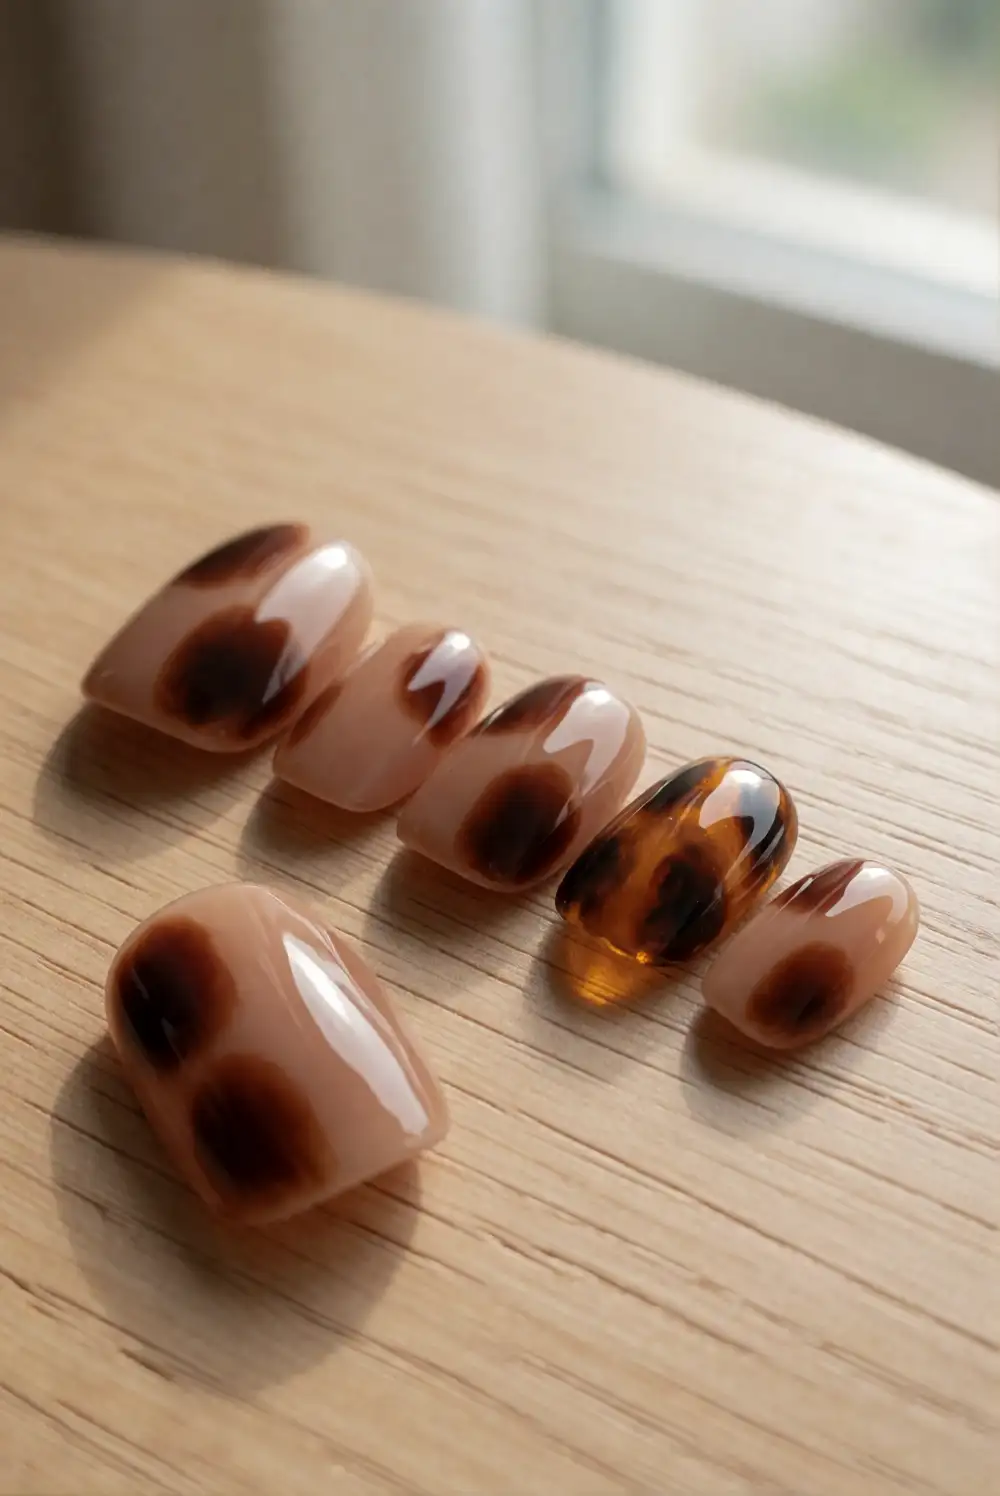
Paint most nails in a sheer caramel or warm beige shade. For an accent nail, apply a translucent amber layer, then add a few irregular patches of dark brown polish while the surface is slightly tacky. Soften the patches with another thin amber layer, leaving areas of golden color visible between them. Finish with a glossy top coat to give the layered pattern depth. The rich, autumnal tones feel seasonal without relying on familiar Halloween symbols.
Keep the patches uneven and spaced apart rather than making a repeated print; this helps the pattern look like natural tortoiseshell. Try the design on one or two nails and leave the rest in caramel, espresso, or sheer nude. A fine brush gives good control over the small dark shapes, while a sponge can soften their edges. The warm pattern works especially well with gold jewelry, brown leather accessories, and cream or rust-colored outfits.
Plum Nails With Tiny Gold Star Details
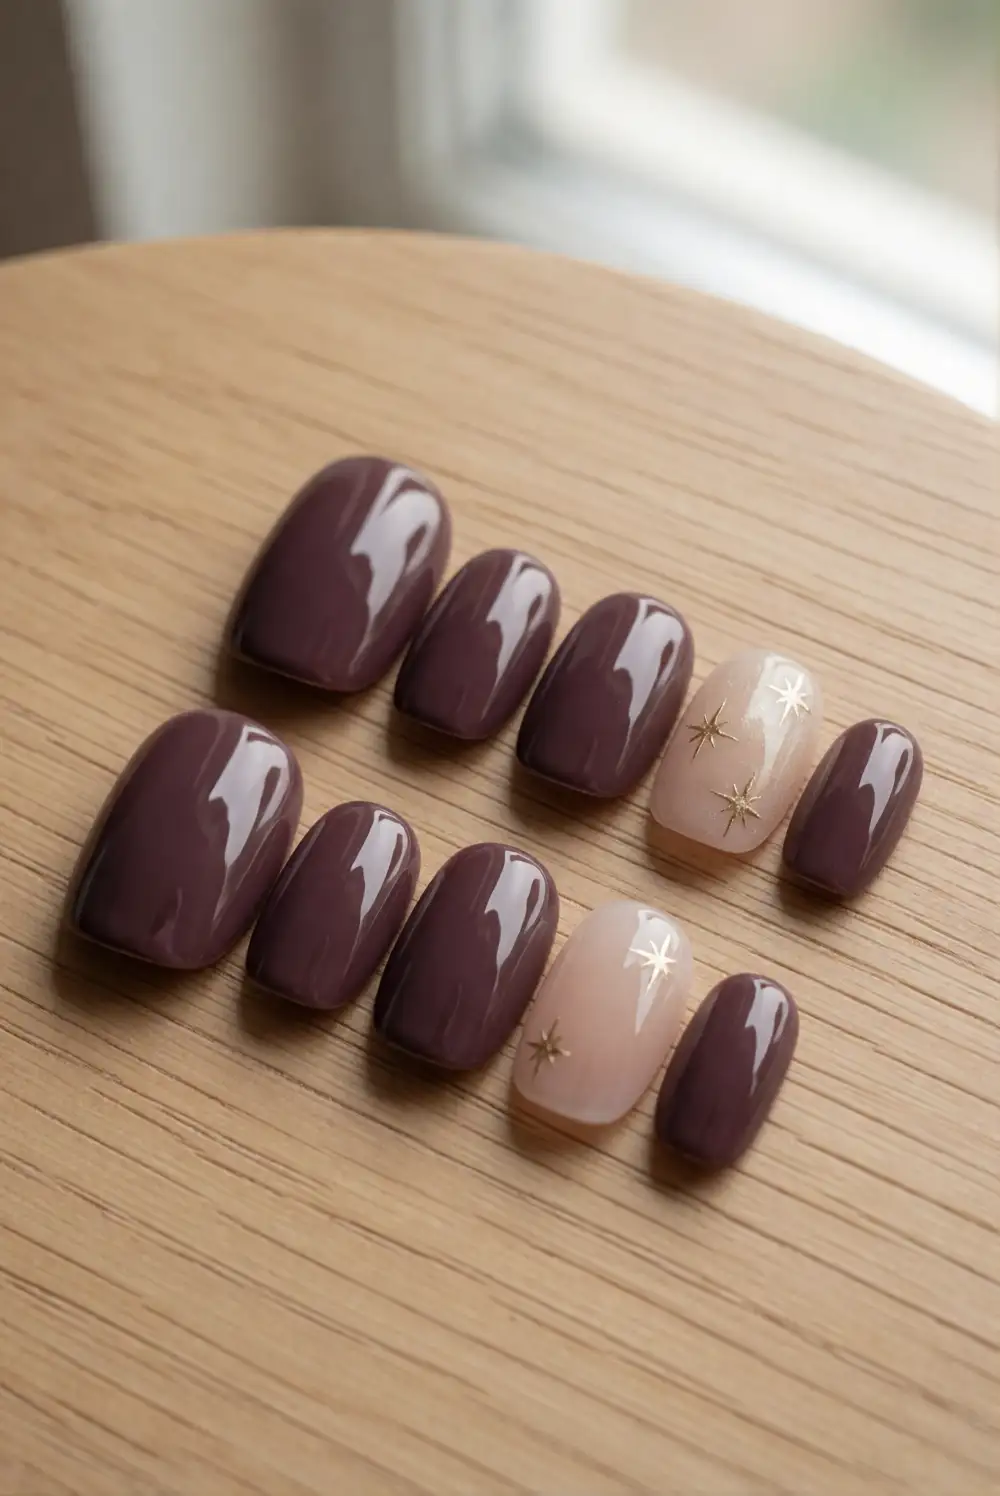
Choose a glossy plum or aubergine polish and apply two even coats over a base coat. After the color dries, use a fine nail-art brush to add one or two small gold stars to an accent nail. Keep the stars simple, with thin lines and plenty of open space around them, then seal the design with a clear top coat. The deep color and restrained metallic detail create a moody seasonal look that still feels elegant.
For a more minimal manicure, place a single star near the base of one nail and leave every other nail plain. Champagne gold gives a softer finish than bright metallic yellow, while silver can make the look feel cooler. If freehand stars are difficult, use a fine nail-art stencil and remove it gently after applying polish. This design looks balanced on short nails and makes a pretty accent beside simple rings or a satin evening outfit.
Soft Pumpkin Ombre With Neutral Tones
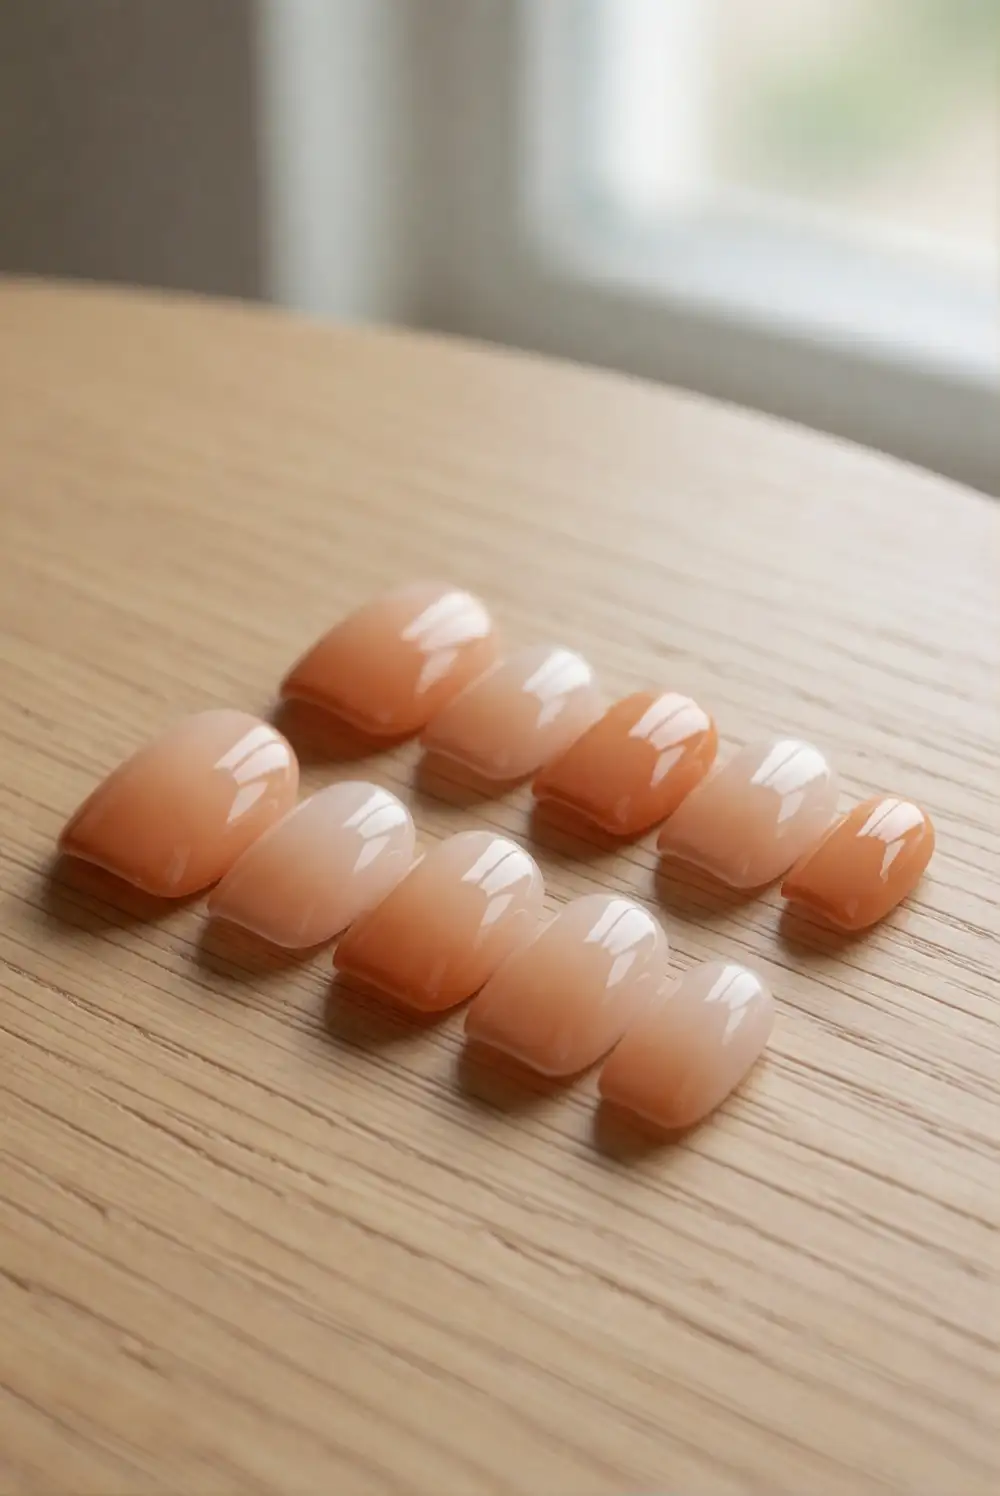
Apply a pale beige or ivory base and let it dry before creating the color fade. Put a stripe of muted pumpkin polish beside a stripe of nude polish on a small makeup sponge, then gently dab the sponge over the nail until the colors blend. Repeat with fresh polish as needed, using light taps rather than pressing hard. Clean the skin around the nail with a small brush, then add a glossy top coat to smooth the gradient.
Keep the orange concentrated near the tips for a delicate fade, or reverse the placement so the color rises from the cuticle. Dusty terracotta and caramel are lovely alternatives to bright orange and make the manicure easier to wear throughout autumn. A sponge creates a softly blended edge, so protect the surrounding skin with peel-off barrier polish if desired. The warm gradient pairs nicely with neutral clothing and looks especially polished on almond-shaped nails.
With muted seasonal colors, fine details, and glossy or matte finishes, Halloween nails can feel chic rather than costume-like. Choose a design that suits your usual style, keep the accents intentional, and enjoy a manicure that brings a little autumn character to your everyday look.








