
Bring a subtle Halloween touch to your manicure with simple nail ideas in black, orange, and nude tones. These wearable designs range from glossy color pairings to tiny seasonal accents, with options you can adapt to your nail length and preferred level of detail.
Glossy Black Nails with a Nude Accent
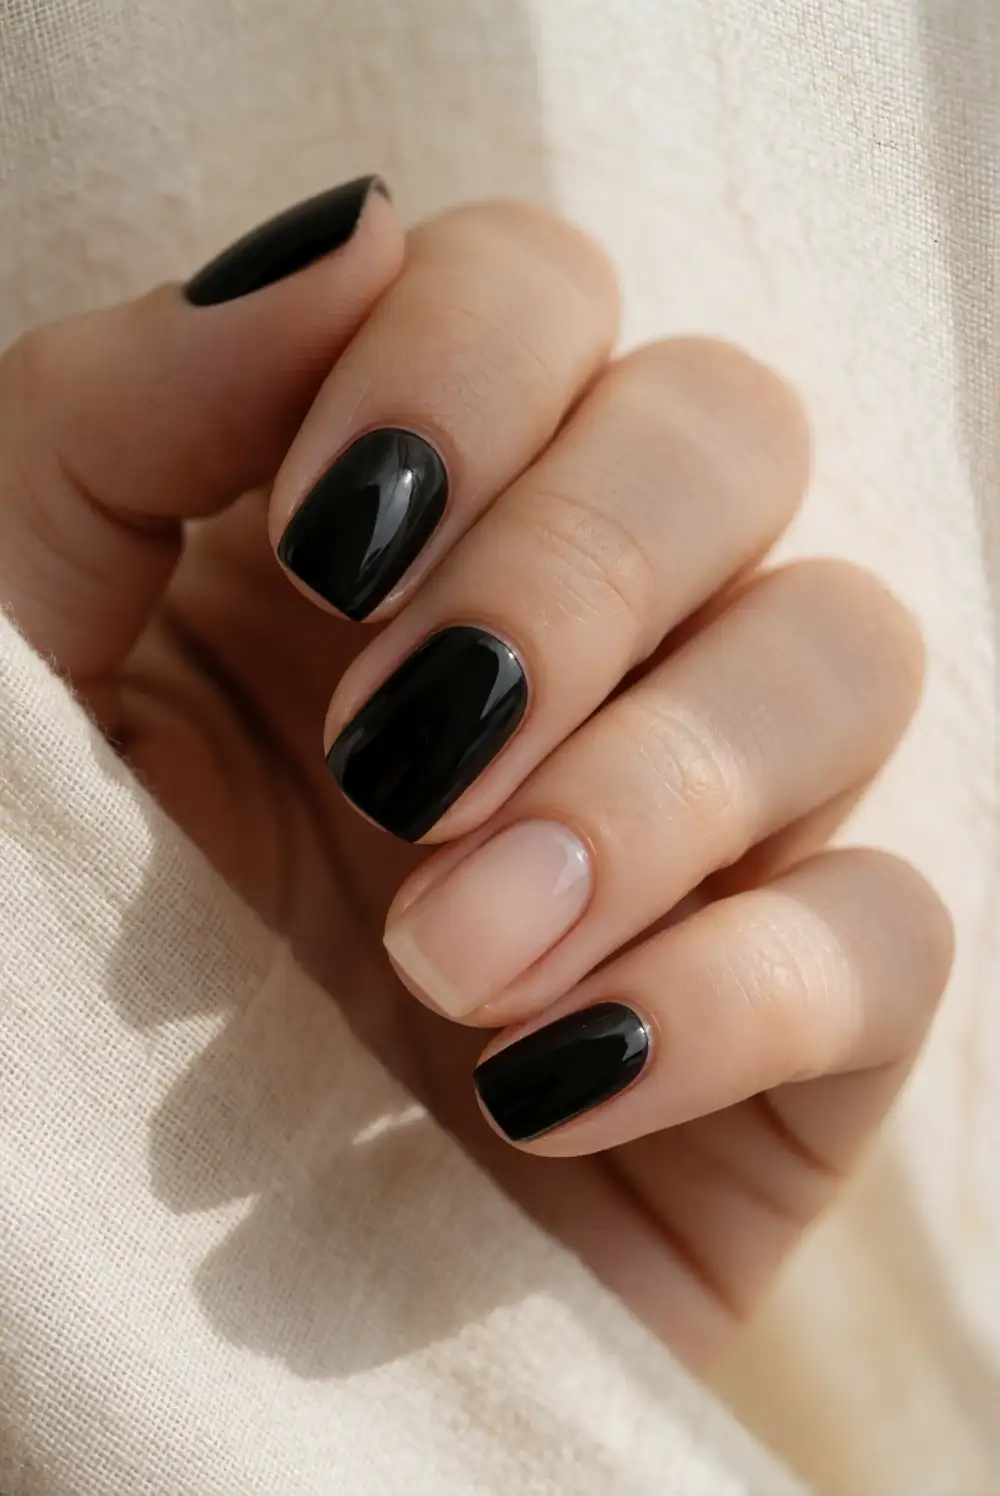
Pair glossy black polish with a single nude accent nail for an easy manicure with a clear Halloween mood. Shape and clean your nails, then apply a base coat. Paint most nails black and leave one nail on each hand bare for a sheer nude polish that suits your skin tone. Let each coat dry before finishing with a glossy top coat. The dark-and-neutral contrast looks polished without requiring detailed nail art or special tools.
Choose a warm beige nude for a softer contrast or a pinky nude for a more delicate finish. You can place the accent on your ring finger, alternate accent fingers, or keep every nail nude and paint just one black. A thin brush dipped in black polish can add a tiny curved detail to the nude nail if you want extra interest. Keep the nail edges neat with a small brush and polish remover, then refresh the top coat as needed.
Orange French Tips on Nude Nails
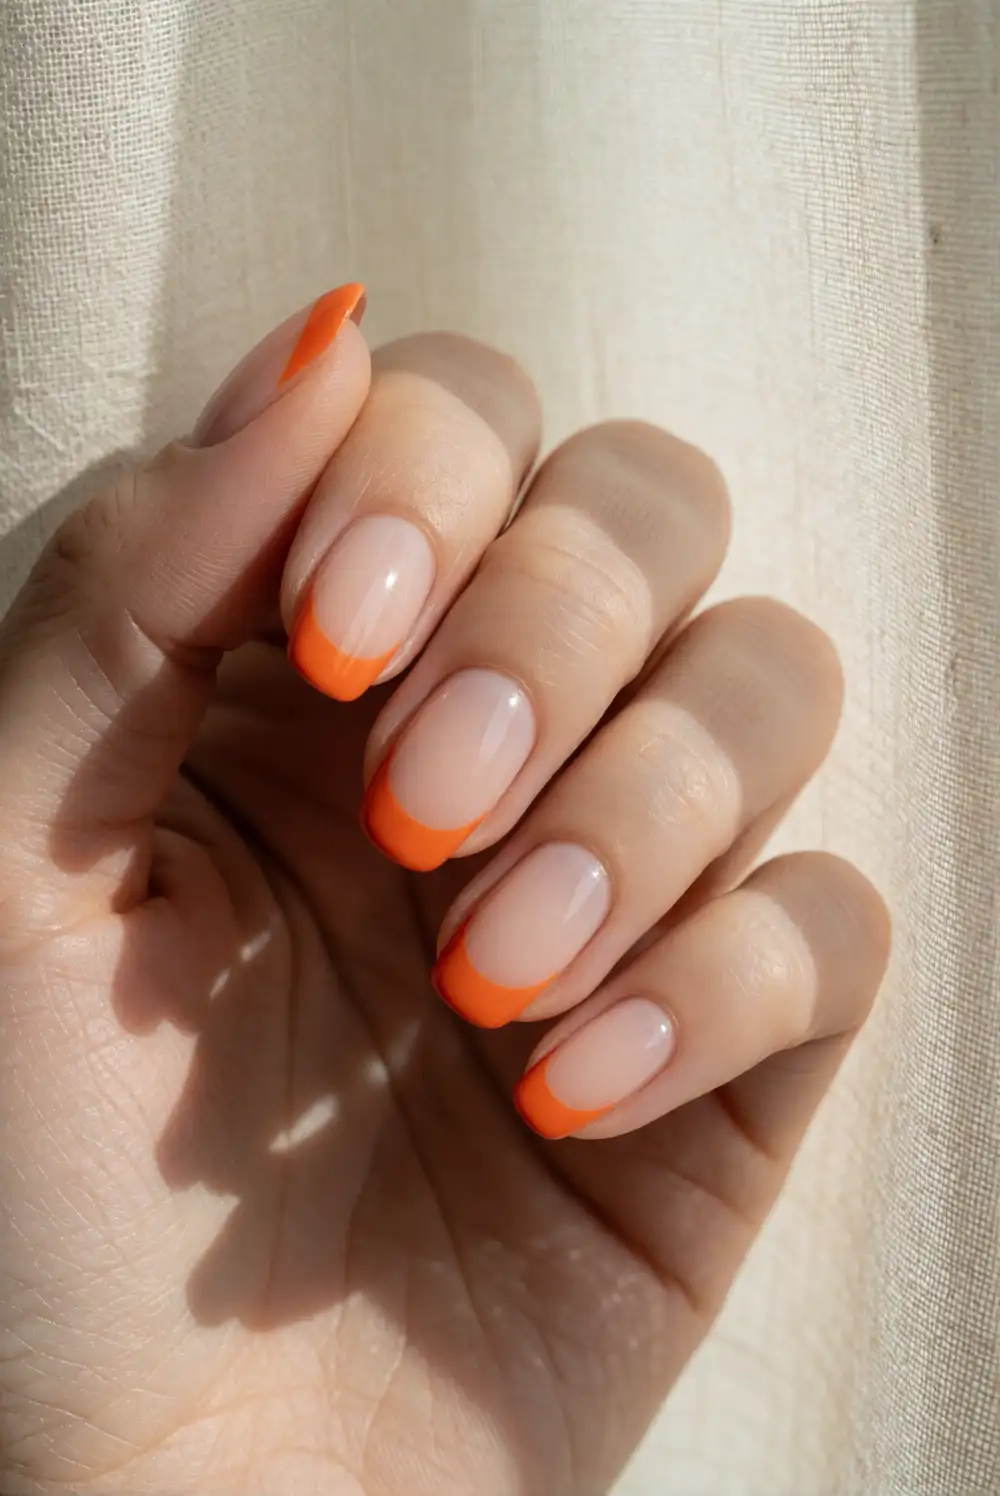
Give a classic French manicure an autumnal update with vivid orange tips over a sheer nude base. Shape your nails and apply a base coat, followed by one or two thin coats of nude polish. Once dry, paint orange across each free edge, following the natural curve of the nail. A fine liner brush offers control, while a French tip guide can help create an even curve. Seal the design with clear top coat after the colored tips have dried.
For a quiet look, choose muted burnt orange and keep the tips narrow. A brighter pumpkin shade and a wider tip make the color more noticeable while leaving the manicure simple. Short, rounded nails work especially well because the curved tip follows their shape naturally. If a line looks uneven, tidy it with a small brush and remover before sealing. Pair the finished nails with a neutral sweater or let them add a seasonal detail to an all-black outfit.
Black and Orange Color-Block Nails
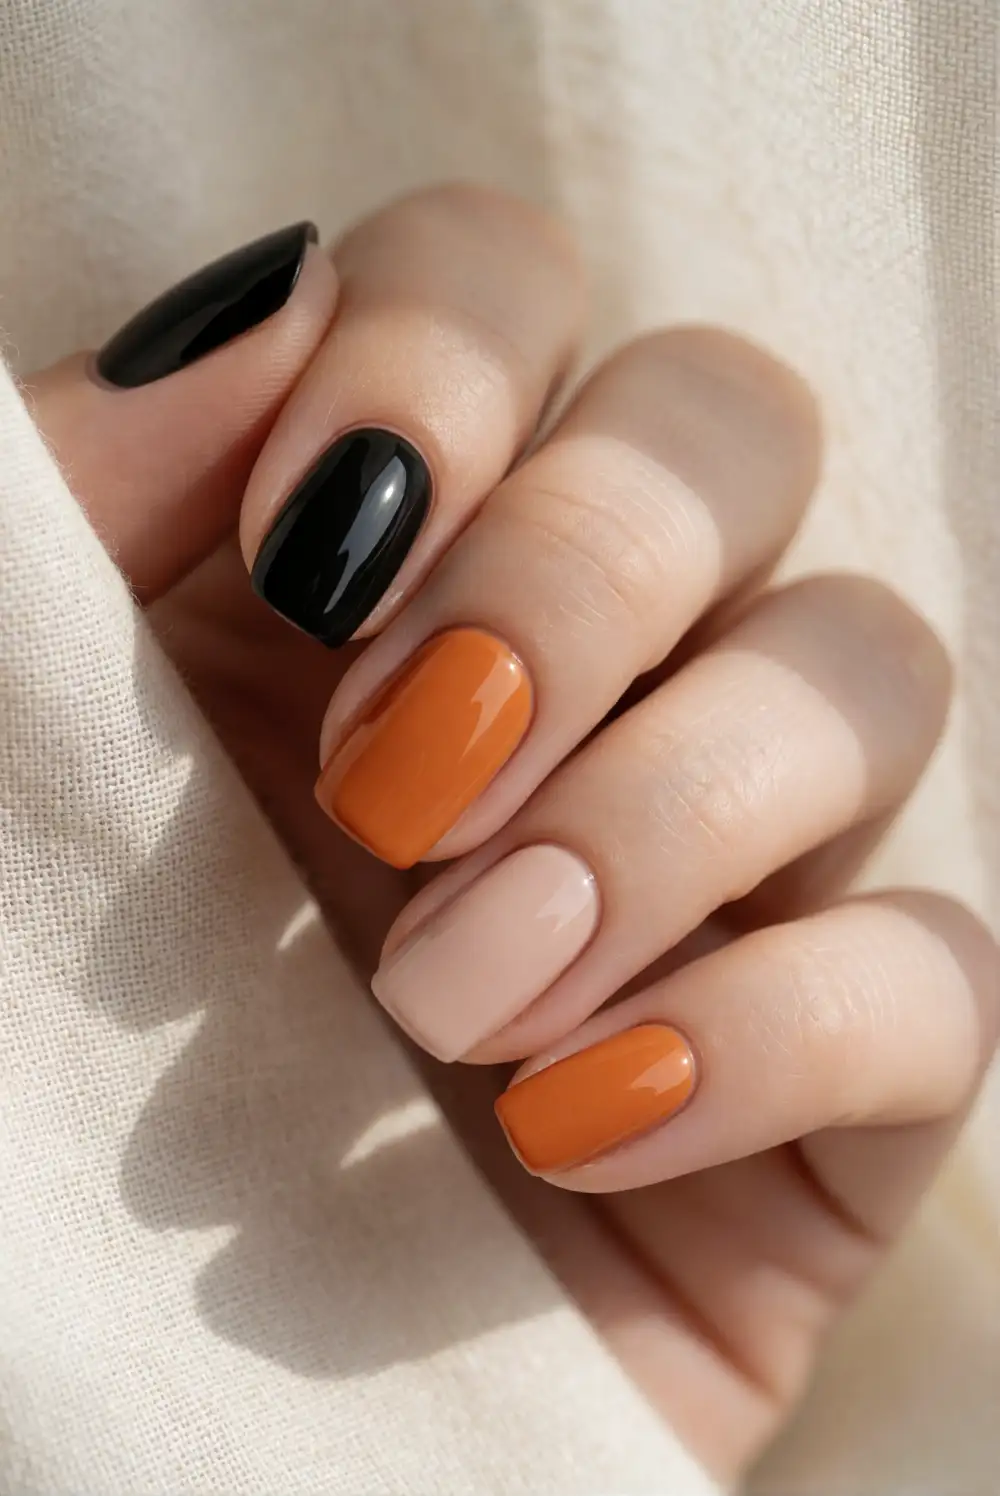
Make a graphic manicure by dividing each nail into simple black, orange, and nude areas. Apply a base coat and a nude polish, then allow it to dry completely. Use narrow striping tape to mark a diagonal or vertical section, paint one exposed area orange, and let it dry before repositioning the tape for a black section. Remove tape carefully and finish with top coat. Working on a few nails at a time helps keep the color boundaries crisp.
Vary the layout from nail to nail while repeating the same colors for a coordinated result. Try a diagonal split on one nail, a black tip on another, and a small orange block near the cuticle on a third. Keep the nude base visible so the design stays light and wearable. If you prefer a softer contrast, choose a muted orange and use black on only a narrow portion. Thin layers help the finished manicure dry smoothly and reduce smudging.
Tiny Pumpkin Accent on Nude Nails
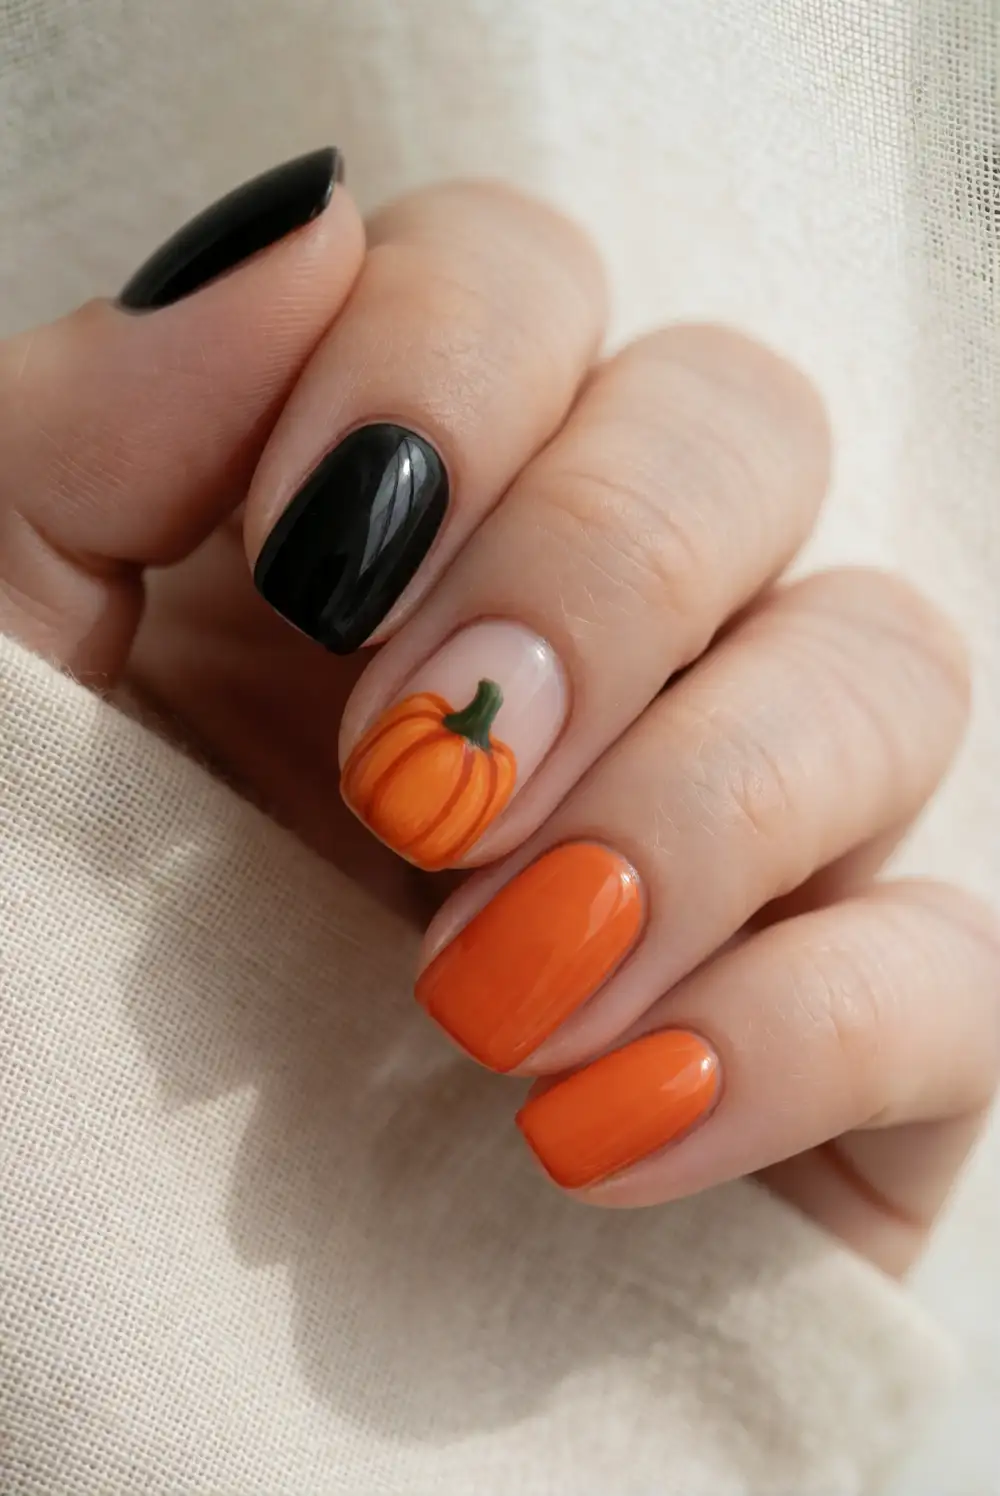
Add a small pumpkin illustration to one nude accent nail and keep the remaining nails a coordinating solid color. Apply a nude base coat and let it dry thoroughly. With orange polish and a fine nail-art brush, paint a small rounded shape near the center of the accent nail. Add a few short curved lines in a deeper orange, then use a thin brush to paint a tiny green stem. Once the design is dry, seal it with a careful layer of top coat.
Choose black, burnt orange, or nude polish for the other nails, depending on how noticeable you want the accent to be. A simplified pumpkin made from a few curved strokes works well on shorter nails, where tiny details can crowd the design. Keep the illustration away from the nail edges to reduce chipping. If freehand painting feels tricky, use a dotting tool to place the orange shape, then gently pull the polish into a pumpkin silhouette with a fine brush.
Black Cat Silhouette Accent Nails
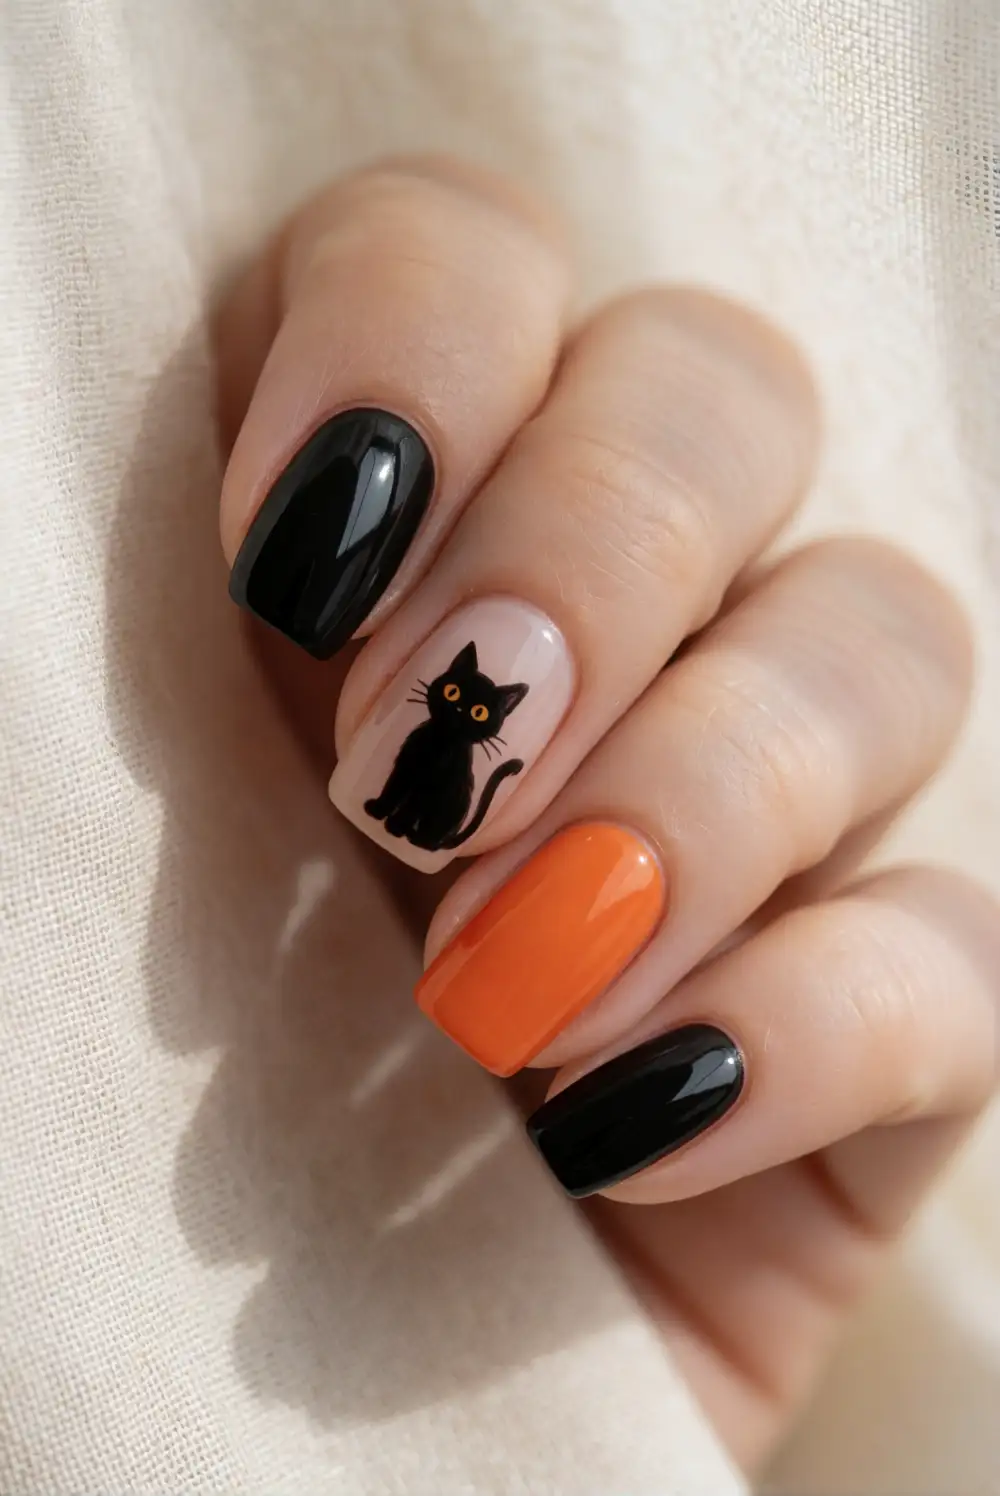
Create a simple black cat silhouette on a nude accent nail using black polish and a fine nail-art brush. Begin with a base coat and a smooth nude layer, then let it dry fully. Paint a small rounded head and body, adding two pointed ears and a curved tail with short, deliberate strokes. Keep the remaining nails glossy black or orange for a seasonal color mix. Allow the illustration to dry before applying a thin clear top coat.
A compact silhouette is easier to paint than a detailed cat face and stays legible on shorter nails. Place it on a ring finger or thumb, where a little more space is available. For a minimal variation, paint only the cat’s head and pointed ears near the tip. You can also switch the background to pale orange for stronger contrast. Use a fine brush to clean the outline while the polish is still workable, and avoid brushing repeatedly over the finished shape.
Crescent Moon and Star Nail Art
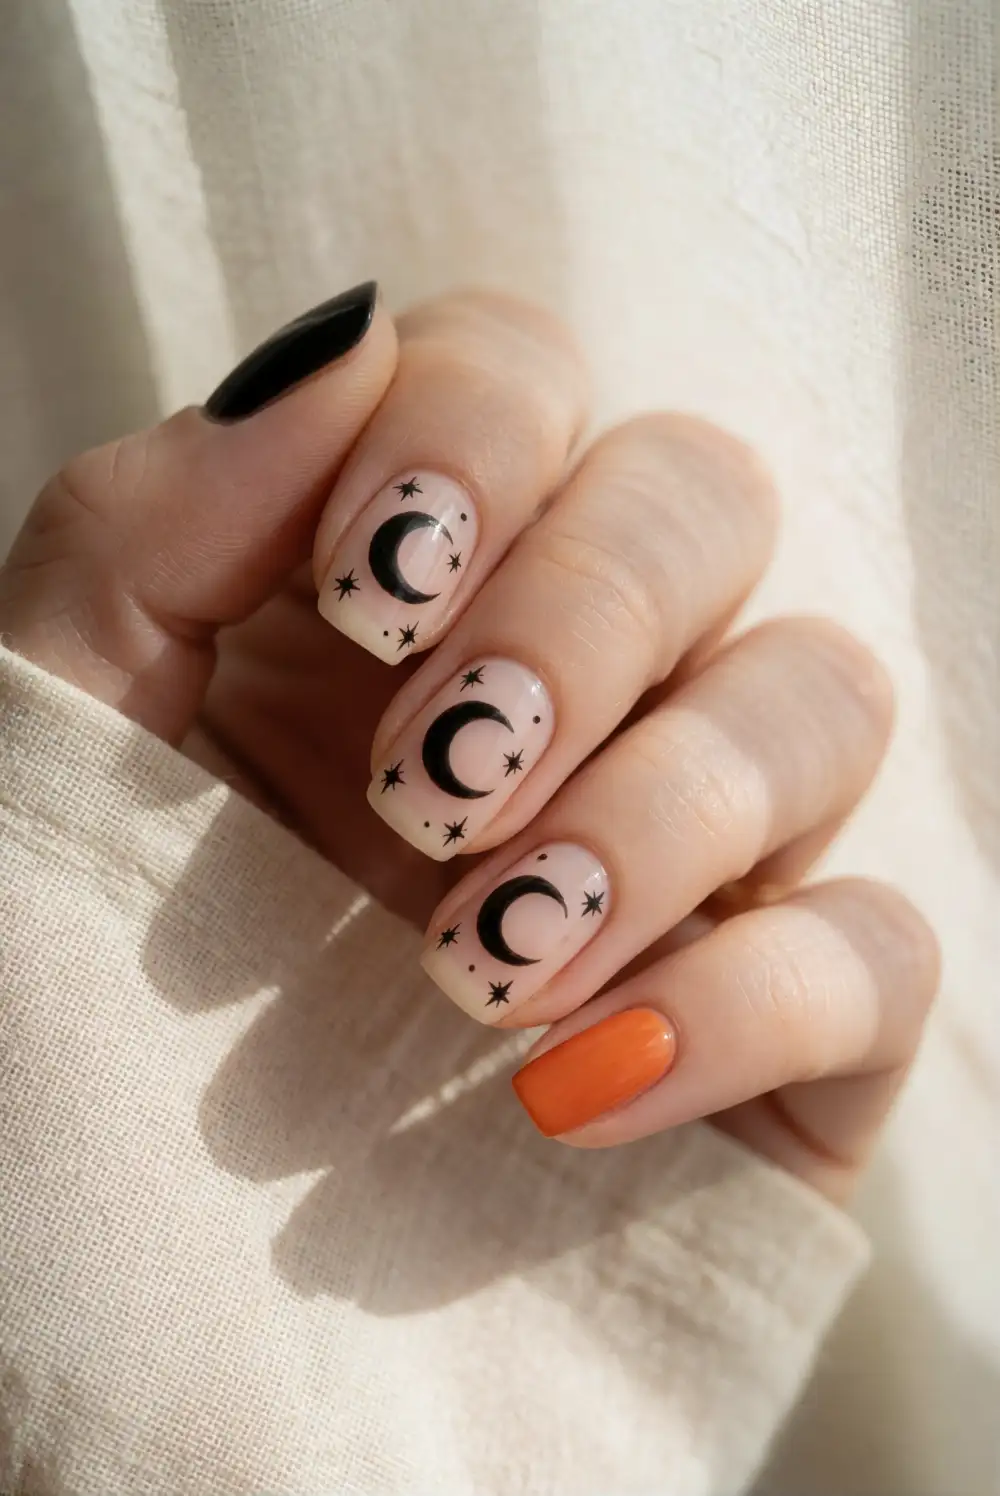
Paint a small crescent moon and a few simple stars over a nude base for a subtle Halloween-night manicure. Apply a base coat and nude polish, allowing the surface to dry before adding details. Use a fine brush and black polish to draw a curved crescent, then create tiny stars with short intersecting strokes. Keep the shapes small and leave plenty of open space around them. Finish with a clear top coat once every detail is dry.
Use orange instead of black for the moon and stars if you want the design to feel brighter, or alternate black and orange details across your accent nails. A single crescent on one nail can look especially understated beside solid black nails. A dotting tool or the tip of a clean toothpick can help place small dots, but use a fine brush for sharper star points. Keep the art near the center of each nail, where it is less likely to wear away quickly.
Nude Nails with Black Spiderwebs
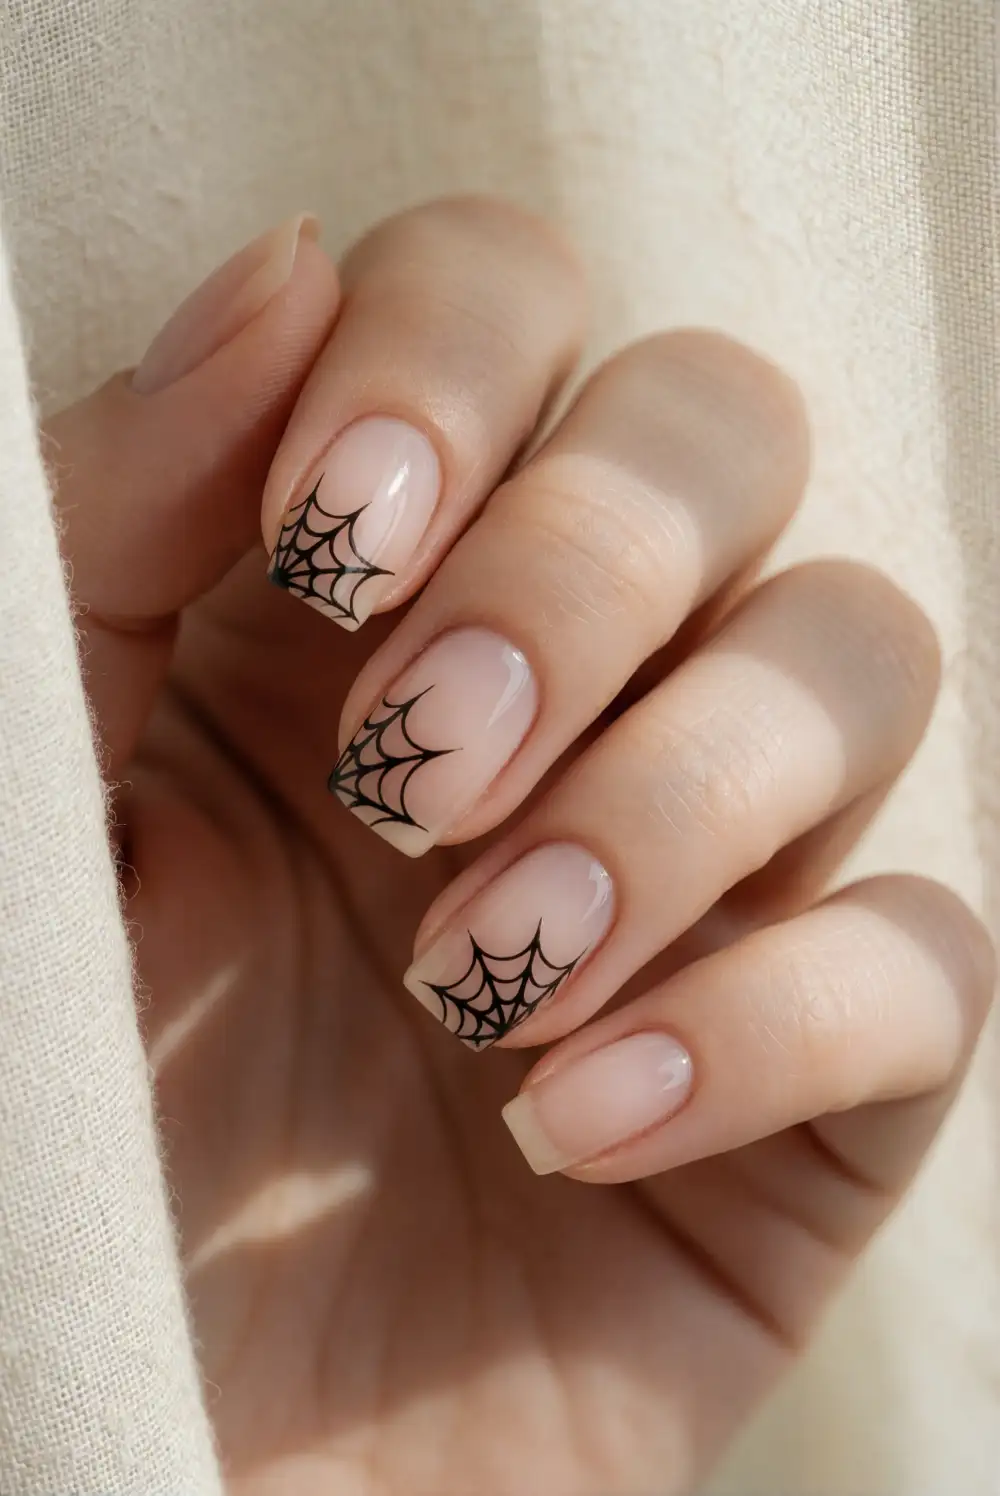
Draw delicate black spiderweb lines over a nude manicure for a graphic seasonal accent. Start with a base coat and a smooth nude polish, then allow the color to dry completely. Use a fine liner brush to paint several thin lines that meet at one point near a nail corner. Connect the lines with small curved strokes to form the web. Keep the pattern on one or two accent nails, and finish with top coat once the black polish has dried.
Place the web near the outer tip for a light, open design, or begin near the cuticle for a more dramatic corner detail. A sheer beige base keeps the black lines easy to see, while a deeper nude gives the look a warmer finish. Use a very small amount of polish on the brush so the lines stay fine. If the full web feels too intricate, paint only a few radiating lines with one curved connector for a simpler variation.
Matte Black Nails with Orange Lines
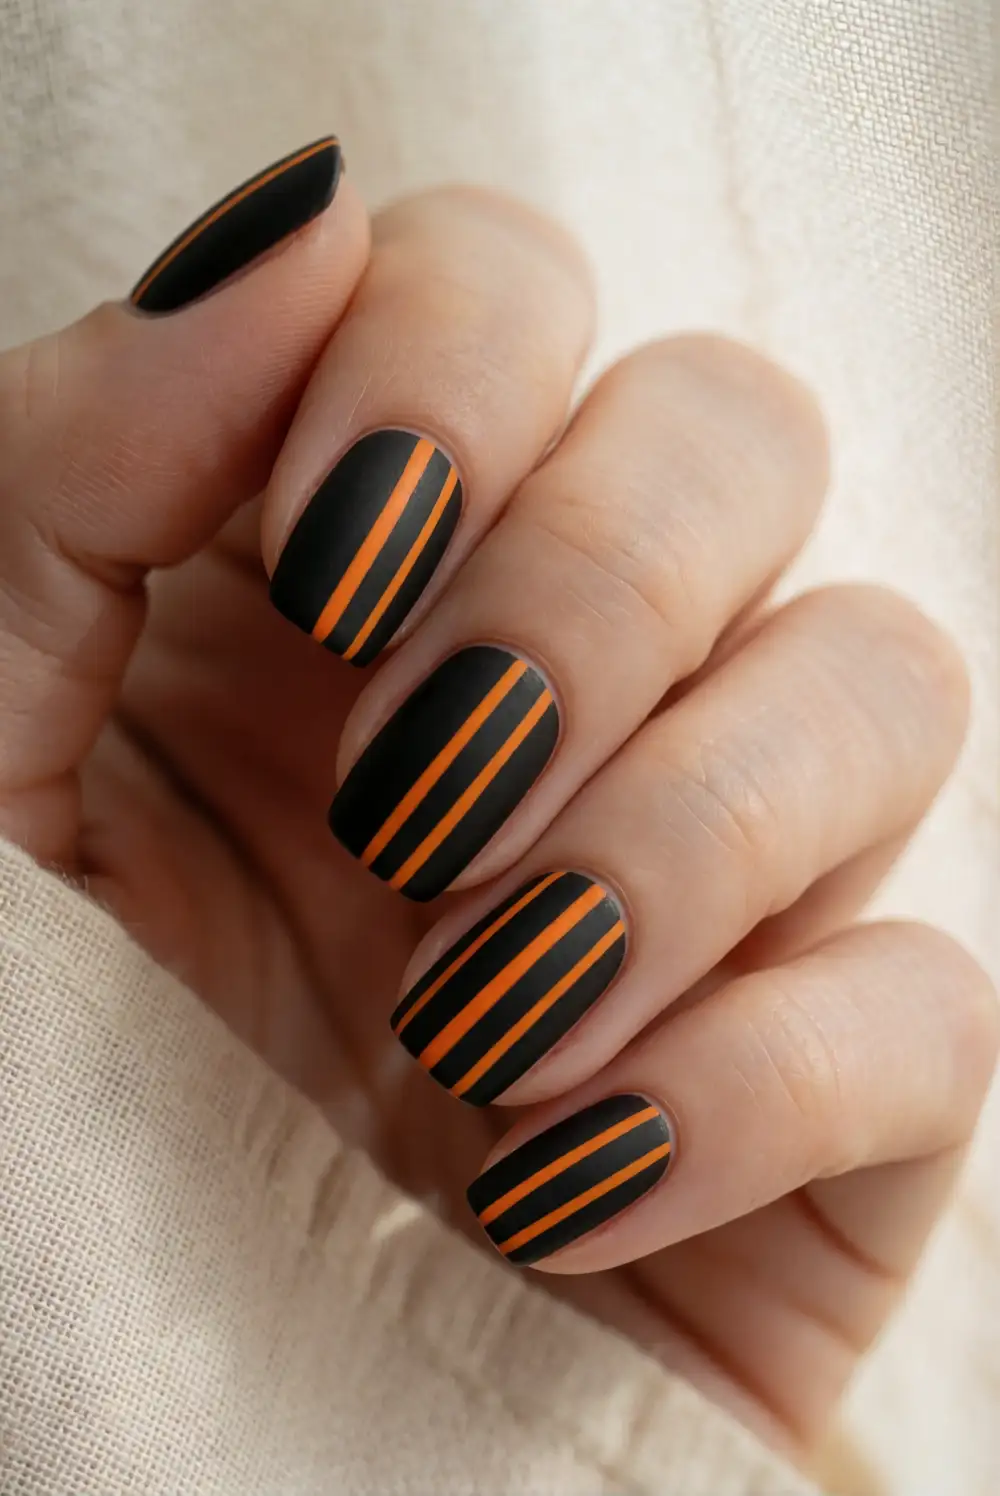
Combine a matte black finish with slim orange accents for a modern manicure that feels seasonal without detailed illustrations. Apply a base coat and two thin layers of black polish, letting each layer dry. Add narrow orange lines using a striping brush, painting a single stripe down the center or along one side of each nail. Wait until the lines are dry, then use a matte top coat over the full design. The contrast between the velvety black and bright orange keeps the look crisp.
Try a different line placement on each nail, such as a diagonal slash, a short tip accent, or a line close to one edge. For a more understated effect, add orange only to the accent nails and leave the rest matte black. A glossy orange stripe can add another finish contrast if you apply it after the matte top coat with a fine brush. Use light strokes and avoid pressing hard, which can drag the base color or make the line uneven.
Negative-Space Checkerboard Nails
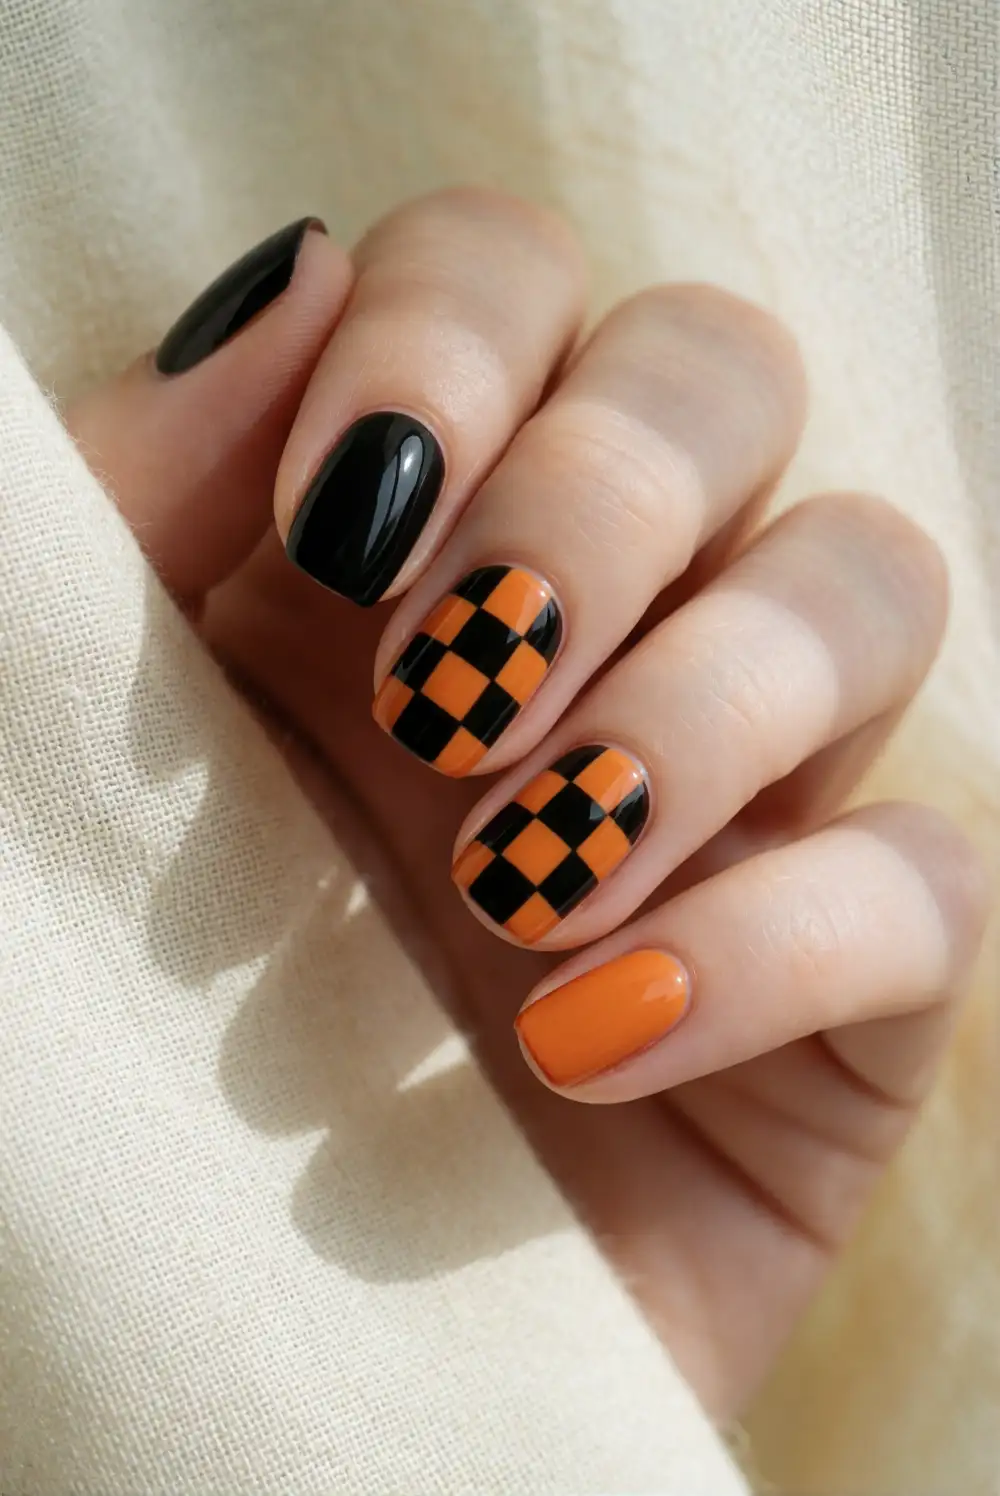
Make a small checkerboard accent by combining black squares with open nude space and a few orange details. Begin with a base coat and nude polish, then let it dry thoroughly. With a fine brush or narrow striping tape, map out a small grid on one accent nail. Fill alternating spaces with black polish and add orange to one or two squares. Keep the pattern compact and seal it with clear top coat after the design has completely dried.
A single checkerboard nail makes the manicure easier to wear and gives the pattern enough room to read clearly. For a softer variation, use a sheer nude base and make the black squares smaller, leaving generous space between them. You can place the accent beside solid orange or black nails, or repeat a simple two-square detail on another finger. Thin coats and a steady brush help prevent colors from bleeding into neighboring spaces. Remove the tape slowly if you use it as a guide.
Copper Glitter on Black and Nude Nails
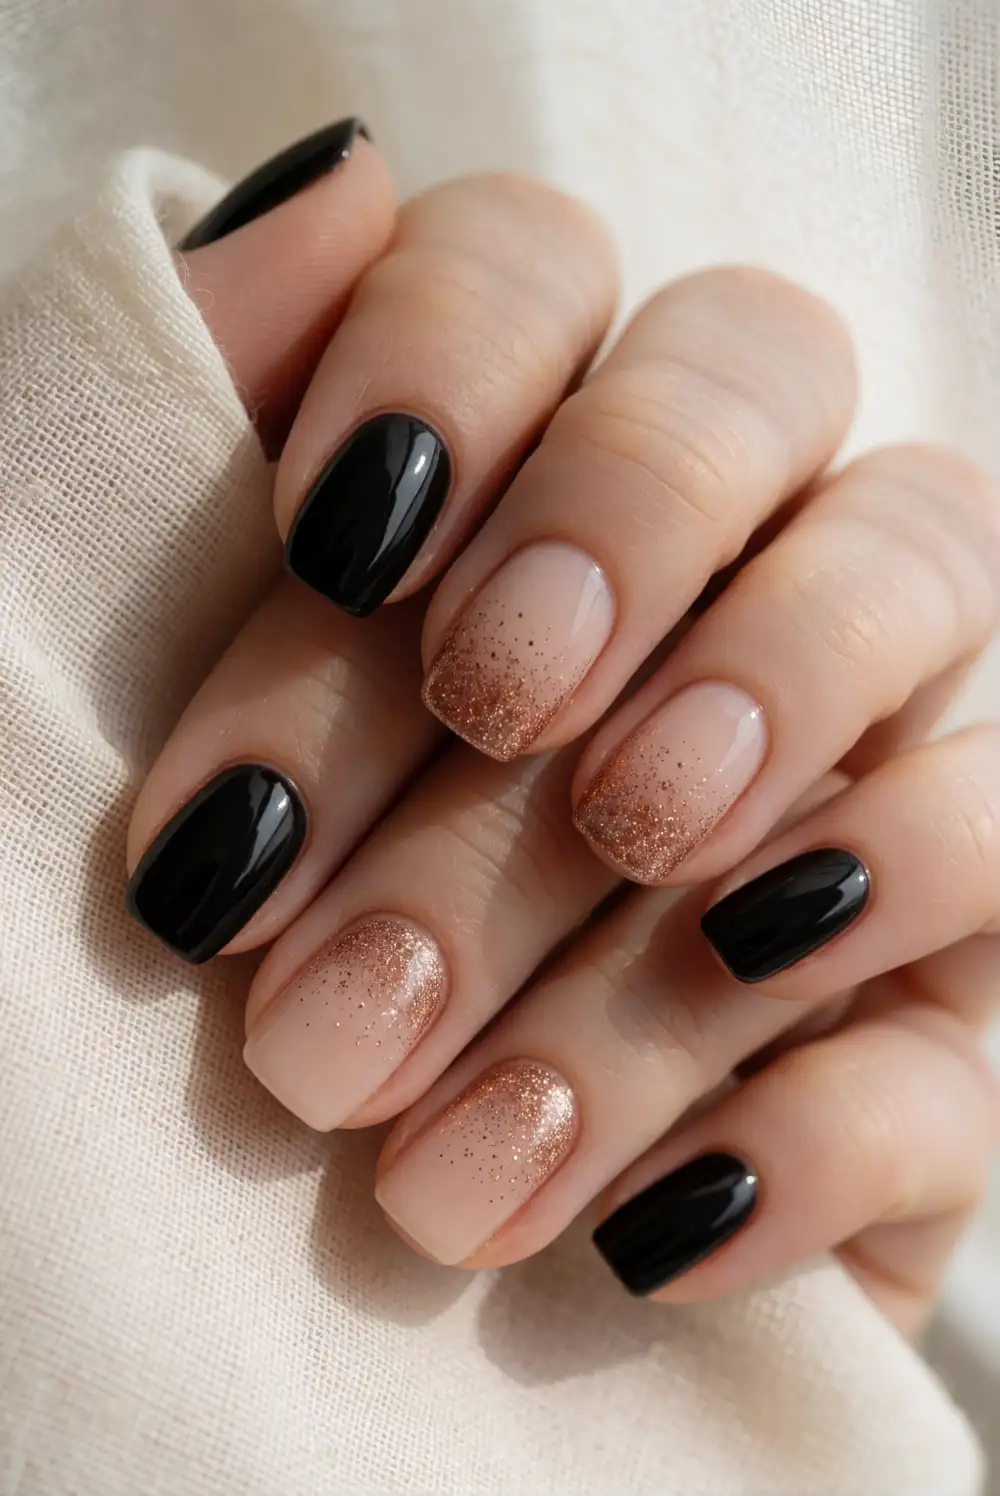
Add a seasonal shimmer with copper glitter layered over a mix of black and nude nails. Apply a base coat, then paint some nails glossy black and the others nude. Once the colors are dry, dab a small amount of copper glitter polish over the tips or lower halves of selected nails. Use a light tapping motion to build the sparkle gradually rather than applying a thick coat. Finish with a smoothing top coat to help the glitter feel even.
Concentrate the glitter on one accent nail for a restrained look, or create a soft gradient by placing more sparkle at the tip and less toward the center. Copper works beautifully with both warm beige nude polish and deep black, making the manicure feel coordinated even when the finishes differ. If glitter polish feels textured, apply a second clear top coat after the first has dried. Keep the glitter placement simple so it complements the color pairing rather than competing with it.
Whether you prefer crisp orange tips, delicate black linework, or a tiny seasonal accent, these Halloween nail ideas make it easy to bring black, orange, and nude tones together. Choose a design that suits your nail length and finish, then personalize the color balance for a manicure you’ll enjoy wearing throughout the season.








