
Celebrate Halloween with understated nail art that feels polished, wearable, and easy to create at home. These simple designs use sheer neutrals, subtle seasonal colors, and small graphic details for a minimalist manicure that still feels festive.
Sheer Black Micro French Tips
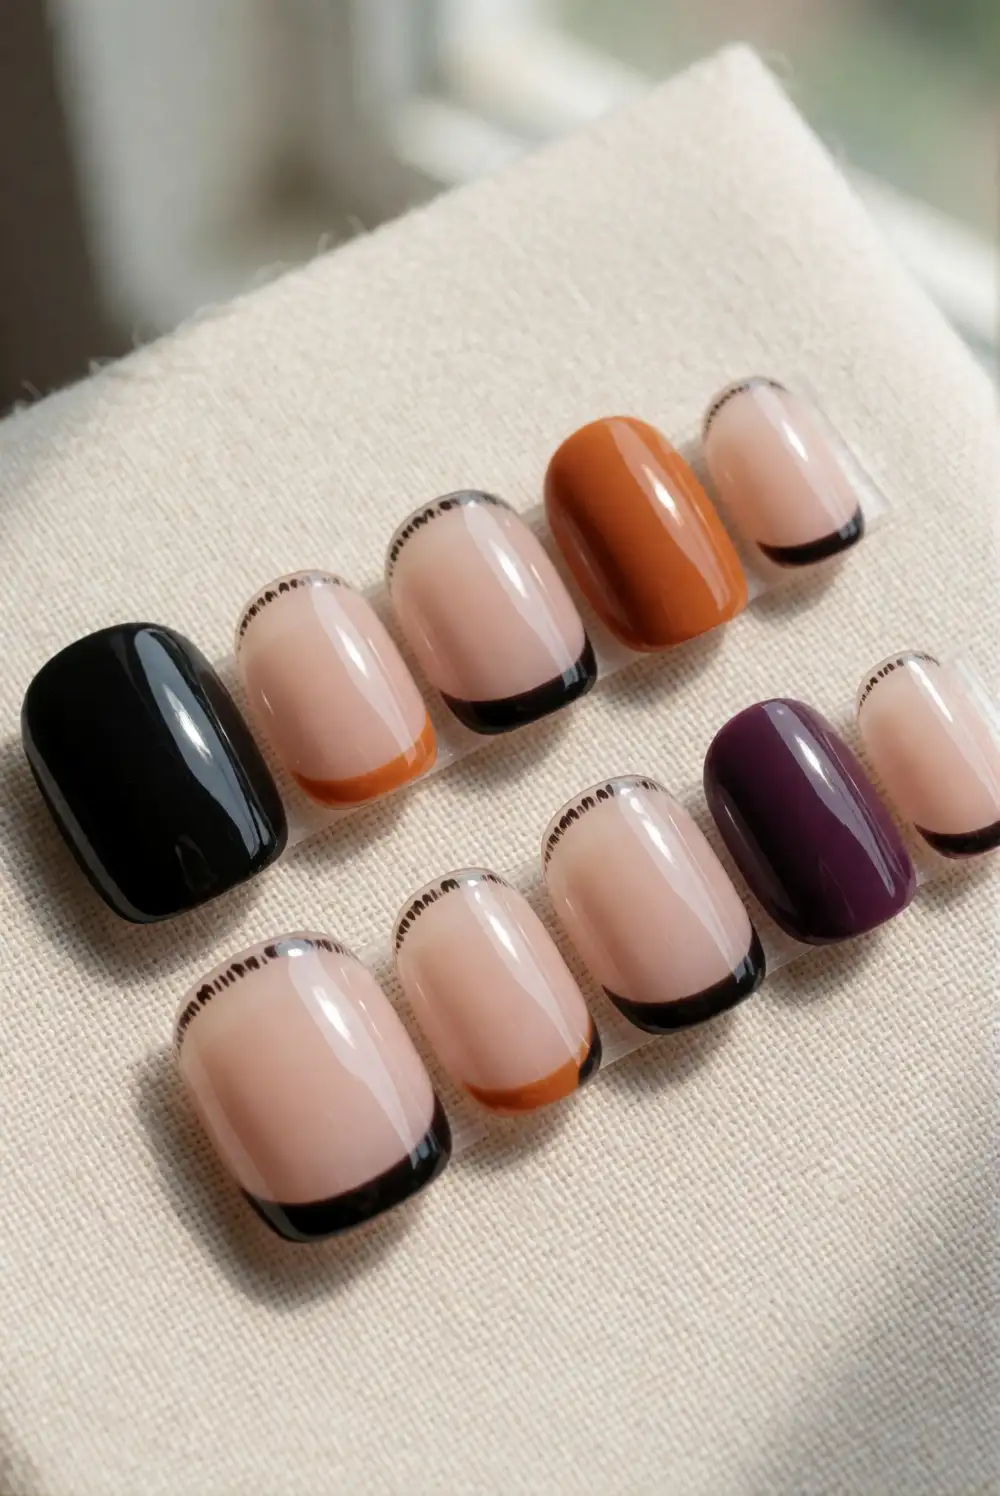
Give a sheer nude manicure a Halloween-appropriate edge with fine black French tips. Apply a clear base coat, then add two thin layers of translucent beige or pink polish. Use a fine nail-art brush to paint a narrow black line along each free edge, following the natural curve of the nail. Finish with a glossy top coat to smooth the design and protect the delicate tips. Short, softly rounded nails make this look especially clean and easy to wear.
Keep the black line especially thin for a quiet, understated finish, or make it slightly wider on one accent nail. A creamy sheer base softens the contrast, while a cooler pink nude gives the manicure a more modern feel. Let each layer dry before adding the next so the fine edges stay crisp. This design pairs easily with everyday outfits and looks polished on its own without extra decoration or seasonal accessories.
One Tiny Ghost Accent Nail
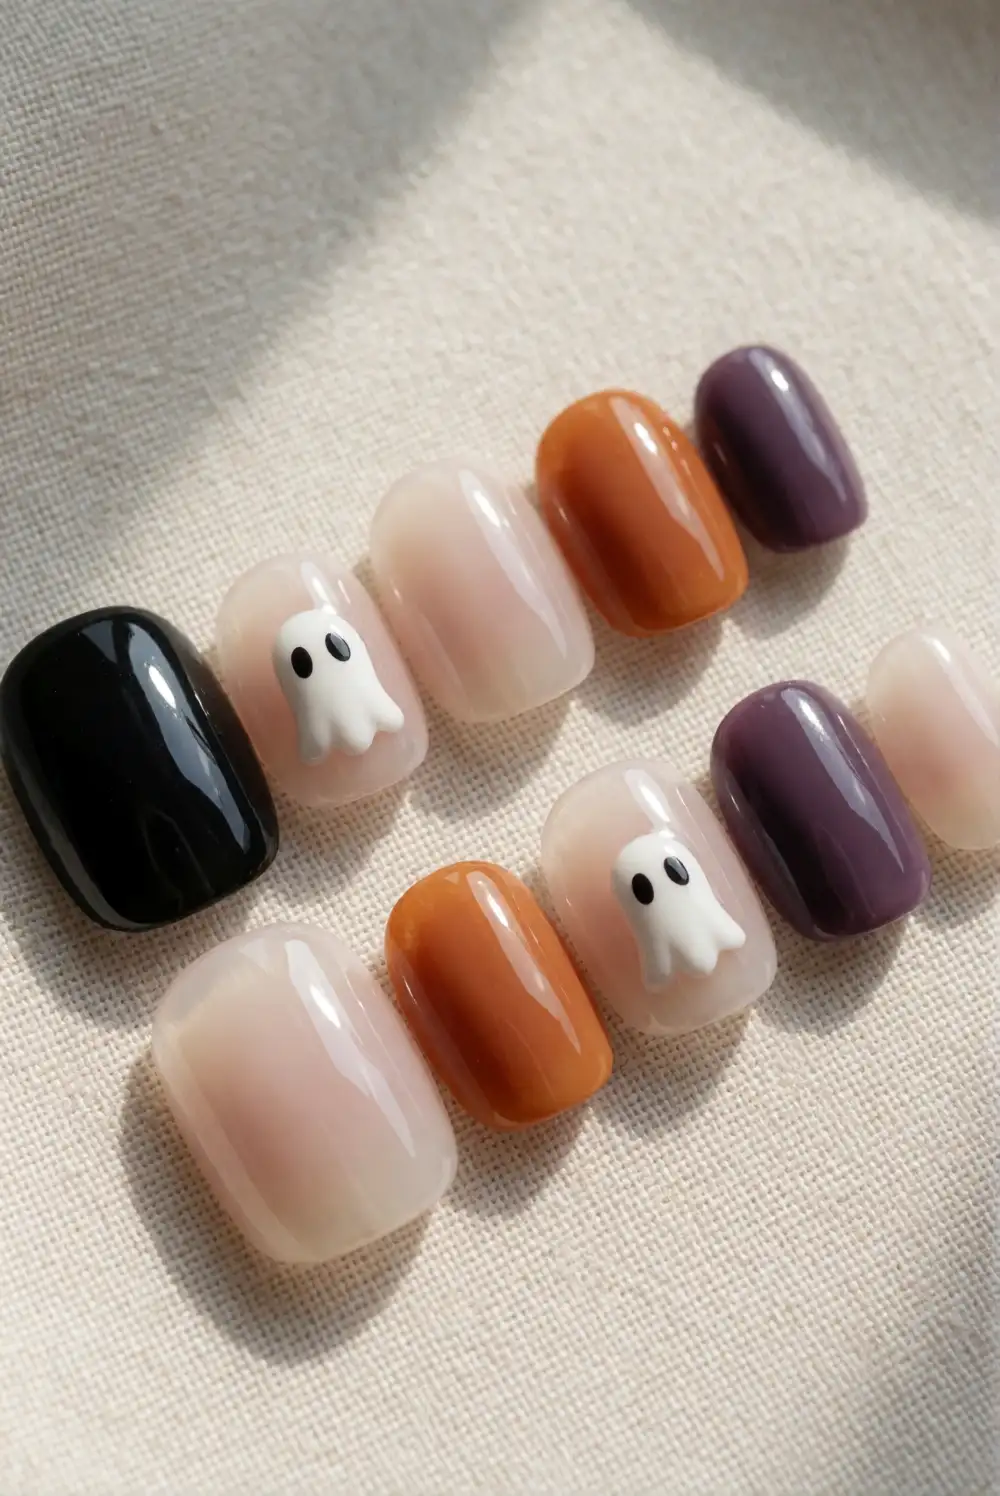
Make a single small ghost the only Halloween motif in an otherwise sheer manicure. Paint every nail with a translucent milky polish and let it dry completely. On one accent nail, use a fine brush to draw a tiny white ghost shape with a rounded top and gently scalloped lower edge. Add two very small black eyes with a dotting tool, then seal the design with clear top coat. Keep the ghost simple and centered for a neat, minimal result.
Choose a nail near the center of the hand for the accent, or place the ghost on a ring fingernail for a familiar, balanced arrangement. A sheer pink or beige base keeps the design soft, while a milky white base makes the ghost blend in more subtly. Use a light touch with the eyes so they remain tiny rather than becoming bold dots. The little motif works well with short nails and neutral clothing.
Burnt Orange Half-Moon Manicure
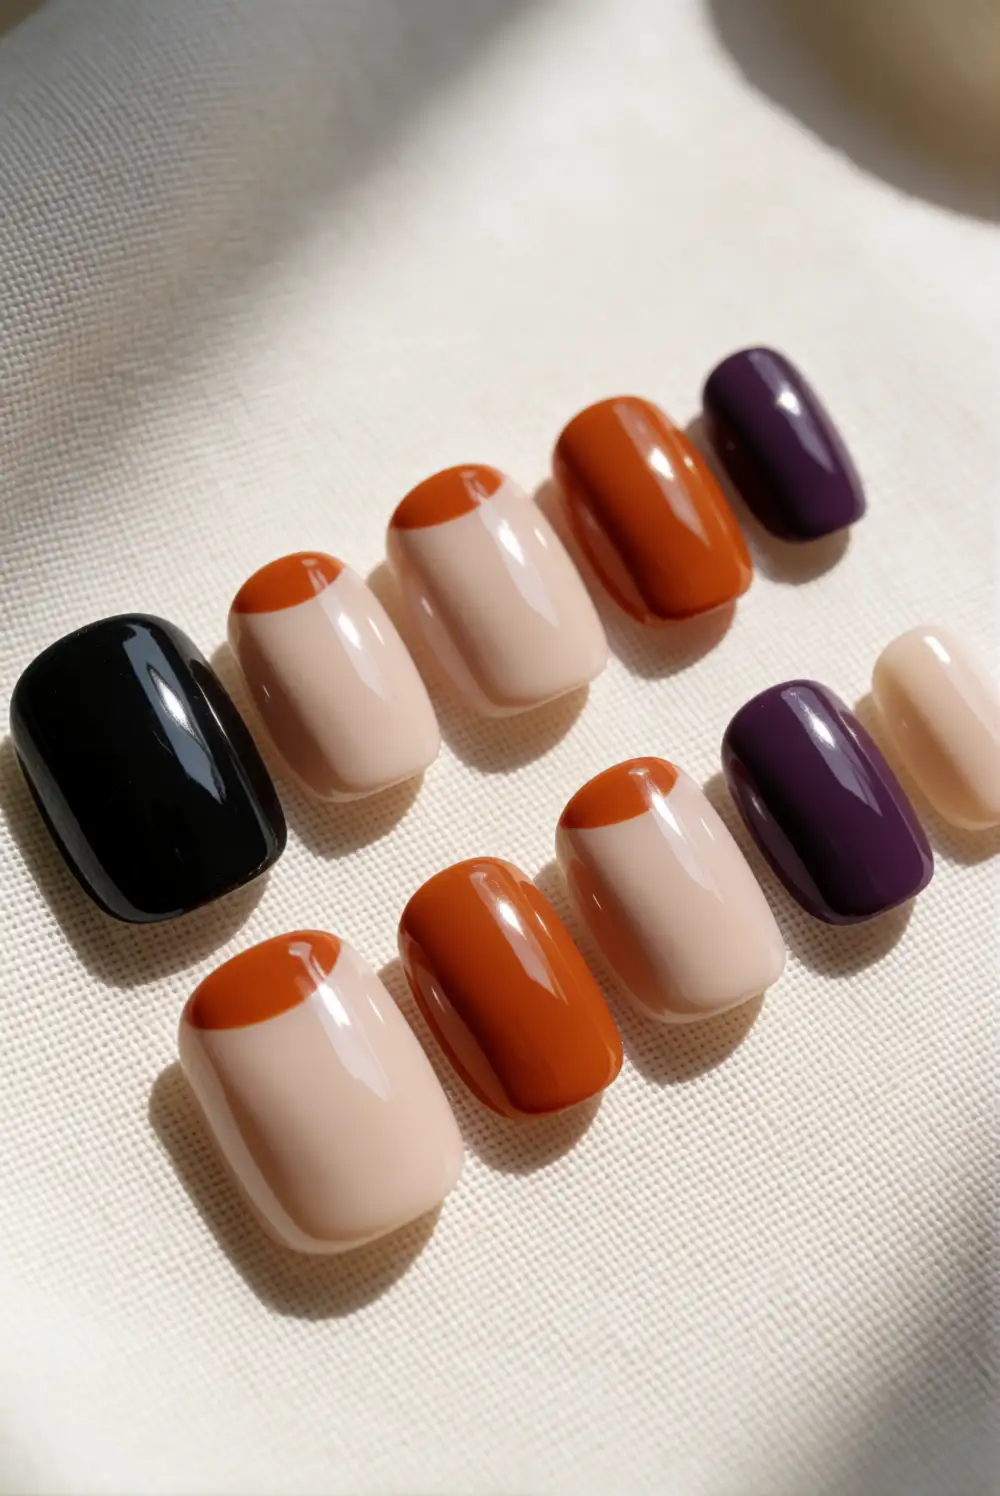
Bring in a warm Halloween color with a small burnt-orange crescent at the base of each nail. Apply a neutral base coat and allow it to dry. Use a fine nail-art brush to paint a curved orange shape just above the cuticle, leaving a slim strip of bare or nude polish between the color and the skin. Keep the crescent shallow and consistent across the nails, then add a glossy top coat once the design is dry.
A muted terracotta shade feels subtle enough for everyday wear, while a deeper pumpkin orange makes the seasonal connection stronger. If painting every nail feels busy, add the crescents to just a few nails and leave the rest nude. Work with small amounts of polish near the cuticle for a tidy curve, and clean the brush between strokes. The warm detail looks especially refined against a creamy beige base and simple gold jewelry.
Minimal Silver Web Corner
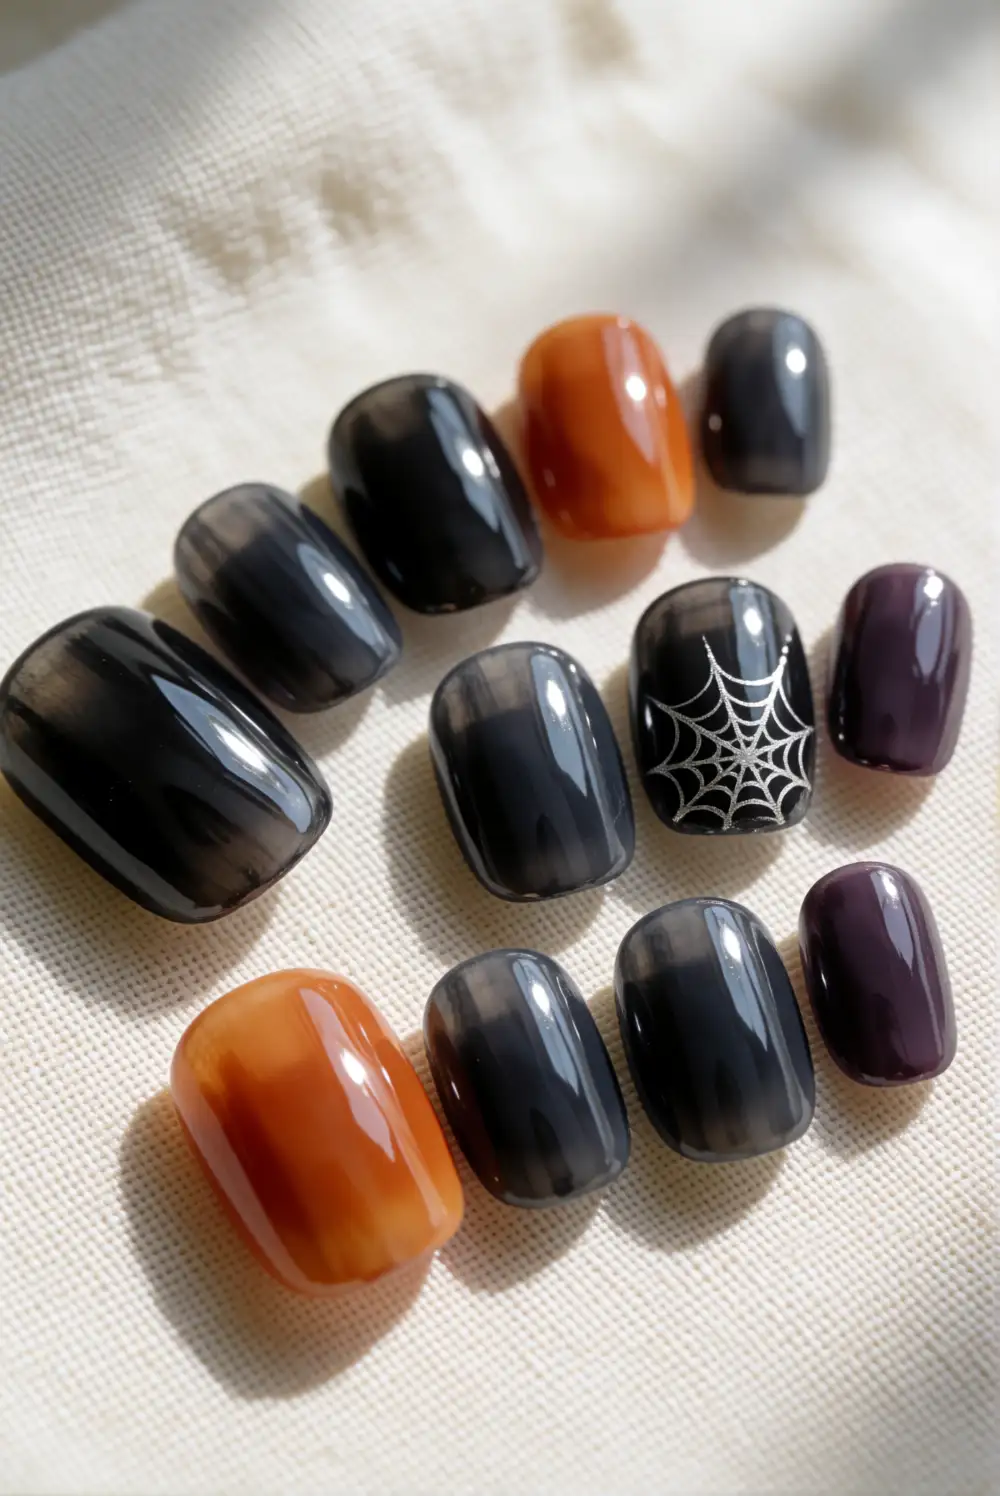
Create a restrained spiderweb detail with fine silver lines in one corner of a single nail. Start with a sheer charcoal, pale gray, or translucent nude base and let it dry. With a thin nail-art brush and metallic silver polish, draw a few short lines radiating from one corner, then connect them with two gently curved cross-lines. Keep the web small and leave most of the nail bare. Finish with a clear top coat after the silver polish sets.
For a barely-there effect, choose a fine shimmer silver that catches the light without looking glittery. A charcoal base gives the lines more contrast, while a nude base makes the design feel especially delicate. Place the web near the tip or cuticle, but use the same corner on each decorated nail for a considered look. One accent nail is enough to suggest the Halloween theme without covering the manicure in detailed artwork.
Glossy Black Negative-Space Stripes
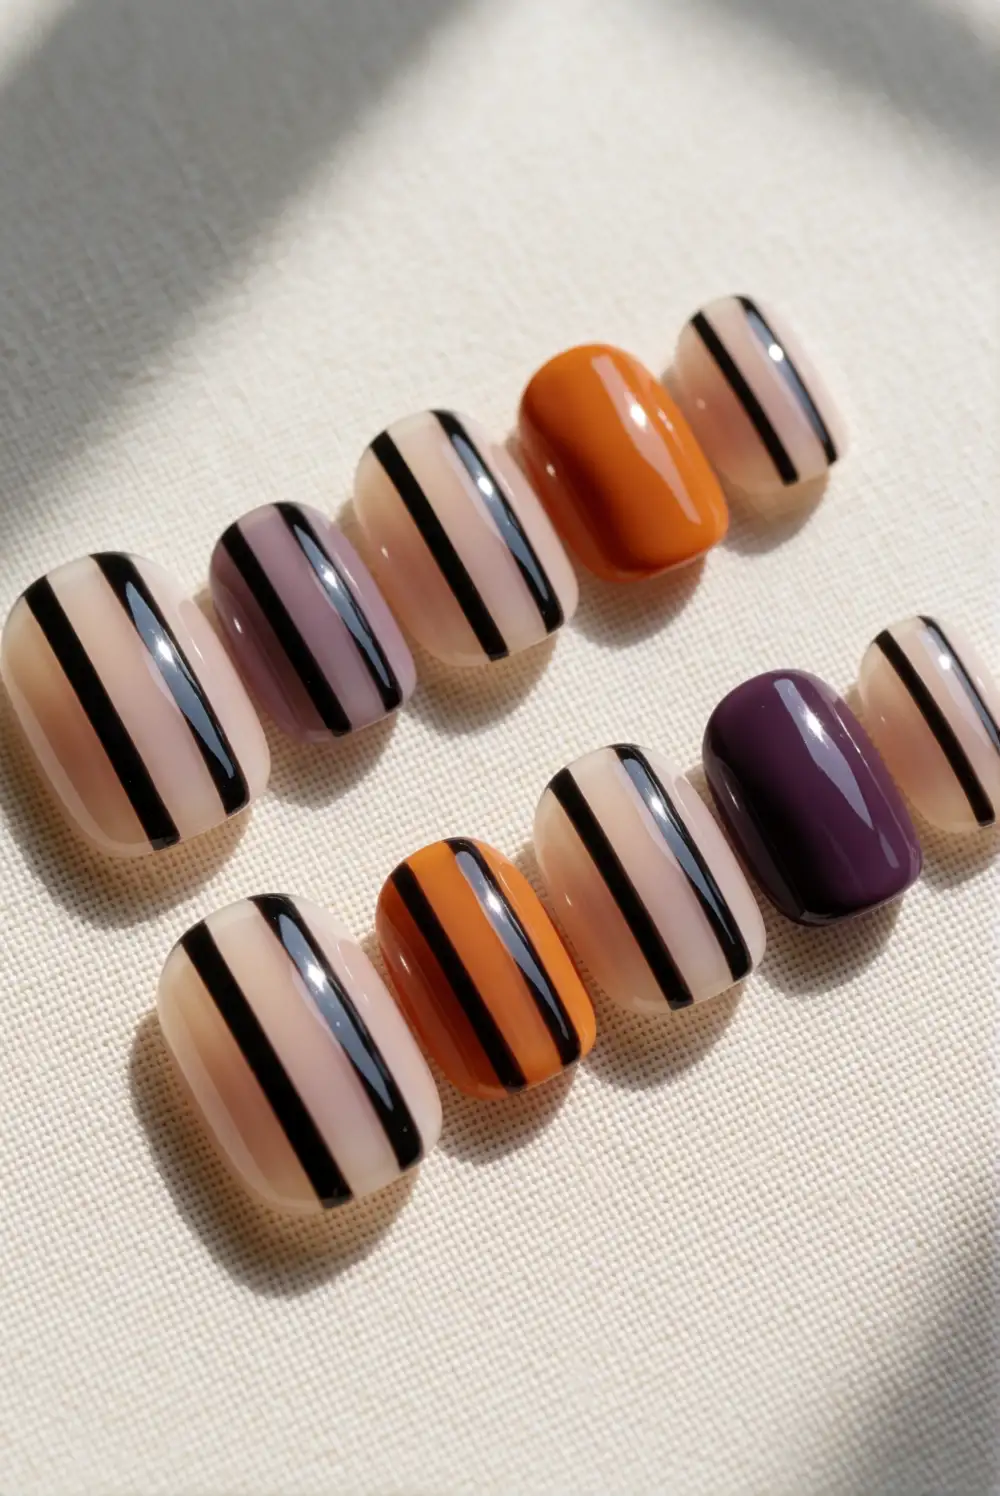
Use slim black lines and bare space to create a graphic manicure with a Halloween feel. Apply a clear or translucent nude base, then let it dry fully. With a fine brush, paint one or two narrow diagonal stripes across each nail, leaving generous gaps between them. Vary the stripe length slightly to follow each nail’s shape, but keep the lines thin and simple. A glossy top coat brings the clear base and black polish together in a smooth finish.
For a more subtle version, decorate only two nails and leave the others in sheer nude polish. You can also make the stripes vertical or gently curved while keeping the same sparse layout. A steady hand helps, but nail-art tape can guide clean lines; remove it carefully before the polish dries. Choose a soft pink base for a delicate contrast or a beige base for a warmer, more natural-looking manicure.
Single Bat Silhouette Accent
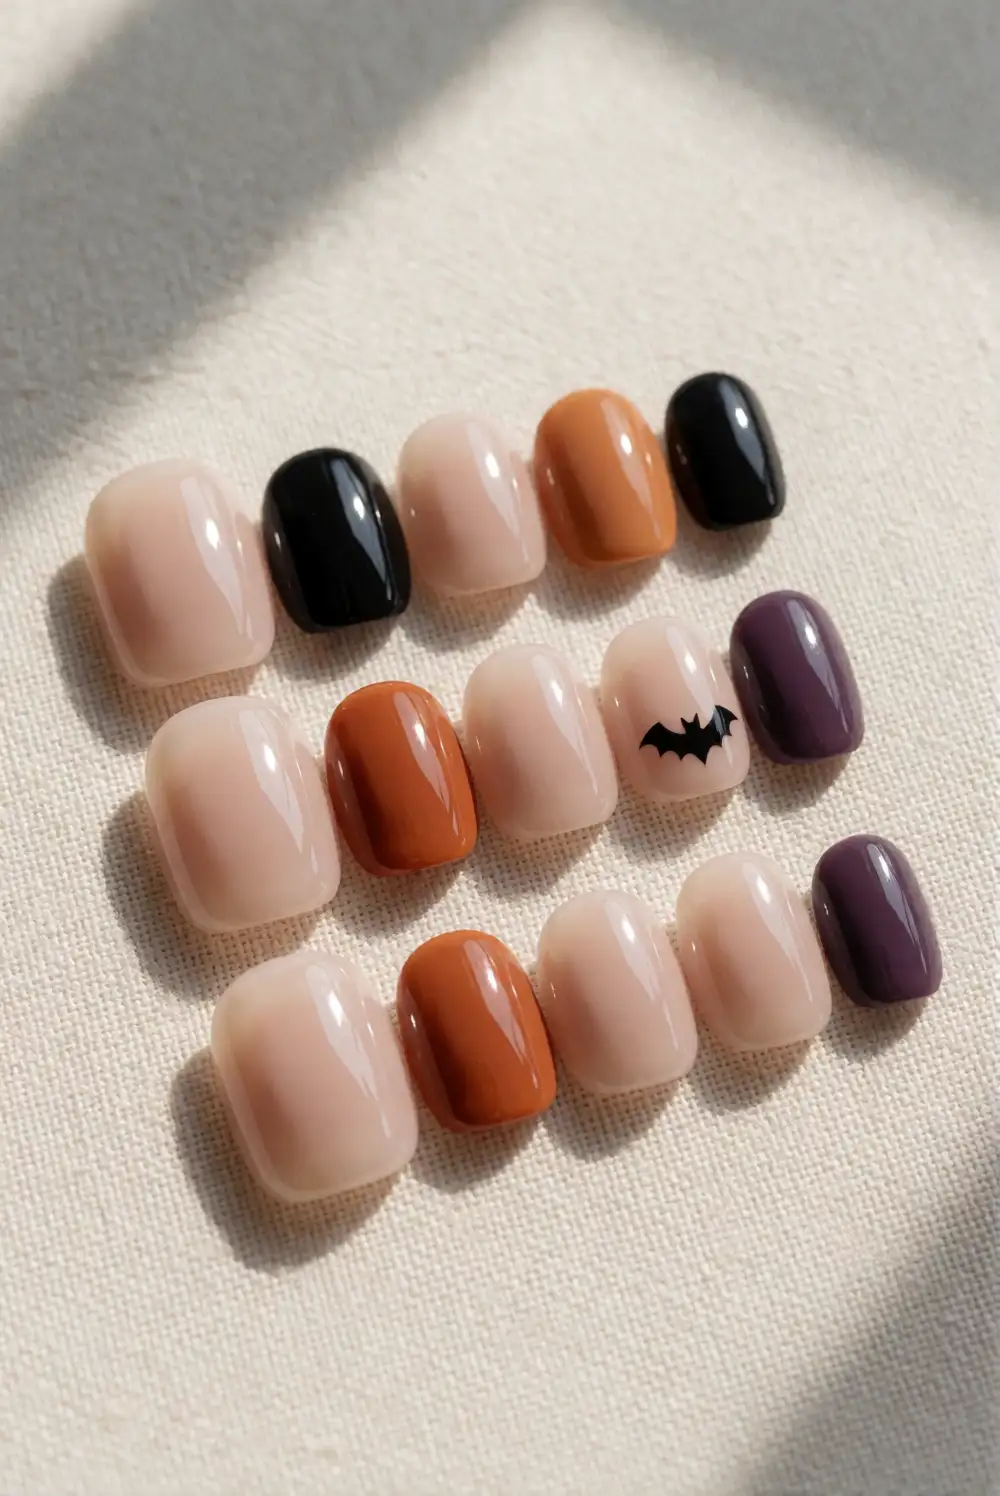
Add a small black bat silhouette to one nail while keeping the rest of the manicure neutral. Paint the nails with sheer beige or pale gray polish and allow the base to dry. On one accent nail, use a fine brush to create a tiny central body with two simple pointed wings. Keep the shape compact and graphic rather than adding small details. Once the black polish is dry, seal all the nails with a clear top coat for an even finish.
A bat on a ring fingernail keeps the design easy to notice without making the whole manicure feel themed. For the most minimal look, use a soft nude base and make the silhouette no larger than a small accent near the center. A muted lavender base adds a quiet seasonal color while still pairing well with black. If freehand painting feels tricky, use a nail-art stencil and remove it gently before the polish fully sets.
Muted Purple Dotted Tips
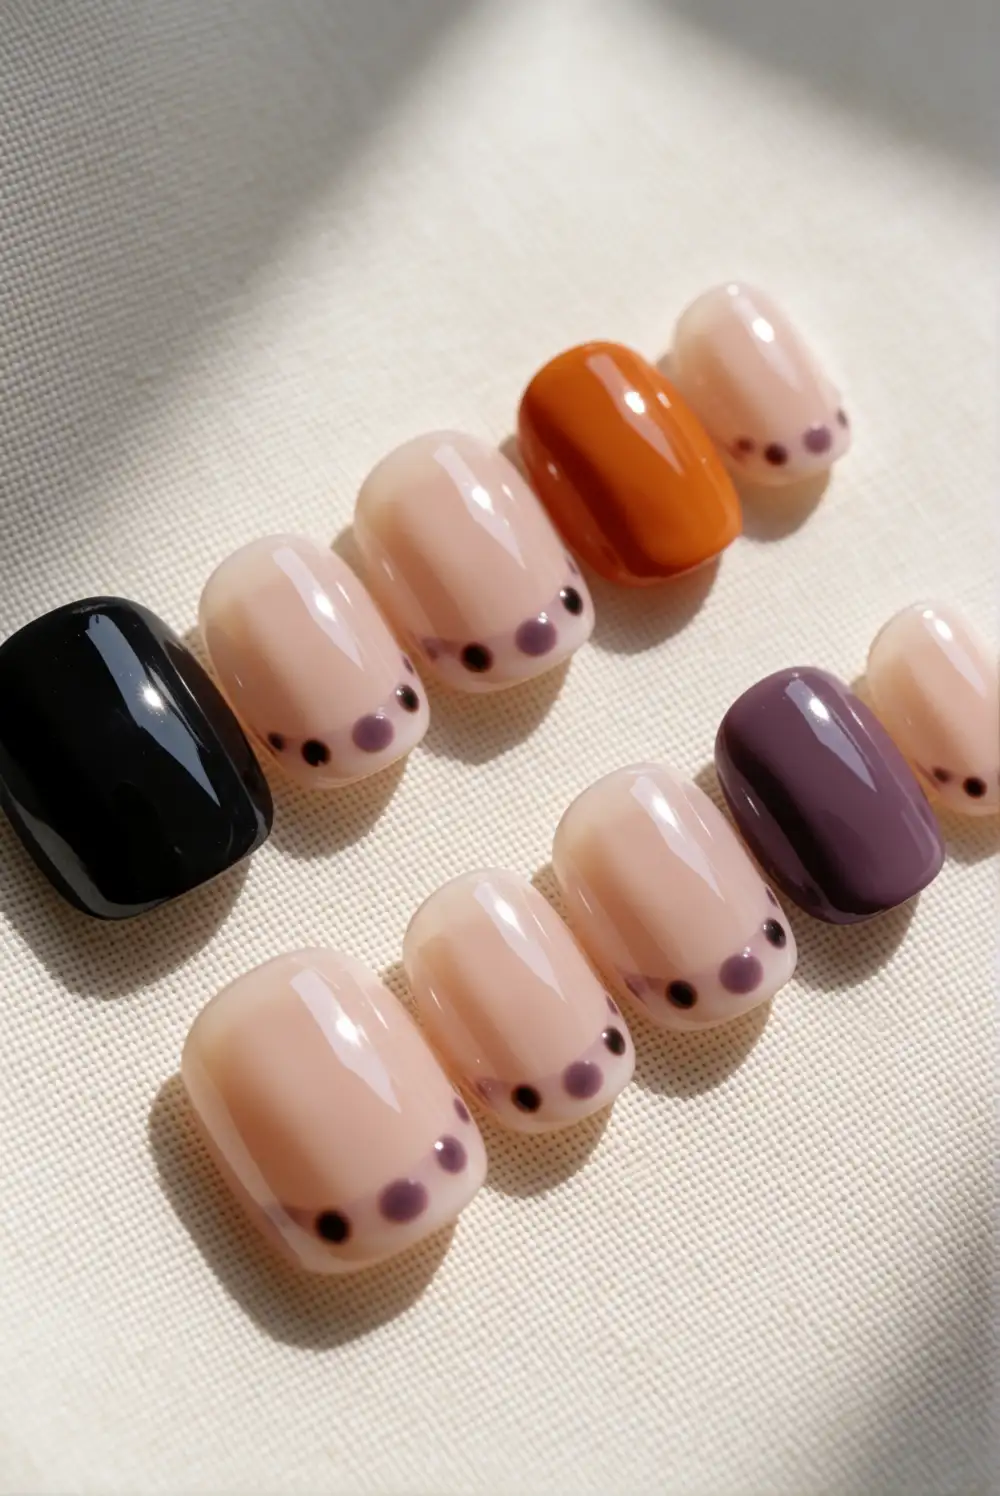
Give a neutral manicure a subtle seasonal finish with tiny muted-purple dots along the tips. Apply a sheer nude polish and let it dry. Dip the end of a dotting tool or the rounded tip of a toothpick into dusty plum polish, then place a small row of dots near the free edge of each nail. Keep the dots evenly spaced and use a light touch so they remain delicate. When the color is dry, add a glossy top coat.
Dusty lavender keeps this design gentle, while a deeper plum gives it a slightly moodier feel. For a particularly minimalist arrangement, dot only a few nails and leave the others plain. Use the same number of dots on each decorated nail to create a tidy visual rhythm, or let the row taper toward one side. This simple detail is easy to refresh between seasons by switching the purple polish for another muted color.
Matte Charcoal With Glossy Tips
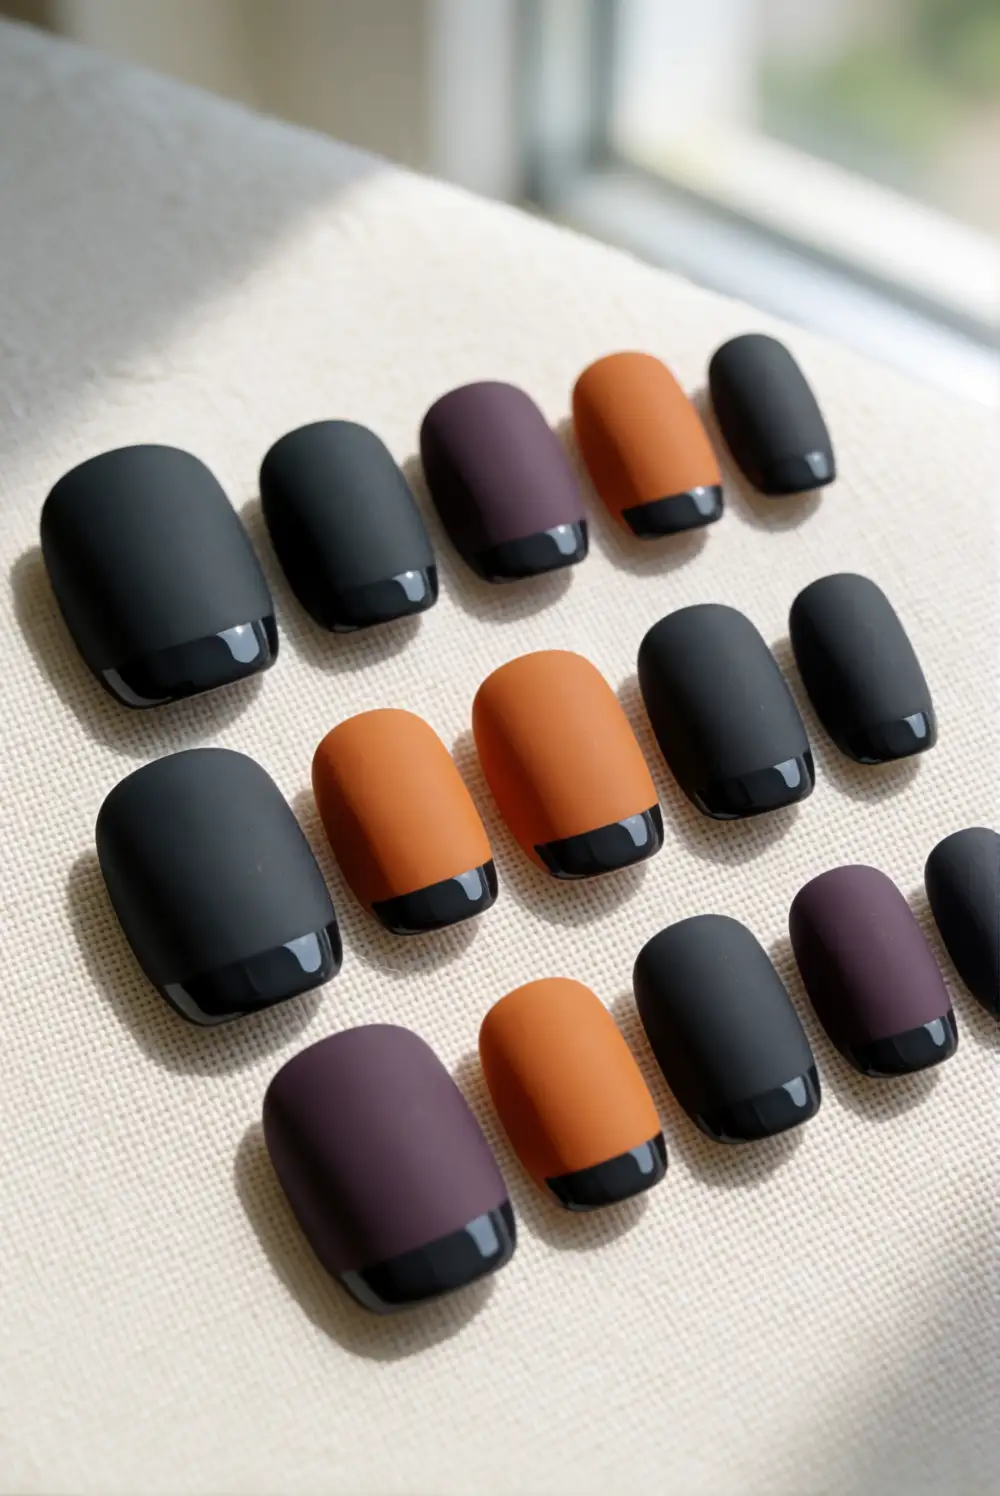
Pair two finishes of the same dark shade for a polished, understated Halloween manicure. Apply charcoal polish to each nail and let it dry completely. Brush on a matte top coat, then carefully paint a narrow strip of glossy top coat along the free edge, as if creating a tone-on-tone French tip. Keep the glossy section slim so the contrast comes from texture rather than a change in color. Allow the finish to settle before handling anything.
A soft charcoal shade looks more subtle than jet black and suits short nails particularly well. If painting a clean edge by hand is difficult, guide the glossy strip with nail-art tape and lift it while the top coat is still workable. You can use this finish on every nail or reserve it for a few accents. The matte-and-shine combination feels intentional while staying simple enough to wear beyond Halloween.
Tiny Crescent Moon Nail Art
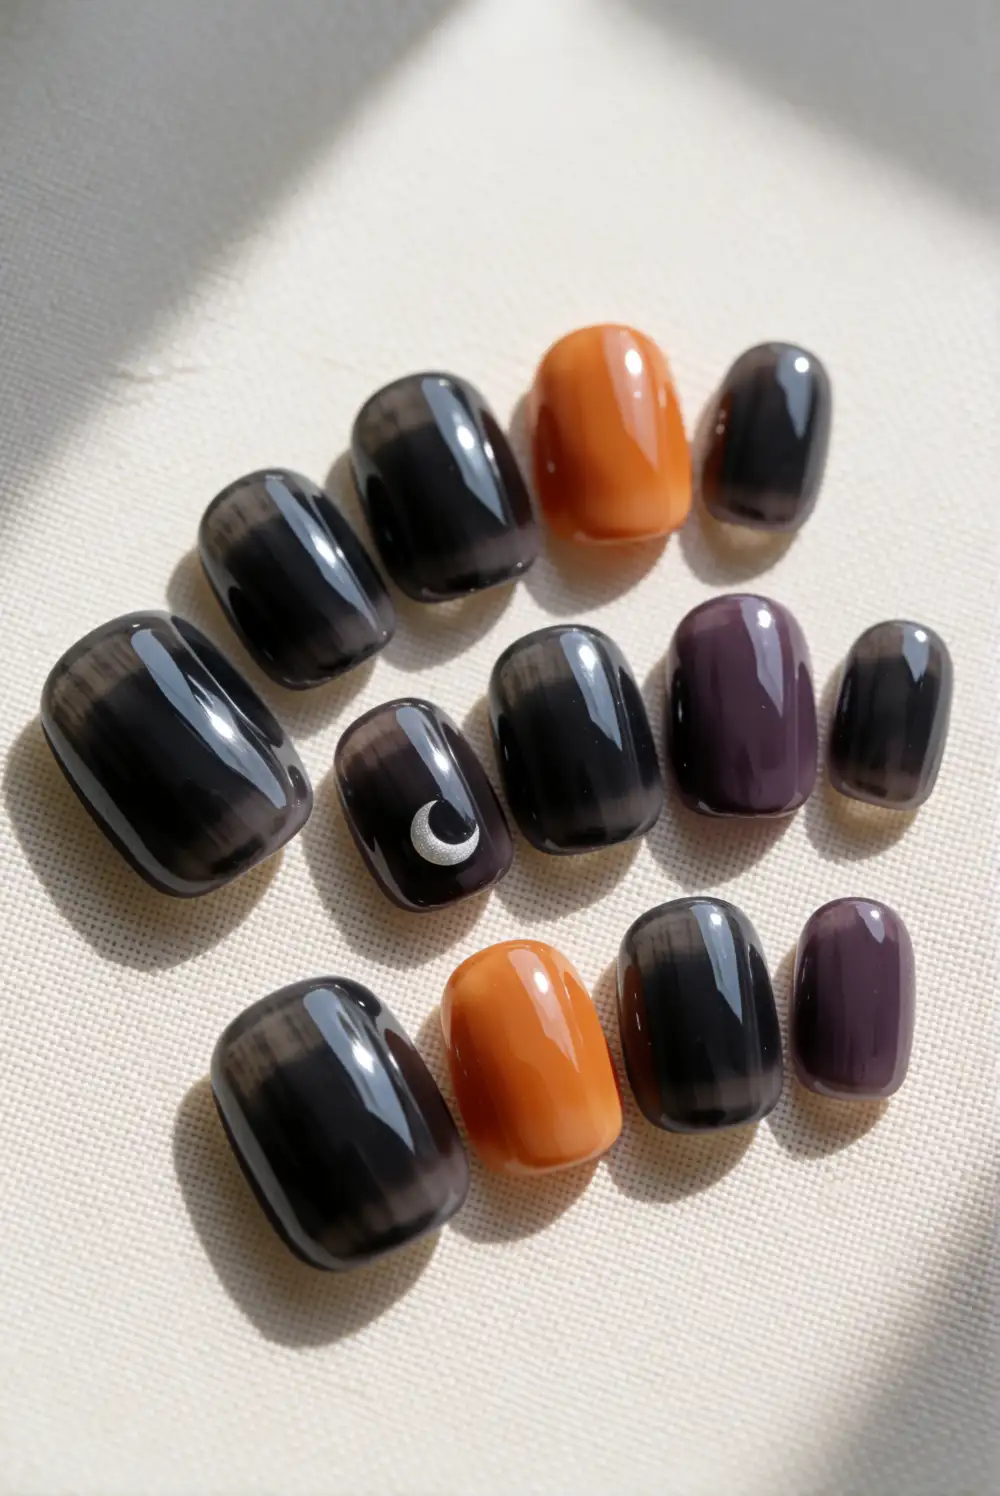
Paint a tiny crescent moon on one or two nails for a quiet nod to Halloween night. Begin with a sheer charcoal or deep plum base and let it dry. Use a fine brush to draw a small curved crescent in pale cream or soft silver, keeping it near one side of the nail rather than filling the center. Let the motif dry, then apply a glossy top coat to smooth the surface and protect the fine shape.
On a translucent nude base, the same moon looks especially delicate and less dramatic. Choose silver for a cool, reflective accent or cream for a softer contrast. Keep the moon small and repeat its placement on any additional accent nails to make the set feel cohesive. This design pairs naturally with simple black clothing, but it is subtle enough for a neutral wardrobe and can remain in rotation after the holiday.
Soft Nude Nails With Orange Side Swipes
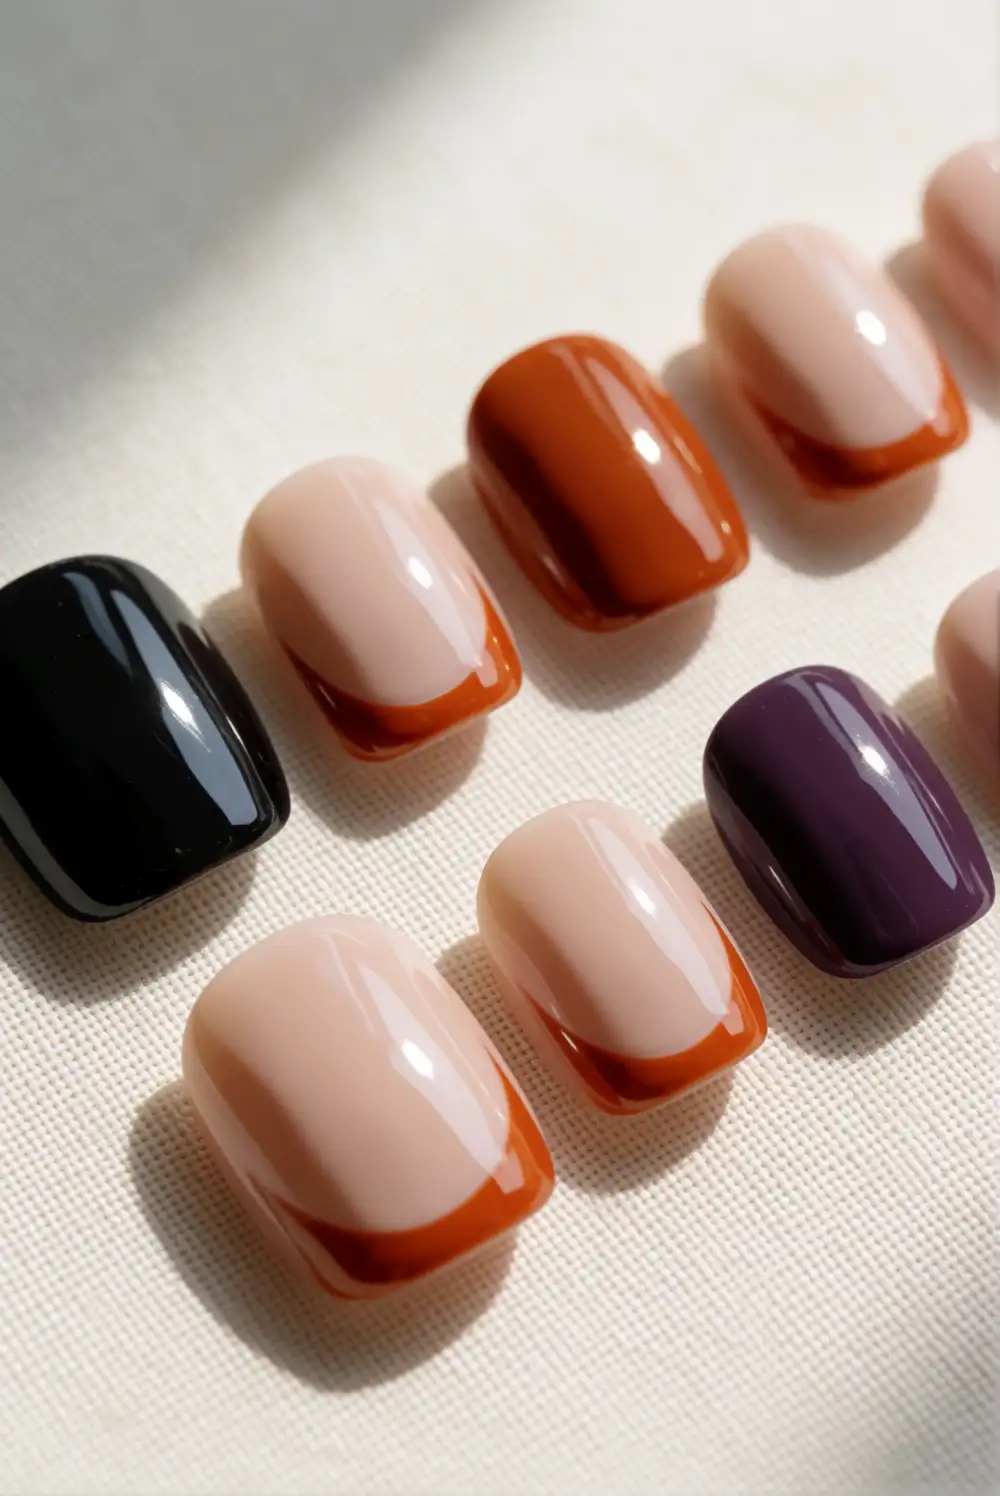
Try an easy abstract design with a single burnt-orange swipe along one side of each nude nail. Apply a translucent beige or pink base and let it dry. Using a fine brush, paint a short curved stroke that follows one edge of the nail, leaving plenty of neutral space visible. Keep the color near the side rather than covering the tip, and vary the curve slightly to suit each nail. Finish with a glossy top coat once the orange is dry.
Terracotta or muted pumpkin polish gives the design a seasonal accent without making it overly bright. For a coordinated look, place the swipe on the same side of each nail; for a relaxed finish, alternate sides. A shorter stroke creates a very subtle detail, while a longer curve makes the orange easier to notice. This design works well on short or medium nails and can be recreated with one color and a steady brush.
Minimal Halloween nails can feel festive without a full set of elaborate designs. Choose a sheer base, add one small seasonal detail or a restrained color accent, and finish with a top coat that suits your preferred shine. The result is an easy manicure that fits naturally into your everyday style.








