
Give your manicure a festive touch with simple Halloween nails finished with tiny spooky accent details. These easy designs pair wearable base colors with small ghosts, pumpkins, bats, and other seasonal motifs, so you can choose a look that feels playful or polished.
Sheer Nude Nails With Tiny Ghosts
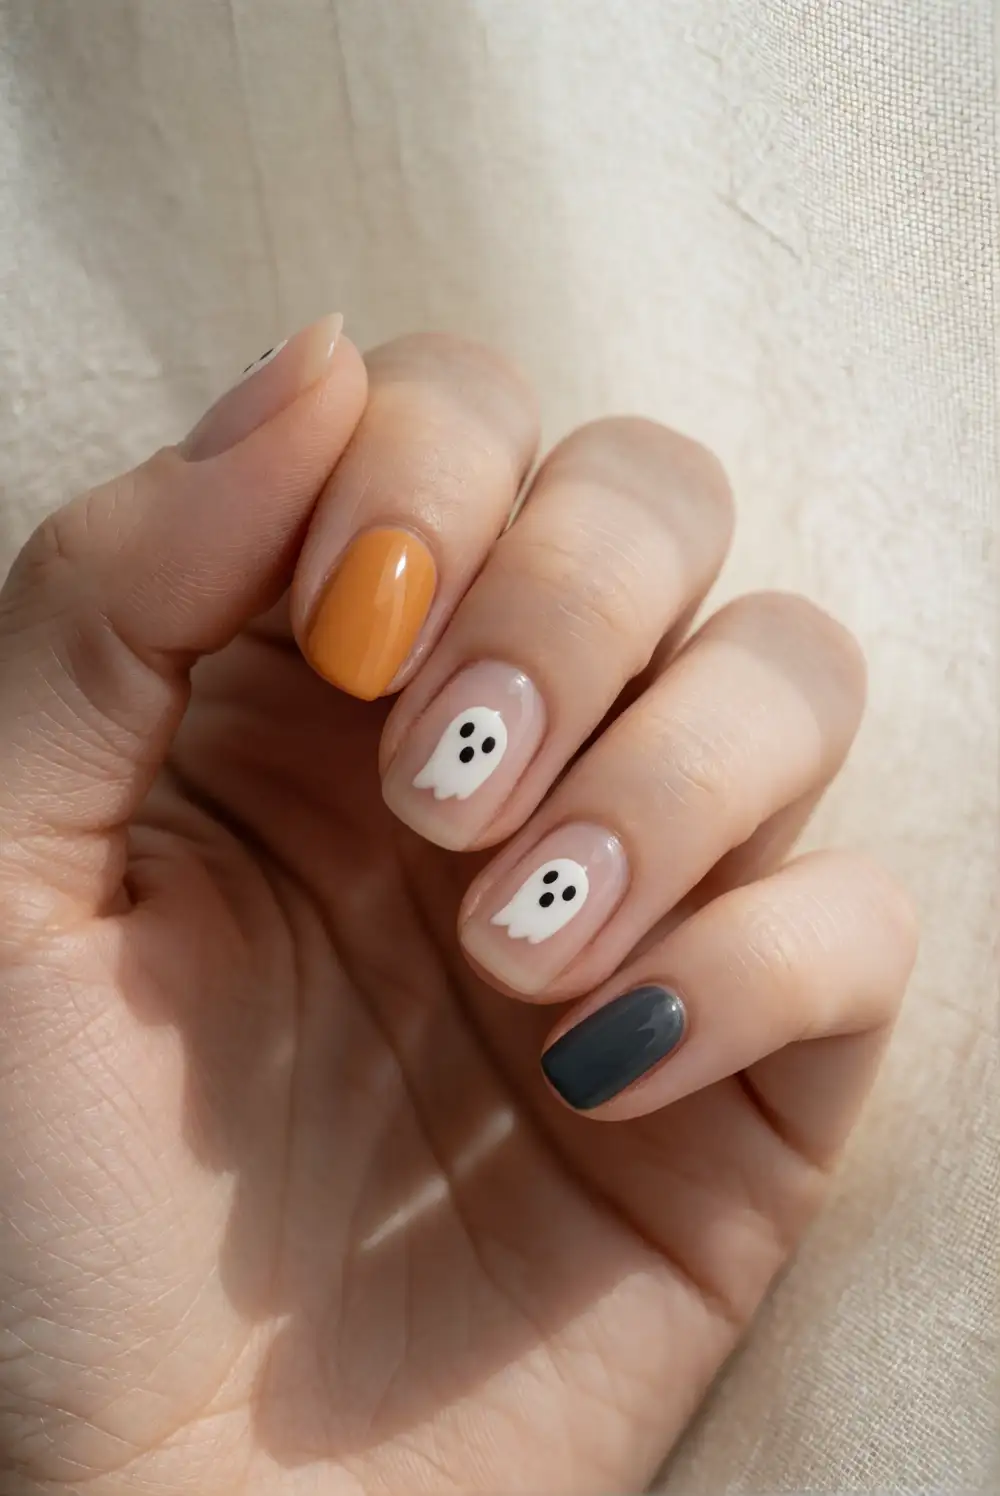
Start with a sheer beige or blush polish and let it dry completely. Using a fine nail-art brush, paint one small white ghost on an accent nail, shaping a rounded top with a softly curved base. Add two tiny black eyes with a dotting tool or the tip of a toothpick, then seal the design with a glossy topcoat. Keep the remaining nails plain for a light, understated Halloween manicure.
Place the ghost near the tip or off to one side so the design stays delicate and easy to notice. A milky white base makes the little figure feel soft, while a warmer nude creates a subtle contrast. If freehand painting feels tricky, use a small ghost decal and smooth it down before applying topcoat. This manicure works especially well on short, rounded nails and pairs neatly with everyday outfits.
Black French Tips With Spiderweb Corners
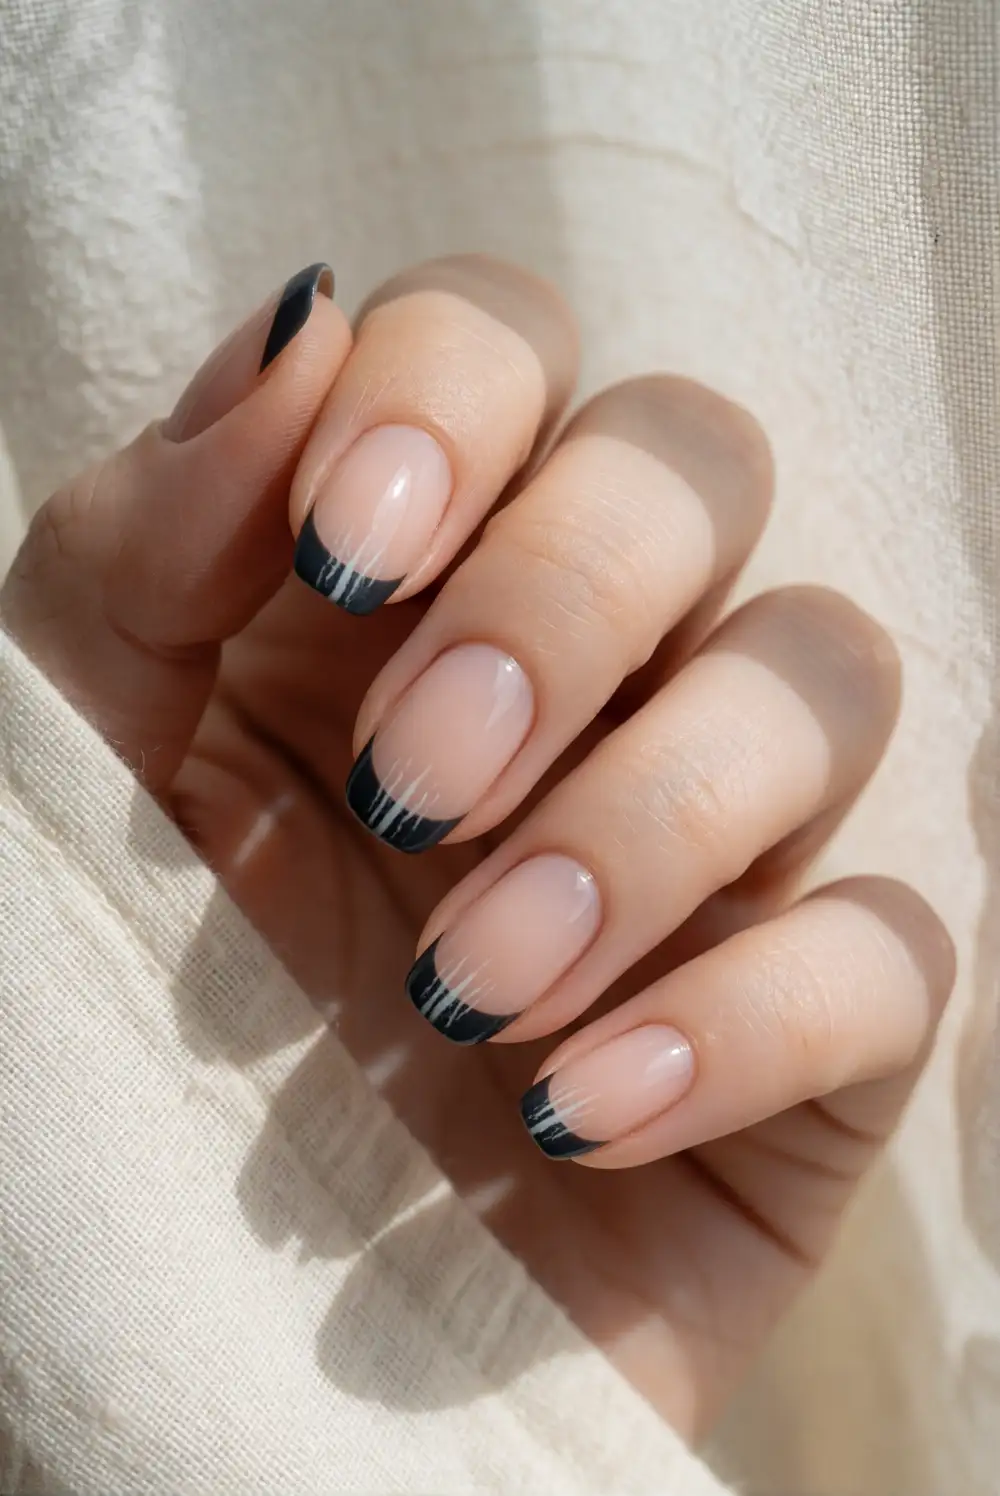
Apply a sheer pink or nude base coat, then paint a slim black French tip across each nail. On one or two accent nails, use a fine brush and white polish to draw a few short lines from a corner, connecting them with tiny curved strokes to suggest a web. Let each layer dry before adding a glossy topcoat. Keeping the web in one corner leaves plenty of negative space and makes the manicure feel clean.
For a softer version, use charcoal polish instead of black or make the tips very narrow. Choose just one web accent if you prefer a quieter look, or place a web on each ring finger for a coordinated finish. A matte topcoat can give the dark tips a modern feel, while glossy polish makes the white web stand out. This design suits almond and square nail shapes and is easy to refresh with a small brush.
Minimal Black Cat Accent Nails
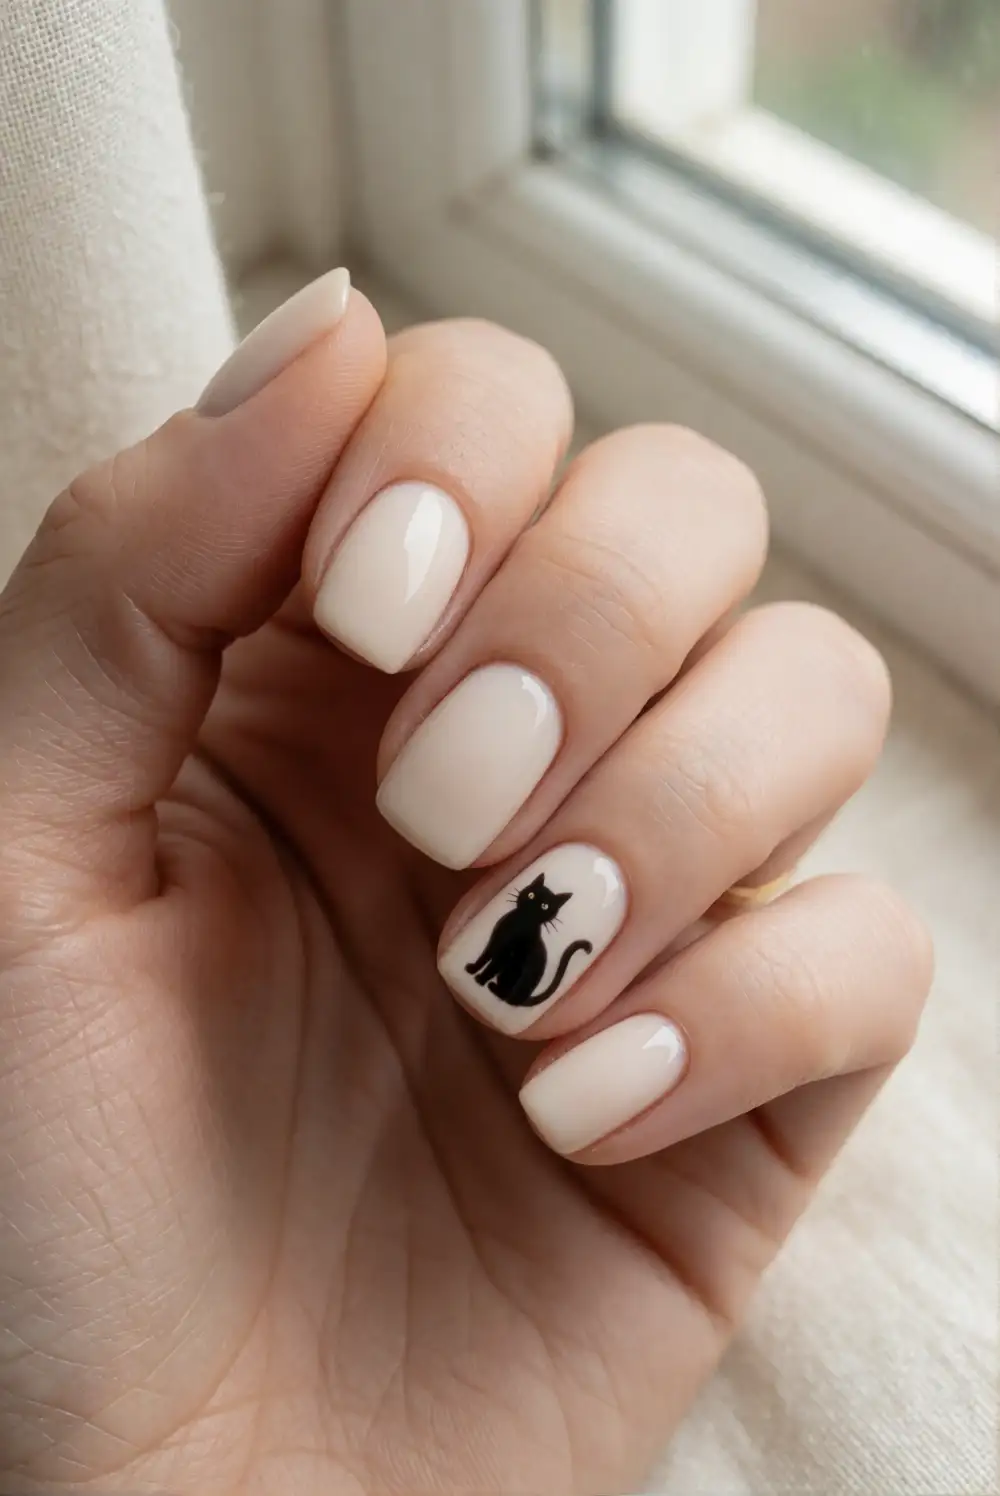
Paint your nails a creamy ivory, pale pink, or soft gray, leaving one accent nail for a simple cat silhouette. With black polish and a fine brush, make a small rounded head, add two pointed ears, and draw a curved tail beside it. Tiny eyes can be added with a dotting tool once the shape is dry. Finish with topcoat, taking care not to drag the brush through the small painted details.
Keep the cat shape small and centered to preserve the neat, minimal look. A single silhouette on each ring finger is enough, while plain nails in the same base color keep the design balanced. For a delicate variation, paint only the cat ears peeking from the nail tip. Use a deep brown or charcoal shade if pure black feels too bold. This accent looks especially crisp against a pale, opaque polish.
Little Pumpkin Accent on Warm Neutral Nails
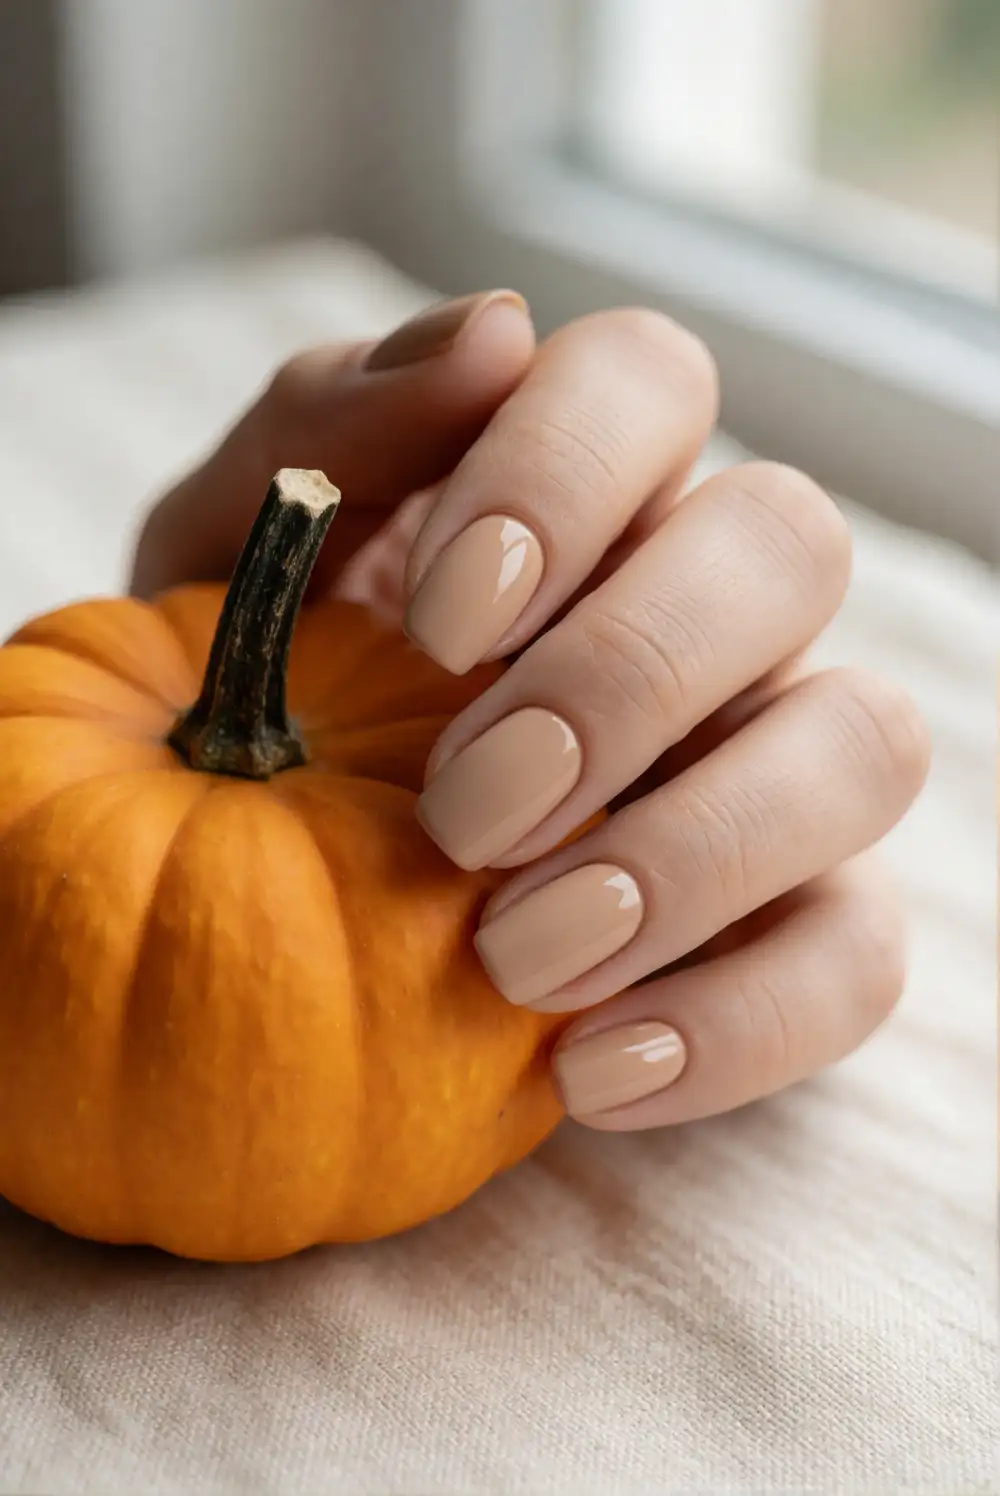
Choose a warm cream, tan, or muted peach polish as the base and reserve one nail for a tiny pumpkin. Paint a small orange oval, then add short curved lines in a deeper orange to suggest its ridges. Finish with a short green stem using a fine brush. Let the design dry before applying topcoat, and keep the pumpkin compact so it fits neatly on the nail without crowding the surrounding color.
A pumpkin accent looks charming on a ring finger or near the tip of a longer nail. Try terracotta polish for a subdued autumn palette, or use a brighter orange against a milky base for a cheerful pop. If painting the ridges is difficult, a plain orange oval with a green stem still reads clearly. Pair the accent with glossy neutral nails for a versatile manicure that works beyond Halloween gatherings.
Moon and Star Details on Charcoal Nails
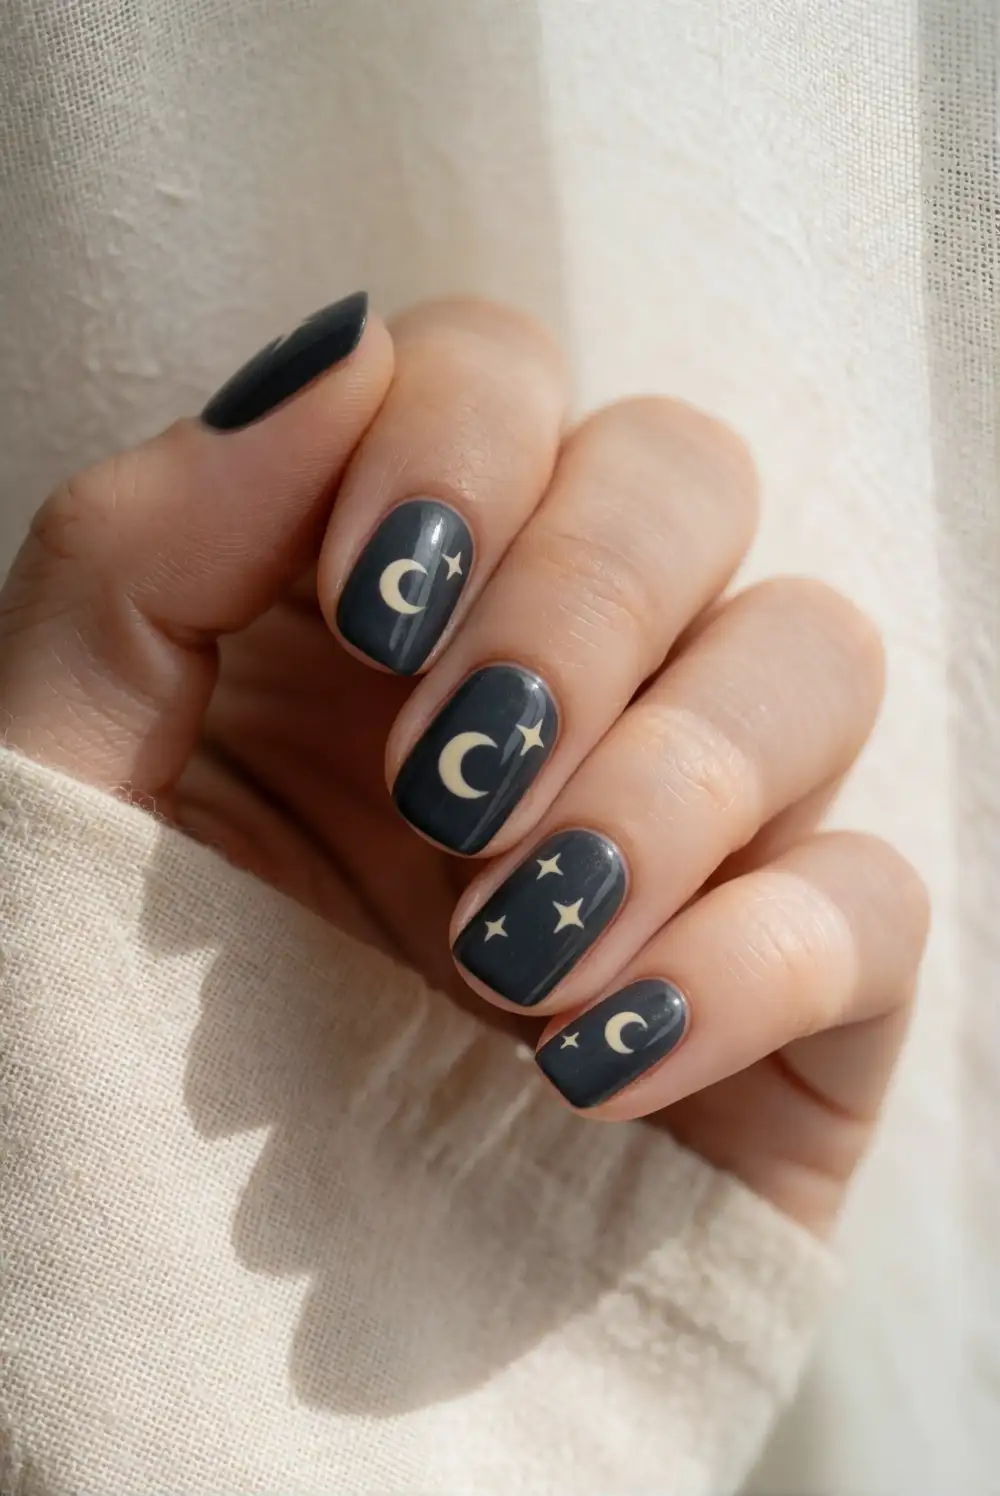
Paint a charcoal or deep navy base and choose one or two nails for small celestial accents. Use a fine brush and pale cream polish to draw a slim crescent moon, then add a few tiny stars with careful short strokes. Let the art dry fully before applying a clear topcoat. Keeping the shapes small and leaving open space around them gives the manicure a night-sky feel without covering every nail in detail.
For a softer contrast, choose a dusty blue base and warm ivory accents. A single crescent on each ring finger creates a subtle matched pair, while scattered stars on one nail add a little extra sparkle without glitter. You can also use a metallic champagne polish for the moon if you want a delicate shimmer. This design looks polished with short nails and complements both dark clothing and simple neutral outfits.
Candy Corn Color-Block Accent Nails
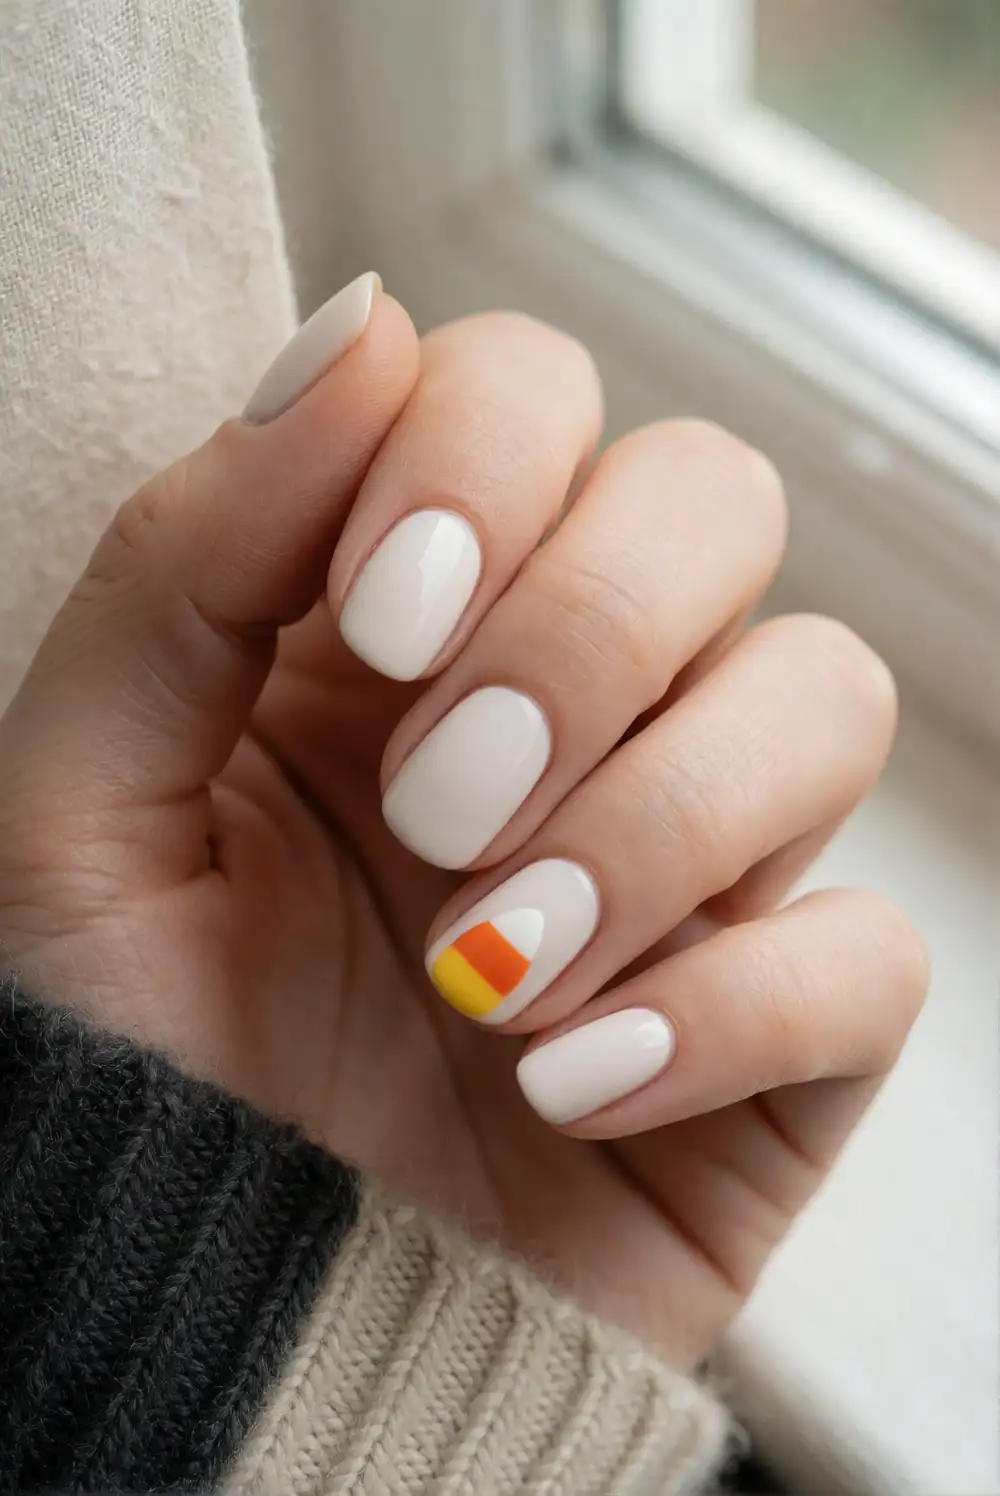
Apply a clear base, then create a small candy-corn accent with three curved bands of white, orange, and yellow polish on one nail. A fine brush helps keep each stripe narrow and tidy; allow one color to dry before adding the next. Keep the other nails in a sheer nude or creamy white shade, then finish the whole manicure with topcoat. The bright color blocks bring a familiar Halloween treat into a simple, wearable design.
Use soft butter yellow and muted orange for a less vivid palette, or choose classic bright shades for a playful accent. The candy-corn shape can sit vertically along the nail or be angled gently toward one corner. If freehand stripes are uneven, let the shape stay charmingly imperfect rather than adding more layers. Pairing just one decorated nail with plain cream polish keeps the look balanced and lets the small motif take focus.
Tiny Bat Silhouettes on Milky White Nails
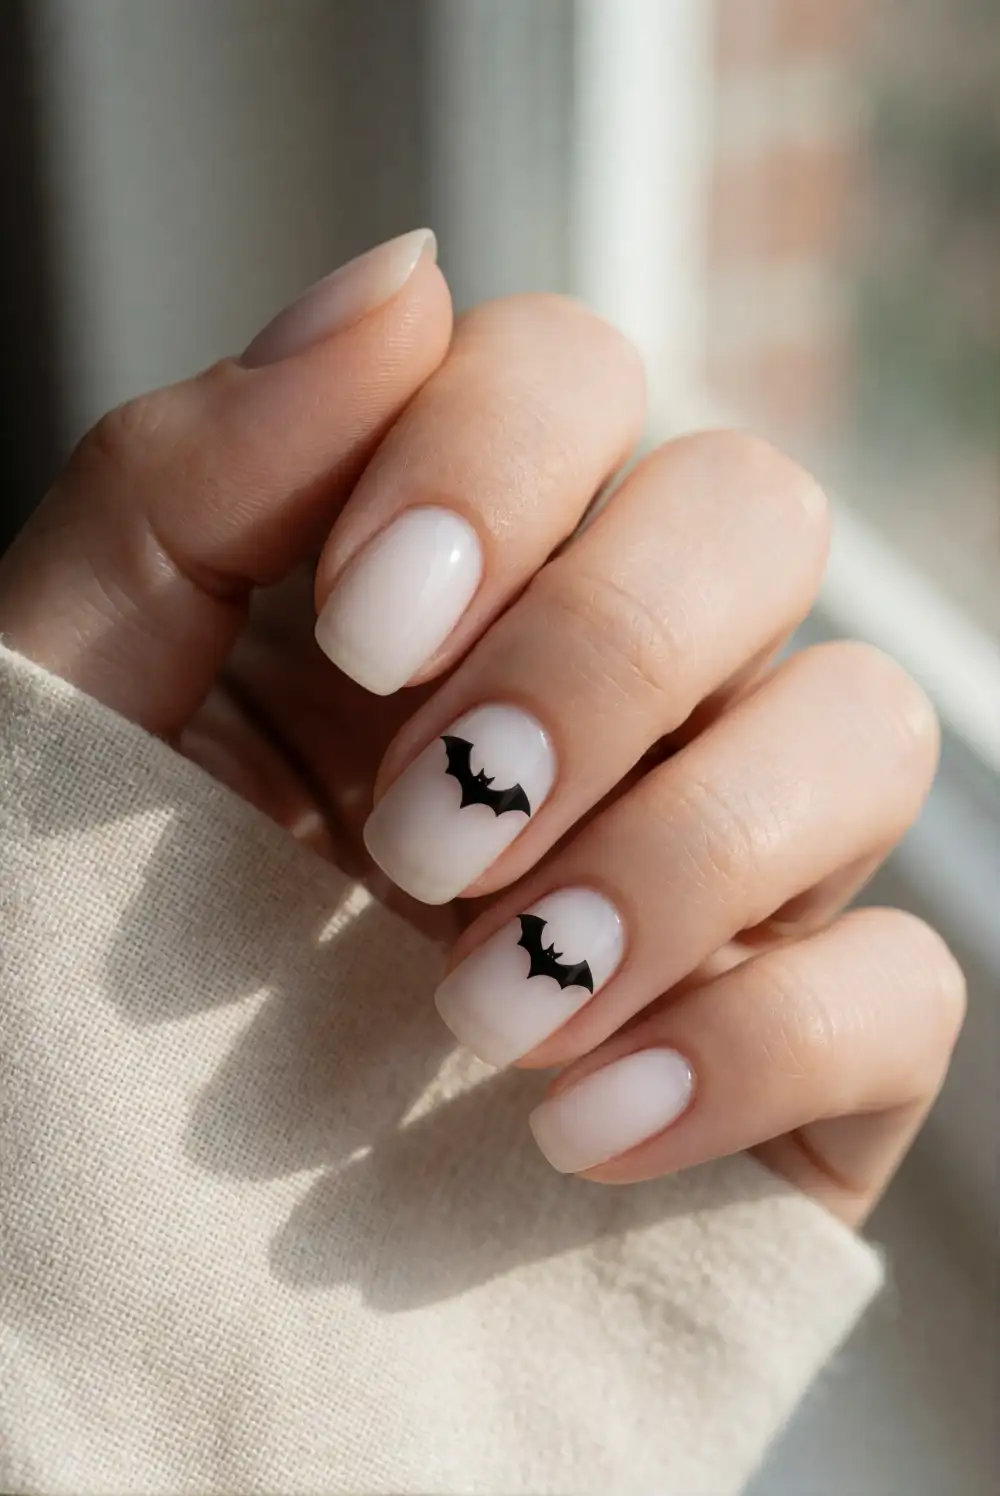
Begin with two coats of milky white or pale gray polish. On an accent nail, use black polish and a fine brush to paint a tiny oval body with two simple angled wings, keeping the silhouette small and clean. Add a second bat on another nail if you want a little movement across the manicure. Once the paint is dry, apply a smooth topcoat to protect the design and soften any visible brush edges.
Place the bat near the cuticle or toward the outer edge to make it feel like a small detail rather than a full illustration. A muted lilac or blush base gives the black shape a softer contrast, while bright white looks crisp and graphic. Keep the other nails plain, or add a single tiny star for a restrained variation. This design is especially effective on short nails, where the small silhouette stays easy to read.
Black and Cream Checkerboard Accent Nails
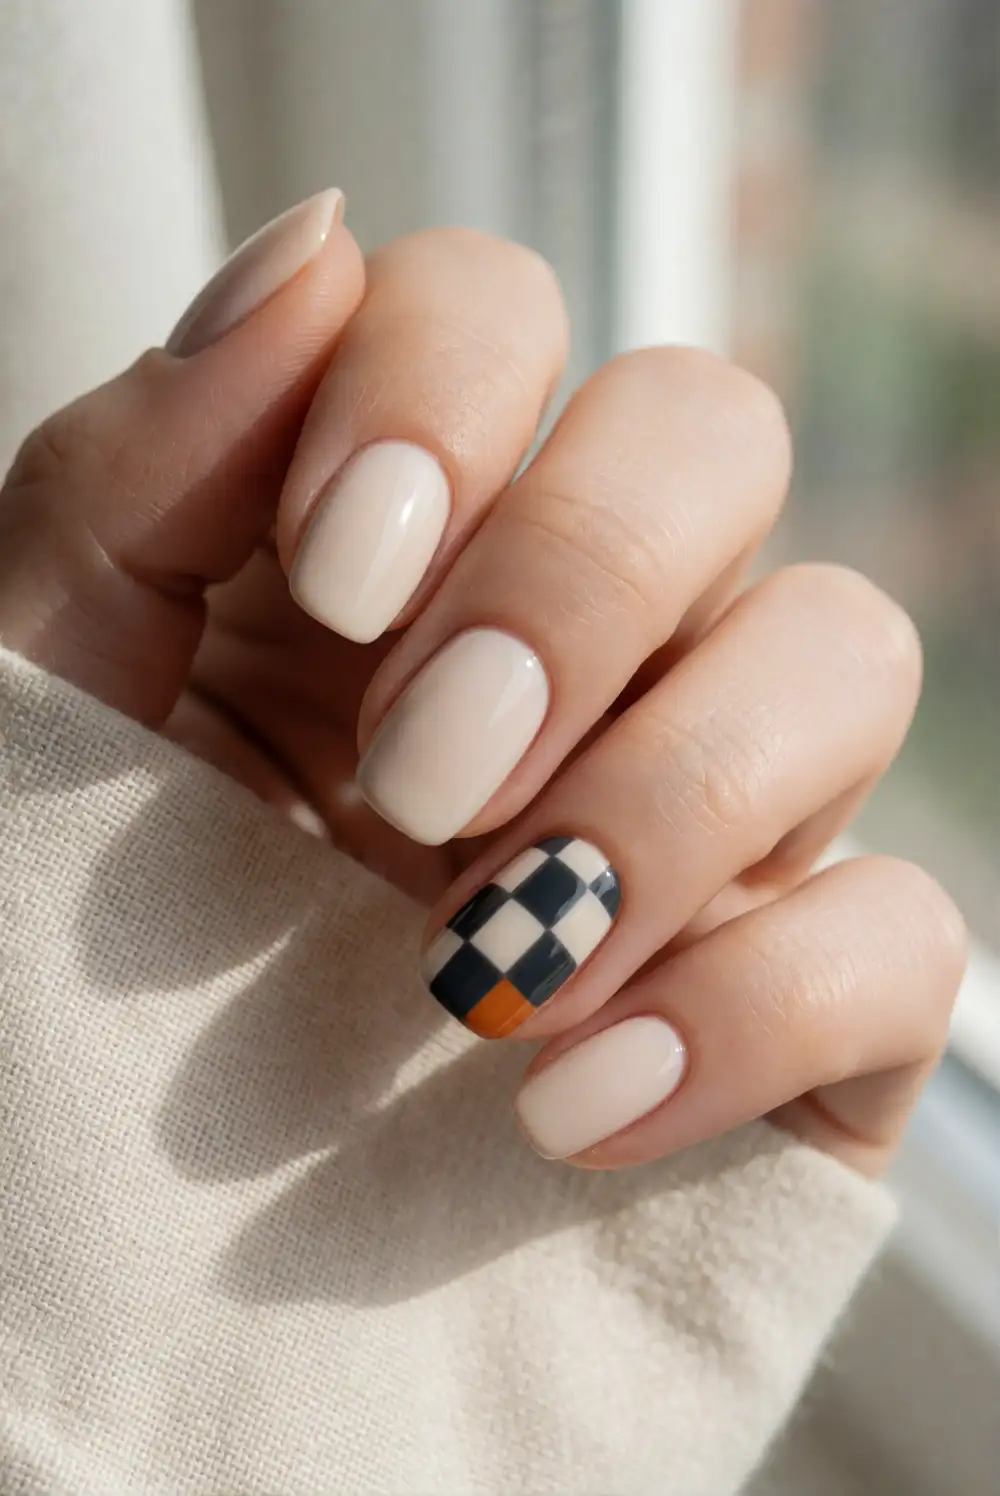
Paint most nails creamy white or pale beige, then choose one accent nail for a small checkerboard. After applying a light base, use a fine brush to paint a few short black squares in alternating positions, leaving the pale base visible between them. Work in thin layers and let each square dry before touching nearby areas. Seal the pattern with topcoat, while keeping the remaining nails glossy and uncluttered for an easy Halloween-ready contrast.
A small checkerboard near the tip can feel more delicate than covering the entire nail. For a softer take, swap black for deep plum or charcoal, keeping the cream squares bright enough to define the pattern. You can repeat the detail on both ring fingers or leave it as a single accent. This graphic design pairs well with the tiny motifs in the same manicure and gives a simple color palette a playful seasonal edge.
Mixed Mini Halloween Motifs on Neutral Nails
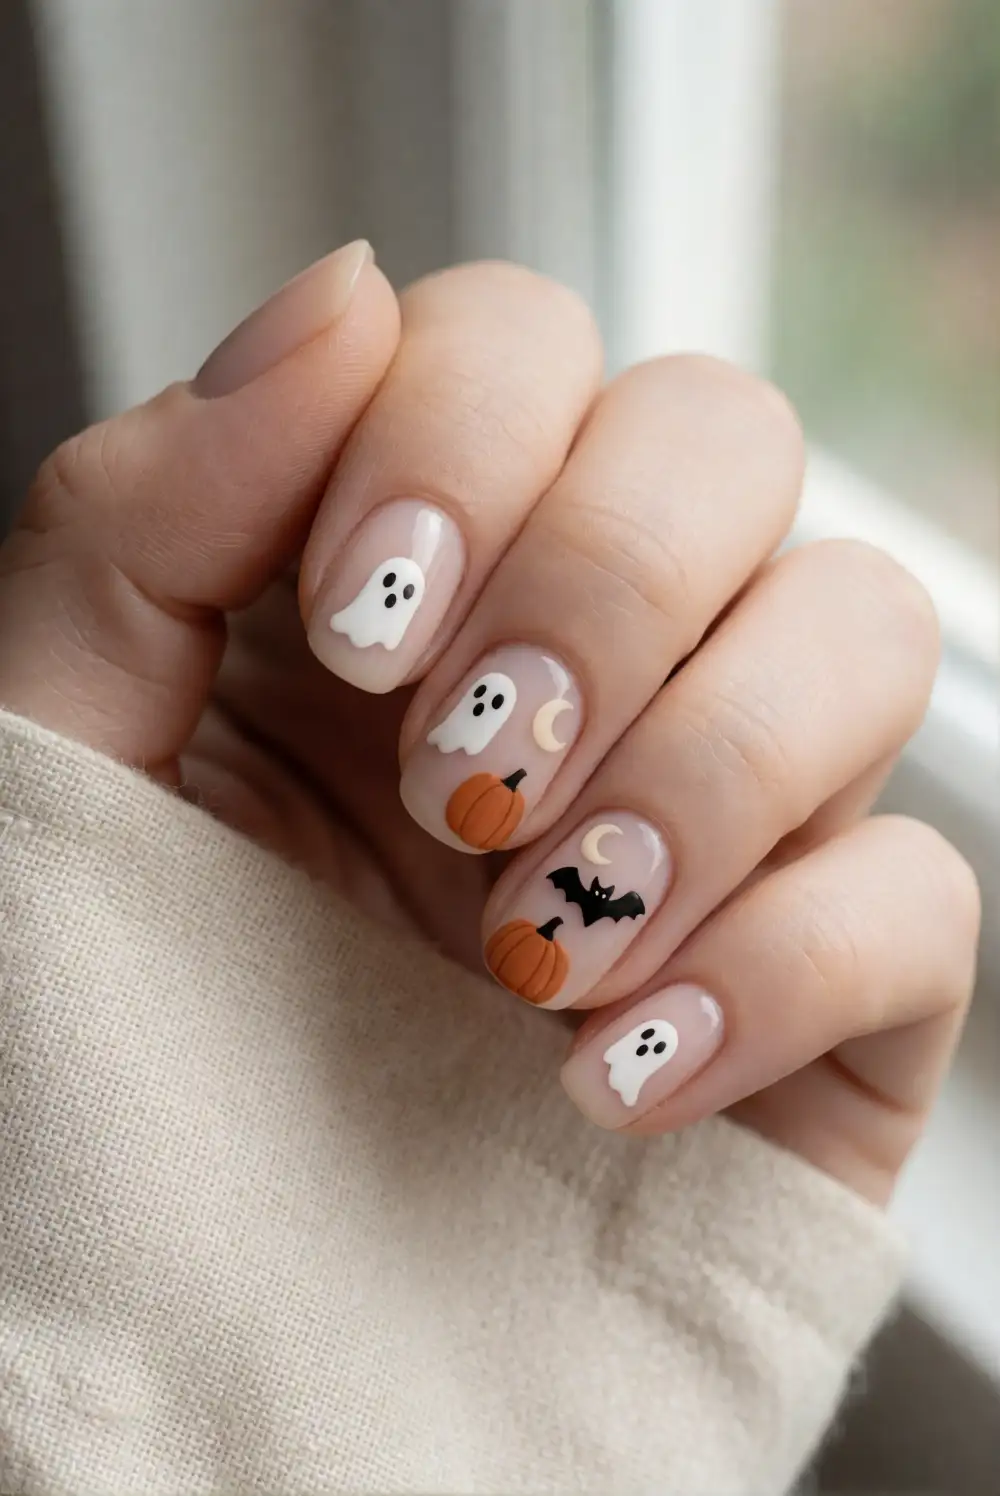
Choose a sheer nude base and plan a small motif for each accent nail, such as a white ghost, orange pumpkin, black bat, or cream crescent moon. Paint each shape with a fine nail-art brush, keeping the palette limited and the drawings small. Let every detail dry before sealing the manicure with topcoat. Leaving some nails plain gives the mixed designs room to stand out and makes the finished set feel coordinated rather than crowded.
Repeat one base color across all nails to tie the different illustrations together. For a subtle arrangement, decorate only the ring and middle fingers; for a more expressive set, add one tiny motif to each nail. Choose motifs with simple silhouettes so they remain recognizable at a small scale. A glossy finish suits the playful art, while a matte topcoat gives the same neutral palette a softer, more modern look.
Whether you prefer barely-there ghosts or crisp graphic accents, these simple Halloween nail ideas make it easy to add a seasonal detail to your manicure. Choose a design that suits your favorite polish colors, keep the artwork small, and enjoy a festive look that still feels wearable.








