
Bring a little seasonal spirit to your workday with Halloween nail designs that stay subtle, neat, and easy to wear. These office-friendly ideas use understated colors, delicate accents, and simple techniques to add a festive touch without taking over your look. Choose a design that suits your workplace, then adapt the colors or placement to fit your personal style.
Sheer Nude Nails with Black French Tips
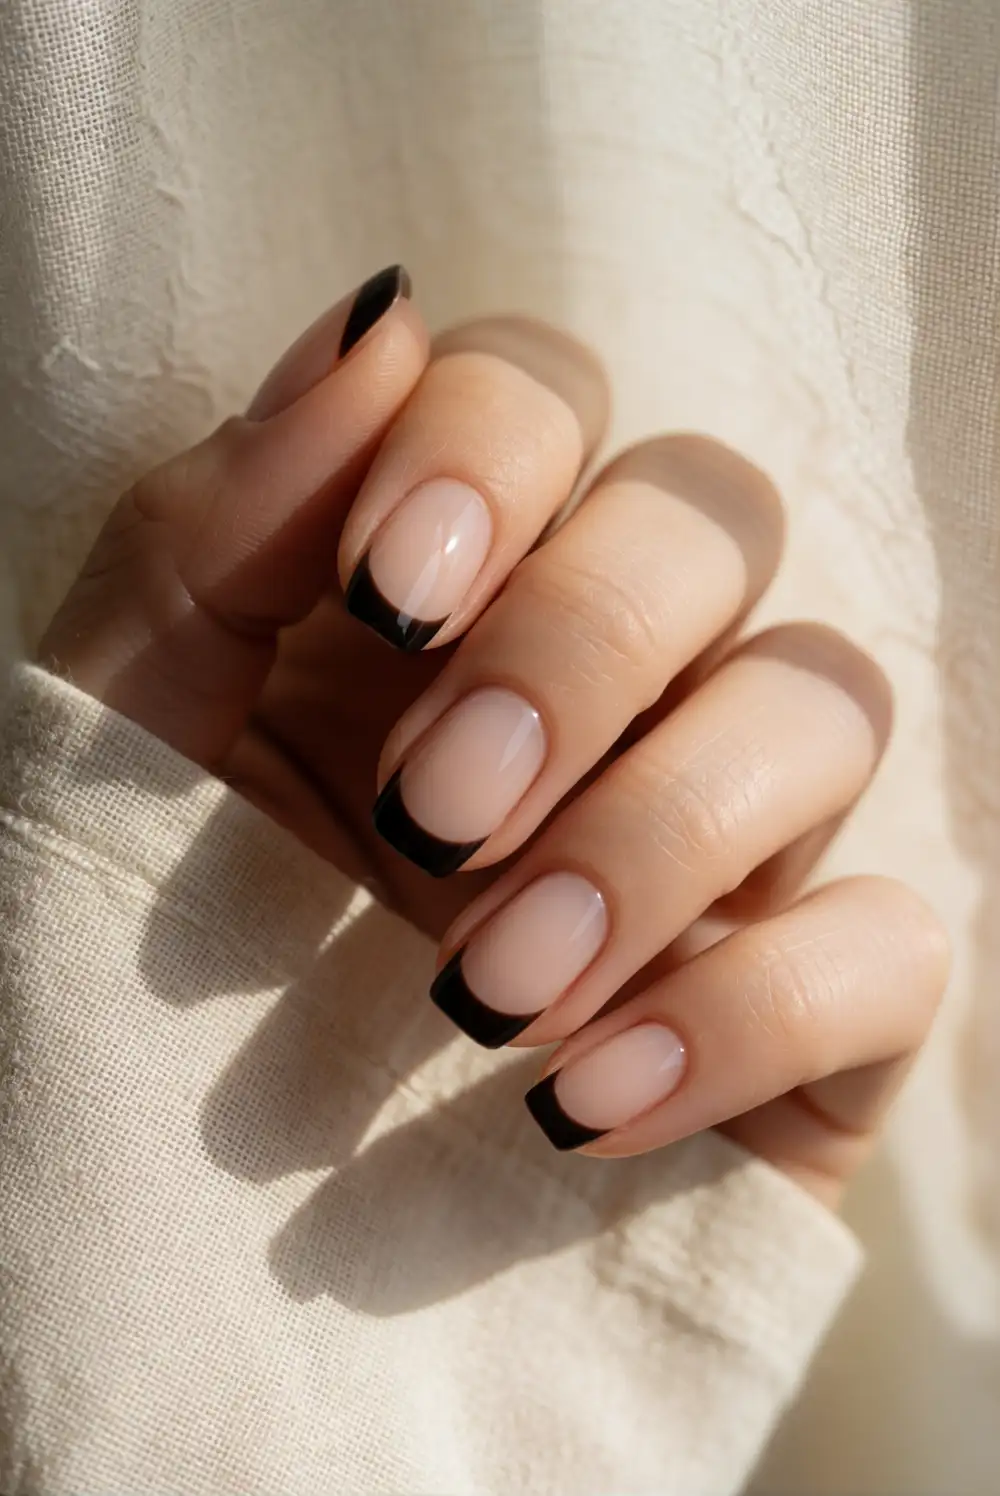
For a restrained Halloween manicure, pair a sheer nude base with slim black French tips. Shape and smooth your nails, apply a base coat, then brush on one or two thin layers of translucent nude polish. Once dry, use a fine nail-art brush or French-tip guide to add a narrow black curve along each free edge. Finish with a glossy top coat, taking care to seal the tips so the dark polish stays crisp through a busy workday.
Keep the black line delicate and consistent for a clean, professional finish, or make the tips slightly uneven for a relaxed, hand-painted look. Short oval and squoval shapes work especially well because they give the curved edge room without feeling dramatic. If a full set feels too bold, paint the black tips on just a few nails and leave the rest sheer nude. The manicure pairs easily with neutral office outfits and subtle Halloween accessories.
Muted Pumpkin Accent Nails
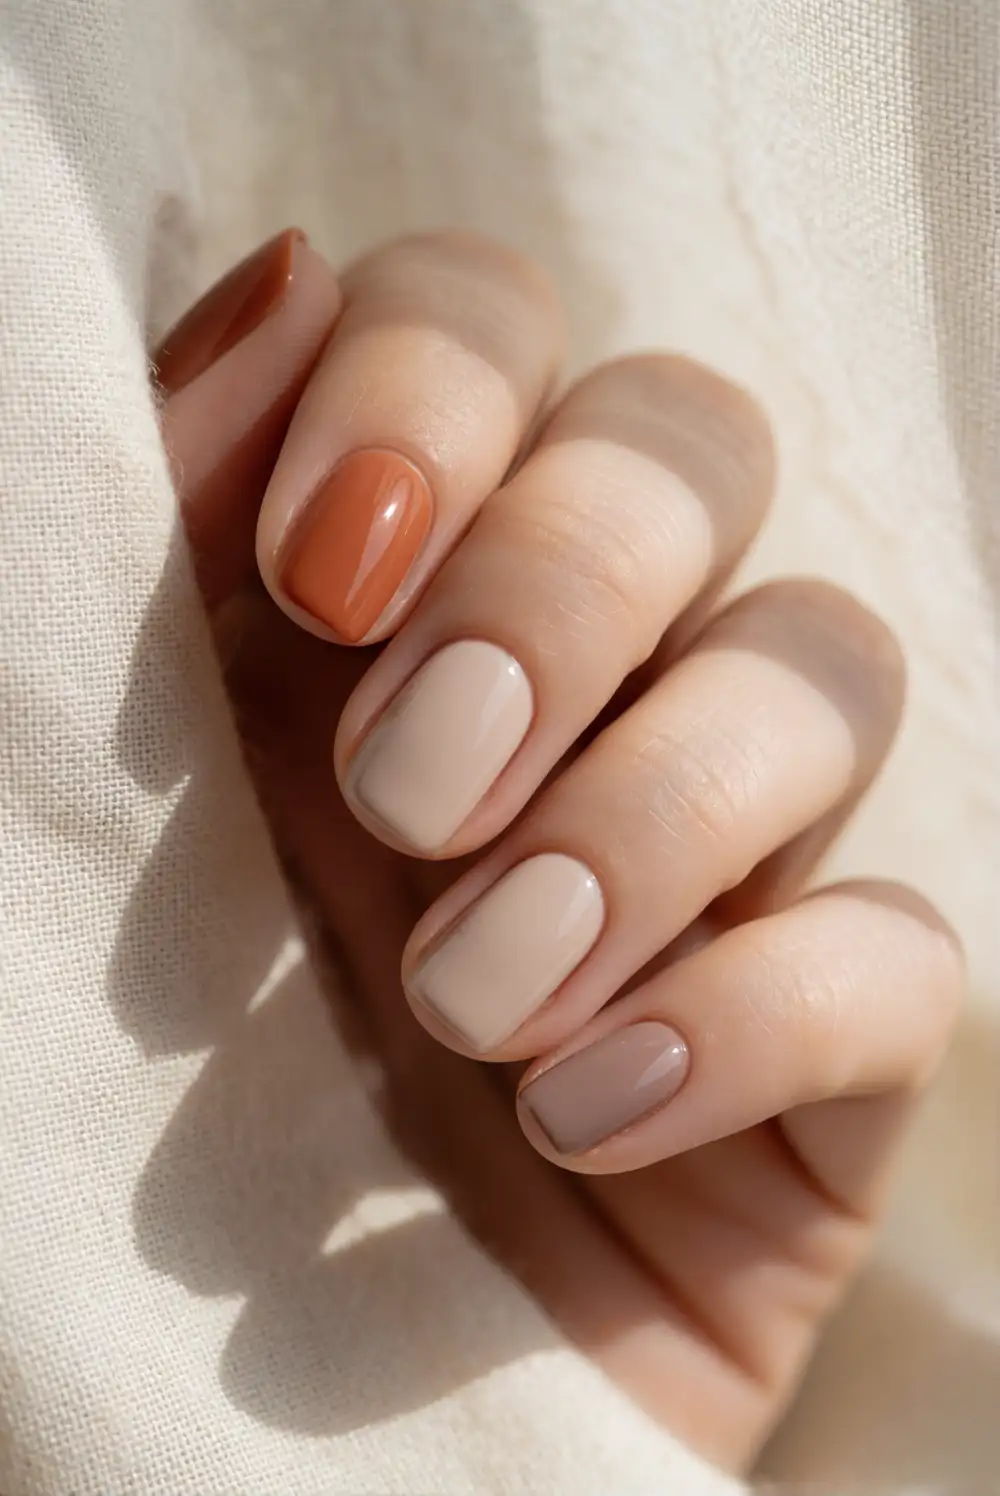
A muted pumpkin accent nail brings in a warm seasonal color while keeping most of the manicure understated. Apply a base coat and a creamy beige or soft taupe polish to every nail. Choose one accent nail on each hand and paint it dusty burnt orange, using thin coats for an even finish. Add a glossy top coat after the color dries. The restrained shade feels autumnal without the brightness of classic orange, making it a comfortable choice for a shared office.
For a coordinated look, keep the accent nails on matching fingers, such as both ring fingers, and leave the other nails neutral. A satin or matte top coat can soften the orange further, while a tiny curved line in a deeper rust shade suggests a pumpkin shape without adding a literal illustration. Match the accent to a scarf, belt, or warm-toned jewelry for a subtle seasonal detail that still looks polished during meetings.
Tiny Ghosts on Milky White Nails
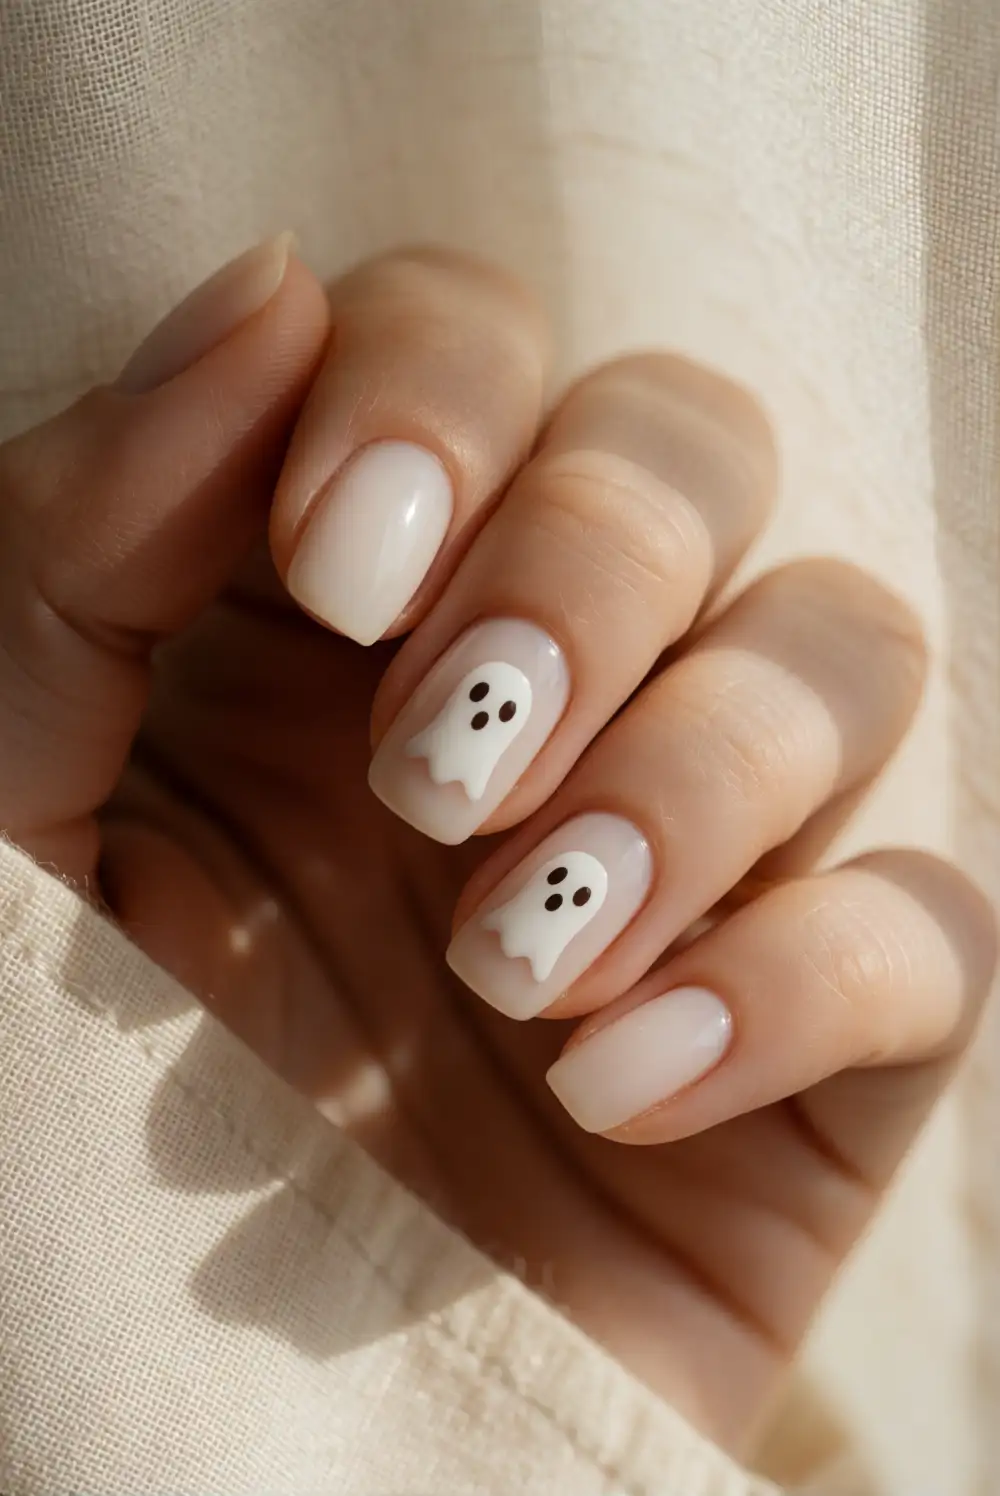
Small ghost silhouettes on a milky white base make a playful design that stays light and tidy. Apply a sheer milky polish over a base coat and let it dry completely. With a fine brush and opaque white polish, paint a simple rounded ghost shape on one or two accent nails, allowing the silhouette to stand out with a slightly brighter finish. Once dry, add two tiny dark eyes with a dotting tool or brush tip, then seal the design with a smooth top coat.
Keep the ghosts small and place them near a side edge or close to the nail tip so the design feels like a quiet accent rather than a full character manicure. On the remaining nails, use the same milky shade for a cohesive appearance. You can skip the facial details for a more abstract silhouette, or use a single ghost on one hand for an especially subtle effect. A glossy finish helps the pale design look neat and intentional.
Fine Spiderweb Accent on Charcoal Nails
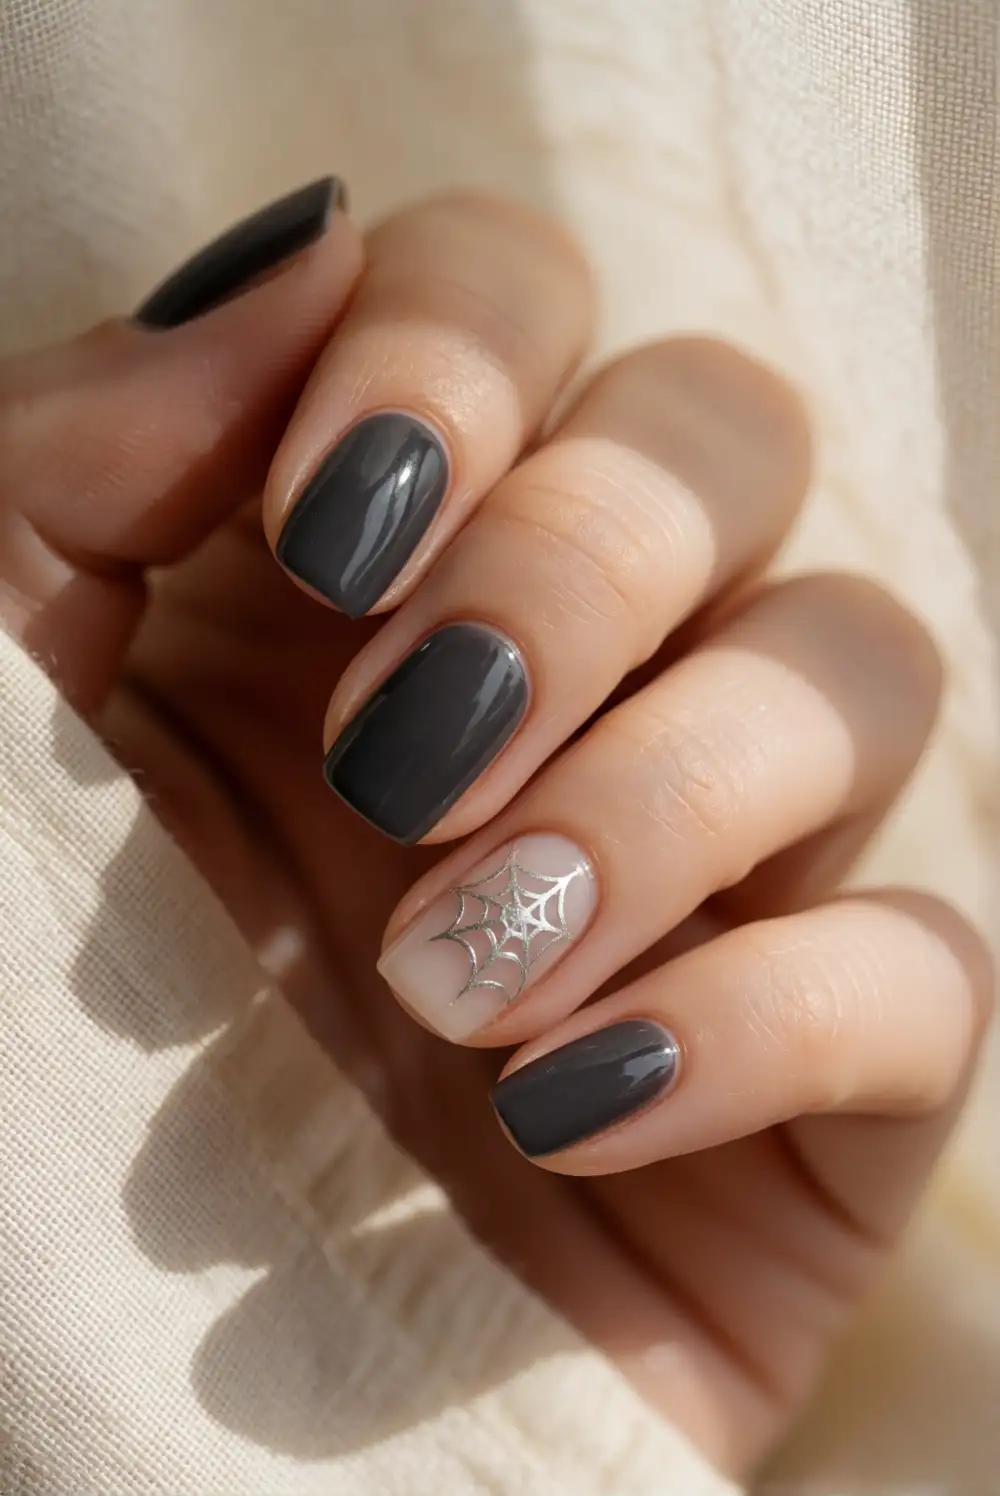
A fine spiderweb detail gives charcoal polish a seasonal twist while keeping the overall palette subdued. Apply a base coat followed by two thin coats of deep charcoal polish. On one accent nail, use a fine liner brush and soft silver polish to draw several delicate lines radiating from a corner, then connect them with small curved strokes. Let the artwork dry before applying top coat with a light touch, so the brush does not drag the fine web lines.
For an office-friendly result, use a single web on one nail rather than repeating it across the whole hand. A soft silver or pewter line reads more gently than stark white, and a glossy charcoal base adds a clean finish. If detailed painting feels tricky, use a fine nail-art sticker and press it down smoothly before sealing. Keep the other nails plain charcoal or alternate with a muted taupe for a softer, wearable contrast.
Deep Plum Nails with Copper Foil
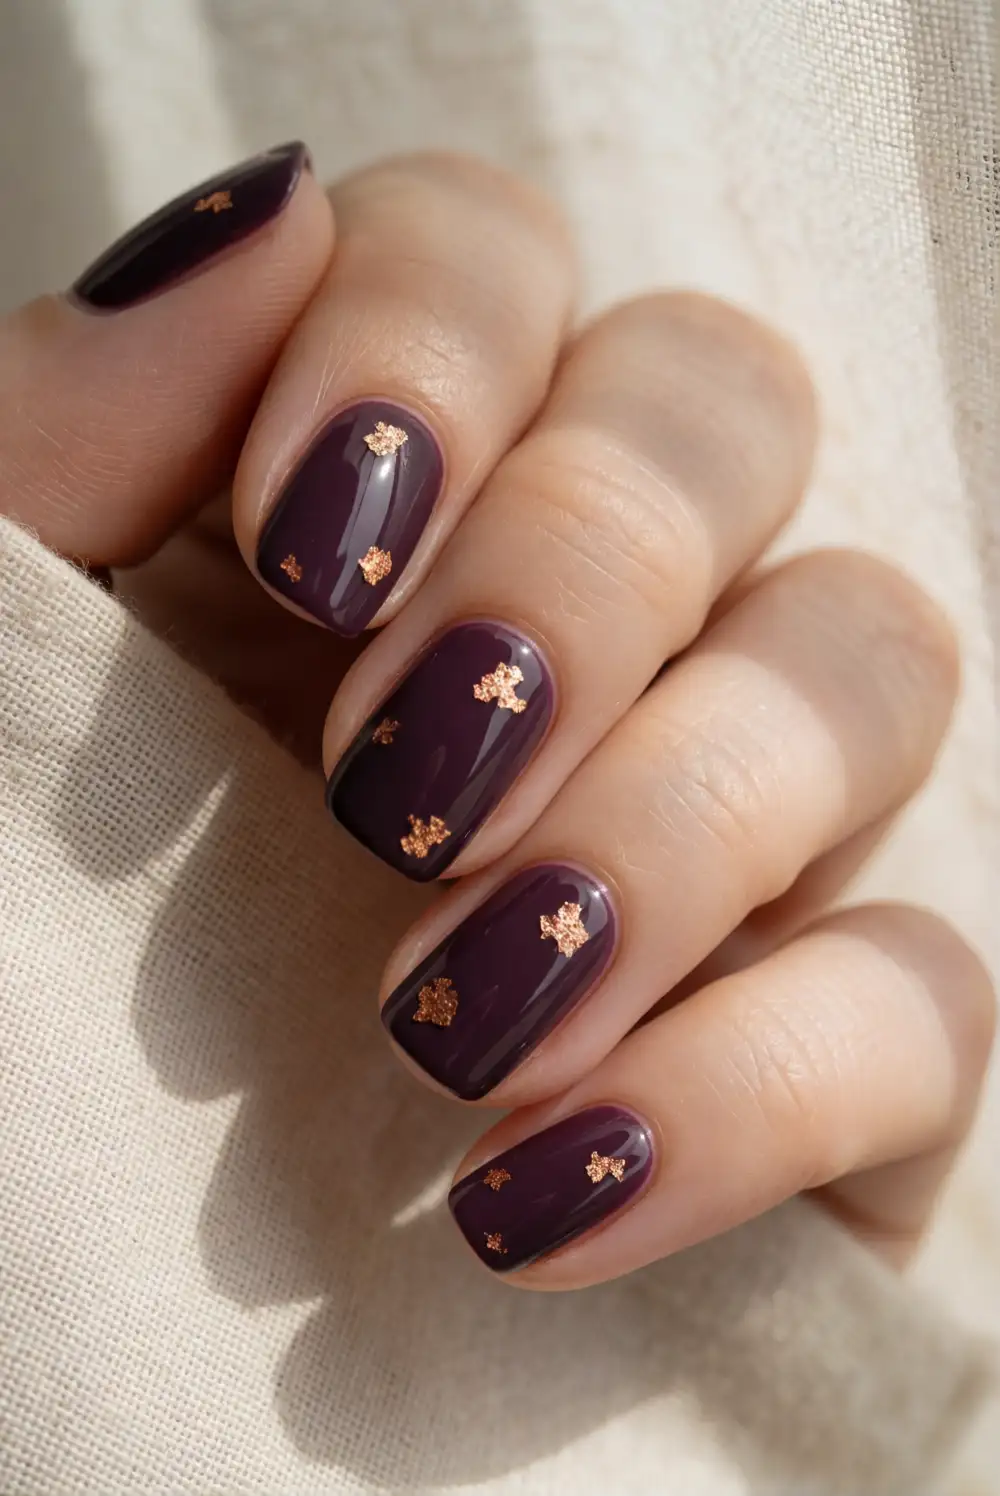
Deep plum polish with small touches of copper foil feels autumnal and refined rather than costume-like. Prepare nails with a base coat, then apply two thin coats of a rich plum shade. While the final coat is slightly tacky, place a few tiny pieces of cosmetic nail foil near the cuticle or along one side of an accent nail. Press them gently into place with a silicone tool, then finish with a generous layer of top coat to smooth the surface.
Use the foil sparingly so the manicure catches the light without appearing overly ornate. A single copper accent on each hand can be enough, especially if your workplace favors understated grooming. If foil is unavailable, a fine copper shimmer polish can create a similar warm glint with less effort. Pair the plum shade with simple rings or a neutral sleeve, and keep the nail shape short or softly rounded for a balanced, office-ready look.
Soft Taupe Nails with Tiny Black Bats
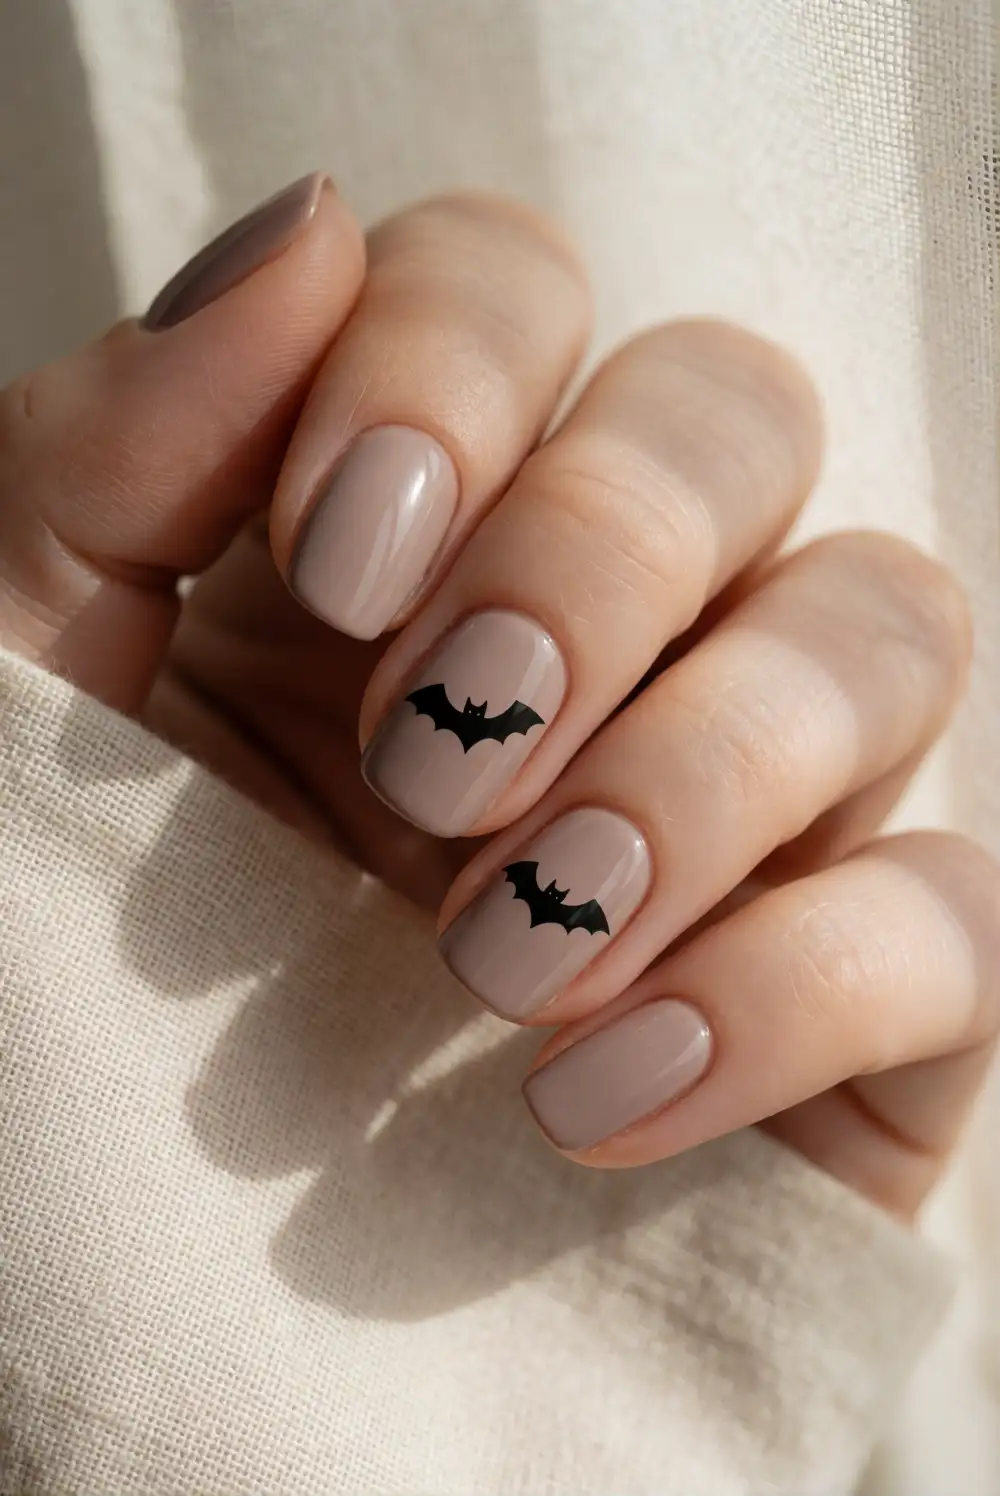
Tiny black bat silhouettes over soft taupe polish create a recognizable Halloween detail in a muted color palette. Start with a base coat and two even layers of warm taupe polish. Once dry, use a fine brush to paint a small central body and two simple angular wings on one or two accent nails. Keep the bat shape compact, and allow each layer to dry before sealing with top coat. A steady brush and a minimal silhouette make the design easier to create than detailed illustrations.
Place each bat near the side of the nail or close to the tip, leaving plenty of taupe visible around it. This negative space keeps the manicure from feeling crowded and lets the neutral base remain the main feature. For an even quieter variation, choose a brown-black polish instead of true black or add just one bat across the entire manicure. The soft taupe color complements office neutrals and makes the tiny seasonal motif easy to wear.
Olive Green Nails with a Black Cat Accent
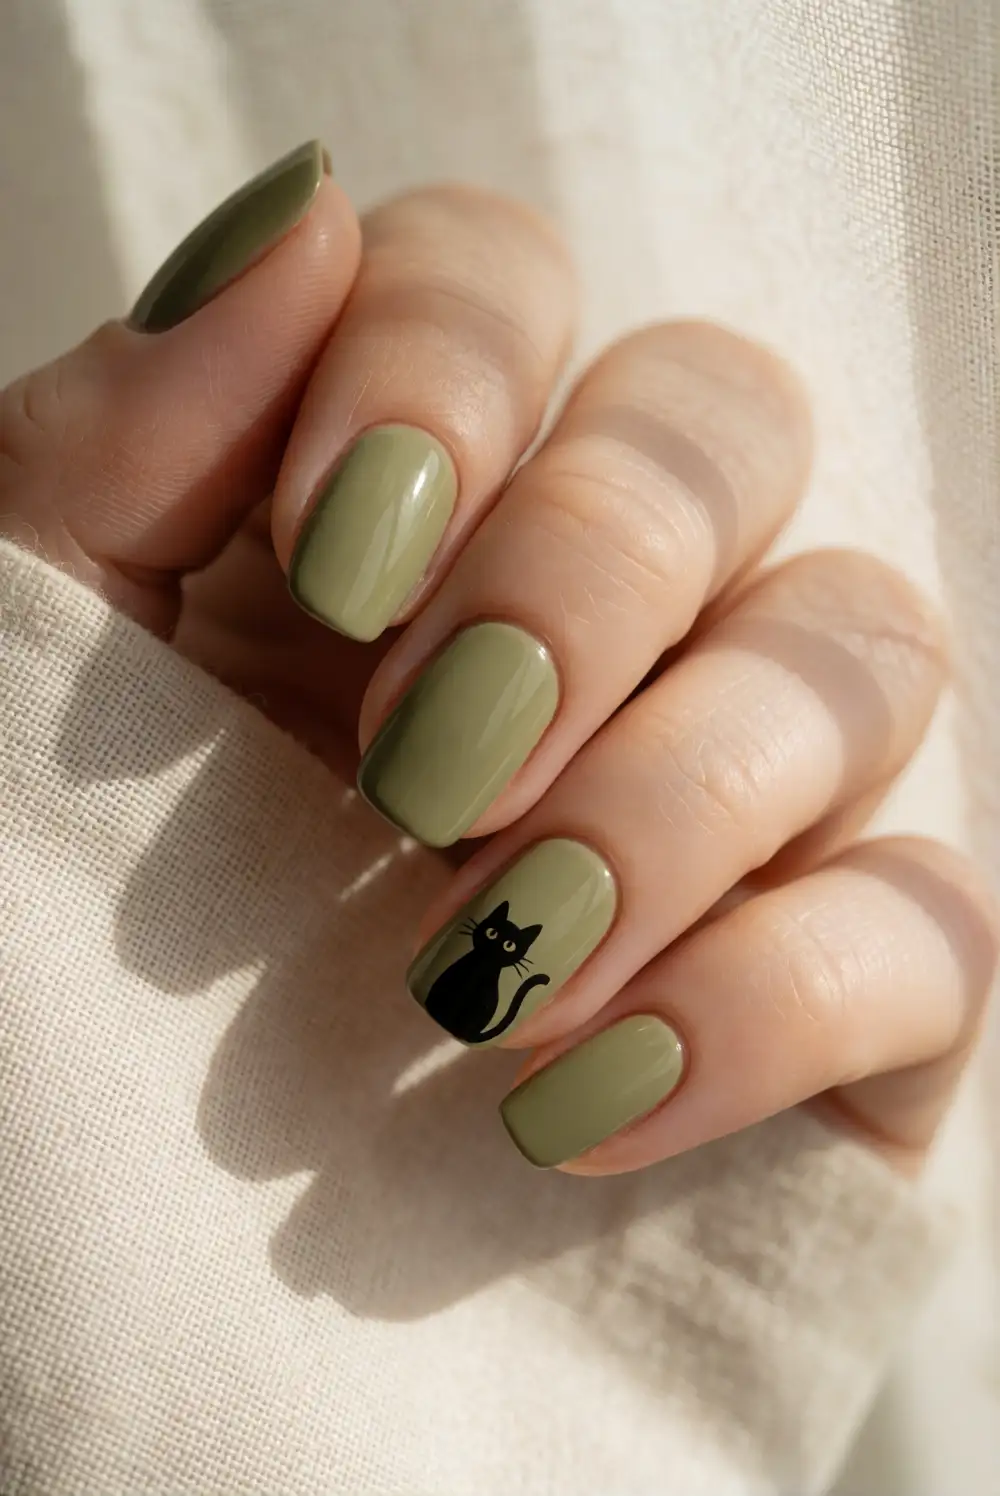
Muted olive polish makes a distinctive base for a minimal black cat accent. Apply a base coat and two thin layers of olive green, allowing the polish to dry between coats. On one accent nail, paint a small rounded cat head with two pointed ears using a fine brush and black polish. Add a slim curved tail only if there is room, then let the artwork dry before finishing with clear top coat. Keeping the illustration simple helps the design remain neat and work appropriate.
Use the cat motif on one nail and keep the rest of the manicure solid olive for a more understated effect. A soft sage or gray-green shade can replace olive if you prefer a lighter palette, while a matte top coat gives the finished look a velvety feel. Place the accent on a ring finger or thumb, where the shape has enough space to read clearly. The dark motif pairs especially well with cream, denim, and other everyday office colors.
Negative Space Nails with Fine Black Webs
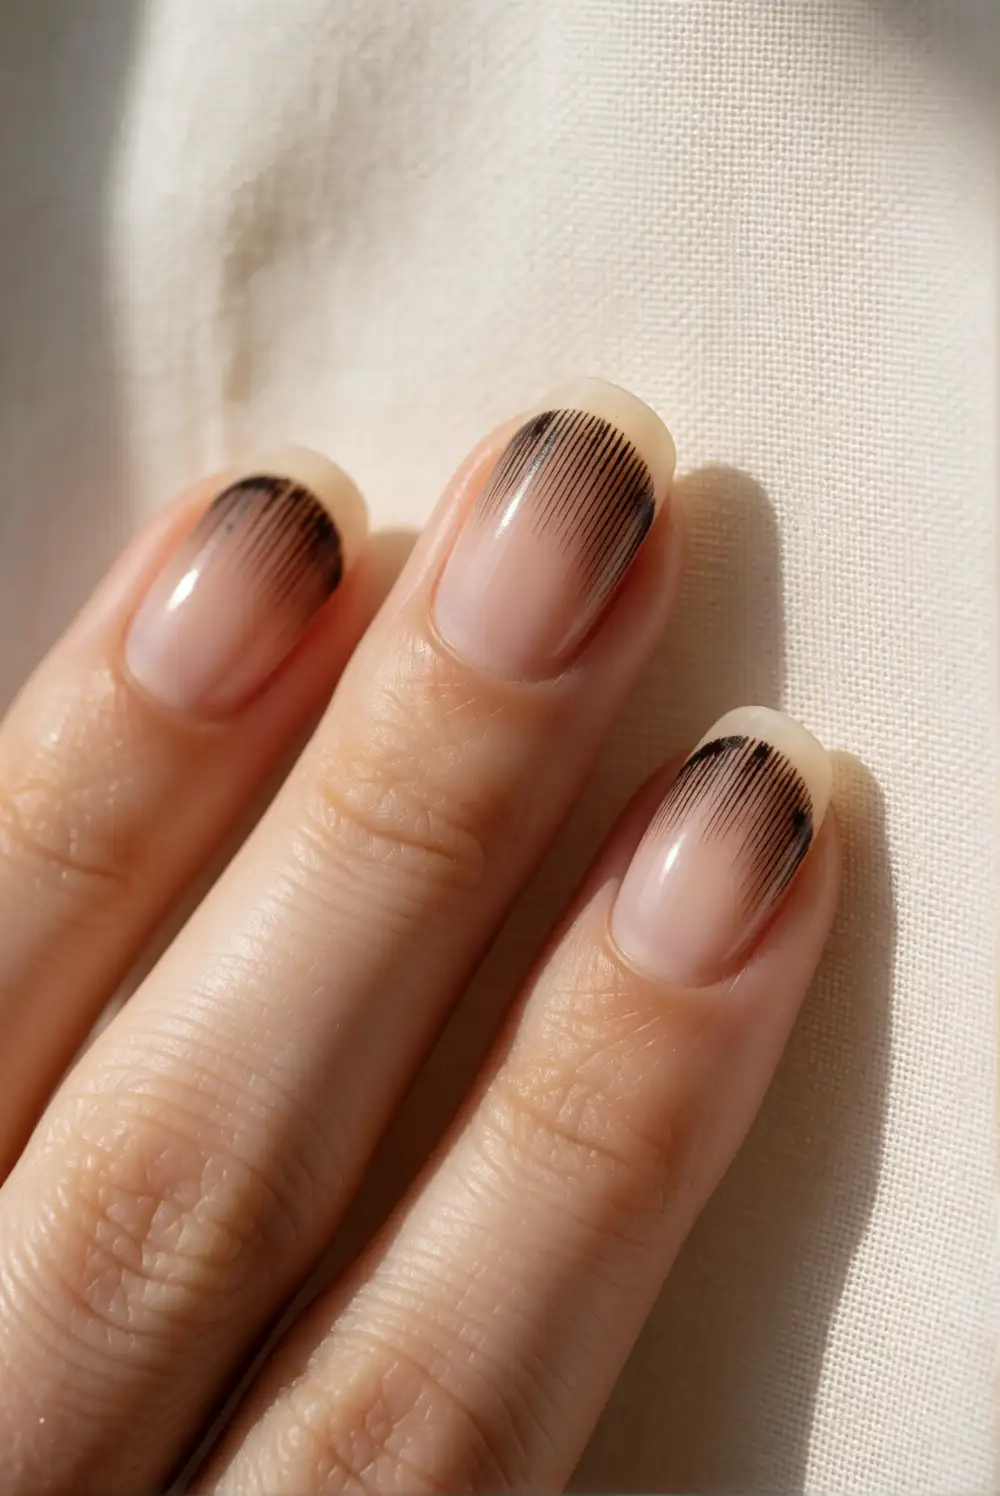
Negative space and fine black lines create a delicate web-inspired manicure without covering the natural nail. Apply a clear or sheer pink base coat and let it dry. With a fine liner brush, paint a few slender black lines from one corner of each selected nail, then add short curved connectors to suggest a web. Keep the artwork on one or two nails and leave the others mostly bare. A clear top coat protects the design while preserving its light, airy appearance.
For a tidier result, work slowly and use a small amount of polish on the brush; heavy lines can make the design look dense. A single web in one corner is enough to suggest the theme while keeping the manicure understated. If bare nail edges do not suit your workplace, add a translucent beige base for a softly finished background. Pair the web accent with plain sheer nails or a very thin black French tip for a coordinated look.
Mocha Nails with Crescent Moon Accents
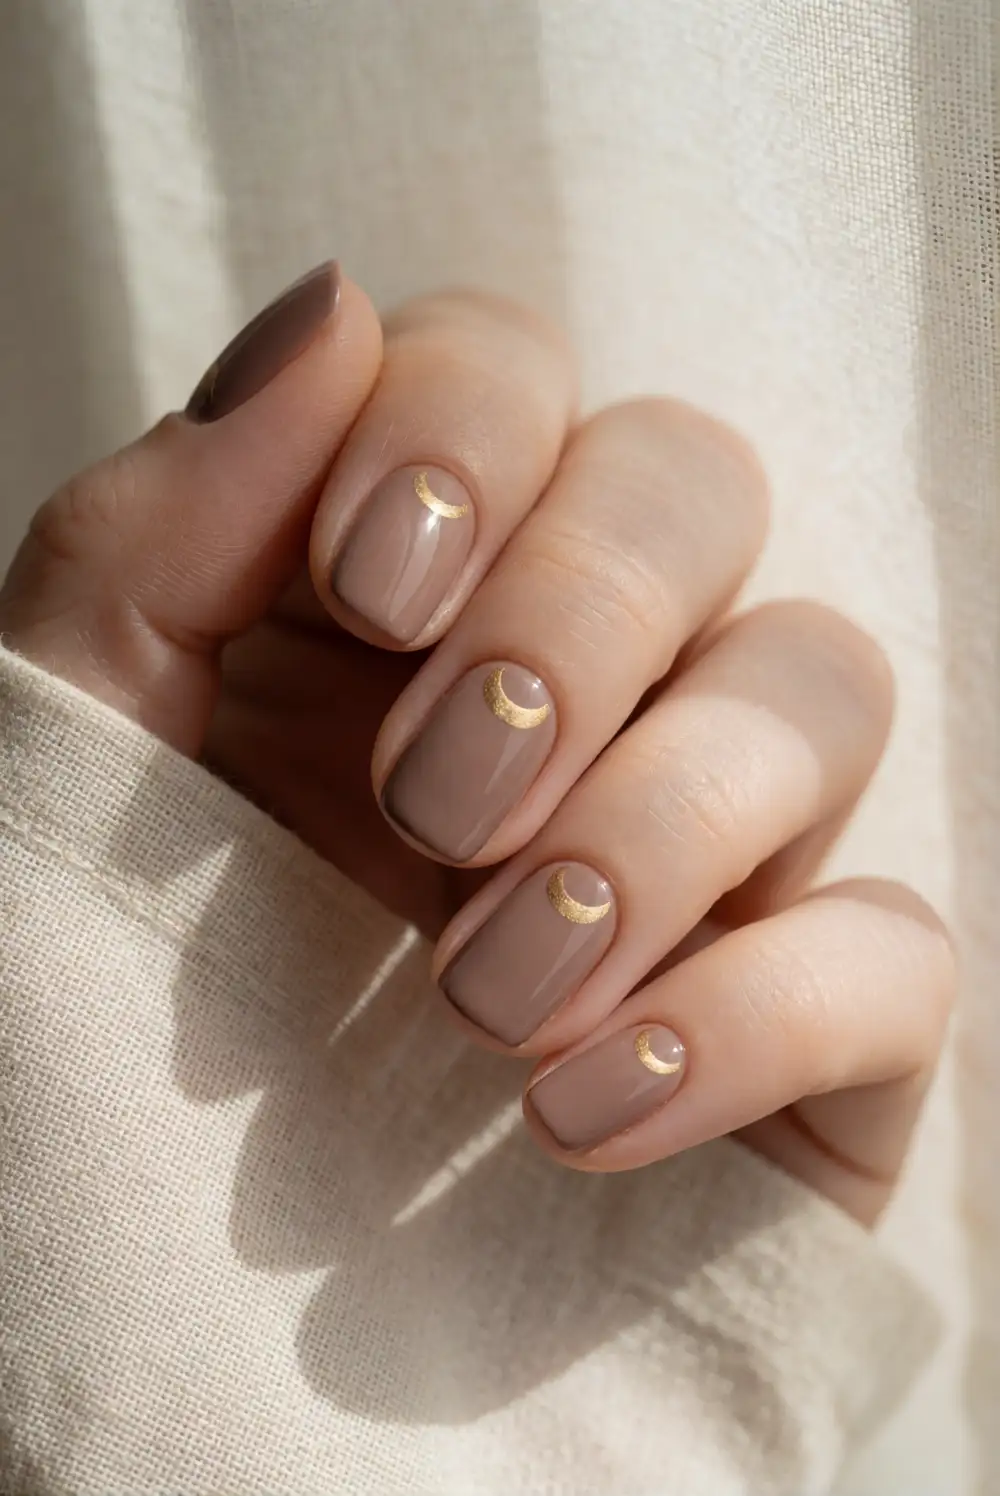
Mocha polish and small crescent moons create a subtle celestial manicure with a seasonal feel. Smooth on a base coat, then apply two thin coats of medium mocha or cocoa-brown polish. On one or two accent nails, use a fine brush to paint a small crescent in muted gold or soft cream near the cuticle. Let the details dry thoroughly before applying top coat. The warm brown base keeps the design grounded, while the small curved shapes add just enough interest.
Choose a subdued metallic rather than bright glitter to keep the manicure polished in a professional setting. You can place a single crescent on each accent nail or alternate the direction for a relaxed, balanced look. If you prefer a lower-contrast finish, use a lighter caramel shade for the moons. Short, softly rounded nails give the design a neat appearance, and the mocha color works naturally with autumn layers, knitwear, and everyday neutral outfits.
Glossy Burgundy Nails with One Matte Accent
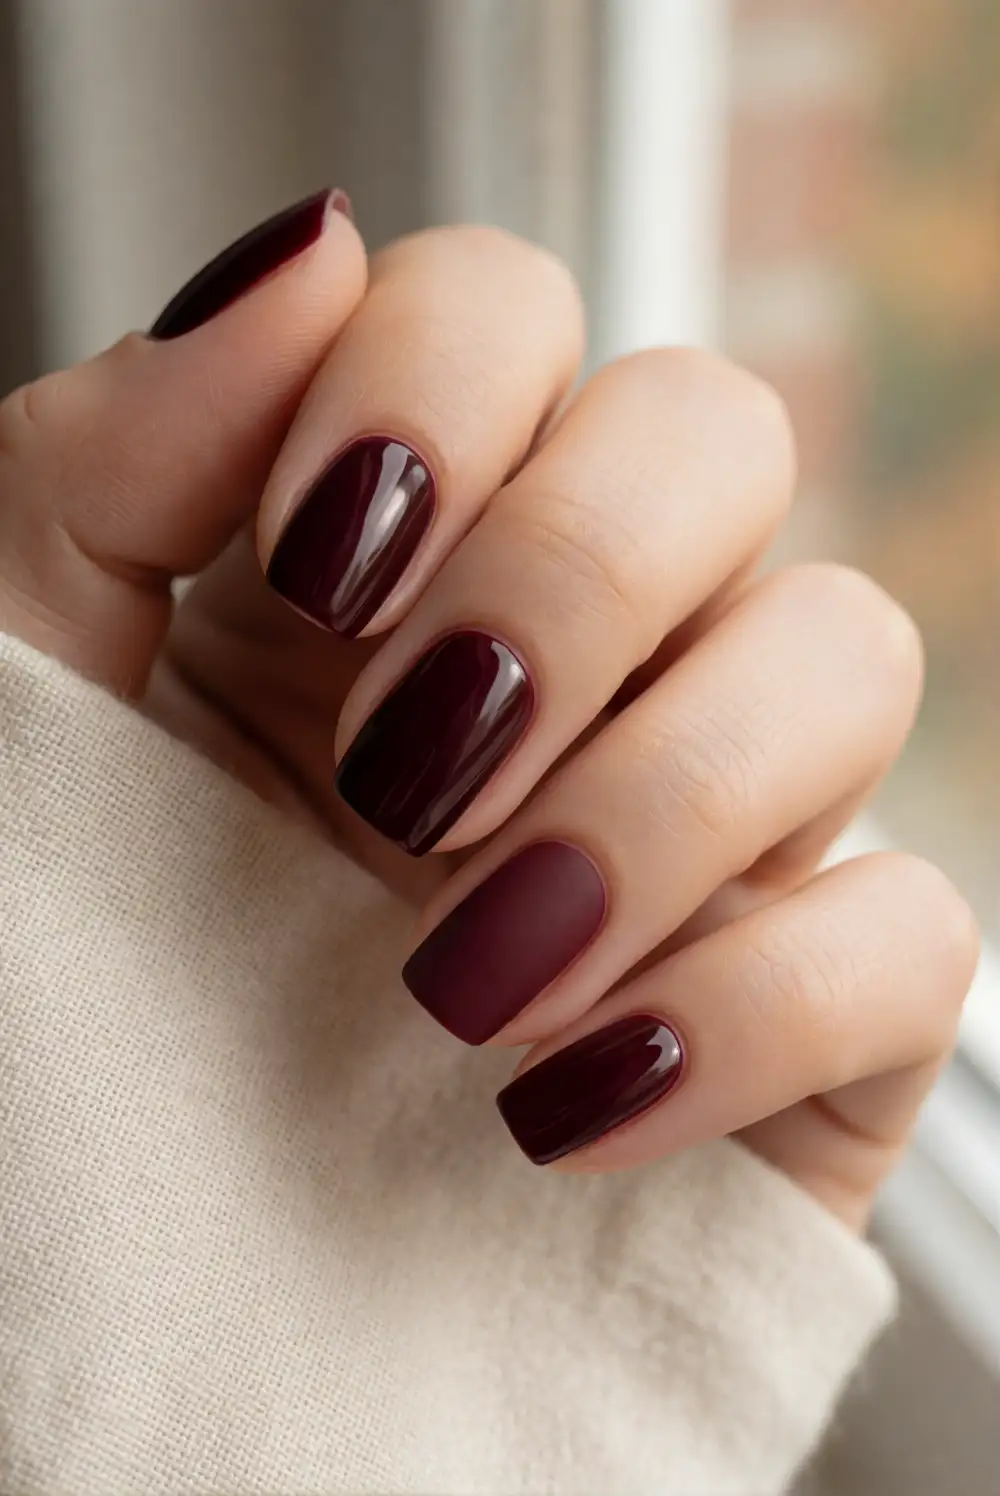
Glossy burgundy with one matte accent nail offers a seasonal manicure without any overt Halloween illustration. Apply a base coat and two thin layers of deep burgundy polish across every nail. Once dry, choose one accent nail and apply a matte top coat, leaving the remaining nails glossy. The finish contrast adds interest using only one color, so the result stays streamlined. Let both top coats dry fully before returning to daily tasks to avoid dents or smudges.
Keep the accent matte on a ring finger for a balanced, intentional look, or place it on the thumb if you prefer a detail that appears less prominent. A wine or berry shade can replace deep burgundy for a softer variation, while a darker polish feels especially suited to autumn. This design is easy to refresh at home and pairs well with simple jewelry. The single-color palette makes it a reliable choice for offices with conservative dress codes.
Office-friendly Halloween nails can be as simple as a sheer base with a dark tip, a muted seasonal accent, or a subtle change in finish. Pick a design that feels comfortable for your workplace, keep details neat, and use colors you already enjoy wearing. A small, thoughtful accent is all it takes to make your manicure feel festive while staying polished throughout the workday.








