
Want festive nails that work with a busy schedule and shorter nail beds? These Halloween nail ideas keep the designs simple, polished, and easy to adapt, from tiny pumpkin accents to glossy black tips. Choose a look that suits your style, gather a few polish colors and a fine nail brush, then add a seasonal touch without committing to elaborate nail art.
Glossy Black Micro French Tips
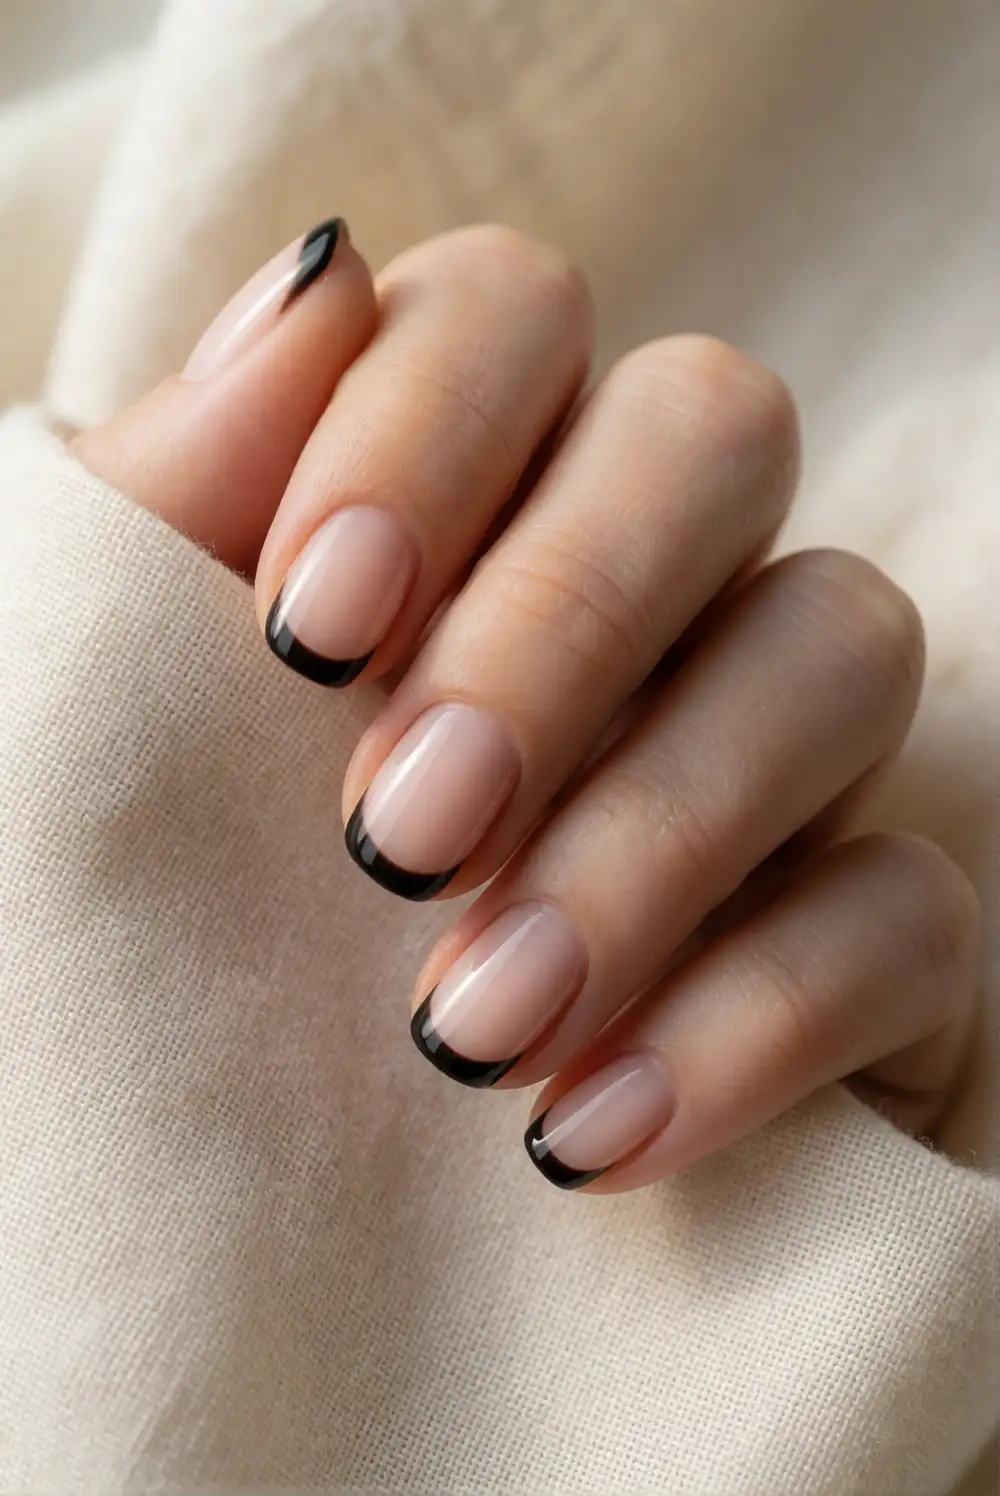
Give short nails a sleek Halloween update with glossy black micro French tips. Start with clean, shaped nails and apply a clear or sheer nude base coat. Once it is dry, use a fine nail art brush to paint a narrow black curve along each free edge. Keep the line delicate so it follows the natural nail shape, then seal the design with a clear top coat. A steady hand and thin brush make this look easier to control.
For a softer finish, try charcoal polish or make the tip on just one accent nail. If a curved line feels tricky, place a small dot of polish near each side edge and connect them with a fine brush. Pair these nails with silver rings or a black outfit for a polished seasonal look. The glossy finish catches the light while the restrained design stays comfortable for everyday plans and busy hands.
Tiny Pumpkin Accent Nails
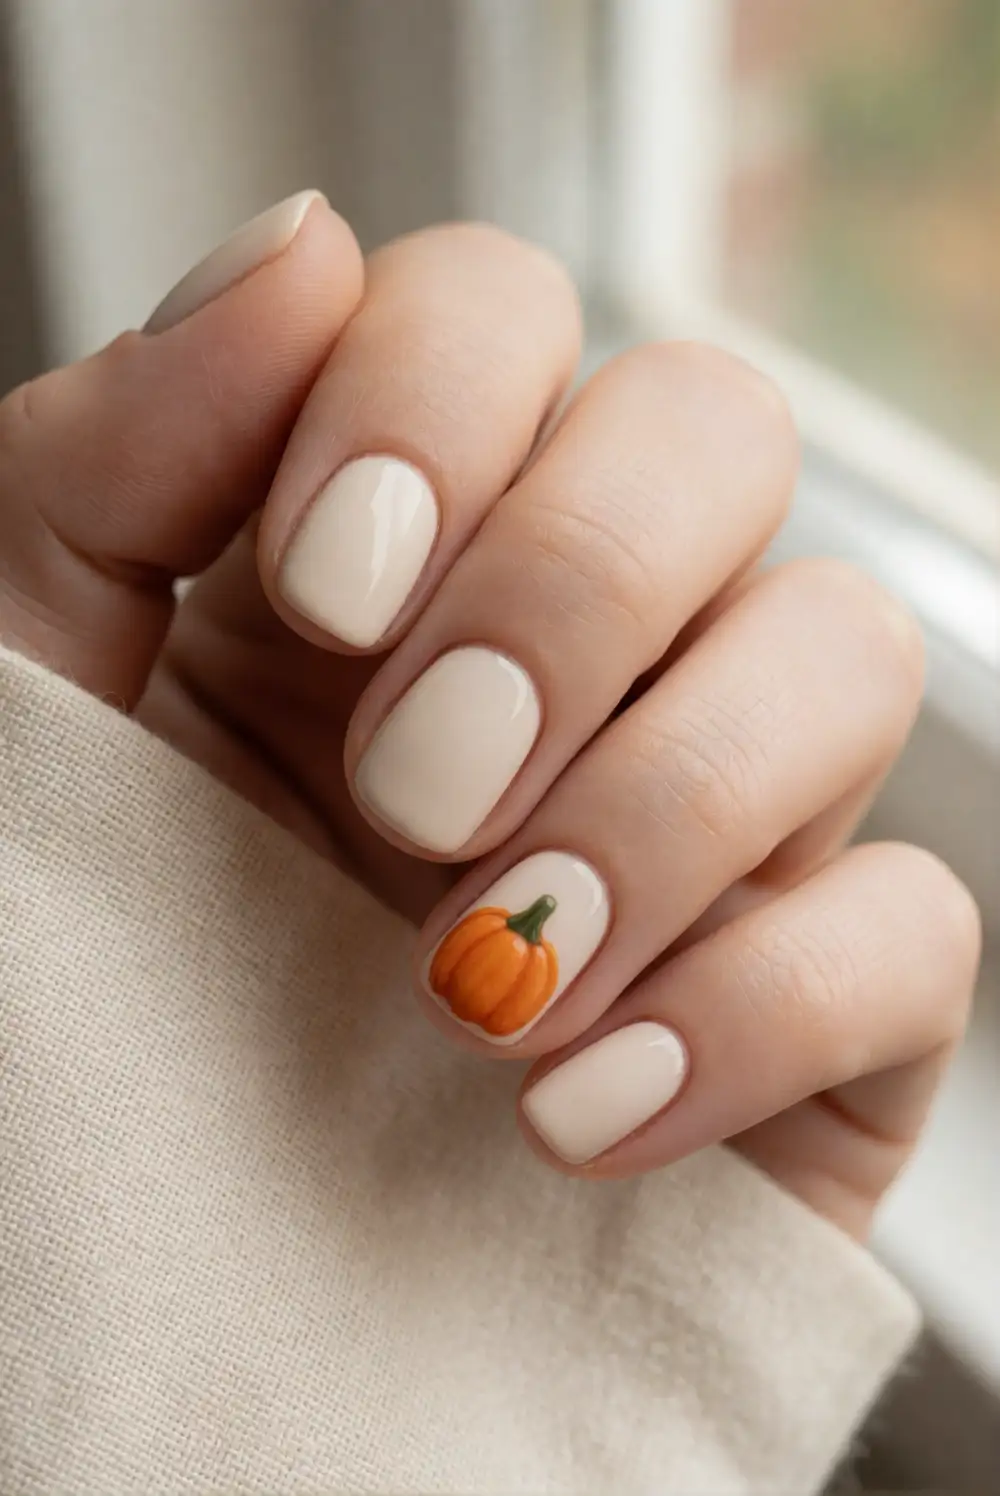
Make a petite pumpkin accent with orange polish, a fine brush, and a neutral base color. Apply the base coat to each nail and let it dry. On one or two accent nails, paint a small rounded orange shape, then add a short green stem with the brush tip. A few curved lines in a deeper orange can suggest pumpkin ridges. Finish with top coat after the details have dried, keeping the motif small enough to suit a short nail.
Choose cream, pale pink, or sheer beige as the base to keep the orange detail crisp. If drawing a pumpkin feels difficult, use a small orange dot with a tiny green stem for a simpler version. Repeat the accent on both ring fingers or keep it on one hand for an understated effect. The design pairs nicely with cozy sweaters and autumn accessories, and it remains easy to touch up when your schedule is full.
Crescent Moon and Star Nails
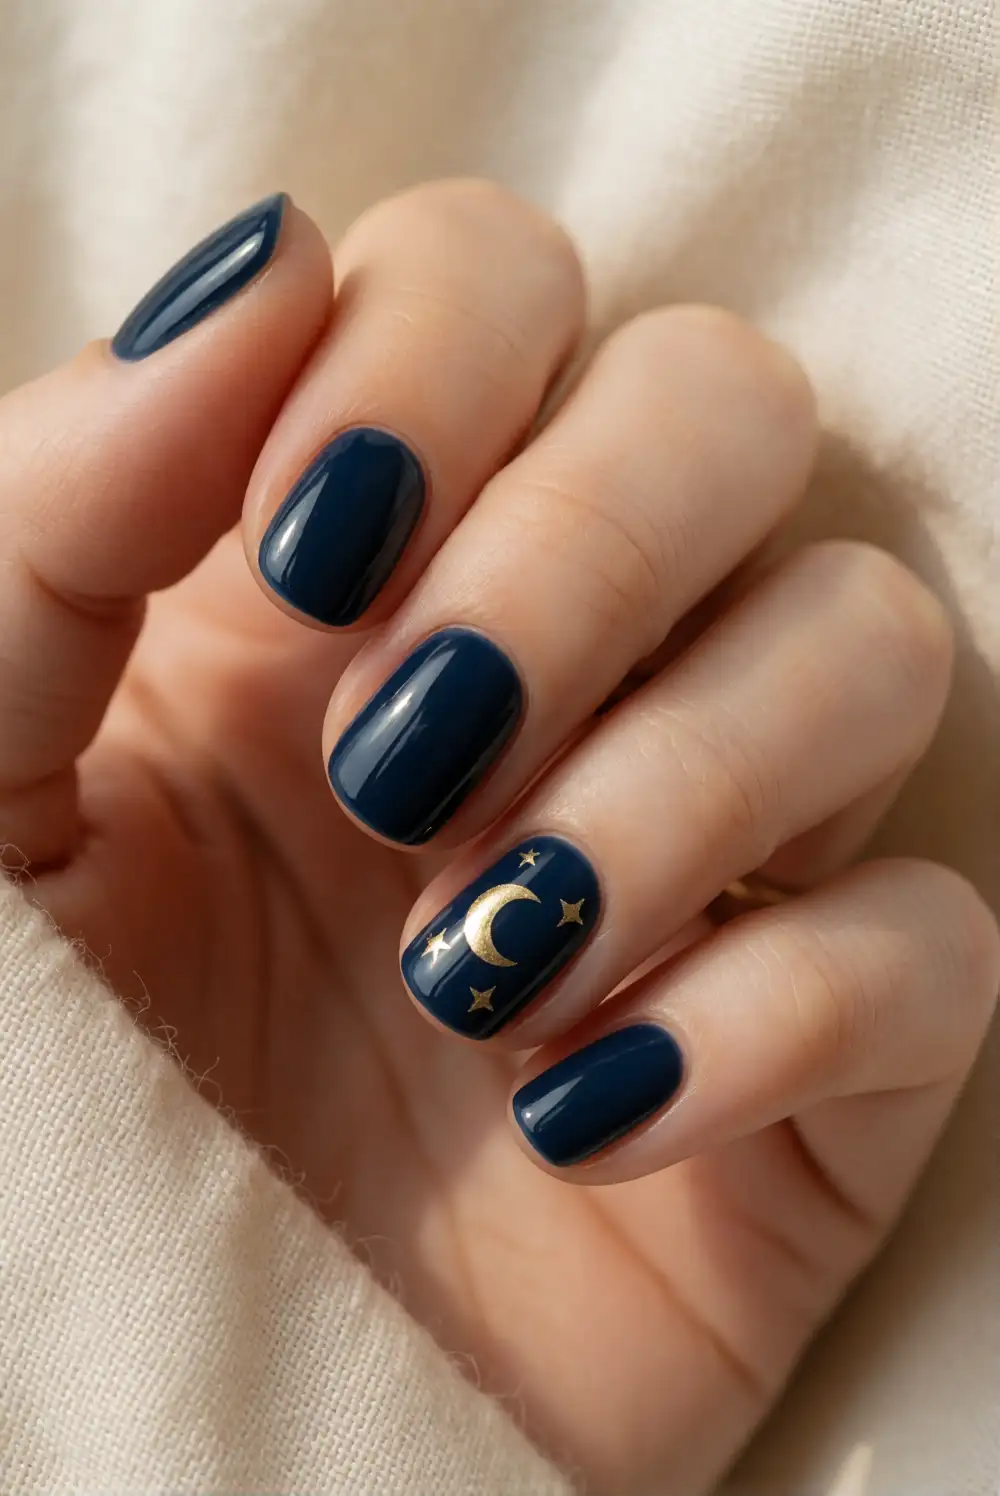
Create a night-sky manicure with a deep navy or black polish, a fine detail brush, and metallic gold polish. Paint the nails with the dark base and let it dry completely. On an accent nail, use the fine brush to draw a small crescent moon, then add a few tiny stars with light, careful strokes. Keep the shapes spaced apart so they remain clear on a short nail. Finish with a smooth top coat to bring out the metallic accents.
For an even simpler version, paint just one gold crescent and leave the remaining nails glossy and dark. A muted bronze or silver detail gives the look a different mood while keeping the same celestial feel. Use a dotting tool or the end of a fine brush to make small star points. This manicure works especially well with dark seasonal outfits and subtle jewelry, and the compact design does not need much room to read beautifully.
Minimal Ghost Accent Nails
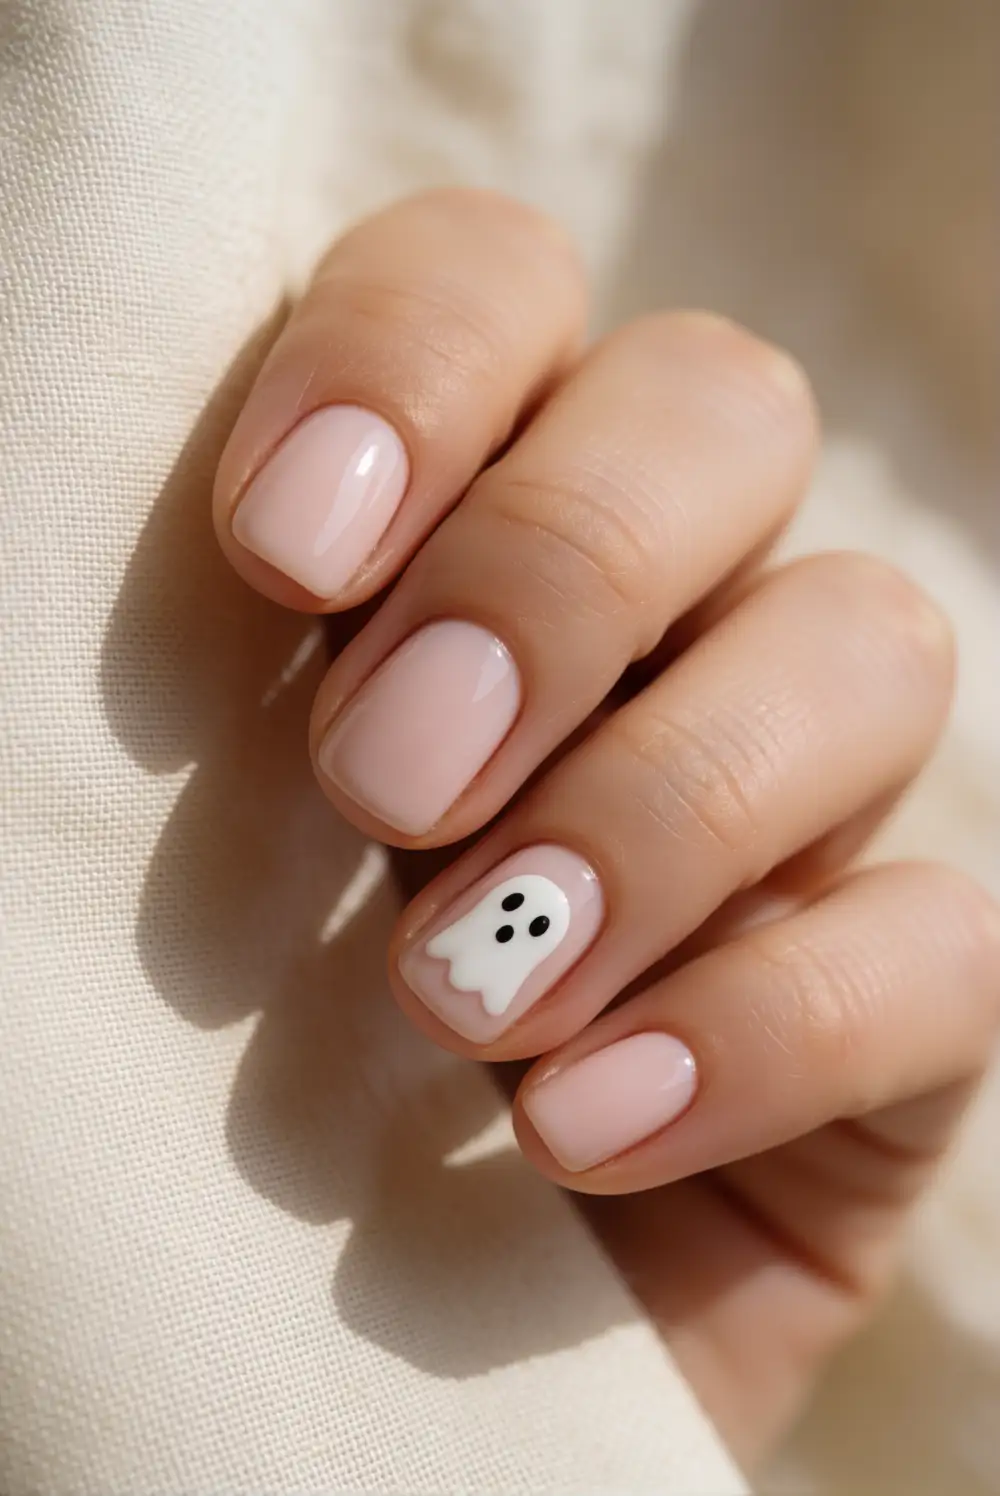
For a simple ghost accent, gather white polish, a fine brush, and a sheer pink or pale gray base. Apply the base color and allow it to dry. On one accent nail, paint a small rounded white shape with a softly wavy bottom edge. Add two tiny black dots for eyes after the white polish has set, then seal everything with a clear top coat. Keeping the figure small makes the design neat on short nails and leaves plenty of space around it.
Use a cream-colored ghost for a softer contrast, or place the small accent over a muted lavender base. If you prefer less detail, skip the eyes and let the simple white silhouette stand on its own. A single ghost on a ring finger can balance a plain manicure without making every nail feel busy. Pair it with a neutral outfit or repeat the white polish on the toes for a coordinated seasonal detail.
Cobweb Corner Nail Art
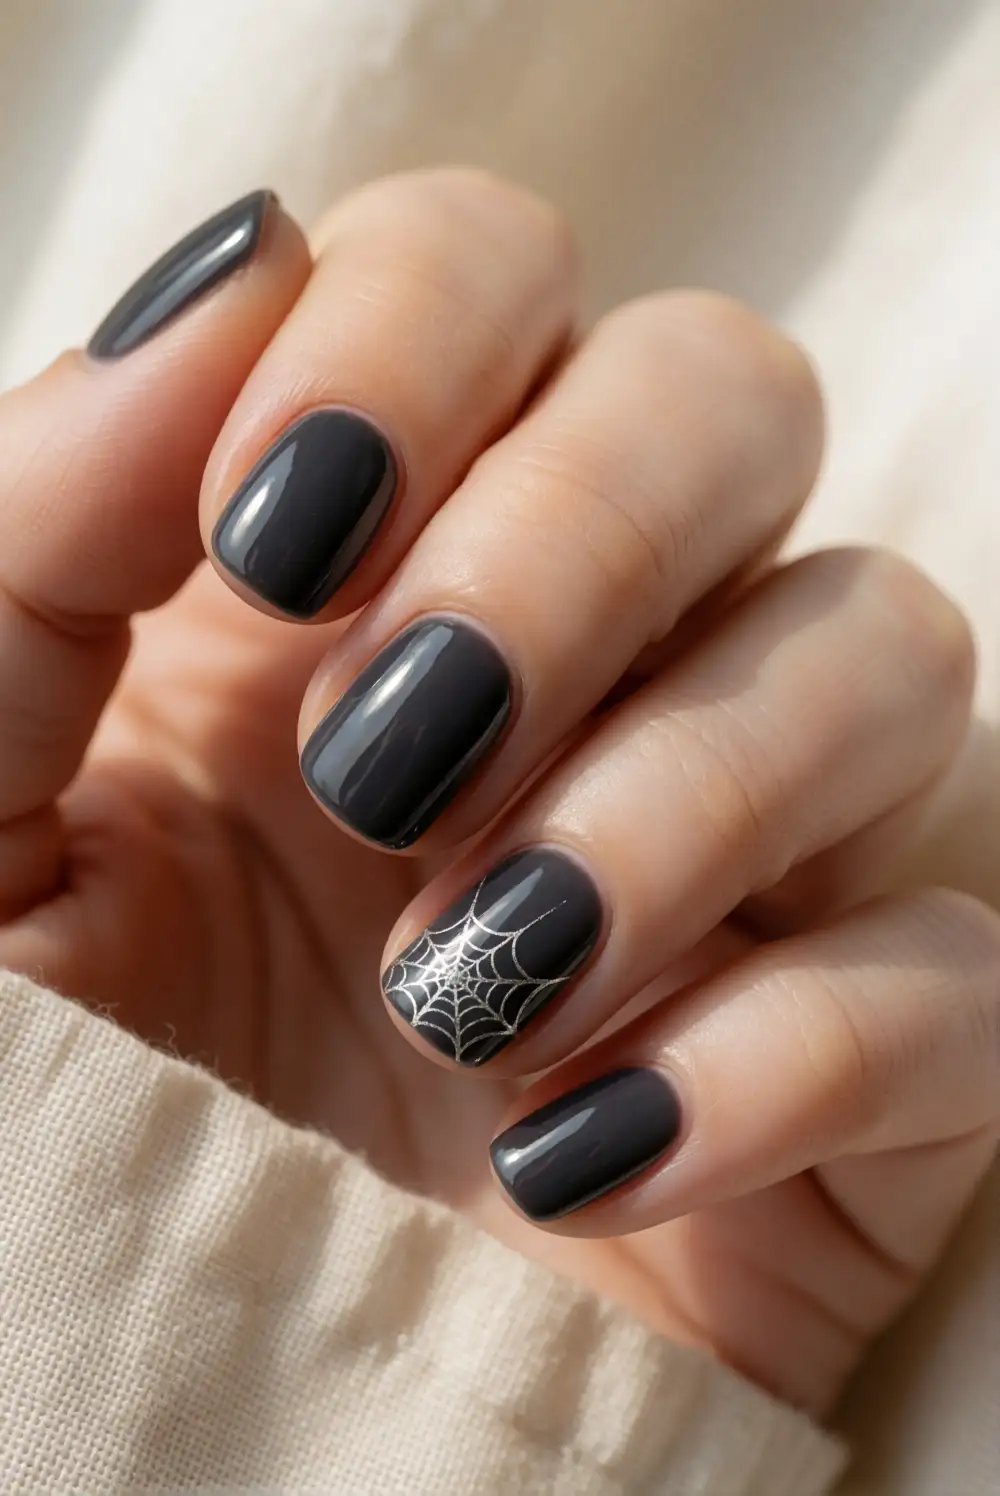
Paint a delicate cobweb in one corner of an accent nail using a fine brush and white or silver polish. Begin with a dark, dry base color, then draw three thin lines radiating outward from one corner. Join them with short curved strokes to form the web. Keep the lines light and the pattern small so it fits the nail without crowding the edges. Once the design is completely dry, apply a clear top coat to smooth and protect it.
A charcoal base creates a softer effect than solid black, while silver polish adds a subtle reflective finish. To simplify the web, draw only two radiating lines and connect them with a couple of curved strokes. Place the accent on a ring finger and keep the other nails a single glossy shade for an easy-to-wear balance. Because the design starts in a corner, it is especially suited to short nails and leaves much of the base color visible.
Burnt Orange Swirl Nails
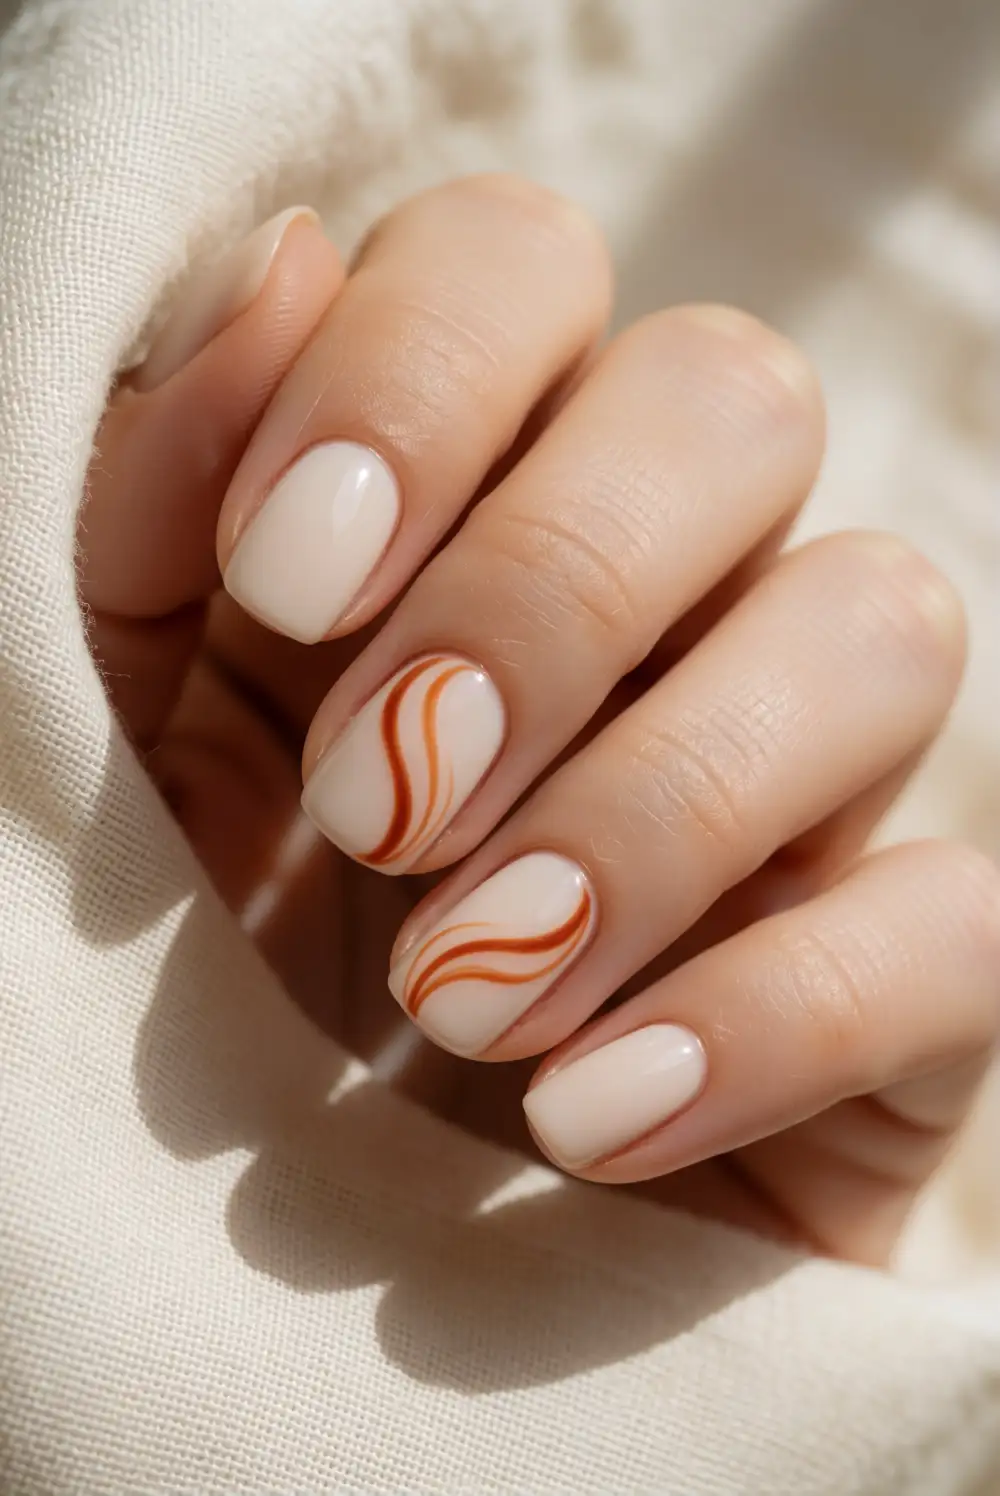
Bring an autumn-inspired accent to short nails with a burnt orange swirl over a creamy base. Apply a light base coat and let it dry before adding a thin, curving line of orange polish with a fine nail art brush. Add a second, shorter curve beside it if there is room, then leave the remaining nails in the base shade or paint them a solid orange. Finish with top coat after the swirls have dried to keep the surface smooth.
Try terracotta, rust, or muted pumpkin shades to suit the colors you already wear. A single broad curve is easier to manage than several tiny lines and still gives the manicure a playful seasonal look. Keep the design on one or two nails for a more understated result, or switch the base to pale pink for a warmer contrast. The soft curves look lovely with knit sleeves and take only a small amount of polish.
Black Cat Silhouette Accent Nails
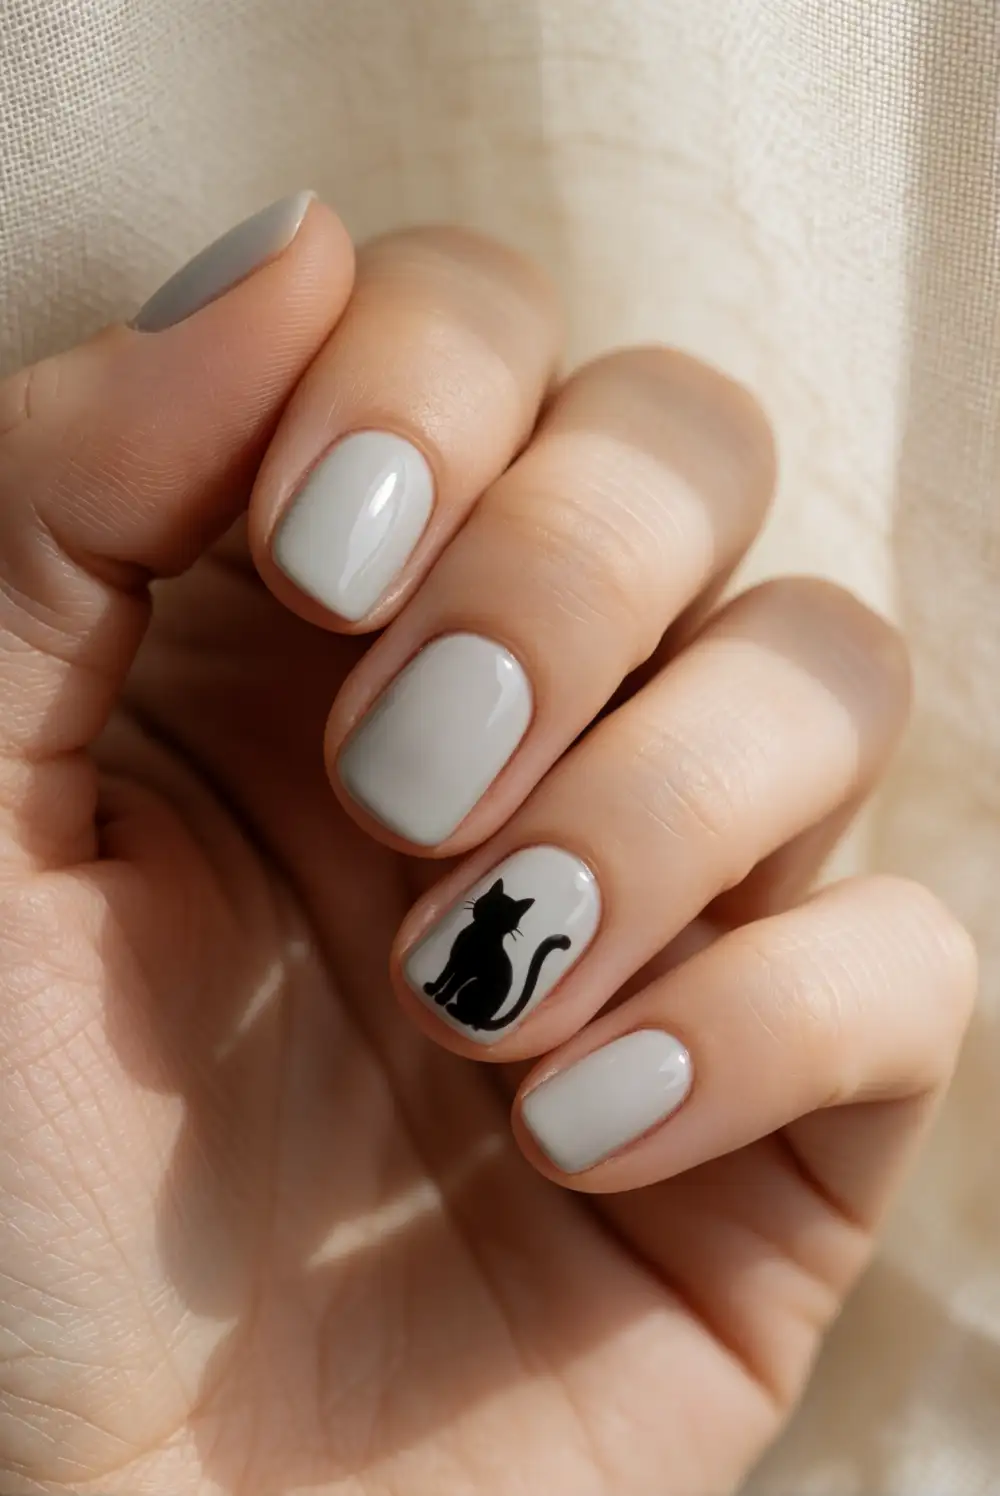
Make a tiny black cat silhouette with black polish and a fine brush over a pale, dry base. Paint a small oval for the body and a smaller rounded shape for the head, then add two pointed ears with short brush strokes. A thin curved tail completes the outline. Work on one accent nail so the shape has enough room to stay recognizable, and let each part dry before applying a clear top coat.
Choose a cream, muted mauve, or pale gray base to make the dark silhouette stand out. If shaping the full cat seems fiddly, use a simple black cat head with two small ears instead. Keep the rest of the manicure glossy black or neutral so the accent remains the focus. The miniature motif suits short nails particularly well and brings a seasonal detail to a simple outfit without requiring a full set of intricate artwork.
Candy Corn Color Block Nails
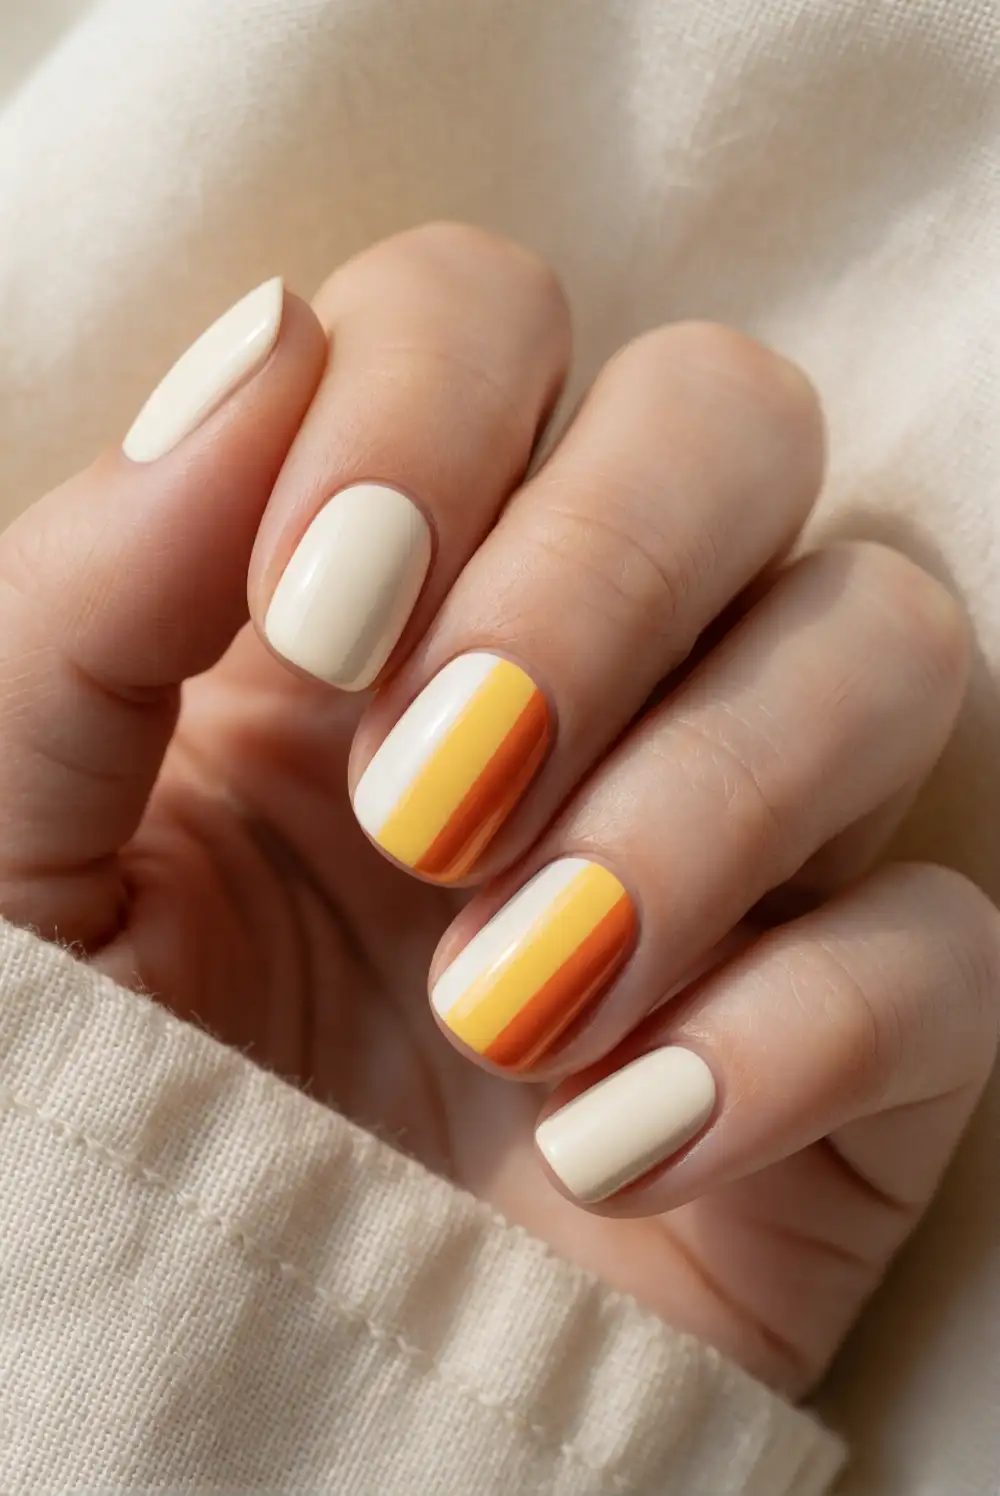
Use white, sunny yellow, and orange polish to make a small candy-corn-inspired accent. Start with a neutral or clear base coat and let it dry. Paint a narrow white band near the nail tip, a yellow band through the middle, and an orange band closer to the cuticle. A fine brush helps keep each stripe tidy on a short nail. Allow the colors to dry before adding a clear top coat to even out the finish.
Make the design on one accent nail if three color bands feel crowded across your manicure. Another option is to paint the bands vertically, using thin strokes that follow the nail’s length. A soft ivory base can help the colors blend into a more wearable palette, while bright white gives a sharper contrast. Keep the other nails in a single shade of orange or cream for a cheerful Halloween look that feels coordinated rather than busy.
Burgundy Drip Accent Nails
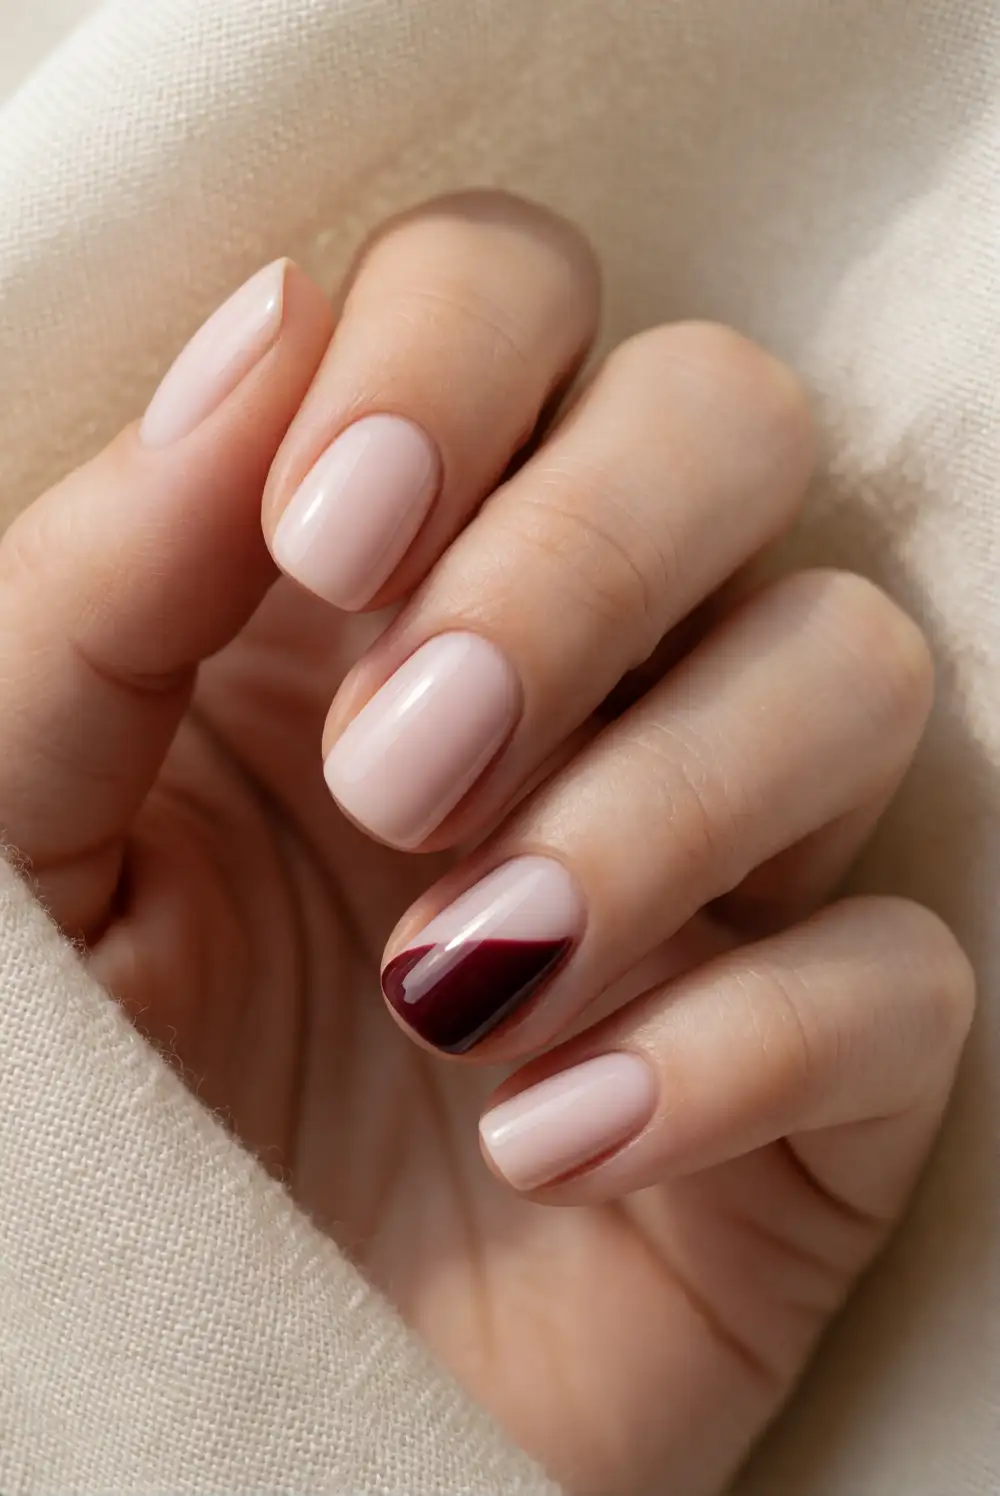
Create a graphic drip effect with burgundy polish over a pale pink, cream, or nude base. Once the base is dry, use a fine brush to paint a thin band near the nail tip. Pull a few short rounded drips downward from that band, varying their lengths for a natural pattern. Keep the shapes spaced out so the design stays readable on short nails. Let the polish dry fully before applying a clear top coat.
For a softer seasonal palette, choose a muted berry shade instead of a deep burgundy. You can also reverse the colors by painting the nail dark and making the drip detail cream. A single accent nail keeps the look subtle, while matching the design on both ring fingers feels more coordinated. Use thin layers of polish so the small details do not become raised, and pair the finished manicure with simple accessories in warm metallic tones.
Autumn Leaf Accent Nails
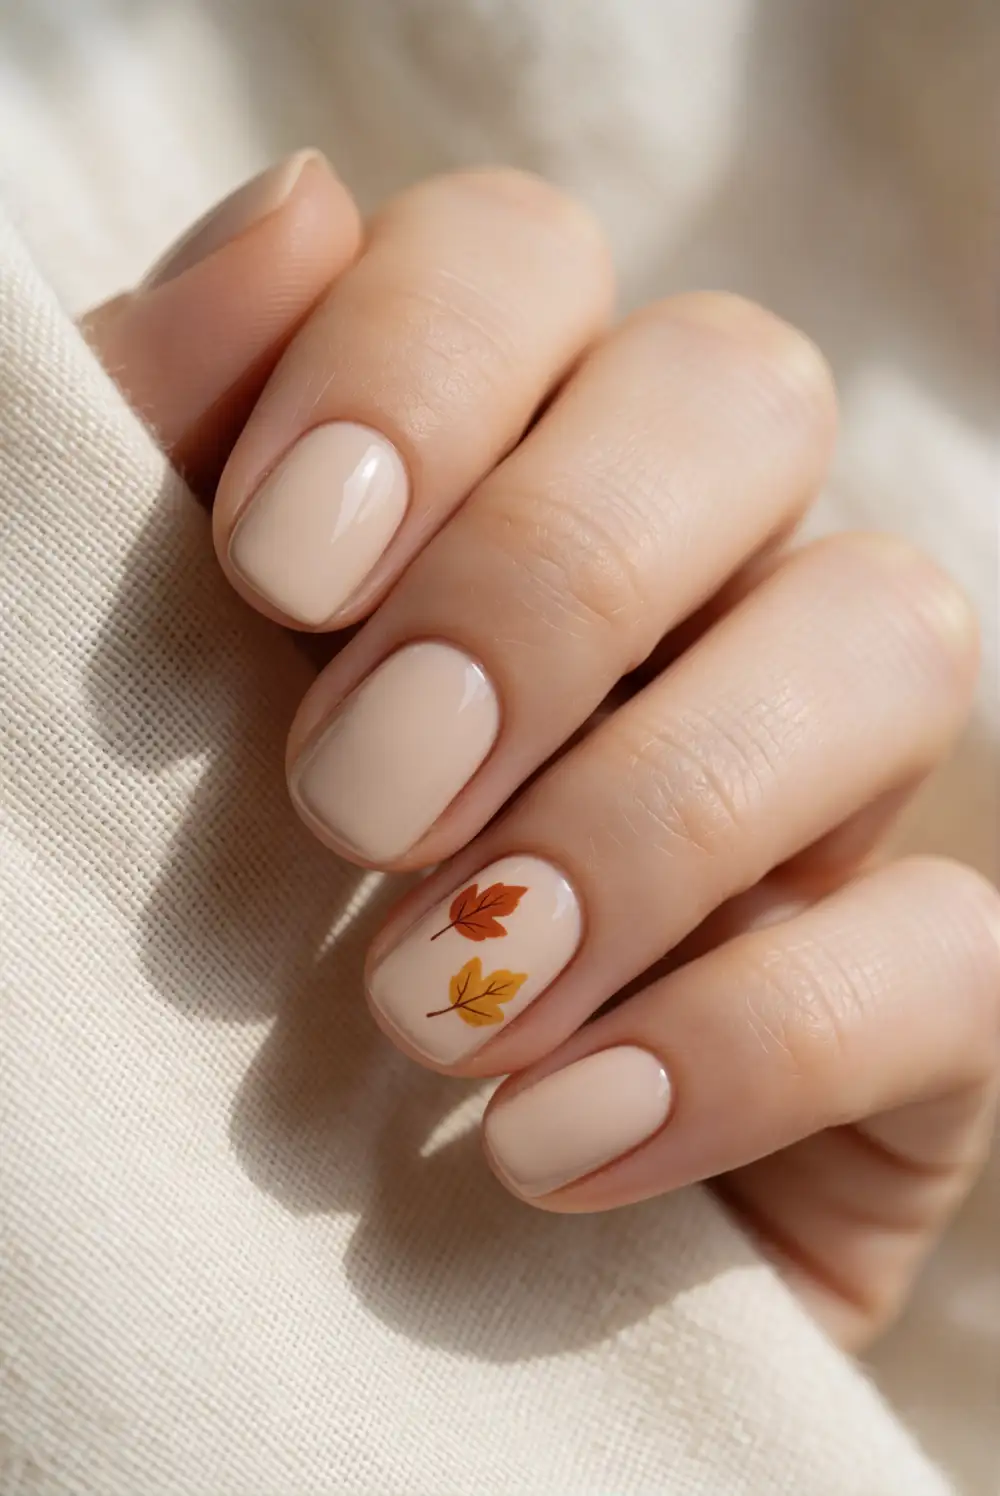
Paint a small autumn leaf using rust, mustard, or deep red polish and a fine nail art brush. Start with a neutral base coat and let it dry. Draw a short central line, then add a few small angled strokes to create a simple leaf shape. Keep the motif centered on one accent nail and avoid adding more detail than the surface can comfortably hold. When the polish has dried, seal the design with a clear top coat.
Use two warm shades on separate leaves if you want a little more color, or make the entire design in metallic bronze for a quieter finish. A sheer beige base lets the leaf take center stage, while pale blush gives it a softer look. Leave the rest of the nails in a coordinating solid color to keep the manicure balanced. This small seasonal detail works beautifully with fall layers and is easy to refresh as polish begins to wear.
Short nails can still feel festive with small, thoughtfully placed Halloween details. Pick one design that suits your routine, use a fine brush for compact accents, and finish with a clear top coat to help your manicure last. Whether you choose a tiny pumpkin, a glossy black tip, or a simple autumn leaf, these ideas make seasonal nail art easy to wear through busy days.








