
Give your manicure a festive touch with simple Halloween nail designs made from dots and lines. These approachable ideas use familiar colors, basic nail art tools, and easy patterns, from pumpkin-inspired accents to candy-corn stripes. Choose a look that suits your style, then adapt the colors or placement for a manicure that feels playful and polished.
Pumpkin Dot Accent Nails
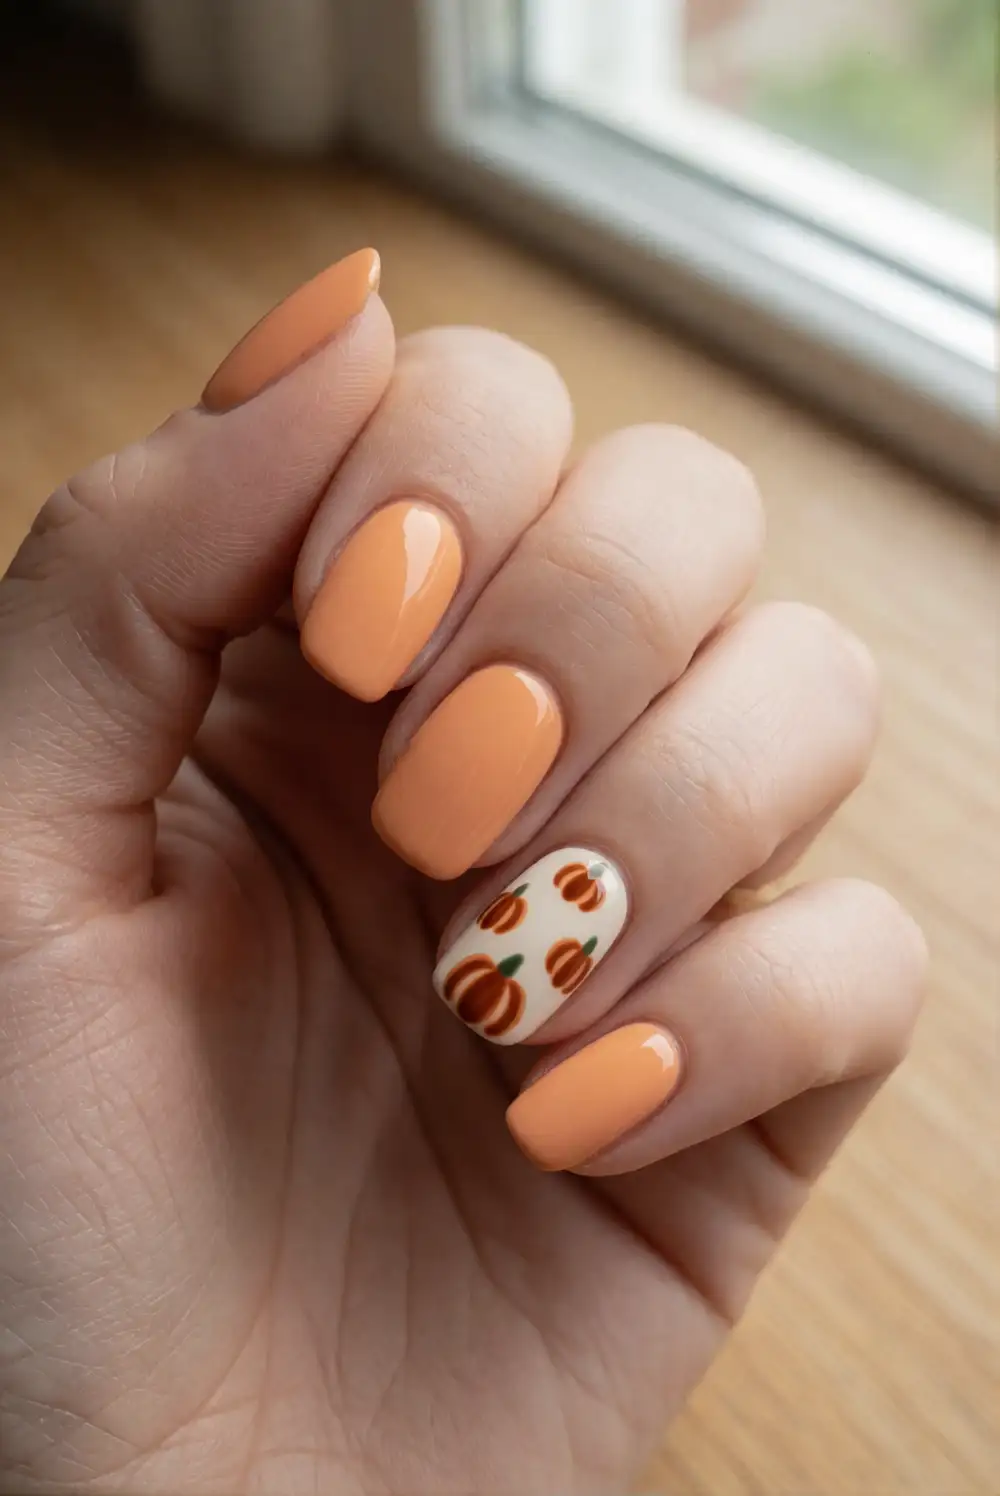
Paint your nails a creamy orange, leaving one accent nail in a soft ivory shade. After the polish dries, use a dotting tool or the rounded end of a toothpick to place dark brown dots in a loose pumpkin-like curve. Add a short green line near the top for a stem. Let the design dry fully before adding a clear top coat, taking care not to drag the dots across the nail.
Keep the pattern small and airy so the accent nail stays easy to wear. A muted burnt orange gives the manicure a softer autumn feel, while brighter orange makes the dots stand out. If you prefer a subtle look, paint the other nails sheer nude and reserve the pumpkin detail for a single finger. A glossy top coat adds a smooth finish, and a matte coat gives the design a velvety, seasonal look.
Candy Corn Stripe Nails
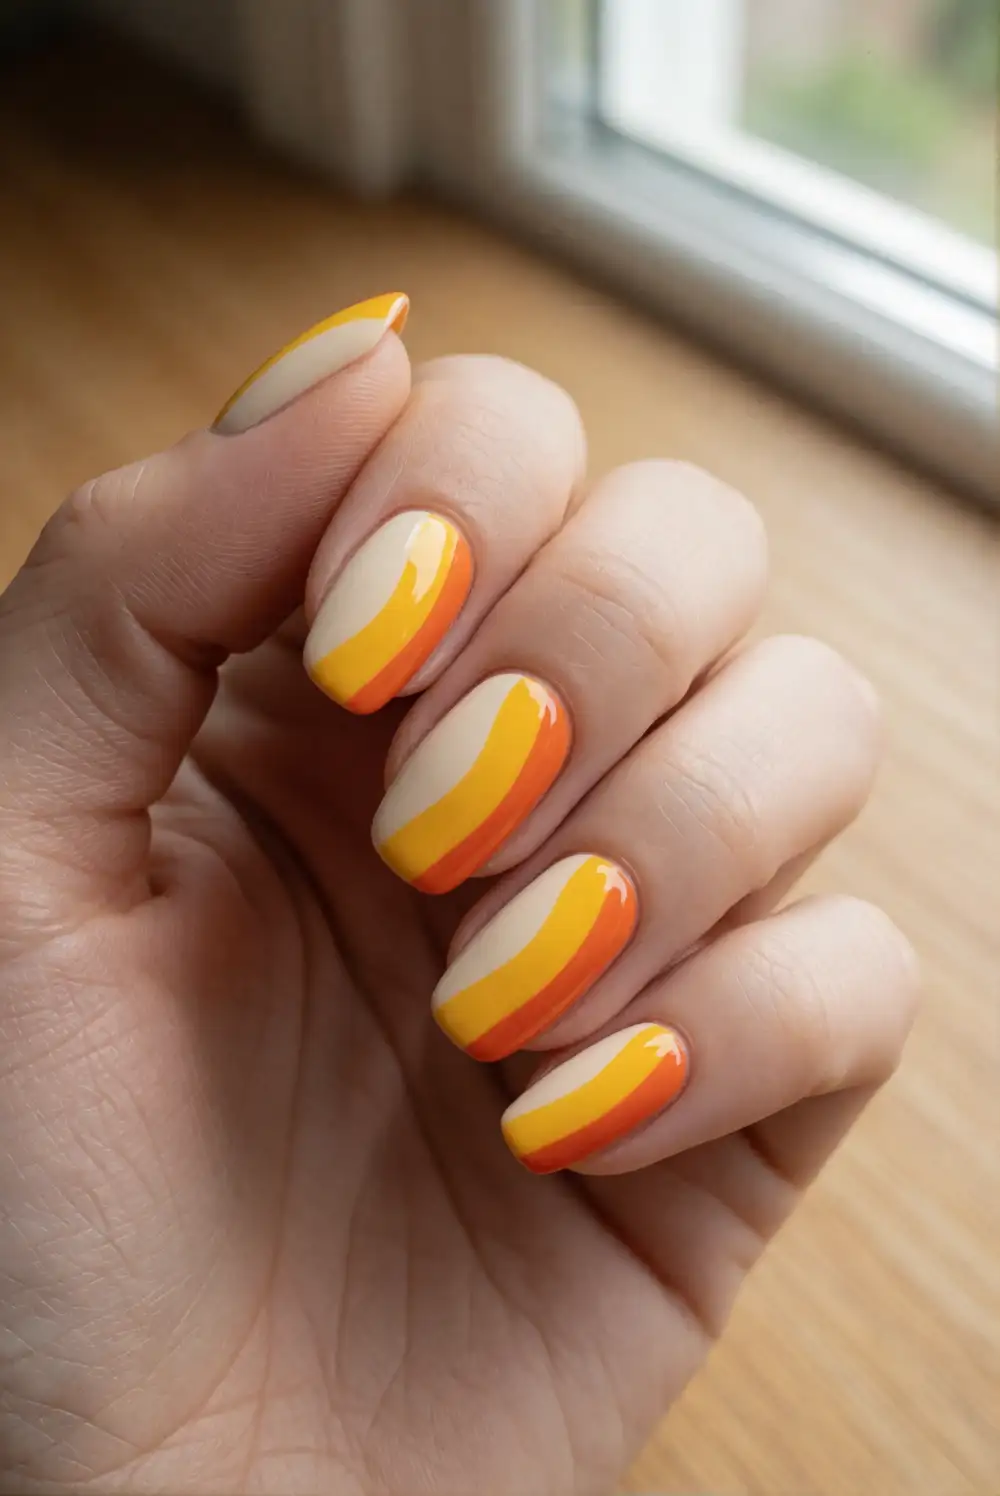
Start with a pale cream base coat, then create curved bands of yellow and orange across each nail, leaving the light base visible at the tips. A fine striping brush helps guide clean lines, but narrow pieces of nail tape can also mark the color boundaries. Allow each band to dry before applying the next shade. Finish with a clear top coat to smooth the edges and give the candy-inspired colors a neat shine.
Try the full striped design on an accent nail and use a single orange or yellow stripe on the remaining nails for a quieter variation. Slightly curved bands follow the natural shape of the nail and look more playful than perfectly straight blocks. Keep the color layers thin to help them dry evenly. For a softer palette, choose buttery yellow and peachy orange over bright shades, then pair the manicure with neutral accessories.
Black Cat Line Accent Nails
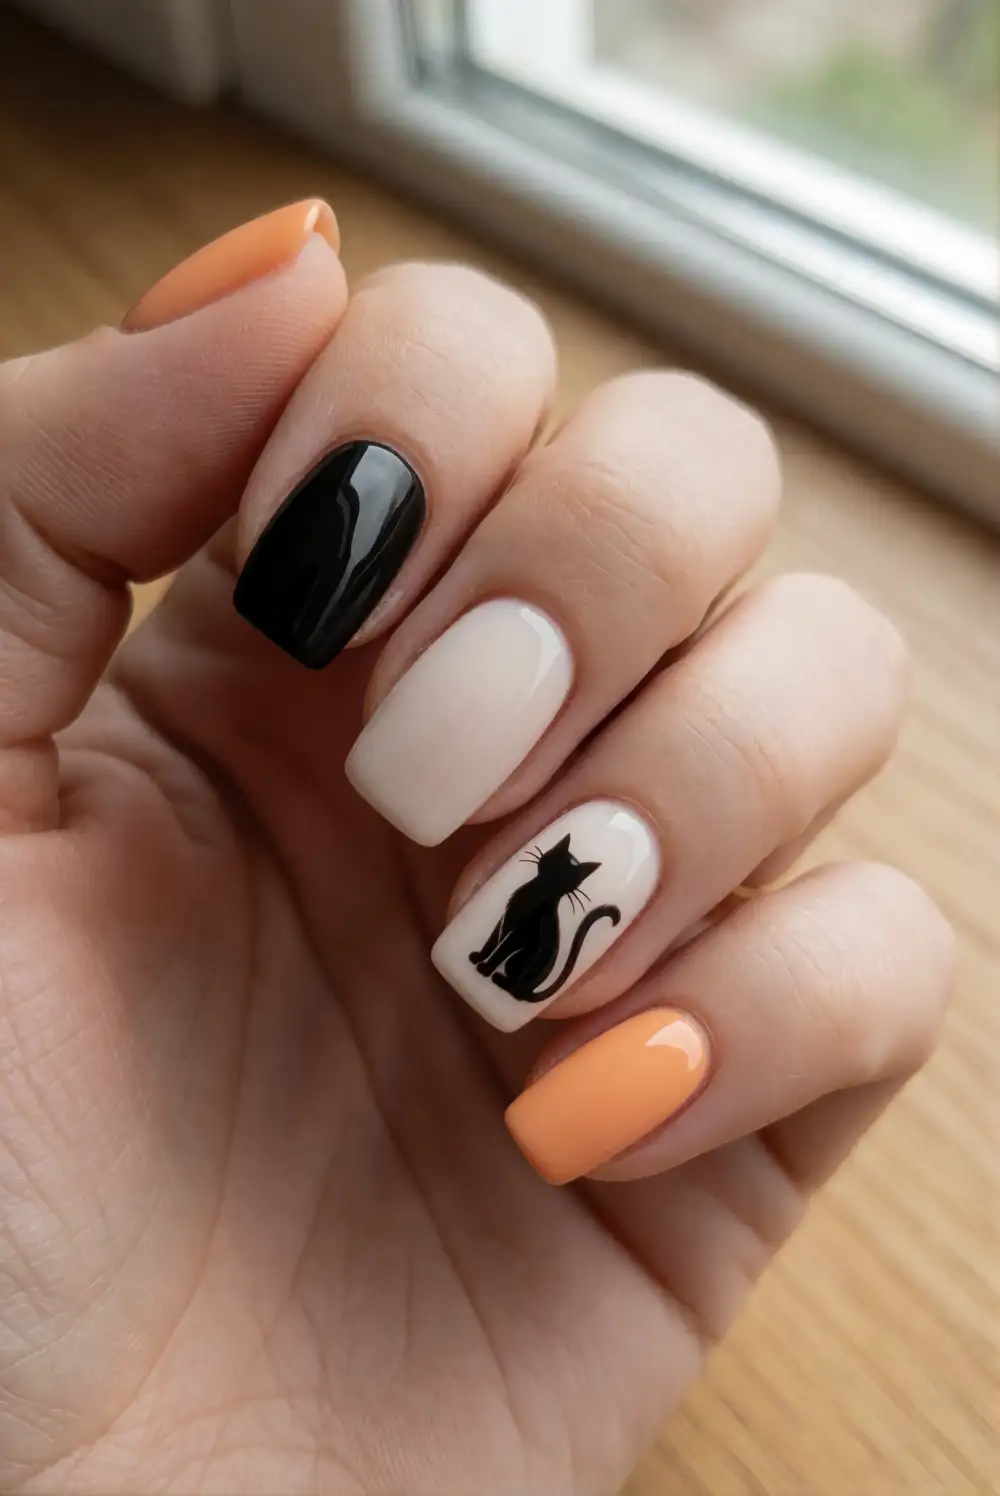
Apply a warm ivory polish as the base and let it dry completely. With a fine black nail-art brush, draw a simple curved line for a cat’s back and tail on one accent nail. Add tiny dots for the eyes and a short line for the nose, keeping the shapes minimal and graphic. Paint the rest of the nails glossy black or soft orange, then seal the design with a clear top coat.
For a more understated version, make the cat outline in charcoal on a sheer nude base and keep the other nails a single cream shade. A fine brush with flexible bristles makes the curved line easier to control; rest your hand on a stable surface while painting. You can place the silhouette near the nail tip or along one side. Let every detail dry well before top coating to keep the outline crisp.
Spiderweb Corner Line Nails
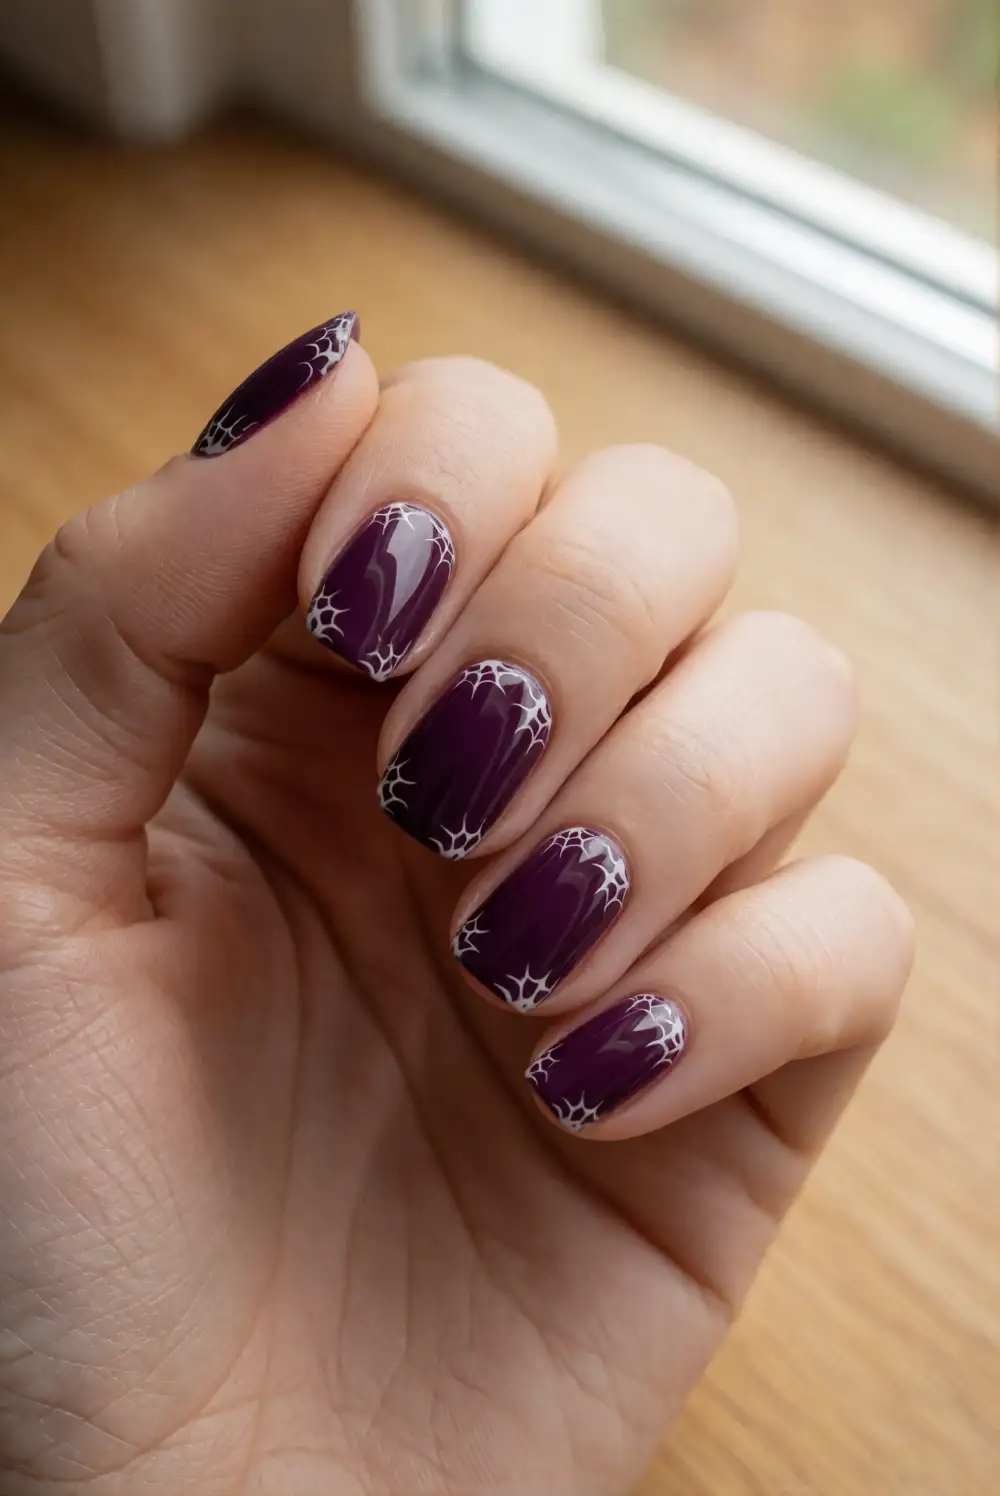
Paint each nail a deep plum or charcoal shade and wait until the base is dry. Use a thin white nail-art brush to draw several lines radiating from one corner, then connect them with short curved strokes to suggest a small web. Keep the web confined to the edge so the design remains clean and wearable. Once the lines have set, add a clear top coat with a light touch.
Choose a single accent nail for a delicate detail, or repeat the corner pattern across a few nails for a bolder effect. A pale lilac base creates a softer contrast, while white lines on black look especially graphic. If freehand painting feels tricky, make shorter strokes and pause between them rather than trying to draw a continuous line. A glossy finish enhances the contrast, while a matte top coat gives the dark base a modern look.
Midnight Dots and Moon Lines
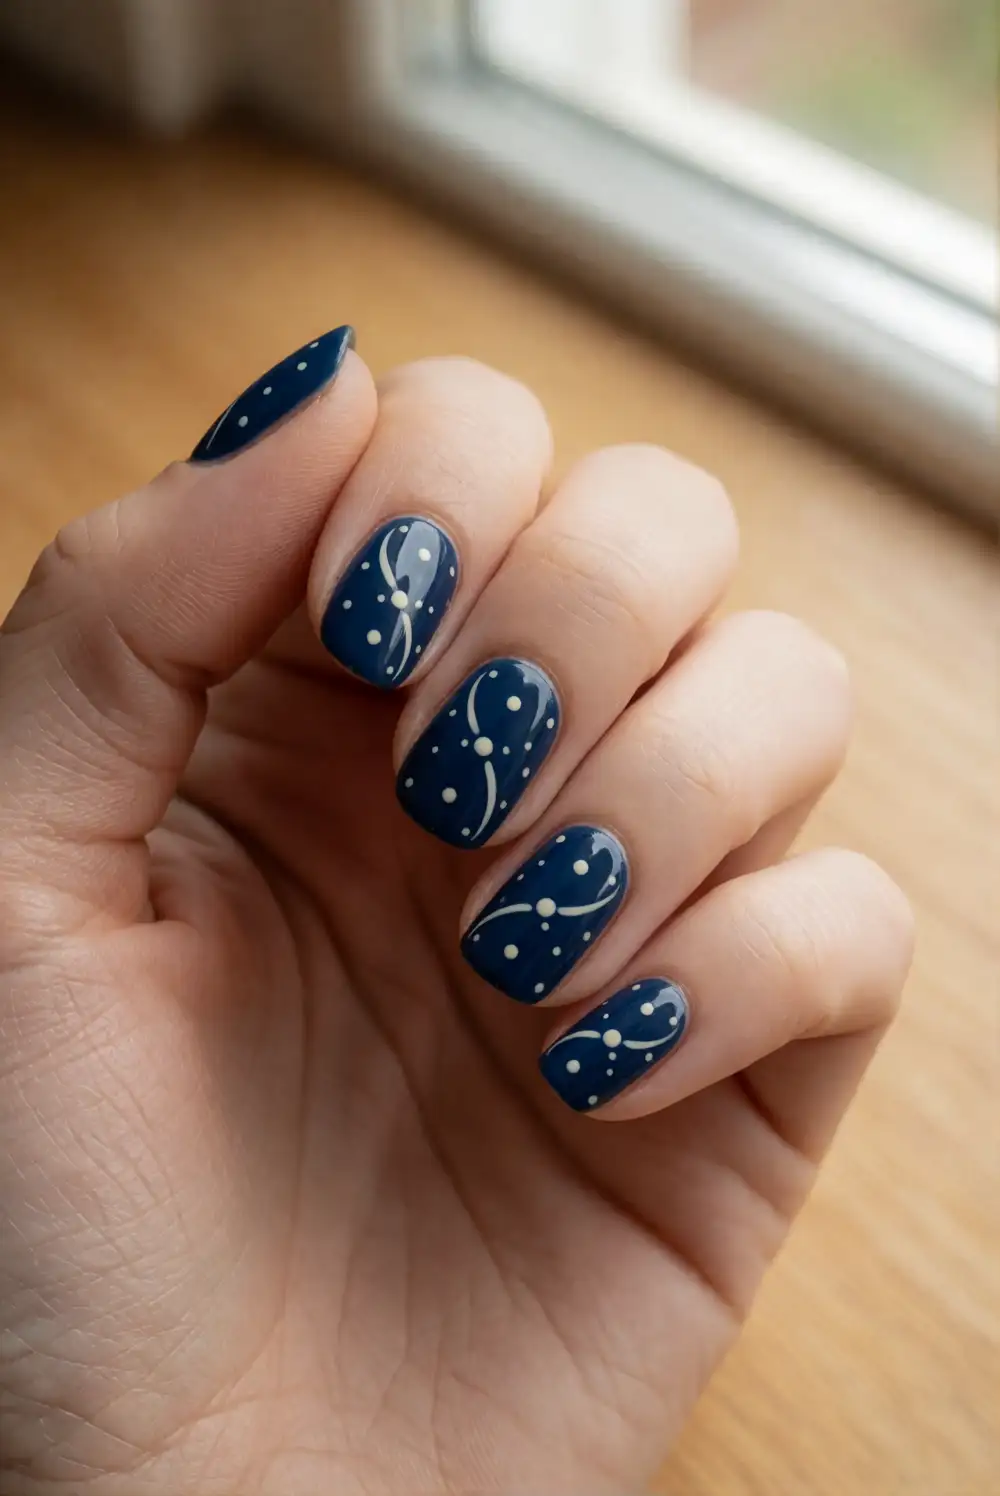
Cover your nails with midnight blue polish and let the color dry. Use a small dotting tool to scatter tiny ivory dots across each nail, then add a slim curved line near the tip with a fine brush. The line can suggest a crescent shape without requiring a detailed illustration. Work with a light touch, leaving plenty of dark space around each mark, and finish with a clear coat once the pattern is dry.
Vary the placement of the dots so the manicure feels balanced rather than crowded. A dusty purple base or a deep charcoal shade works well if you want an alternative to blue. Keep the curved line on an accent nail and use scattered dots on the others for a simpler everyday version. A glossy top coat makes the pale details pop, while a sheer shimmer layer can add a soft night-sky effect without obscuring the pattern.
Ghostly White Dot Nails
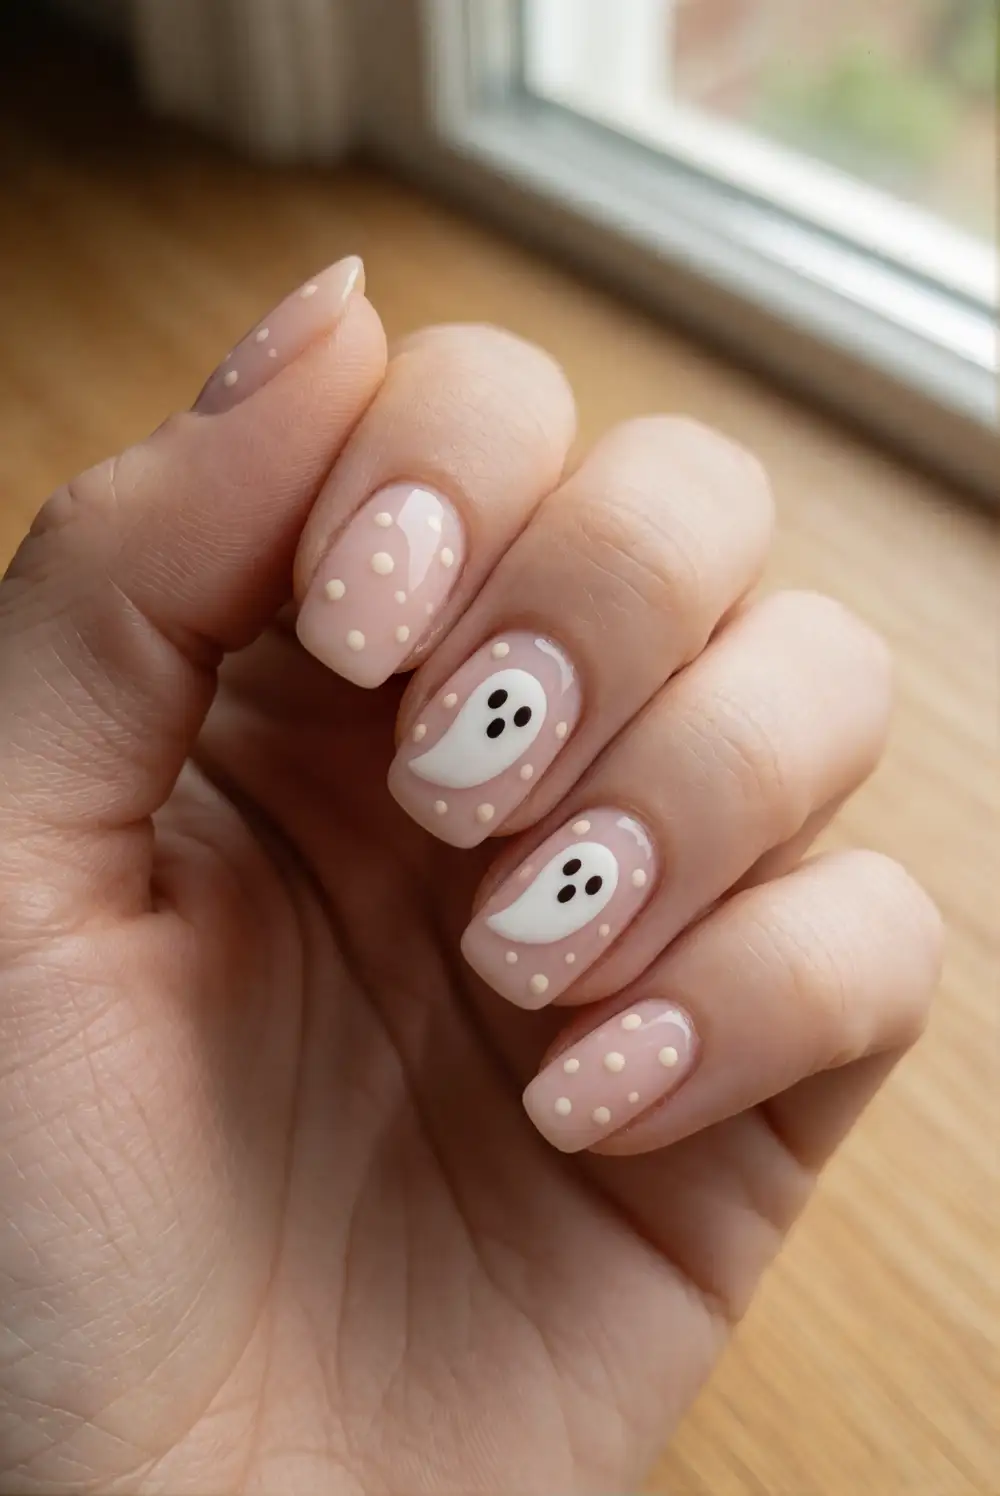
Brush on a sheer peach or pale pink base and allow it to dry. On an accent nail, paint a small rounded white shape with a fine brush, then add a short wavy line at the bottom to make a flowing ghost silhouette. Use a dotting tool for tiny dark eyes, and place a few scattered white dots on neighboring nails. Let the details dry before sealing the manicure with a smooth clear top coat.
For a minimal take, skip the silhouette and use only ivory dots over a rosy nude base. You can also paint the small ghost near the nail tip, leaving the rest of the nail open for a clean, airy finish. Keep the design light by using only a few details per nail. A glossy top coat makes the white shapes look crisp, while a milky base creates a softer, more delicate contrast.
Orange French Tip Lines
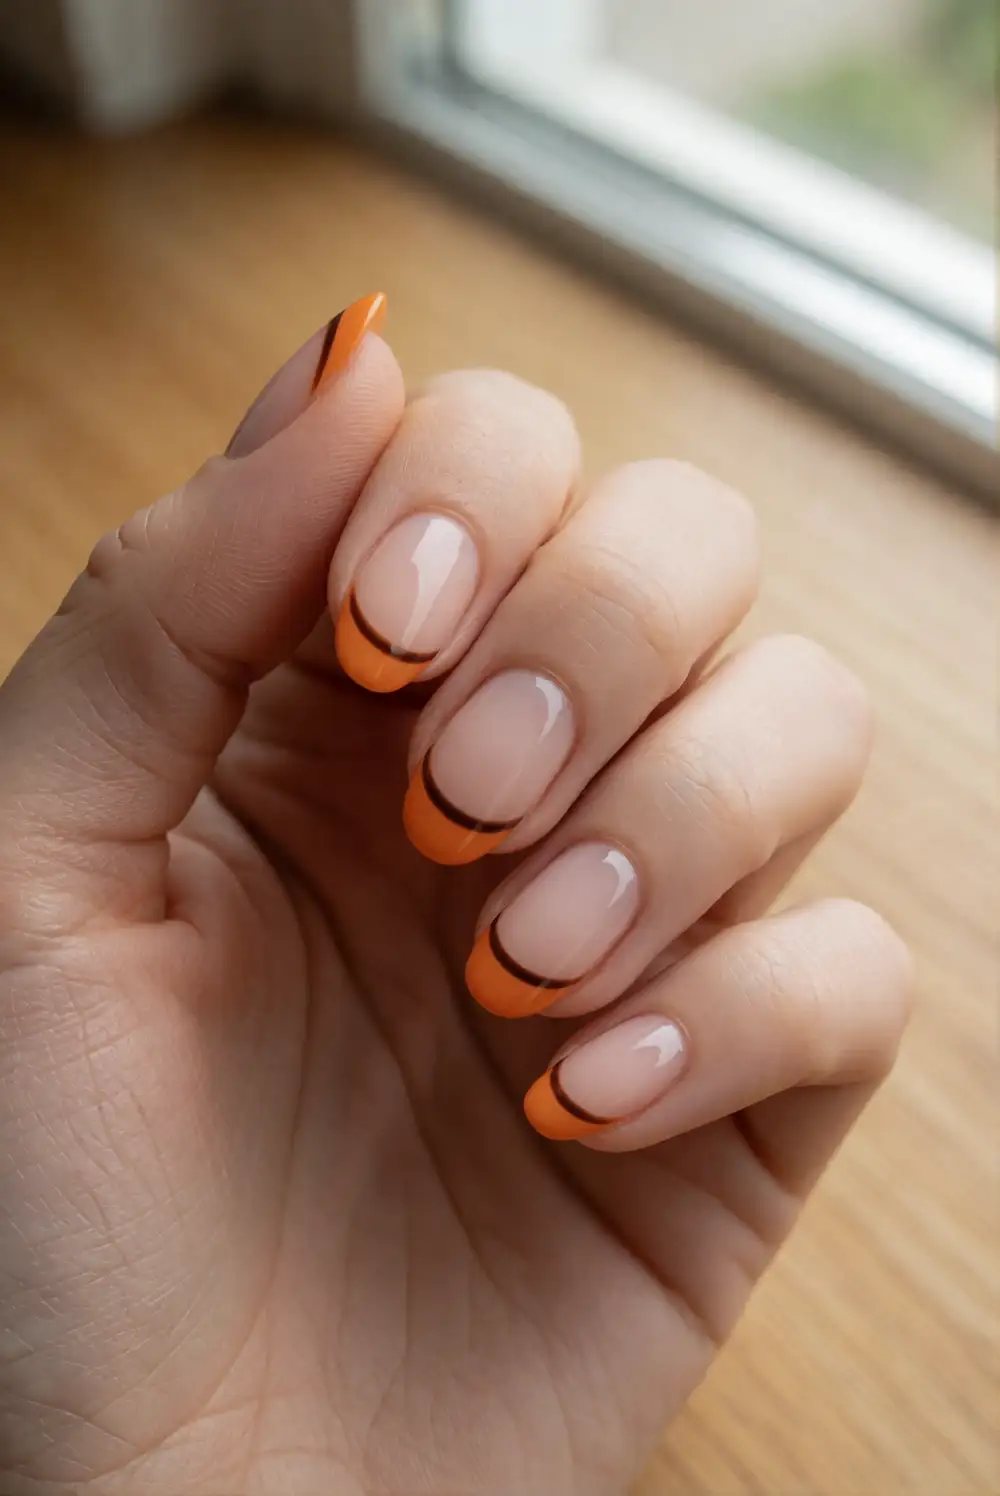
Begin with a sheer nude or milky pink base. Use a fine brush to trace a narrow orange curve along each nail tip, following the natural smile line. Add a thin dark brown line just beneath the orange for a graphic Halloween accent. If freehand curves are difficult, use nail guides and remove them after the polish has set but before it fully dries. Seal the design with a clear top coat.
Keep the orange line delicate for a polished manicure, or widen it slightly for a brighter seasonal statement. Swap dark brown for charcoal if you prefer stronger contrast, or add a small dot near the side of each tip to echo the line detail. This design works on short nails as well as longer shapes because the accent follows the natural edge. A glossy finish helps the narrow bands look smooth and intentional.
Matte Black Nails With Orange Dots
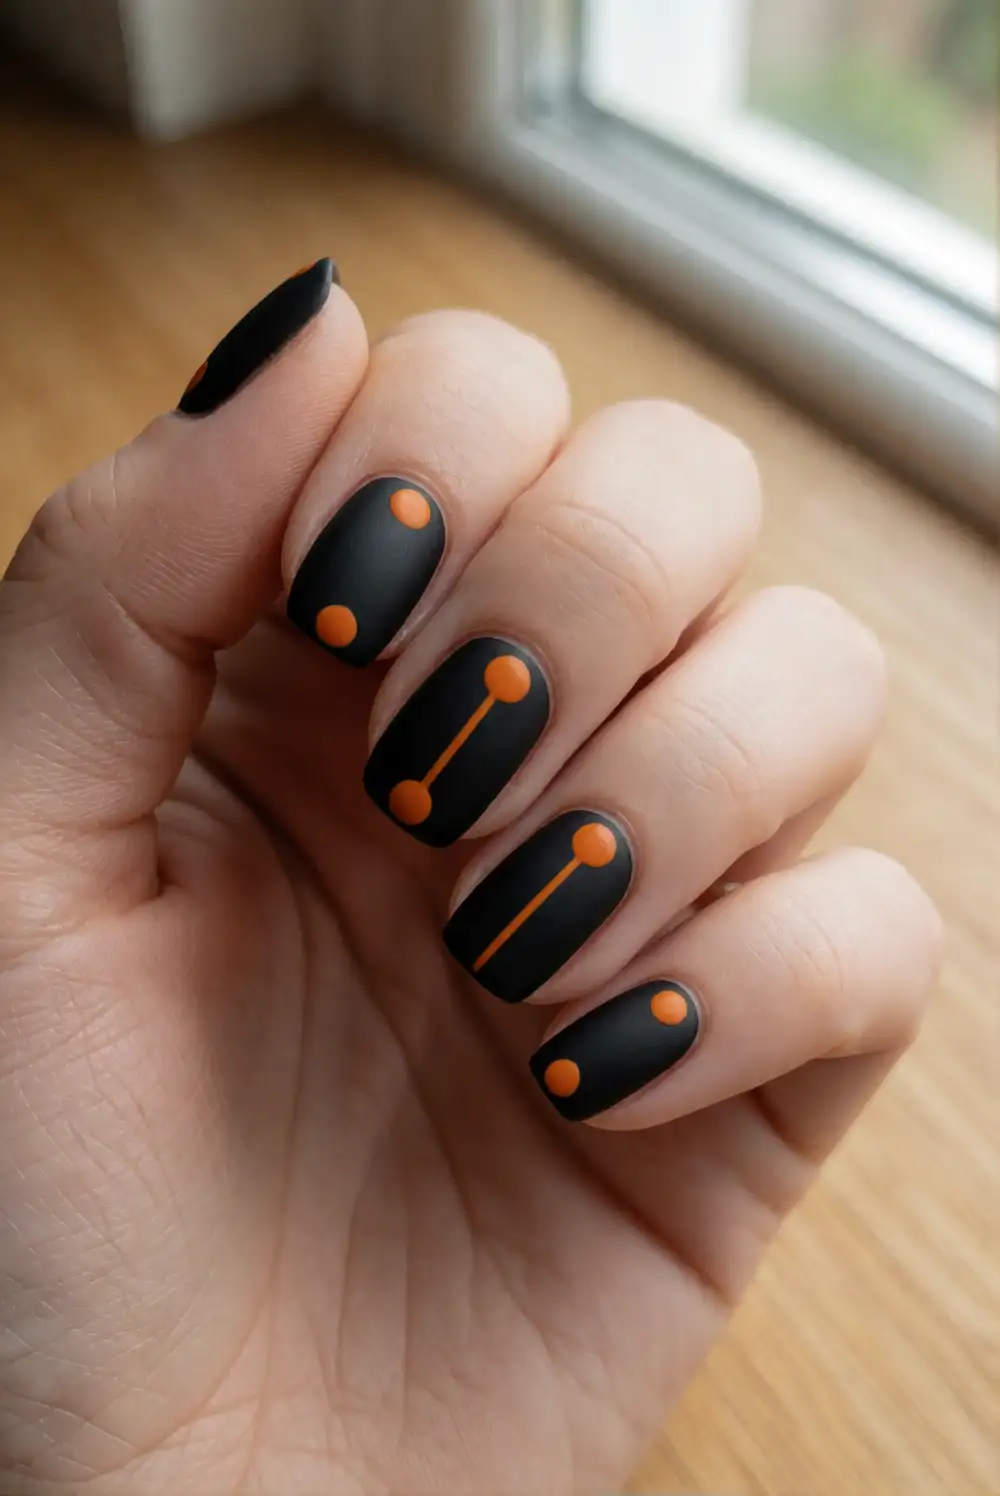
Apply a dark black polish and let it dry thoroughly before adding a matte top coat. Once the surface is set, place small orange dots near the cuticle or along one side of each nail with a dotting tool. Add a thin orange line to one accent nail for a simple contrast. Use a light hand with the top coat so the dots remain defined, then allow the finished manicure to dry without smudging.
Arrange the dots in a loose trail for a lively look, or place a single dot on each nail for a restrained version. Bright pumpkin orange stands out clearly, while muted terracotta gives the design a softer autumn mood. If you do not have a dotting tool, the rounded end of a clean toothpick can make small marks. Keep the orange detail in one area of each nail to make the matte black finish feel sleek.
Purple Nails With Silver Dots
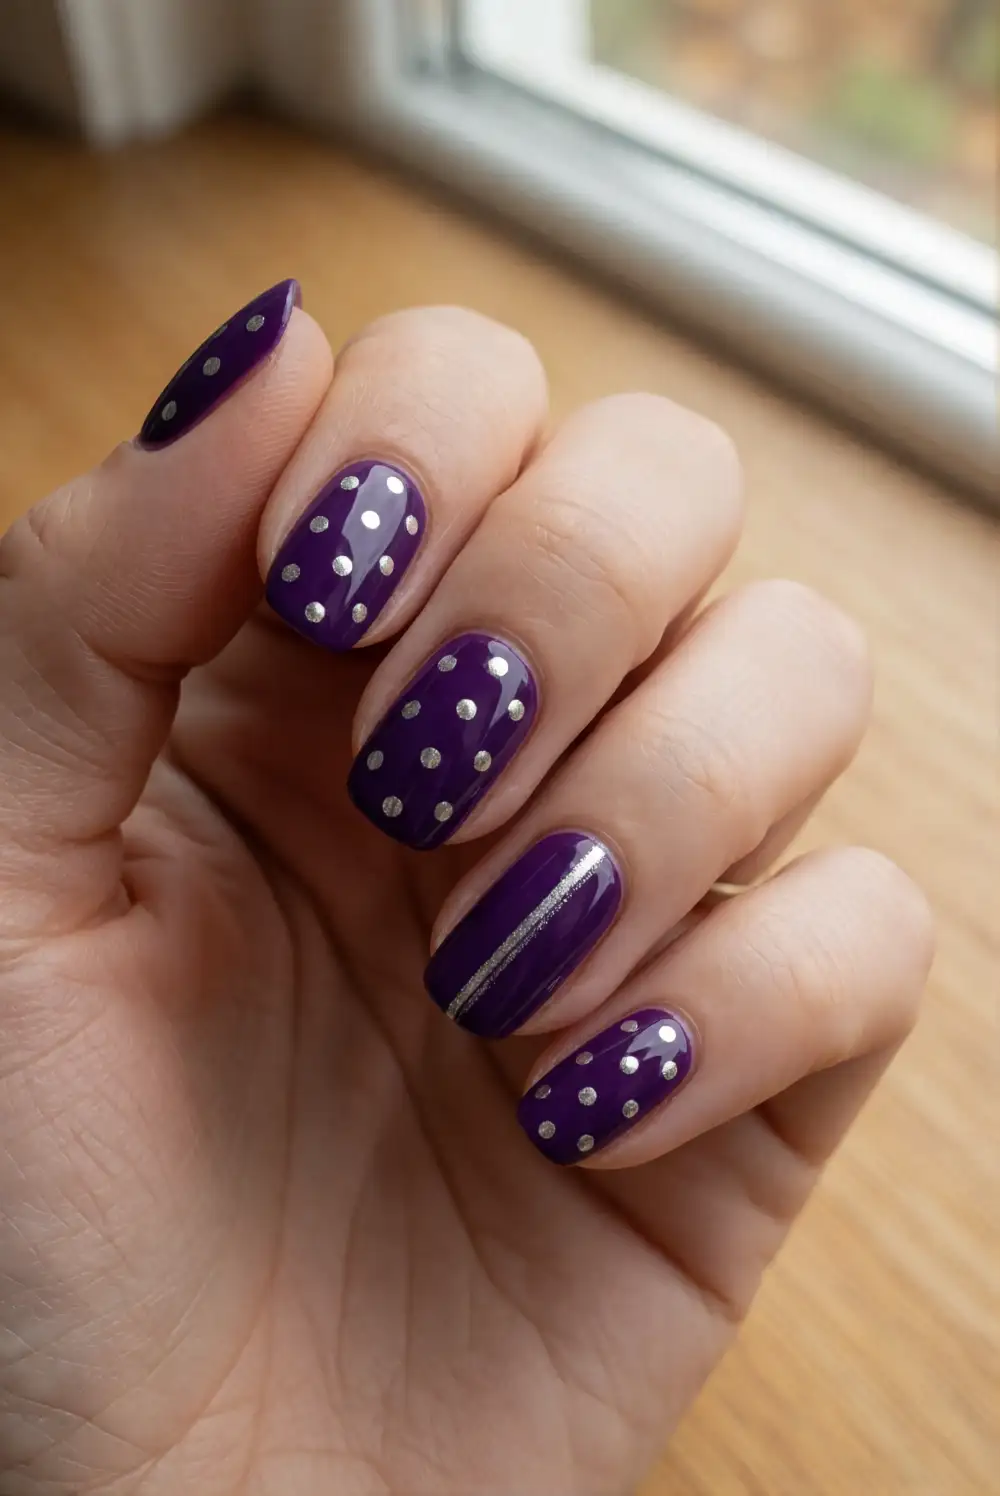
Paint your nails a rich purple shade and wait until the polish is completely dry. Use a small dotting tool to place silver dots near the nail tips, then draw a fine silver line down one side of an accent nail. A metallic nail-art polish gives the marks a reflective finish, while a pale gray shade offers a subtler effect. Let the design dry before applying a thin clear top coat.
For a softer manicure, choose lilac polish and use only a few silver dots rather than adding the side line. Deep plum creates a more dramatic contrast and pairs well with a simple outfit. Keep the dots spaced apart so the silver catches the light without covering the base color. A narrow striping brush makes it easier to draw a straight accent line; rest your hand on a table to steady each stroke.
Olive Green Nails With Black Lines
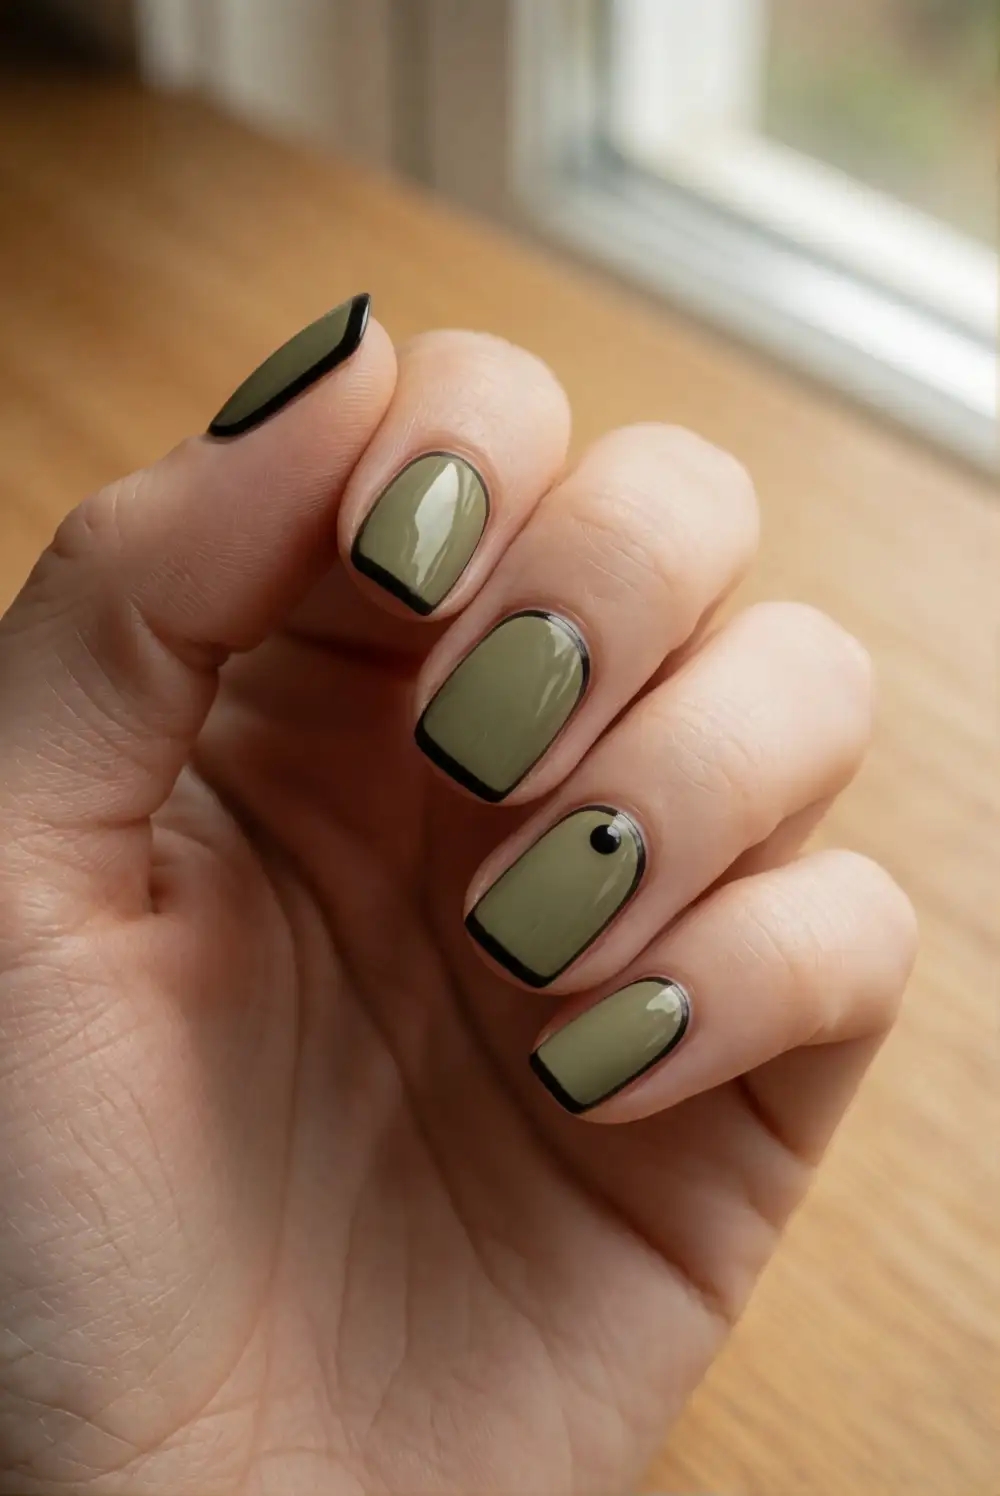
Choose an olive or muted sage polish as your base and let it dry. With a fine nail-art brush, add a slim black line along one side of each nail, varying its placement slightly. Use a dotting tool to add a small dark dot near the tip of an accent nail. Keep the shapes simple and graphic, then finish with a clear top coat once all the details have set.
Deep forest green gives this design a richer seasonal feel, while pale sage makes the dark details look softer. Try a pair of fine parallel lines on one accent nail, leaving the others mostly plain with a single dot. Wipe excess polish from the brush before drawing so the lines stay narrow. This understated palette works beyond Halloween, making the manicure an easy option for autumn outfits and everyday wear.
Dots and lines make Halloween nail art approachable, whether you prefer tiny seasonal details or graphic color contrasts. Pick a base shade you already enjoy, add one simple pattern, and let each layer dry before sealing it with a top coat. A single accent nail can feel festive, while repeated details create a more expressive manicure.








