
Bring a little Halloween spirit to your manicure with designs that feel festive without taking over your look. These nail ideas range from delicate spiderweb details and glossy pumpkins to playful colors and subtle seasonal accents. Choose a style that suits your taste, adapt it to your nail length, and use simple polish techniques to create a manicure that feels polished all October long.
Glossy Pumpkin Accent Nails
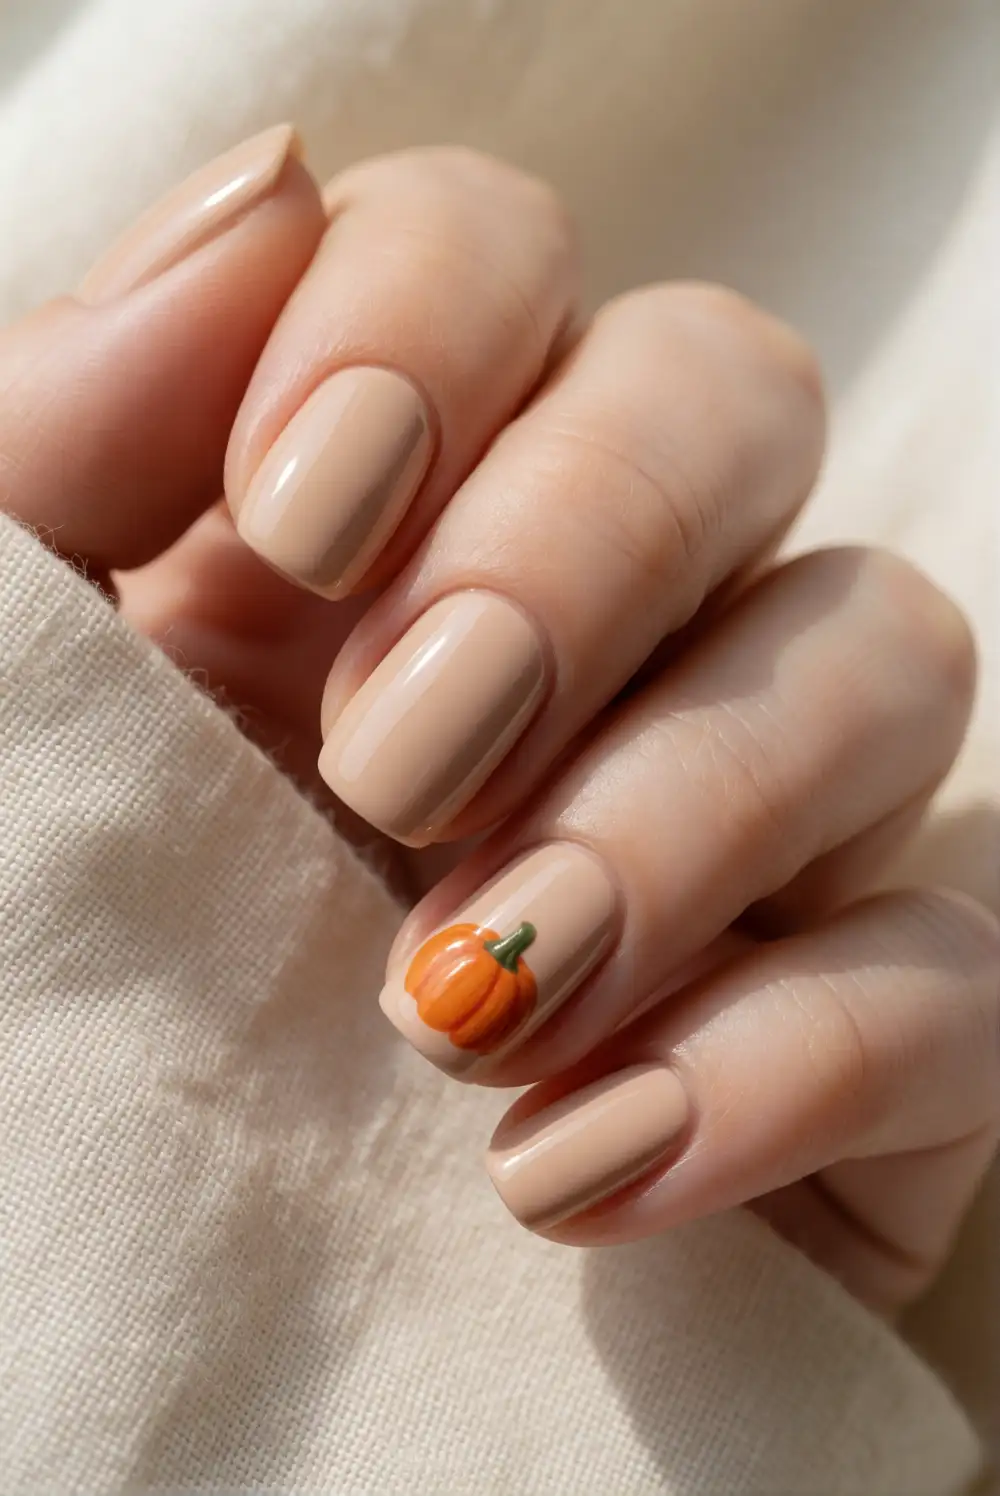
Paint most nails a creamy nude or warm beige, then choose one accent nail for a tiny pumpkin. Use orange polish to make a rounded shape, adding a short green stem with a fine nail-art brush once the orange has dried. A dotting tool or the rounded end of a toothpick can help shape the pumpkin neatly. Finish every nail with a clear top coat to smooth the design and give the manicure a glossy finish.
Keep the pumpkin simple for a clean, modern look, or add a delicate curved line in a deeper orange to suggest its ridges. A sheer base color helps the accent stand out without making the whole manicure feel busy. If you prefer a coordinated set, place a small pumpkin on each ring finger. Let every layer dry fully before adding top coat, and use a fine brush dipped in remover to tidy the edges.
Minimal Black Spiderweb Tips
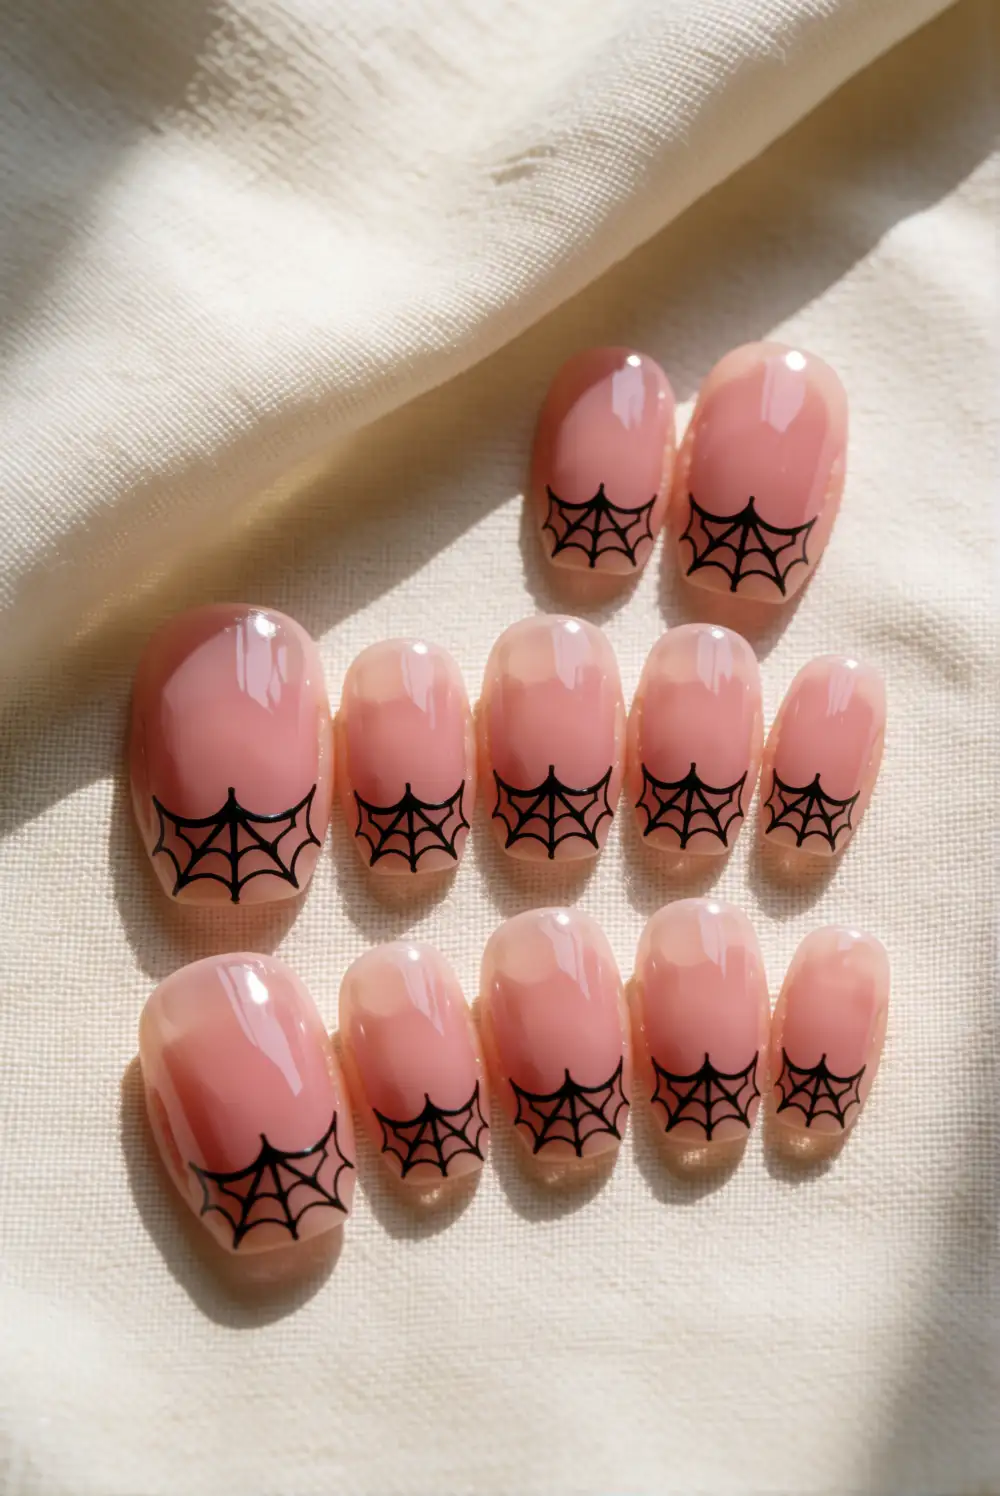
Start with a sheer pink, milky white, or clear base and let it dry completely. With a fine nail-art brush and black polish, draw a few short lines from one corner of the nail toward the edge, then connect them with gently curved strokes to create a small web. Keep the web at the tip or side of the nail rather than covering the whole surface. Seal the design with a thin layer of clear top coat.
This look works especially well on short nails because the small web detail remains crisp and easy to see. For a softer effect, use charcoal polish instead of jet black, or create the web on just one nail per hand. A liner brush makes the lines easier to control; rest your painting hand on a table for steadier strokes. If a line looks uneven, let it dry before touching up the nearby base color.
Deep Plum and Copper Color Blocking
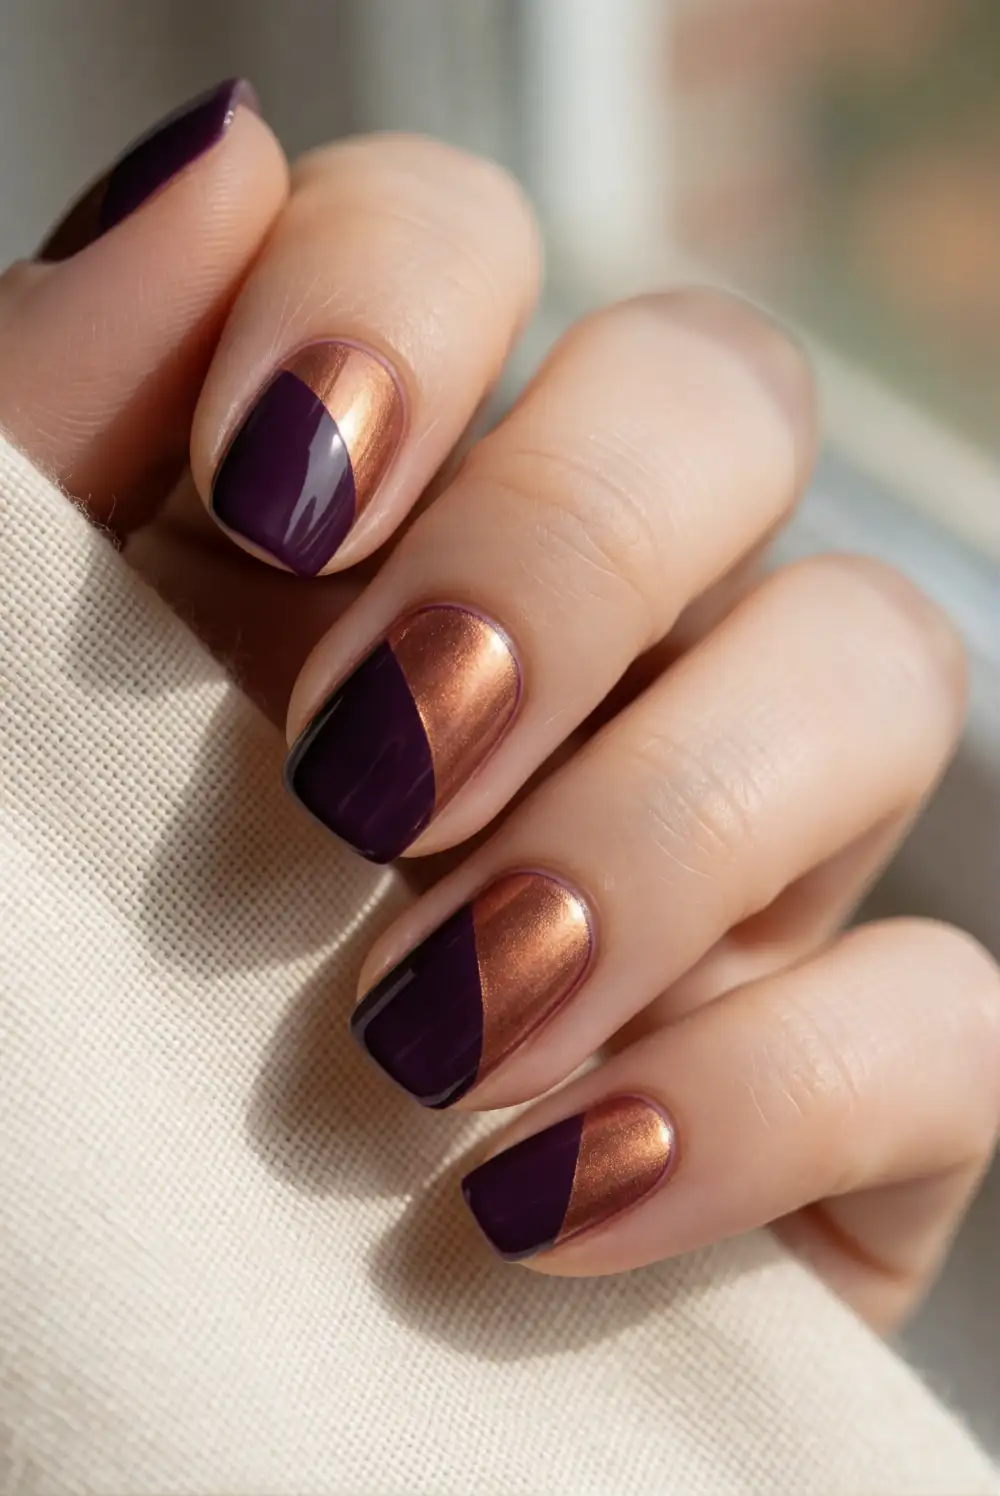
Choose a deep plum polish and a metallic copper polish for a bold but wearable seasonal manicure. Paint the nails with a plum base and allow it to dry. Use striping tape to mark a diagonal section on each nail, then brush copper polish into the exposed area. Remove the tape while the copper is still slightly wet to help leave a crisp edge. Once the design has dried, apply clear top coat over each nail.
Vary the angle of the color block from nail to nail for a relaxed, artful finish, or keep every diagonal aligned for a more tailored look. If you do not have striping tape, use a fine brush to paint a single copper stripe by hand. A muted copper brings a subtle glow, while a brighter metallic finish feels more dramatic. Keep the rest of your accessories simple so the rich colors remain the focus.
Sweet Candy Corn Color Layers
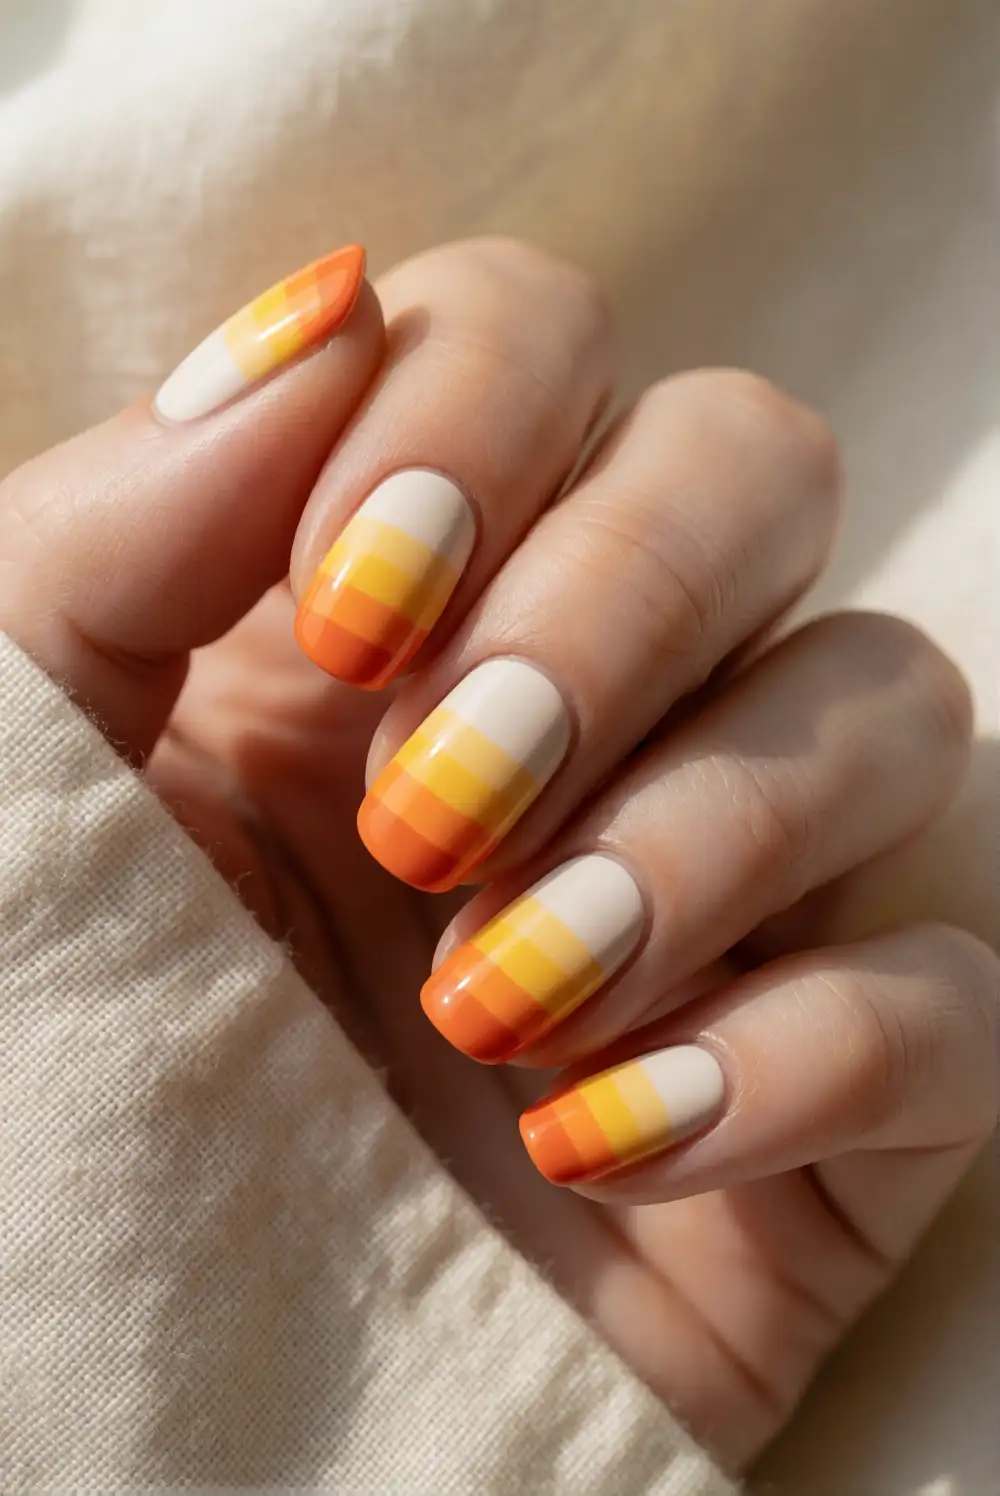
Recreate the familiar candy-corn palette with bands of creamy white, sunny yellow, and bright orange. Apply a white base coat and let it dry. Paint a yellow band across the middle of each nail, then add an orange band near the tip, leaving a small white area at the cuticle. A makeup sponge can help blend the borders, or striping tape can create neat, distinct color blocks. Finish with top coat after the polish is dry.
For an understated take, use the three shades on separate nails instead of making a striped pattern on every finger. You can also reverse the order of the bands or make them diagonal for a less literal design. Choose opaque, creamy polishes so the colors show clearly over the base. When using tape, press it down gently and remove it slowly to protect the polish underneath.
Midnight Navy Starry Nails
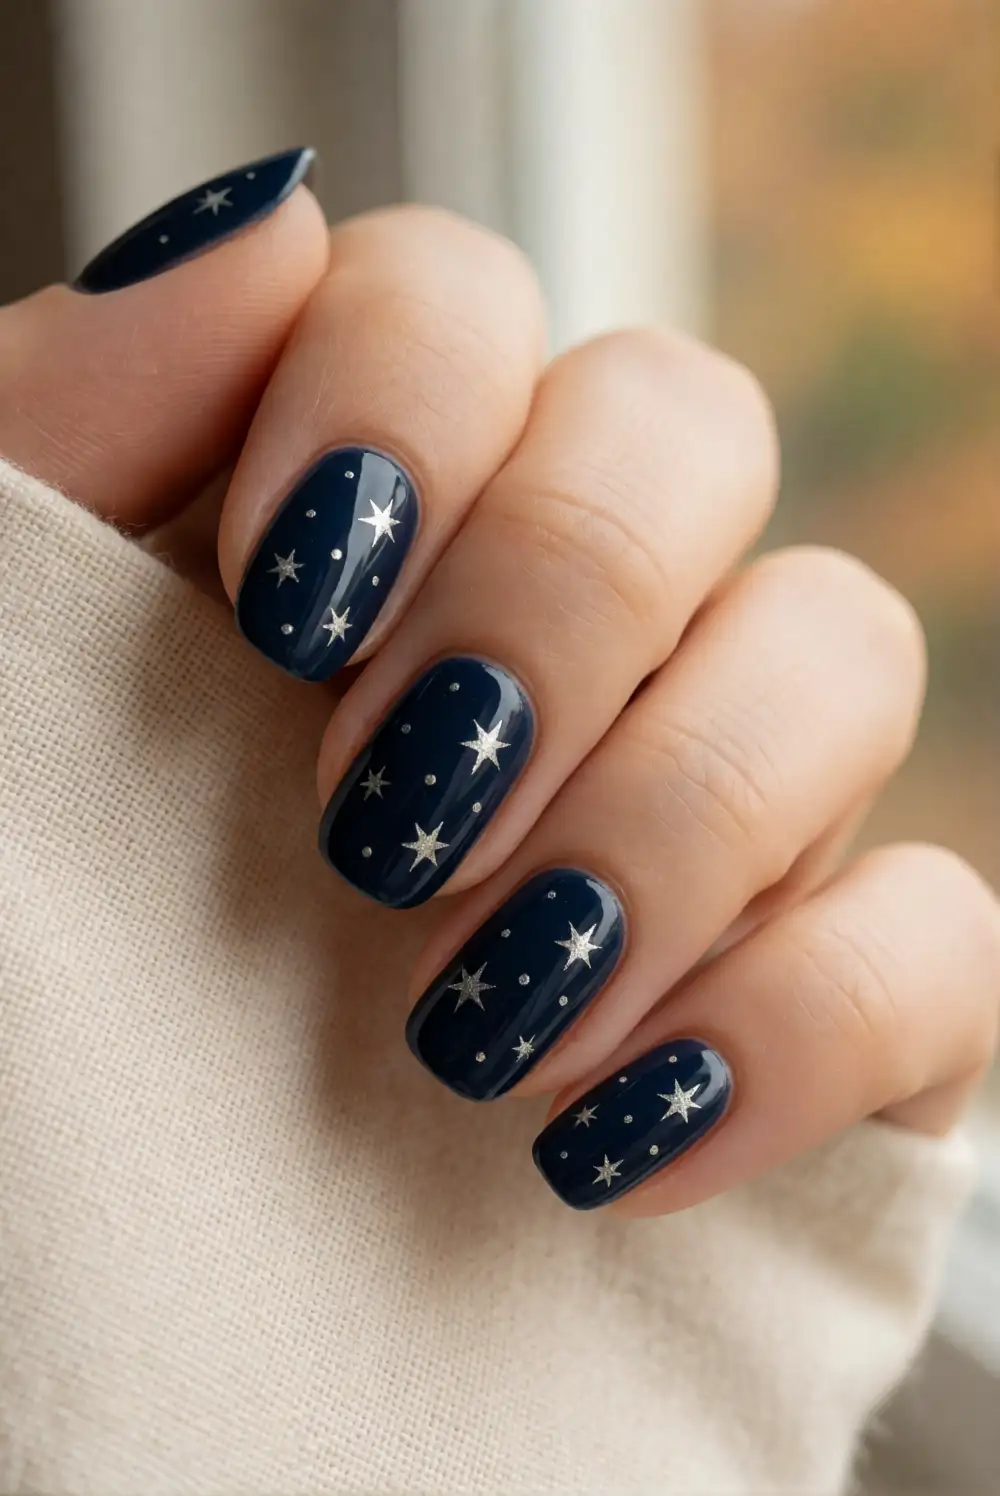
Paint your nails with a rich midnight navy polish and let the color dry before adding details. Dip a fine brush or dotting tool into silver polish to place tiny stars and scattered dots across the surface. For a simple star, make a small cross with two fine strokes, then add shorter diagonal strokes if you want a more defined sparkle. Keep the details sparse, and seal the finished manicure with a clear top coat.
A single star on each accent nail gives this look a subtle seasonal mood, while scattered dots across every nail create a brighter night-sky effect. If silver feels too cool, try a soft champagne metallic for a warmer finish. Vary the size and spacing of the dots so the design looks natural rather than patterned. A thin top coat helps protect the delicate details without making the polish look thick.
Soft Ghost Silhouette Nails
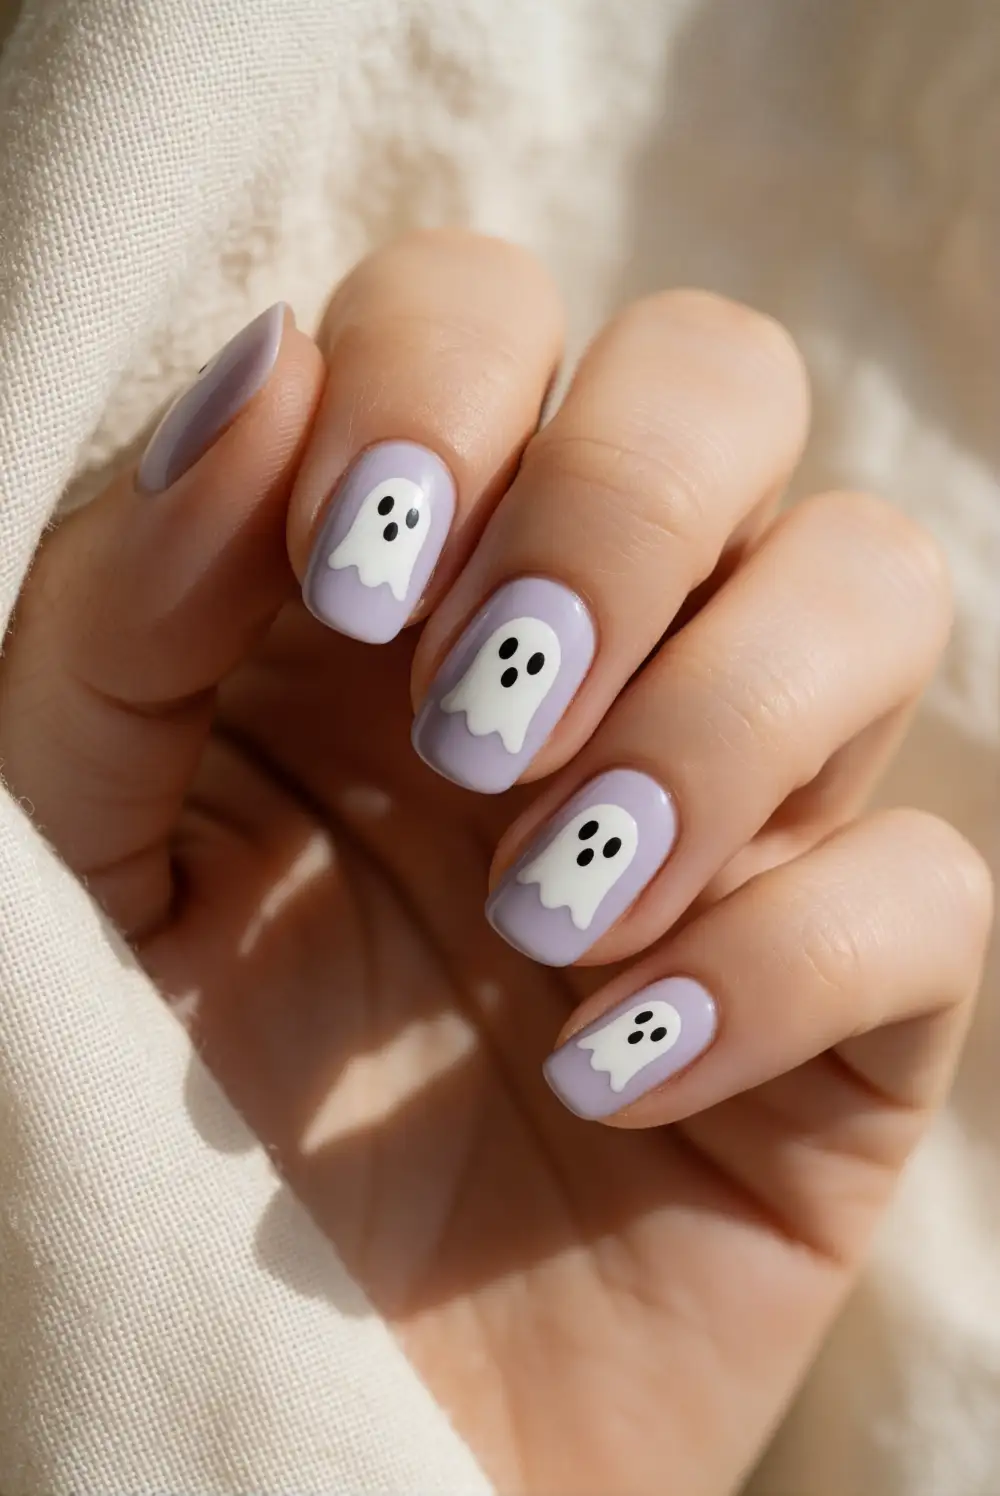
Begin with a pale lavender, sheer nude, or soft gray base. On one or two accent nails, use white polish to make a small rounded ghost shape with a slightly wavy lower edge. A small brush helps form the silhouette, while a dotting tool can add tiny black eyes after the white polish dries. Keep the face details simple and the ghost small, then apply clear top coat to protect the design.
For a more minimal version, paint just one ghost on each hand and leave the remaining nails a solid coordinating color. A lavender background gives the white design gentle contrast, while a nude base keeps it understated. Make the ghost shapes slightly different so the finished set feels hand-painted rather than stamped. Wait until the black details are completely dry before applying top coat to prevent smudging.
Olive Green and Gold Moon Manicure
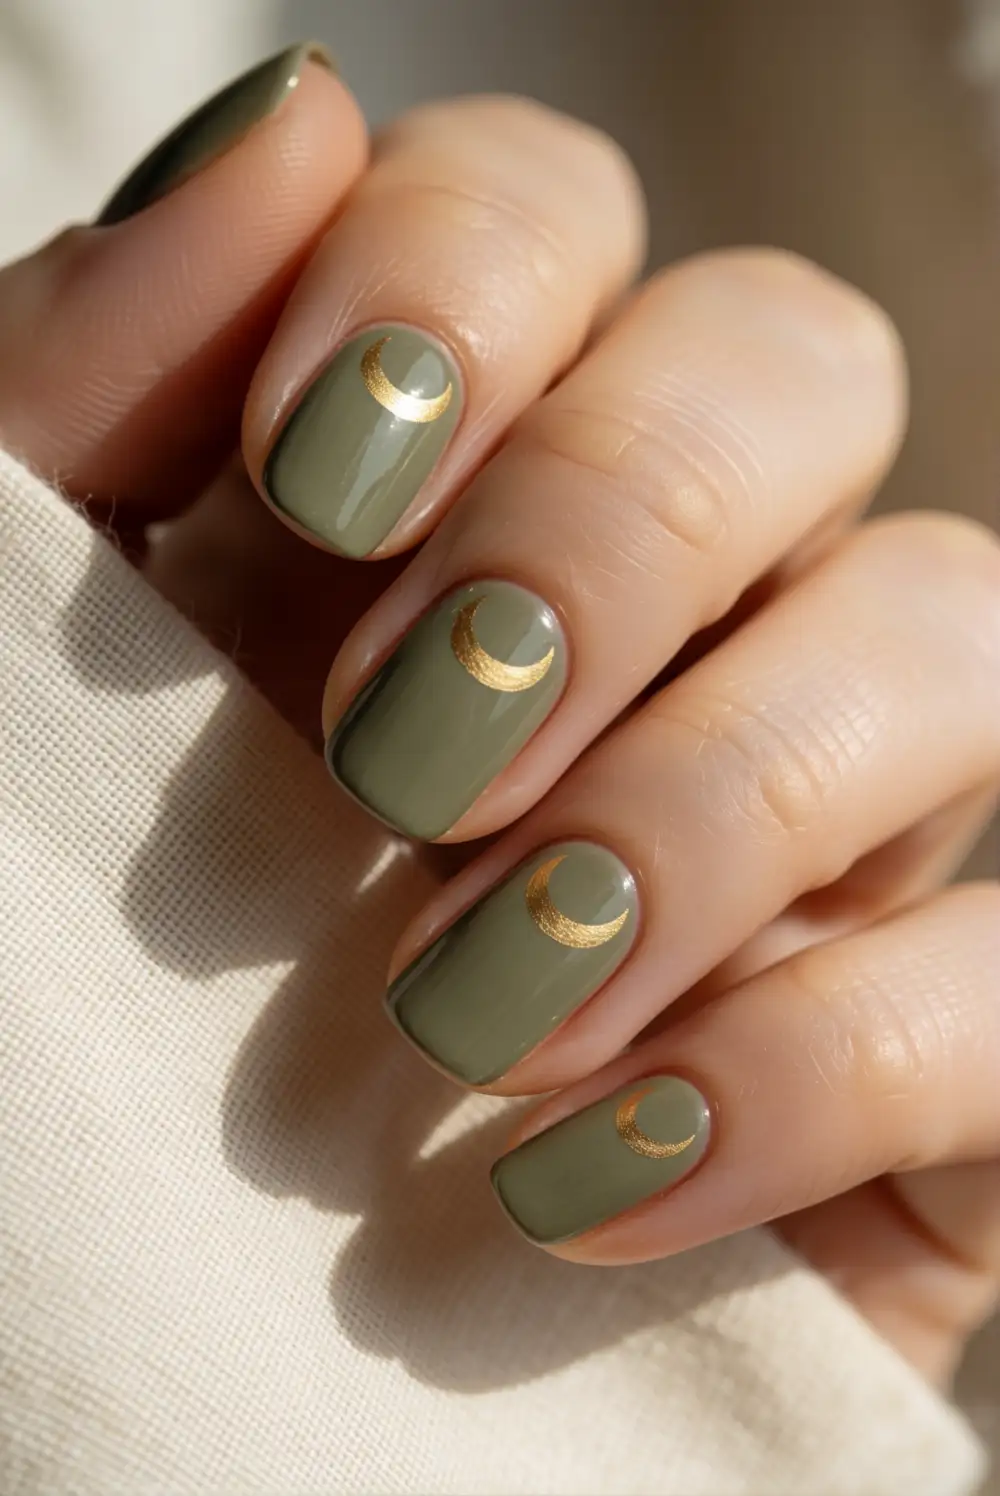
Apply a muted olive-green polish to each nail and let it dry. Use a fine nail-art brush to paint a small gold crescent near the base of one or more nails, curving the line gently around the cuticle area without touching the skin. Gold metallic polish or a fine-tip nail-art pen makes the shape easier to draw. Allow the details to dry, then apply a clear top coat for an even, glossy surface.
Keep the crescent on a single accent nail for a restrained look, or repeat it across the set for a more decorative finish. A deep forest green creates stronger contrast, while a softer sage shade feels light and modern. If painting a crescent by hand feels tricky, use two curved strokes that meet at their tips. Leave a little breathing room around the cuticle so the design looks neat as the manicure grows out.
Matte Black Nails With Glossy Tips
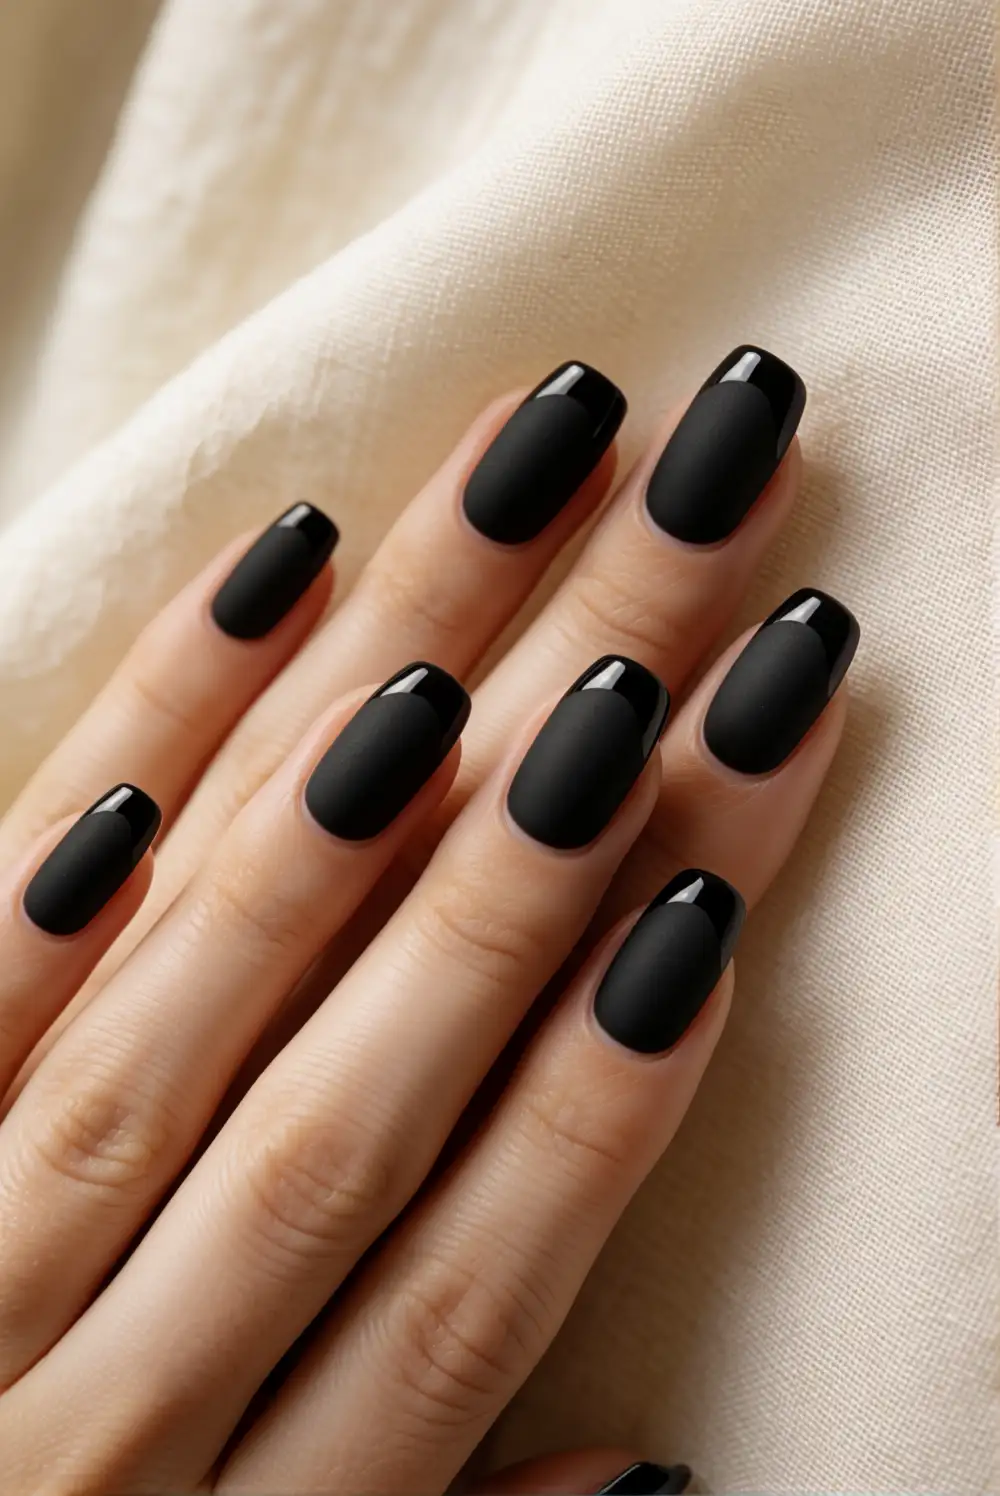
Coat each nail in black polish and allow it to dry fully. Apply a matte top coat over the entire nail, then use a fine brush and clear glossy top coat to paint a curved French tip. The contrast between the matte base and shiny edge creates a graphic finish using only one polish color. Work slowly along the smile line, and clean up any uneven curves with a small brush before the glossy top coat sets.
This design feels especially polished on short, softly rounded nails, though it also suits longer shapes. Keep the glossy edge narrow for a subtle effect or make it wider for a bolder contrast. If you would rather avoid black, try deep burgundy with a matching glossy tip. Use a fresh matte top coat for an even finish, and avoid brushing repeatedly over the same area as it dries.
Burnt Orange and Cream Checkerboard Nails
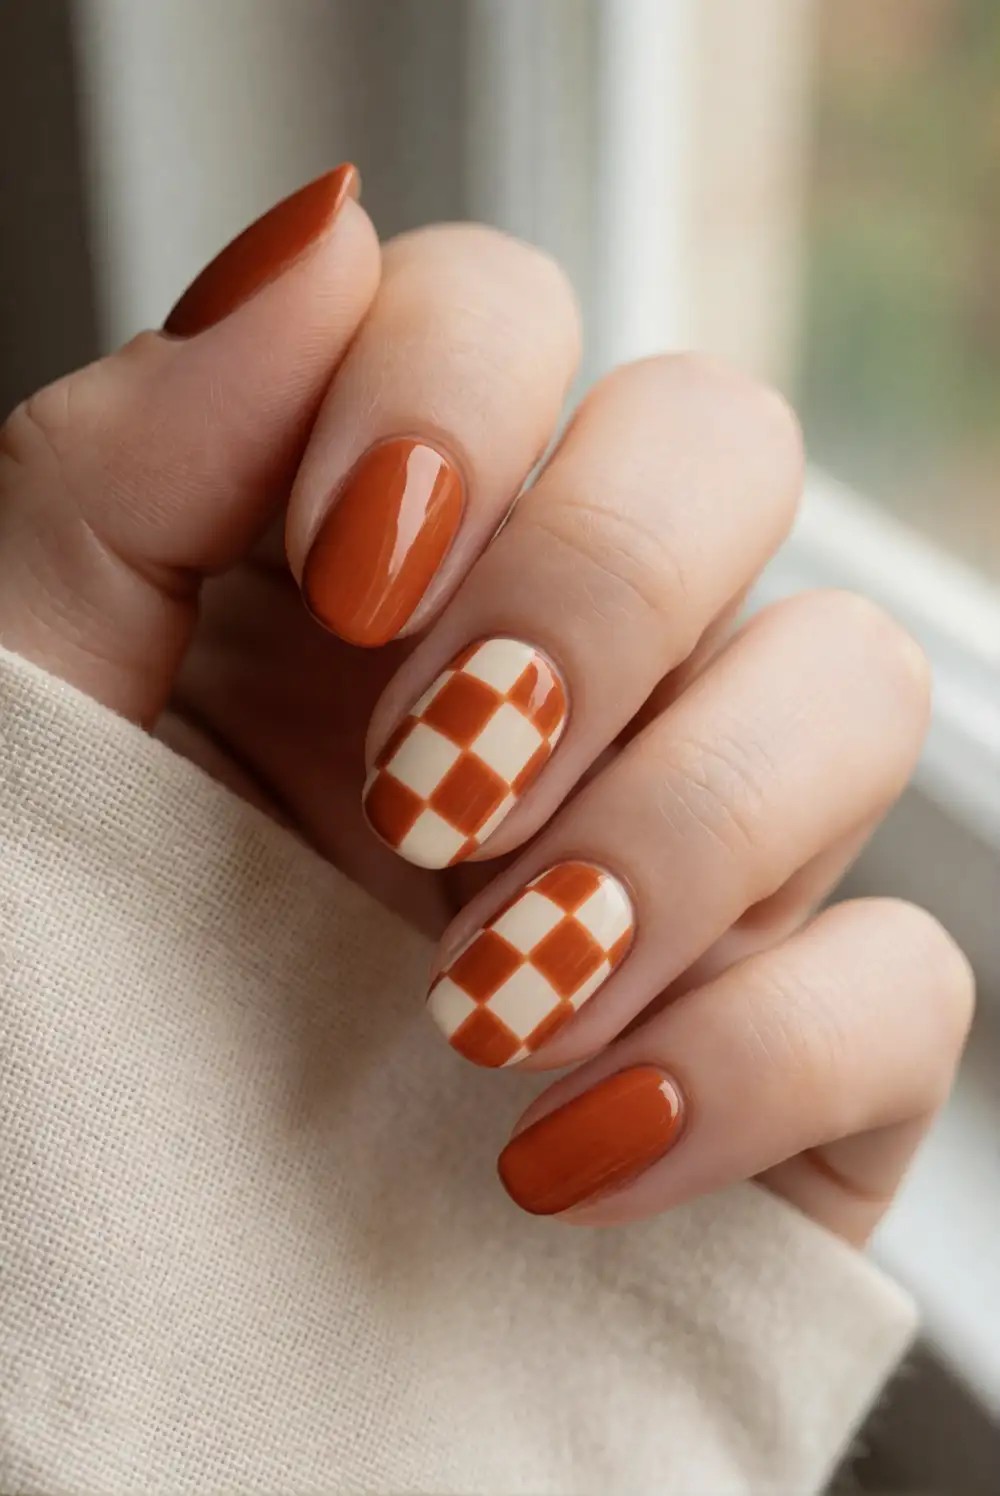
Paint a few accent nails with a creamy base and leave the remaining nails a solid burnt orange. Once the cream polish is dry, use a fine brush to paint a simple checkerboard grid with orange polish, filling alternating squares. Keep the squares small and slightly imperfect for a hand-painted look. You can also use striping tape to mark the grid before filling it in. Finish with clear top coat after the pattern dries completely.
A checkerboard accent looks striking on one nail per hand, while a single checked stripe along the side gives the design a lighter touch. Choose a warm ivory rather than stark white to soften the contrast. Use a thin brush and build the grid gradually; rushing the lines can make the small squares difficult to fill. Pair the pattern with plain orange or cream nails so the manicure stays balanced.
Berry Red Nails With Tiny Bats
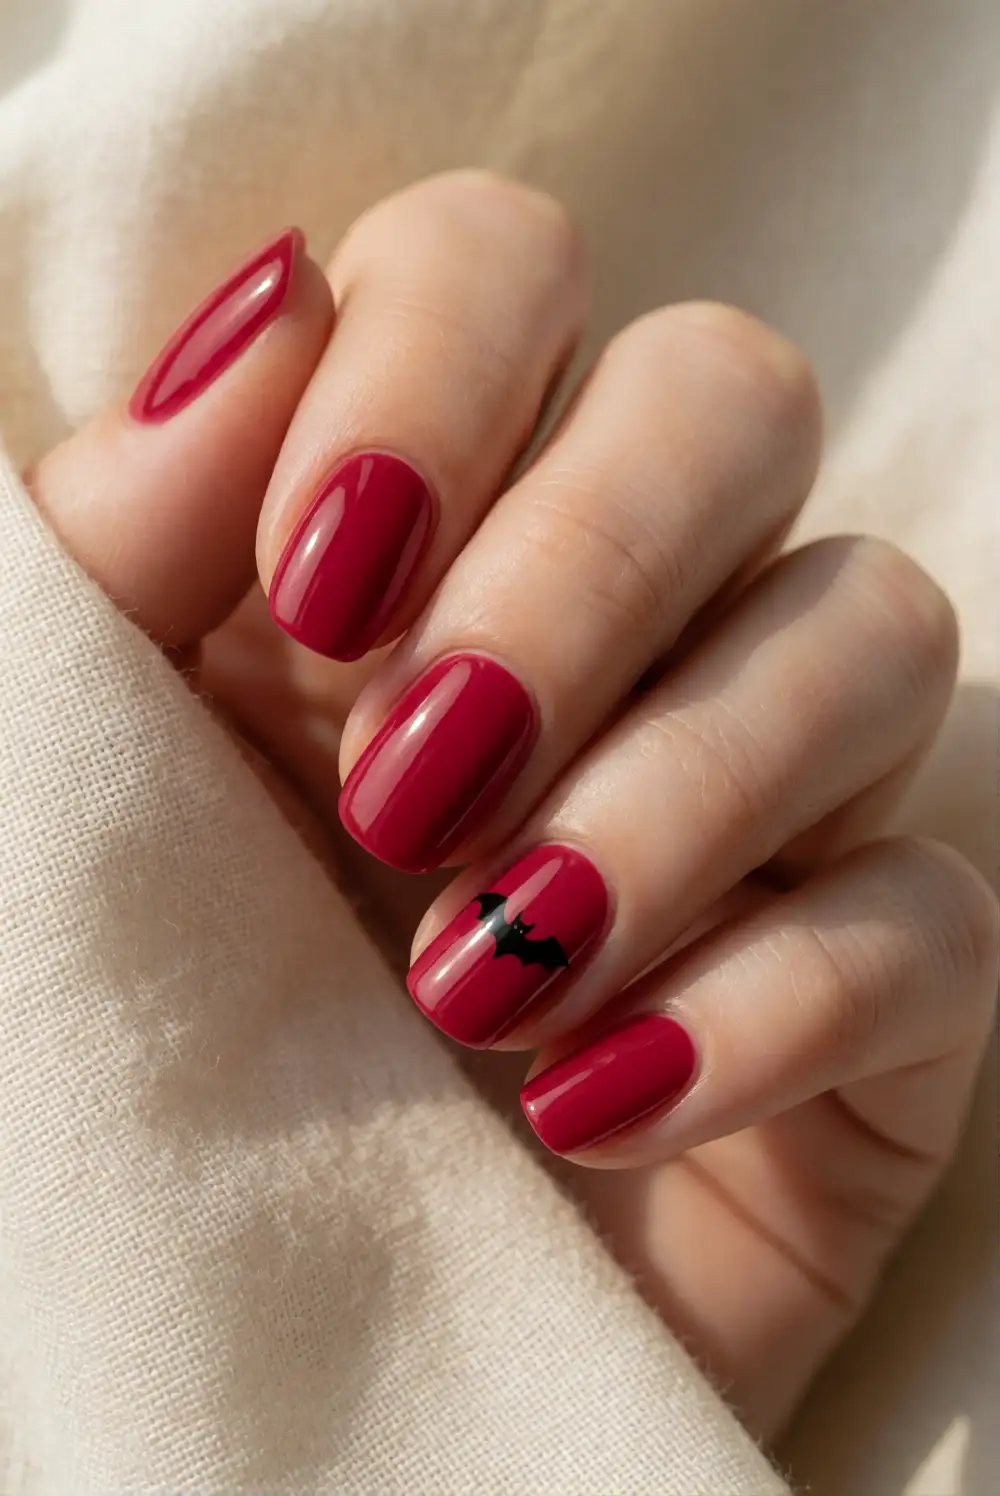
Apply a berry-red polish as the base and let it dry. On an accent nail, use black polish and a fine brush to create a tiny bat with a small central body and two simple angled wings. Keep the silhouette compact so it reads clearly against the red background. If drawing the wings freehand feels difficult, make two small curved shapes that meet at the center. Allow the design to dry before sealing it with clear top coat.
For a more understated manicure, place one bat on a single ring finger and leave the rest of the nails a glossy berry red. A deeper wine shade creates a rich, evening-ready version, while a brighter berry looks more playful. Use a small amount of black polish on the brush so the silhouette stays neat. Let the base color dry completely first to keep the bat edges clean and prevent accidental streaks.
Whether you prefer a tiny seasonal accent or a full set of playful patterns, these Halloween nail designs can be adjusted to suit your style and nail length. Choose a palette you already love, take your time between polish layers, and finish with a top coat for a smooth, lasting look. A thoughtful detail or a rich seasonal color is often all you need to make a manicure feel festive.








