
Give your almond-shaped manicure a festive seasonal twist with Halloween nail art that feels polished, playful, and easy to wear. These simple designs use familiar colors and approachable details, from pumpkin curves and ghostly French tips to delicate spiderwebs. Choose a look that suits your style, gather nail polish and a fine brush or dotting tool, and adapt the accents to your favorite length and finish.
Soft Pumpkin Almond Nails
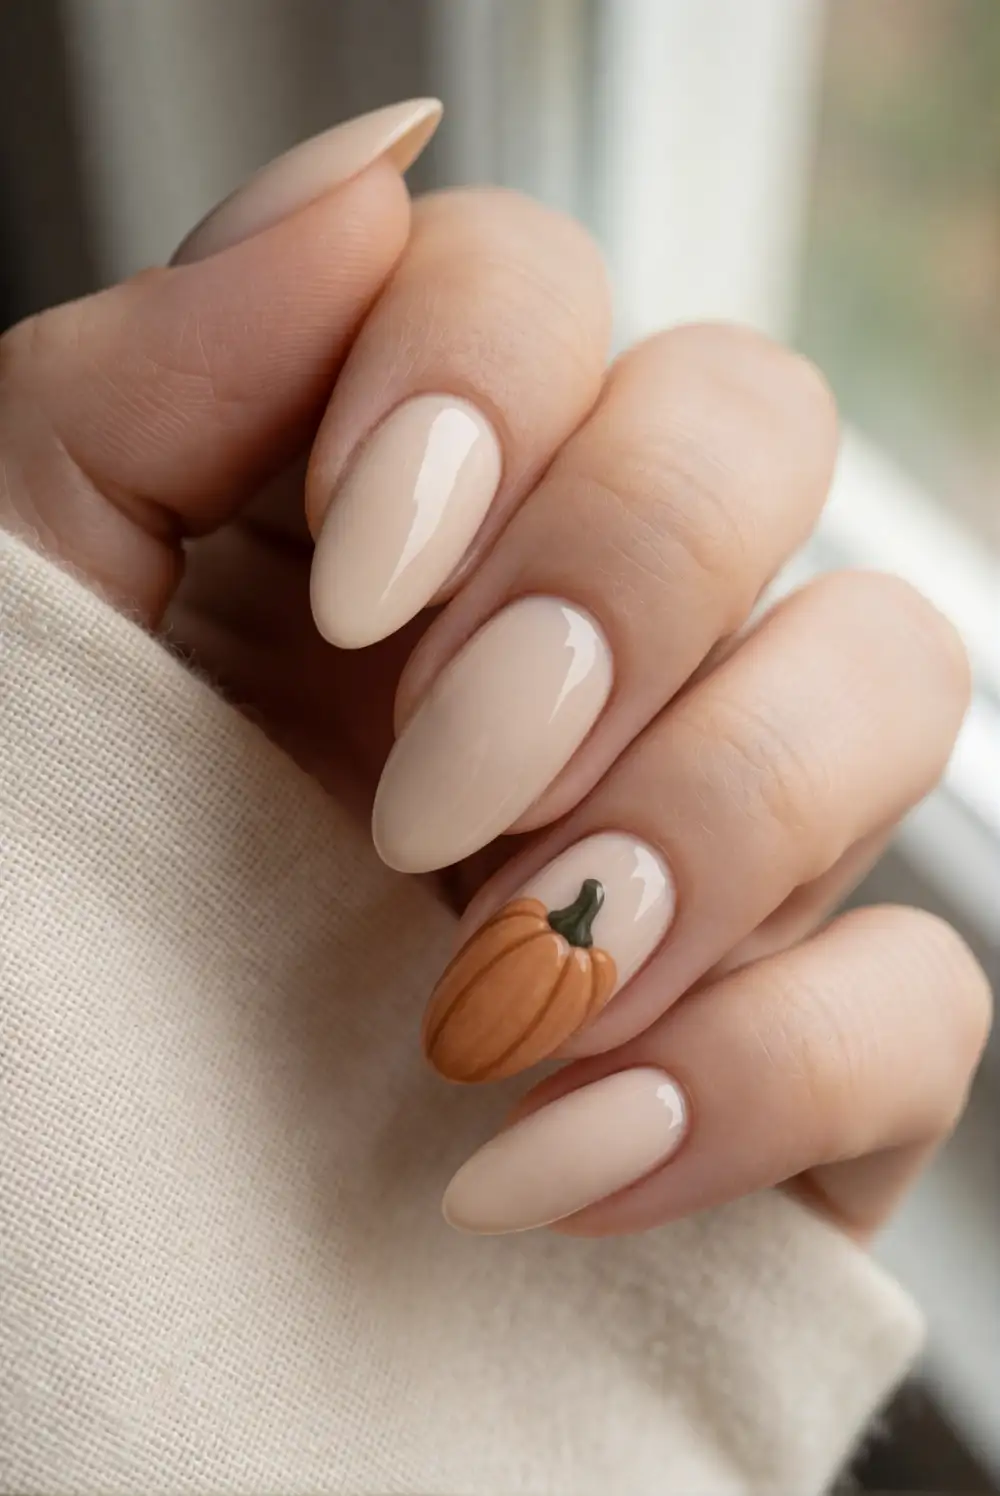
Paint the nails a creamy nude or warm beige, then add a rounded pumpkin accent in muted orange. Use a fine nail-art brush to form the pumpkin with curved strokes, leaving a narrow gap between each section for definition. Add a tiny dark green stem at the top, and finish with a glossy top coat after the design is completely dry. The almond shape gives the rounded pumpkin a graceful, softly elongated frame.
Keep the pumpkin small enough to sit comfortably near the center of the nail, and leave the remaining nails in the neutral base for a wearable balance. A matte top coat gives the orange a velvety, autumn feel, while glossy polish looks fresh and bright. Try burnt orange for a subtle finish or a deeper pumpkin shade for extra contrast. This design pairs beautifully with cozy knits and warm-toned jewelry.
Black Cat Silhouette Nails
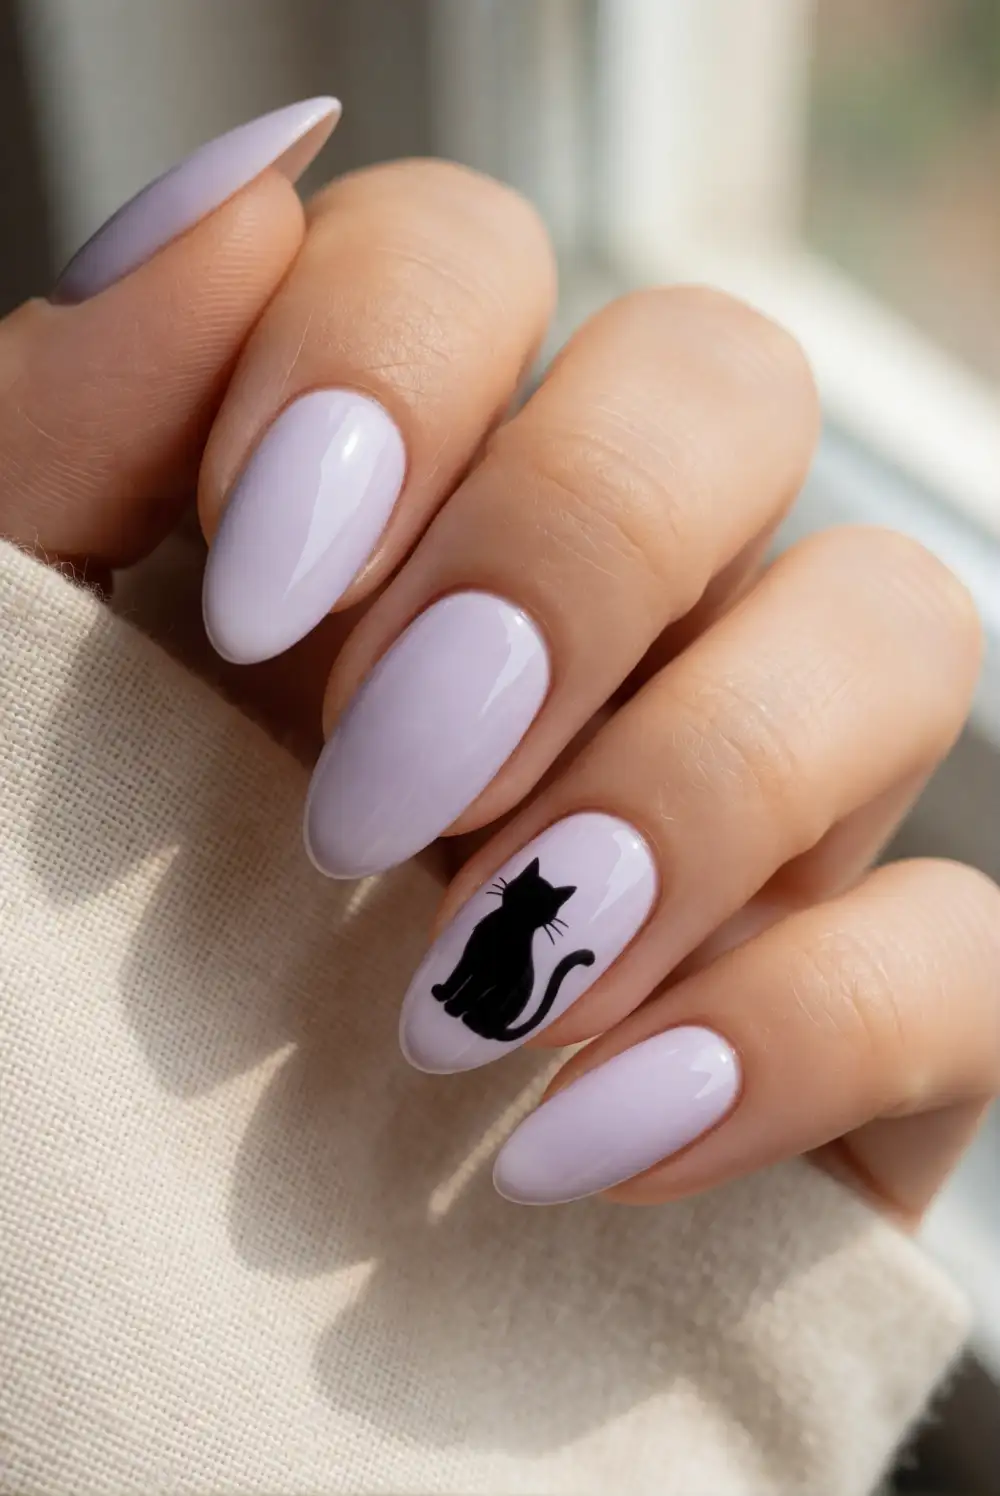
Start with a sheer pink, ivory, or pale lavender base, then paint a small black cat silhouette on an accent nail. Use a fine brush to make a rounded body, a curved tail, and pointed ears; a dotting tool can help shape the head. Keep the other nails glossy and simple so the tiny figure stays clear. Let the polish dry fully before applying a careful top coat to protect the design.
Place the cat near the tip or along one side of the nail to complement the almond outline without crowding it. A tiny crescent moon painted beside the silhouette adds a gentle Halloween detail, while a plain cat keeps the look minimal. For a softer effect, use charcoal polish rather than deep black. Choose a pale base with strong contrast, and use a fine liner brush for clean curves and crisp ears.
Ghost French Tip Nails
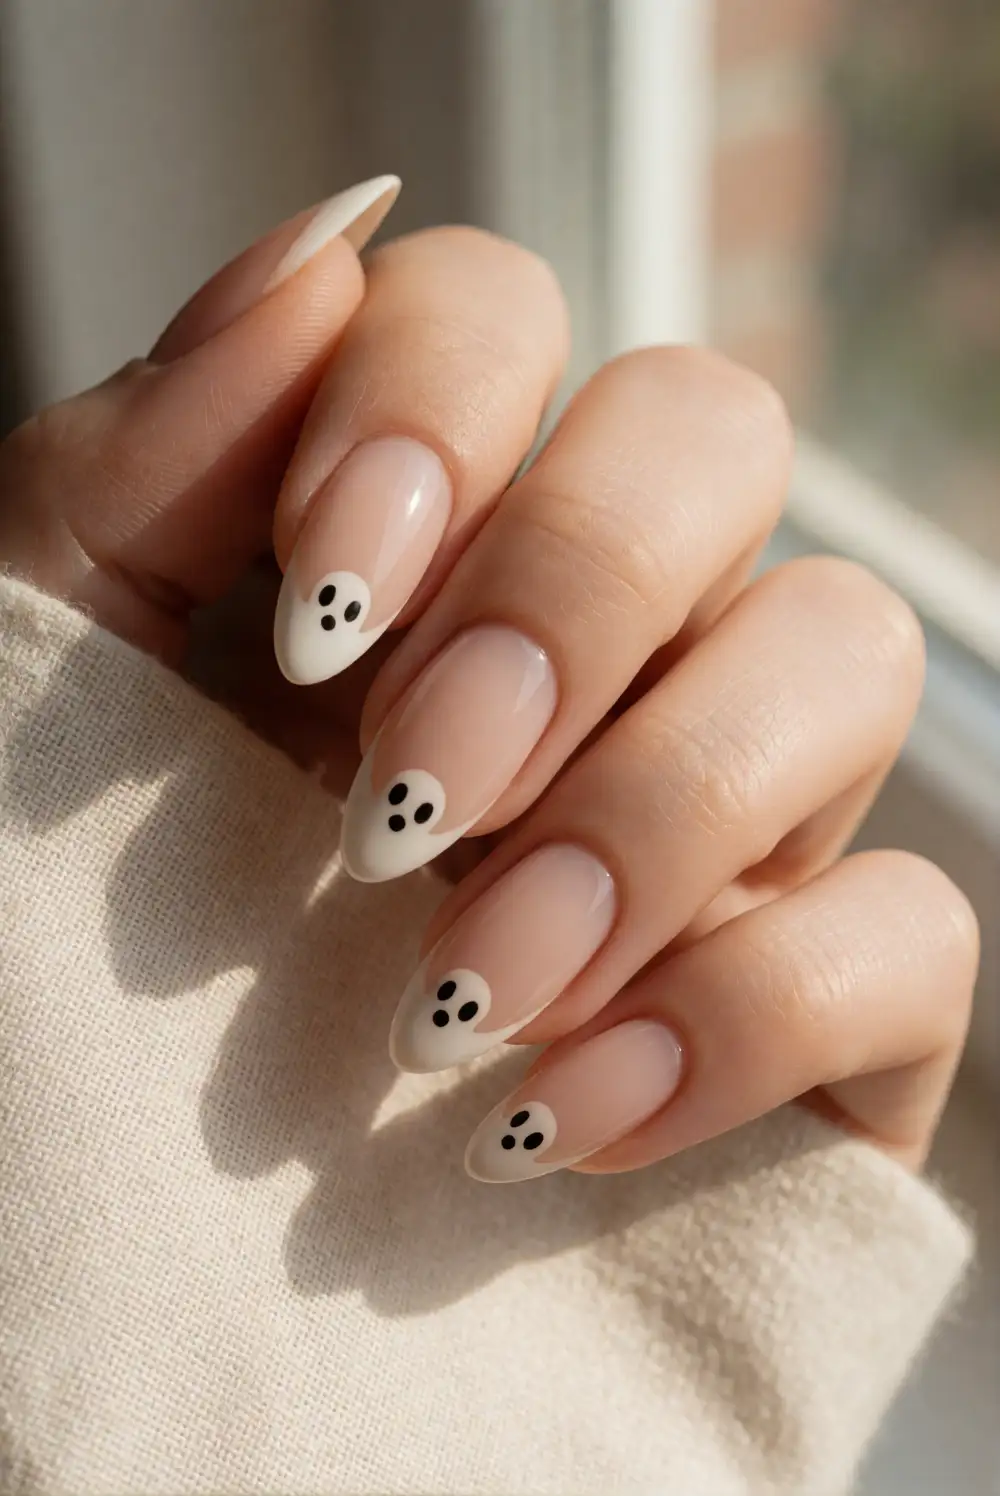
Give a classic French manicure a playful seasonal update by painting small white ghosts along the almond tips. Apply a sheer nude base, then use a detail brush to create soft rounded ghost shapes that follow the curved nail edge. Add tiny black eyes with a dotting tool or the tip of a fine brush. Keep the polish layers thin, allow them to dry between steps, and seal the finished design with a clear top coat.
Vary the ghost shapes slightly so the tips look hand-painted rather than like a repeated stamp. A milky base makes the white figures blend softly into the manicure, while a blush base creates a brighter contrast. For a subtle alternative, decorate just the accent nails and leave the rest with a sheer finish. Keep the faces minimal, with tiny dots rather than large features, for a clean and charming look.
Fine Spiderweb Accent Nails
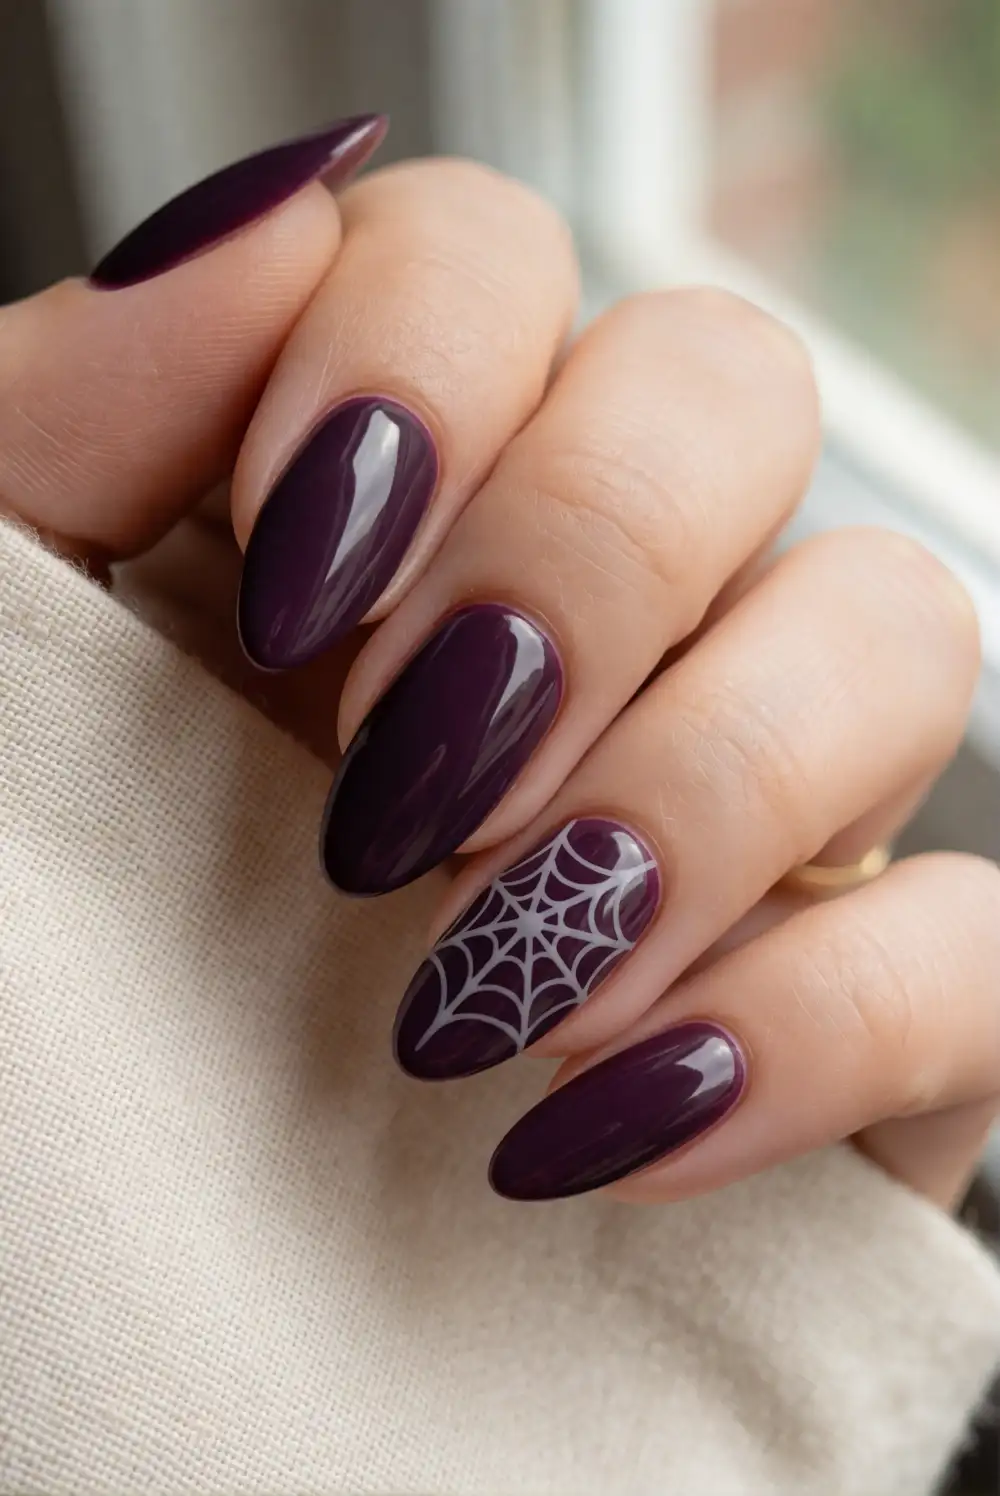
Choose a dark plum, charcoal, or black base, then paint a delicate web on an accent nail with a thin striping brush. Begin with fine lines that fan outward from a corner, then connect them with gently curved arcs. Silver or pale gray polish makes the web visible without overpowering the base. Keep your strokes light and let each layer dry before adding a glossy top coat for a smooth, finished surface.
Position the web near the outer edge so its lines echo the almond shape and leave breathing room across the nail. A sheer nude base offers a lighter take, while deep plum gives the design a richer seasonal mood. If a detail brush feels tricky, use a nail-art pen made for polish and work slowly. Pair the web with plain dark nails or a small metallic accent to keep the overall manicure balanced.
Blood Moon Crescent Nails
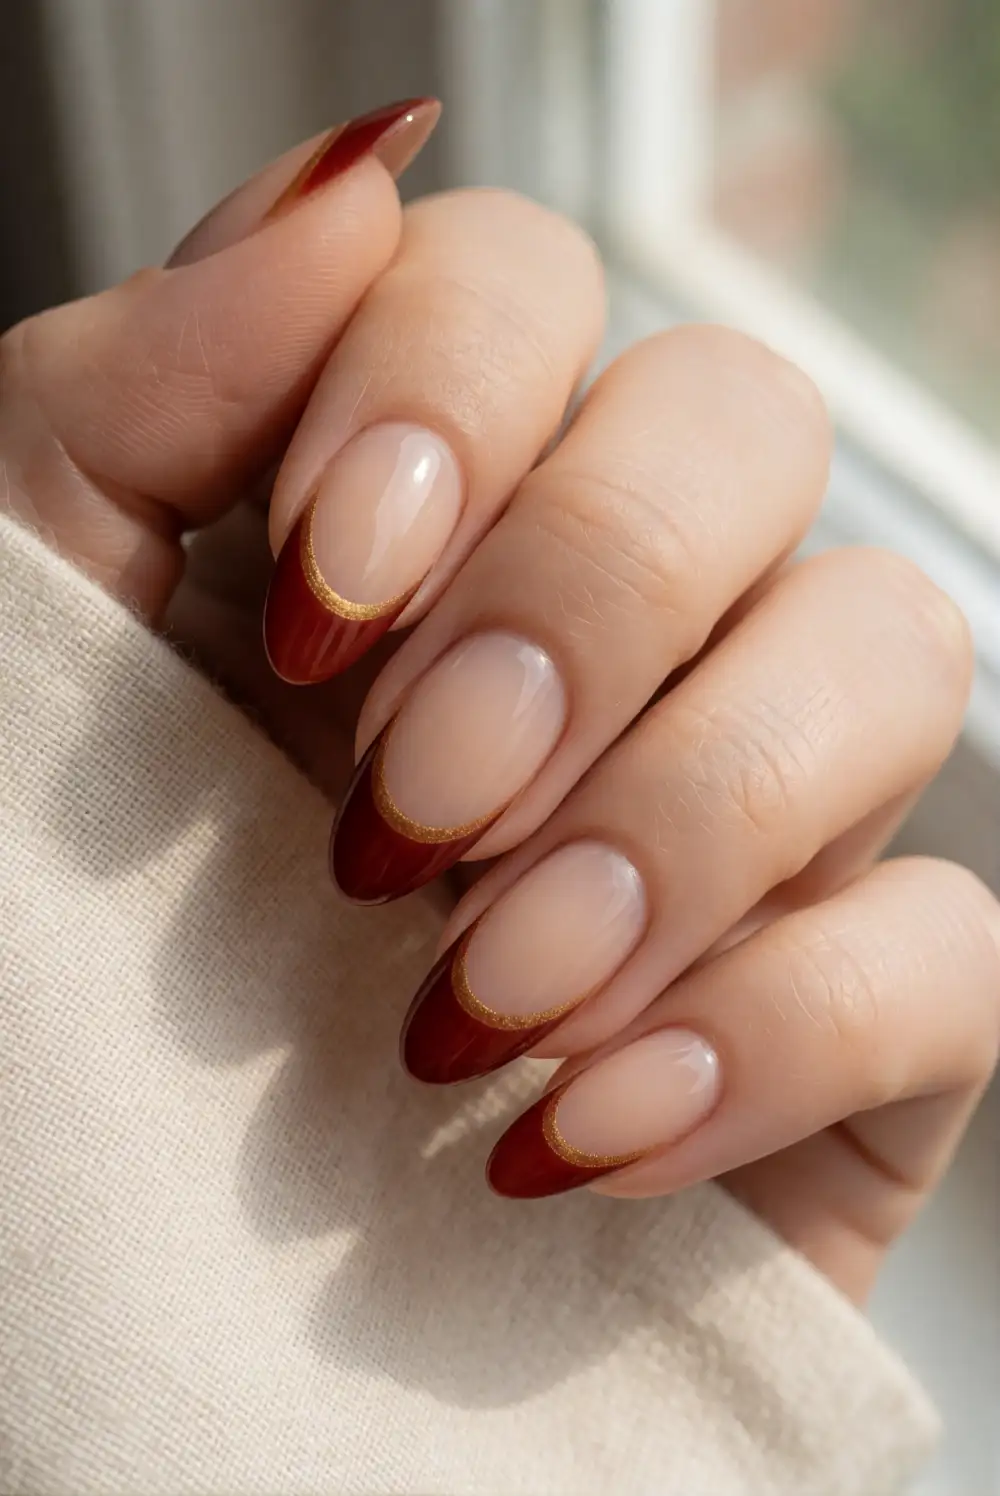
Paint a sheer beige or smoky mauve base, then add a curved deep-red crescent near the nail base to suggest a dramatic harvest moon. A fine brush helps shape the arc; use the rounded edge of a small nail-art stencil if you prefer a smoother curve. Add a thin line of warm gold polish along part of the crescent for a subtle glow. Finish with a clear top coat once all colors are dry.
Keep the moon shape slim to preserve the open space that makes this design feel elegant on almond nails. A wine-red shade creates a moody look, while rusty terracotta feels softer and more autumnal. You can leave the other nails neutral or repeat the crescent with varied placement for a coordinated set. Choose a fine shimmer rather than chunky glitter so the curved detail stays crisp and refined.
Candy Corn Ombre Nails
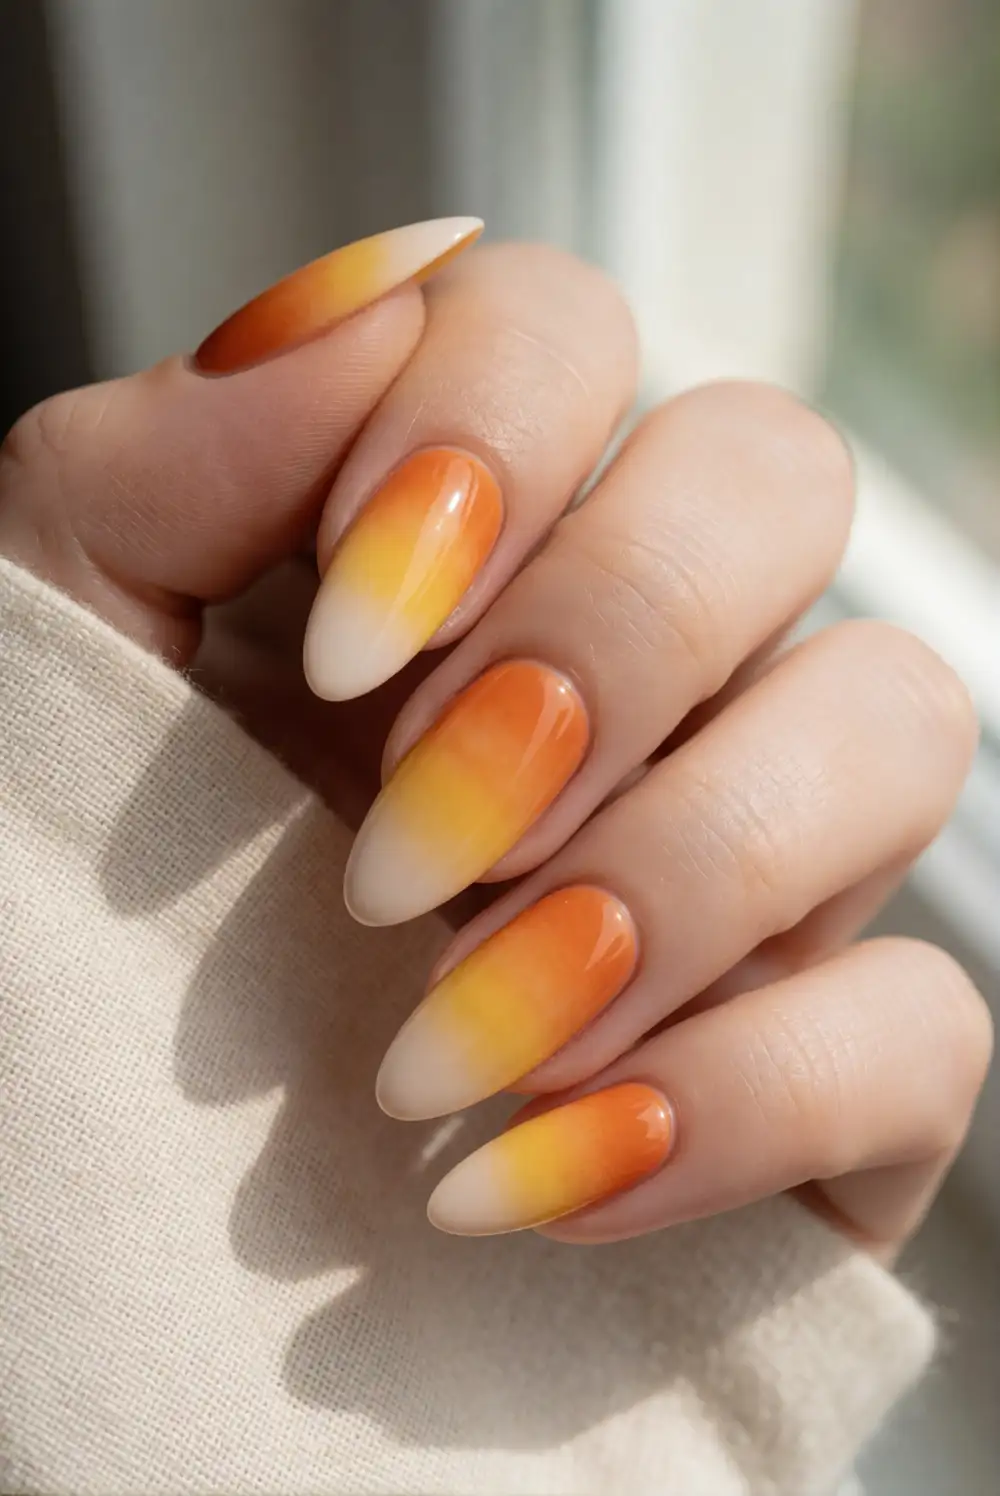
Create a candy-corn-inspired gradient with creamy white, sunny yellow, and pumpkin orange polish. Apply a sponge with the three colors in soft bands, then gently dab it over the nail to blend the transitions. Protect the skin around each nail with removable barrier product, and build the color with thin passes rather than a thick layer. When the gradient looks smooth, remove the barrier, let the polish dry, and finish with a glossy top coat.
The almond silhouette naturally elongates the warm color fade, making the design feel especially polished. Keep the color bands soft for a wearable manicure, or use brighter shades for a more playful seasonal finish. A sheer nude base beneath the gradient can soften the effect, while a matte top coat gives it a velvety look. Repeat the ombre across the nails or use it as an accent beside solid cream polish.
Midnight Bat Accent Nails
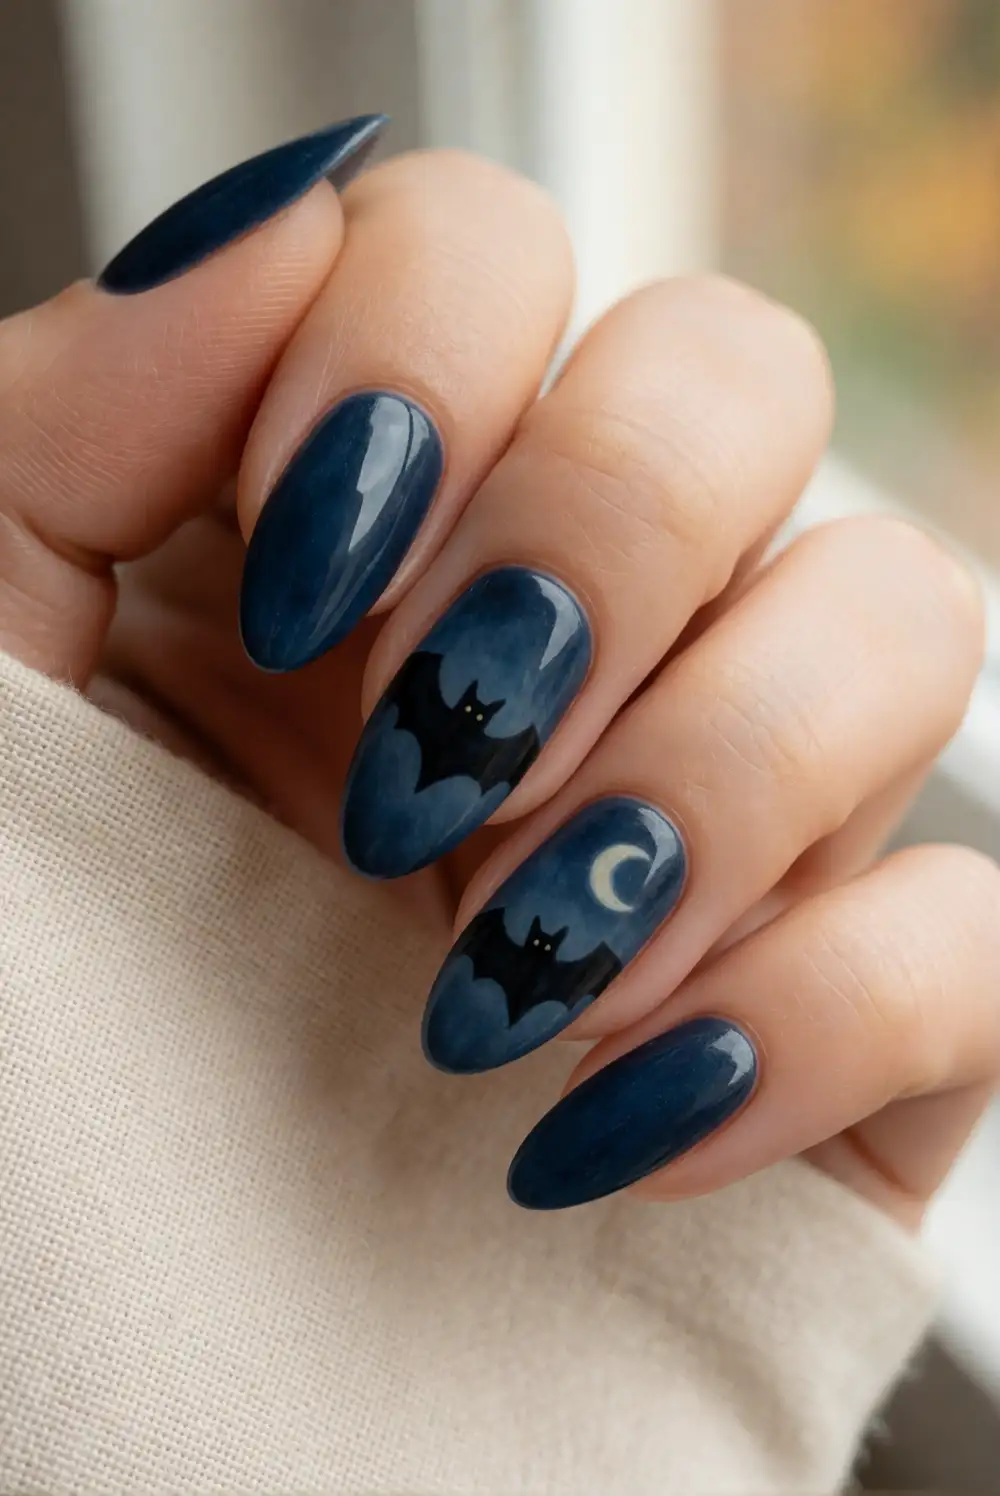
Use a deep midnight-blue or charcoal base to create a night-sky backdrop, then paint a small bat in black or soft gray on an accent nail. Draw the body with a fine brush and add curved wings with short, controlled strokes. A tiny pale moon or a few small stars can complete the scene without filling the nail. Allow the artwork to dry thoroughly before adding a smooth clear top coat.
Keep the bat silhouette compact so its wings remain distinct against the dark polish. For a softer version, swap the midnight base for dusty lavender and use charcoal for the figure. A hint of fine silver shimmer can suggest a glowing night sky, but leave enough plain space to make the artwork easy to see. This design works well with solid dark nails or a sheer neutral manicure for a lighter contrast.
Autumn Plaid Nail Accents
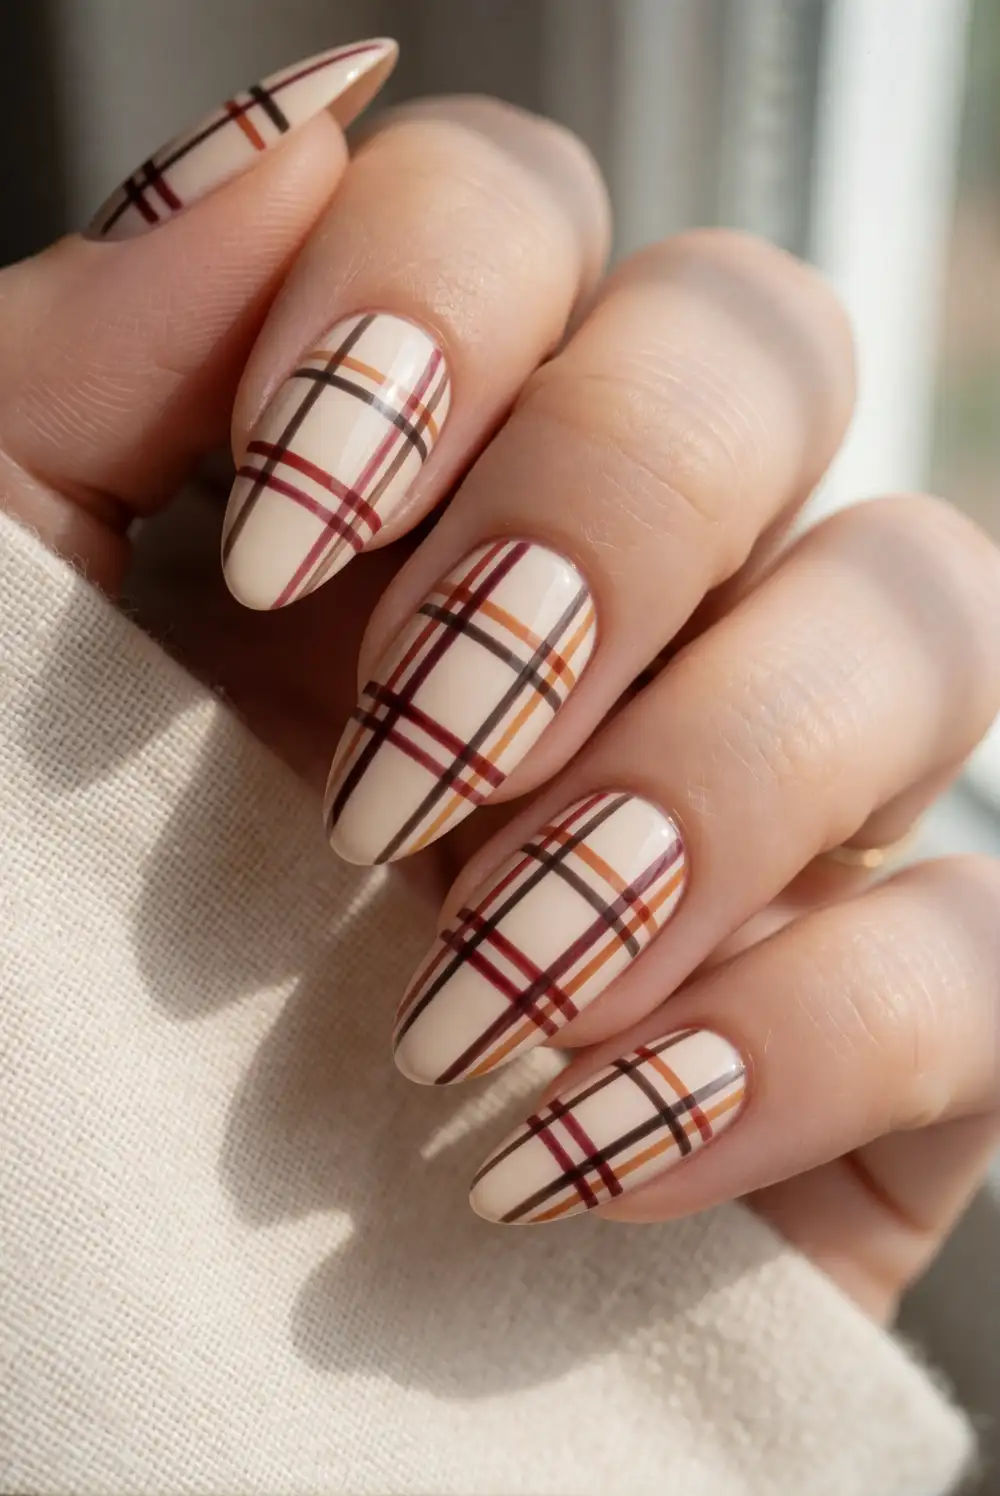
Choose a warm cream or muted rust base, then build a small plaid pattern with a fine liner brush. Paint a few intersecting stripes in burgundy, dark brown, and soft orange, leaving parts of the base visible between the lines. Keep each stripe thin and let it dry before crossing it with another color. A glossy top coat smooths the pattern and adds a neat finish to the layered autumn palette.
Use the plaid as an accent against solid cream, rust, or deep brown nails to keep the look easy to wear. For a delicate finish, choose muted shades and fine lines; richer colors make the pattern bolder without requiring extra detail. Follow the natural length of the nail with vertical strokes, then add shorter crosswise lines for a balanced effect. A matte finish gives the design a cozy fabric-inspired appearance.
Smoky Purple Shimmer Nails
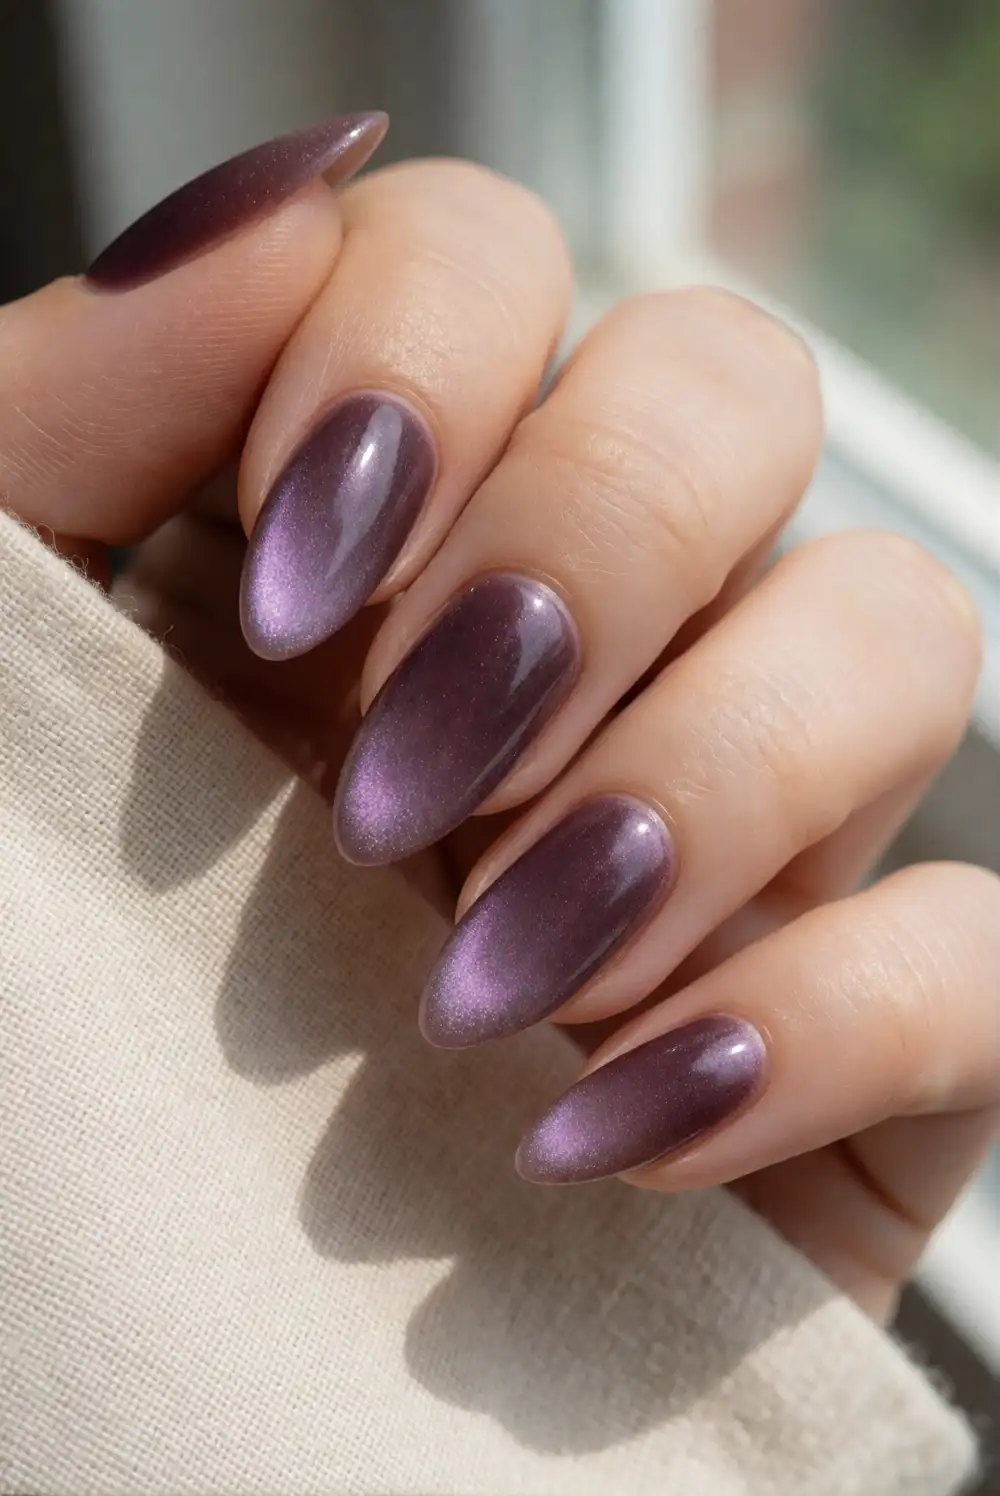
Apply a smoky plum polish across the nails, then layer a fine violet or silver shimmer over the surface for a softly glowing Halloween manicure. Use a makeup sponge to dab shimmer near the tips and blend it toward the center, creating a gentle gradient rather than a sharp line. Work in thin layers so the almond shape remains sleek, and seal the finished polish with a glossy top coat.
Choose a deep aubergine base for a richer look or a muted mauve for a softer effect. A sheer shimmer keeps the color wearable for everyday plans, while extra layers make the finish more festive for an evening out. Add a tiny crescent detail in pale silver if you want a little extra polish, or leave the nails free of art for a simple, atmospheric look. The reflective finish catches light beautifully.
Black and Orange Color-Block Nails
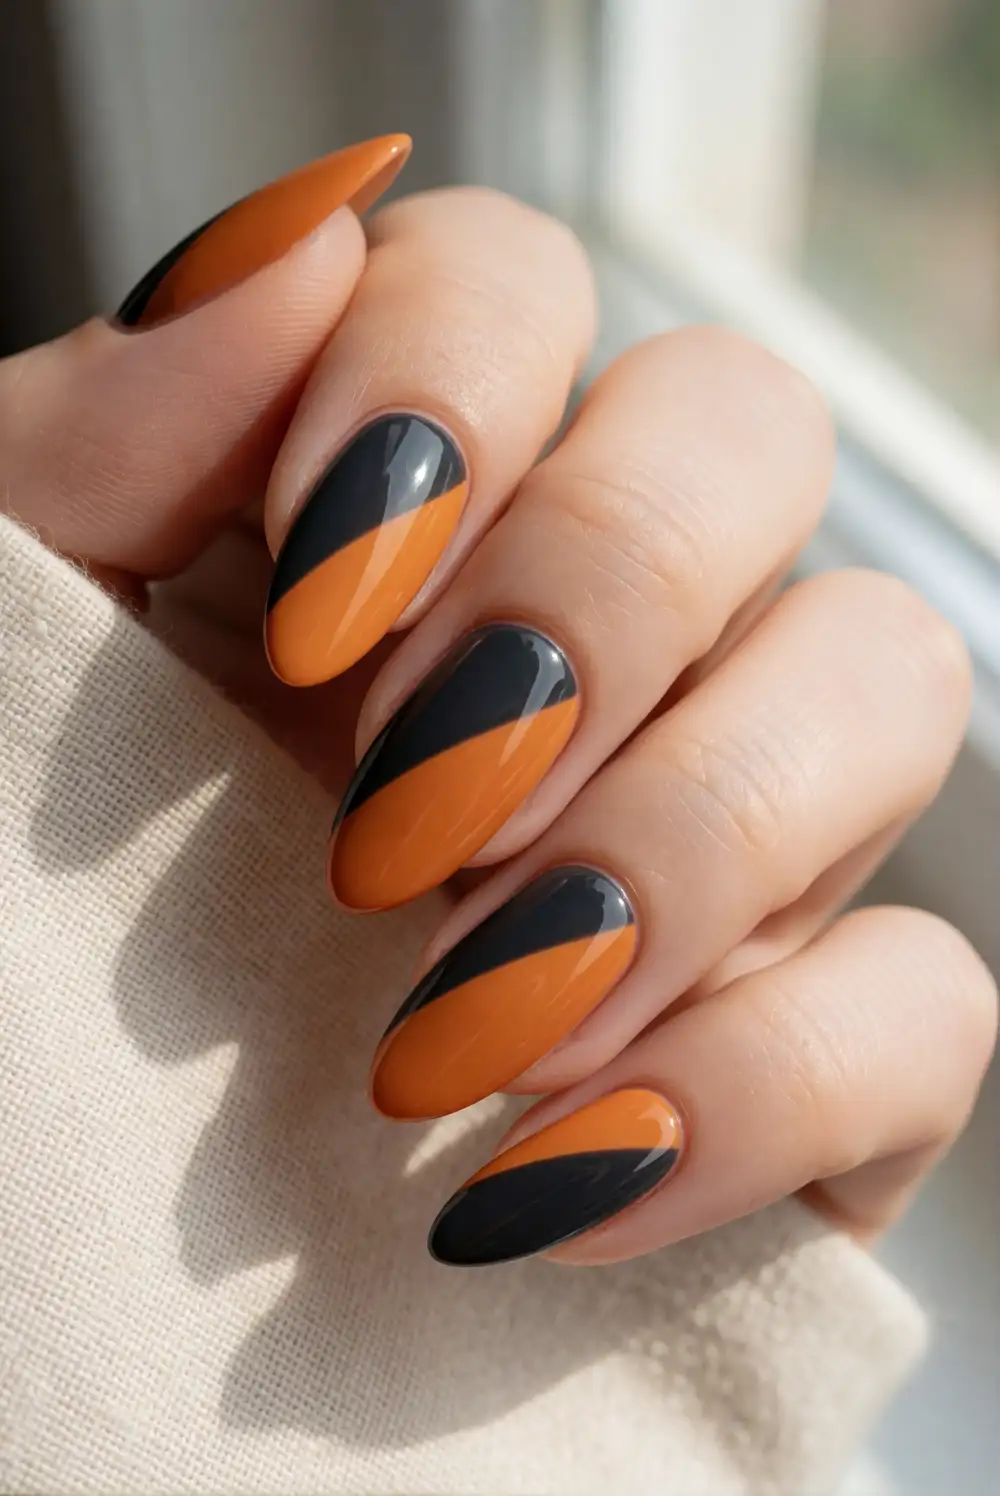
Pair glossy black with warm pumpkin orange in a clean color-block manicure. Paint the nail with a neutral base, let it dry, and use nail-art tape to mark a diagonal or curved division. Apply orange to one side and black to the other, then remove the tape while the polish is still slightly tacky. Finish with a clear top coat once the design has fully dried, taking care to smooth the border.
Try a narrow orange tip against a dark base for a subtle look, or make the color division more dramatic across the nail. A fine gold line along the boundary adds a polished accent without complicating the design. Keep the color placement consistent for a coordinated manicure, or alternate the direction of the divide for a relaxed feel. The bold contrast looks especially striking against the long, tapered outline of almond-shaped nails.
From soft pumpkin accents to bold color blocking, these Halloween nail designs make it easy to find a look that suits your almond-shaped manicure. Choose a simple detail for a subtle seasonal touch, or combine rich colors and playful motifs for a more expressive finish. With a steady hand, a fine brush, and a glossy top coat, your favorite design can feel festive while still looking polished.








