
Looking for Halloween nail inspo that feels festive, stylish, and easy to personalize? These wearable nail designs range from glossy black tips to playful pumpkins, delicate webs, and rich seasonal colors. Try them at home with polish and a fine brush, or bring a favorite look to your next manicure appointment.
Glossy Black French Tips
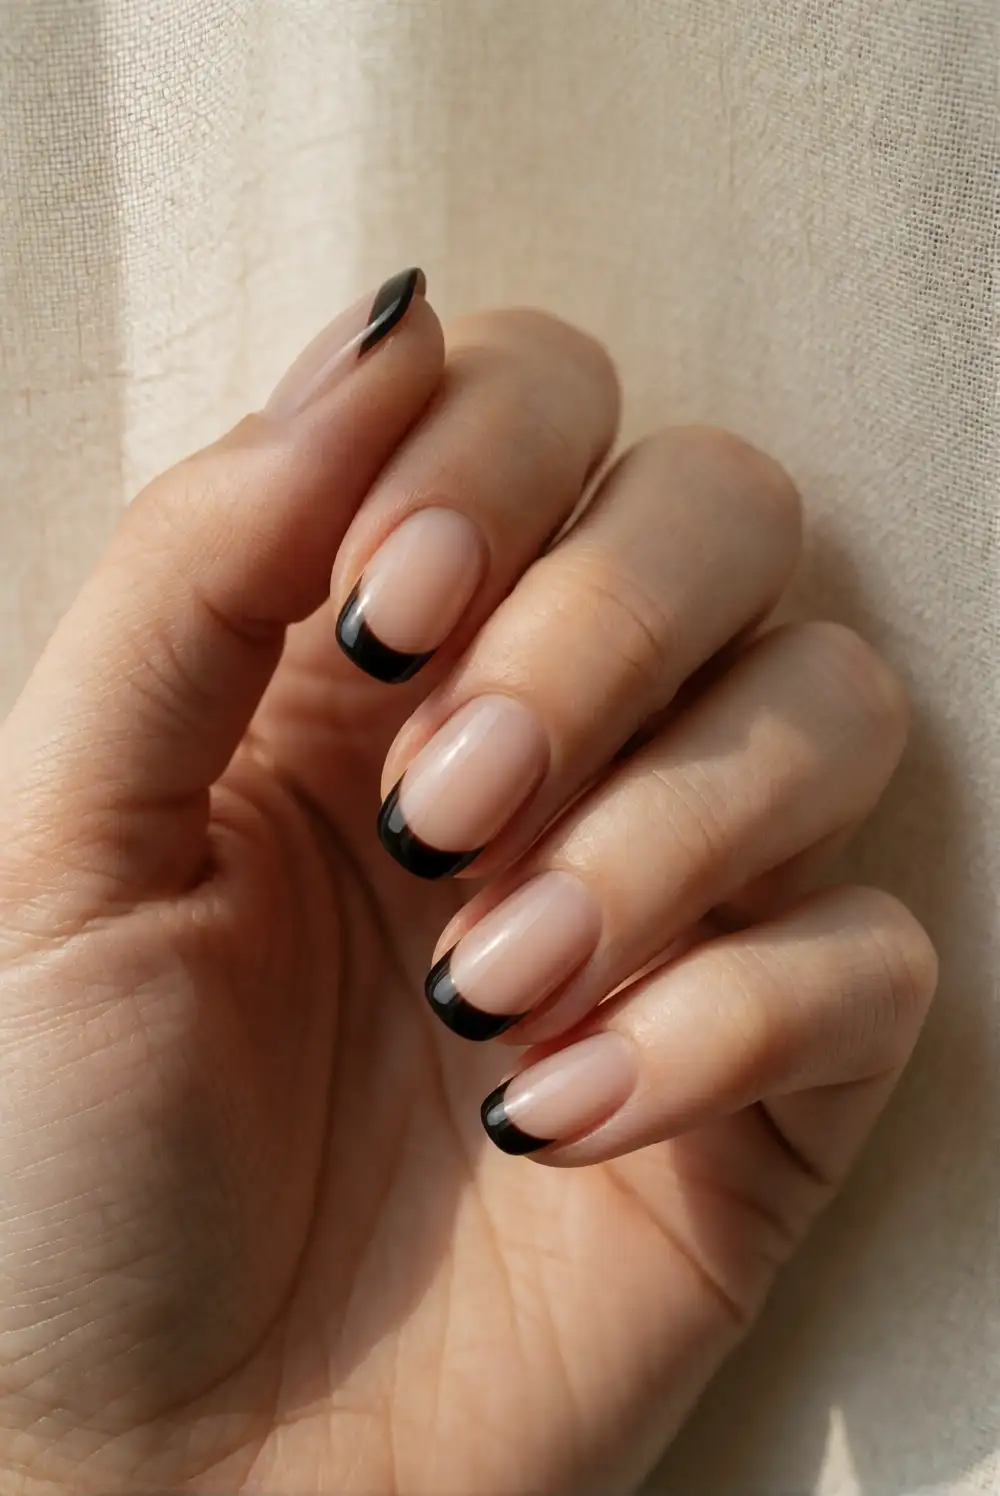
Give a classic French manicure a Halloween update with glossy black tips over a sheer nude or milky pink base. Shape and clean your nails, apply a protective base coat, then paint the tips using a fine nail-art brush or a French-tip guide. Let the polish dry between coats and finish with a clear top coat. The crisp contrast feels seasonal without requiring elaborate illustrations, making this design an approachable choice for beginners and a polished option for any nail length.
Keep the tips slender for a subtle look, or make them deeper for a bolder graphic edge. A tiny silver accent on one nail can add a little sparkle without crowding the design. If painting both hands is tricky, use a dark polish pen or ask a technician to create an even curve. Pair the manicure with silver jewelry, a black sweater, or a simple orange accessory for an understated Halloween outfit.
Mini Pumpkin Accent Nails
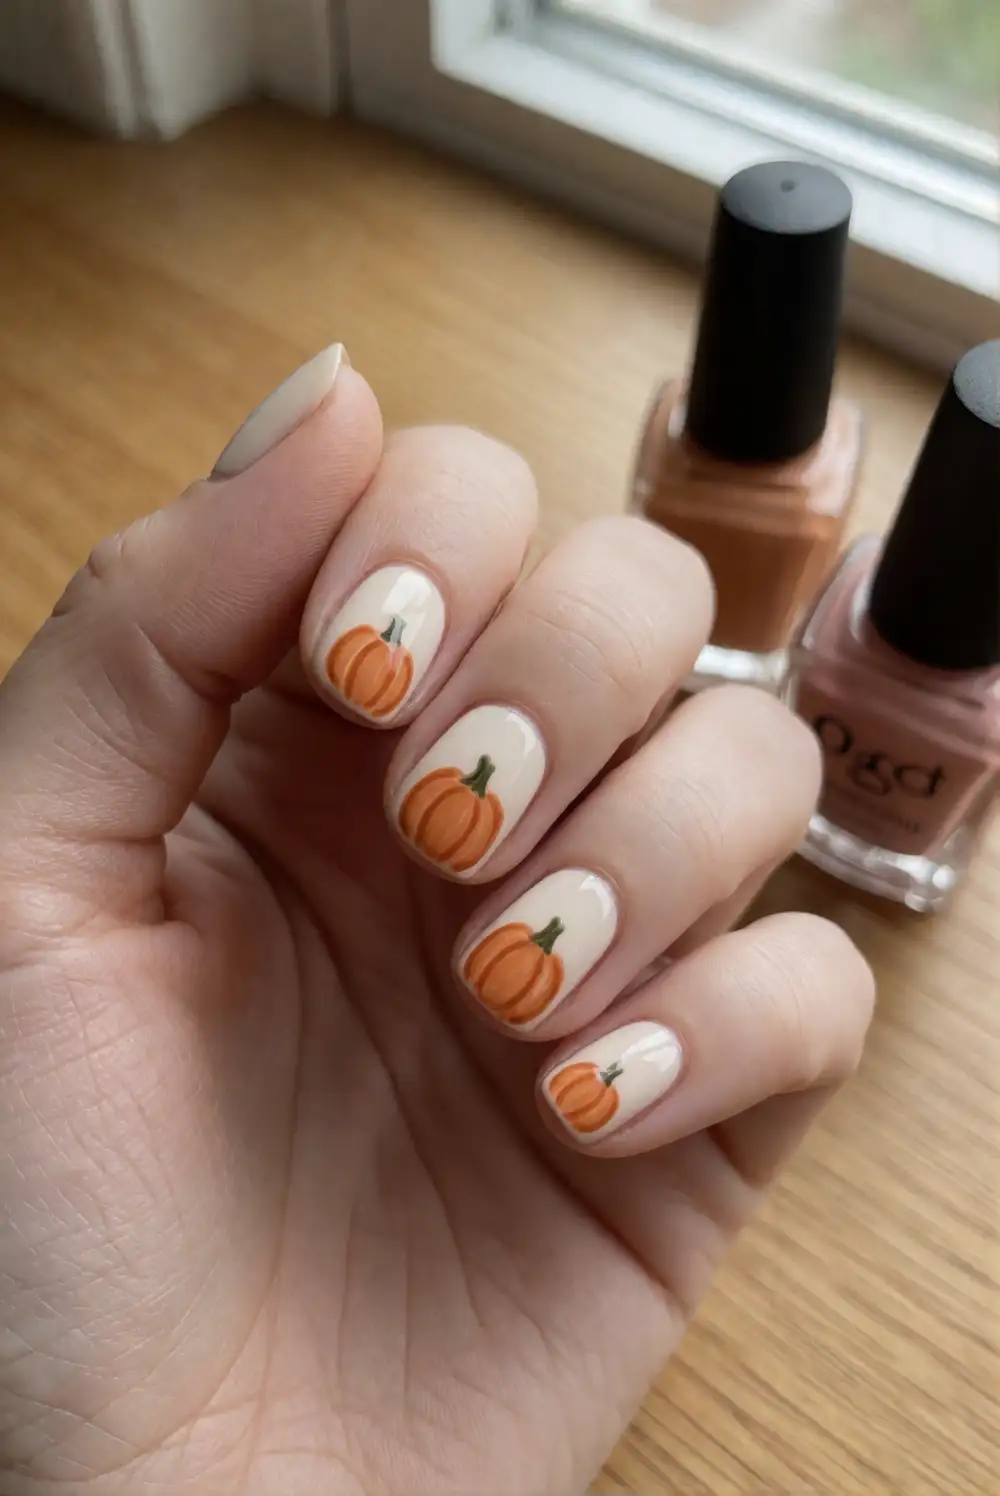
Paint miniature pumpkins over a warm cream, pale peach, or sheer beige manicure for a cheerful seasonal accent. Start with a smooth base color and let it dry completely. Use a dotting tool or the rounded end of a small brush to place an orange oval on one or two nails, then add short curved strokes to suggest pumpkin ridges. Finish with a tiny green stem using a fine brush and seal the design once every layer is dry.
Leave the remaining nails in a coordinating solid shade so the tiny artwork stays easy to notice. A soft terracotta pumpkin looks especially lovely against cream, while bright orange gives the manicure a more playful feel. Place the accent on a ring finger or thumb, or vary the pumpkin size for a relaxed hand-painted effect. This design pairs nicely with cozy knits and autumn colors without relying on a full set of detailed art.
Delicate Spiderweb Corners
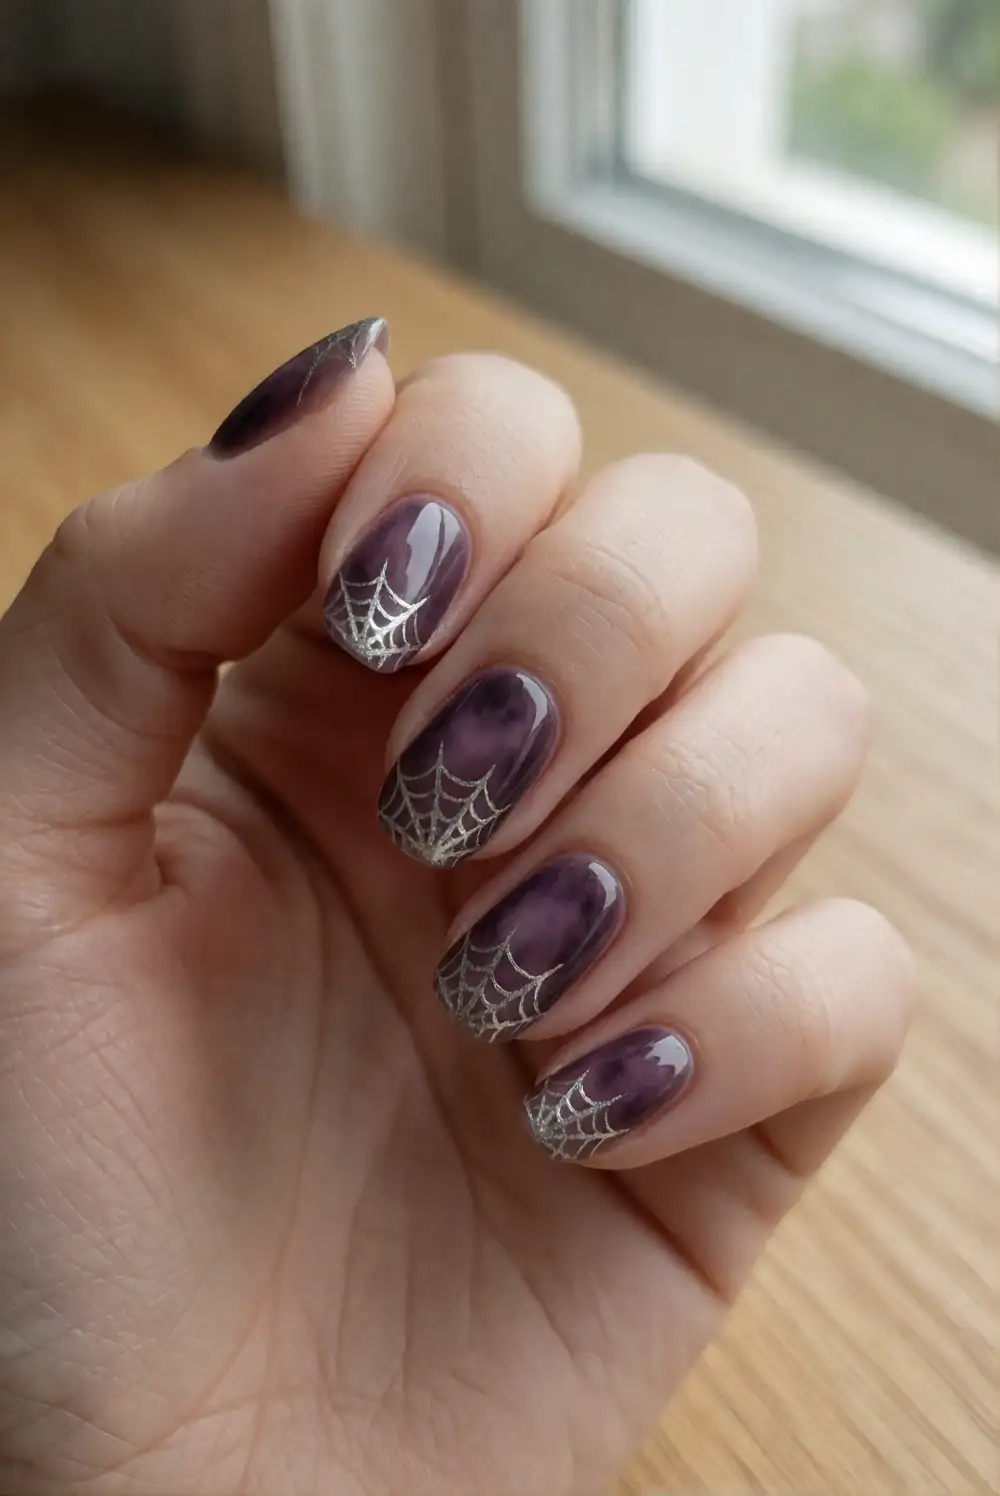
Create a fine spiderweb that spreads from a nail corner rather than covering the entire surface. Apply a sheer pink, smoky gray, or deep plum base and allow it to dry. With a fine liner brush and white or silver polish, draw a few thin lines radiating from one corner, then connect them with small curved strokes. Keep the lines delicate and finish with a glossy top coat. The open space preserves a refined look while giving the manicure a recognizable Halloween detail.
For a softer effect, choose pale gray lines over a muted base; for more contrast, use bright white on plum or black. Repeat the web on just one nail per hand and keep the others plain, or place tiny webs on several nails in different corners. A steady hand helps, but nail-art stickers can offer a neat alternative. The design looks especially striking with simple rings and dark, solid-color clothing.
Sweet Candy Corn Stripes
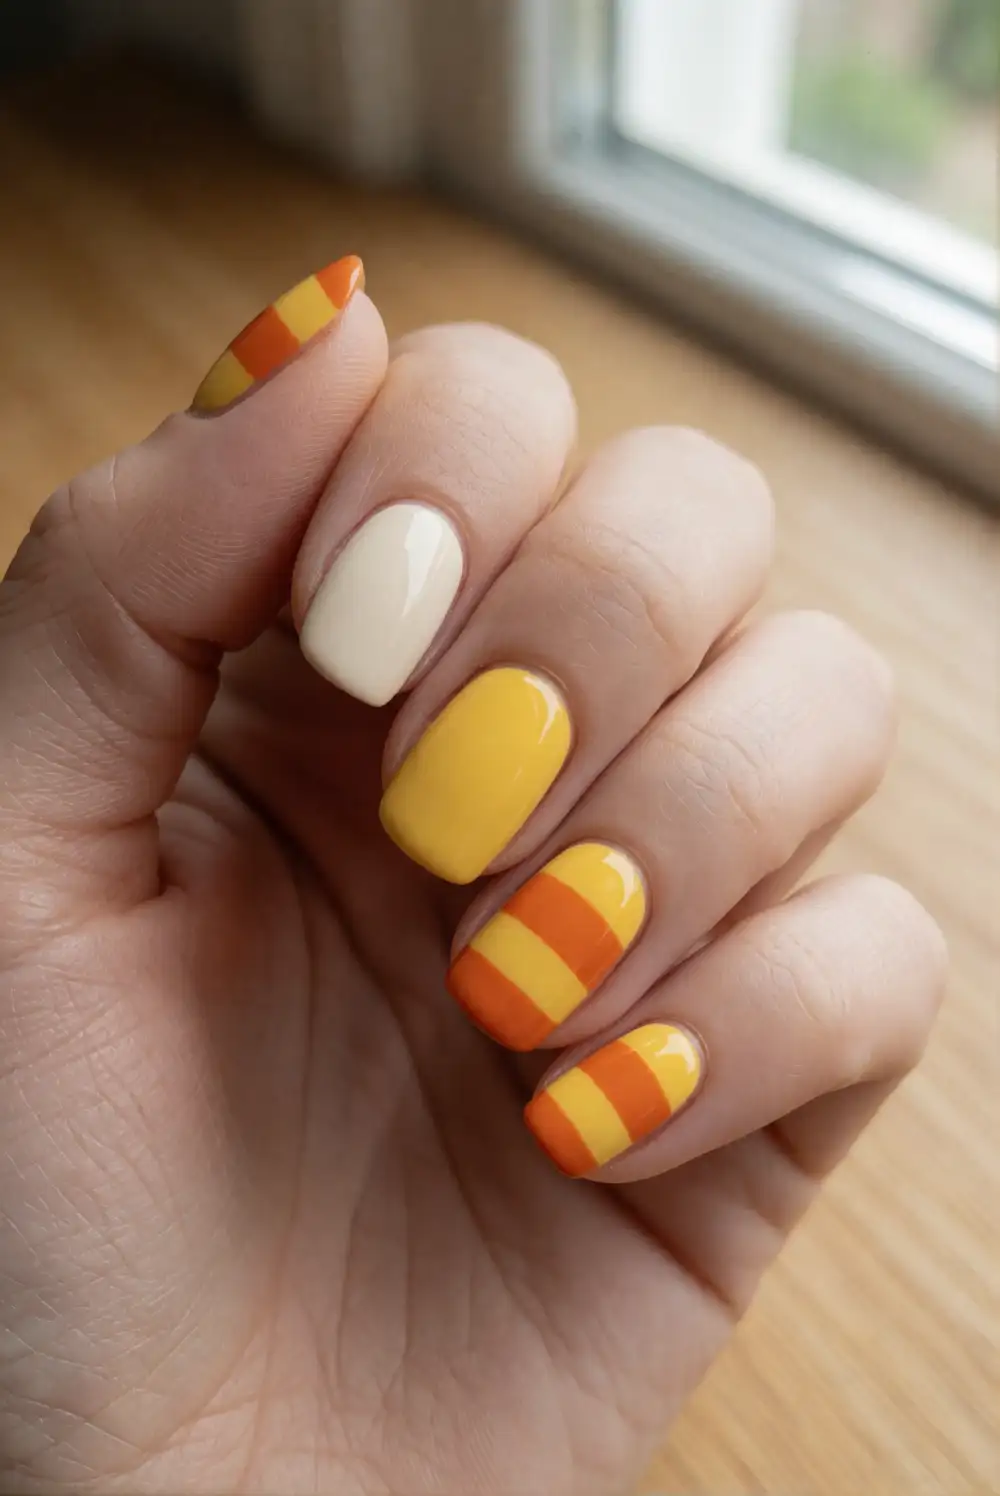
Bring candy-corn colors to your nails with clean bands of cream, sunny yellow, and orange. Apply a base coat, then paint a pale cream section near the cuticle, a yellow band through the middle, and an orange tip. Nail tape can help separate the colors; remove it gently while the polish is still slightly tacky. Work in thin coats and let each color dry before adding the next. A glossy top coat smooths the stripes and gives the finished manicure a candy-like shine.
Use the familiar colors on every nail for a coordinated look, or make just one striped accent nail and paint the rest orange or cream. A diagonal layout feels more modern than straight horizontal bands, while a soft pastel palette makes the design gentle and playful. Keep the stripes broad enough to remain distinct on shorter nails. This cheerful manicure works well with simple outfits and adds a seasonal pop without detailed painting.
Midnight Bat Silhouettes
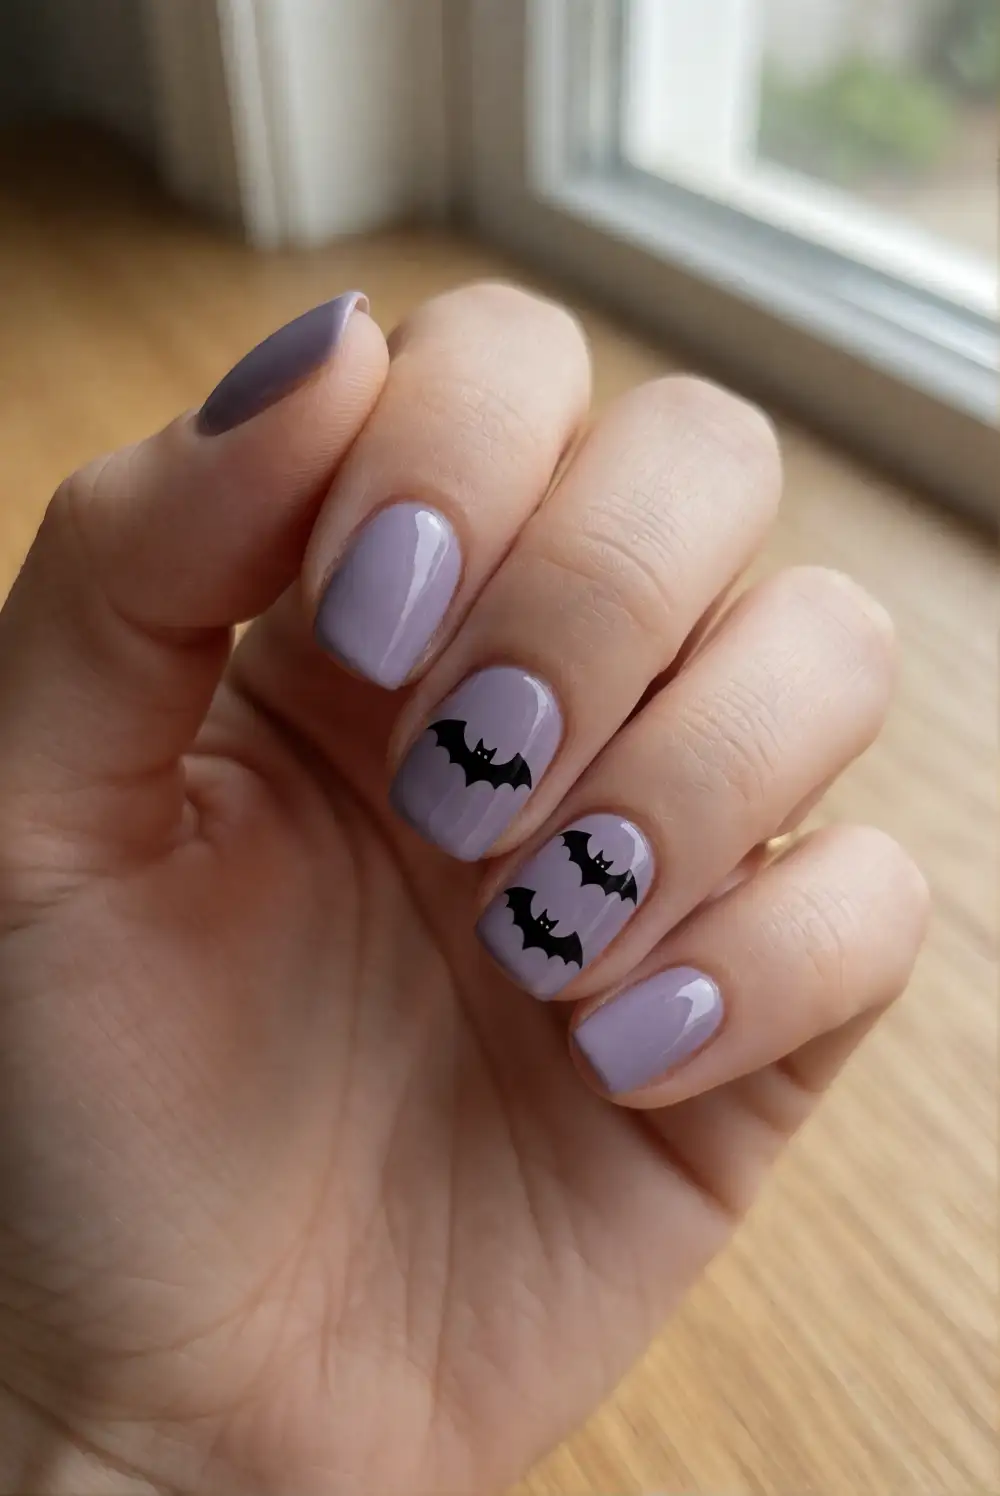
Paint tiny bat silhouettes against a dusky lavender, muted orange, or pale gray background for a graphic Halloween manicure. After applying a base color, use a fine brush and black polish to create a small central body with short wings on either side. Simple curved shapes are easier to paint than detailed outlines, so keep the design miniature and uncluttered. Let the artwork dry before adding a clear top coat to protect the silhouettes and give the nails a smooth finish.
One bat on an accent nail creates a subtle look, while a few varied silhouettes can suggest movement across the hand. Choose a translucent base for an airy effect or a saturated color for stronger contrast. If freehand painting feels challenging, use a small nail-art decal and press it onto fully dry polish. Keep the rest of the manicure glossy and plain so the little shapes remain the focus rather than competing with other details.
Warm Orange Chrome Nails
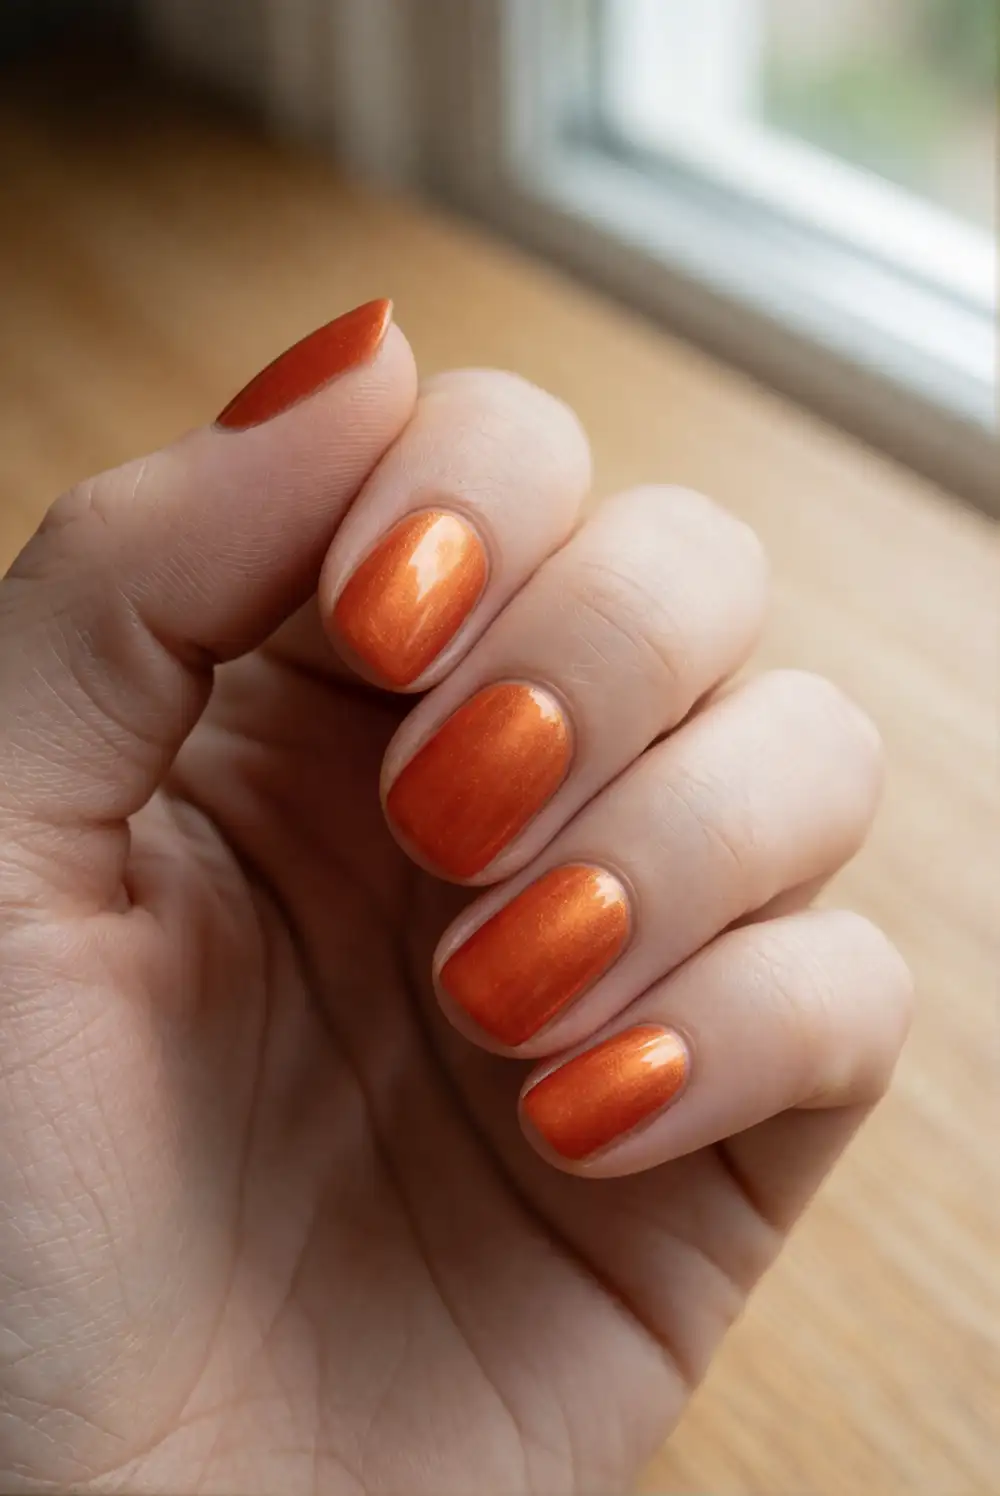
Make a bold seasonal statement with orange chrome nails that catch the light like polished metal. Apply a compatible base color, cure it if using gel polish, and add chrome powder according to the product directions. Gently buff the powder over the surface with an applicator, remove any excess, and seal the edges with the appropriate top coat. A professional manicure can help achieve an especially even mirror finish, while a regular orange shimmer polish offers an easy at-home alternative.
Choose vivid pumpkin orange for a bright, playful finish or a deeper copper shade for a more subdued look. Keep the shape simple so the reflective color has room to shine, and consider using chrome on only a few accent nails if you prefer a softer effect. This manicure looks striking against black clothing and warm neutral knits. Avoid adding busy artwork over the chrome; a clean surface makes the metallic glow feel intentional.
Smoky Purple Cat-Eye Nails
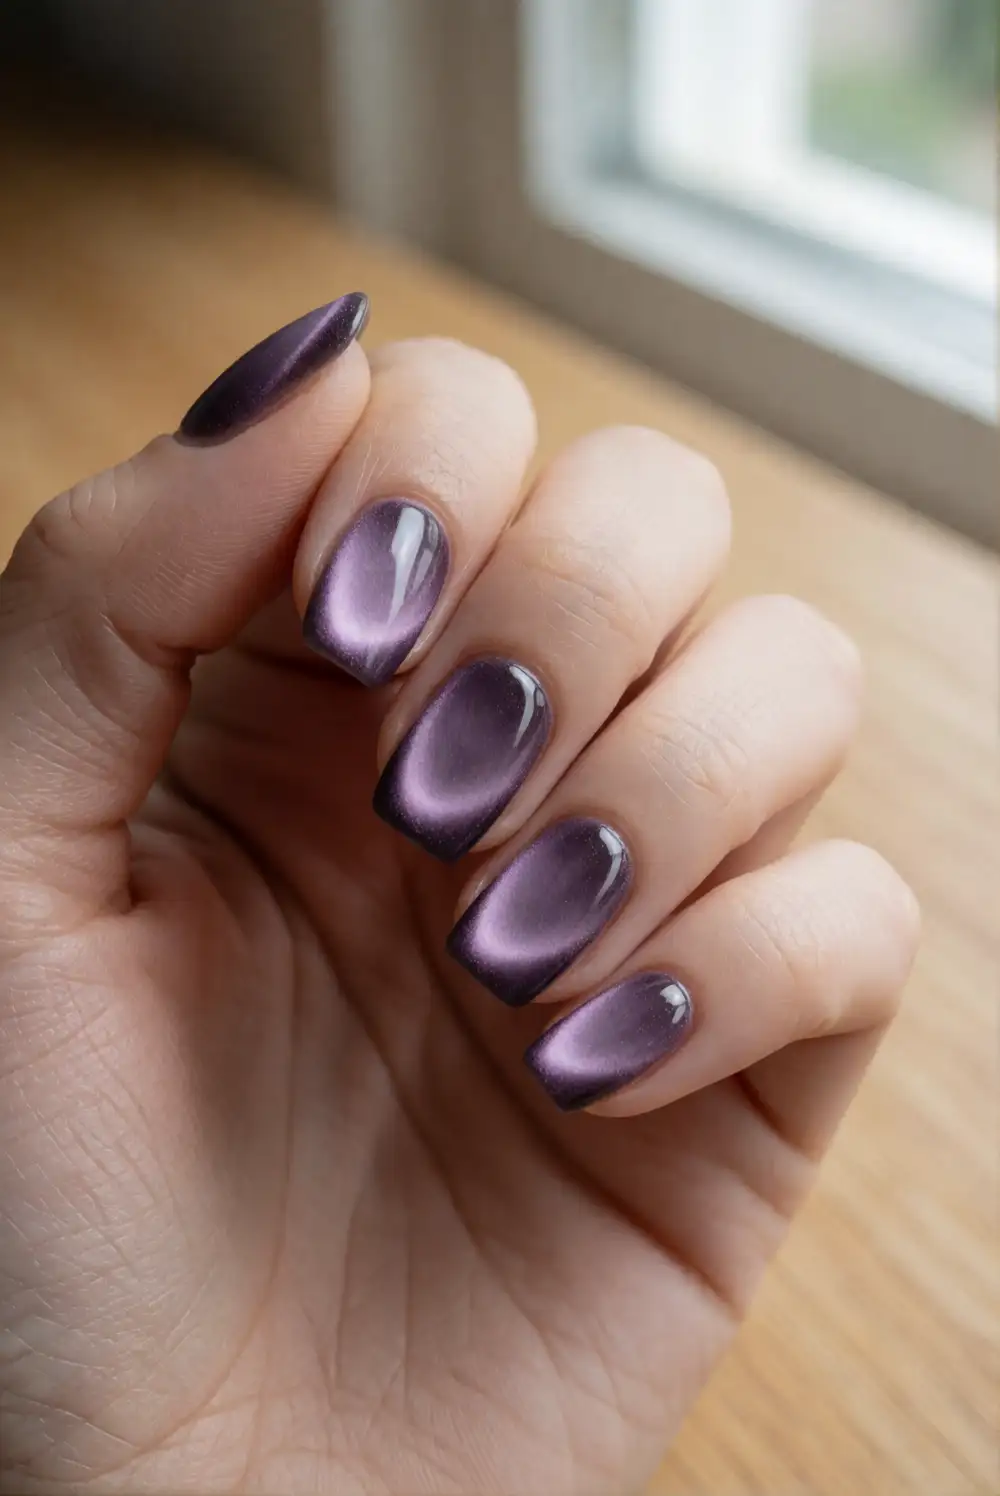
Use magnetic cat-eye polish in smoky purple to create a shifting, dimensional Halloween manicure. Apply the polish in a thin coat, then hold the magnet near each nail as directed so the shimmer gathers into a glowing line. Repeat with another coat if needed, shaping the light before the polish sets. Seal the finish with a suitable top coat. The layered violet and charcoal tones feel atmospheric and seasonal while remaining smooth, elegant, and easy to wear beyond a costume party.
Move the magnet position from nail to nail to create different arcs of reflected light, or keep the highlight centered for a coordinated set. A short oval or almond shape makes the sheen especially visible, but the effect works on many nail lengths. Pair the polish with minimal silver jewelry so the shifting color stays prominent. If magnetic polish is unavailable, a deep plum shimmer lacquer can provide a similar moody impression with fewer application steps.
Black and Orange Checkerboard
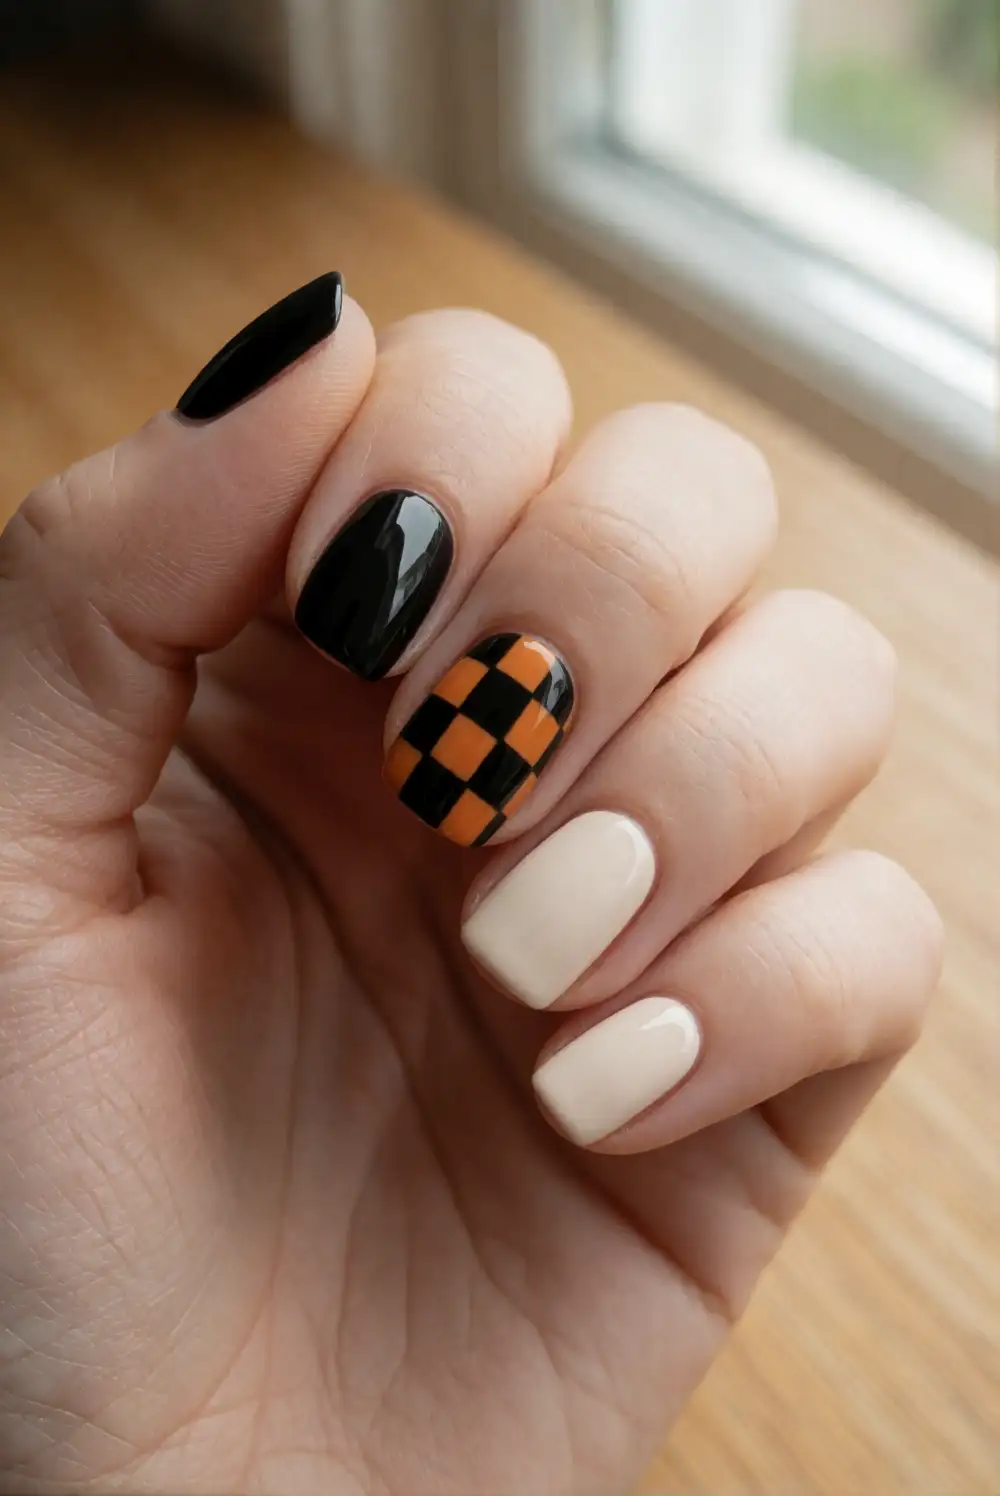
Paint a compact checkerboard accent using black and pumpkin-orange squares over a light base. First lay down the lighter color and allow it to dry fully. Use a fine brush or thin nail tape to map a small grid, then fill alternating spaces with black polish. Keep the squares broad enough to remain clear on the nail, and remove any tape carefully before the polish becomes too dry. A glossy top coat helps smooth the pattern and makes the contrasting colors look crisp.
Limit the checkerboard to one or two nails and use a solid orange, black, or cream polish on the rest for an easier-to-wear result. A diagonal grid can give the pattern a lively feel, while a simple square layout looks clean and graphic. Nail stickers are a useful shortcut when precise lines are difficult to paint. This design works especially well with a minimal outfit, letting the bold pattern serve as the main seasonal accent.
Silver Moon and Star Accents
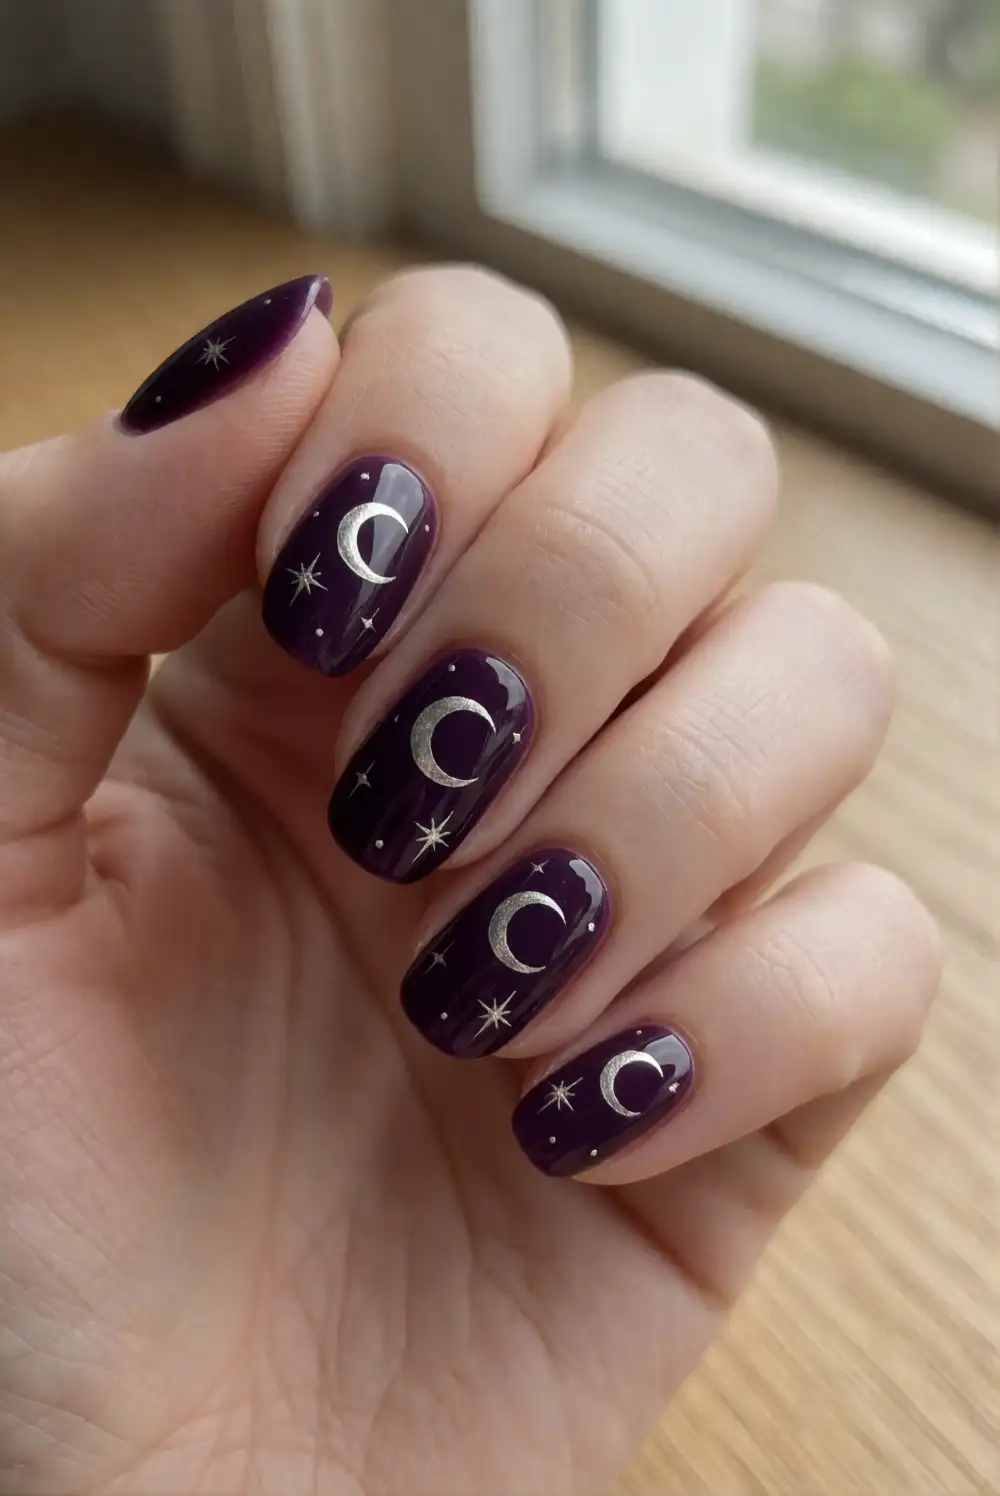
Create a celestial Halloween manicure with small silver moons and stars over midnight blue, deep plum, or sheer smoky polish. Apply the base color and let it dry, then use a fine brush or nail-art decals to place a crescent moon and a few simple star shapes. Keep the artwork spaced apart rather than filling every open area. Finish with a clear top coat to protect the details and add a reflective sheen. The result feels festive while staying delicate and polished.
Use one moon on a feature nail and keep the surrounding nails in a matching solid shade, or scatter tiny silver stars across a translucent base for a lighter look. A charcoal base gives the design a more dramatic contrast, while lavender keeps it soft. Avoid oversized embellishments so the manicure remains comfortable for everyday wear. The celestial details complement a dark dress, a soft sweater, or understated metallic accessories.
Velvet Plum Nail Polish
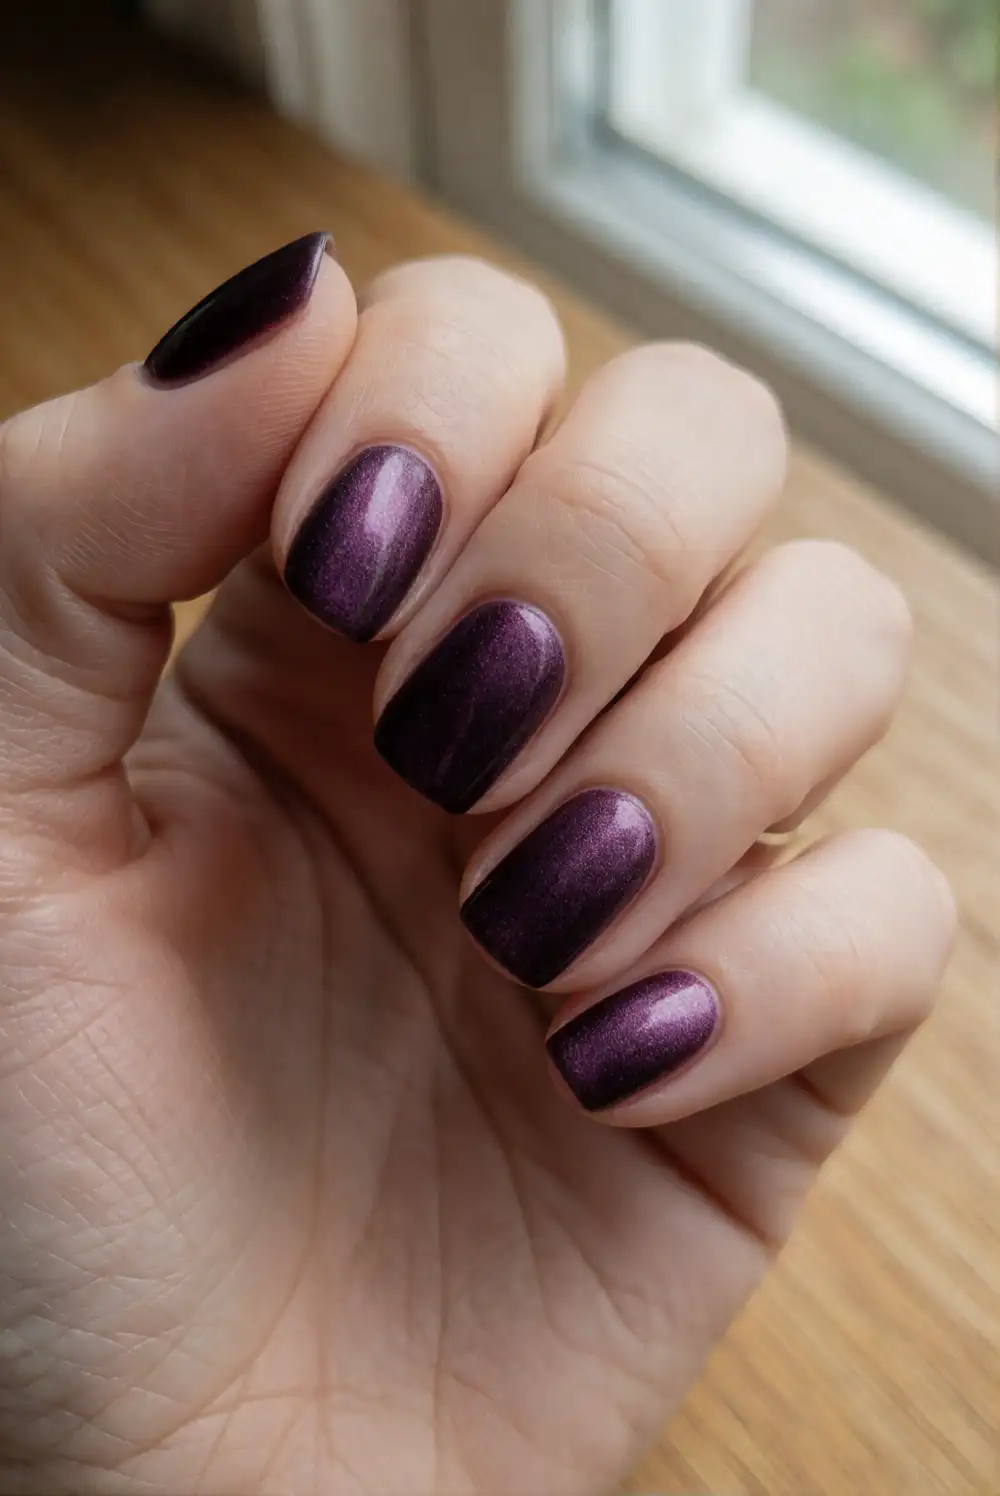
Choose a deep plum polish with a velvety shimmer for an easy Halloween manicure that needs no extra artwork. Shape the nails, apply a base coat, and brush on two thin layers of polish, allowing each to dry before the next. A fine shimmer or magnetic velvet finish adds depth without requiring painted motifs. Seal the color with a compatible top coat and clean the edges for a salon-like finish. The rich shade brings seasonal character while remaining sophisticated and versatile.
Try a blue-toned plum for a cooler look or a berry-toned shade for a warmer feel. The color suits short, rounded nails as well as longer almond shapes, making it simple to adapt to personal style. Add a single glossy black accent nail if you want subtle contrast, or keep the whole set monochrome. Plum polish pairs easily with neutral clothing and can transition smoothly from a Halloween gathering to everyday wear.
Negative-Space Crescent Tips
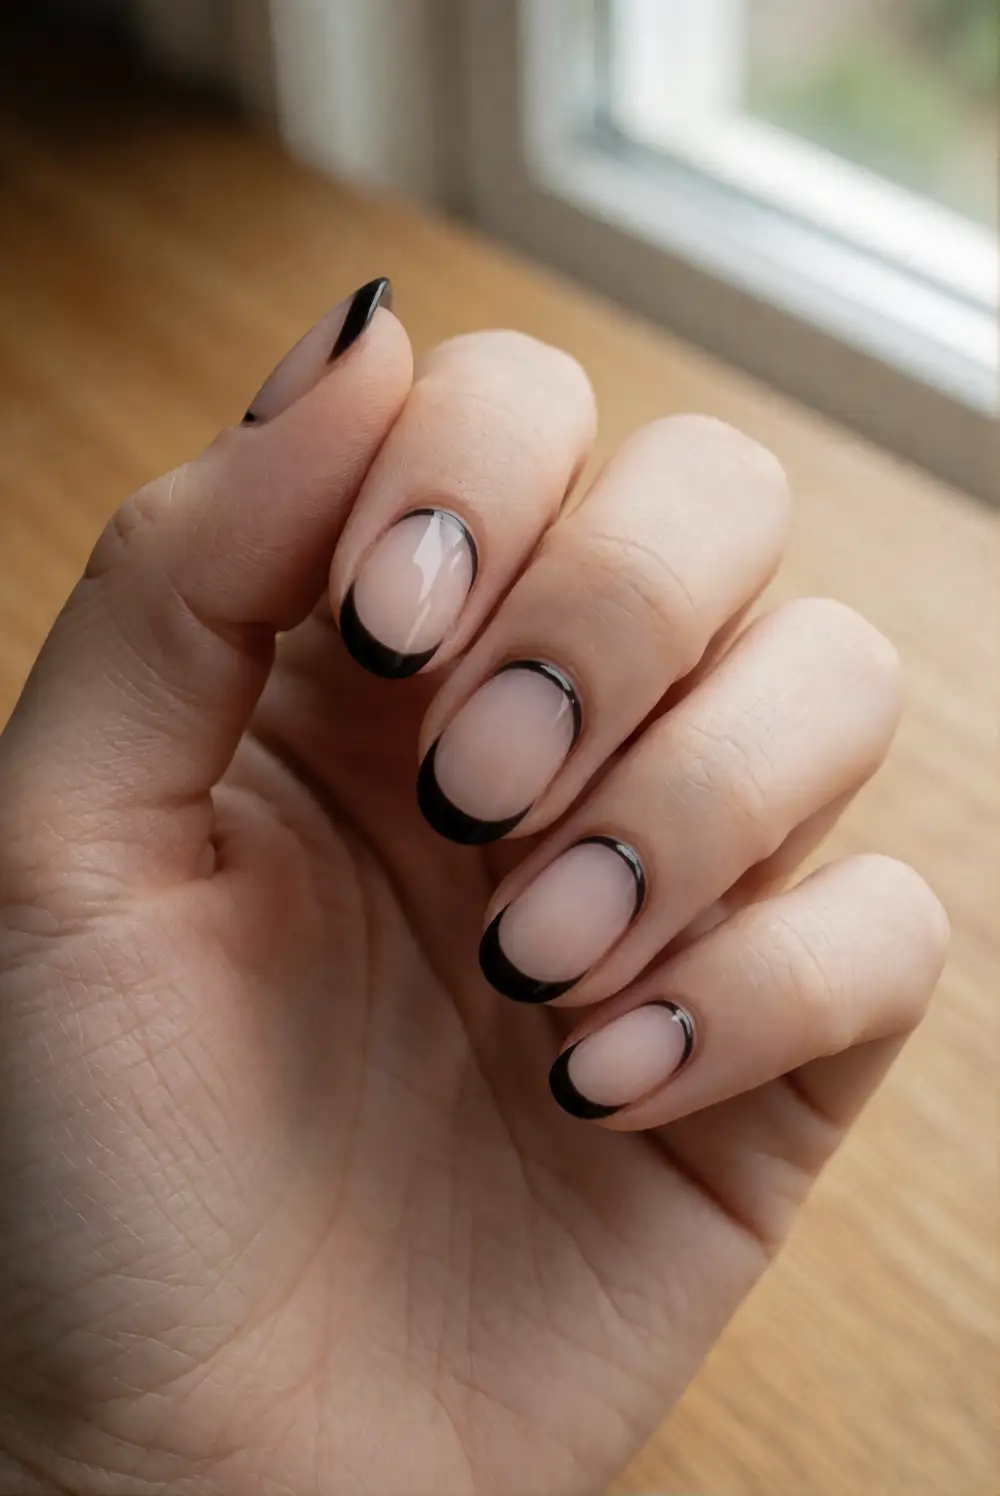
Frame the natural nail with curved black or deep orange crescents for a modern negative-space design. Apply a protective base coat, then paint a thin curve along the tip and a second curve near the cuticle, leaving the center largely clear or covered with sheer nude polish. A fine liner brush gives the curves control, while guides can help create a balanced outline. Let the design dry thoroughly and apply a glossy top coat to unify the finish.
Keep the crescents narrow for a delicate look or make them thicker for a bolder graphic effect. Black gives the manicure a classic Halloween feel, while rust orange offers a warmer seasonal variation. Try the design on every nail for a coordinated set or use it on an accent nail beside a solid neutral shade. Because the natural-looking center leaves visual breathing room, this style feels striking without looking overly busy.
Autumn Plaid Accent Nails
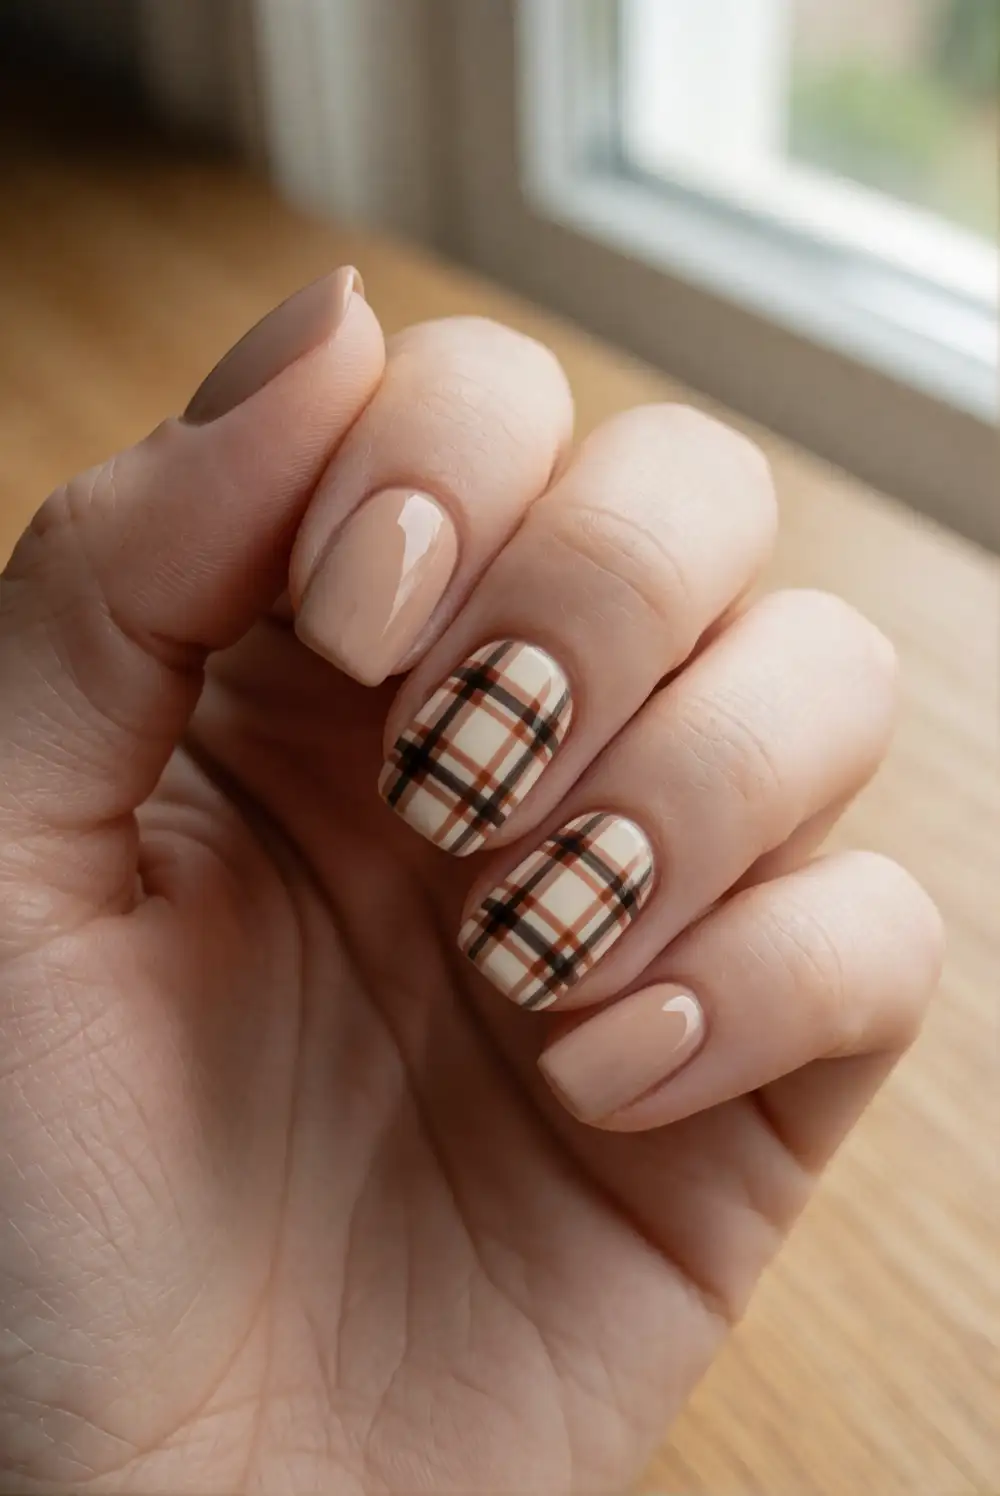
Add a cozy plaid accent with narrow overlapping lines in rust, cream, and deep brown over a warm beige base. Apply the base shade and let it dry completely. Use a fine liner brush to paint a few vertical stripes, allow them to set, then add horizontal lines that cross them. Vary the line thickness slightly for a fabric-inspired finish, and avoid crowding the pattern. Seal the completed artwork with a clear top coat to protect the design and smooth the surface.
Use plaid on one feature nail per hand and pair it with solid rust, chocolate, or cream polish for a balanced manicure. For a lighter look, swap the dark brown for soft taupe; for a richer palette, add a narrow burgundy stripe. Keep the lines thin enough to remain distinct on a smaller nail. This design coordinates beautifully with scarves and knitted layers, bringing a warm seasonal detail to a simple outfit.
From understated plum polish to playful pumpkins and graphic checkerboard accents, these Halloween nail ideas make it easy to find a look that suits your style. Save a favorite design, adapt the colors to your wardrobe, and enjoy a seasonal manicure that feels personal, polished, and ready for October.








