
Give your manicure a playful Halloween update with these easy nail ideas, designed for a festive look without a complicated salon appointment. From pumpkin orange tips and tiny ghost accents to glittery purple polish, each design can be adapted to your favorite colors and nail length. Pick a style that suits your plans, gather a few basic polishes and a fine brush, and enjoy a seasonal manicure you can create at home.
Classic Pumpkin Orange French Tips
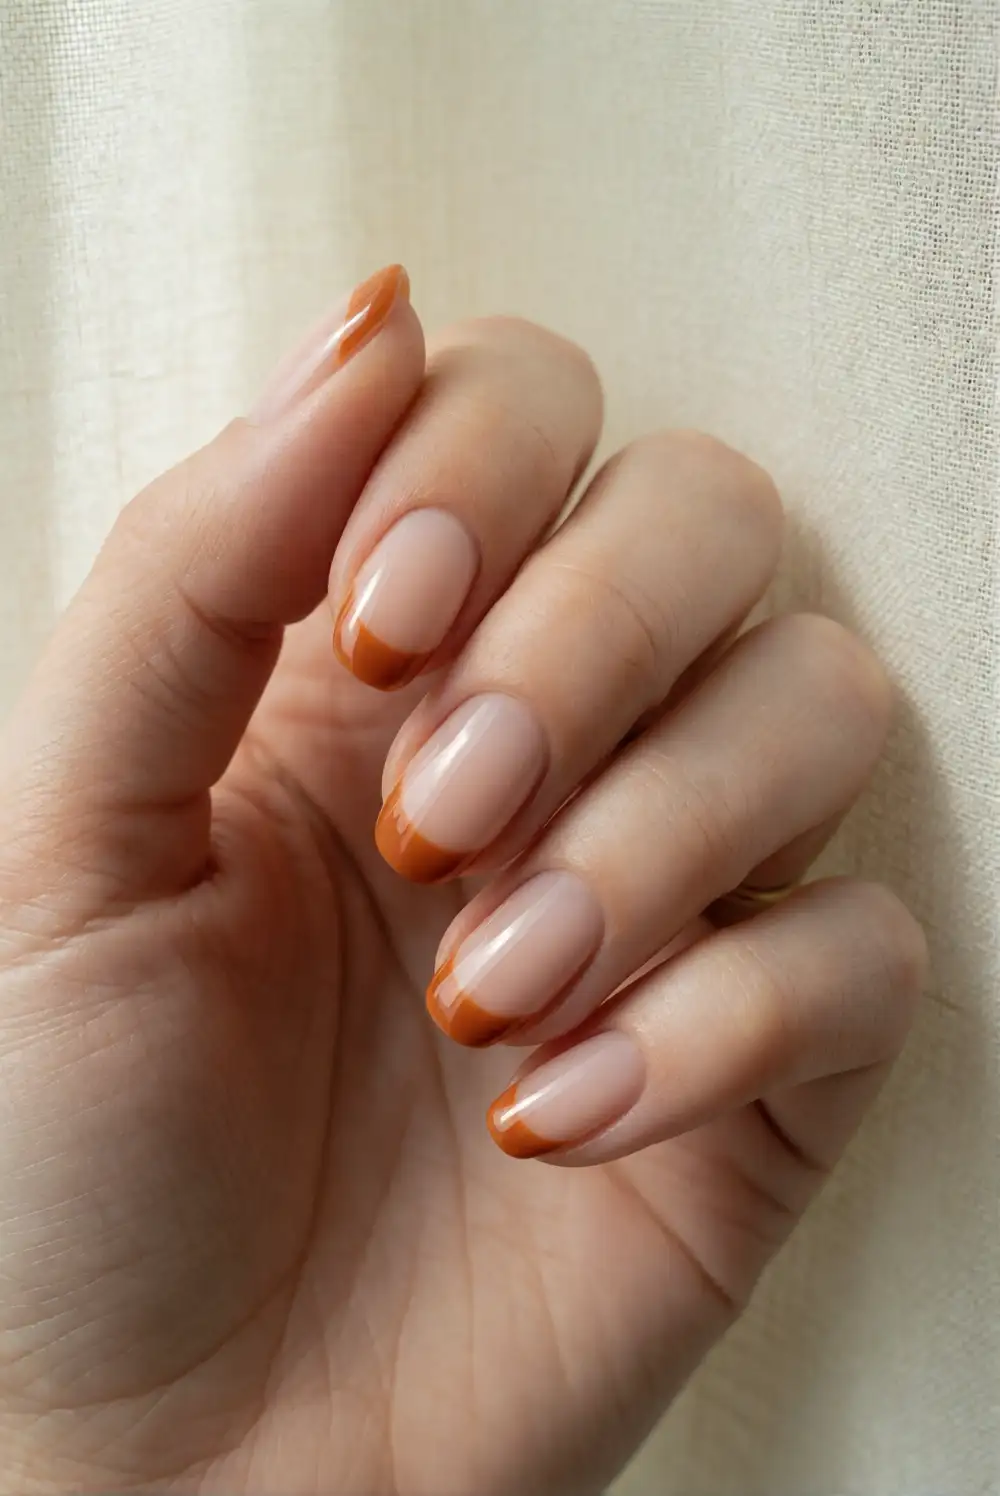
Give a classic French manicure a seasonal twist with pumpkin orange tips. Start with clean, dry nails and apply a sheer nude or clear base coat. Once it dries, sweep orange polish across each nail tip, following its natural curve; use a fine nail brush to tidy the edge if needed. Finish with a glossy top coat after the color has dried. The design works on short nails as well as longer almond or square shapes.
For a softer look, choose a muted burnt orange; a brighter pumpkin shade feels especially festive against a sheer base. Keep the tips narrow for a subtle manicure, or make them wider for a bolder color-block effect. A fine brush or French manicure guide can help create a clean curve, but a slightly imperfect hand-painted edge still looks charming. Pair the orange tips with a simple black outfit or let them peek out beside a cozy sweater.
Black Cat Silhouette Accent Nails
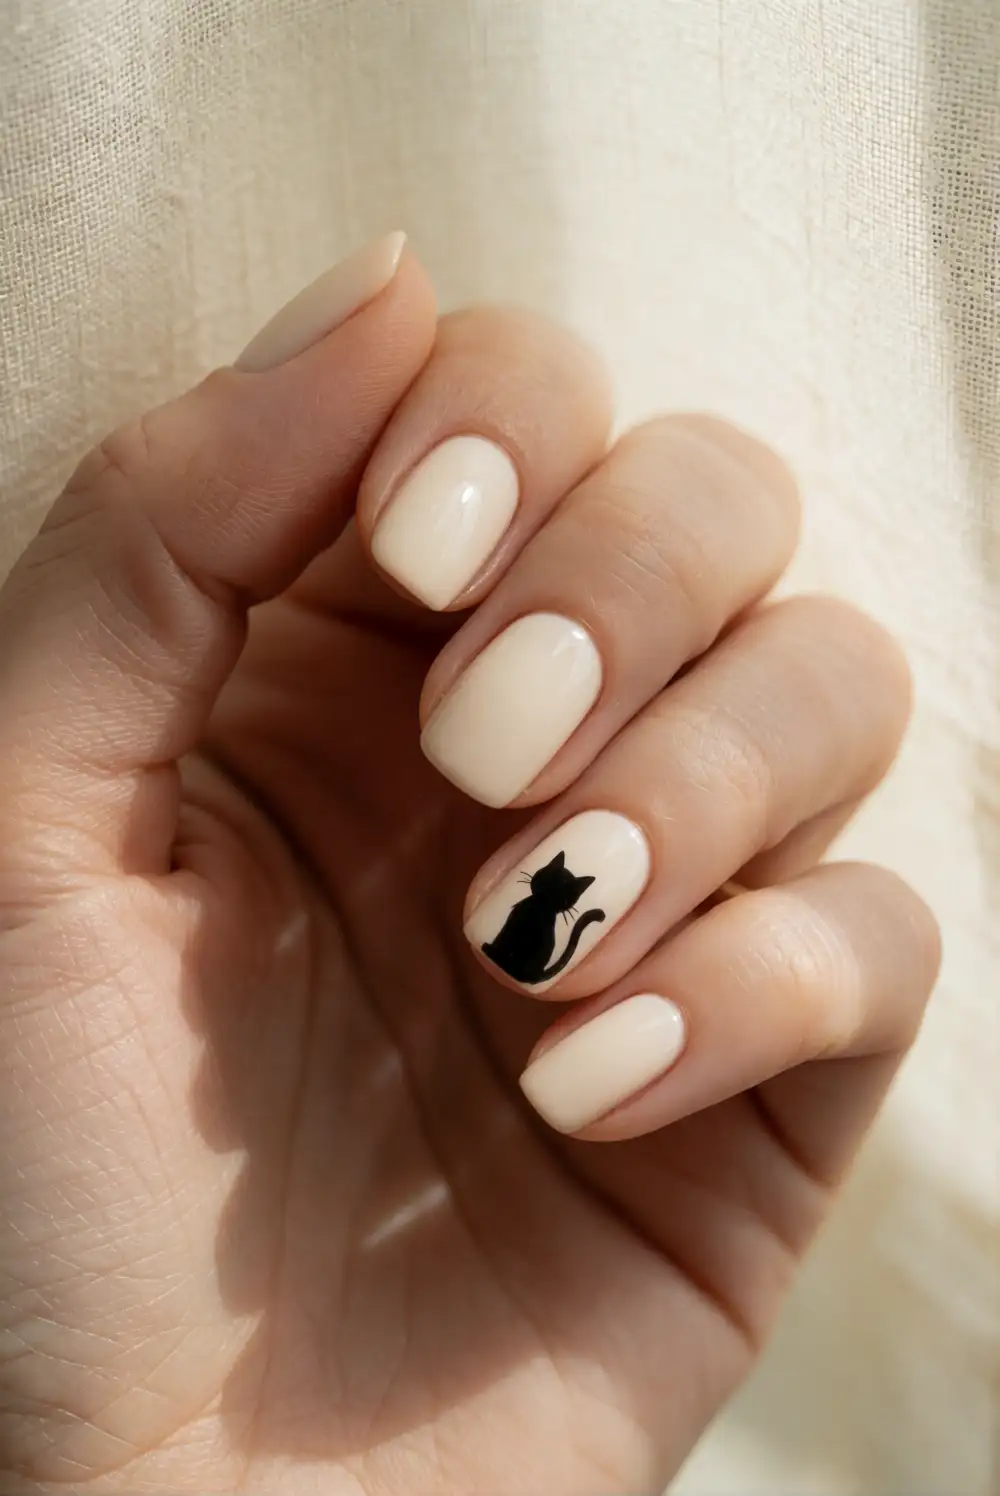
Create a playful cat accent against a smooth cream-colored manicure. Paint the nails with a pale beige or ivory polish, then choose one accent nail for the silhouette. With a fine nail art brush and black polish, paint a small oval body, a round head, and two pointed ears; add a curved tail with a light stroke. Let the design dry fully before adding a clear top coat. Keep the shapes simple so they remain easy to paint.
A single cat accent keeps the manicure understated, while a matching silhouette on each ring finger makes the theme more noticeable. If a fine brush feels tricky, use the rounded end of a toothpick to place and shape the polish carefully. Try a glossy black cat over a matte cream base for a subtle finish contrast, or use a soft gray background. Keep the silhouette centered with breathing room around it so the small design stays crisp and easy to see.
Soft White Ghost Accent Nails
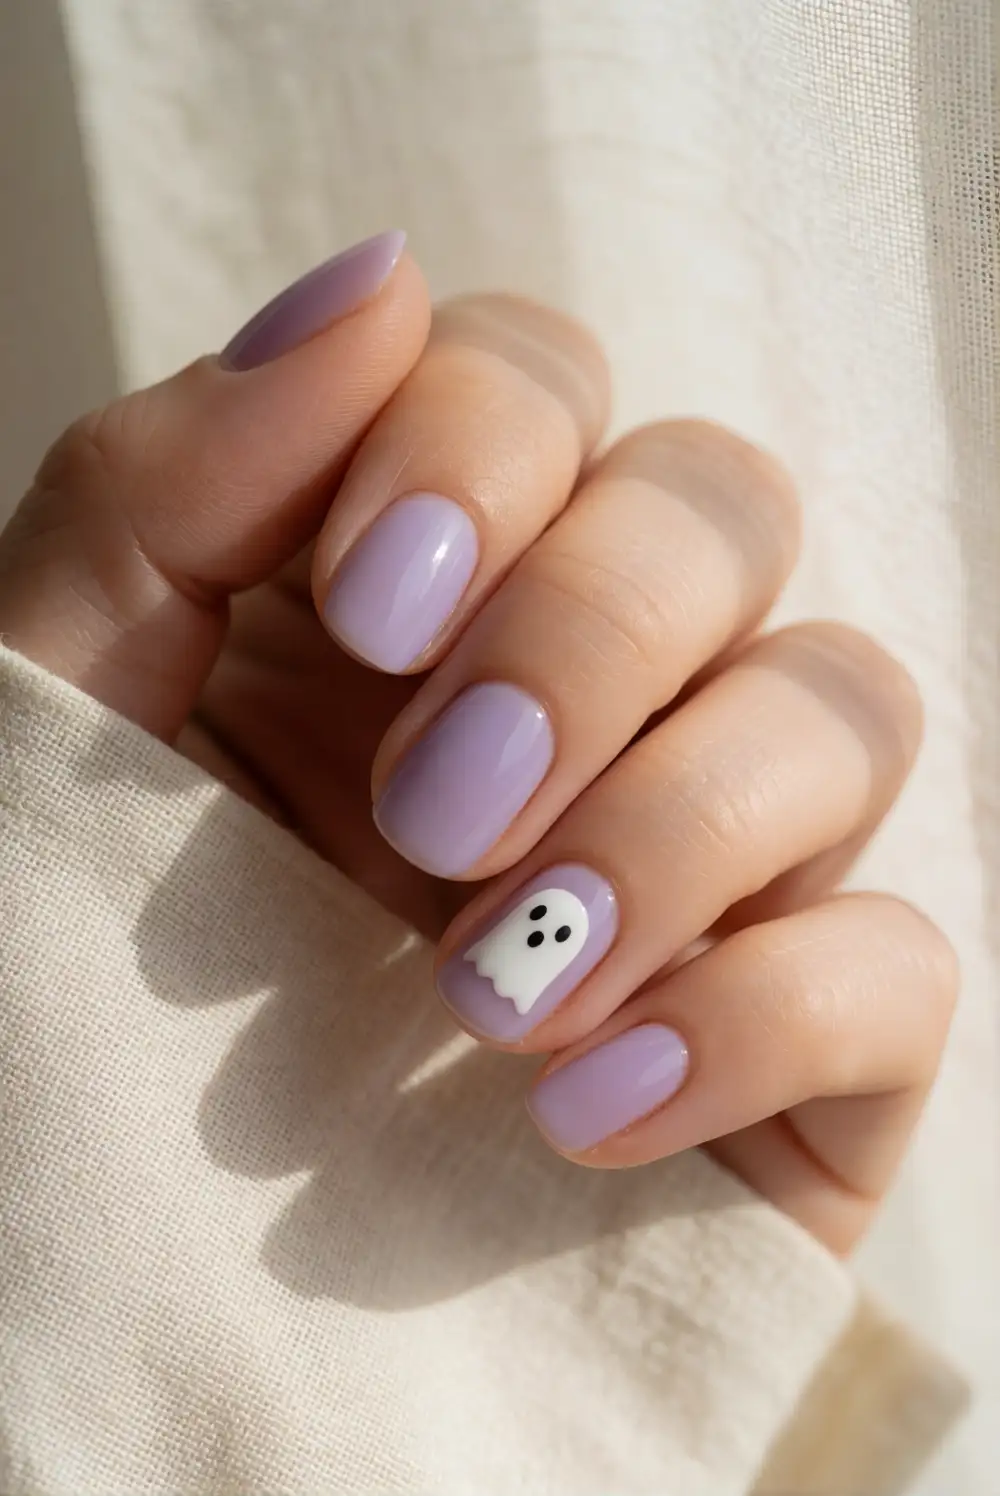
Make a cute ghost accent with opaque white polish over a sheer pink or pale lavender base. Paint a small rounded dome on an accent nail, then draw a softly rippled edge below it using a fine brush. Once the white shape is dry, add two tiny black dots for eyes with a dotting tool or the tip of a toothpick. Seal the design with clear top coat, taking care not to drag the dark details across the pale polish.
Keep the ghost small and simple for a delicate detail, or make it larger on a single accent nail for a more playful manicure. A milky base gives the white figure gentle contrast, while a cool lavender background creates a dreamy Halloween palette. Let each color dry before adding the next so the features stay defined. If freehand painting feels challenging, practice the rounded shape on paper first, then use the same easy strokes on the nail.
Candy Corn Color Block Nails
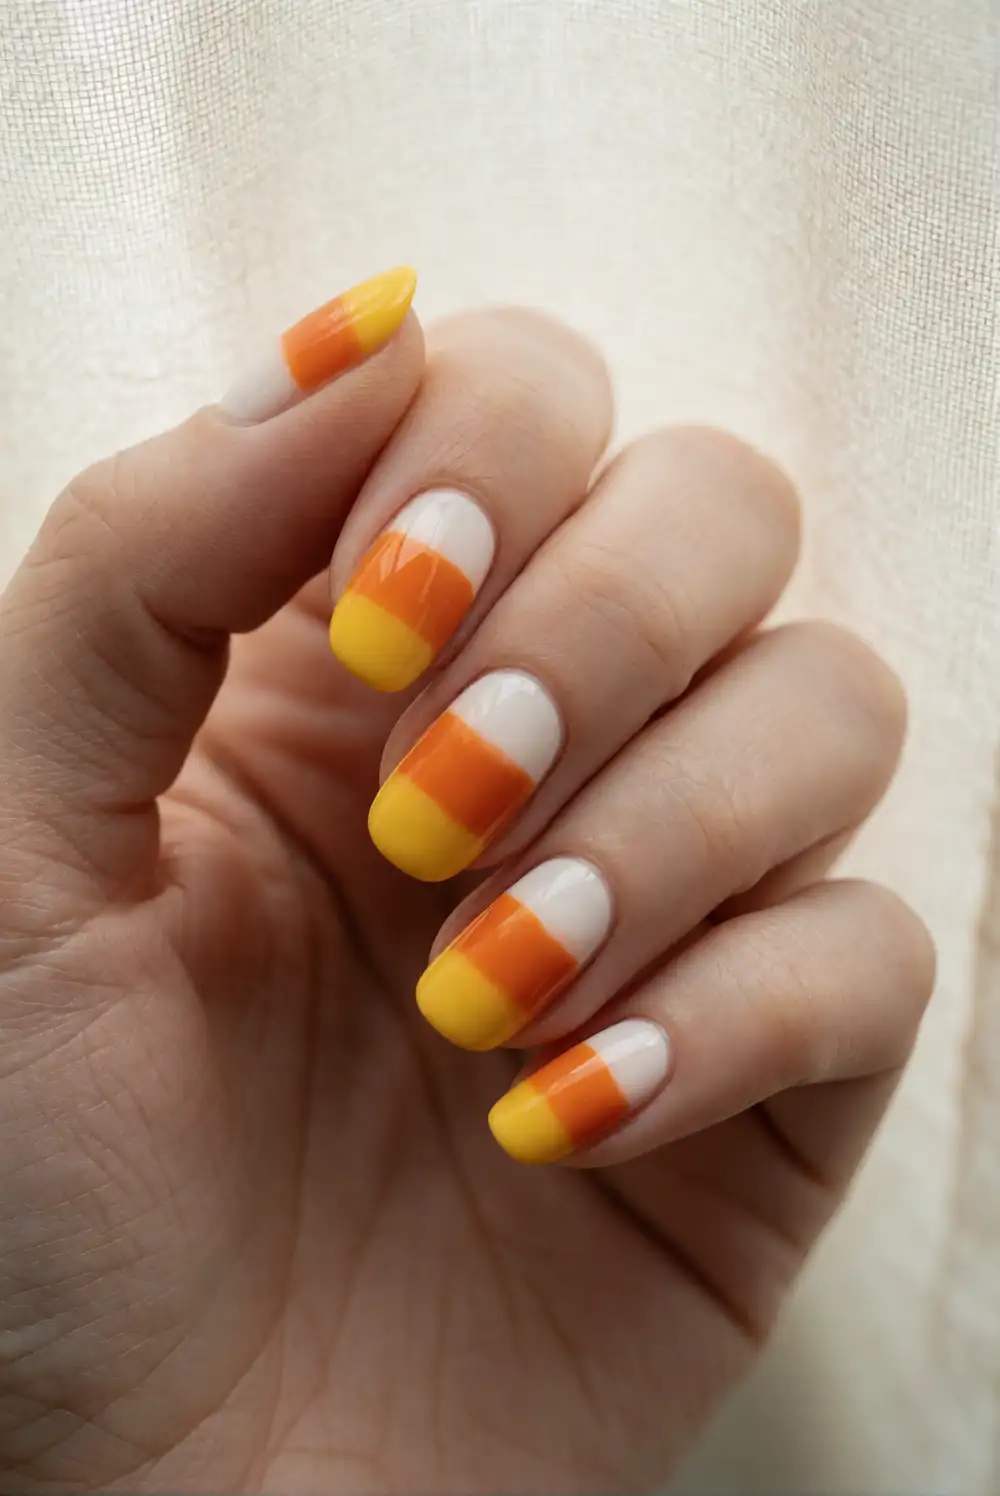
Borrow the cheerful colors of candy corn for a bright seasonal manicure. Apply a clear base coat, then paint the lower part of each nail yellow, the middle orange, and the tip white. Work in narrow curved bands that follow the nail shape, letting each color dry before painting the next. A fine brush makes it easier to keep the stripes neat, and a glossy top coat brings the finished color blocks together.
For an easier variation, use the candy corn colors on separate nails instead of painting stripes on every finger. You can also make the bands wider or narrower to suit your nail length; shorter nails look tidy with just a few broad sections. Keep the colors opaque by applying thin coats and allowing them to dry between layers. If the edges look uneven, a small brush dipped in remover can clean the outline before you seal the manicure.
Delicate Spiderweb Corner Nails
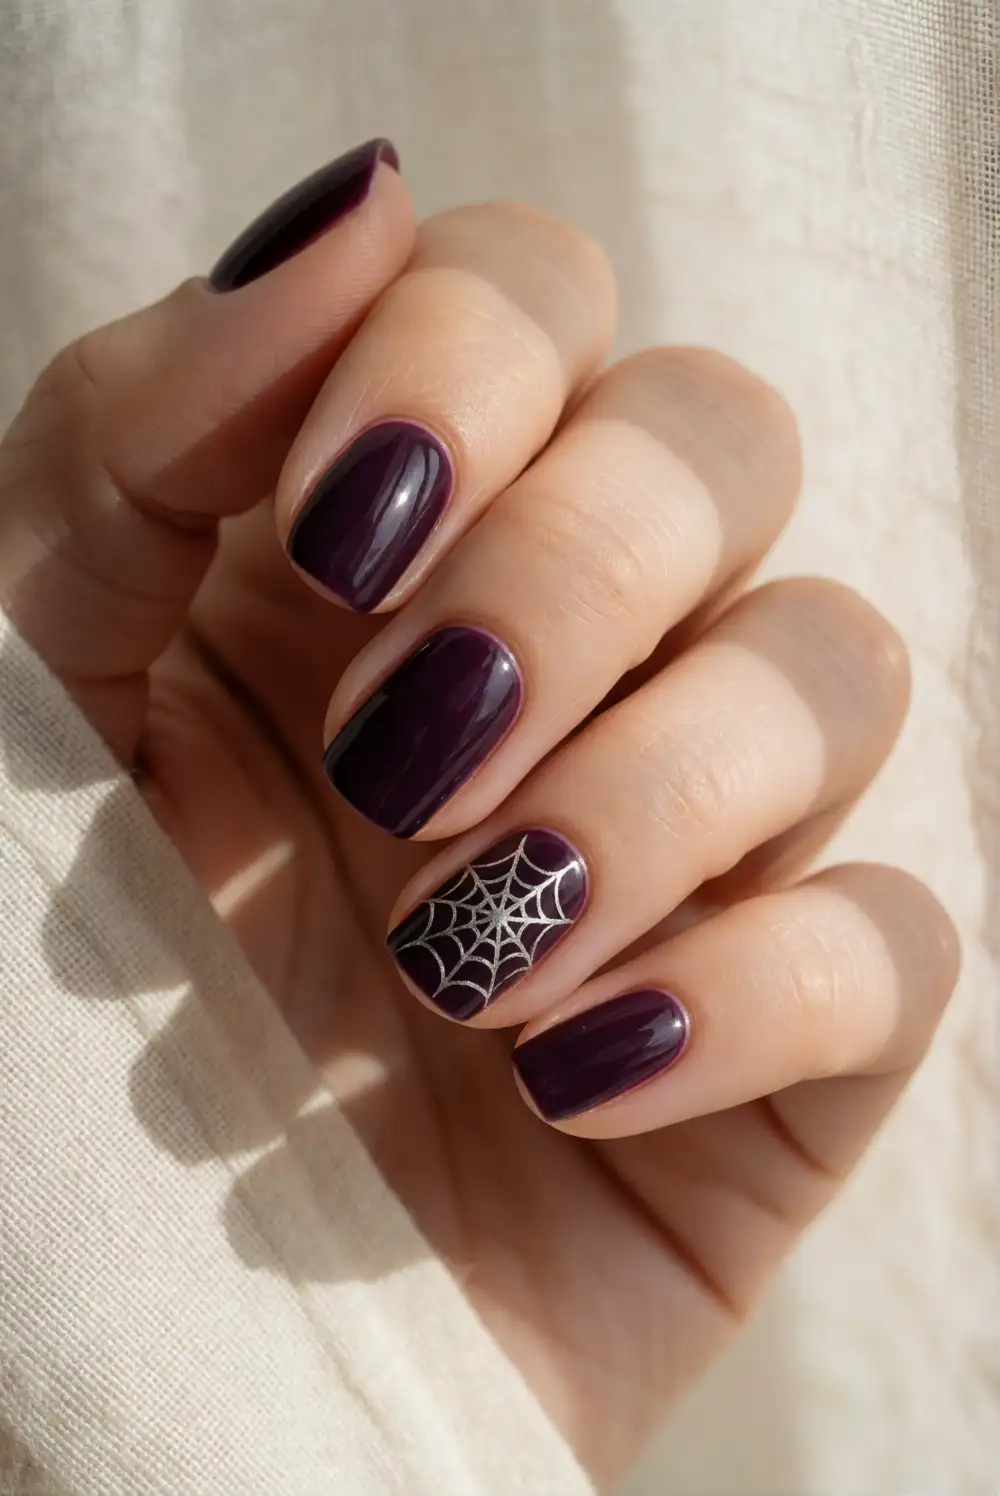
Add a fine spiderweb detail to a dark, glossy manicure. Paint the nails deep plum, black, or charcoal and allow the base color to dry completely. On an accent nail, use a thin nail art brush and silver or white polish to draw a few lines radiating from one corner. Connect the lines with short curved strokes to suggest a web, then finish with a clear top coat. Keeping the web in one corner makes the design manageable.
A dark background makes pale web lines stand out, while a cream base gives the same motif a softer feel. Use fewer lines on short nails, where a small corner detail will look cleaner than a crowded design. If the brush is difficult to control, make the lines in short sections and pause between strokes. Add the web to just one nail for a polished accent, or repeat it on both ring fingers to echo the Halloween theme.
Midnight Sky Starry Nails
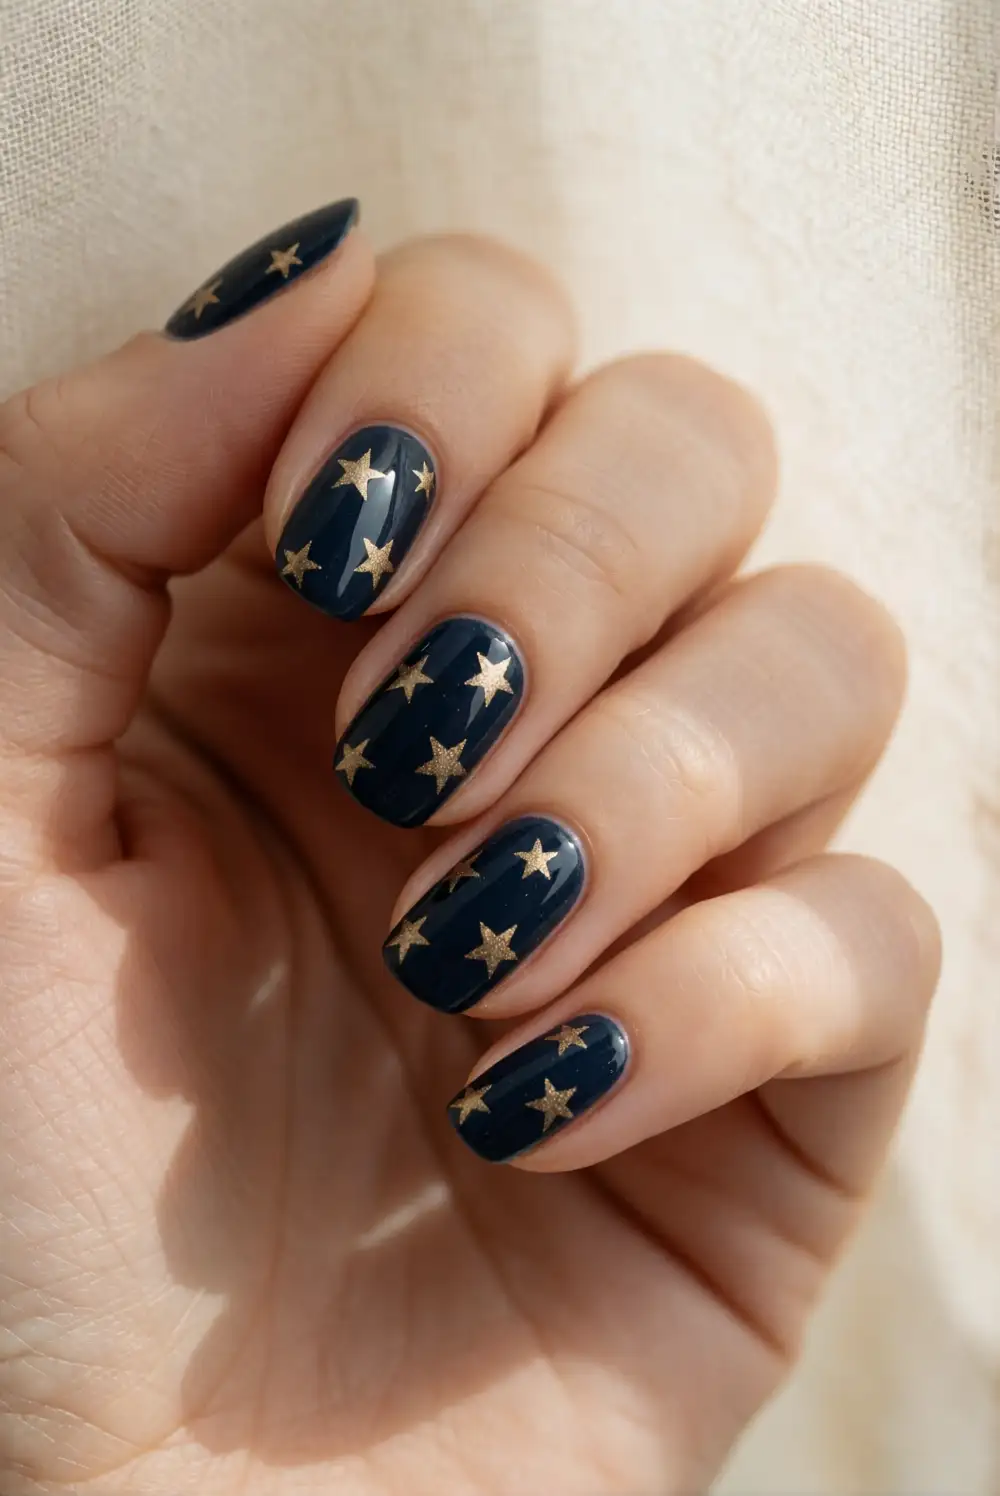
Turn a deep navy or black manicure into a simple midnight sky with scattered metallic stars. Apply two thin coats of dark polish, letting them dry between layers. Use a fine brush or a small star-shaped nail stencil to add gold or silver stars across a few nails. For tiny dots, place a small amount of metallic polish with a dotting tool. Finish with a glossy top coat to smooth the surface and give the star details a bright, reflective finish.
Vary the size and placement of the stars so the manicure feels like a night sky rather than a uniform pattern. A single accent nail with denser stars can balance quieter solid-color nails. Choose silver for a cool, moonlit effect or gold for warmer contrast against black. If you do not have a stencil, make simple four-point stars with short crossing strokes. Keep the polish layers thin to help the design dry evenly and remain comfortable to wear.
Purple Glitter Gradient Nails
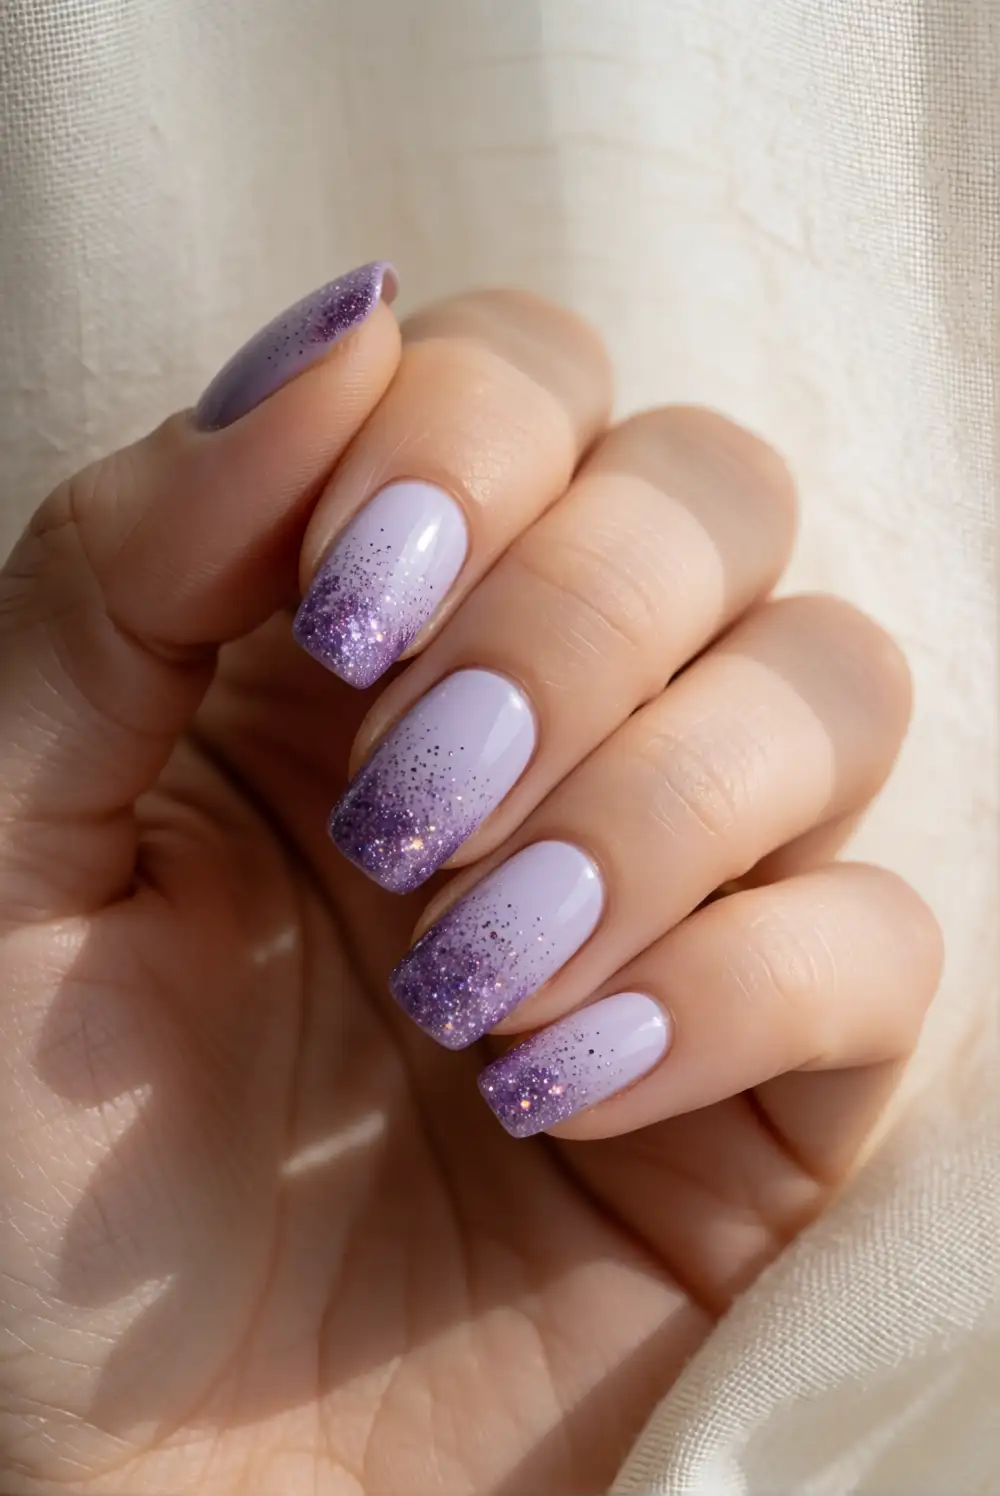
Make a festive gradient by concentrating purple glitter near the nail tips and fading it toward the base. Apply a sheer lavender or clear base coat and let it dry. Dab glitter polish onto a small makeup sponge, then gently press it onto the outer part of each nail. Repeat with light layers, moving the glitter slightly closer to the tip each time. A clear top coat smooths the texture and helps the sparkly finish look even.
Choose fine glitter for a soft shimmer or larger flecks for a bolder party-ready effect. A deep plum base makes the sparkle feel dramatic, while pale lilac keeps the manicure airy. Use a sponge with a light touch to build up color gradually and avoid a harsh line across the nail. Apply a little liquid latex around the nail before sponging if you want easier cleanup. Keep some nails plain purple to give the glitter accents room to shine.
Orange and Black Mismatched Manicure
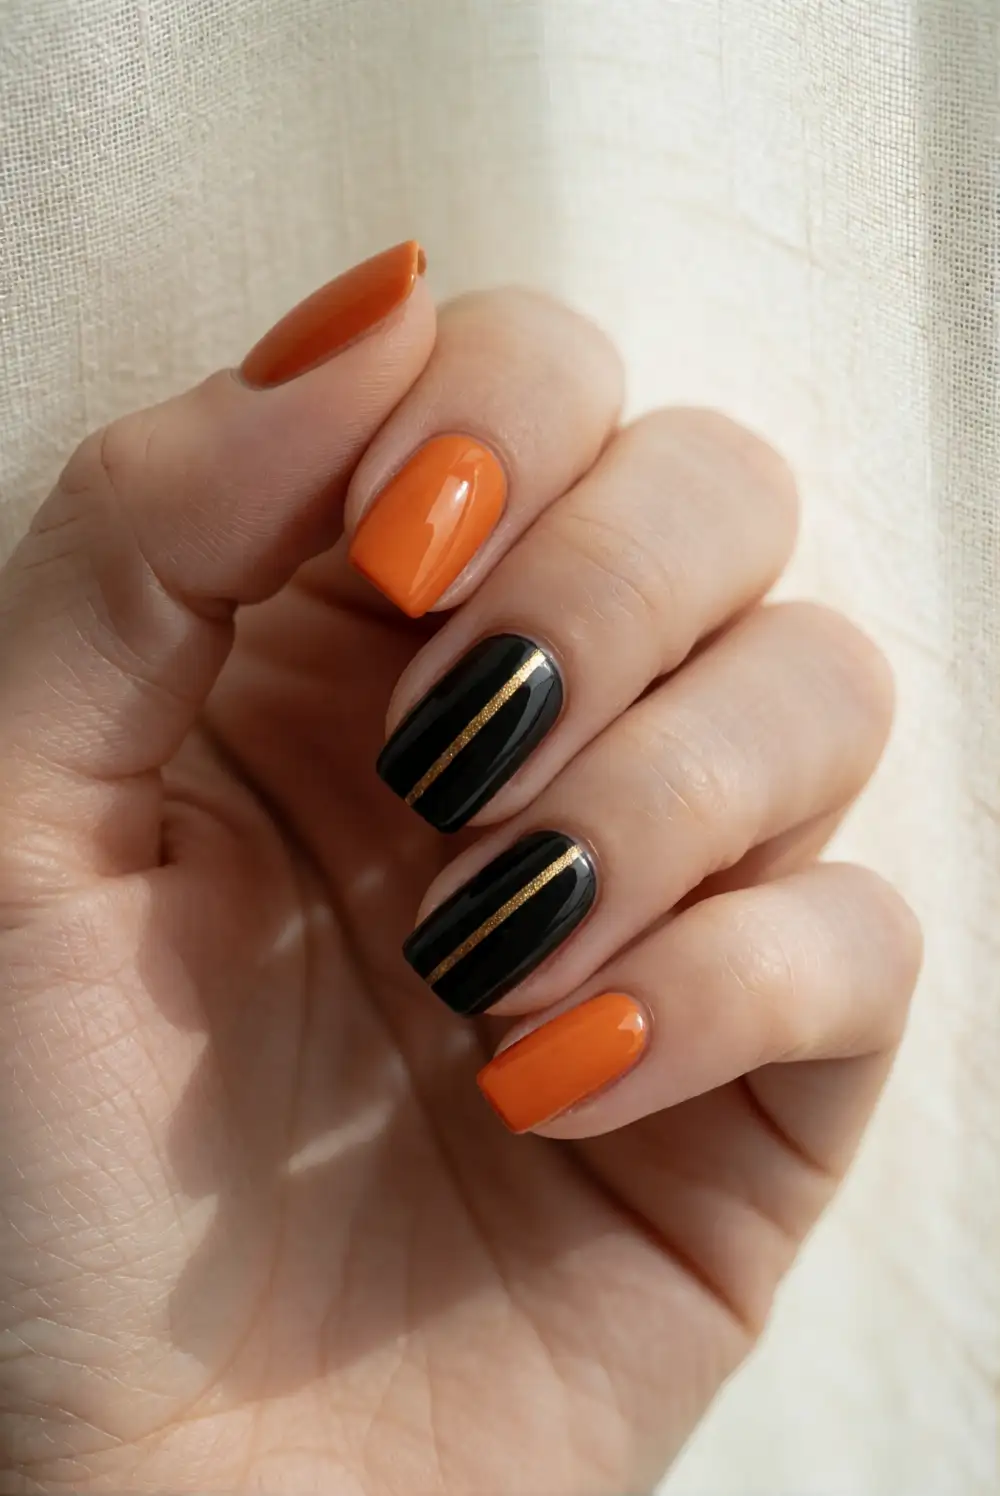
Combine Halloween colors in an easy mismatched manicure, alternating pumpkin orange and glossy black across the nails. Apply a base coat first, then paint each nail one solid color, switching shades as you move across the hand. Add a small accent such as a thin stripe, a tiny dot, or a metallic line to one or two nails with a fine brush. Finish each nail with a clear top coat for a smooth, coordinated look.
Keep the pattern balanced by repeating each color, or make one orange accent nail the focal point against mostly black polish. A softer approach uses burnt orange and charcoal, while vivid orange with jet black feels more graphic. If you want extra detail without complicated art, add a narrow gold stripe where two colors meet. This flexible design suits different nail shapes and is especially useful when you want a festive manicure but have limited time.
Mini Pumpkin Accent Nail Art
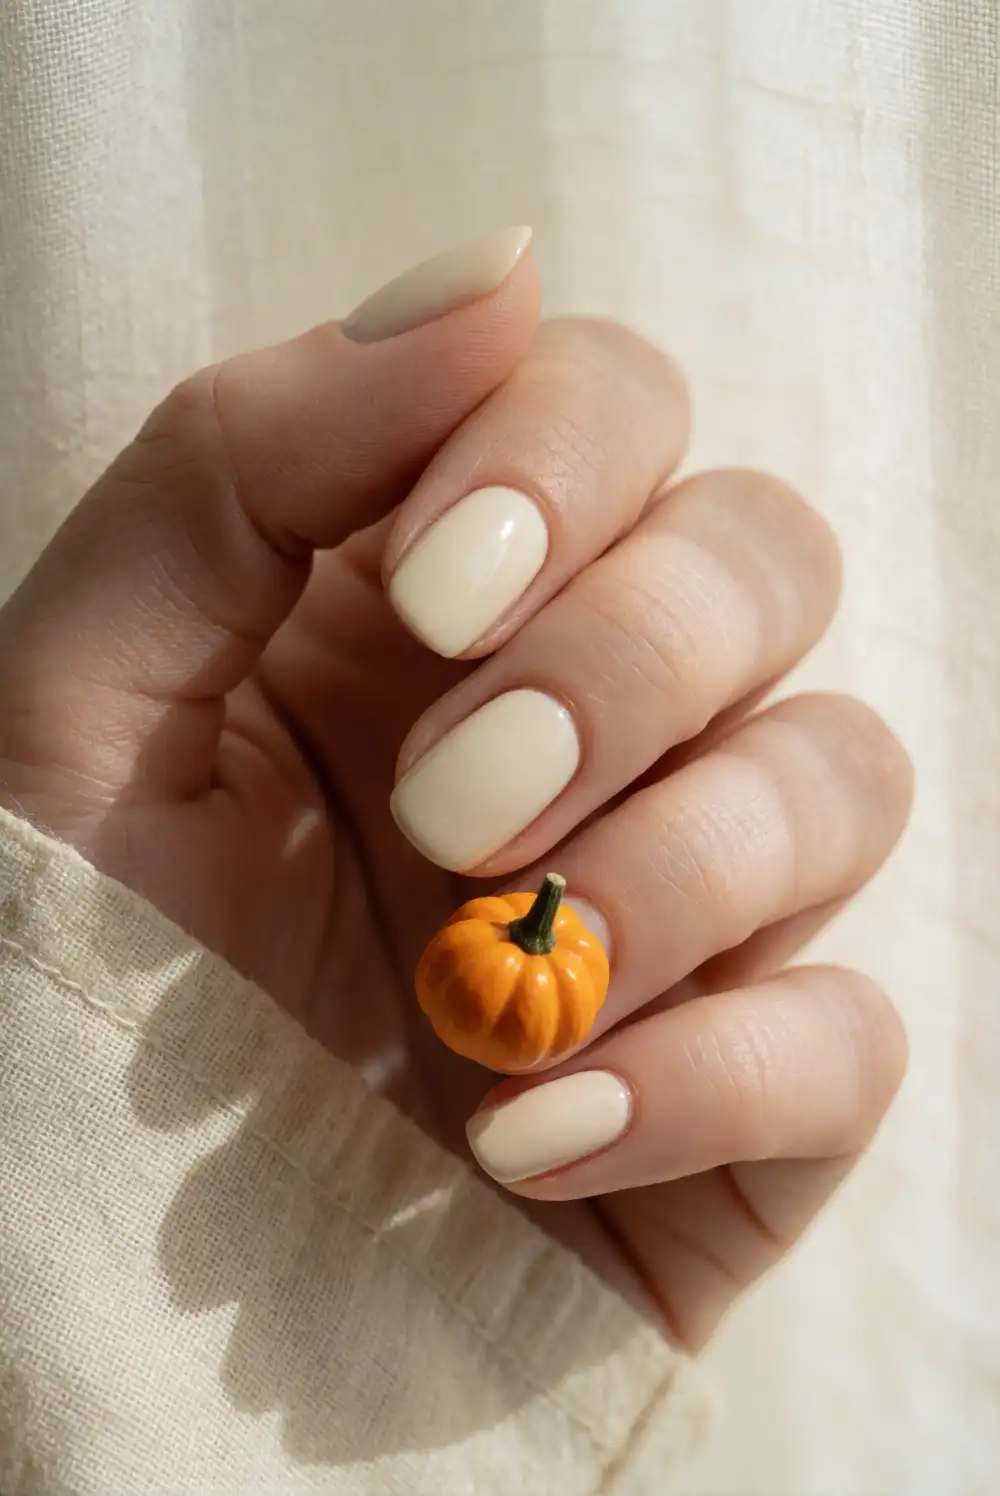
Paint a miniature pumpkin on a cream or pale nude accent nail for a classic seasonal detail. After applying the base color, use orange polish to make a small rounded shape with a few curved sections. A fine brush can add a short green stem and a small leaf once the orange polish dries. Finish with a glossy top coat, brushing gently over the design so the colors do not smudge. Keep the remaining nails a coordinating solid shade.
A pumpkin looks especially clear when placed on a wider accent nail, but the shape can be simplified for shorter nails. Try a soft sage base for a muted palette, or use black polish on the other nails to make the orange pop. Instead of painting every detail, use a simple orange oval with a green stem for an easy version. Allow the artwork to dry fully before adding top coat, and use a thin brush for the leaf and stem.
Glossy Black Nails with Orange Dots
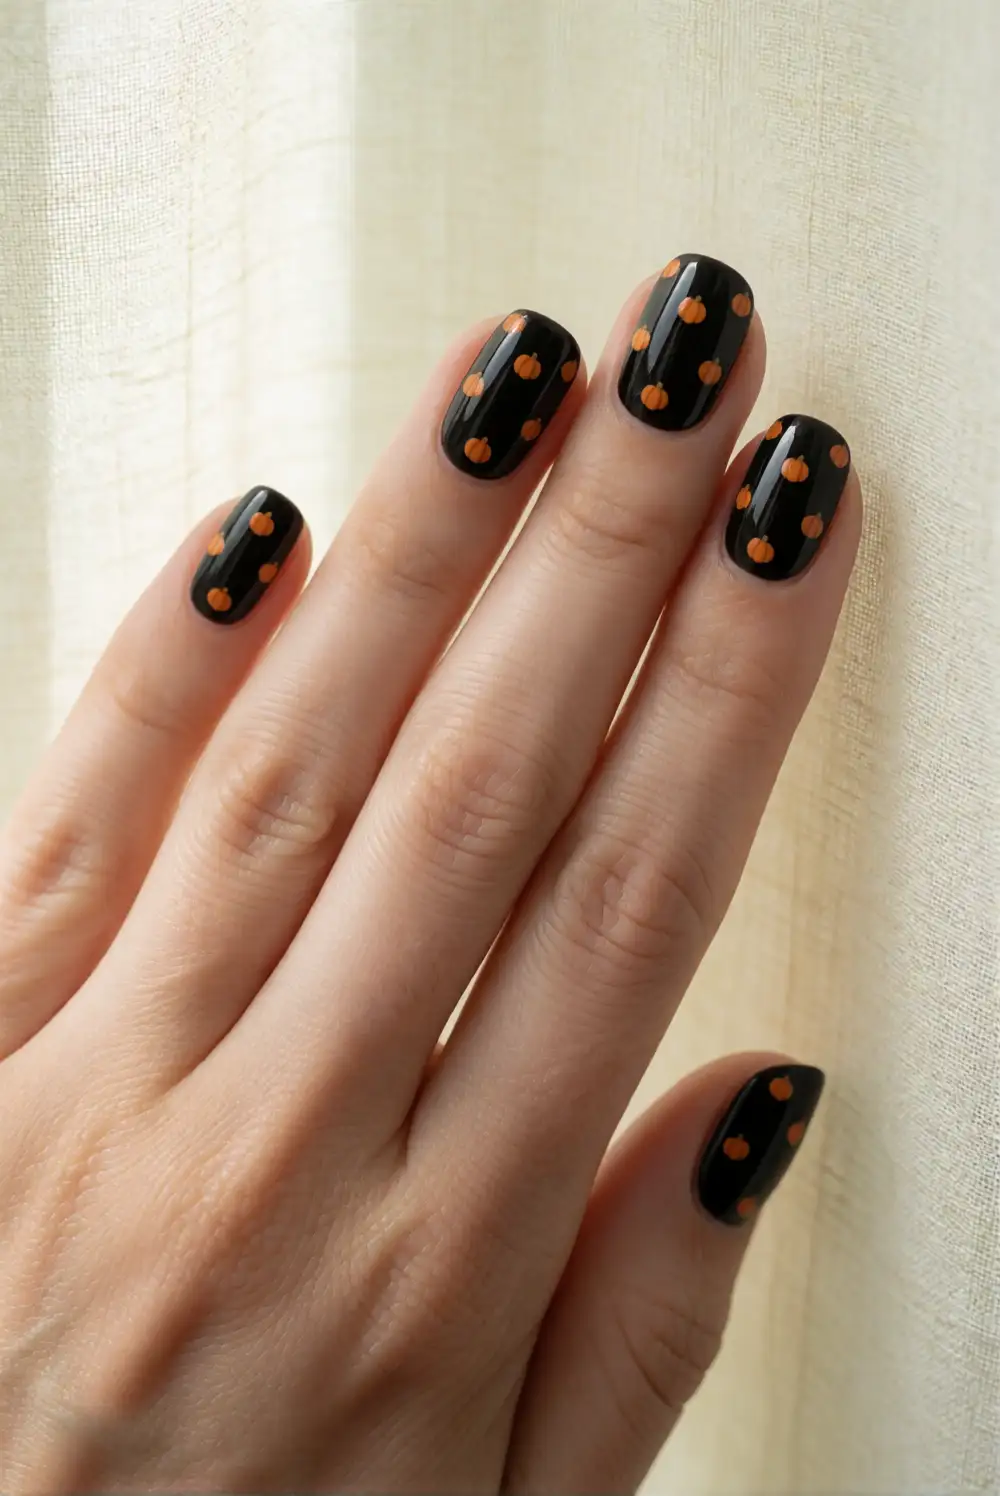
Give glossy black polish a quick Halloween update with a few orange dots. Apply a smooth black base coat and let it dry thoroughly. Use a dotting tool, the rounded end of a toothpick, or a small brush handle to place orange polish near the cuticle or along one side of each nail. Vary the spacing slightly for a casual look, then seal the design with clear top coat. This simple detail works well on both short and long nails.
Use a warm pumpkin orange for a classic seasonal contrast, or choose metallic copper for a more subtle finish. Keep the dots small and sparse if you prefer a minimal manicure; a short trail of dots on an accent nail creates a bolder focal point. Wipe the dotting tool between uses to keep the circles neat, and wait for the orange polish to dry before applying top coat. The design pairs easily with a black outfit or a colorful Halloween costume.
These easy Halloween nail ideas make it simple to add a festive touch, whether you prefer subtle French tips, cute accent art, or bold orange and black color. Choose a design that fits your schedule and nail length, then personalize it with polish shades you already love. A careful base coat, patient drying time, and glossy top coat help your last-minute manicure look neat and ready for Halloween plans.








