
Give your manicure a cute Halloween update with ghost face nail art paired with crisp red details. These wearable ideas range from tiny ghost accents and French tips to graphic patterns and glossy finishes, with options for short or long nails. Use regular polish, a fine nail art brush, and a dotting tool to create designs at home, or bring a favorite look to your nail appointment.
Classic White Ghost Faces With Red Cheeks
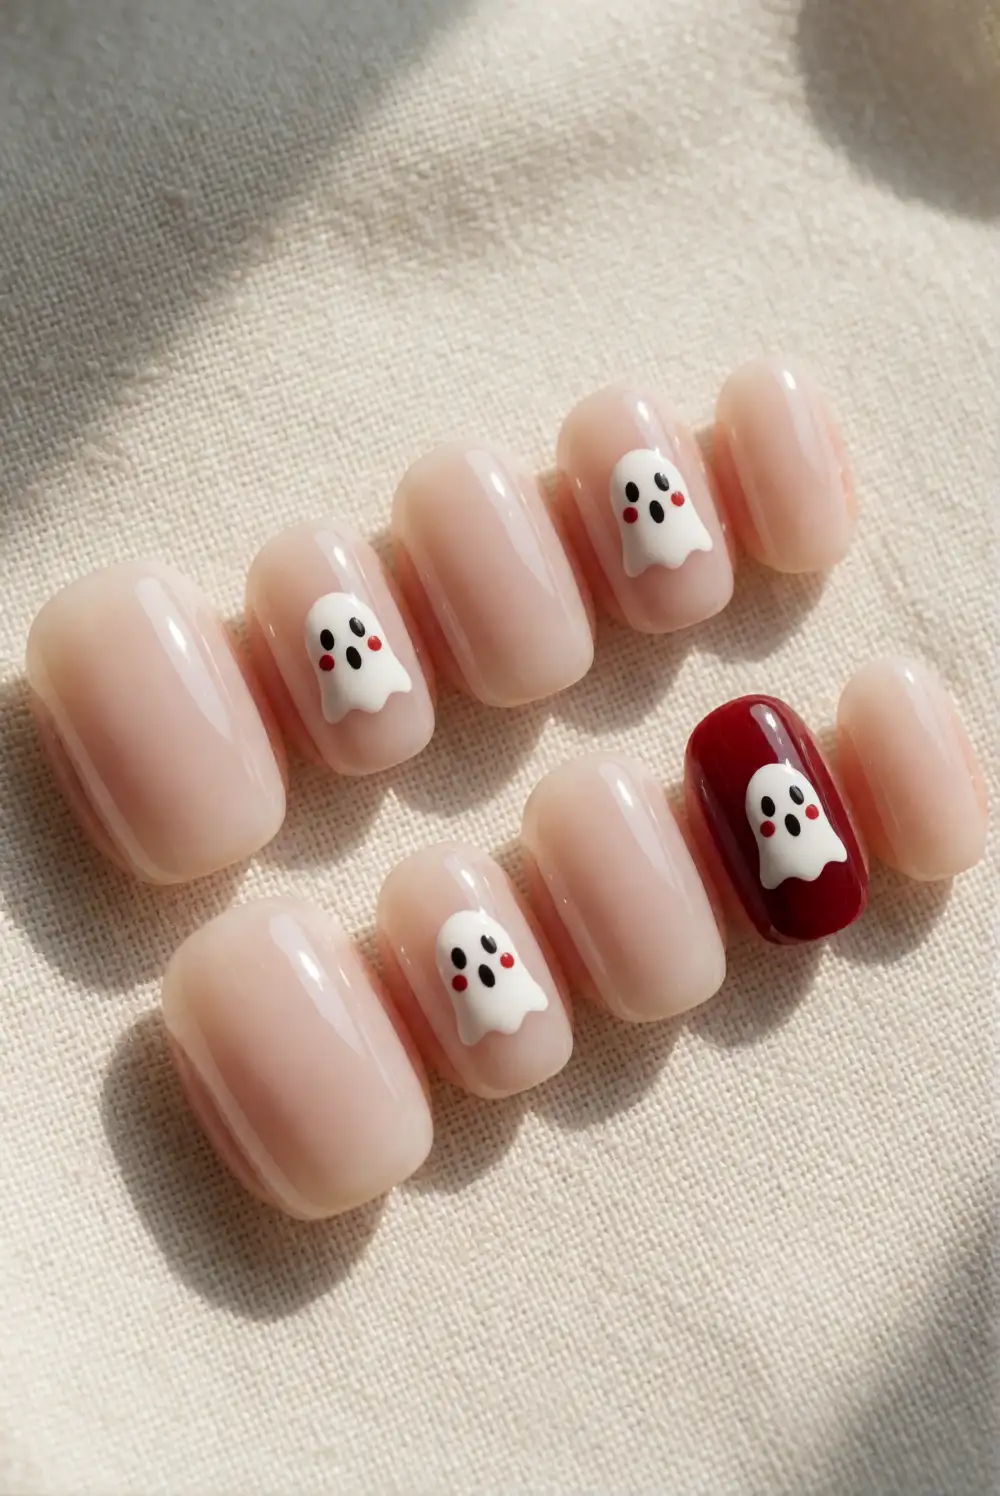
Paint each nail with a sheer nude or milky base and let it dry completely. Use white polish to make a small rounded ghost shape on an accent nail, then add two tiny black eyes and a curved mouth with a fine brush. Dot a little red polish onto each cheek for a sweet pop of color. Repeat the design on one or two nails, keeping the remaining nails simple and glossy.
For a softer look, choose a pale pink base and make the ghost details delicate rather than bold. Short, rounded nails give the faces a charming, compact appearance, while longer oval nails offer extra space for expressive features. Let each layer dry before adding top coat to help prevent smudging. This manicure pairs well with a red sweater, a simple black outfit, or other understated seasonal accessories.
Red French Tips With a Ghost Accent
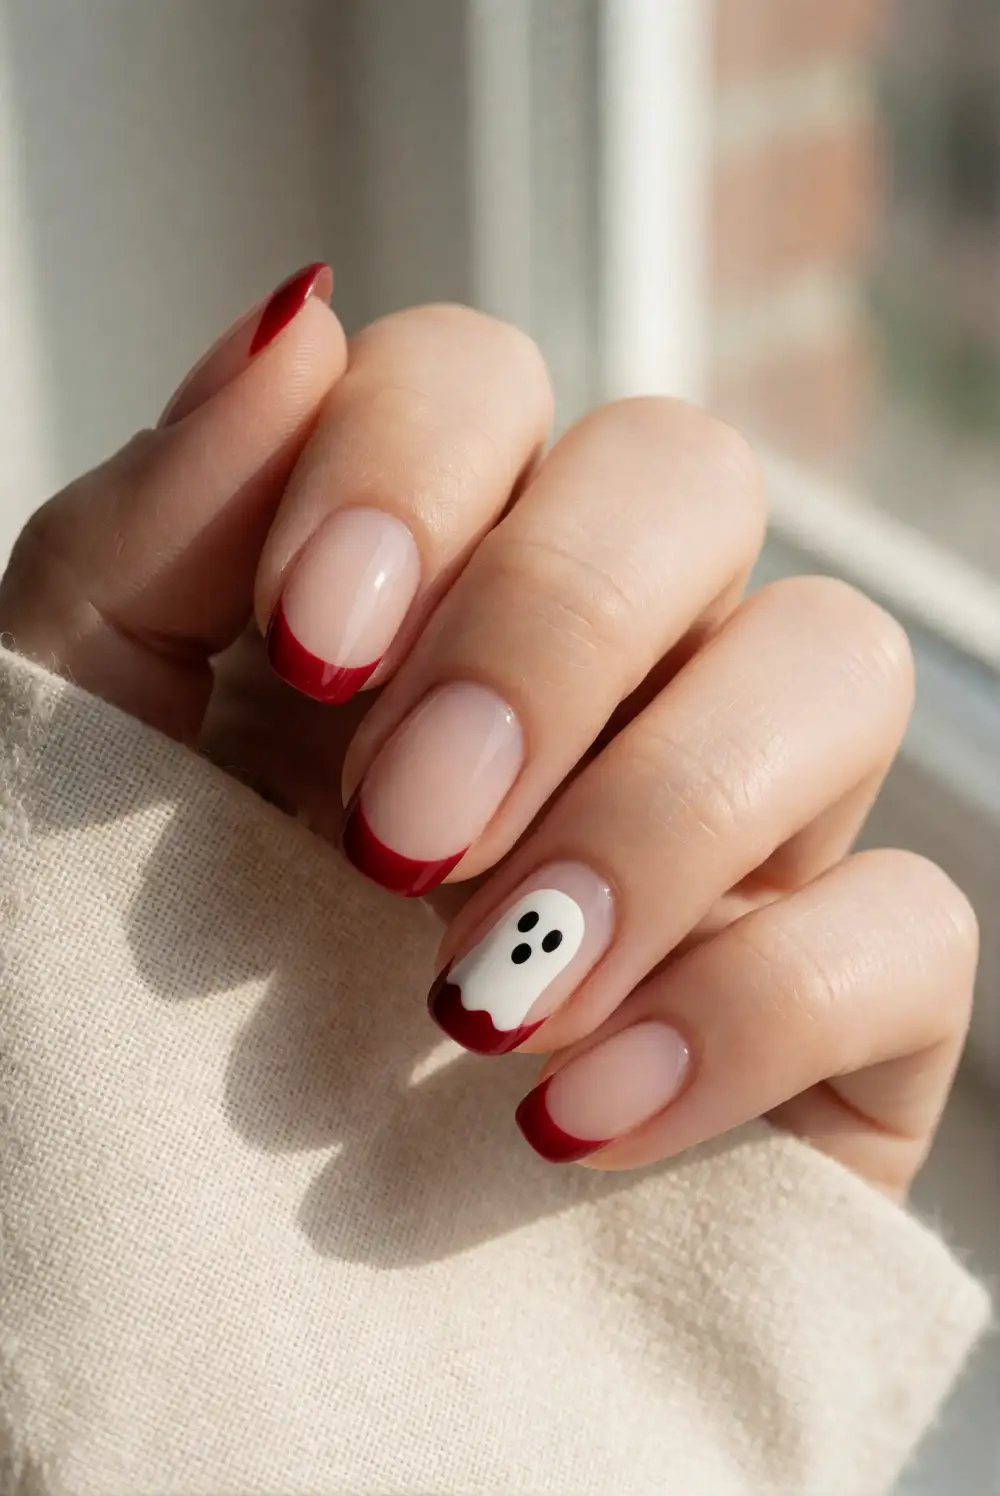
Start with a clear or nude base coat and shape the red tips along the free edge of each nail using a fine brush. Keep the French line slim for a clean finish, or make it softly curved to follow the nail shape. On one accent nail, paint a small white ghost with a rounded top and gently wavy bottom. Add simple black eyes after the white polish has dried.
A glossy top coat brings the red tips and ghost art together, while a sheer base keeps the overall look light. If freehand lines feel tricky, use nail guides and remove them while the polish is still slightly tacky. Try this design on short square nails for a crisp effect or on almond nails for a softer silhouette. Keep the ghost on the ring finger for an easy focal point.
Fine-Line Ghosts on a Sheer Nude Base
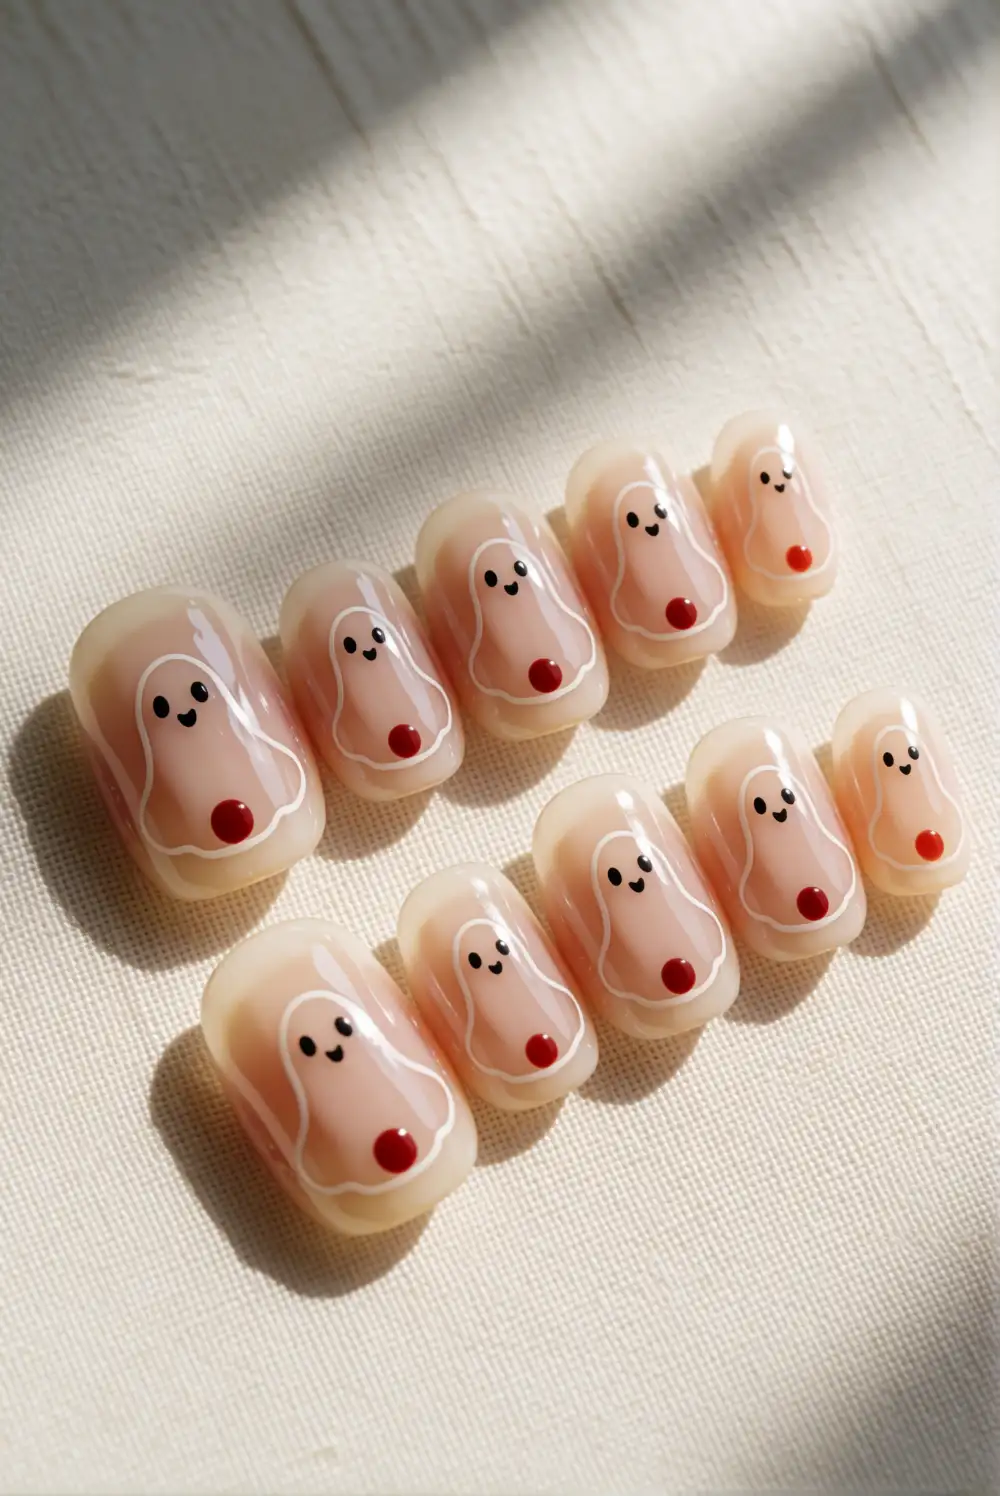
Apply two thin coats of sheer nude polish and allow them to dry before adding the artwork. With a fine liner brush and white polish, draw a small ghost outline on each nail, leaving the inside mostly transparent. Give each outline a softly scalloped base, then add tiny black eyes and a neat red dot near the bottom edge. A steady hand and small design scale help the manicure look airy rather than crowded.
This delicate version works especially well when you want seasonal nail art that still feels polished for everyday wear. Use a milky pink base for extra warmth or a beige nude that closely matches your skin tone. Keep the outlines on every nail for a coordinated set, or place them on just a couple of fingers. A glossy clear top coat protects the thin details without hiding the sheer effect.
Red Drip Tips With a Tiny Ghost
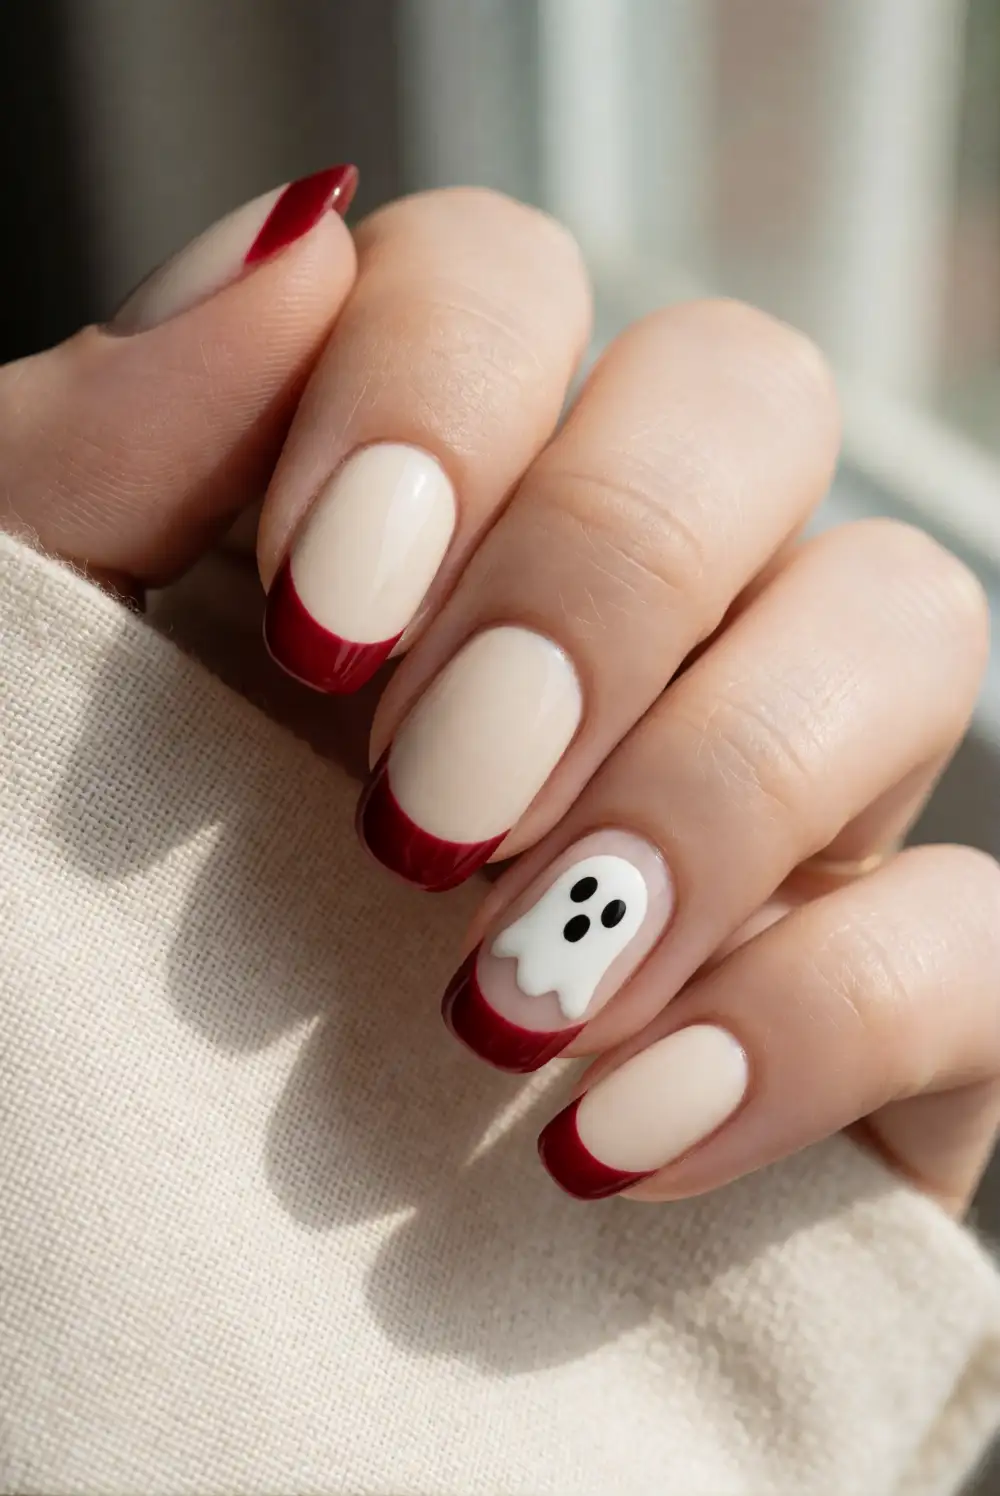
Coat the nails in a pale cream base and let it dry thoroughly. At the tips, use a nail art brush to paint red polish in an uneven band, adding a few rounded drips that extend toward the center of the nail. Keep the shapes smooth and deliberate rather than overly busy. Place a small white ghost on one accent nail, then add its black eyes with a dotting tool or the tip of a fine brush.
Choose a bright cherry red for a cheerful contrast or a deeper red for a more dramatic finish. The drip detail is easiest to control when the polish is not too thick, so wipe excess product from the brush before painting. If you prefer a subtler manicure, put the red drips on just two nails and repeat the cream base across the rest. Seal the design once all artwork is dry.
Negative-Space Ghost Silhouettes
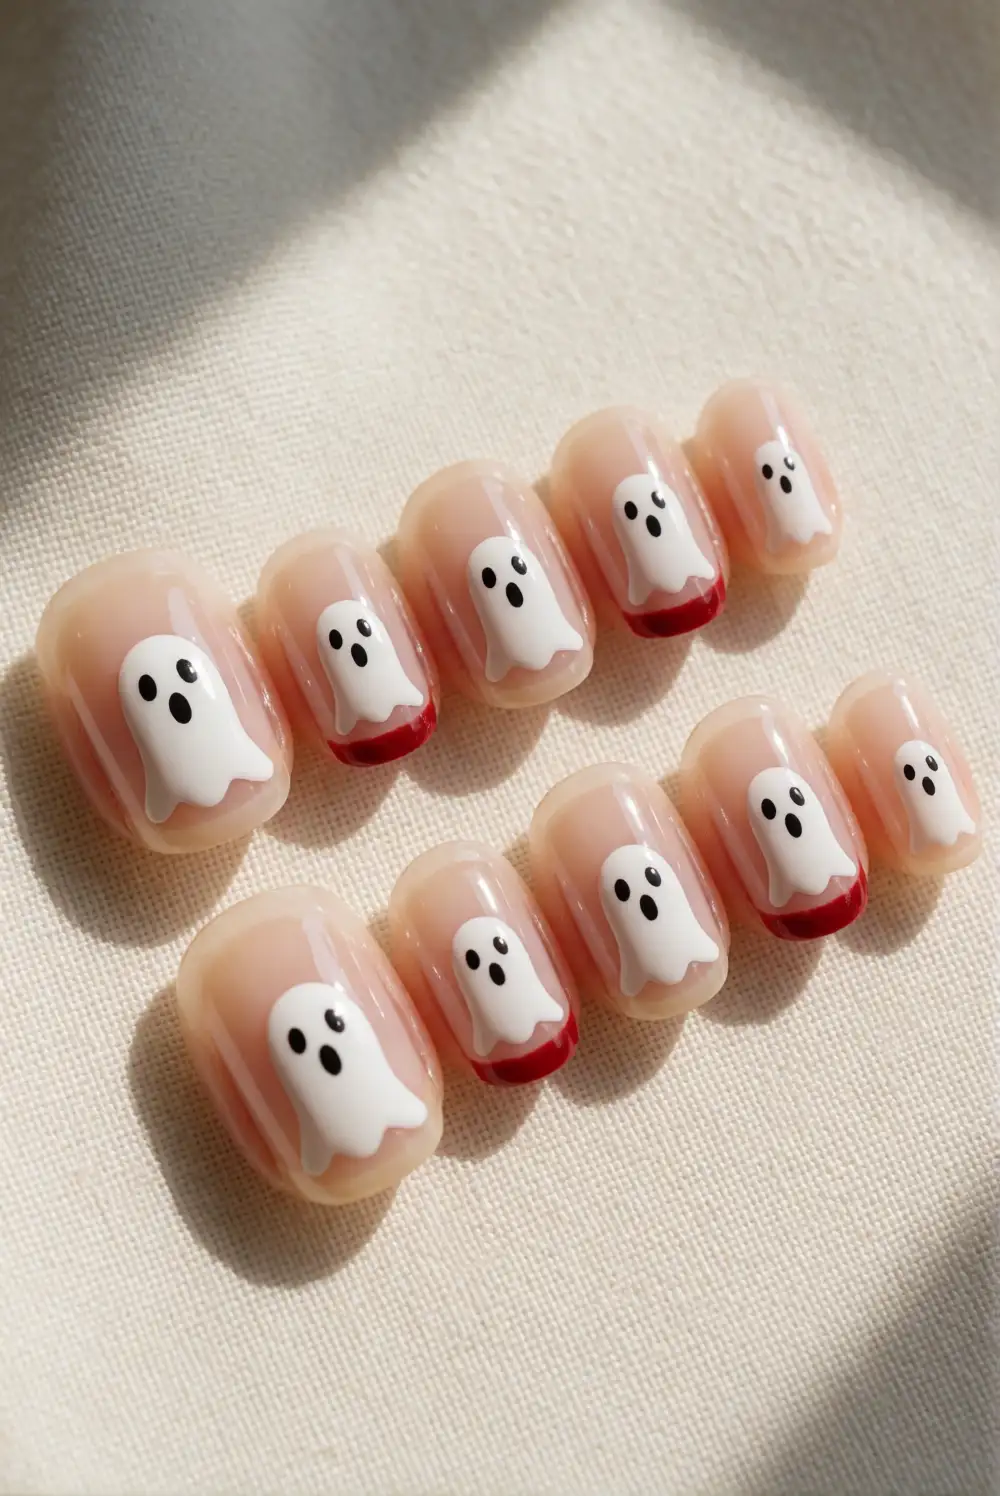
Begin with a transparent or barely tinted base so the natural nail remains part of the design. Paint a small white ghost silhouette near the center or tip of each chosen accent nail, leaving the surrounding space open. Add two tiny black eyes, then draw a thin red curve beside the ghost or along the nail edge. Keep the shapes crisp with a fine brush and allow each color to dry before adding the next.
Negative space makes the manicure feel light and graphic, especially on short nails where larger artwork can look crowded. You can place a single ghost on one nail and use small red curves on neighboring nails to tie the set together. A glossy finish creates a smooth contrast against the bare-looking areas, while a matte top coat gives the art a softer appearance. Apply a careful final layer to protect the details.
Mini Ghosts on a Cherry Red Accent Nail
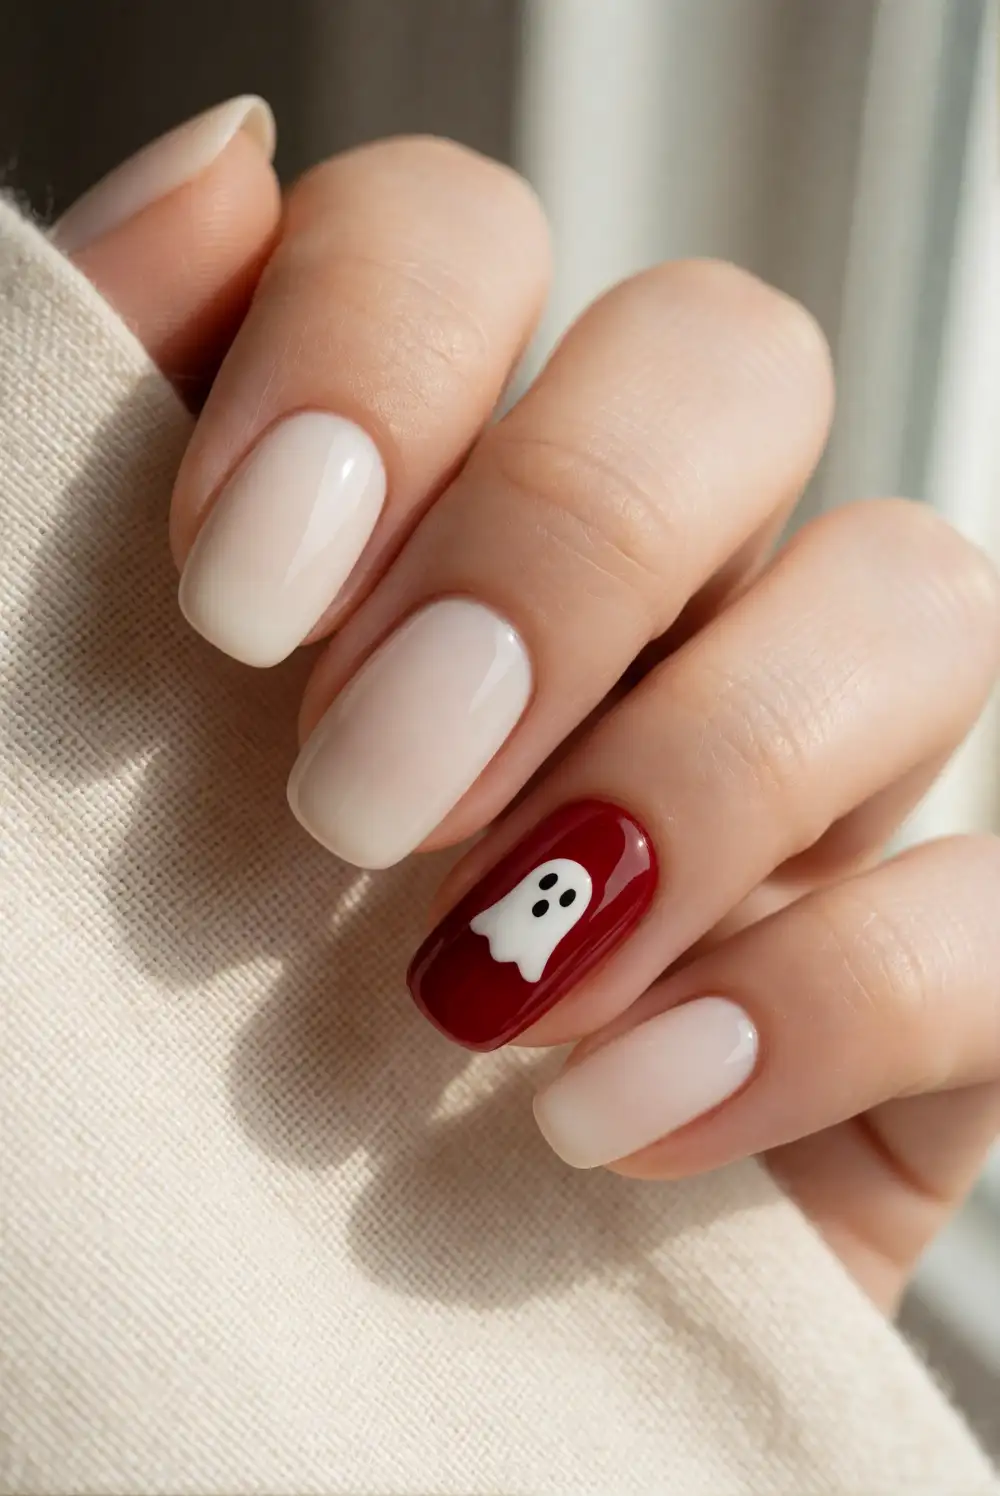
Paint most nails a creamy white or soft nude and choose one accent nail for a bold cherry red finish. Once the red polish is completely dry, use a fine brush to add a tiny white ghost near the cuticle or along one side of the nail. Add its black eyes with a small dotting tool, keeping the features minimal. A thin layer of glossy top coat smooths the finish and brings extra shine to the red.
This arrangement balances a vivid accent with a simple base, making it an easy choice if you like seasonal details without artwork on every nail. For a more coordinated set, add a fine red tip to one pale nail or repeat a tiny white dot elsewhere. Try the accent on the ring finger for a familiar placement, or choose the thumb to give the ghost more room. Let the red layer dry fully before painting over it.
Red Checkerboard With a Ghost Detail
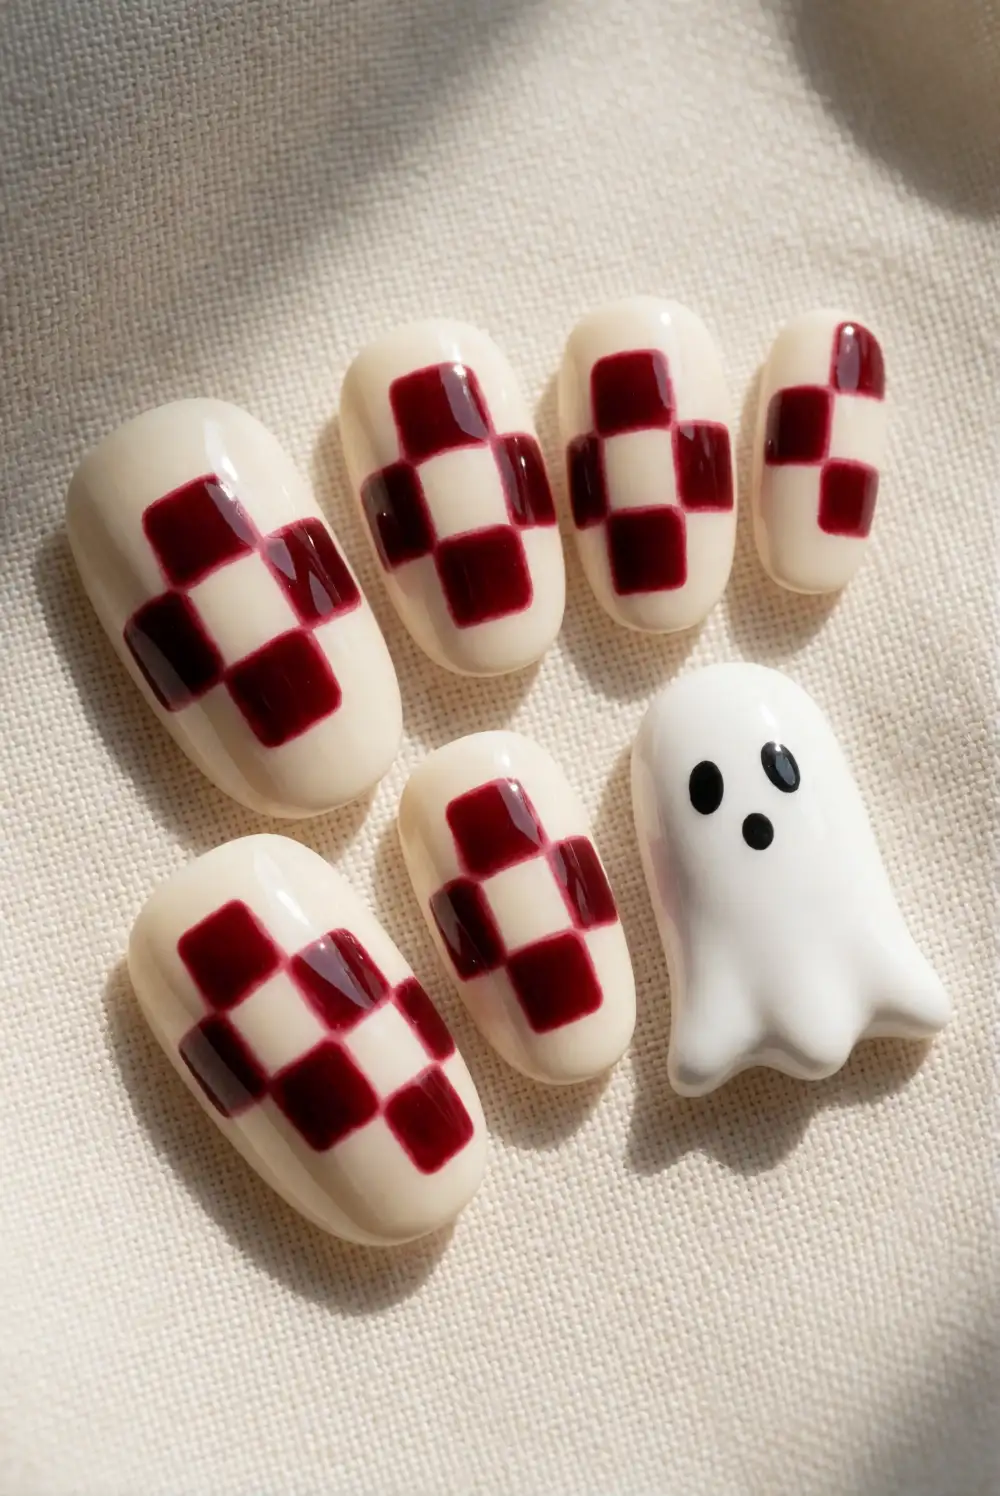
Apply a pale cream base, then use a thin nail art brush to paint small red squares in a checkerboard pattern on one or two nails. Work in neat rows, leaving narrow cream gaps between the squares for definition. On a neighboring accent nail, add a simple white ghost with tiny black eyes. Take your time with the grid and let the red squares dry before applying a top coat to avoid dragging the pattern.
For a softer finish, make the checks small and limit them to the tips or one side of each nail. A brighter red creates a playful contrast, while a deeper cherry shade gives the design a more polished feel. Keep the other nails in a solid cream or sheer nude so the pattern remains the star. A glossy top coat helps the checkerboard look smooth and makes the white ghost stand out.
Red Aura Nails With a White Ghost
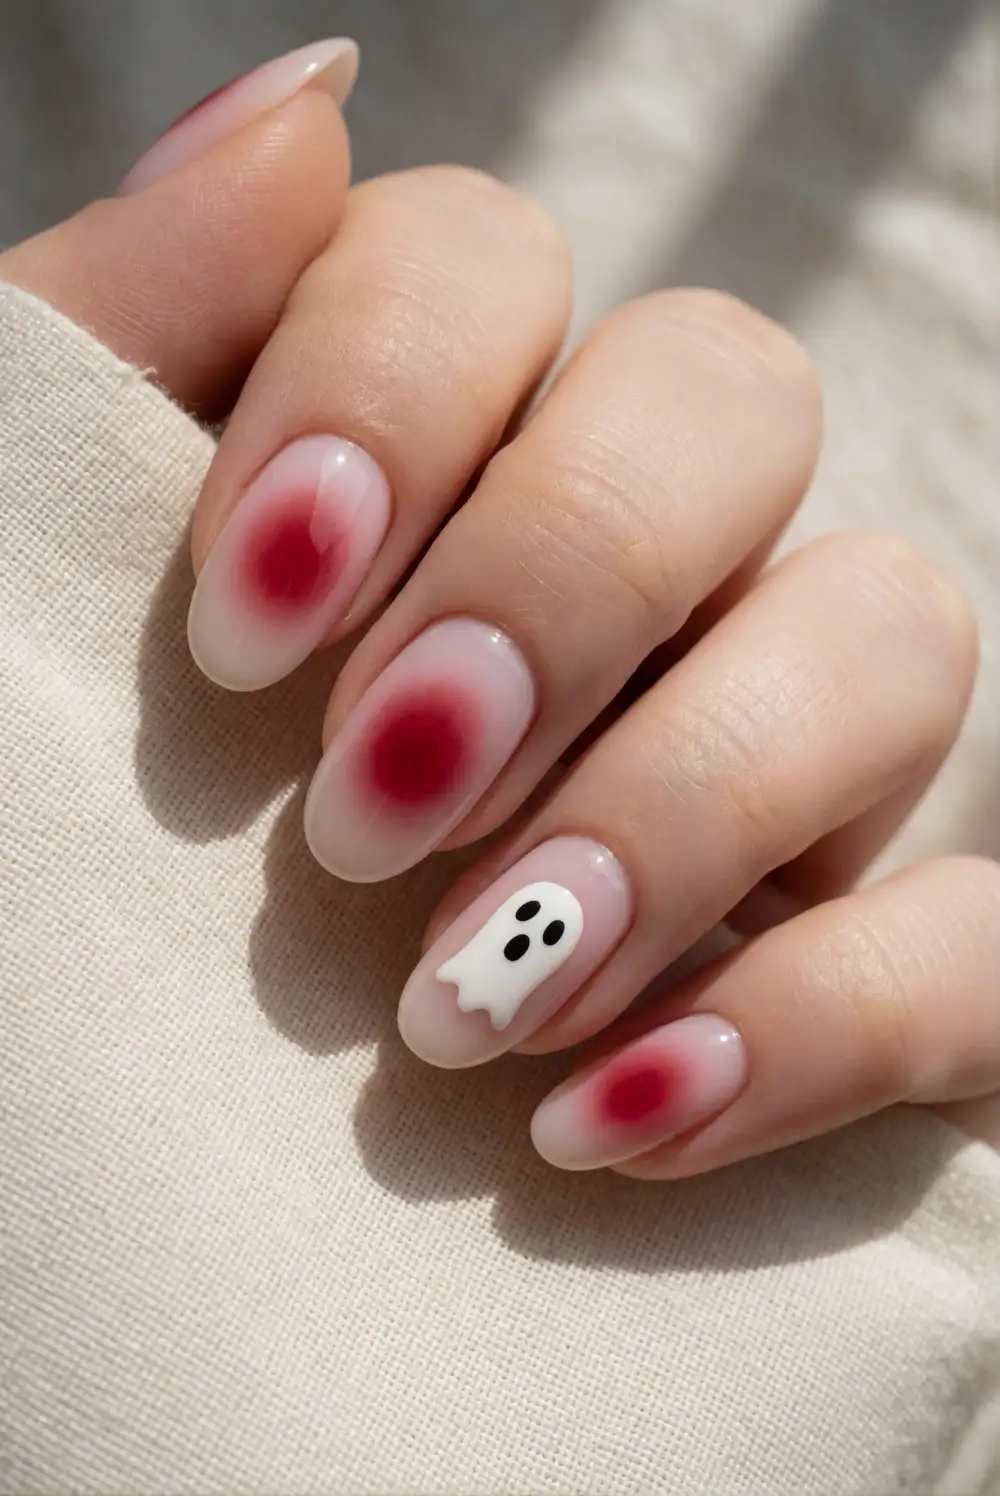
Start with a pale pink or milky white base and allow it to dry. Blend a small circle of red polish into the center of each nail using a sponge or a soft nail art brush, keeping the color strongest in the middle and diffused at the edges. Add a white ghost on one nail once the aura effect is dry, then finish its face with two small black dots and a short curved mouth.
A sheer, layered application gives the red center a softly blurred look without covering the pale base. Build the color gradually, letting each pass dry before adding more pigment. Place the ghost over the edge of the red aura for a layered effect, or keep it on a separate nail for a clearer focal point. Use a glossy top coat to blend the finish visually and protect the design from everyday wear.
Matte Black Nails With Red Hearts and Ghosts
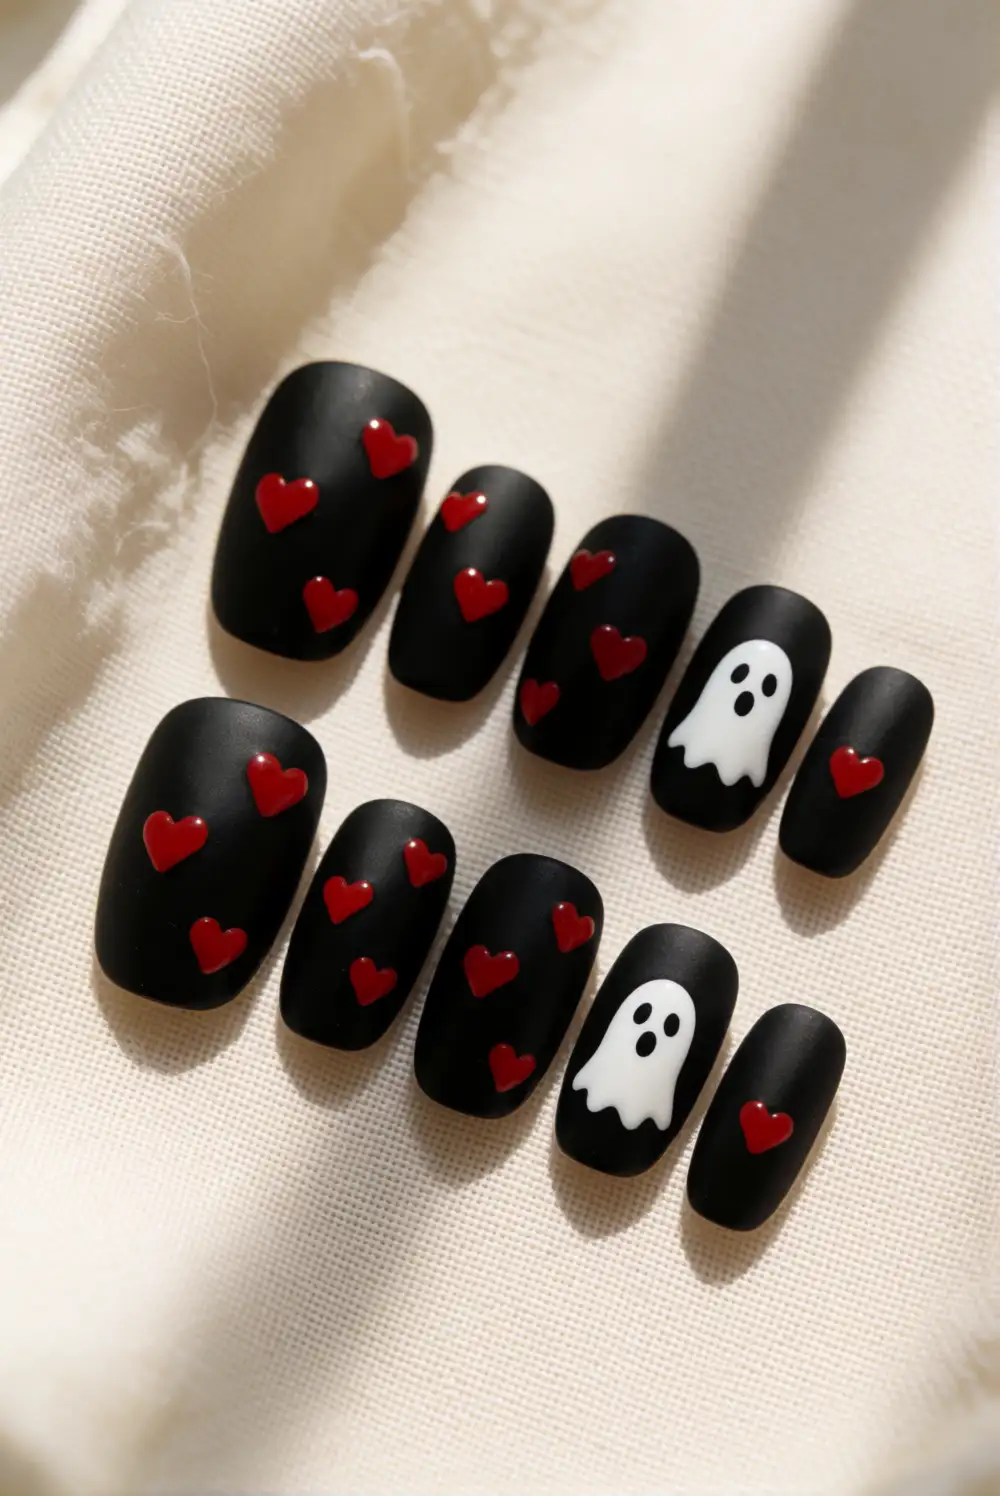
Paint the nails with opaque black polish and wait until the color has dried before applying a matte top coat. On selected nails, use a fine brush to add small red hearts and a compact white ghost with simple black facial details. Keep each motif spaced apart so the dark background stays visible. If the black polish is not fully dry, the white artwork may pick up color, so give the base plenty of drying time.
For a cleaner manicure, place the ghost on one accent nail and use tiny red hearts on the others. A satin finish is a nice alternative if you want a hint of sheen without losing the soft black effect. On shorter nails, keep the hearts and ghost small and centered; longer nails can accommodate a slightly larger motif. Use a compatible top coat over the artwork to help the design wear evenly.
Glittering Red Tips With a White Ghost
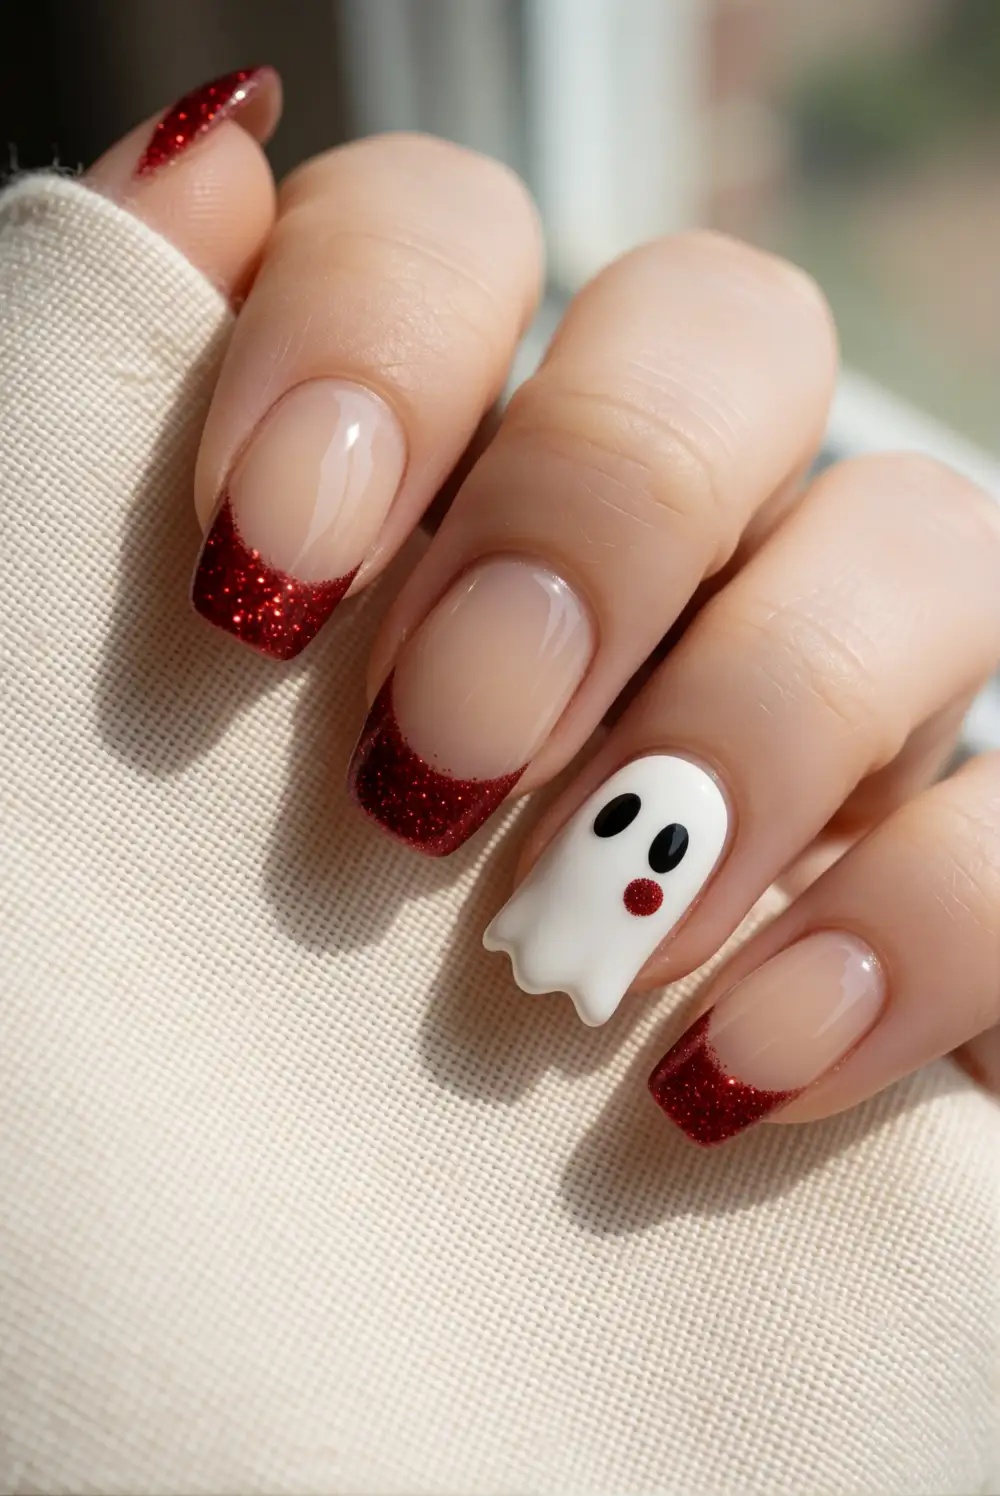
Apply a sheer beige or pale pink base and let it dry. Paint the tips with a red glitter polish, concentrating the sparkle along the free edge and softening it slightly toward the center. On one accent nail, add a small white ghost with a rounded silhouette and a gently wavy base. Once the ghost is dry, use a tiny brush to place black eyes and a small red cheek detail that echoes the glitter tips.
Fine glitter gives the manicure a festive finish without making the artwork difficult to see. Choose a dense glitter polish for a brighter tip or dab on a few layers of a subtle sparkle shade for a softer look. Keep the ghost on a plain base so its shape remains clear, and finish with a smooth glossy top coat. If the glitter texture feels rough, apply an extra thin layer once the first coat has settled.
Whether you prefer crisp French tips, delicate ghost outlines, or bold red-and-black patterns, these manicure ideas make it easy to add a playful seasonal detail. Choose a design that suits your nail length and polish skills, then personalize the red shade, finish, and placement to make the look your own.








