
Set the mood for a horror movie night with Ghost Face nail art that balances recognizable mask details with wearable finishes. From crisp black-and-white accents to smoky gradients and tiny ghost silhouettes, these manicure ideas offer practical inspiration for different nail lengths, polish colors, and skill levels.
Ghost Face French Tip Nails
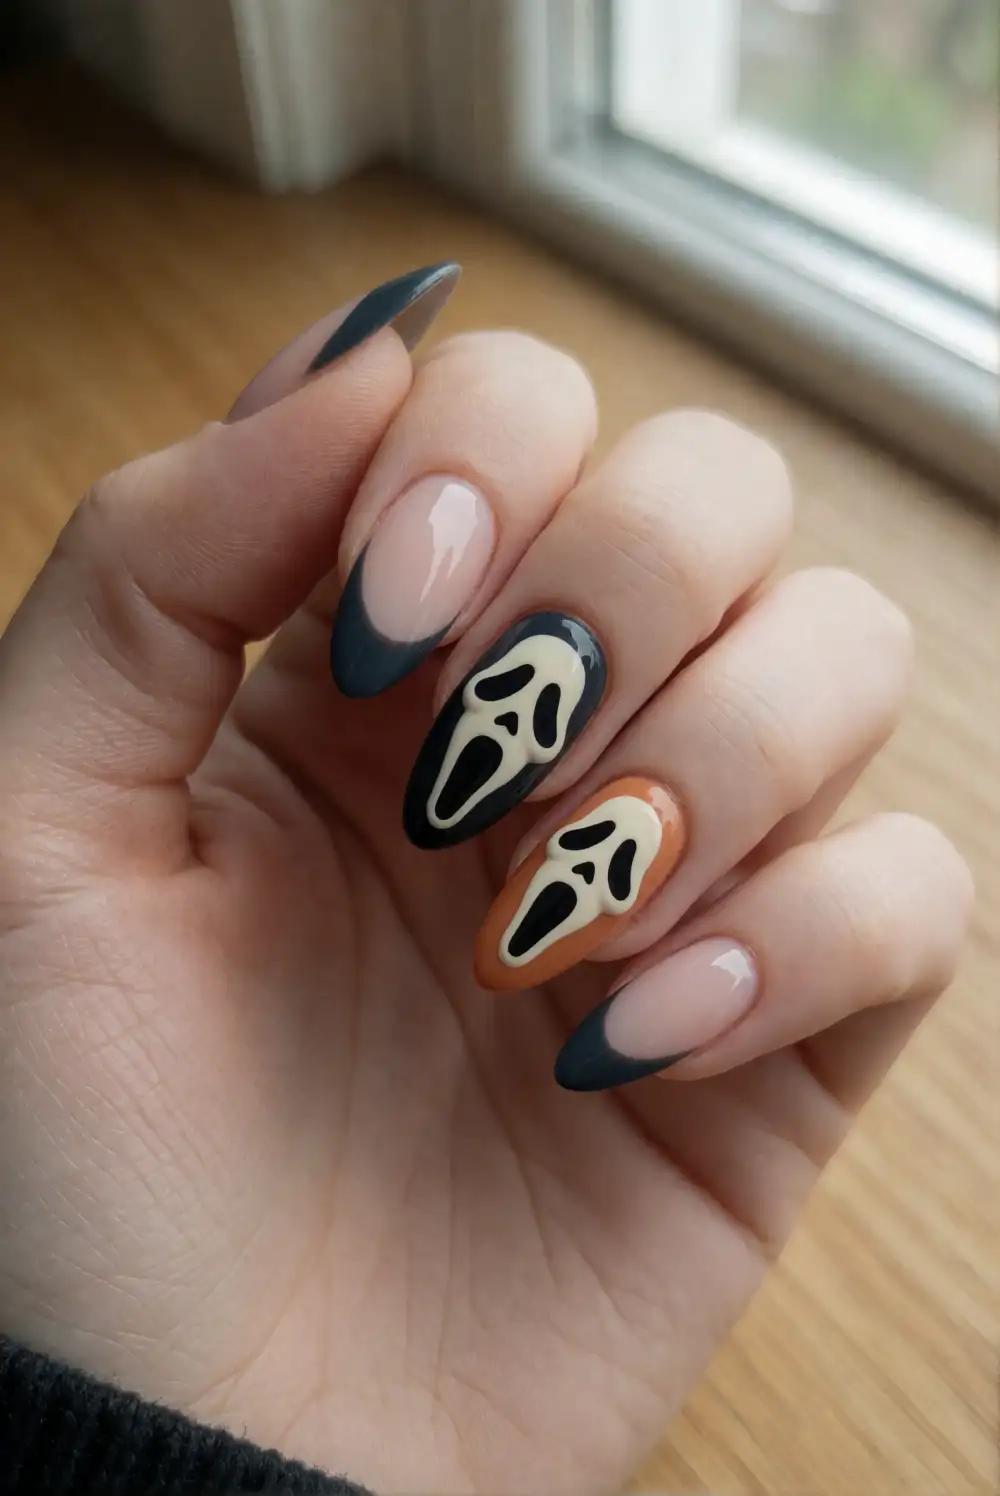
Start with a sheer nude or milky base coat, then paint each tip black with a fine nail-art brush. Once the tips are dry, add small white Ghost Face mask shapes across selected nails using a dotting tool and a detail brush. Draw the long open mouth and narrow eyes with black polish, keeping the design on a couple of accent nails if you want a more understated manicure.
Almond and oval nails give the curved tips a natural shape, while short nails look neat with a thinner black edge. Use a glossy top coat to smooth the mask details and bring the manicure together. For a softer look, swap the nude base for sheer gray, or keep the mask accents to the ring fingers so the French tips remain the main feature.
Black and White Mask Accent Nails
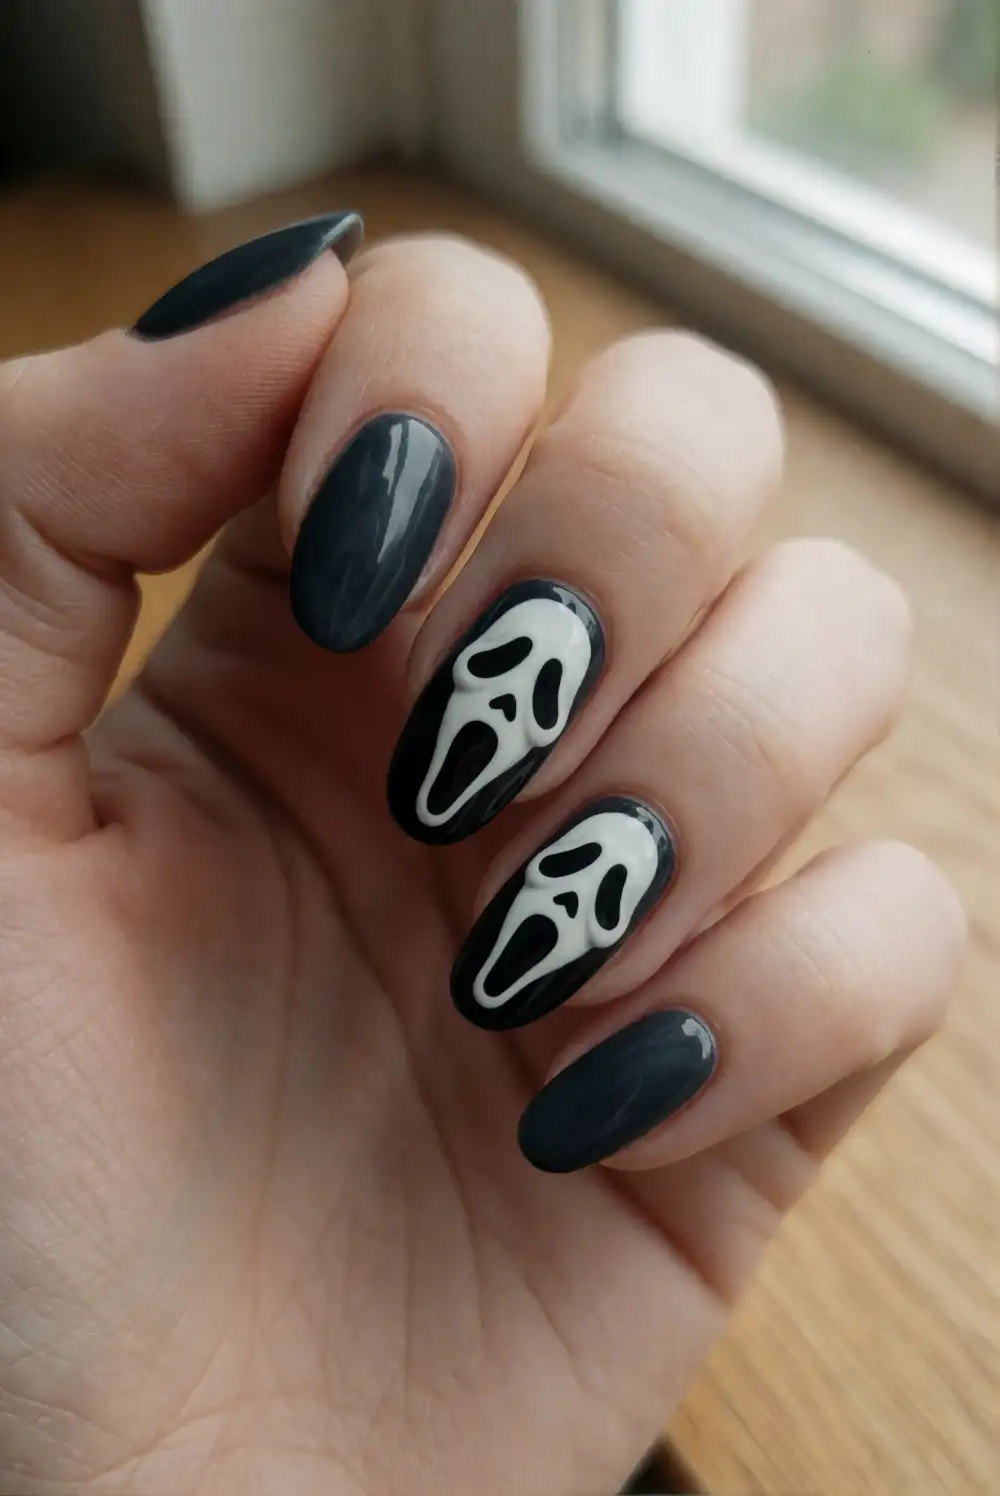
Paint most nails glossy black and reserve a couple of accent nails for a white mask design. After applying a white base to those accent nails, use a fine brush to sketch the stretched mouth and dark eye shapes in black polish. Let each layer dry before adding another detail, and clean the edges with a small brush dipped in polish remover. Finish the full manicure with a clear top coat.
This high-contrast idea works especially well on short, rounded nails because the mask remains easy to read without needing much space. Keep the black nails smooth and simple to make the white accents stand out. If freehand drawing feels tricky, place a small reference image nearby and build the mask from basic shapes rather than trying to paint every detail at once.
Smoky Gray Ghost Nails
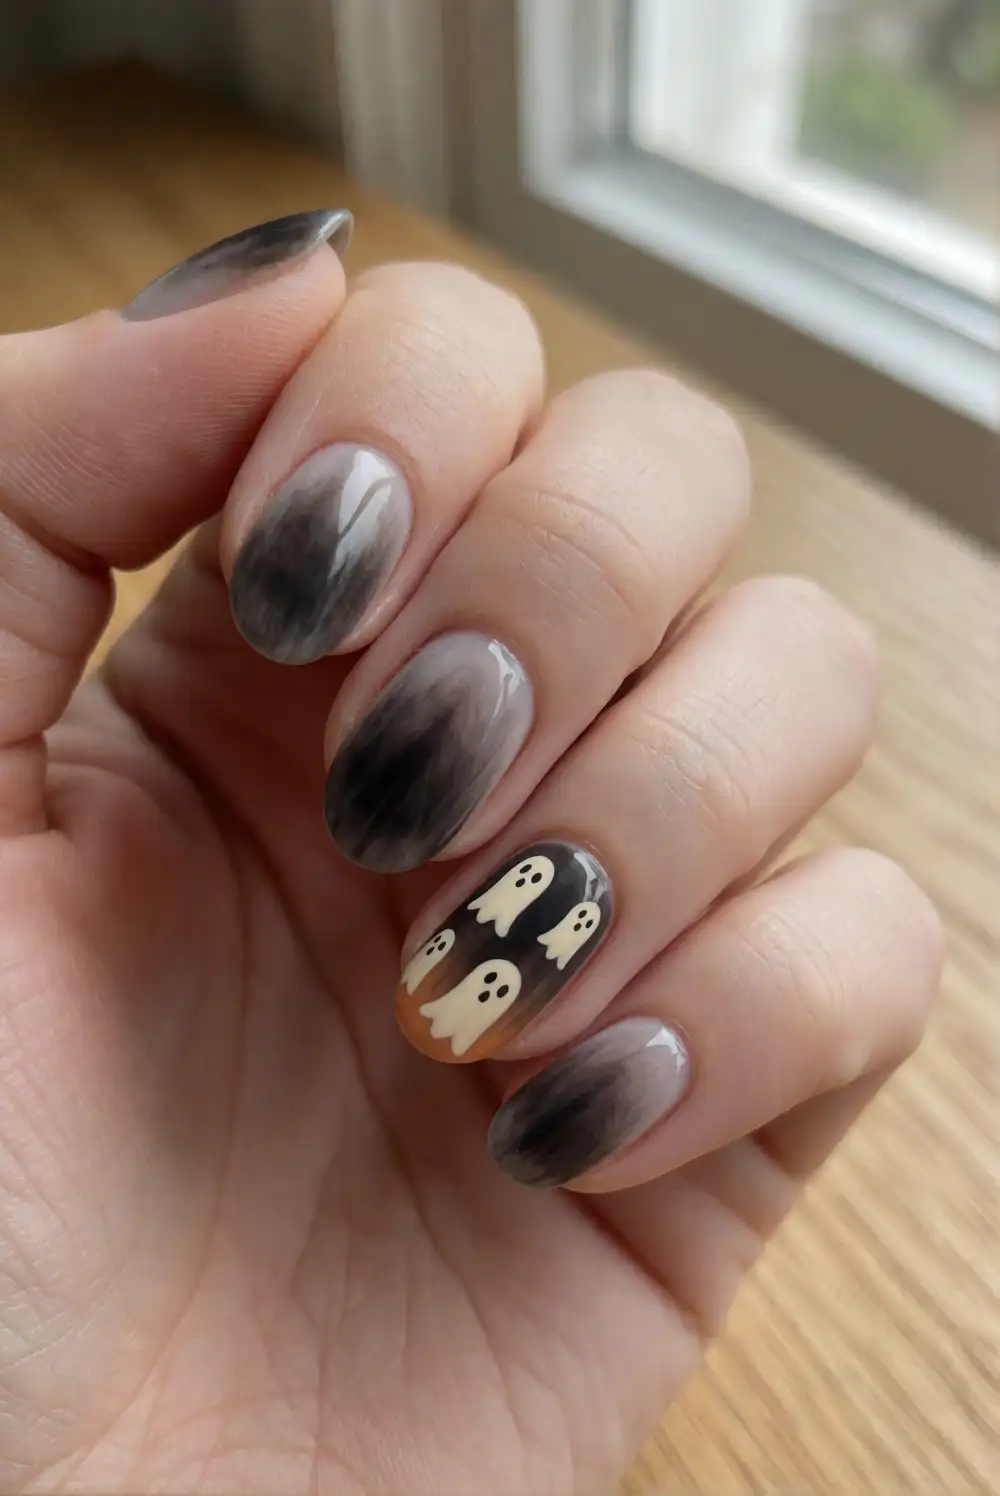
Blend charcoal and pale gray polish across each nail to create a soft smoky base. Apply both shades in small sections with a sponge, gently overlapping the colors until the transition looks misty. Once the gradient is fully dry, paint a small cream ghost silhouette on an accent nail, then add tiny dark eyes and an open mouth with a fine brush. Seal the design with clear top coat.
A makeup sponge creates a diffused effect, while a sheer layer of gray polish can soften any edges that look too sharp. Keep the ghost shapes simple so they remain visible against the blended background. This design suits both long and short nails; use fewer details on shorter nail beds and position the ghost near the center for a balanced look.
Matte Black Ghost Face Manicure
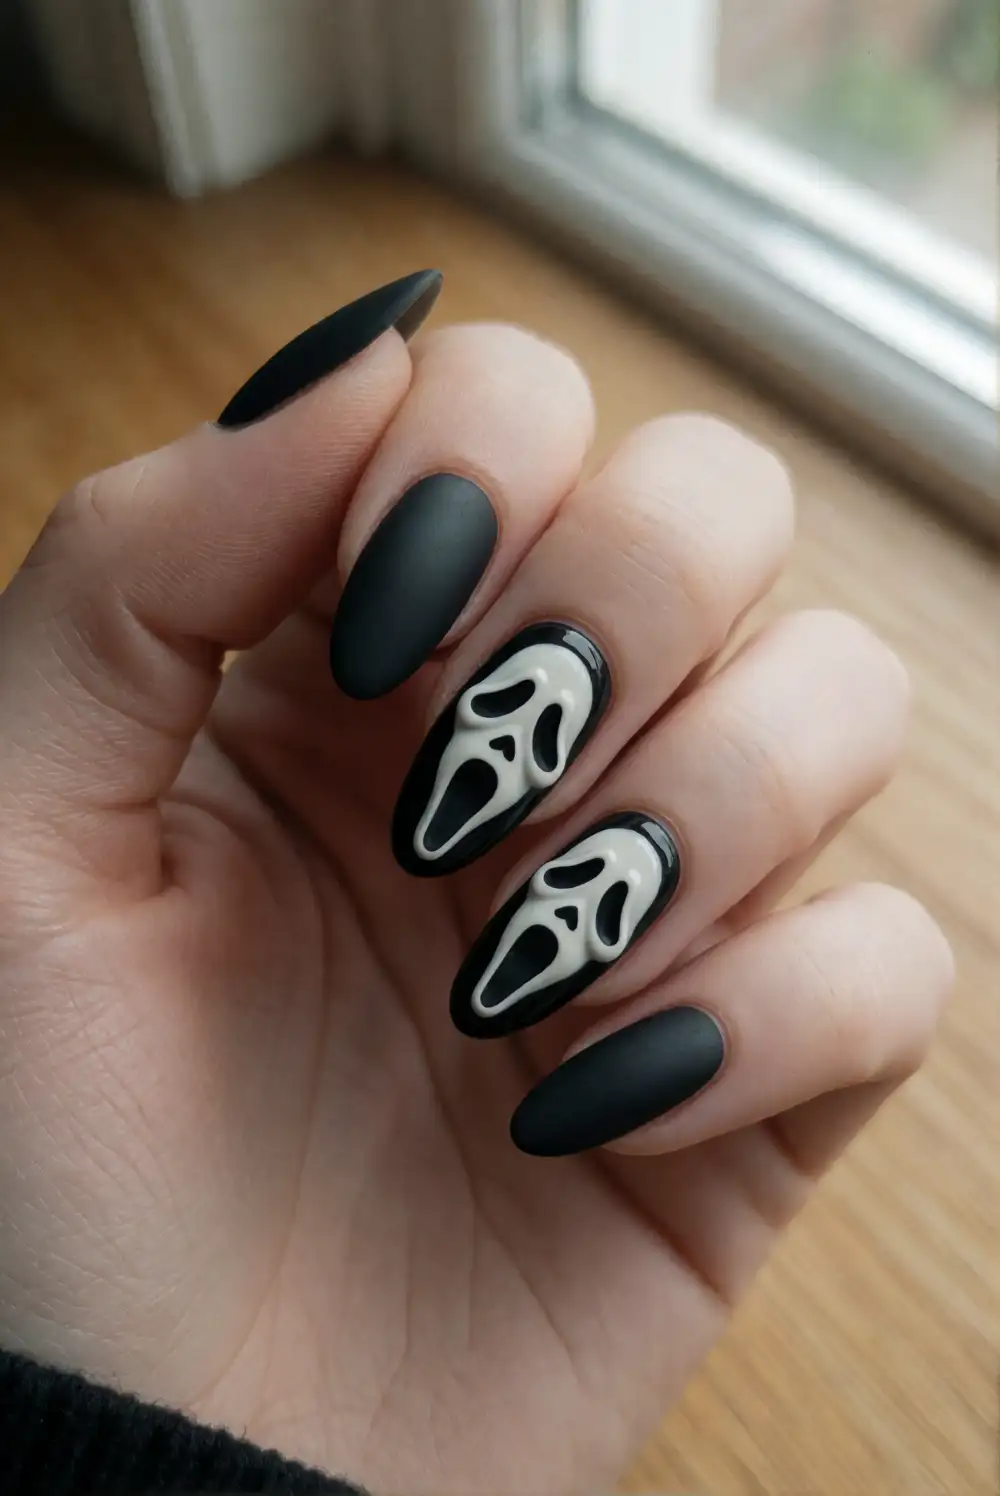
Apply opaque black polish to every nail and allow it to dry completely. Add a Ghost Face mask to an accent nail with white polish, using a fine brush for the long face shape and a detail tool for the dark eyes and mouth. Once the art has set, apply a matte top coat over the black nails. For a crisp finish, protect the white mask with glossy top coat instead.
The contrast between matte polish and a shiny mask gives the manicure dimension without adding extra colors. If you prefer a subtler result, paint the mask in charcoal gray so it sits gently against the black base. A glossy version is just as effective: use a regular top coat throughout and let the sharp mask silhouette provide the visual contrast.
Ghost Silhouettes on Clear Nails
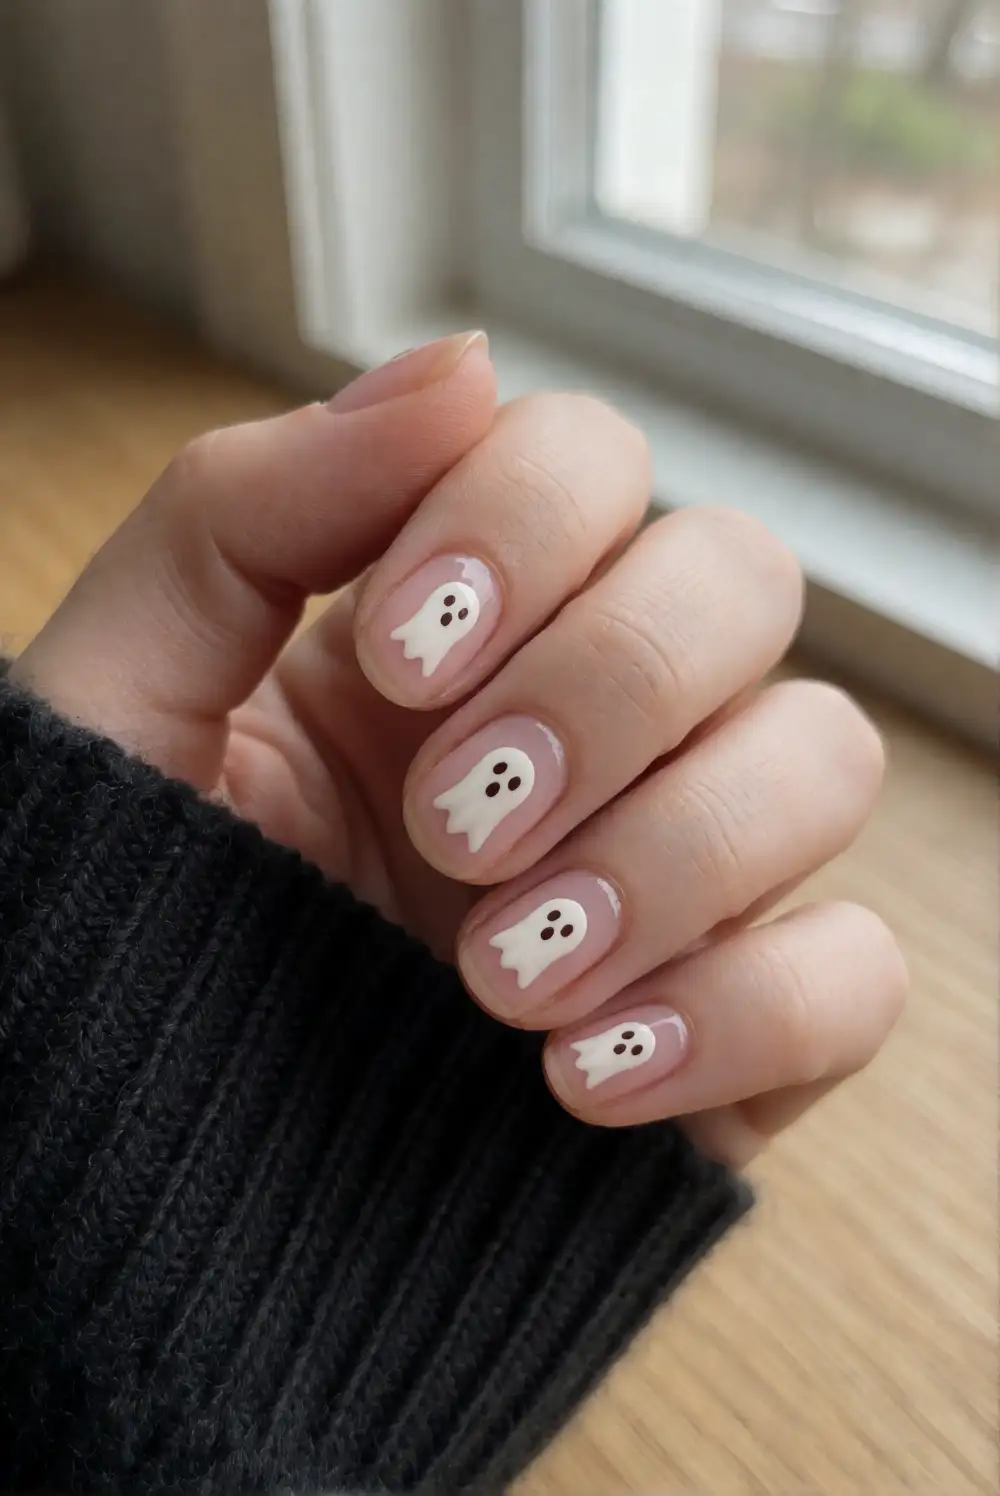
Begin with a clear or sheer pink base to keep the nails light and see-through. Paint small white ghost shapes on a few nails using a dotting tool or a small brush, then add simple black eyes and mouths after the white polish dries. Place the silhouettes at different angles rather than lining them up identically. A clear base coat and a glossy top coat help the delicate artwork look smooth.
This airy design is a good choice if a full black manicure feels too dramatic for movie night. Keep the ghosts small near the tips, or make a single larger mask-inspired ghost the focal point on a feature nail. Short nails benefit from simple silhouettes with plenty of clear space around them, while longer nails can carry a tiny ghost on each nail.
Black and Cream Checkerboard Nails
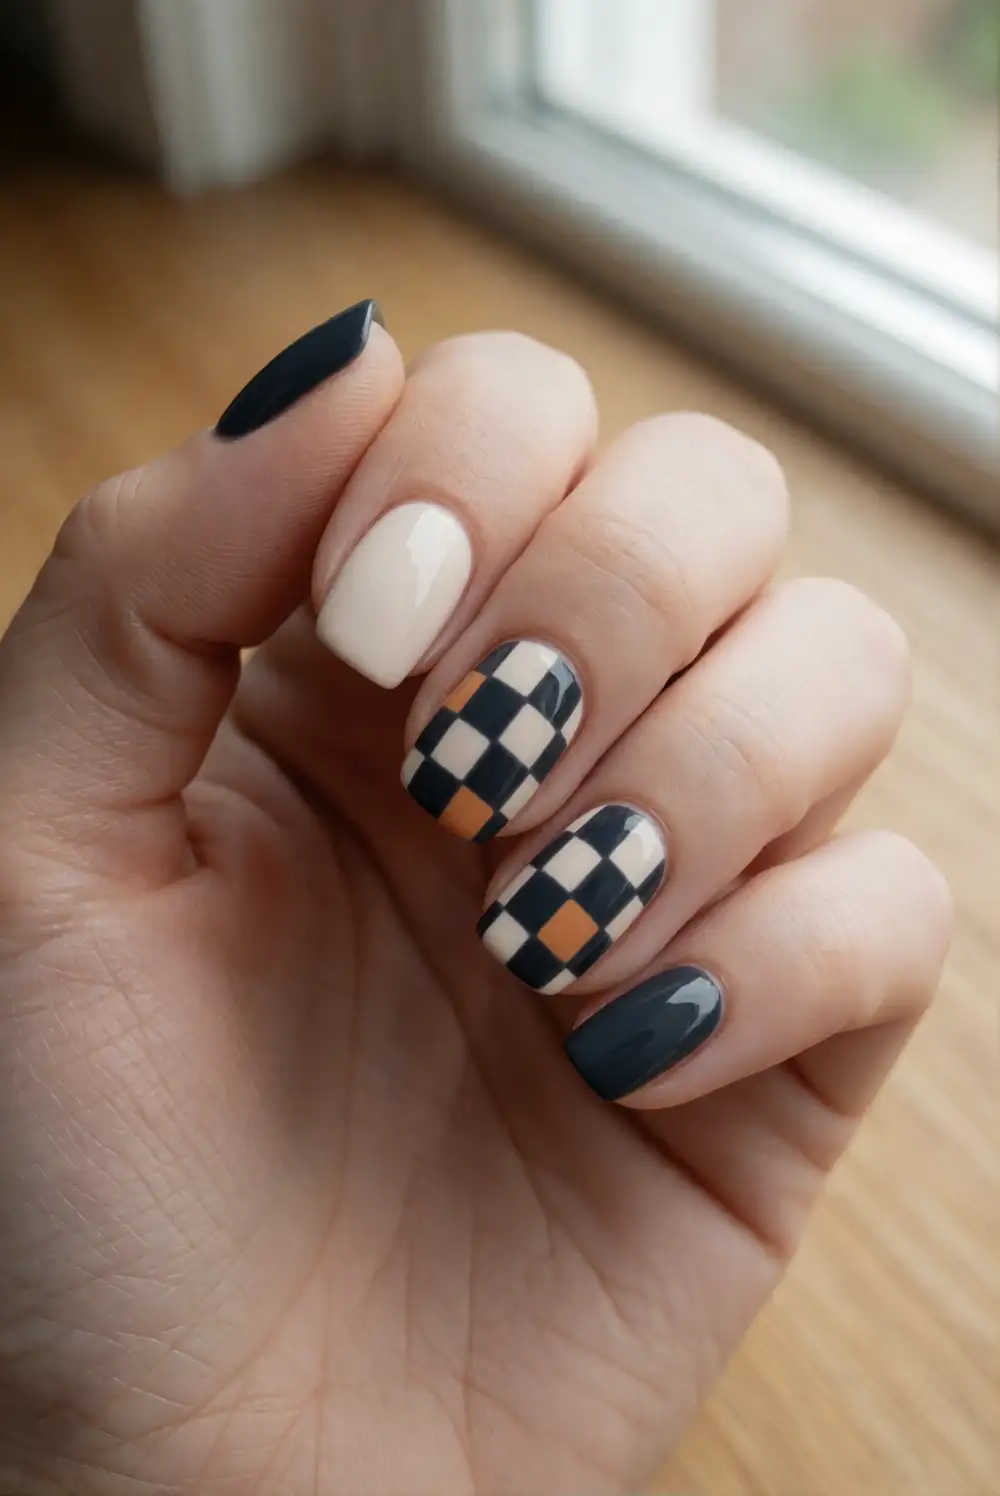
Choose a cream base and let it dry before painting a black checkerboard across one or two accent nails. Use a fine brush to create a loose grid, then fill alternate squares with black polish. The remaining nails can be painted solid charcoal or black for a coordinated set. If freehand squares are difficult, use thin nail-art tape as a guide and remove it once the polish is touch-dry.
A slightly imperfect grid gives the design a hand-painted feel and avoids the need for perfectly even squares. Keep the pattern on accent nails so it does not compete with Ghost Face artwork elsewhere in the manicure. On short nails, use larger blocks and fewer rows; on longer nails, a finer grid adds a graphic, film-inspired finish.
Negative Space Ghost Face Nails
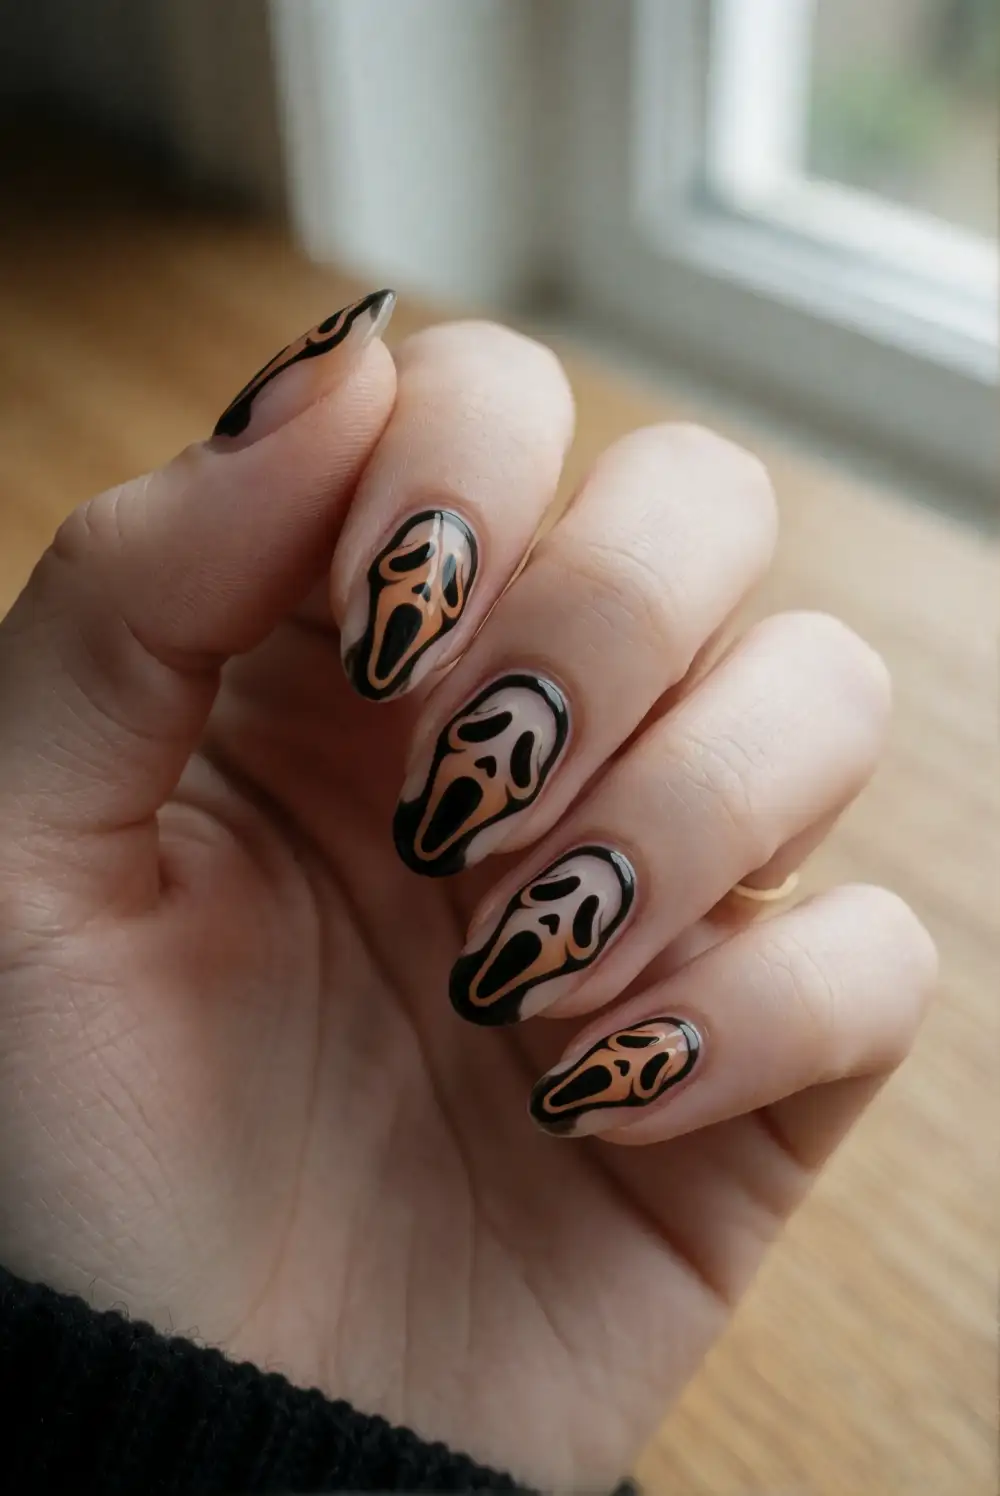
Leave parts of the natural nail visible by painting black polish into a mask outline rather than filling the entire design. Start with a clear base coat, then use a fine brush to draw the long face shape, eye openings, and mouth around open sections of nail. Work slowly and let each section dry before adding nearby lines. A clear top coat protects the finished artwork without hiding the negative-space effect.
This graphic approach feels lighter than a solid black manicure while keeping the familiar mask expression easy to recognize. It works best when the lines are clean and the open areas remain uncluttered. Try the design on just one accent nail and pair it with sheer gray polish elsewhere, or repeat smaller abstract mask shapes across a longer nail set.
Charcoal Ombre with Silver Details
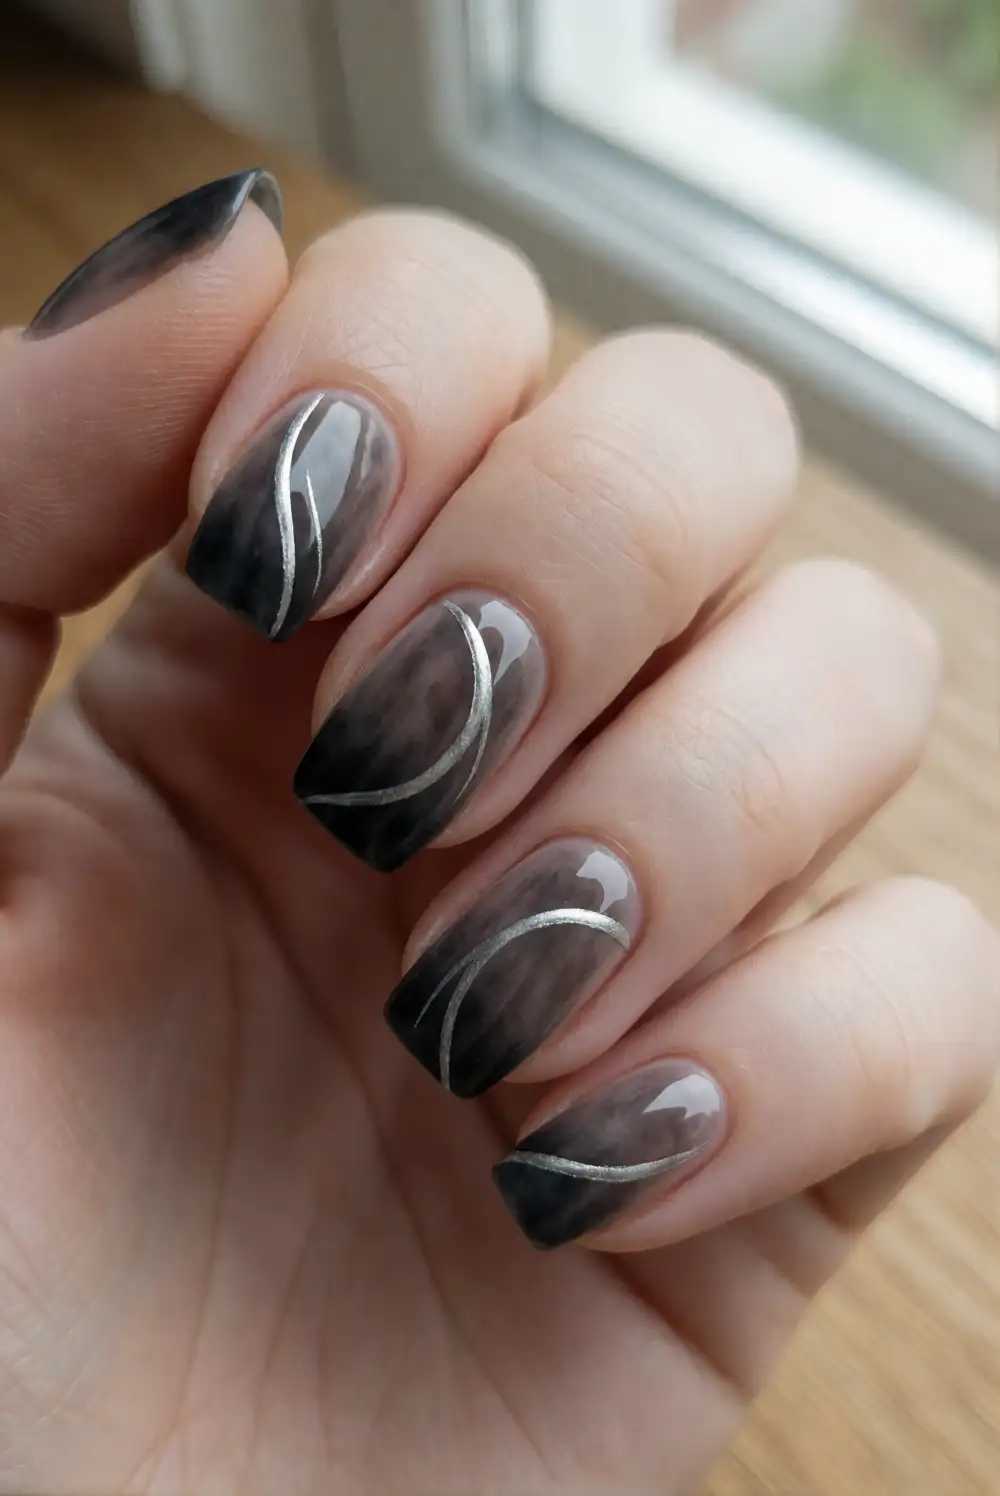
Paint a charcoal base, then blend it toward smoky gray at the tips with a sponge for a soft ombre effect. After the gradient dries, add a few slender silver arcs or small reflective accents using metallic polish and a fine liner brush. Keep any Ghost Face artwork on a separate accent nail so the details do not crowd each other. Finish with a glossy top coat to bring out the silver.
Use just a hint of metallic polish for a subtle glint under movie-night lighting, or add a brighter silver accent where the gray meets charcoal. The gradient can run from cuticle to tip or across the nail from side to side. Short nails look polished with a simple fade and a single metallic line, while longer nails leave more room for delicate accents.
Muted Pumpkin Ghost Nails
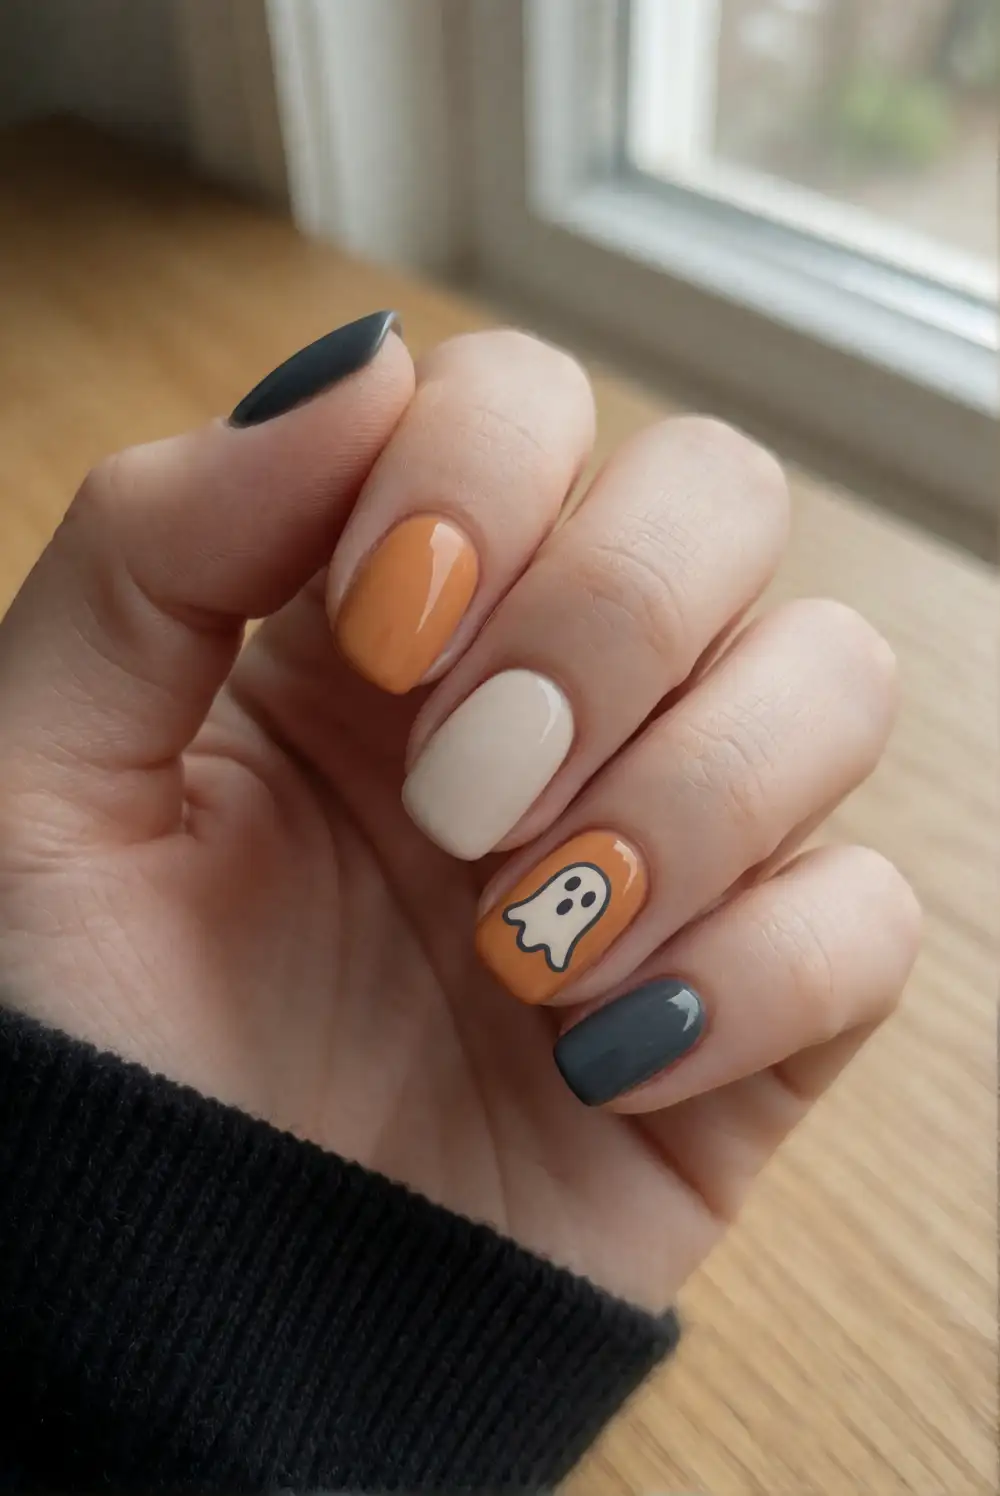
Paint a few nails muted pumpkin orange and keep the rest cream or charcoal for a seasonal palette. On one cream accent nail, create a small white ghost with a charcoal outline and simple eyes. Let the polish dry between colors so the warm base stays clean and the face details remain sharp. A fine brush makes it easier to draw a narrow mouth without covering the ghost shape.
Choose a soft, dusty orange rather than a vivid shade for a more wearable manicure. A charcoal base on the remaining nails grounds the warm colors and keeps the look connected to the movie-night theme. For a coordinated finish, add a tiny orange detail near the tip of the ghost nail, then seal every nail with a smooth glossy top coat.
Ghost Face Nails with Red Accents
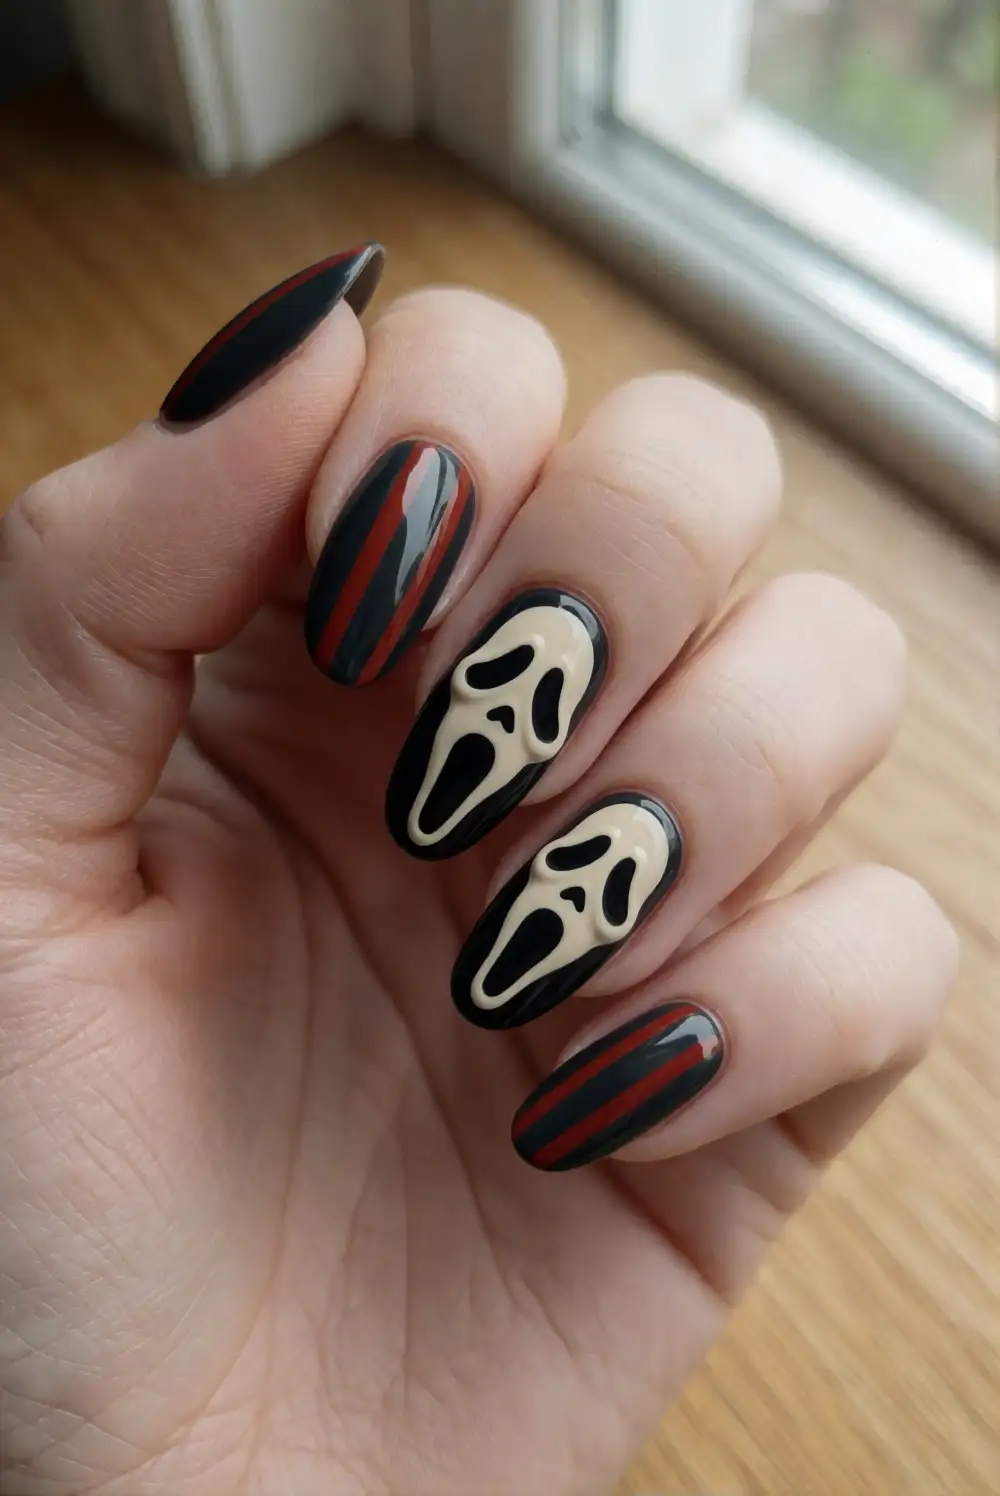
Pair black and cream nails with restrained deep-red details for a dramatic, movie-inspired manicure. Paint most nails black, use cream for a mask accent, and add a thin red stripe or a small red block near the tip of one nail. Use a fine brush for tidy lines and allow the accent to dry before applying top coat. Keep the red polish away from the mask’s facial features so the design stays clear.
A burgundy shade gives the palette a softer finish, while a brighter red creates a bolder contrast against charcoal. To keep the set balanced, let the red appear on only a couple of nails and leave the others monochrome. This color combination pairs well with a simple black outfit and remains easy to adapt to different nail shapes and lengths.
Ghost Face Nails with Glossy Details
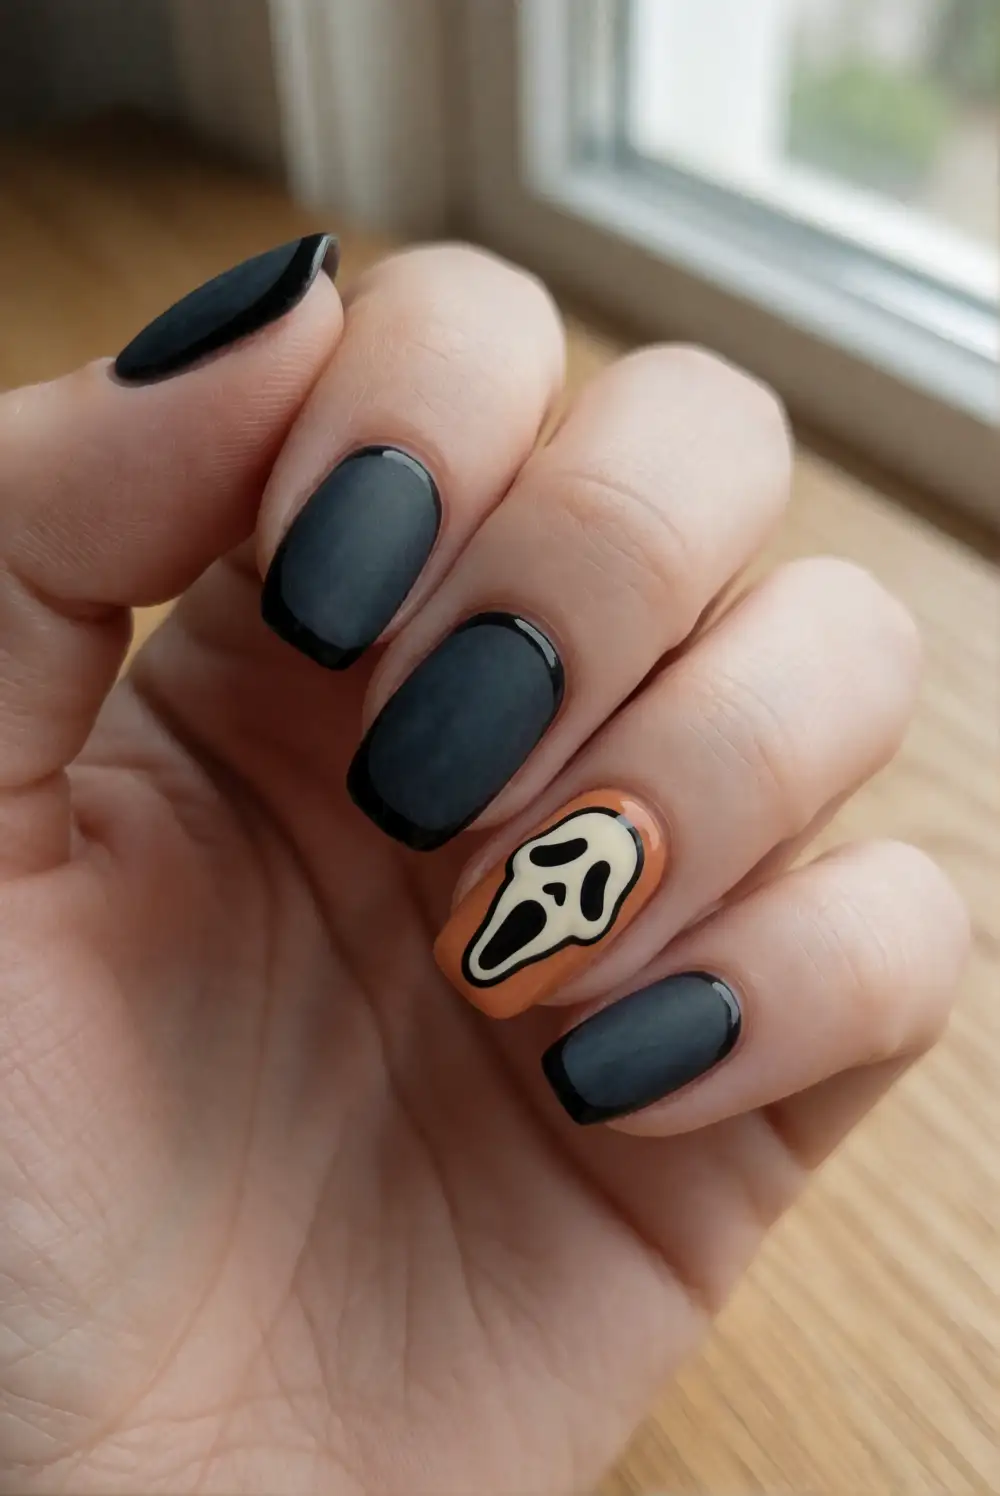
Apply a matte charcoal base to most nails, then paint a mask accent in the same shade using glossy black polish. The slight finish difference creates a subtle design that becomes visible as the nails catch the light. For a more recognizable look, add a small cream mask outline to one nail and preserve the glossy-on-matte effect on the others. Let the manicure dry before applying any protective top coat.
This understated finish suits anyone who wants a horror-inspired detail without a busy pattern. A glossy top coat can be brushed into narrow curves, mask outlines, or small tips over the matte background. Keep the design restrained and consistent across the set, or use the contrast only on the accent nail for a minimal manicure that still feels intentional.
Short Ghost Face Nail Art
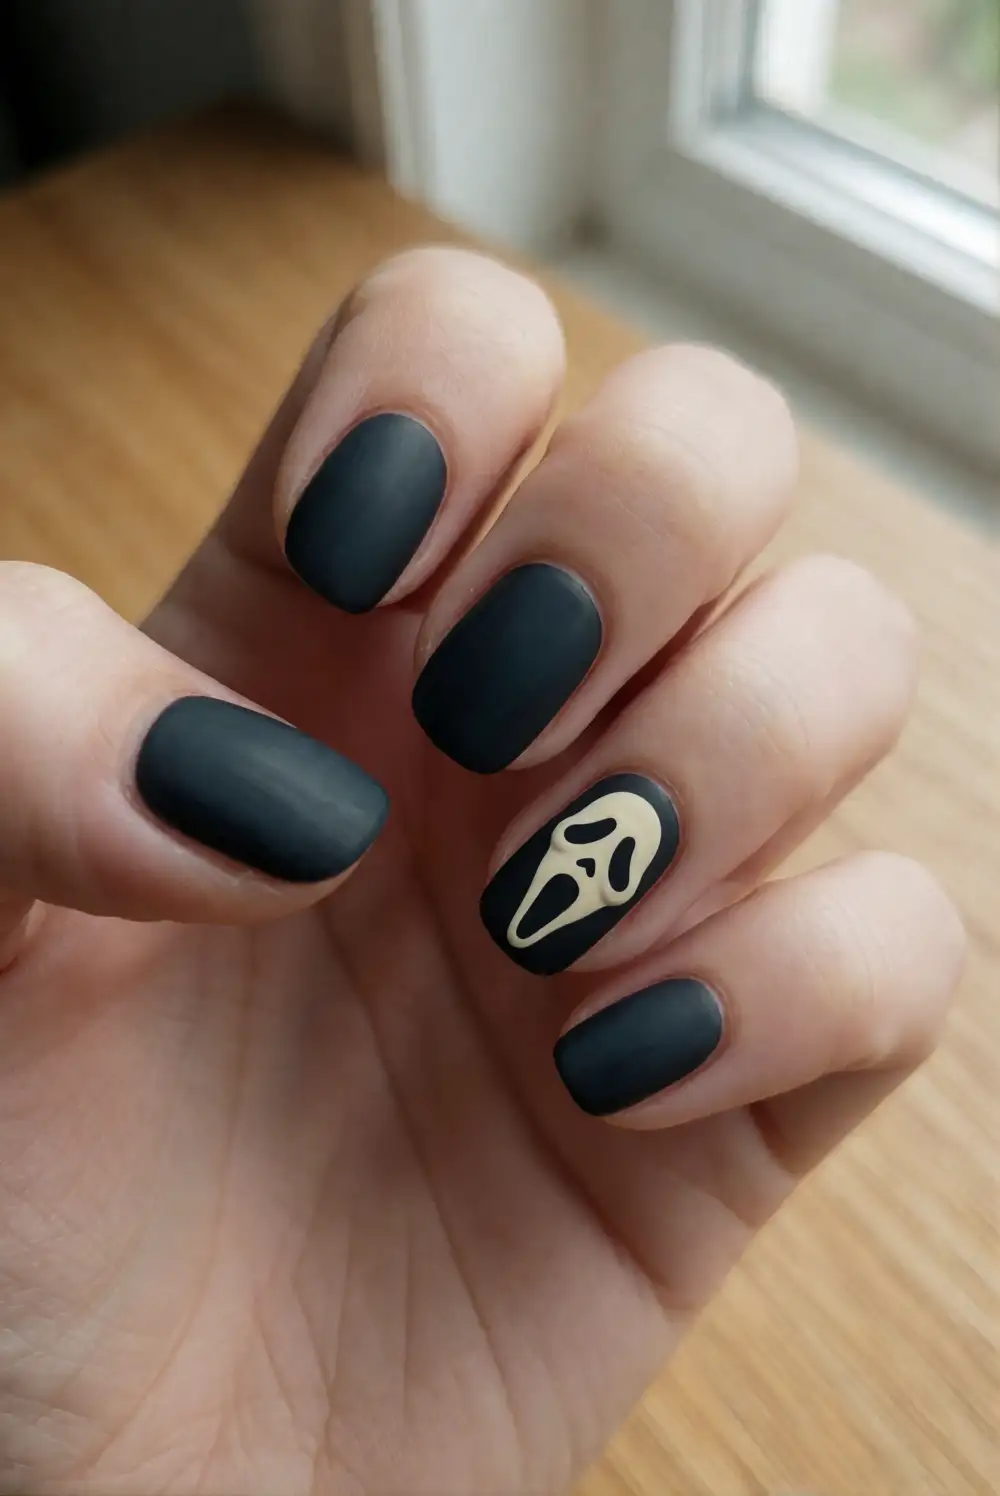
For short nails, use a simple black-and-cream palette and focus on one clear mask accent. Apply black polish to most nails, then paint a cream base on a single accent nail. Add the mask’s dark eyes and mouth with a fine brush, keeping the shapes bold enough to show against the small surface. A thin clear top coat smooths the design without adding visual clutter.
Short, rounded nails can carry plenty of personality with clean color blocking and just a few carefully placed details. Avoid crowding the accent with extra patterns; a small gray or cream dot on another nail is enough to tie the look together. If brush control is difficult, practice the mask shapes on a palette first, then transfer the simplest version to the nail.
For a coordinated horror movie night look, choose a Ghost Face design that suits your nail length and comfort with detail. Keep the rest of the palette simple, let one or two accent nails carry the mask artwork, and finish with a top coat that matches the effect you want, from glossy and bold to matte and understated.








