
Ready to give your Halloween manicure a fresh twist? These Halloween nail ideas look beyond the familiar orange-and-black palette, using jewel tones, pastels, metallic accents, and creamy neutrals for a festive look with plenty of personality. Each design offers practical steps for creating nail art at home, from simple color-blocked tips to tiny seasonal details. Choose a look that suits your style, then adjust the colors and placement to make it your own.
Plum and Gold Crescent Moon Nails
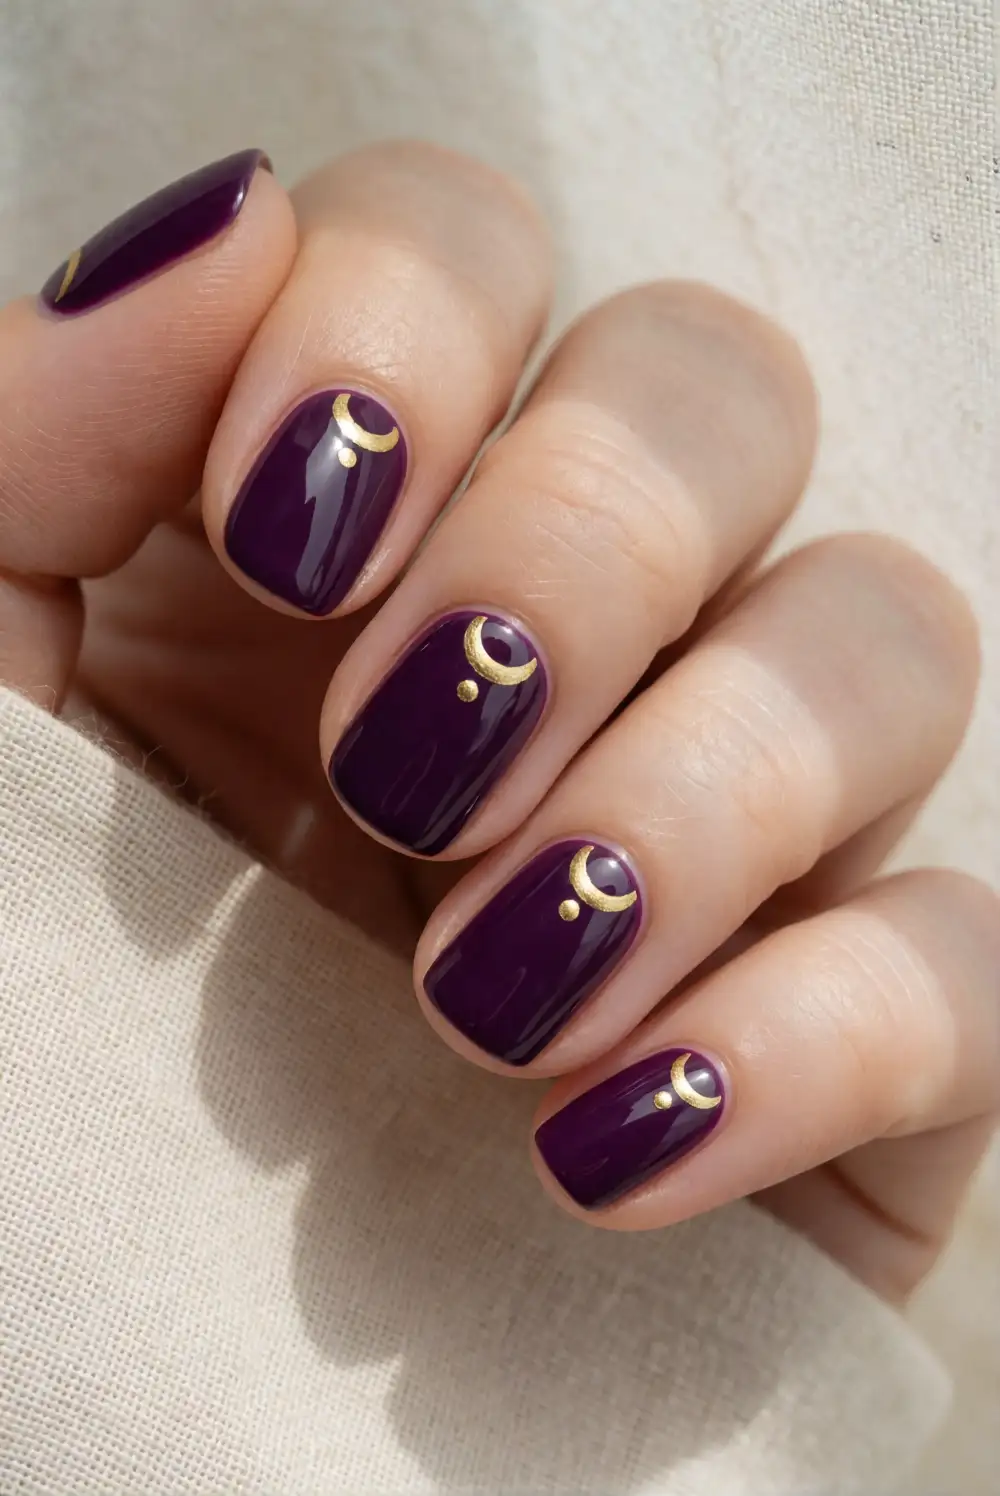
Paint each nail a deep plum and let the polish dry completely. Use a fine nail-art brush or a small stencil to add a slim gold crescent near the cuticle, following the curve of the nail rather than drawing a full moon. A gold metallic polish gives a luminous finish, while a gold nail-art pen can make the curve easier to control. Finish with a clear top coat, taking care to seal the crescent edges.
Keep the moons on every nail for a coordinated look, or place them only on accent nails and leave the rest solid plum. A small dot of gold near each crescent adds a starry detail without making the design crowded. For a softer effect, choose muted mauve instead of deep plum and use champagne metallic polish. This manicure pairs beautifully with gold rings, velvet accessories, or a simple dark outfit.
Sage Green Ghost Accent Nails
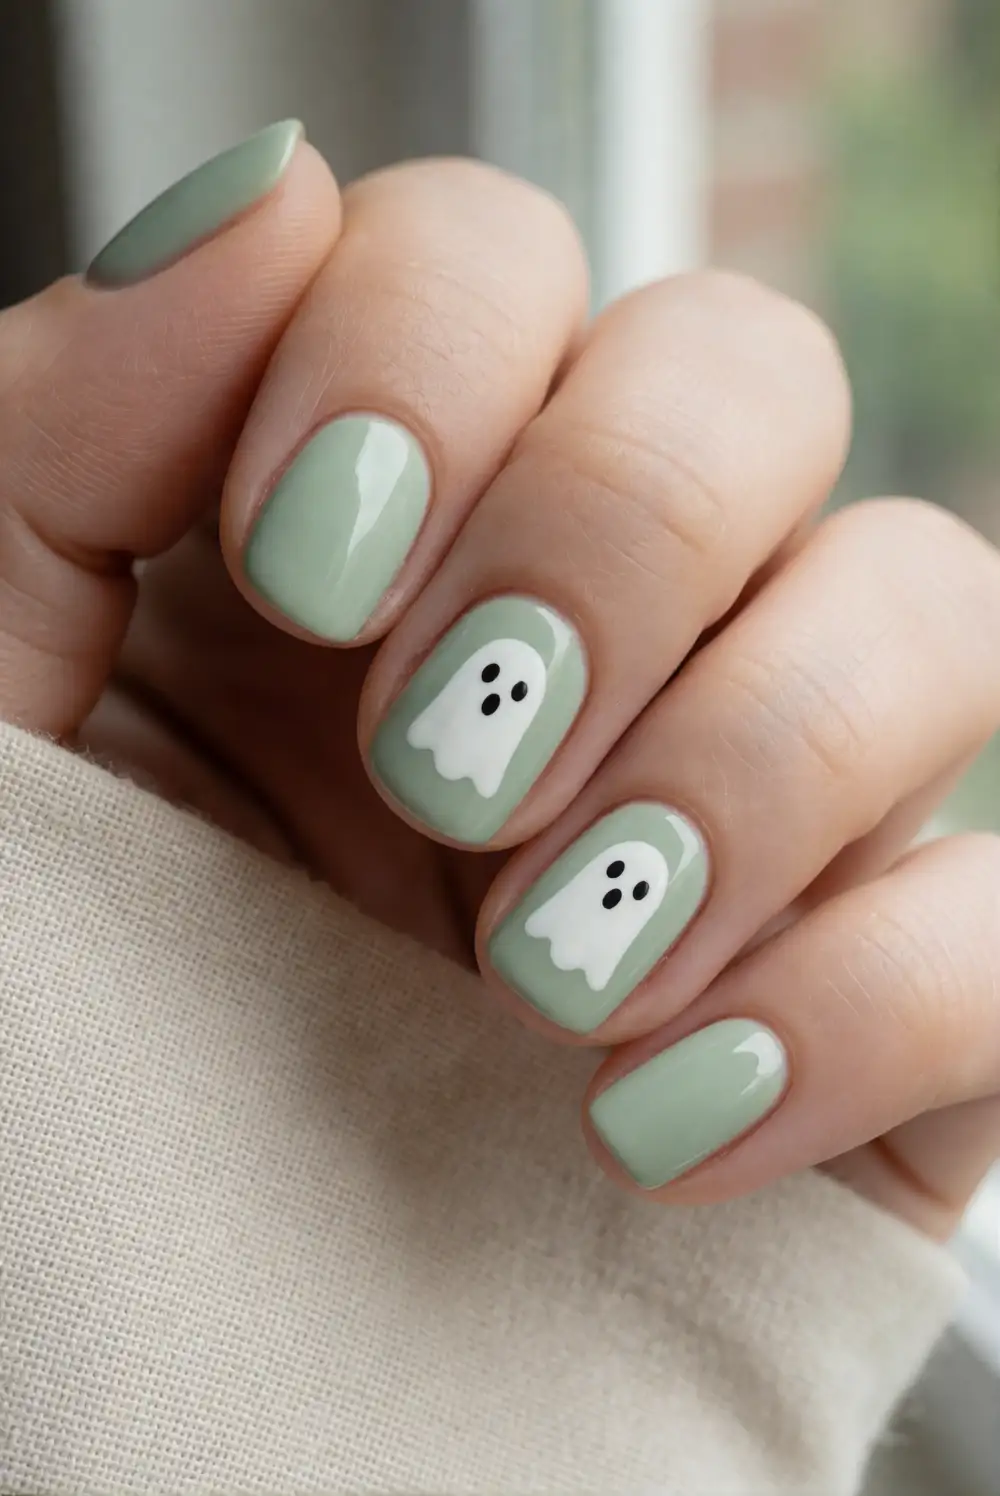
Apply a pale sage-green base coat to most nails and choose one or two accent nails for simple white ghosts. Once the base is dry, use a small nail-art brush to paint a rounded white shape with a gently wavy lower edge. Add two tiny dark eyes with a dotting tool or the tip of a toothpick, then let the art dry before applying clear top coat. Keep the ghost shapes bold and uncomplicated so they show clearly.
For a subtler manicure, use creamy ivory for the ghosts and a sheer sage base, or make the ghosts smaller and place them near the tips. A few pale green dots can tie the accent nails into the rest of the manicure without adding more characters. If freehand painting feels tricky, use a small stencil designed for nail art. The gentle color palette makes this design feel playful while still looking polished.
Berry Red Dripping Cherry Nails
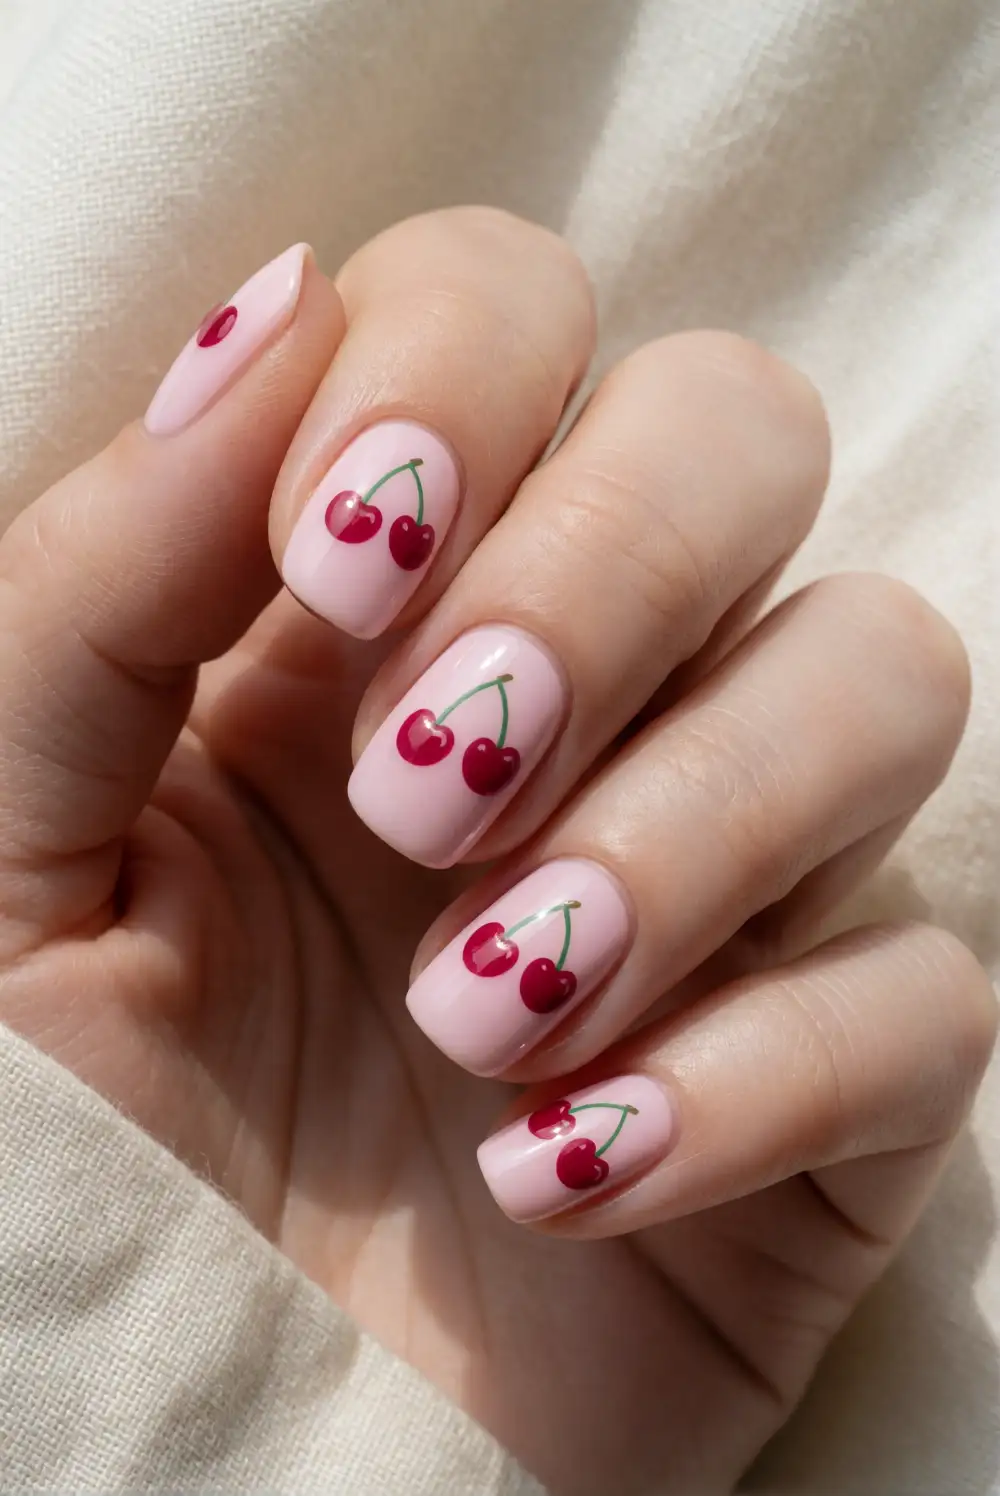
Start with a glossy pale pink or creamy base, then use a berry-red polish to paint two rounded cherry shapes on each accent nail. Add short curved stems with a fine brush, keeping the design small enough to fit comfortably on the nail. For a Halloween-inspired twist, add a few red drip shapes along the tip of one nail, pulling each drop downward with a detail brush. Let the art dry fully before sealing it with a glossy top coat.
Keep the cherries on just one or two nails if you prefer a cleaner manicure, and paint the remaining nails solid berry red or soft pink. A tiny white highlight on each cherry can suggest a shiny finish without requiring detailed shading. You can also replace the drip accent with simple red French tips for a more understated look. Pair this design with berry-toned clothing or use it as a bright accent against neutral fall shades.
Midnight Blue Starry Cat Nails
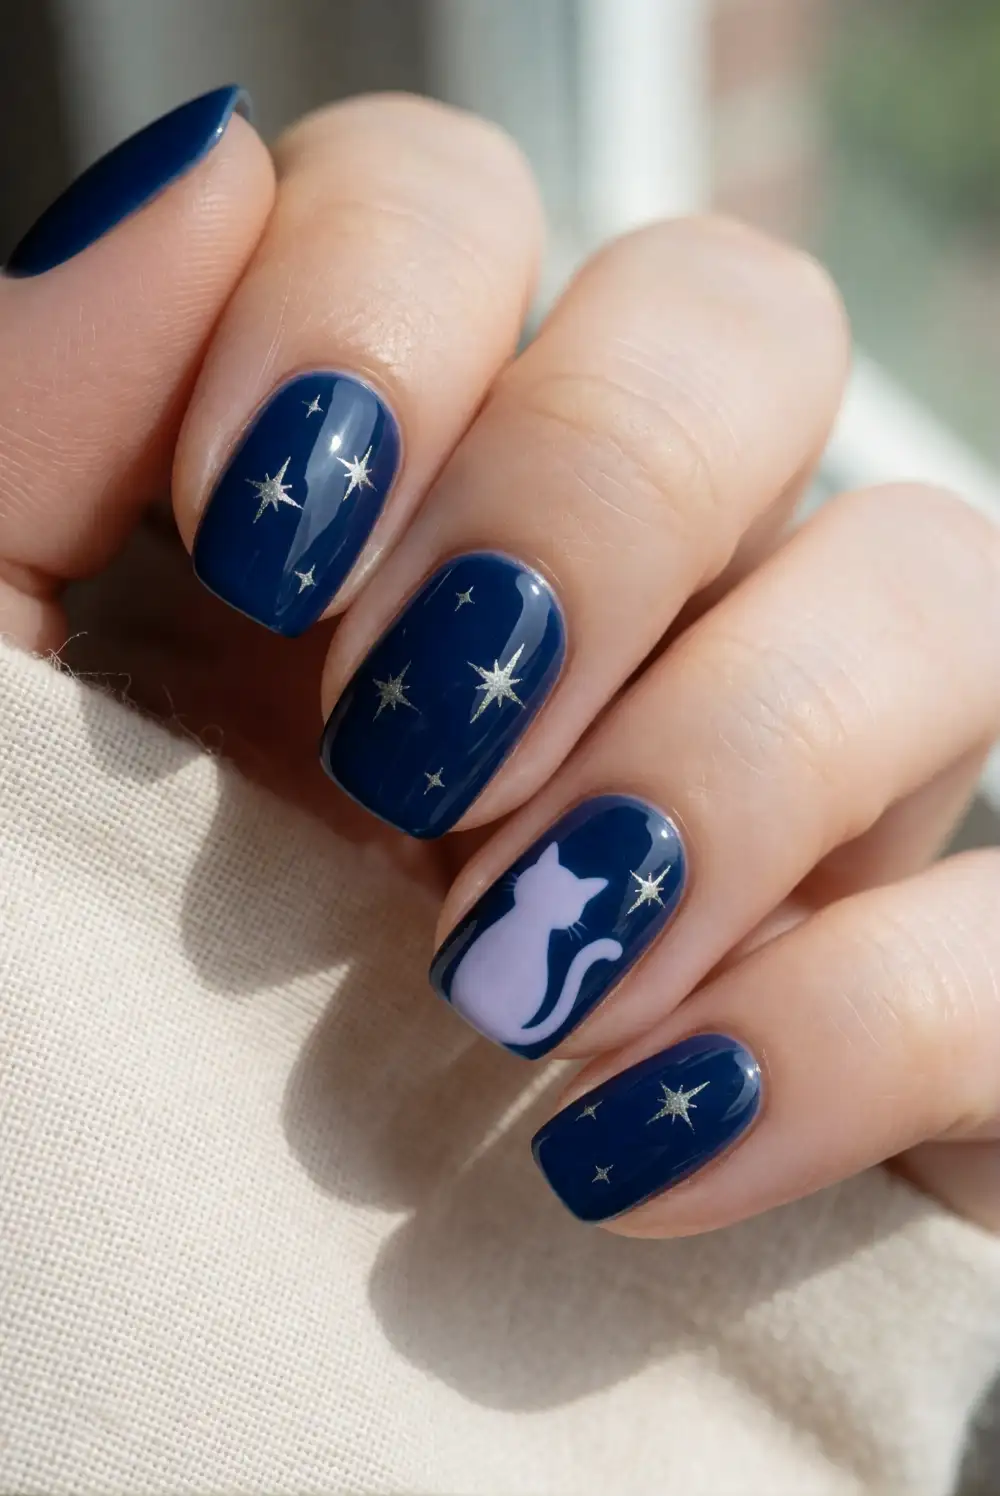
Paint your nails midnight blue and let the base dry before adding the cat details. On an accent nail, use a fine brush to draw a small rounded cat head with two pointed ears in a pale shade such as silver, lilac, or cream. Add tiny eyes with a contrasting polish, then scatter a few simple star shapes or dots across nearby nails. A metallic detail polish helps the stars stand out against the dark, night-sky base.
For an easier version, skip the full cat silhouette and add just two small ears above a curved line near the tip. Keep the stars sparse so the manicure feels like a night sky rather than a crowded pattern. A shimmer top coat can add dimension to the blue without hiding the artwork. Try a different accent color on each hand, such as silver on one and lavender on the other, for a coordinated mismatch.
Lavender Spiderweb French Tips
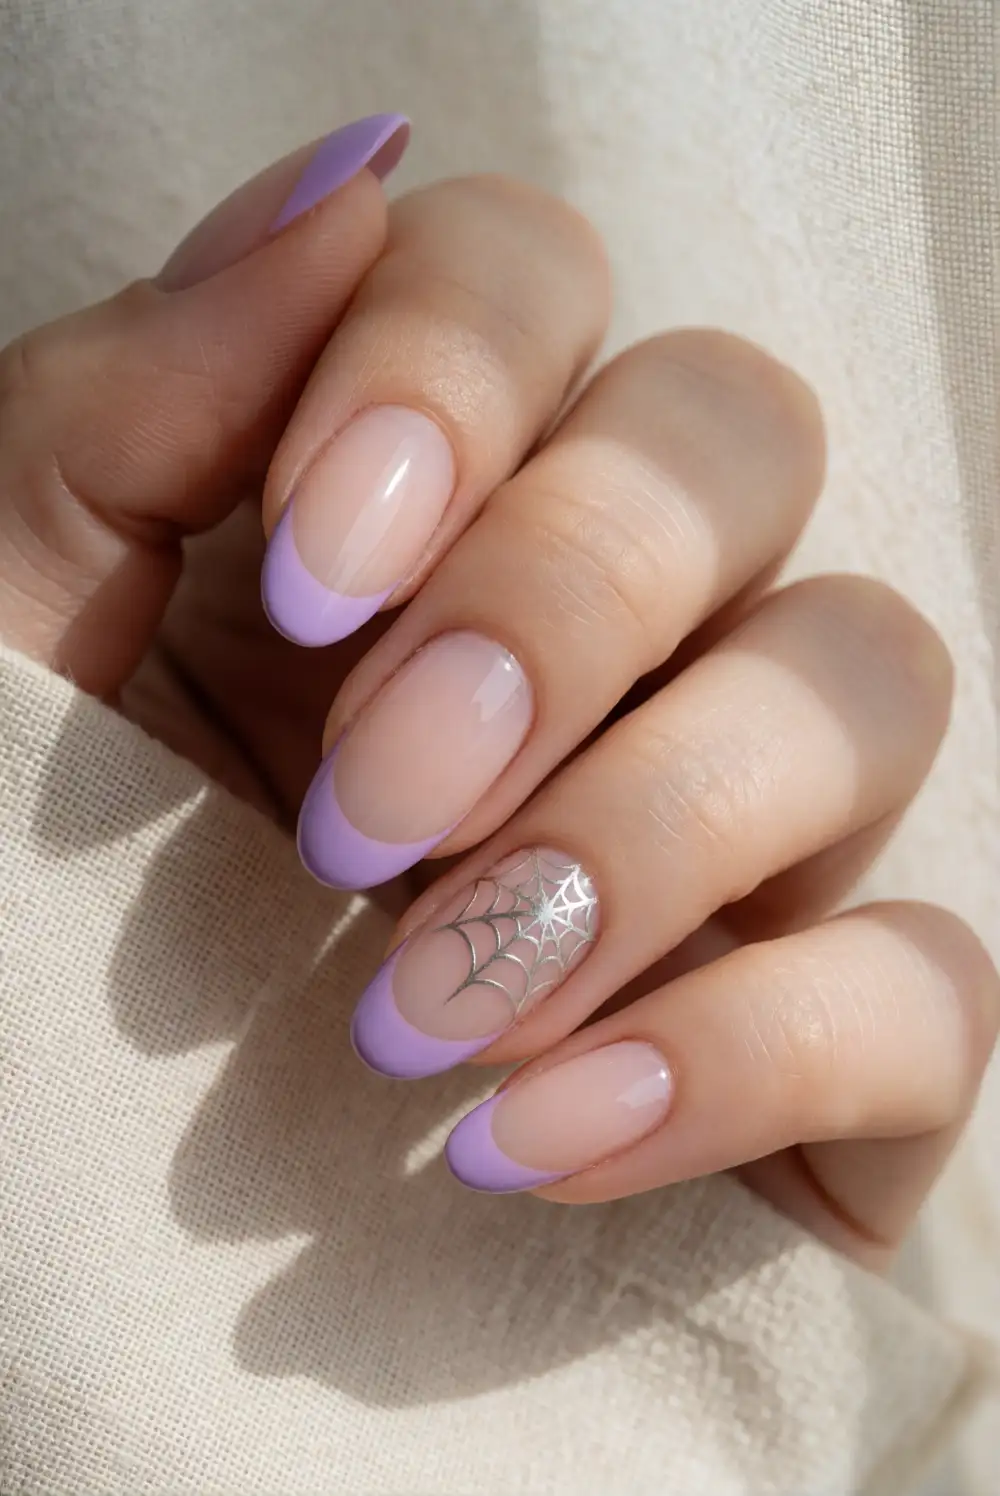
Begin with a sheer nude or pale pink base and paint lavender French tips using a detail brush or tip guides. After the tips are dry, draw a few thin white or silver lines radiating from one corner of an accent nail. Connect the lines with small curved strokes to create a delicate web. The web can sit over the lavender tip or extend slightly onto the base, while the remaining nails stay simple. Seal the finished design with clear top coat.
Make the web subtle by using a shade only slightly lighter than the tip, or choose metallic silver for a brighter contrast. If painting a full web feels difficult, place a small web on just one nail and use plain lavender tips elsewhere. Rounded or almond-shaped nails both suit this design, and a sheer base helps the colors feel light. Keep the lines thin and spaced apart so the web remains crisp when viewed from a distance.
Cream and Purple Checkerboard Nails
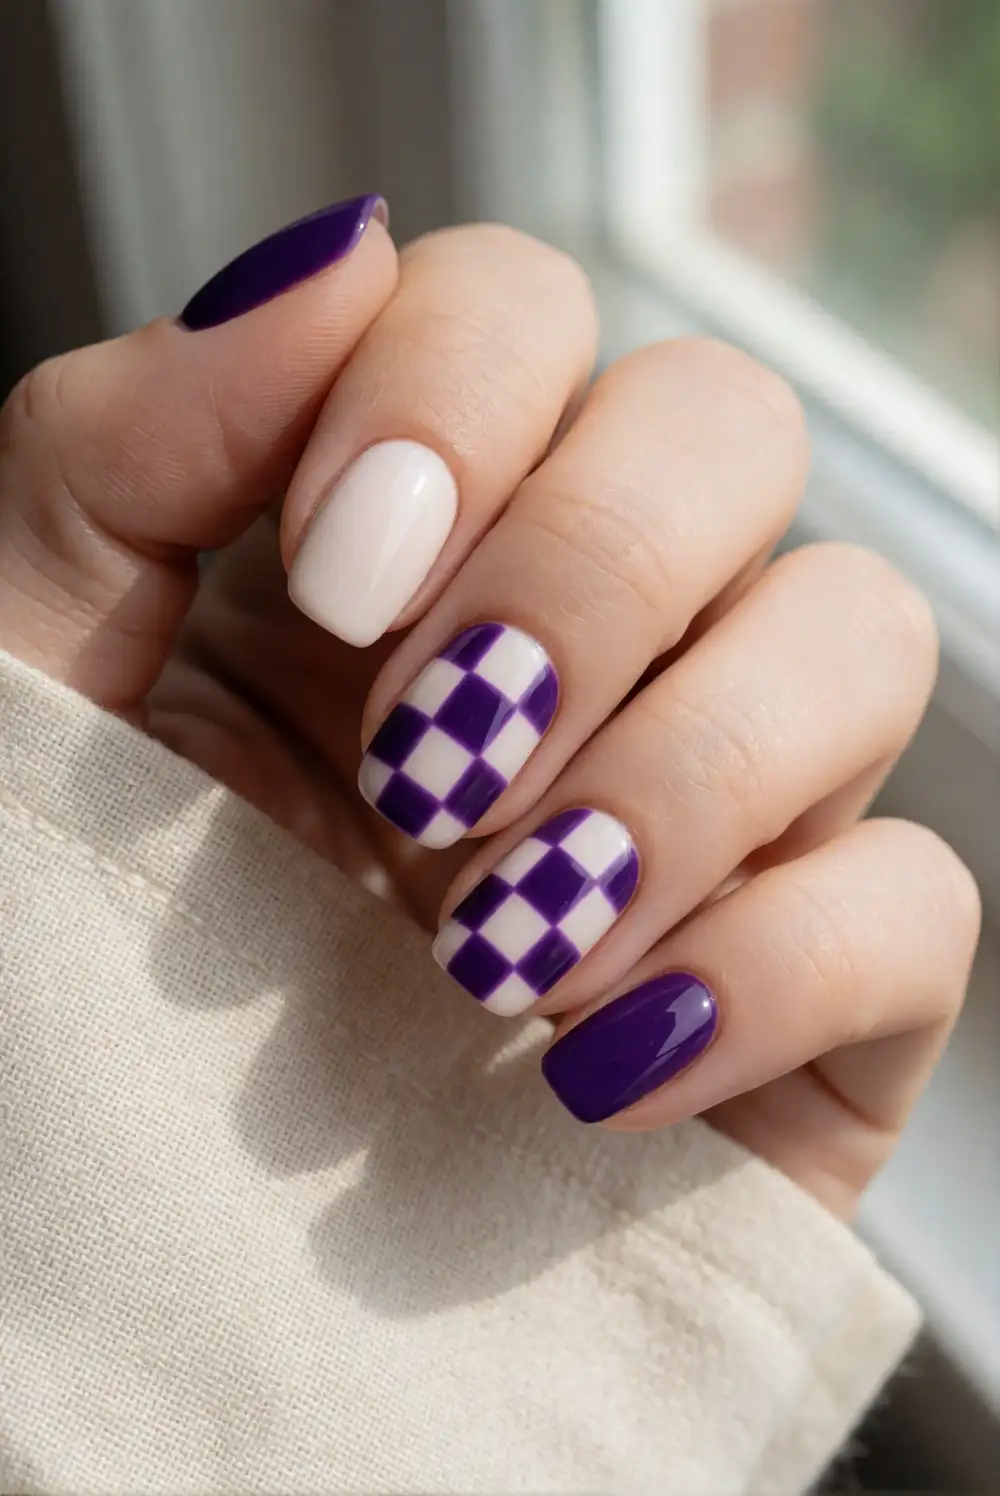
Apply a creamy ivory base and allow it to dry thoroughly before making the checkerboard pattern. Use a thin nail-art brush to paint small purple squares in alternating positions, working from one side of the nail to the other. A striping brush or square stencil can help create neater edges, but slight variations give hand-painted checks a relaxed feel. Keep the pattern on one or two accent nails and paint the rest a solid purple or ivory.
Choose a deep violet for bold contrast or a soft lilac for a gentler finish. Short nails work well with a few larger checks, while longer nails can fit a tighter pattern. For a cleaner look, place the checkerboard only along the tip as a graphic French manicure. A glossy top coat smooths the surface and brings the colors together. Pair the design with simple jewelry so the geometric pattern remains the focus.
Emerald Green Potion Bottle Nails
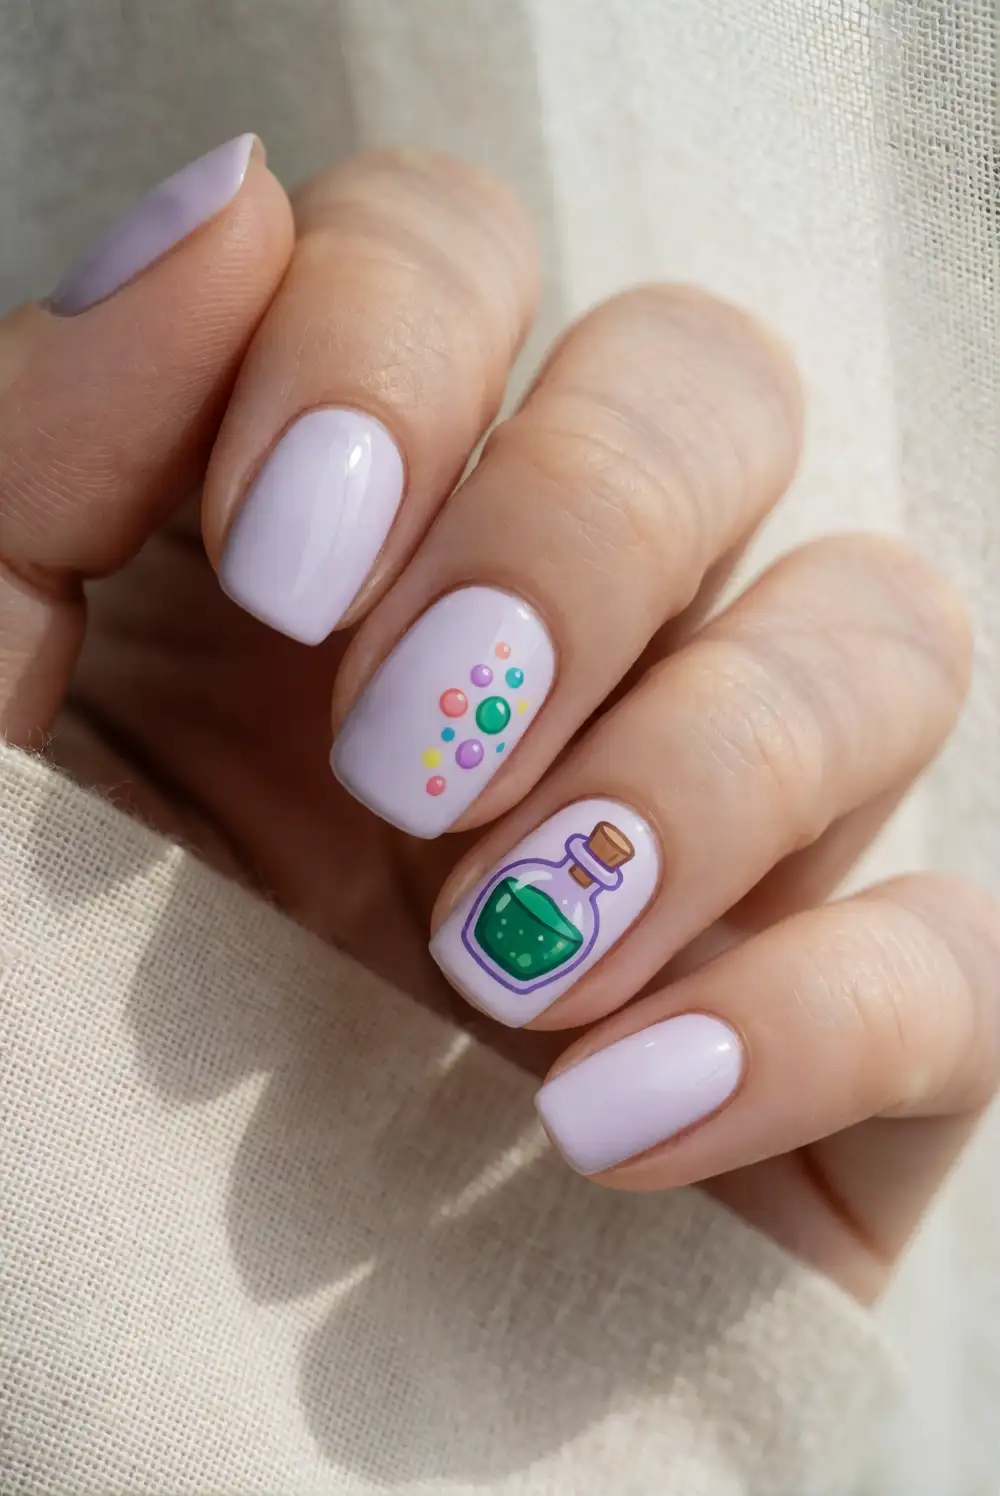
Use a sheer neutral or pale lavender polish as the base, then paint a small emerald-green bottle on an accent nail. Build the shape with a rounded rectangle and a short neck, leaving enough space for a contrasting cap. Add a tiny white highlight and a few colored dots nearby to suggest bubbles, without adding lettering or labels. Use a fine nail-art brush for the bottle outline and fill, then let the design dry before applying a protective clear coat.
For a simpler interpretation, paint the nails emerald green and add one small bottle silhouette in cream or silver. A lilac cap or a touch of shimmer can give the design a playful, potion-like finish. Keep the bottle centered and use only a few bubbles so the image stays legible on a small nail. This look works especially well with rounded nails and can be adapted with teal or forest green polish.
Pastel Candy Corn Color-Block Nails
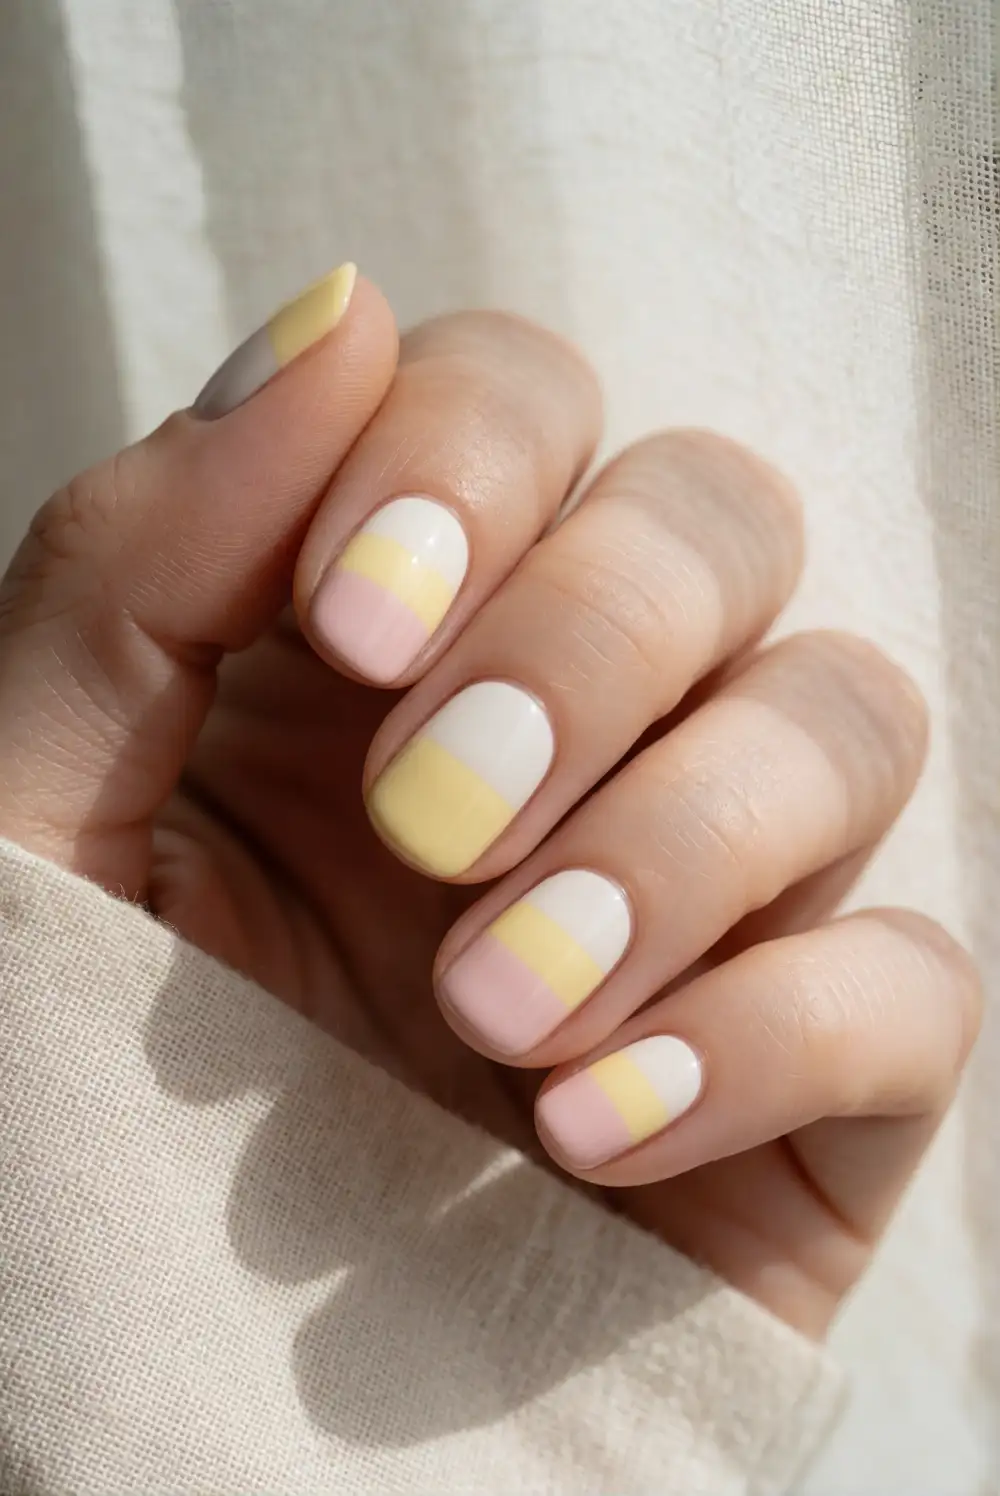
Give a familiar Halloween sweet a softer palette by painting each nail in three horizontal color blocks: creamy white, pale yellow, and blush pink. Use thin nail-art tape to mark the bands, letting each layer dry before adding the next. On shorter nails, place the colors in broad sections; on longer nails, use slimmer stripes for a delicate look. Finish with a glossy top coat to even out the transitions and help the color-blocked design last.
Vary the order of the colors from nail to nail for a playful mismatched manicure, or keep the same arrangement across every finger for a coordinated finish. A sheer base can soften the overall effect, while brighter yellow and pink make the design more vivid. If tape feels cumbersome, paint loose bands with a flat brush and embrace slightly rounded edges. The pastel palette keeps the look cheerful and pairs easily with cream or lavender clothing.
Icy Blue Crystal Accent Nails
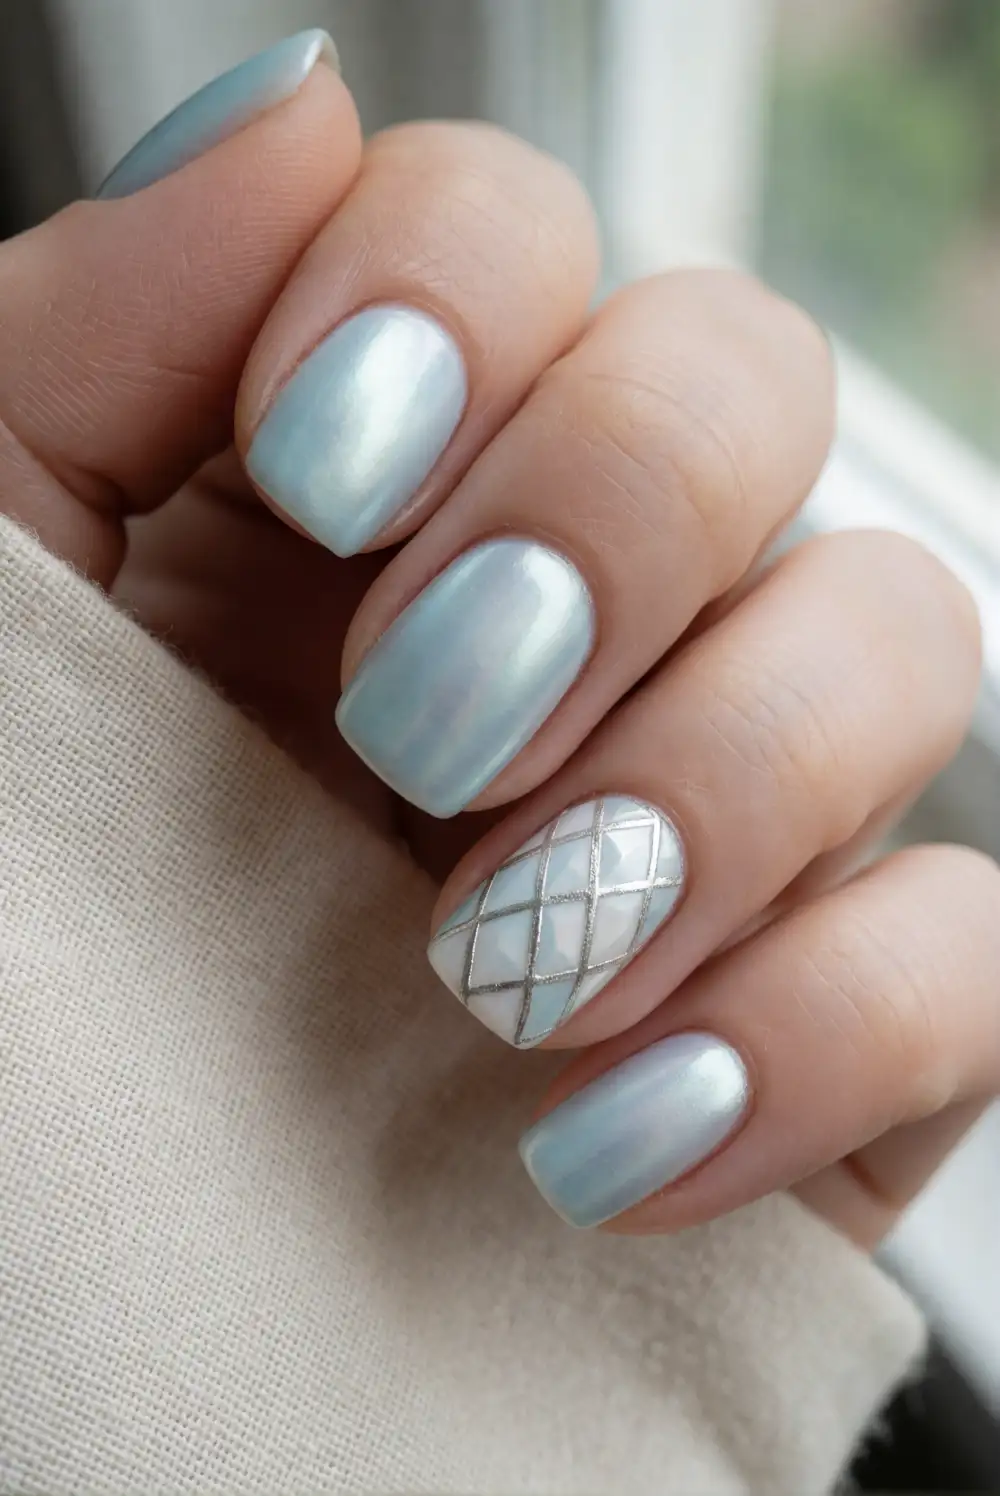
Paint the nails a pale icy blue or translucent pearl shade, then select one accent nail for a simple cluster of crystal-like shapes. Use a fine brush to draw a few angular lines in silver, white, or a deeper blue, joining them into small geometric facets. Add a touch of shimmer polish inside some shapes and leave others transparent. Allow the design to dry completely, then apply a smooth clear top coat to give the manicure a glassy finish.
Keep the crystal cluster near the tip or along one side of the nail so the artwork does not feel heavy. A fine silver line on the remaining nails can echo the accent without repeating the full design. For a more understated version, use a pearly base and draw only a few icy-blue facets. This cool-toned manicure offers a seasonal alternative to traditional Halloween shades and looks especially elegant with silver accessories.
Burgundy Velvet Bat Nails
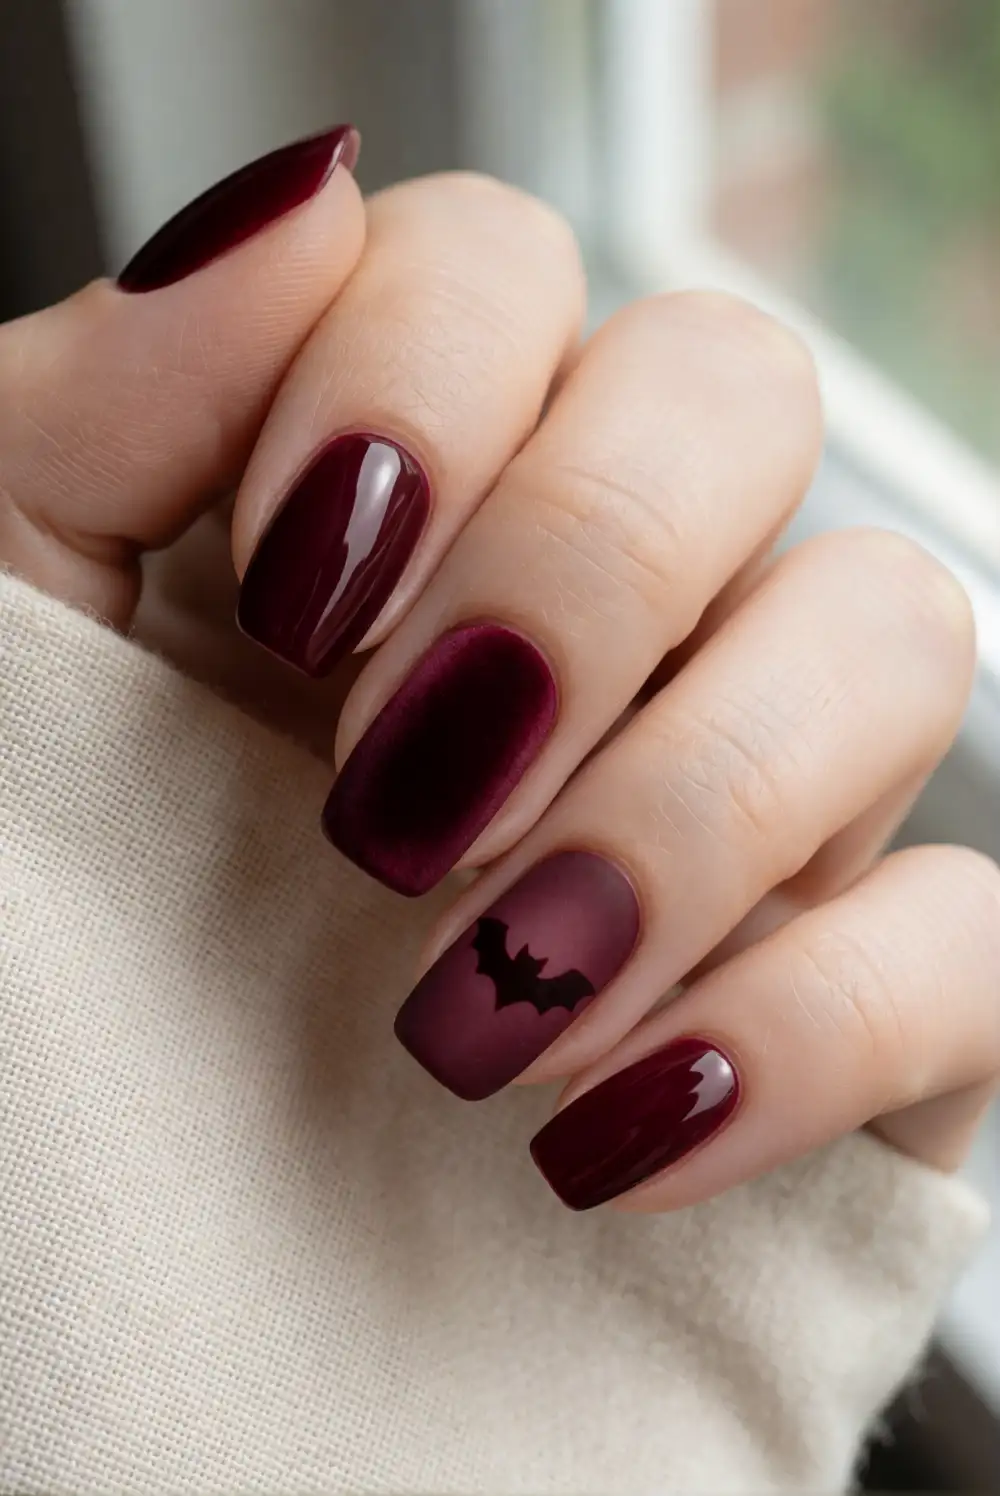
Apply a rich burgundy polish to each nail and choose one accent nail for a small bat silhouette. Use a fine brush to paint a compact oval body with simple scalloped wings in black, charcoal, or a darker burgundy. A matte top coat can create a soft velvet-like effect, while a glossy bat over a matte base gives the detail extra definition. Let each layer dry fully, especially before applying a top coat over the artwork.
Make the bat a subtle tone-on-tone detail for a refined manicure, or choose pale cream for a more graphic contrast. One bat on each hand is often enough; keep the other nails solid burgundy or add a slim metallic line near the tips. If painting wings by hand is challenging, use a small nail-art stencil and remove it carefully once the polish is set. The deep color feels seasonal while staying wearable beyond Halloween.
Teal and Lilac Marble Swirl Nails
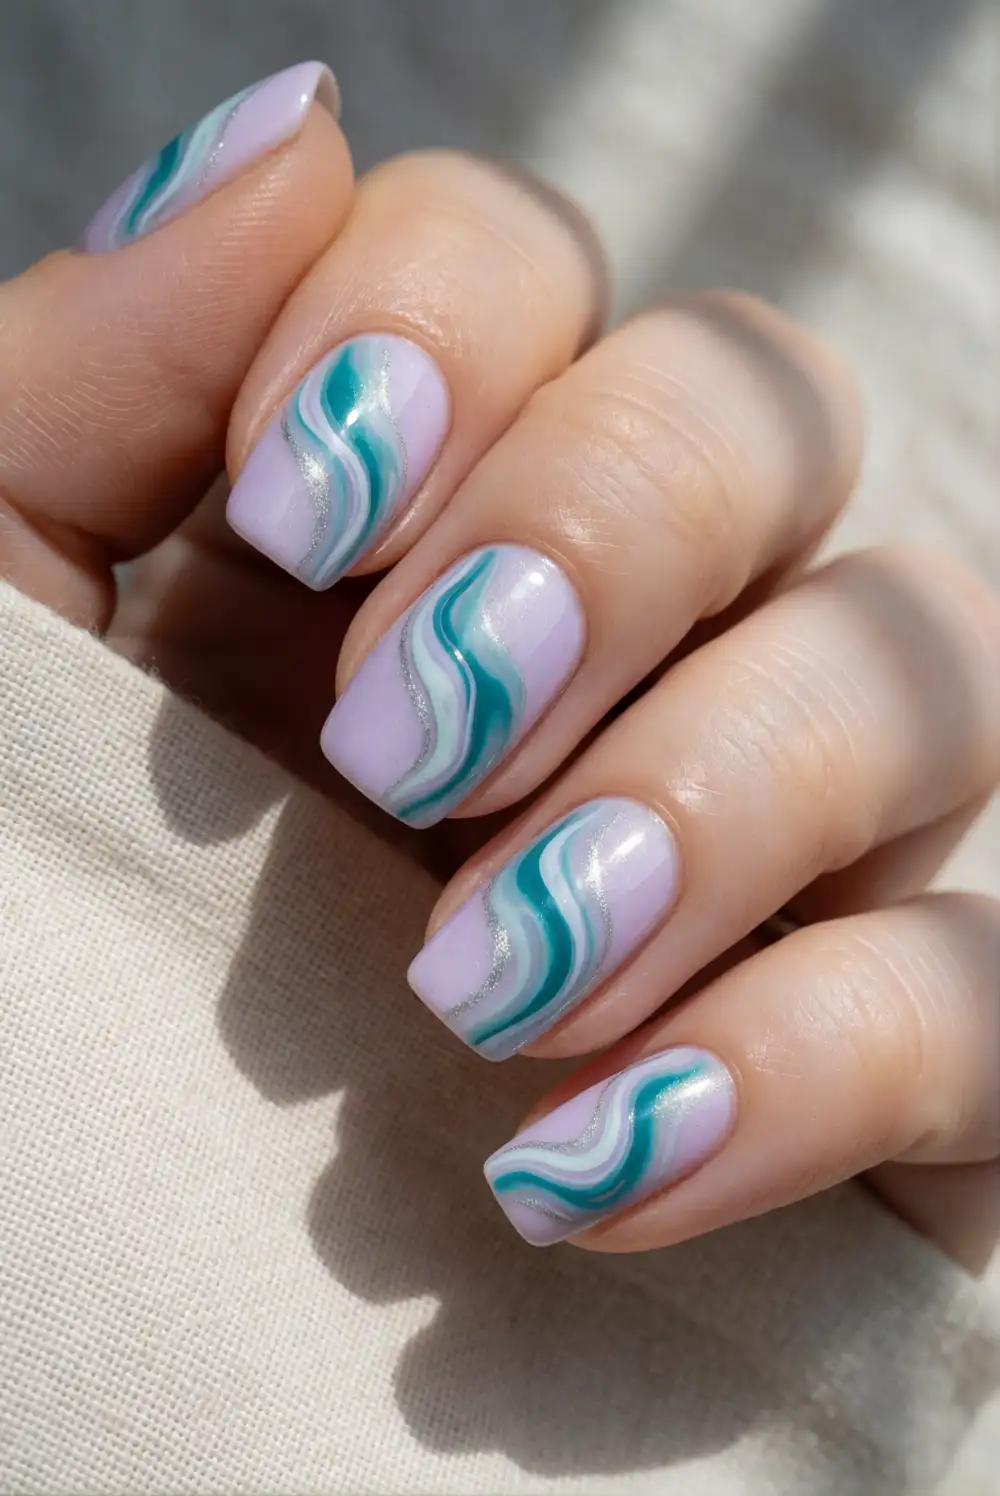
Start with a pale lilac base, then add a few small drops of teal and milky white polish while the surface is slightly tacky. Use a fine brush or toothpick to gently pull the colors into loose, flowing curves, stopping before they blend into one flat shade. Work on one nail at a time so the polish remains workable. Once the swirls are dry, add a glossy top coat to smooth the surface and enhance the marble-like movement.
For a more controlled design, paint two or three curved stripes on each nail rather than swirling the colors together. A hint of silver shimmer can be added sparingly for a moonlit finish, while a matte top coat gives the pattern a softer appearance. Keep the background pale to let the teal and lilac stand out. Since every swirl will differ slightly, repeating the same colors across the nails helps the manicure feel cohesive.
Pearl White Skeleton Hand Nails
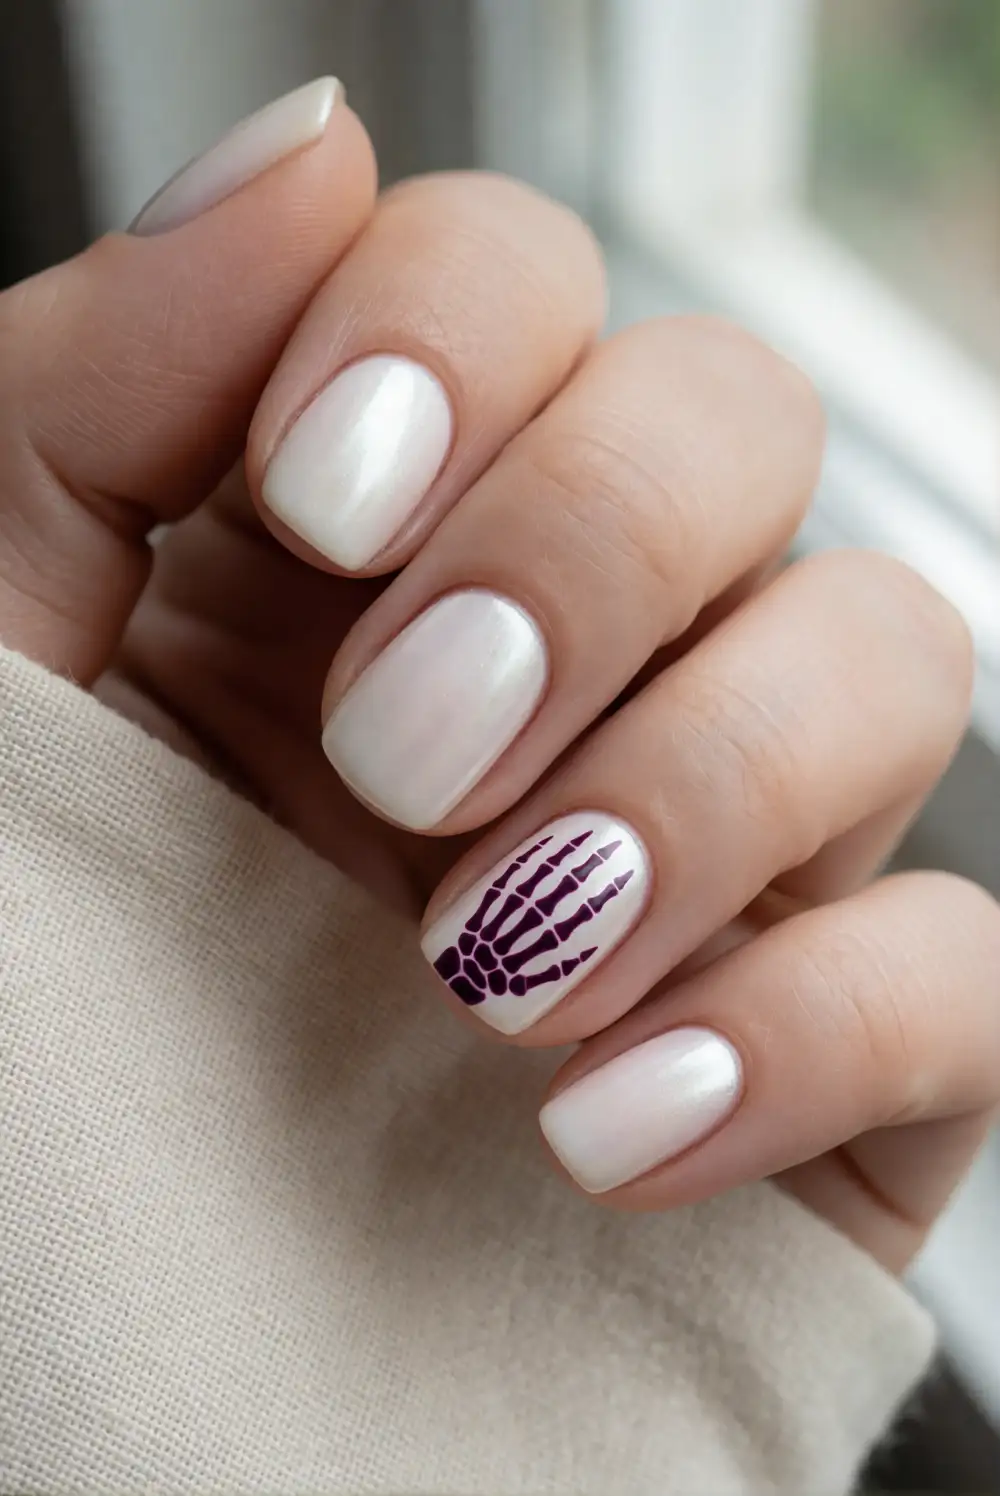
Coat the nails in pearl white or a sheer ivory polish and choose a dark plum accent nail for a simplified skeletal hand. With a fine nail-art brush, paint a small palm shape and several thin finger lines, using short strokes that fit the nail’s surface. Keep the illustration graphic rather than attempting tiny anatomical details. Let the lines dry before adding top coat, and use a gentle touch with the brush to avoid dragging the design.
Place the hand illustration on only one or two nails and leave the rest pearly white for a clean, luminous manicure. A pale gray outline can soften the contrast, while a dark plum background makes the design easier to see. If the finger lines are tricky, use a simple skeletal-hand nail decal without printed words. The subtle color palette gives this Halloween motif a polished finish that pairs well with silver jewelry and cool-toned outfits.
Halloween nails do not have to rely on orange and black to feel seasonal. Try a single accent design in plum, sage, berry, blue, or lavender, or combine several ideas for a playful mismatched set. Start with the techniques that feel comfortable, let each polish layer dry, and finish with a top coat to protect your artwork. With unexpected colors and small details, your manicure can feel festive, personal, and easy to wear.








