
Give your Halloween manicure a polished, otherworldly finish with chrome, reflective foil, and metallic accents. These wearable nail ideas pair seasonal shades with eye-catching shine, from molten silver French tips to pumpkin-inspired copper details. Each design can be adapted to your preferred nail length and done at home or brought to a nail appointment.
Molten Silver French Tips
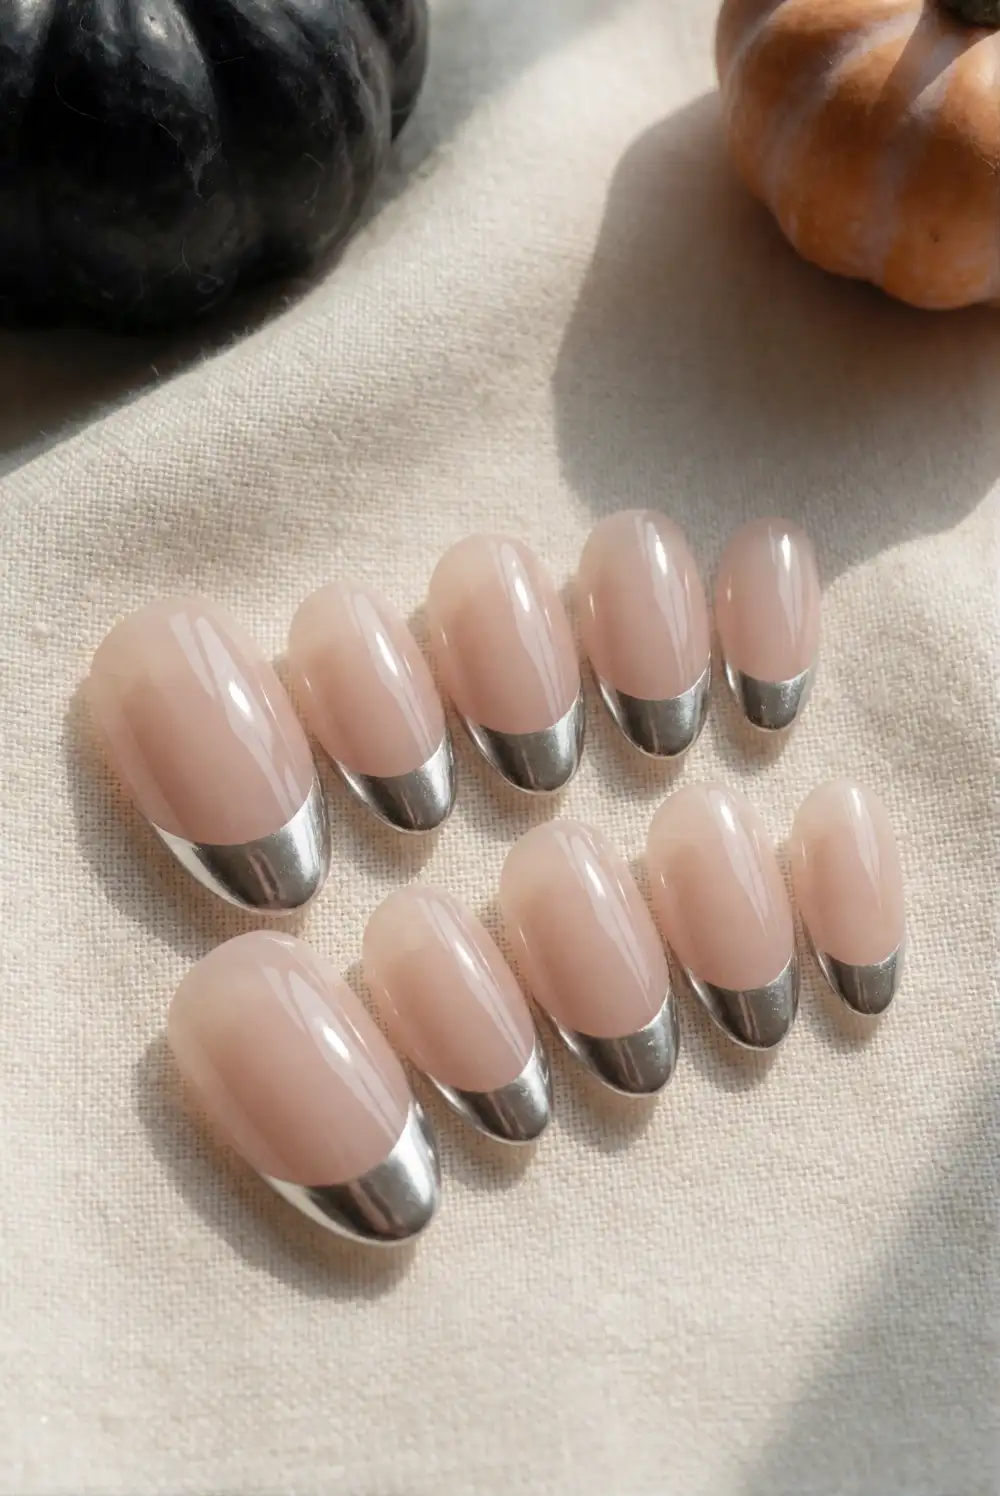
For a sleek Halloween manicure, keep the nail bed sheer pink or milky beige and replace the classic white French edge with reflective silver chrome. Shape the nails into soft almonds or rounded squares, apply the base color, and cure it according to the polish instructions. Paint a narrow curved tip, then press chrome powder over the tacky layer or use metallic silver polish. Seal the finished edges with a compatible top coat.
Keep the tips fine for a subtle glint, or make them deeper for a bolder mirror effect. A single silver accent nail can balance the shine if you prefer a quieter set. This design pairs especially well with black clothing and silver jewelry, and its neutral base makes it easy to wear beyond Halloween. For a crisp finish, use a curved nail guide or ask a nail artist to tailor the smile line to your nail shape.
Chrome Pumpkin Accent Nails
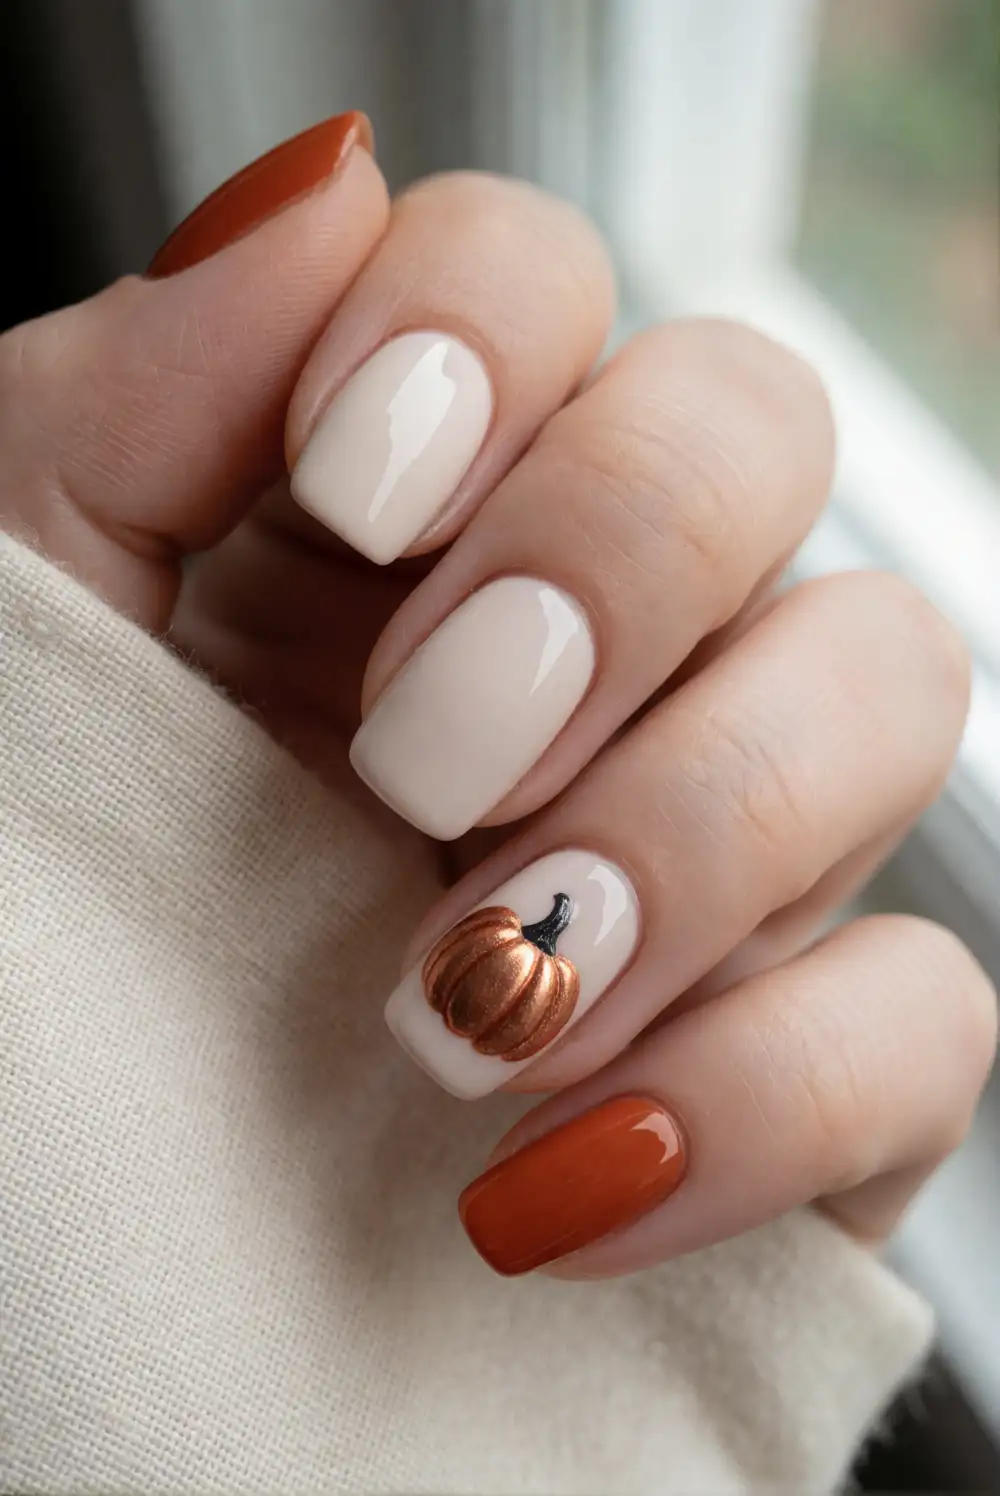
Bring a little harvest color to a glossy manicure with a small metallic pumpkin on one or two nails. Paint the remaining nails in warm cream, burnt orange, or deep brown, leaving the accent nail a pale neutral. Once the base is dry, draw a rounded pumpkin shape in copper or orange metallic polish, add fine curved grooves, and finish with a tiny green stem. Cure and seal the design with a glossy top coat.
Place the pumpkin near the cuticle for a delicate detail, or center it on the nail for a more illustrative look. Copper chrome gives the motif a reflective finish, while a flat metallic polish keeps the design easier to create at home. Add a fine gold outline only if the pumpkin shape needs definition. The accent works beautifully with plain orange nails and can be repeated on a pedicure for a coordinated seasonal look.
Black Cat Eye Chrome Nails
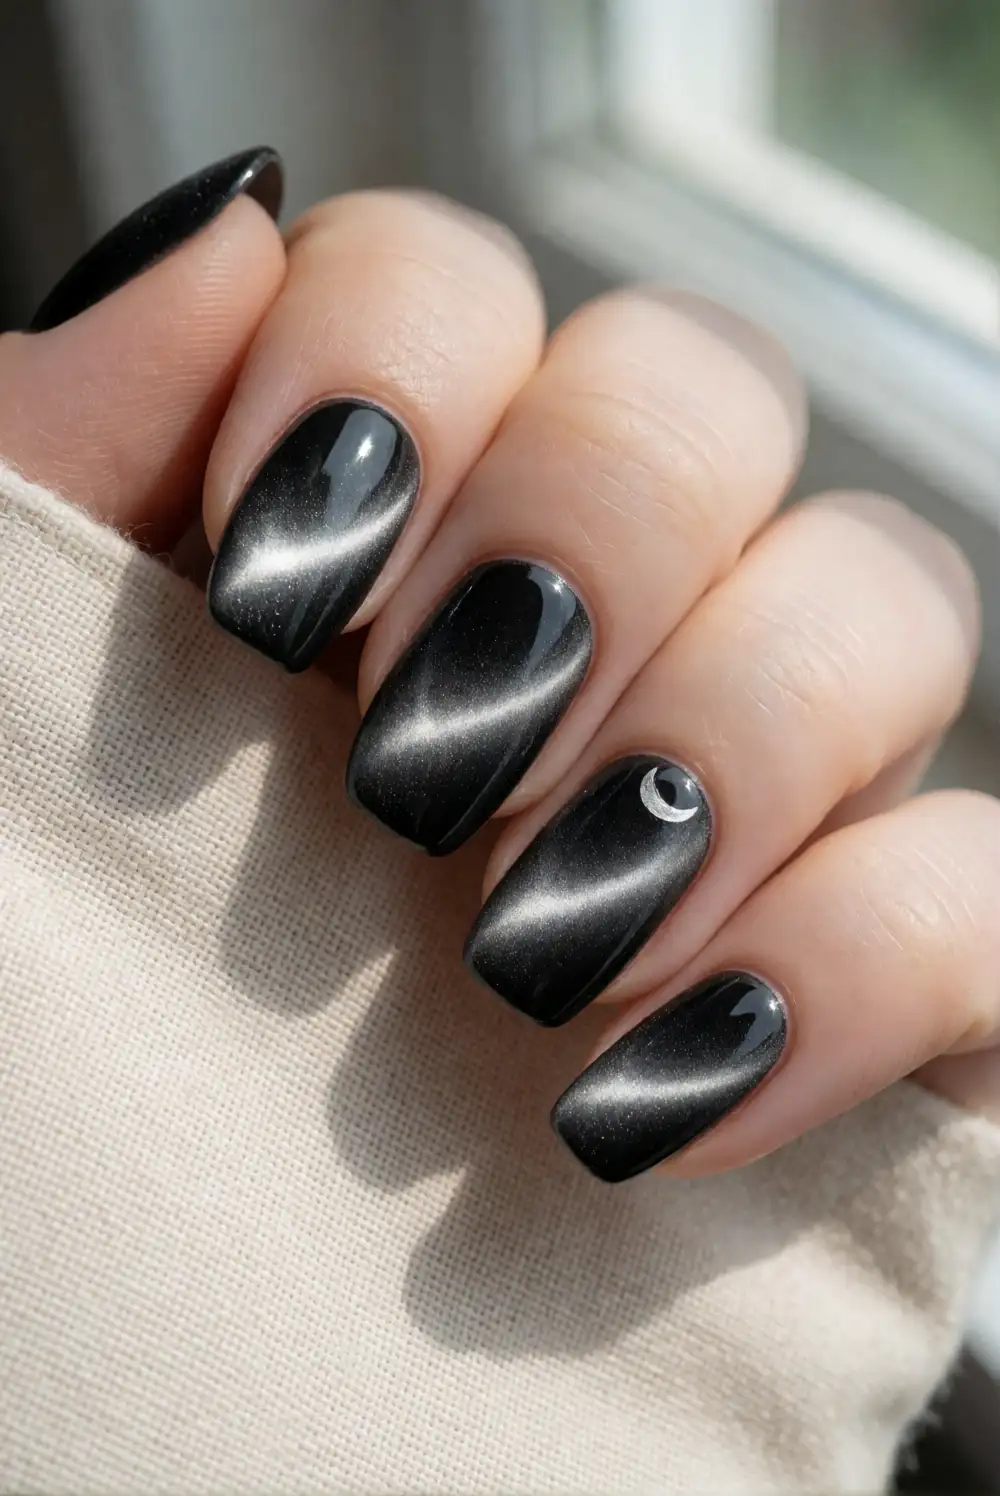
Create a mysterious, polished manicure with black magnetic cat-eye polish and a cool metallic sheen. Apply a dark base coat, then brush on a layer of magnetic gel polish. Hold the magnet close to each nail to pull the reflective particles into a slim diagonal or centered beam, following the product directions before curing. A glossy top coat deepens the inky finish. For an extra seasonal touch, add a tiny silver crescent on one accent nail.
Move the magnet slowly and keep its position consistent to give the set a cohesive glow. A single bright stripe feels sleek, while a soft, scattered reflection creates a more smoky effect. Keep the surrounding nails plain so the magnetic finish remains the focus. If working with gel products, follow the manufacturer’s curing and skin-contact guidance. This design looks especially striking on short, rounded nails as well as longer almond shapes.
Silver Spiderweb Chrome Details
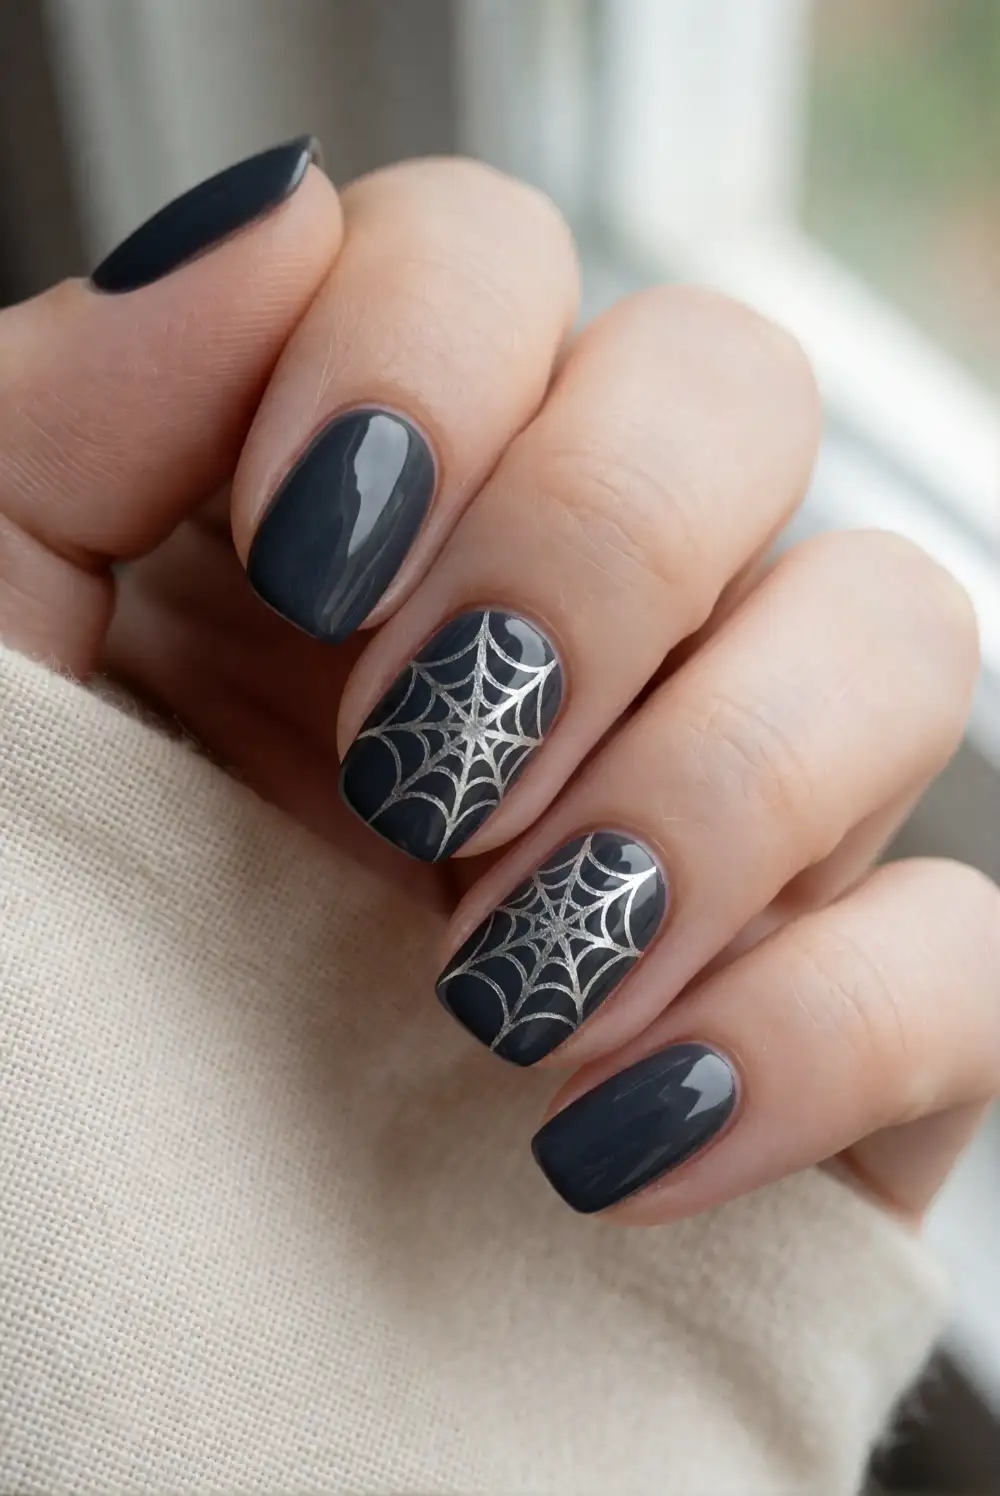
Fine silver web lines turn a simple dark manicure into a Halloween-ready design without covering every nail. Start with a glossy charcoal or black base and let it dry or cure completely. On one or two accent nails, draw several delicate lines from a corner or the nail edge, then connect them with gently curved cross-lines. Use a thin nail-art brush and metallic silver polish, or apply chrome powder over a suitable tacky design layer before sealing.
Leave plenty of dark space around the web so its delicate structure stays legible. An off-center web feels modern and is often easier to paint than a perfectly symmetrical one. For a softer interpretation, use a deep plum base and pale silver detailing. Keep the other nails in a matching solid color, or add one chrome French tip to tie the manicure together. A glossy finish gives the web crisp contrast under evening light.
Liquid Metal Drip Nails
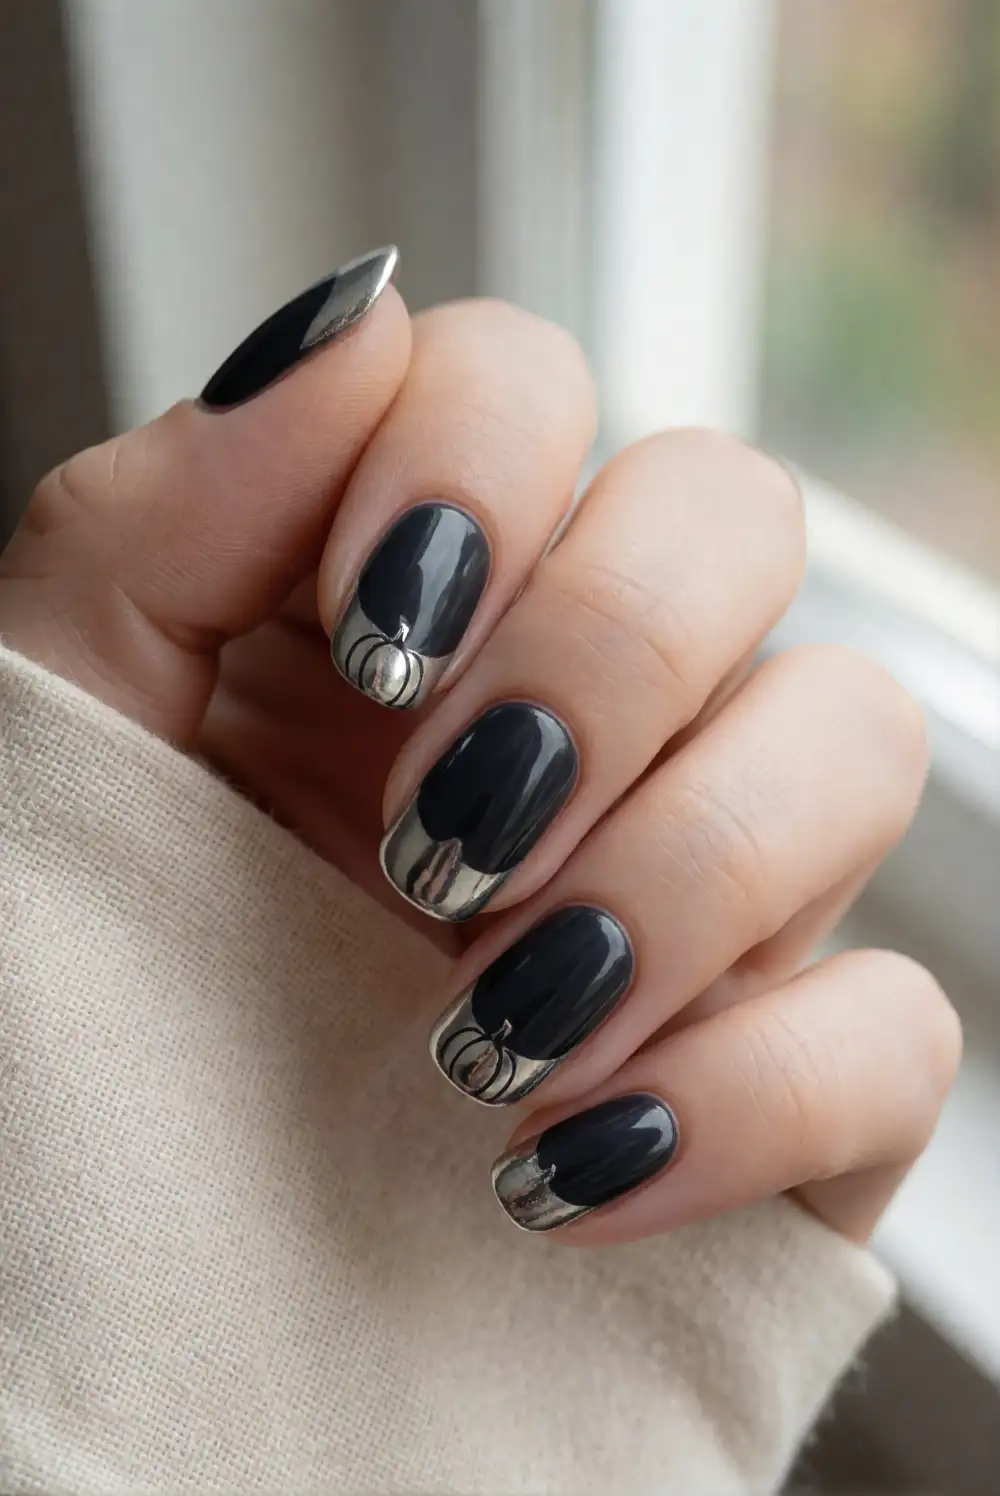
Metallic drips create the impression of liquid silver or molten gold sliding over a Halloween-colored manicure. Paint the nails in glossy black, oxblood, or deep green, then use a fine brush to draw an uneven metallic line near the cuticle or tip. Pull a few rounded drips down from the line, varying their length for a natural melted effect. Let the design dry or cure fully, then add a clear top coat to smooth and protect it.
Silver against black gives the strongest contrast, while copper over burgundy feels warmer and more understated. You can place the drips at the cuticle for a reverse French look or along the free edge for a classic tip variation. Keep the metallic shapes rounded rather than sharply pointed to suggest liquid metal. Try the design on just a pair of accent nails if you want a more comfortable everyday manicure.
Copper Moon Phase Nails
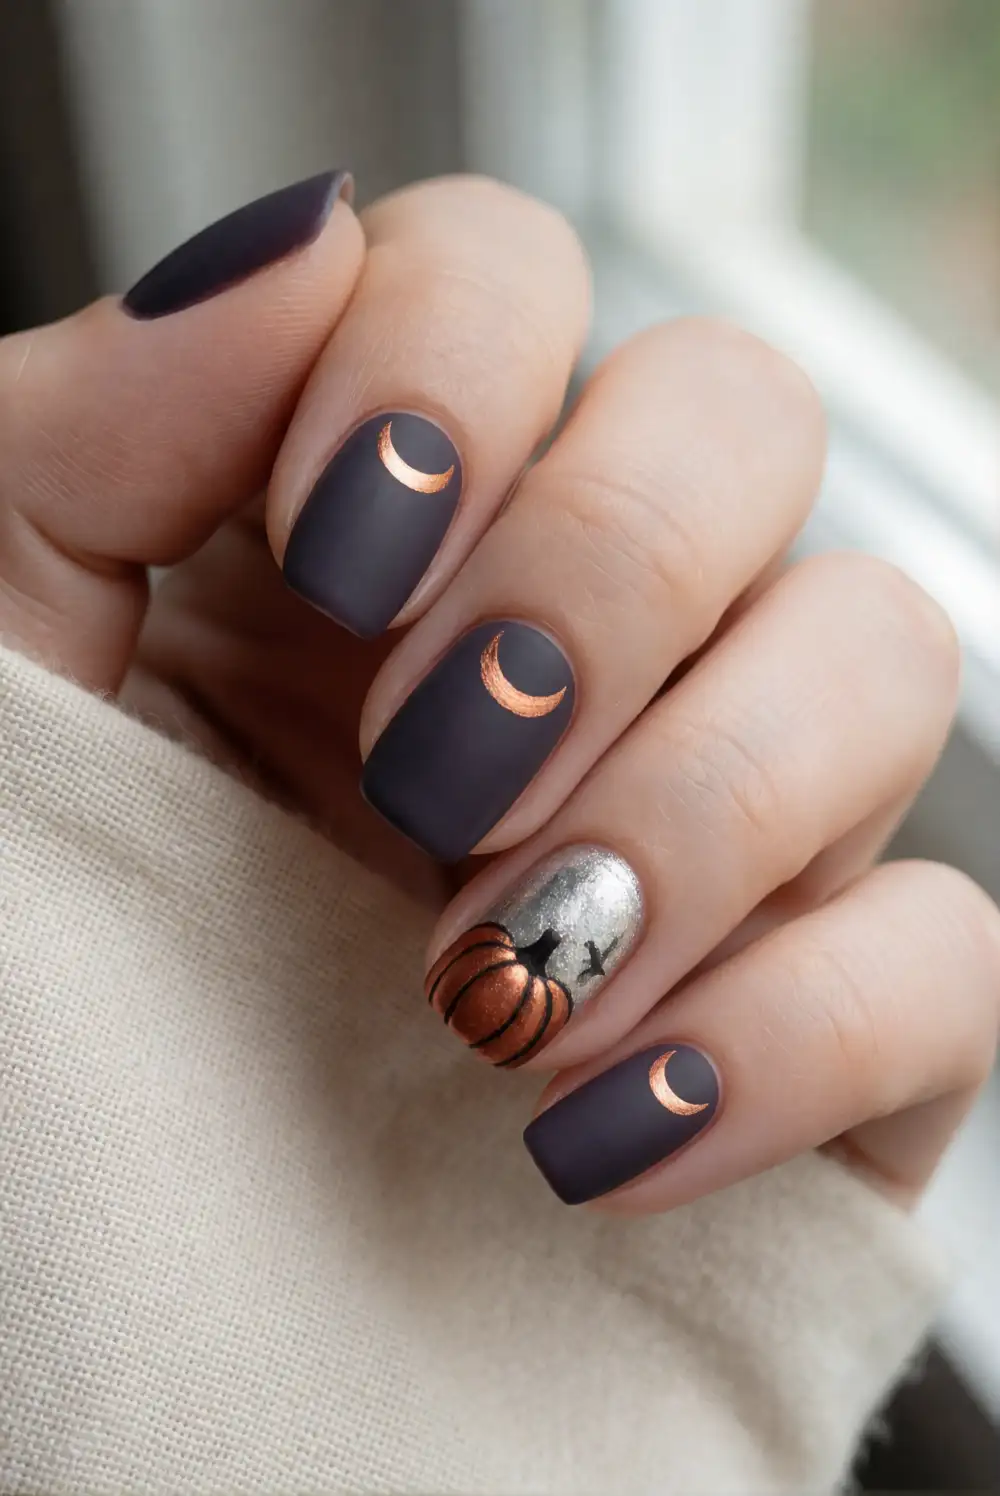
Pair a midnight base with copper metallic moons for a celestial Halloween manicure. Apply a deep navy, plum, or charcoal polish across the nails and allow it to dry or cure. Use a small detail brush to paint crescent moons in copper foil polish, spacing them across a few accent nails. To make a crescent, paint a curved metallic shape and refine its inner edge with the base color. Finish with a smooth glossy top coat.
Vary the moon sizes slightly to give the set an intentionally hand-painted feel, or repeat one small crescent on each nail for a coordinated pattern. Copper brings warmth to cool dark shades, while silver can create a sharper, moonlit contrast. A single crescent near the cuticle keeps the look minimal. Add a few tiny metallic dots only if there is enough space to keep the design clean and uncluttered.
Sweet Chrome Ghost Nails
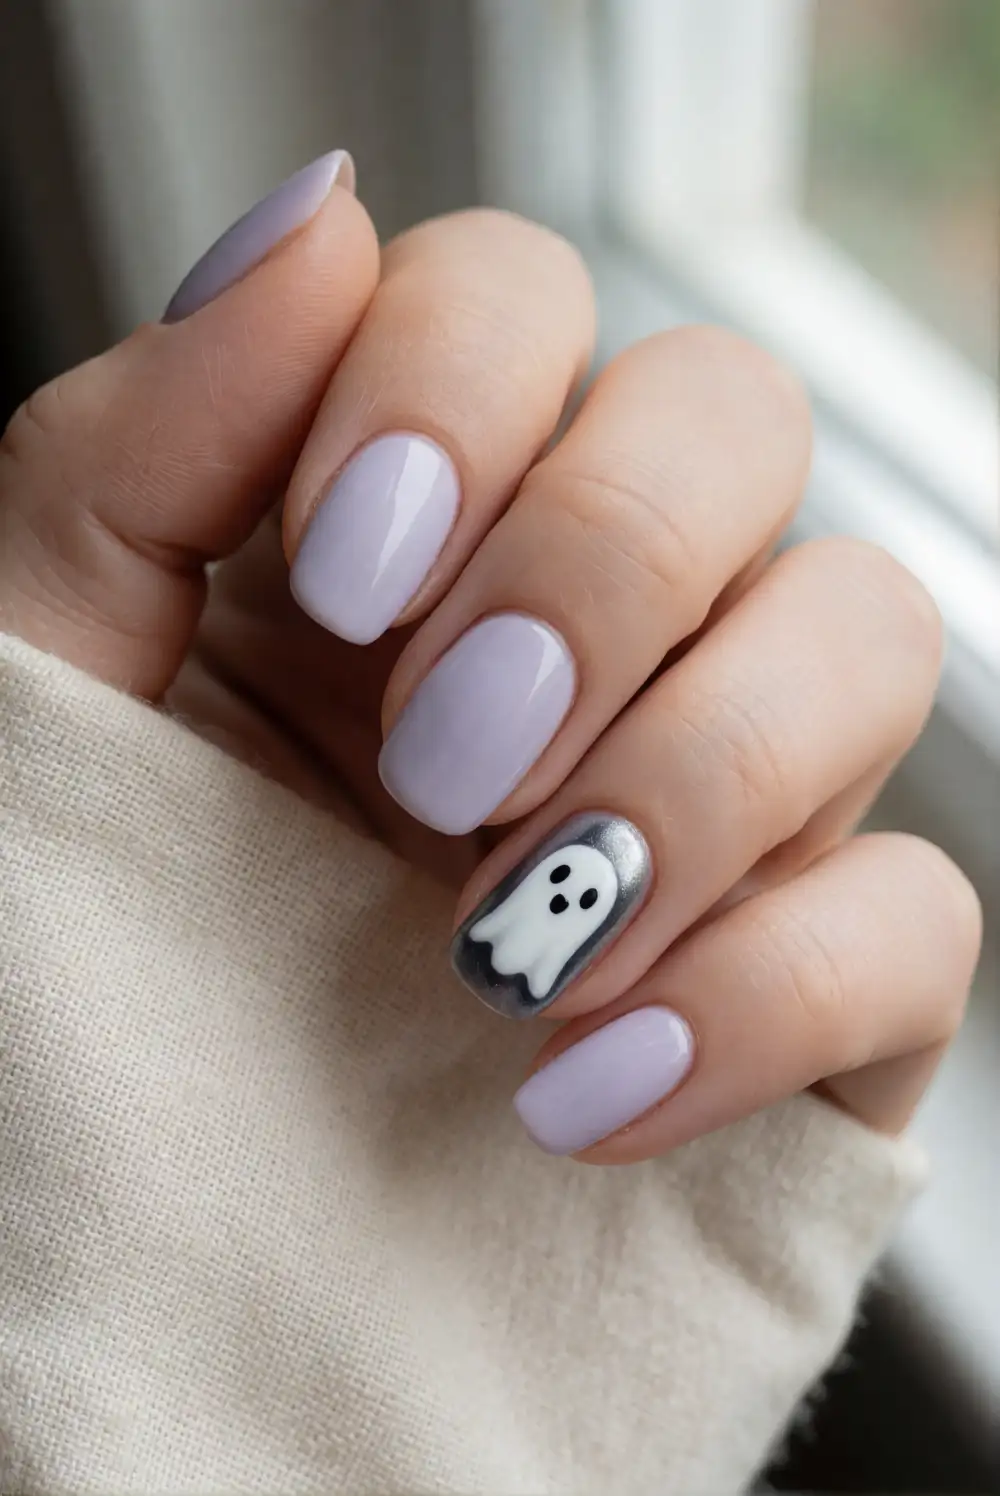
For a playful seasonal manicure, paint a small, friendly ghost in pearly chrome over a sheer blush or pale lavender base. Use white or pearl metallic polish to create a rounded head and a softly wavy lower edge on one accent nail. Once the shape is dry, add two tiny black facial dots with a fine nail-art brush. Keep the remaining nails glossy and simple so the little ghost stands out without making the whole set feel busy.
A pearly finish gives the ghost a gentle shimmer, while bright silver chrome makes it more reflective. Place the design near the tip or slightly off-center, depending on the nail shape. If detailed painting is tricky, use a small ghost-shaped stencil and metallic polish, then remove it carefully before the design fully sets. A pale base makes the motif easy to see, and a clear top coat helps keep the edges smooth.
Emerald Witchy Aura Nails
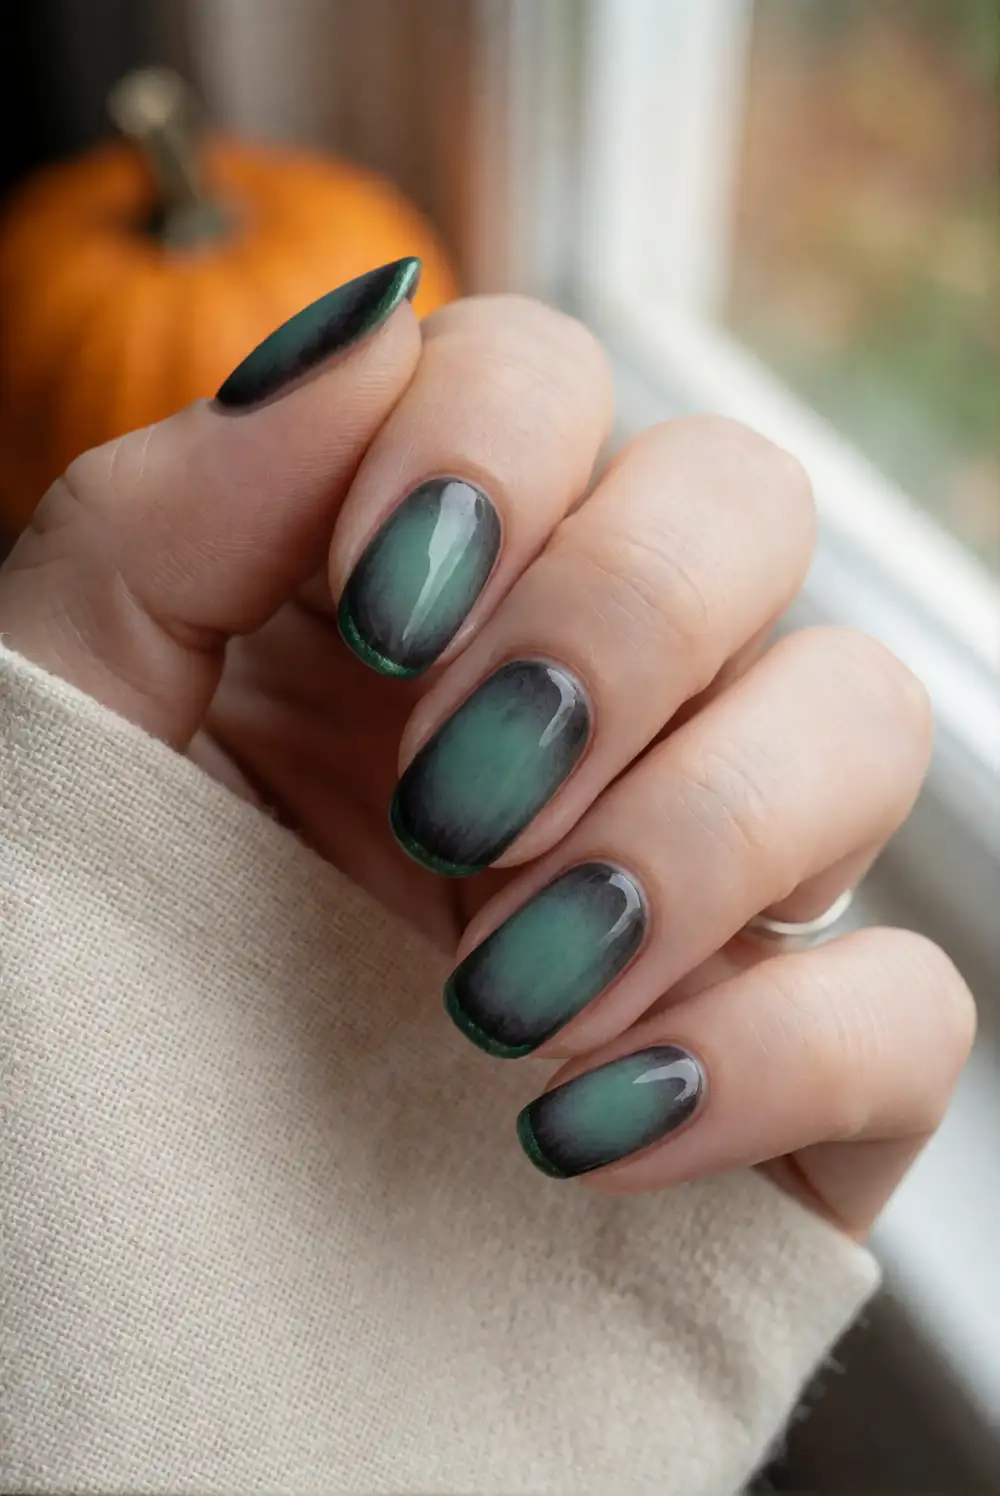
Blend a deep emerald center into blackened edges for a moody aura effect, then add a restrained flash of chrome. Apply a dark base and use a makeup sponge to dab green polish toward the center of each nail, building a soft halo with repeated light layers. Cure or dry between coats as needed. Finish with a slim metallic silver or green chrome line along one side of an accent nail, then seal the set with glossy top coat.
Keep the aura soft by using small amounts of polish on the sponge and blending outward rather than drawing a hard circle. Emerald and charcoal create a rich, witchy palette, while a hint of blue-green can make the glow feel cooler. Chrome accents look most effective on one or two nails, leaving room for the blended color to show. This design suits both short and long nails, especially when paired with understated rings.
Metallic Candy Corn Tips
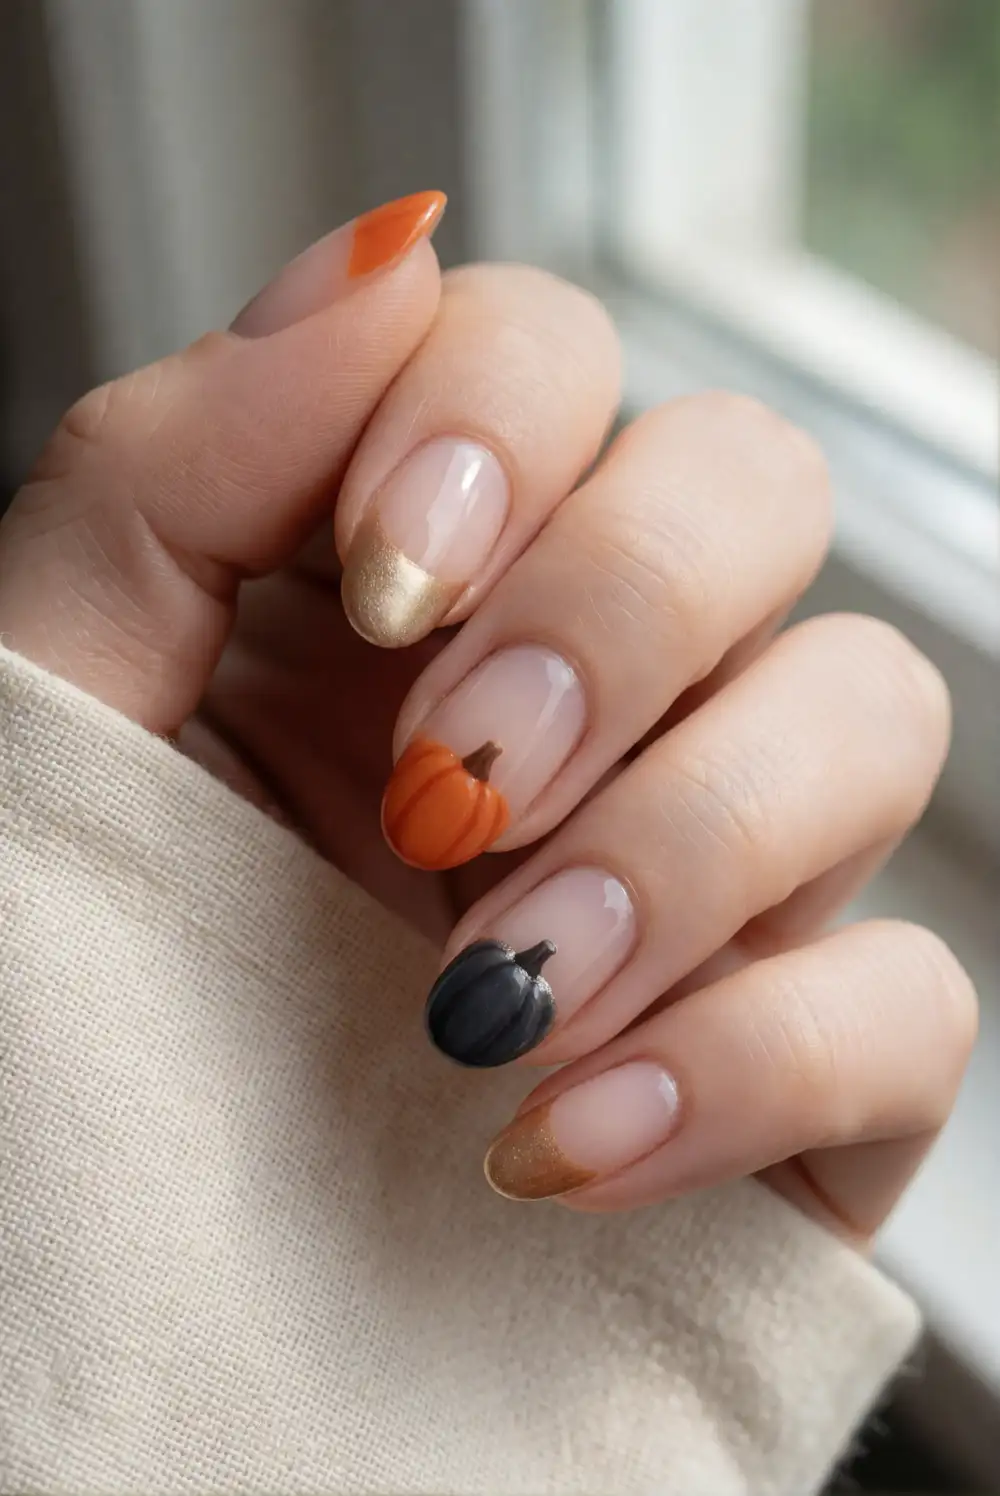
Translate candy-corn colors into a more grown-up manicure by placing slim cream, orange, and gold bands at the nail tips. Begin with a nude or sheer base coat and let it dry. Use fine striping brushes or curved guides to paint a narrow cream edge, a warm orange band, and a final metallic gold accent. Keep the color transitions tidy and seal the finished tips with a glossy top coat once every layer has set.
For a subtle version, use the three-color combination on just one or two nails and keep the rest a sheer neutral. A metallic gold line can replace a wider yellow stripe, making the design feel more refined while still suggesting the familiar seasonal palette. Adjust the bands to suit the length of the nail; shorter nails benefit from very fine lines. This cheerful detail pairs nicely with a glossy orange accent nail.
Gunmetal Ombré Chrome Nails
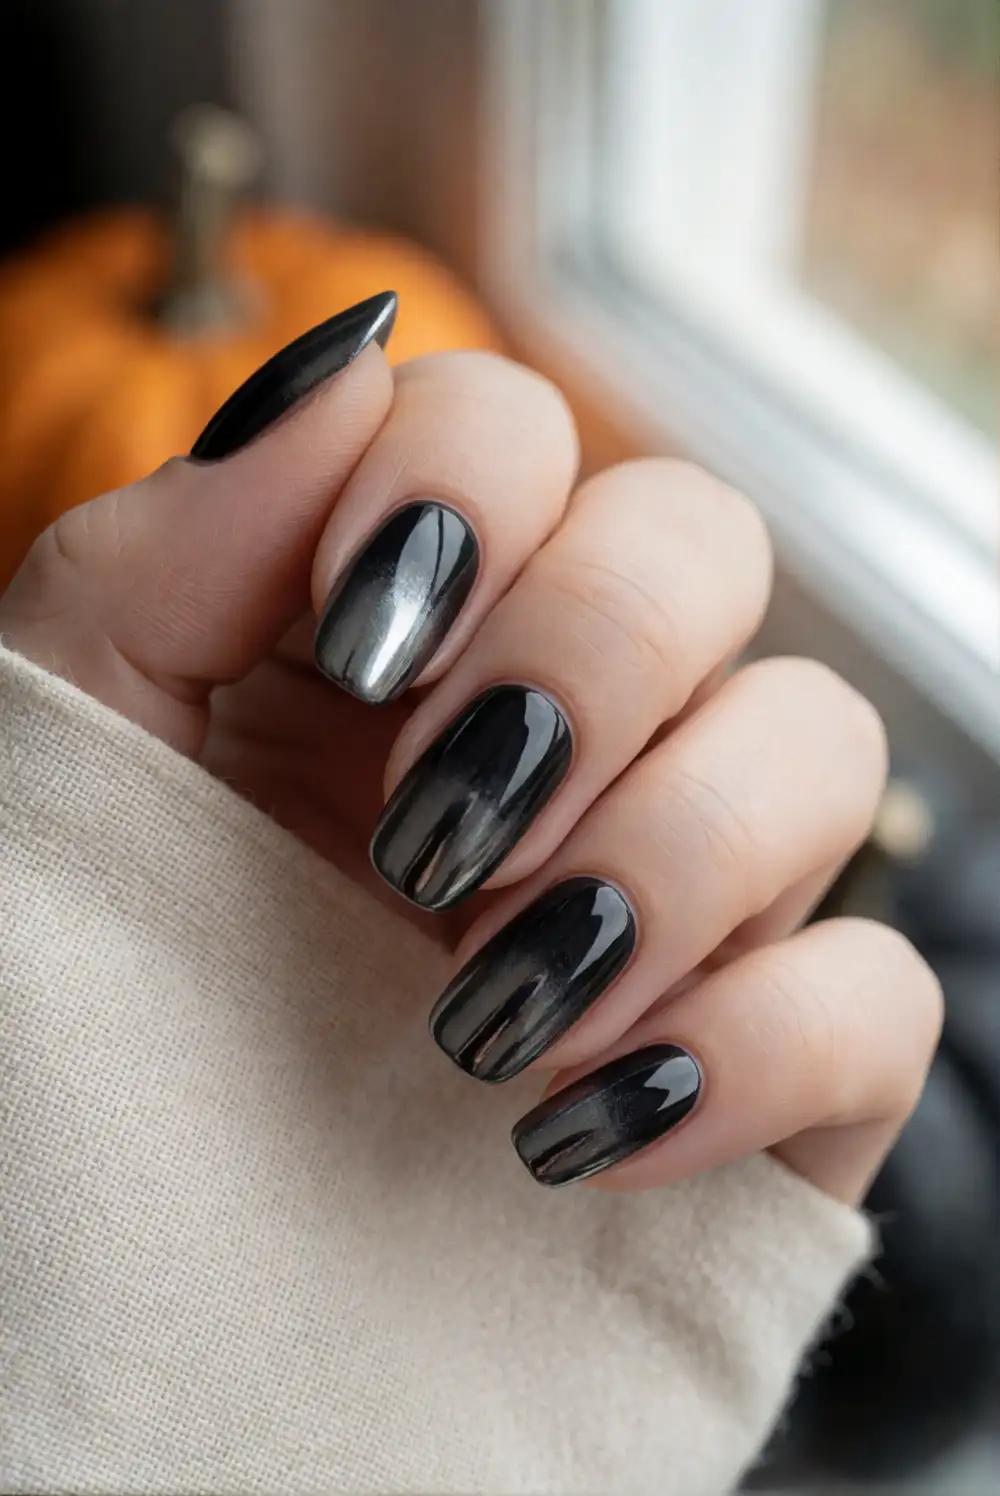
Give dark nails a reflective fade by blending black polish into gunmetal chrome at the tips. Apply a black base and allow it to dry or cure. Use a sponge to tap on gunmetal polish from the free edge toward the center, building a gradual transition with light layers. For a brighter mirror finish, rub chrome powder onto the designated gel layer according to product directions. Finish with a compatible top coat to smooth the gradient and preserve its metallic shine.
Keep the fade concentrated at the tips for an elongated look, or reverse it by placing the metallic glow near the cuticle. A charcoal-to-silver blend feels dramatic but remains easy to pair with everyday outfits. Apply the sponge lightly to avoid a harsh dividing line, and clean around the nail before sealing. If you want a little extra Halloween character, add one tiny copper accent on a single nail without interrupting the sleek gradient.
Chrome and metallic details make Halloween nails feel festive while still leaving room for your own style. Choose a single accent for a subtle shimmer, or combine dark bases and reflective finishes for a more dramatic manicure. With seasonal colors, a few simple tools, and a glossy top coat, these ideas can be tailored to different nail lengths and skill levels.








