
Give your manicure a festive finish with Halloween nail art that ranges from glossy and dramatic to playful and sweet. These wearable designs use approachable techniques and seasonal colors, making it easy to find a look for a costume party, a cozy night in, or everyday October style.
Glossy Black Cat-Eye Nails
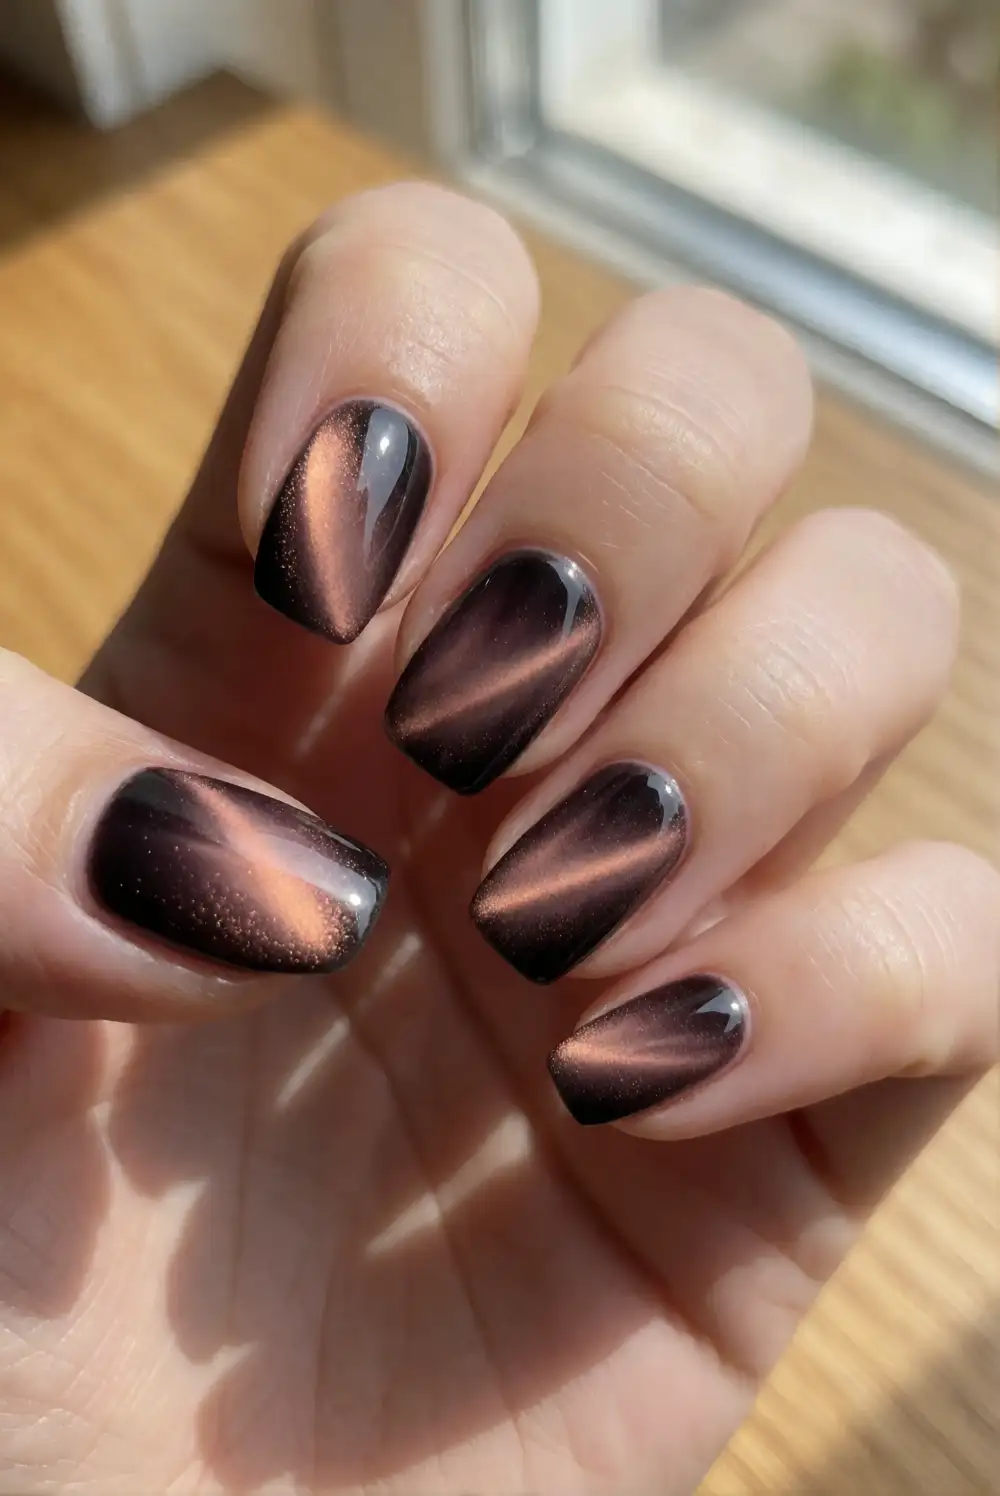
Make a sleek cat-eye manicure with black gel polish and magnetic cat-eye polish in a deep bronze or smoky purple. Apply a thin base coat, cure it, then brush on the magnetic shade. Hold a nail magnet near each nail to draw the shimmer into a narrow diagonal beam, then cure and finish with a glossy top coat. Working one nail at a time helps the magnetic effect stay crisp while you position the light-catching stripe.
Keep the magnetic shimmer subtle for an elegant look, or layer it over black for a more dramatic, dimensional finish. A single accent nail with a tiny hand-painted crescent adds a Halloween touch without crowding the design. If you prefer regular polish, use a metallic bronze stripe over glossy black instead. Pair the manicure with silver rings, or let the reflective finish stand out against a simple dark outfit.
Warm Pumpkin French Tips
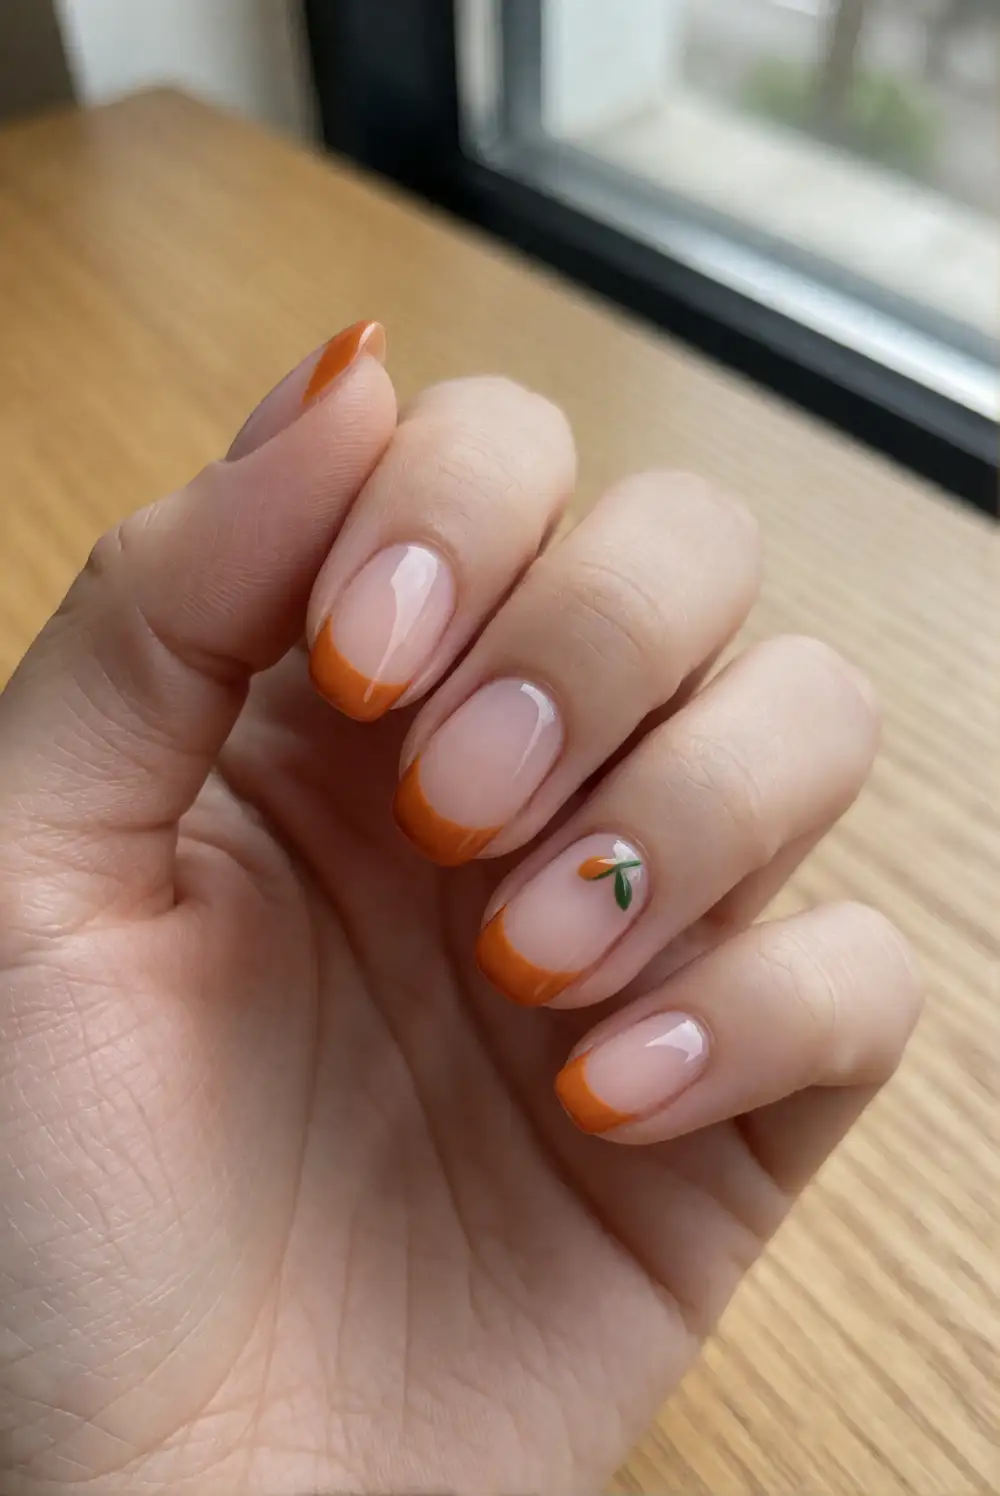
Give a classic French manicure a seasonal update with pumpkin-orange tips. Shape nails, apply a sheer nude or milky cream base, and let it dry completely. Use a fine nail-art brush to paint a curved orange band along each free edge, following the natural shape of the nail. Add a slim second stroke if you want more coverage, then seal the tips with a clear top coat for a smooth finish.
Choose burnt orange for a muted autumn feel or bright pumpkin for a cheerful pop of color. Short, rounded nails make the curved tips especially easy to paint, while a single tiny green stem on one accent nail hints at a pumpkin shape. For a more polished variation, add a fine gold line where the orange meets the base. The design works beautifully with neutral sweaters and warm-toned jewelry.
Sweet Little Ghost Accent Nails
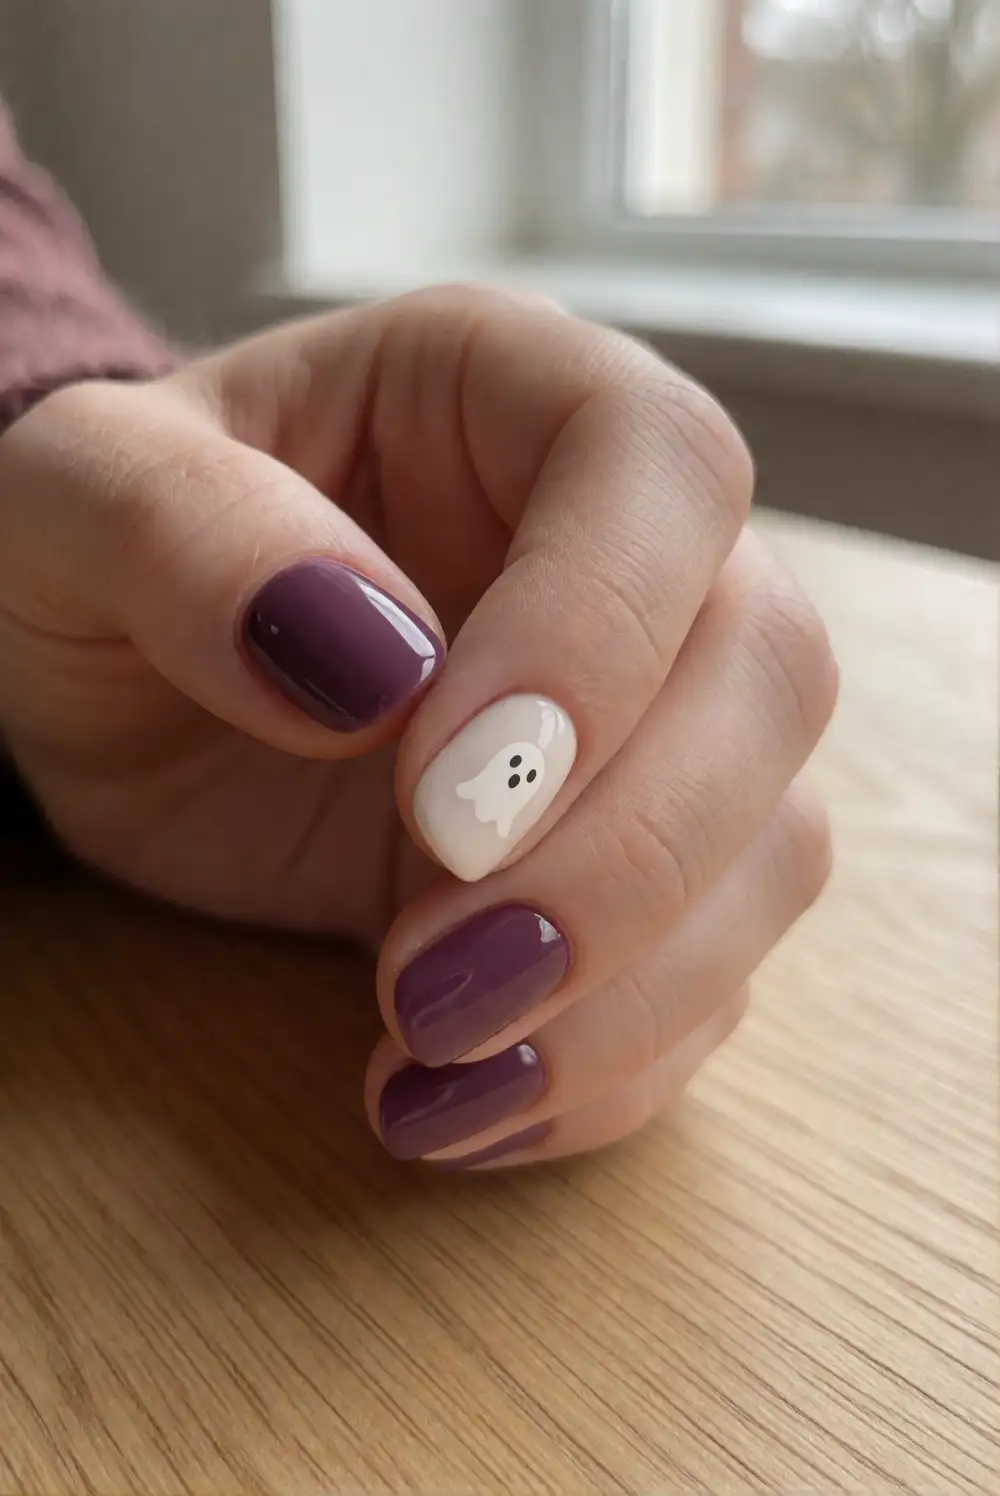
Create a friendly ghost accent over a dark or neutral manicure using white polish, a dotting tool, and a fine brush. Paint the other nails in plum, charcoal, or sheer beige, then use a small brush to form a rounded white ghost silhouette on one or two nails. Once the shape is dry, add two tiny black eyes with a dotting tool and finish all nails with clear top coat.
Keep the ghost shapes small and simple so the design feels cute rather than busy. A pale lavender background softens the contrast, while a deep plum base makes the white figure stand out. If detailed painting feels tricky, use a simple rounded silhouette without facial features or choose a ghost-shaped nail decal. Leave the remaining nails glossy and plain to give the accent room to shine.
Candy-Corn Ombre Nails
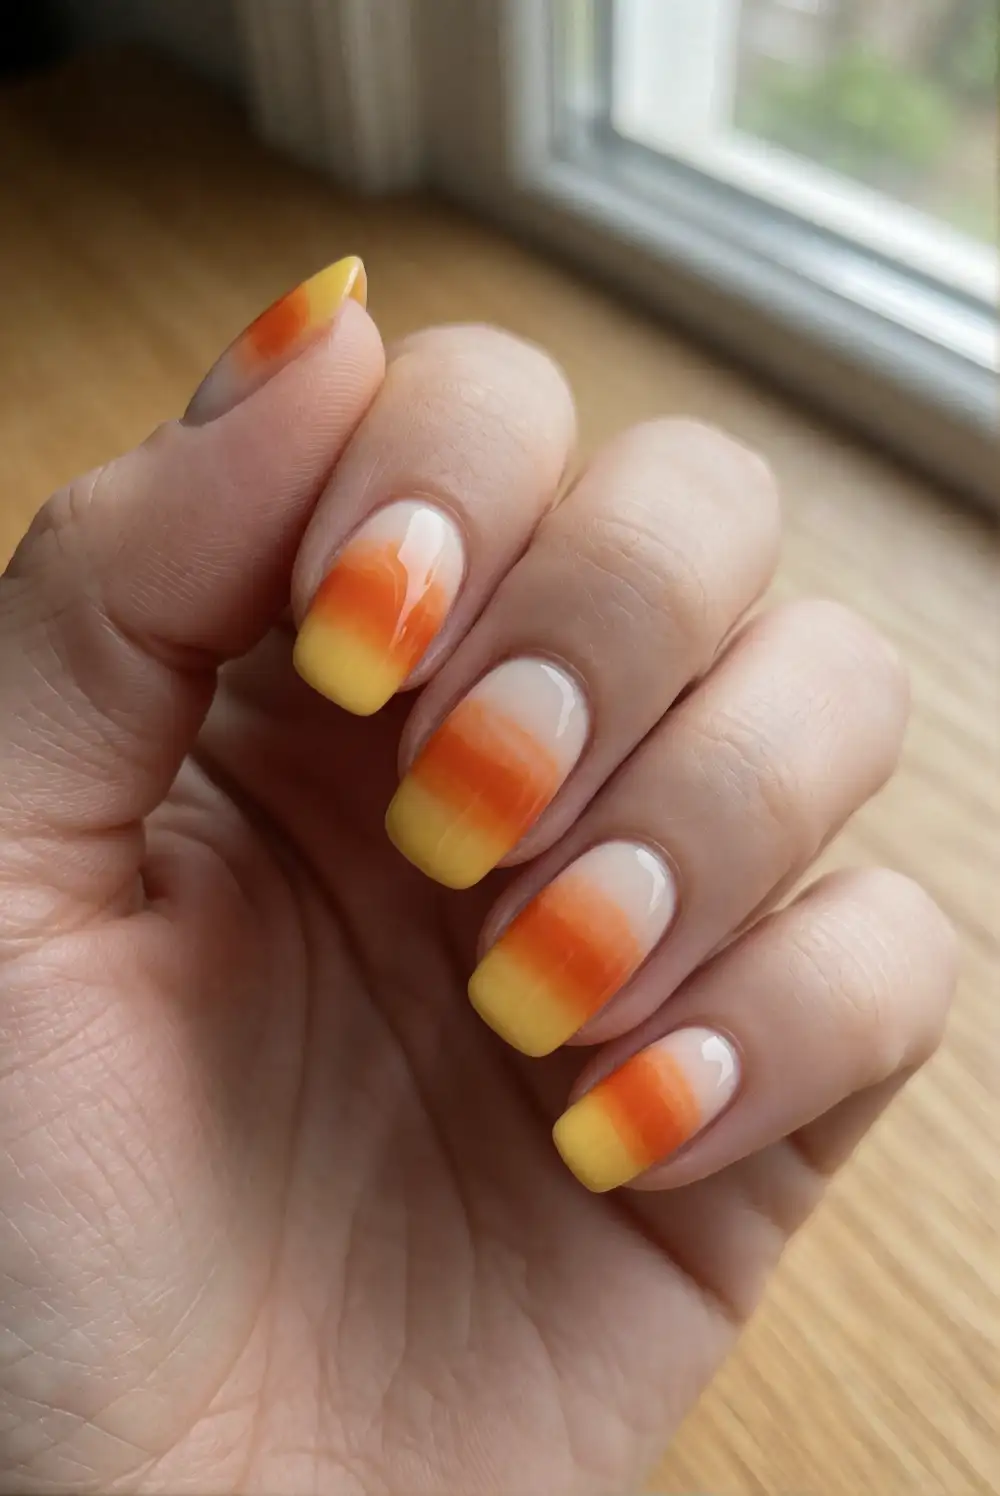
Blend sunny yellow, warm orange, and creamy white into a candy-corn-inspired manicure. Apply a light base coat and let it dry, then paint the three shades in narrow horizontal bands on a makeup sponge. Press the sponge gently onto each nail, shifting it slightly between passes to soften the joins. Repeat until the colors look vivid, clean stray polish from the skin, and apply a glossy top coat to smooth the gradient.
Use a fresh section of sponge for each pass to keep the colors bright and prevent muddy edges. For a simpler version, paint each nail a solid candy-corn shade and reserve the blended effect for an accent nail. A matte top coat gives the gradient a velvety finish, while glossy polish makes the colors look juicy. This playful palette pairs well with cream knits and understated accessories.
Fine Spiderweb Corner Nails
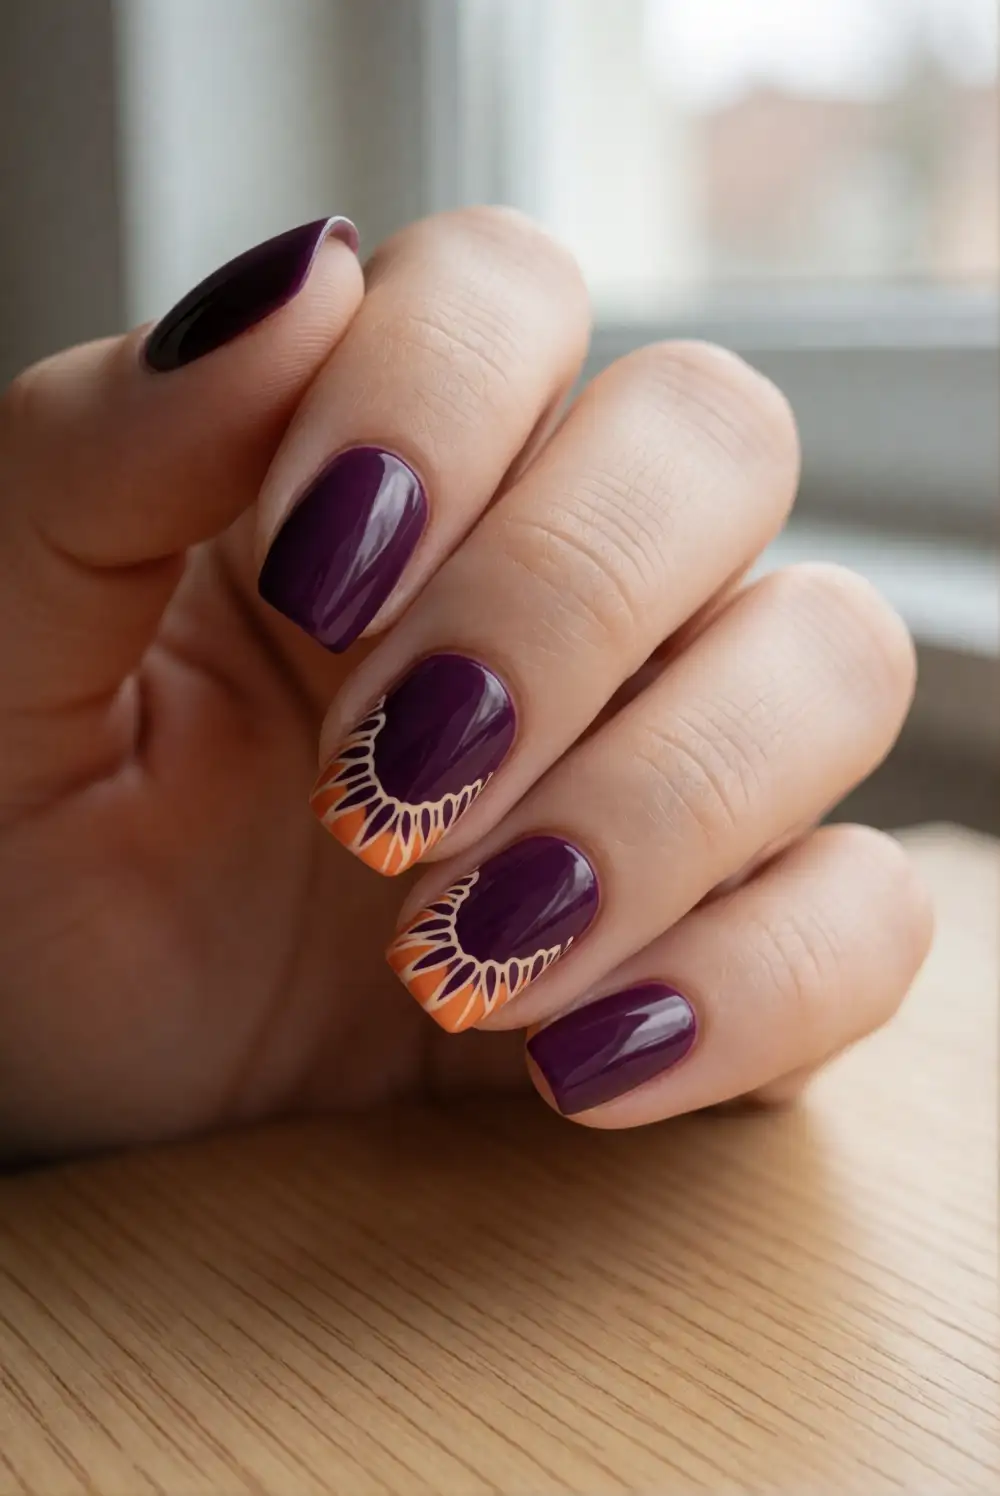
Paint delicate spiderwebs in one corner of each nail for a graphic Halloween detail. Start with a smooth black, plum, or nude base and allow it to dry. With a fine nail-art brush and white polish, draw a few thin lines radiating from one corner, then connect them with small curved strokes. Keep the lines light and spaced apart, and let the design dry before adding a clear top coat.
Try a single web on an accent nail if you want a more understated manicure, or repeat the corner detail across several nails for a coordinated set. Silver polish gives the threads a shimmery finish, while cream looks softer than bright white. A sheer base makes the web feel airy; a dark base makes it graphic and bold. Clean up the brush between strokes for finer, neater lines.
Berry Drip Halloween Nails
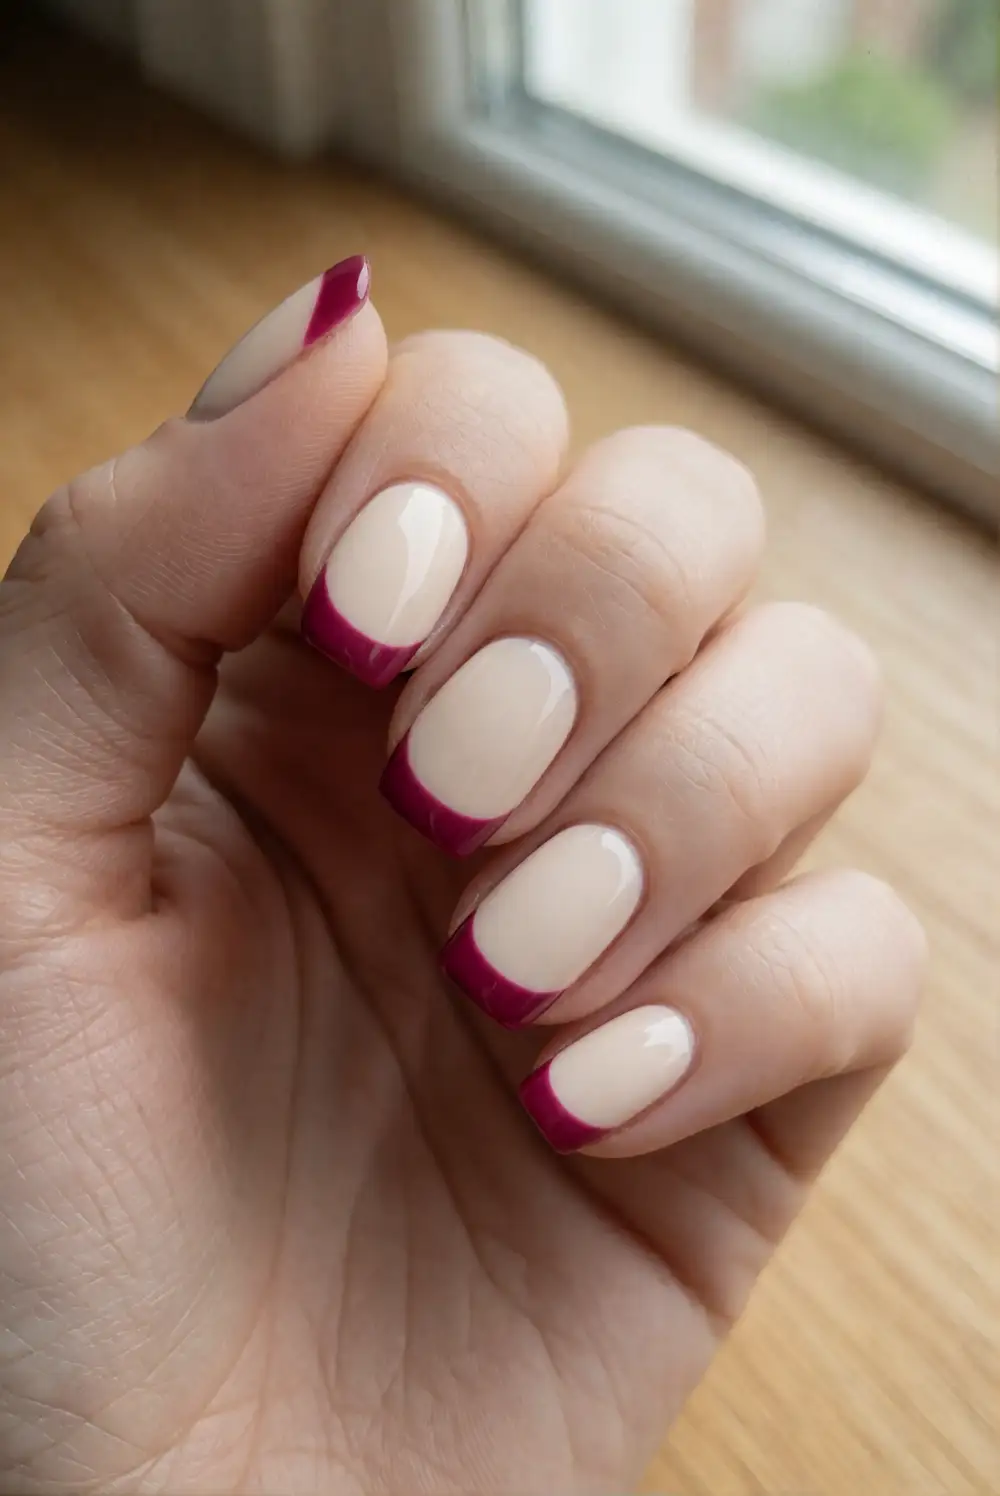
Make a glossy, playful drip design with berry-red polish over a pale pink, cream, or charcoal base. Once the base color is dry, paint a band of berry polish across the nail tip. Use a fine brush to pull rounded drips downward from the band, varying their lengths slightly, then fill the tip evenly. Allow the design to dry thoroughly and seal it with a clear top coat for a smooth, glassy finish.
For a softer look, choose deep cranberry instead of vivid red and keep the drips confined to one or two accent nails. A black base creates high contrast, while ivory makes the color feel more like a candy-inspired detail. Use a thin brush and work with small amounts of polish so the drips keep their rounded ends. Pair the manicure with berry-toned lipstick or a simple black outfit.
Minimal Bat Silhouette Nails
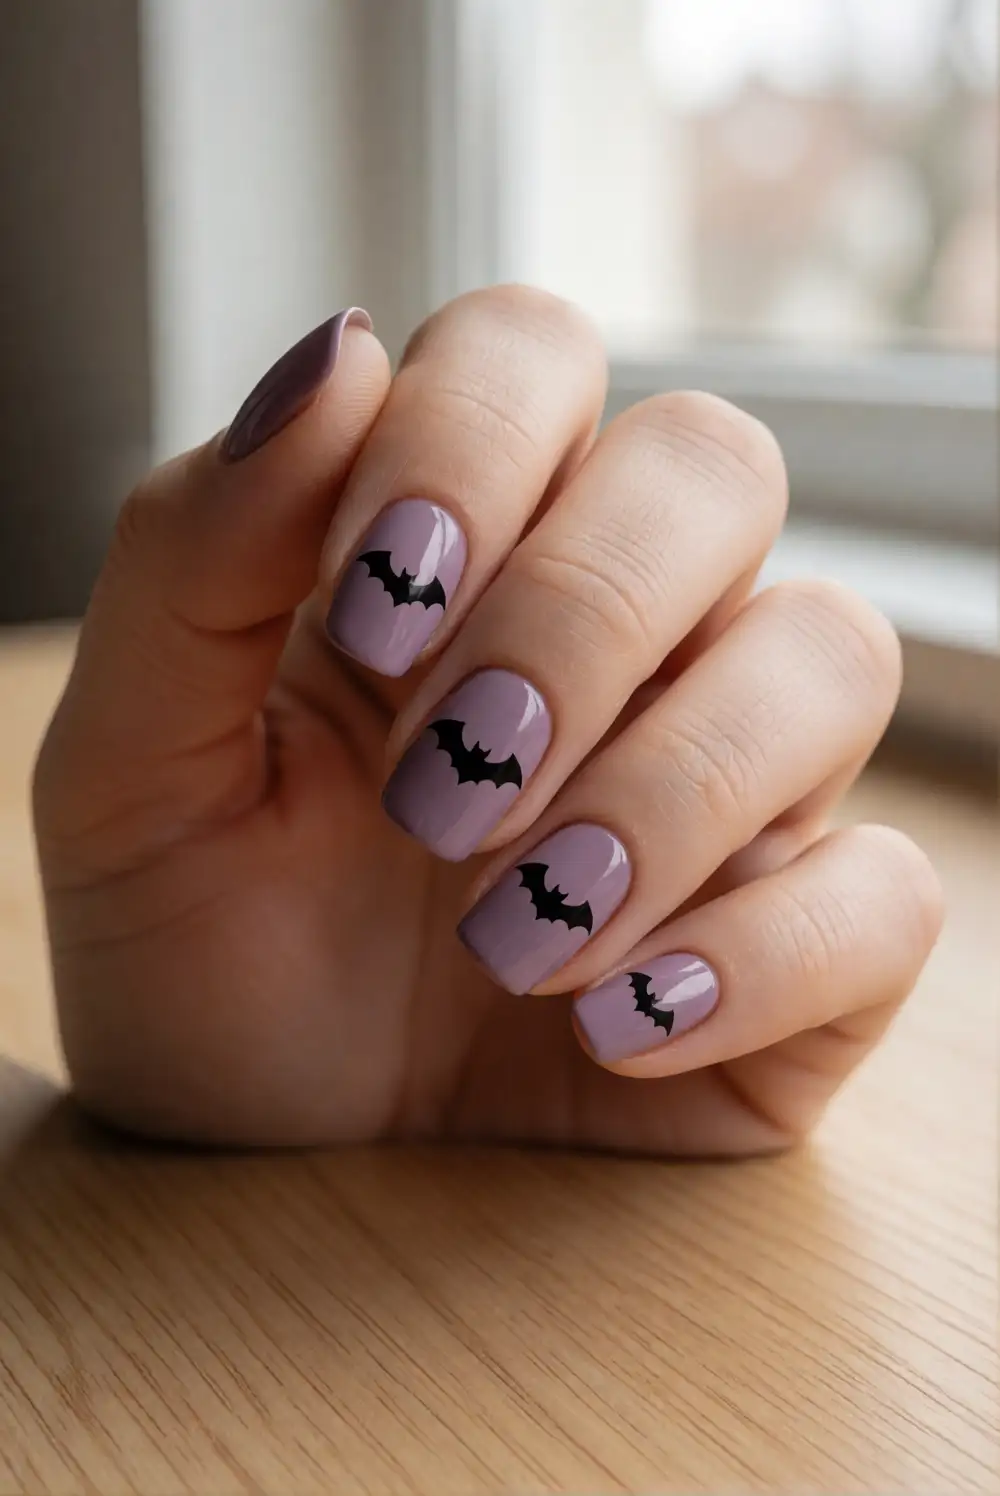
Add tiny bat silhouettes to a smooth base color using black nail polish and a fine detail brush. Paint nails in dusty lavender, soft gray, or sheer nude, then sketch a small body and two angular wings on an accent nail. Build the wings with short, controlled strokes and let the polish dry before applying top coat. For a simpler alternative, use a small bat-shaped nail decal over the base color.
Keep the bats small and widely spaced so the manicure remains neat and wearable. A single silhouette on each ring finger gives the design a subtle seasonal nod, while a few scattered shapes feel more playful. Try cream bats on a deep plum base for an inverted palette, or add a tiny silver crescent nearby. A glossy finish keeps the dark shapes crisp against the softer background.
Charcoal Checkerboard Nails
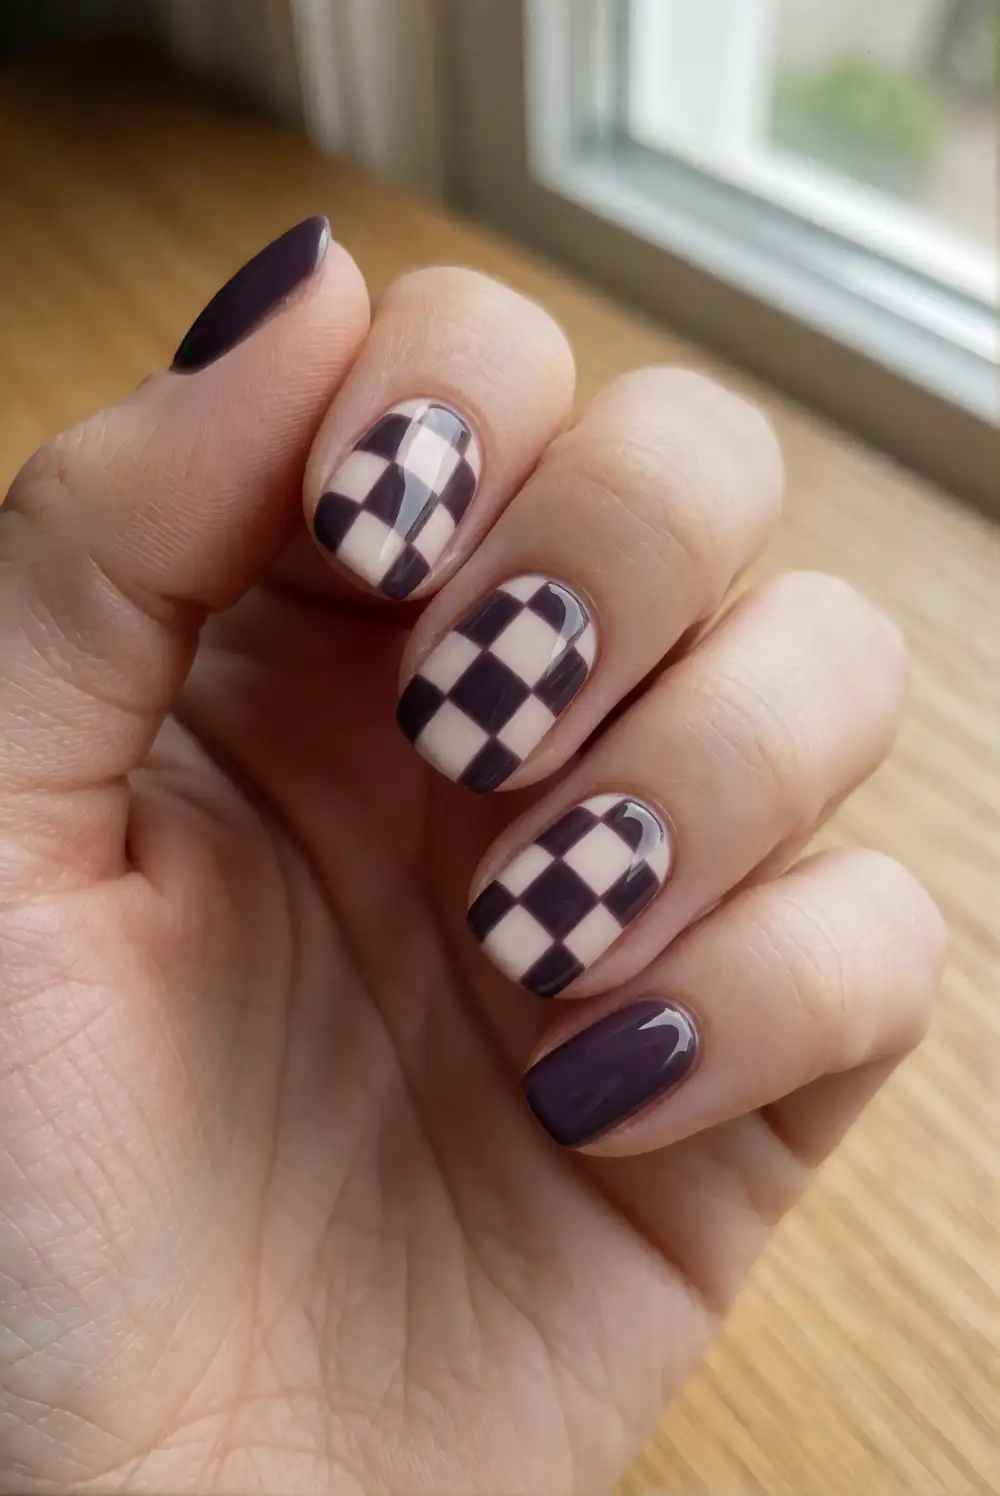
Create a modern checkerboard manicure with charcoal and cream polish. Paint a solid base color and allow it to dry completely. Using a fine brush or striping tape, mark a tidy grid on an accent nail, then fill alternating squares with the second shade. Keep the squares fairly large so the pattern stays clear on a smaller nail surface. Finish with a glossy top coat after the design has dried.
Limit the checkerboard to one or two nails and paint the rest in a solid shade for an easy-to-wear result. Cream and black deliver a bold contrast, while charcoal and pale gray make the pattern softer. If freehand lines wobble, use striping tape as a guide and remove it before the polish fully sets. The graphic design looks especially striking beside a simple plum or orange accent nail.
Plum Witchy Aura Nails
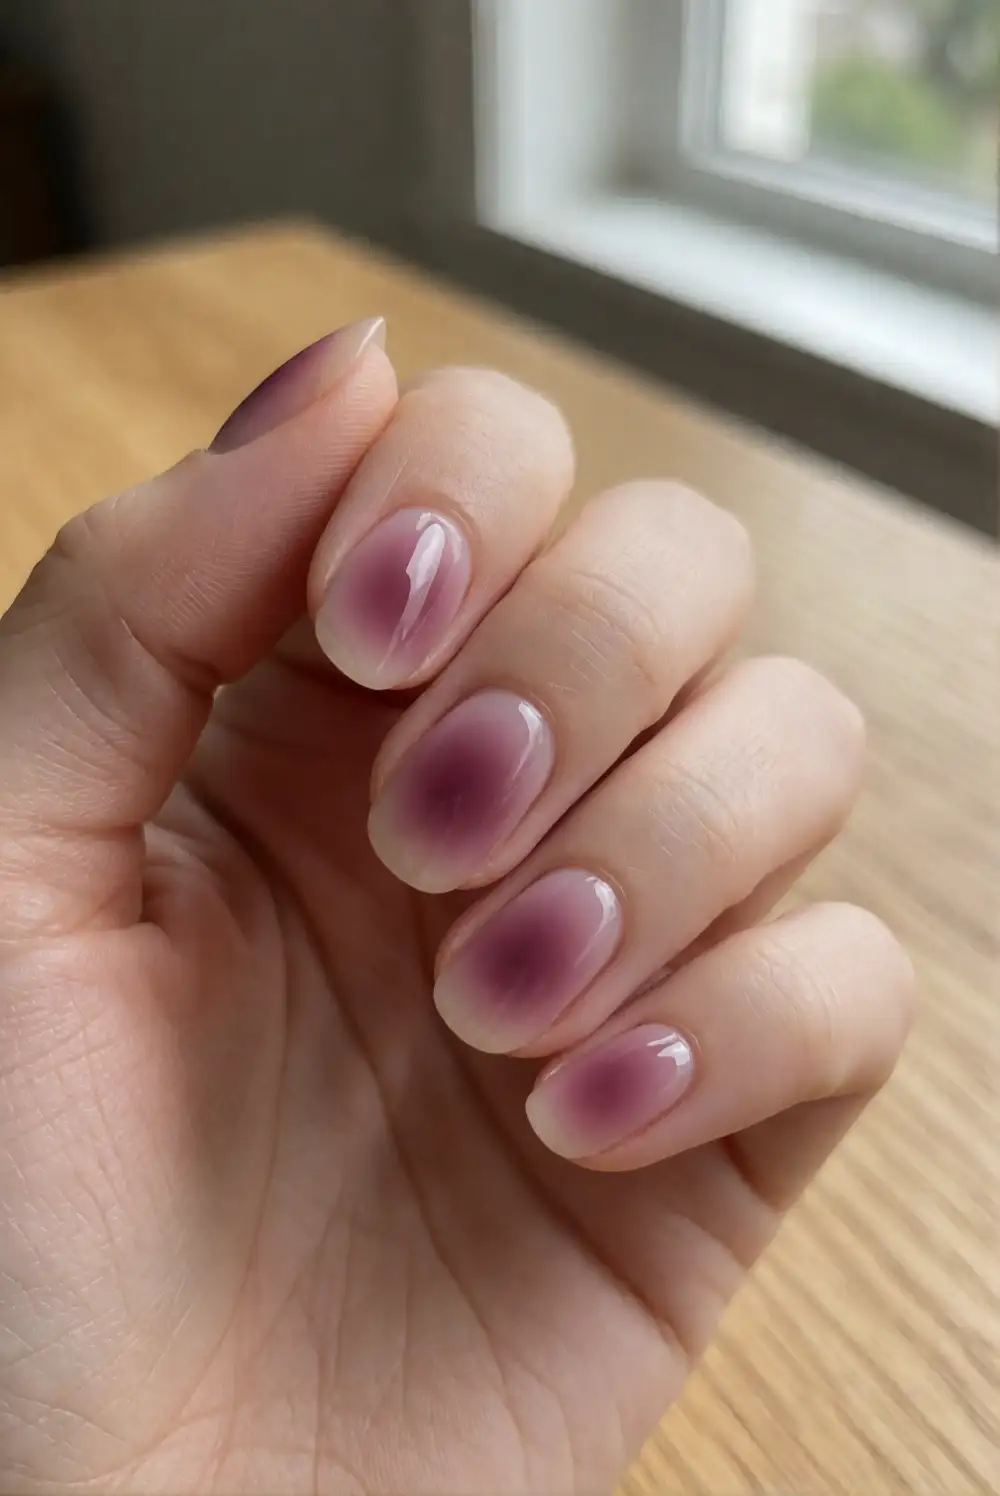
Build a soft aura effect with deep plum polish surrounded by a hazy halo of mauve or dusty pink. Apply a sheer base, then place a small spot of plum polish near the center of each nail. Use a sponge to gently tap mauve around the color, blending outward until the edges look diffused. Add another light layer if needed, let the design dry, and finish with a glossy top coat to bring the colors together.
Choose a near-black plum center for a dramatic finish or a lighter berry shade for a softer, romantic look. Sponging in thin layers gives you more control and helps preserve the blurred edges. A shimmer top coat adds a subtle enchanted glow without extra nail art. Wear the aura on every nail for a cohesive set, or keep it to accent nails alongside a simple solid plum manicure.
Tiny Jack-o’-Lantern Faces
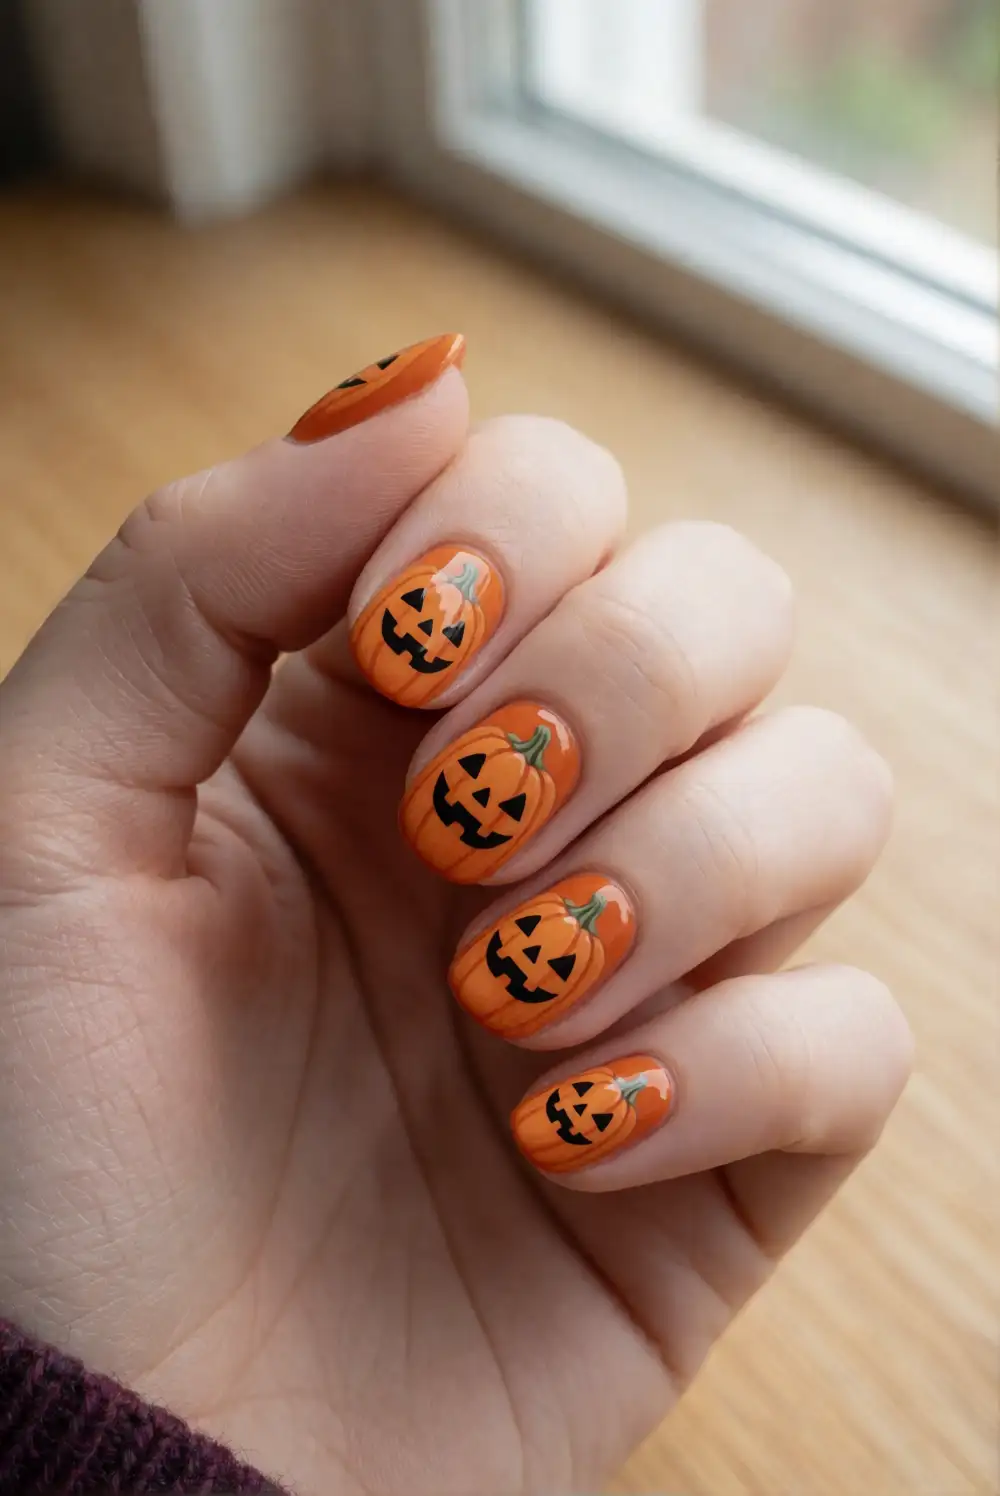
Paint cheerful mini jack-o’-lanterns on orange accent nails with black polish and a fine detail brush. Apply an orange base and let it dry, then draw two small triangular eyes and a simple curved smile. Add a narrow green stem at the cuticle edge if you like, and seal the finished design with clear top coat. Keep the facial details spaced apart and use a light touch to avoid spreading the dark polish.
For a subtle set, place a single pumpkin face on one nail and use solid orange or cream polish on the others. Rounded nail shapes suit the friendly faces, while a pale peach base gives the design a softer feel. Try different smiles for a little personality without making the pattern complicated. A glossy finish enhances the pumpkin color, and a matte top coat gives it a cozy, velvety look.
Midnight Moon and Star Nails
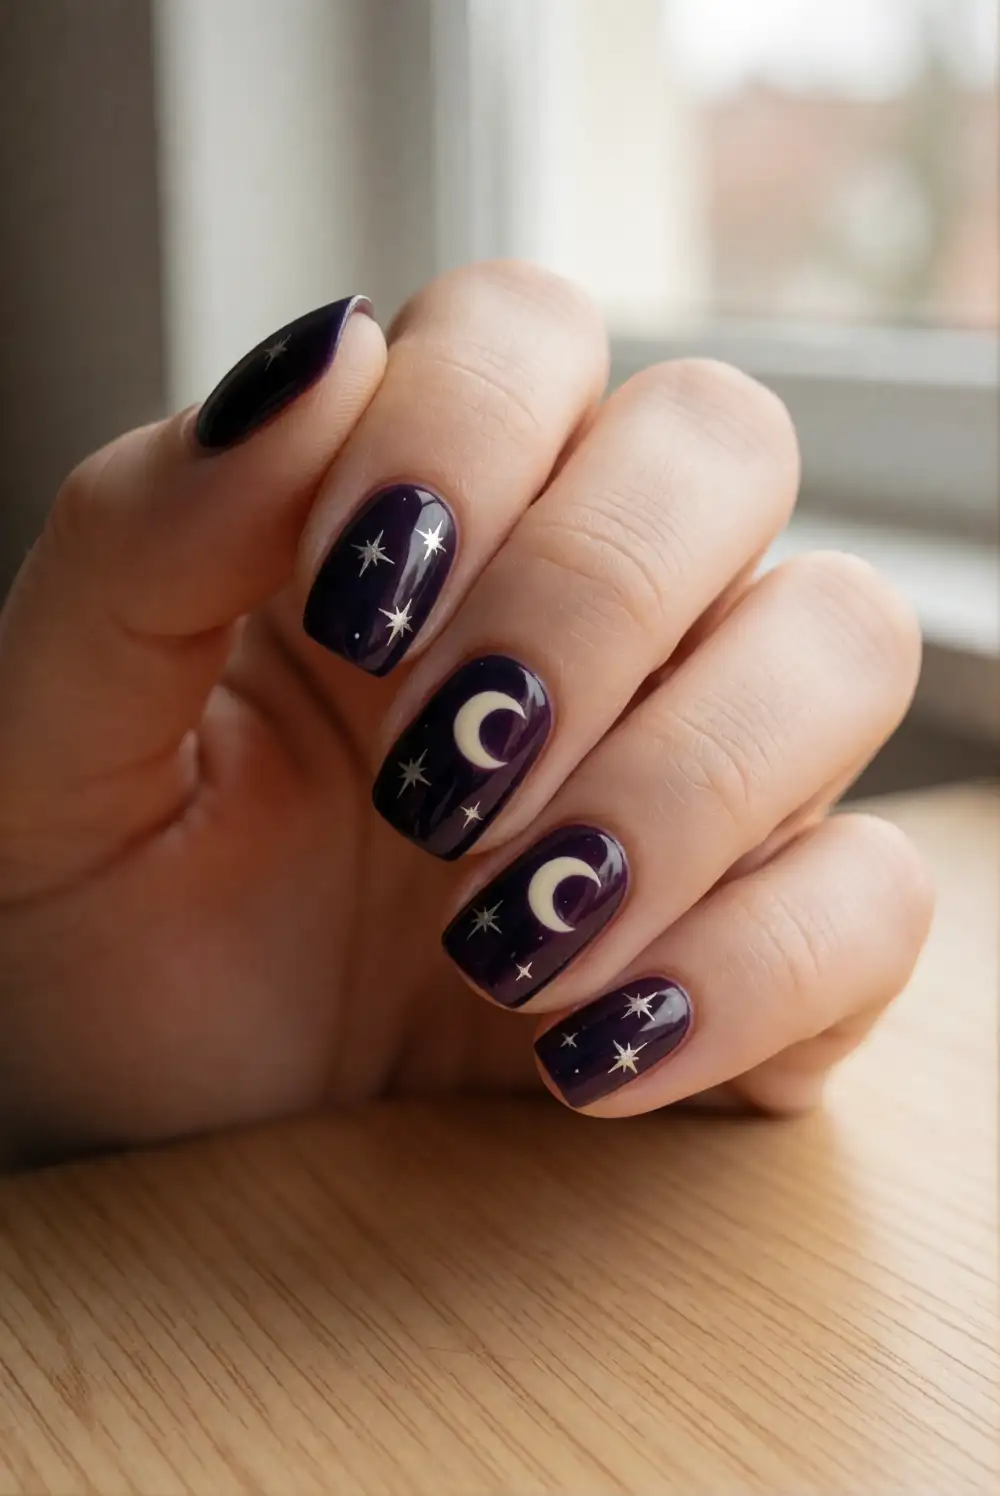
Create a night-sky manicure with midnight blue polish, a fine brush, and metallic silver or cream nail paint. Apply the dark base and let it dry, then paint a small crescent moon on an accent nail. Add a few tiny stars using a dotting tool or the tip of a fine brush, varying their placement across the set. Finish with a clear top coat to protect the details and add a polished shine.
Keep the stars sparse for an elegant look, or add more to create a lively celestial pattern. Deep plum makes a softer alternative to navy, while gold details bring a warmer glow. If painting tiny shapes is difficult, use a fine glitter polish as a simple starry accent and reserve the crescent for one nail. This design looks lovely with silver rings and dark evening layers.
Whether you choose a glossy cat-eye, a tiny pumpkin accent, or a dreamy midnight sky, Halloween nail art can feel festive while still matching your personal style. Pick a design that suits your comfort with detail, gather a few seasonal shades, and finish with a top coat to help your manicure look polished for every October occasion.








