
Give your manicure a seasonal refresh with Halloween nail designs that balance playful details and wearable style. From glossy pumpkin tones and delicate cobweb accents to moody chrome and soft ghost art, these ideas offer inspiration for different nail lengths and skill levels. Choose a look to recreate at home or bring to your next salon appointment.
Black Cat-Eye Nails with Velvet Shine
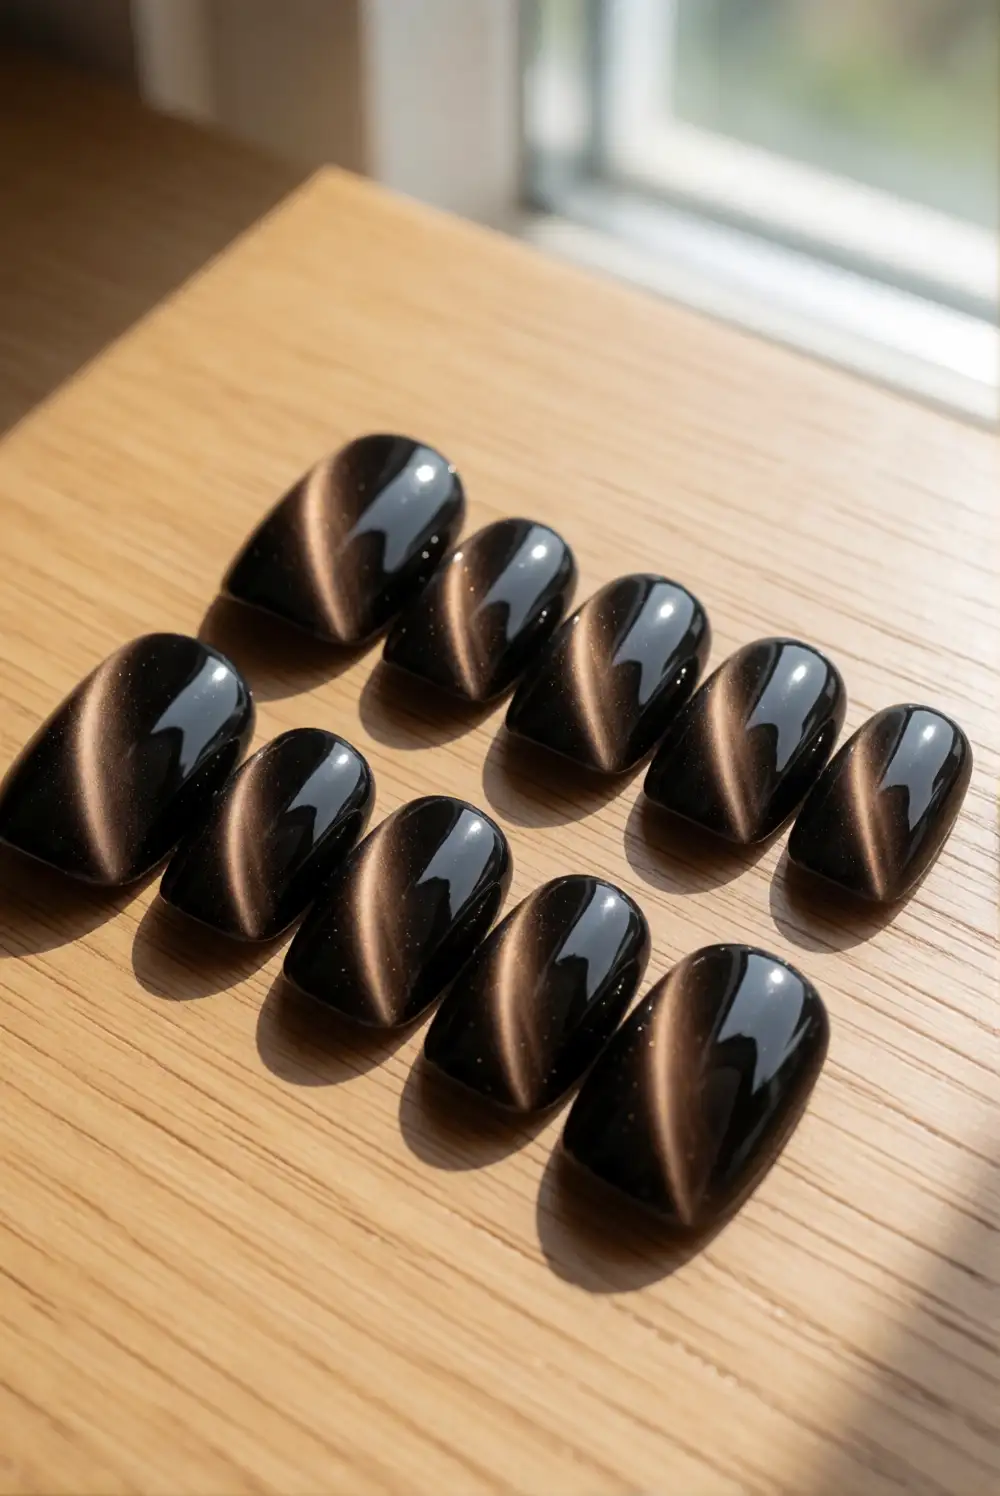
For a sleek Halloween manicure, apply a deep black magnetic polish over a prepared base coat. While the polish is still wet, hold a nail magnet near each nail to draw the shimmer into a narrow, luminous stripe. Cure or allow the polish to dry according to its product directions, then seal with a glossy top coat. The shifting finish creates a velvety, dimensional effect without needing painted characters or extra decorations.
Try the magnetic stripe down the center for a classic cat-eye effect, or angle it diagonally for a more dramatic look. This design works especially well on almond and oval nails, where the reflective line follows the shape naturally. Keep every nail black for a polished finish, or use one accent nail with a tiny silver star painted by a steady hand. A dark outfit or simple silver rings let the shimmer stand out.
Glossy Pumpkin Orange French Tips
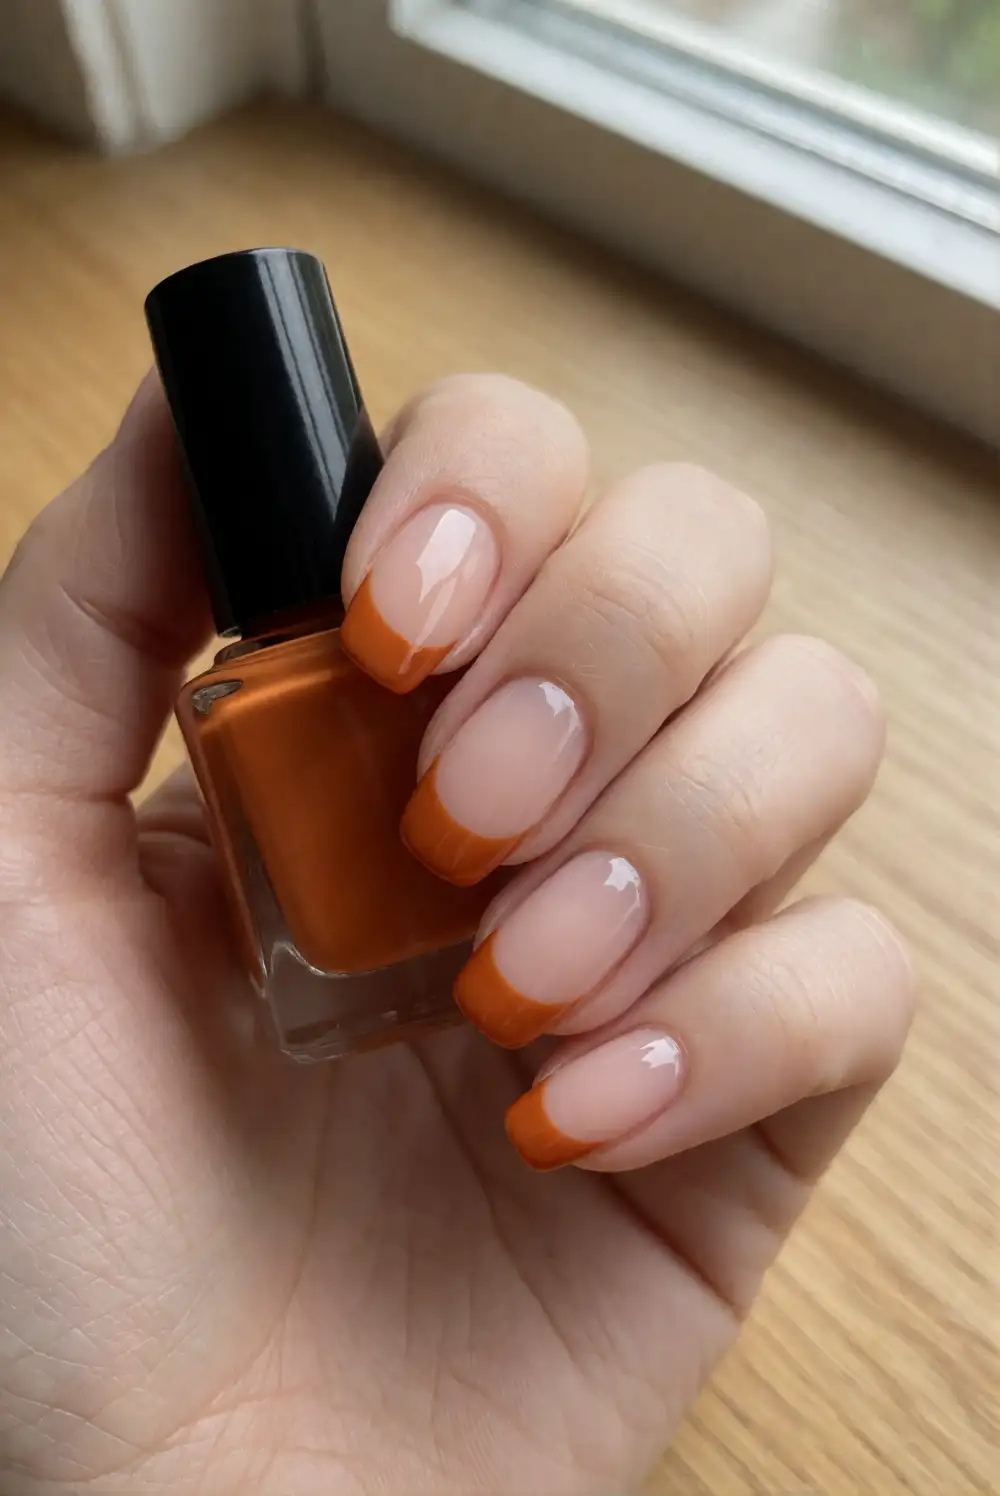
Bring a familiar Halloween shade into an everyday manicure with pumpkin-orange French tips. Apply a sheer nude or milky base coat, let it dry, then paint a curved orange line across each nail tip using a fine nail brush. Build the color in thin layers for an even finish and seal the design with clear top coat. A rounded smile line suits short nails, while a sharper angle gives longer nails a crisp, modern edge.
Choose a bright tangerine for a playful look or a muted burnt orange for a softer autumn feel. Keep the tips uniform, or make one nail a full orange accent to add a little variation. For extra polish, trace a very fine gold line where the orange meets the base. This design pairs nicely with neutral sweaters and works for everyday wear beyond Halloween, especially when the orange is kept glossy and the details minimal.
Milky White Ghost Accent Nails
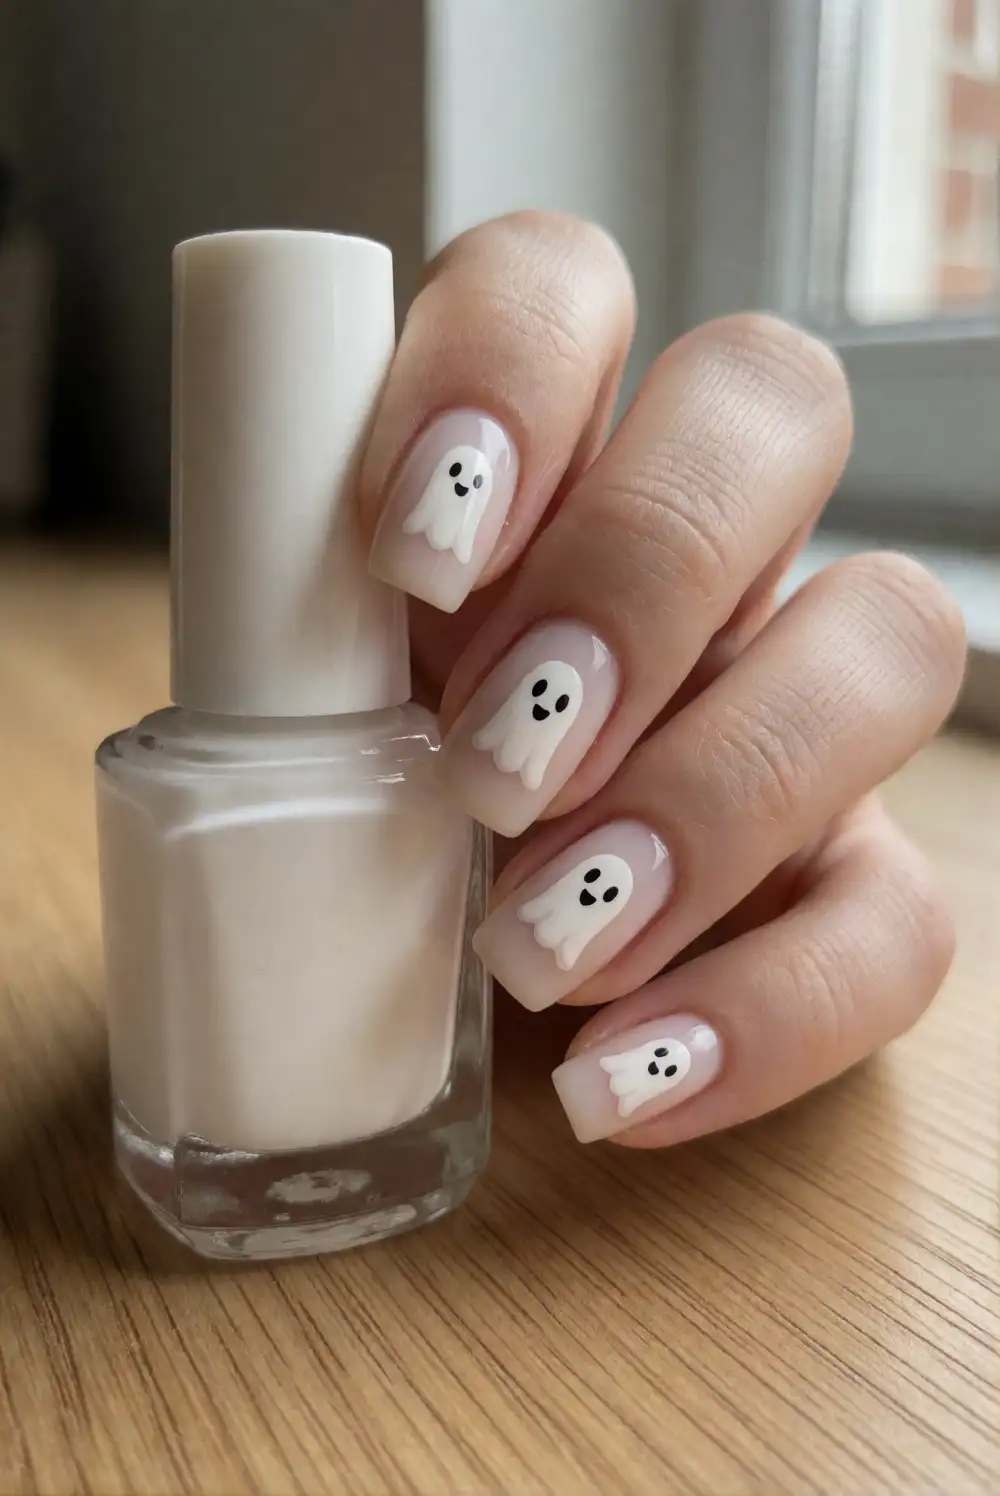
Create a lighthearted ghost manicure with a sheer milky base and a few simple white ghost shapes. After applying the base color, use a small nail-art brush to paint a rounded dome with a gently wavy lower edge on selected nails. Let the shapes dry, then add tiny black eyes with a fine detail brush and finish with a glossy top coat. Leaving plenty of open space keeps the design clean rather than crowded.
Place the ghost accents on alternating nails or keep them to the ring fingers for a more understated result. A pale pink or translucent beige base softens the contrast, while a cool white base makes the little figures pop. If painting small details feels tricky, use a dotting tool for the eyes and keep each ghost shape broad and simple. The design looks especially sweet with short, softly rounded nails and cozy cream-colored clothing.
Delicate Black Cobweb Corner Details
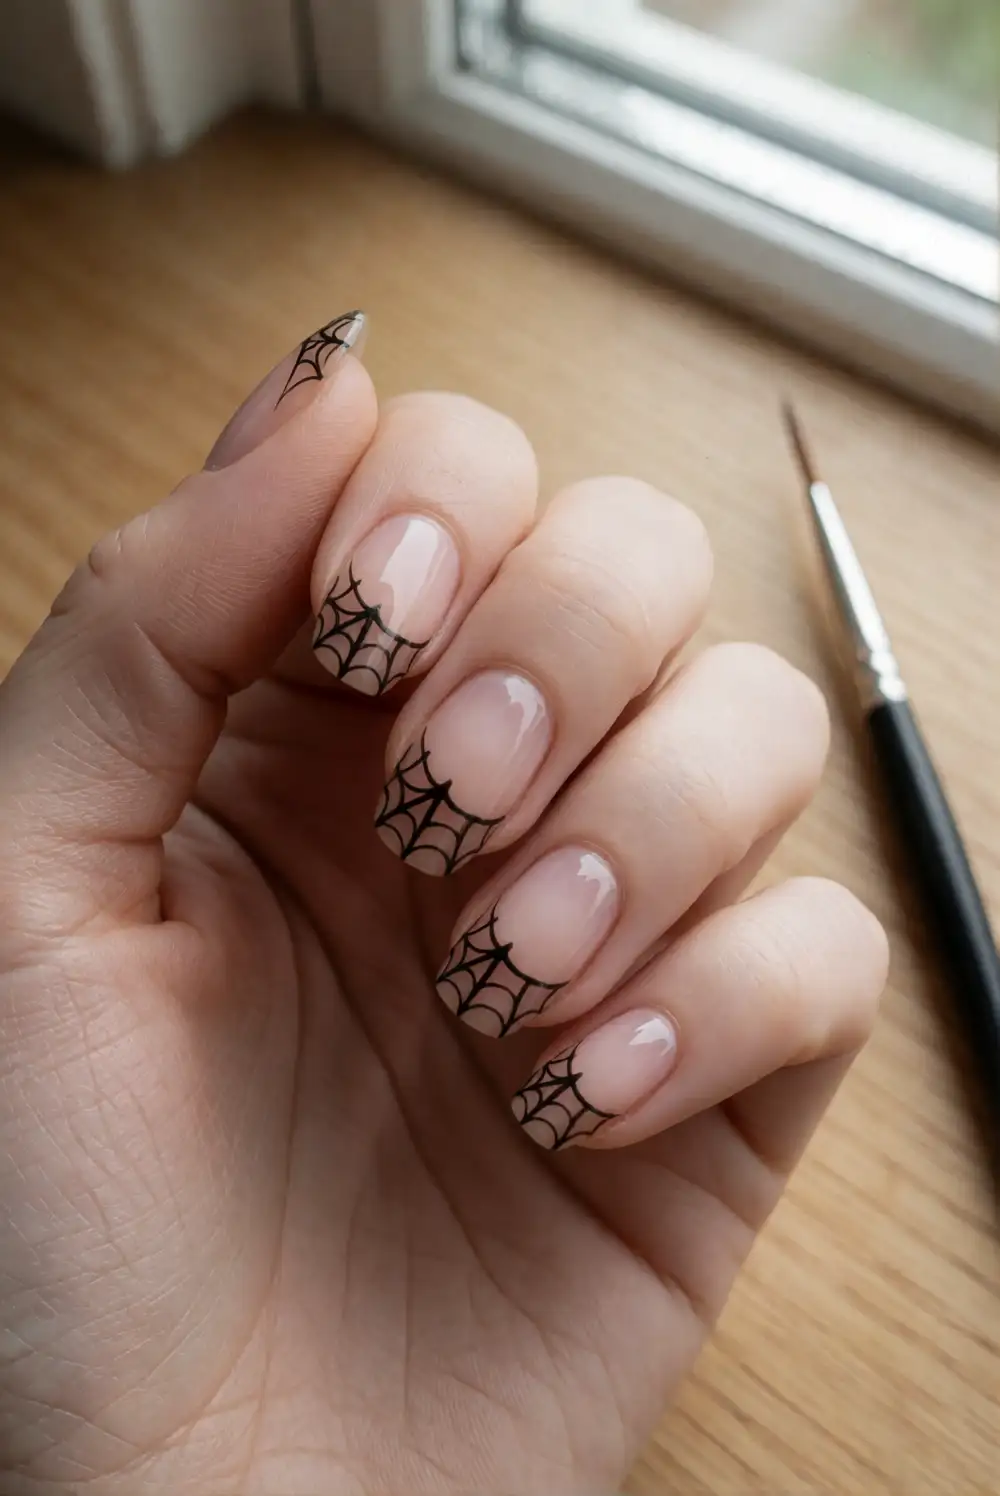
Make a refined cobweb manicure by starting with a sheer nude, blush, or clear base. With a fine liner brush and black polish, draw a few thin lines radiating from one corner of the nail, then connect them with gently curved arcs. Work slowly and keep the strokes delicate so the web reads as a small accent rather than a dark block. Allow the artwork to dry fully before adding a smooth top coat.
Use the web on just one or two nails and leave the rest glossy and plain for an easy-to-wear balance. A silver polish can replace black for a softer, reflective finish, while a tiny orange dot near the web adds a seasonal touch. The design fits short nails particularly well when the lines stay close to one edge. For a salon-ready version, ask for fine linework over a sheer neutral base.
Black and Orange Mismatched Checkers
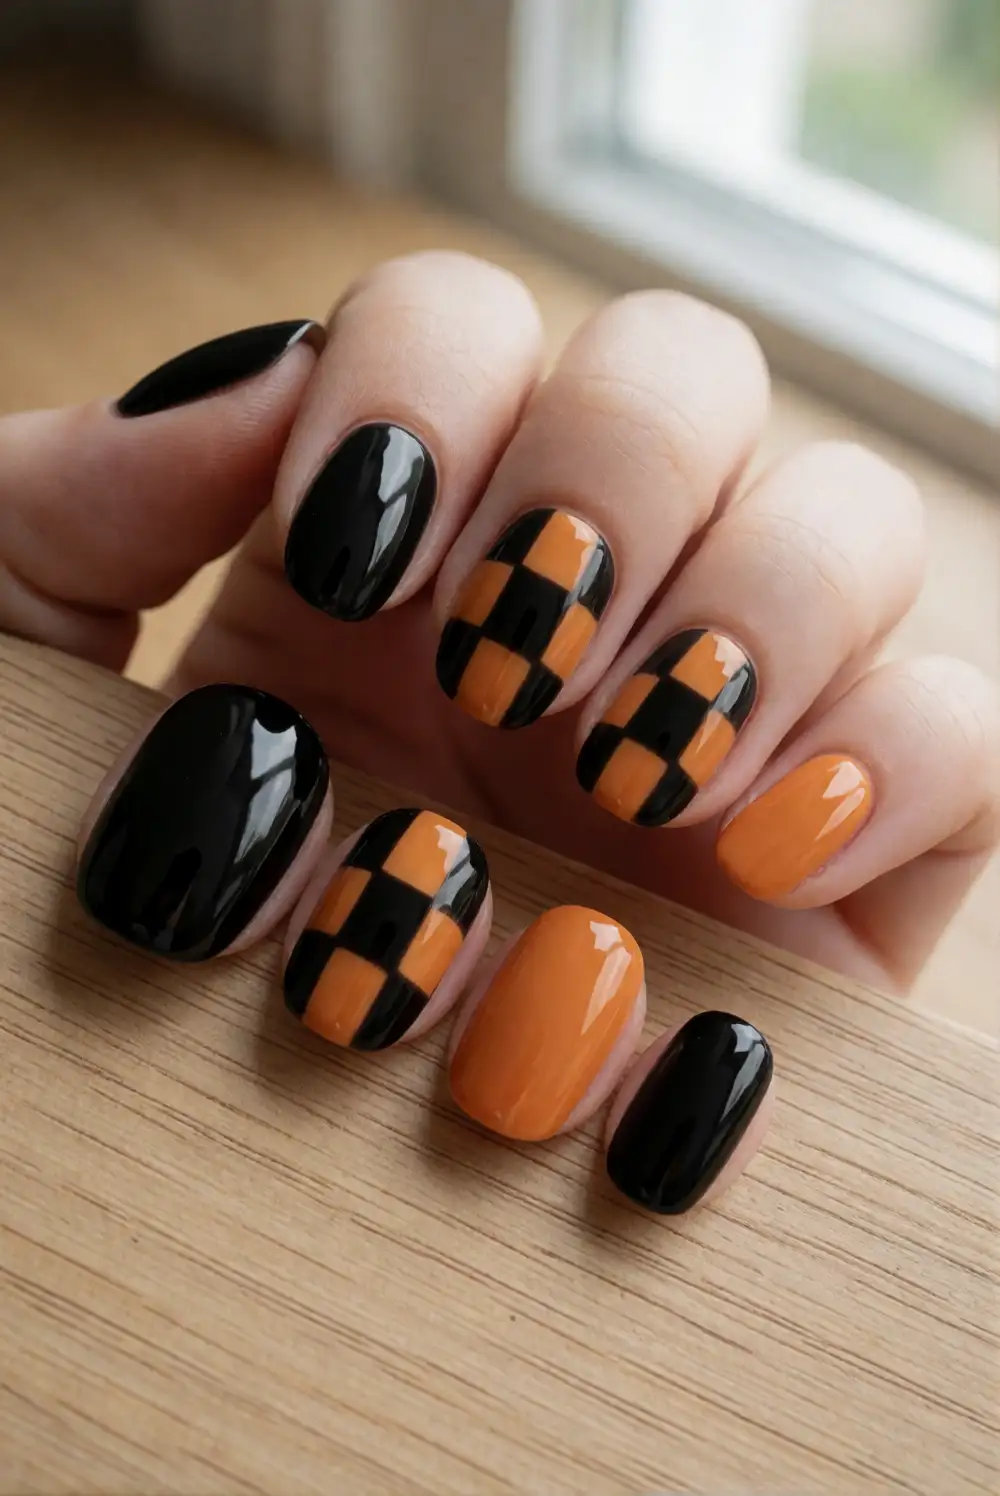
Give a classic checkerboard a Halloween palette by alternating black and orange squares across a few nails. Apply a light base color, let it dry, and use a fine brush or striping tape to create a tidy grid. Fill alternating spaces with black and pumpkin orange, keeping the squares small enough to follow the natural curve of the nail. Finish with top coat once the artwork is completely dry to smooth the surface and bring out the color.
For a less busy manicure, use checkerboard only on the accent nails and paint the remaining nails solid orange, black, or sheer nude. Slightly varied square sizes can make the pattern feel hand-painted and relaxed rather than rigid. Short nails suit a compact grid with just a few visible checks, while longer nails can carry a more spacious pattern. Pair the design with simple accessories so the bold contrast remains the focus.
Deep Plum and Black Ombre Nails
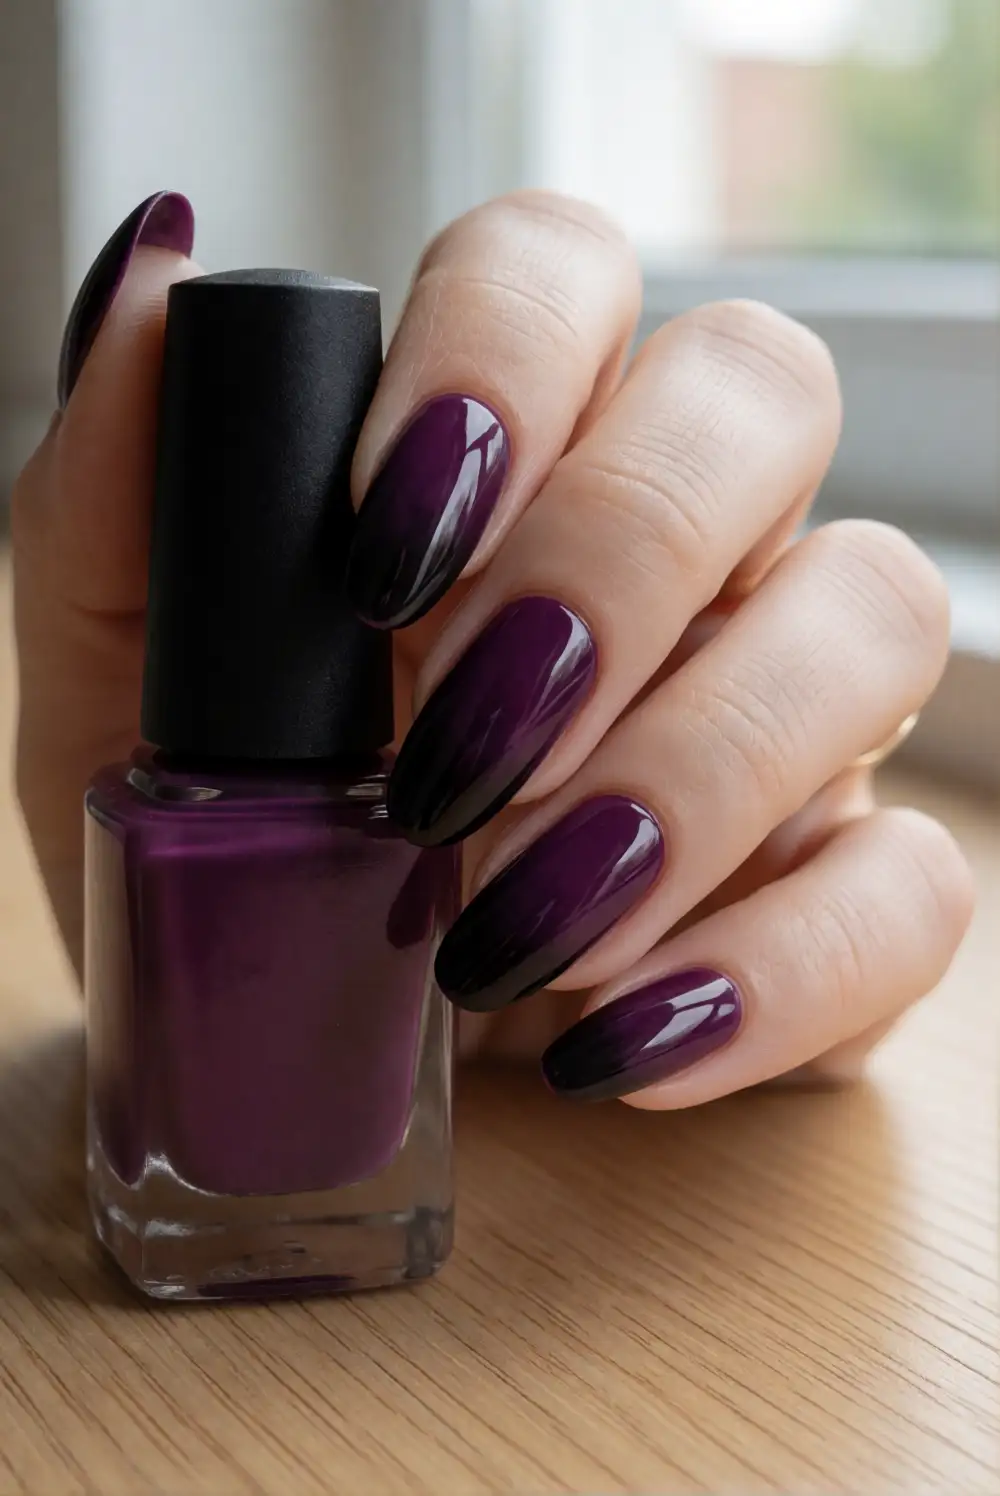
Create a moody seasonal manicure by blending deep plum into black at the nail tips. Apply a plum base coat and let it dry. Dab black polish lightly onto a small makeup sponge, then tap it over the outer third of each nail, building the gradient gradually until the colors melt together. Clean up the skin around the nails, allow the polish to dry, and apply a glossy top coat to soften the texture and unify the finish.
Keep the plum visible near the cuticles for a rich, dimensional fade, or reverse the blend with black at the base and plum toward the tips. A subtle shimmer layer can add depth without competing with the gradient. This look is especially striking on longer oval or almond nails, but a soft fade also works on shorter shapes. Wear it with dark denim, berry lipstick, or understated gold jewelry for a polished seasonal combination.
Silver Chrome Lines on Midnight Nails
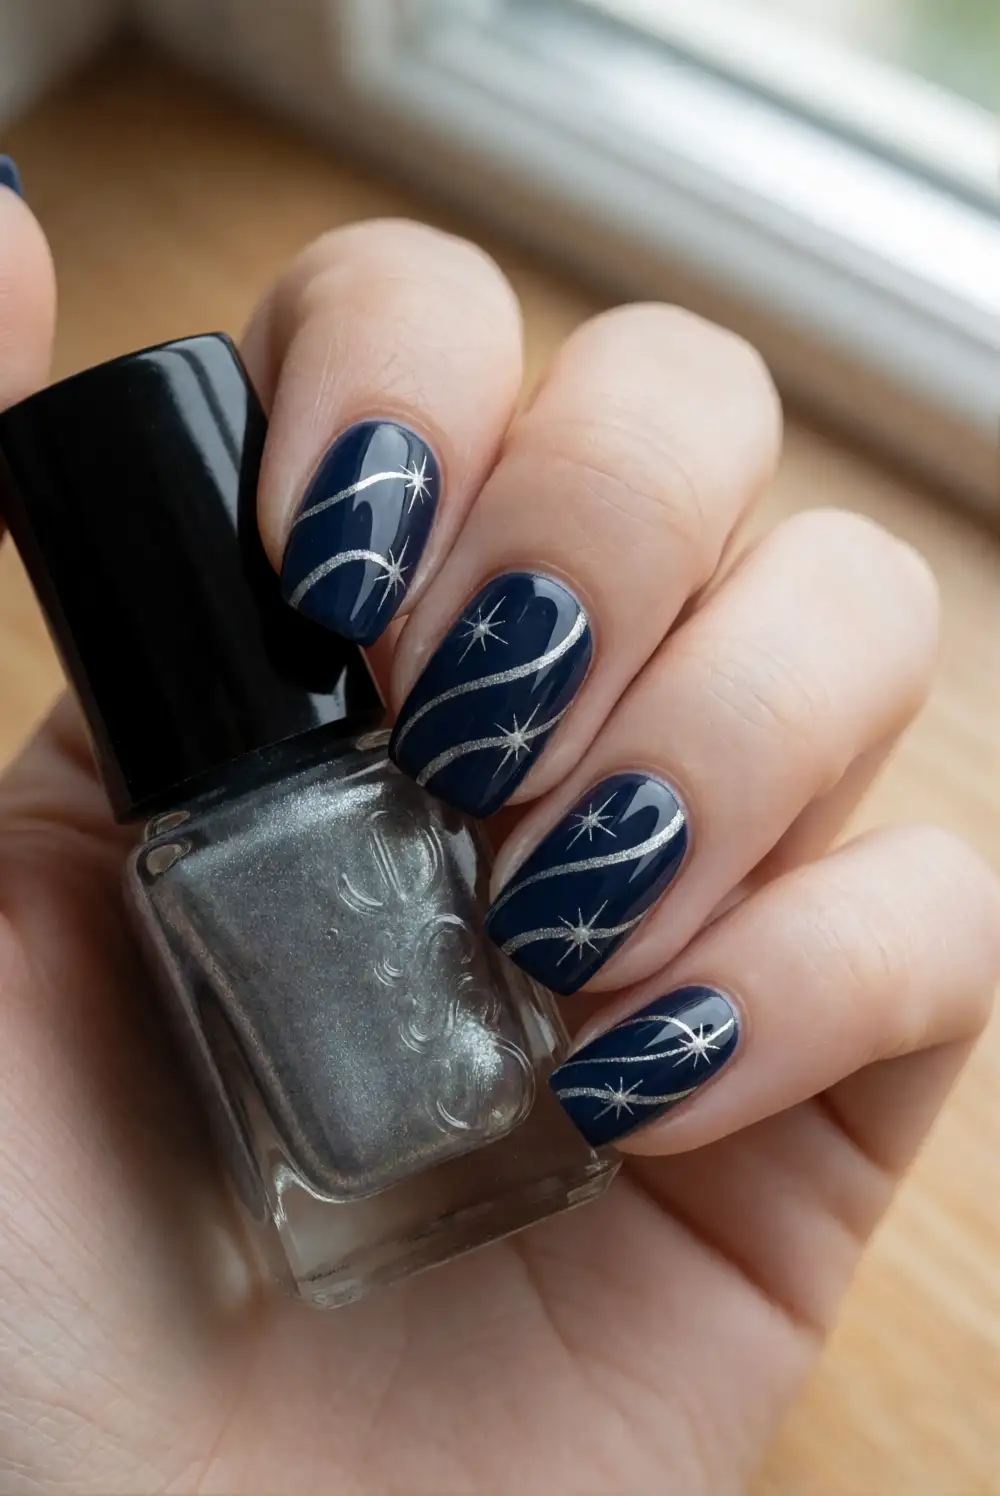
Pair a midnight navy or black manicure with fine silver chrome lines for a sleek Halloween look. Paint the nails in a deep glossy shade and let the surface dry completely. With a detail brush, add a narrow curved line, a small starburst, or a few simple strokes in silver polish or nail-art gel. If using chrome powder, follow its product instructions and apply it only over the recommended tacky surface before sealing everything with top coat.
Leave most nails solid and reserve the silver artwork for one or two accents to keep the design wearable. A single sweeping line gives a minimalist finish, while clustered starbursts feel more celestial. On short nails, use sparse details that do not crowd the nail bed; longer nails can carry a more intricate motif. The combination looks striking under evening light and pairs naturally with silver rings or a charcoal outfit.
Soft Sage Nails with Tiny Black Bats
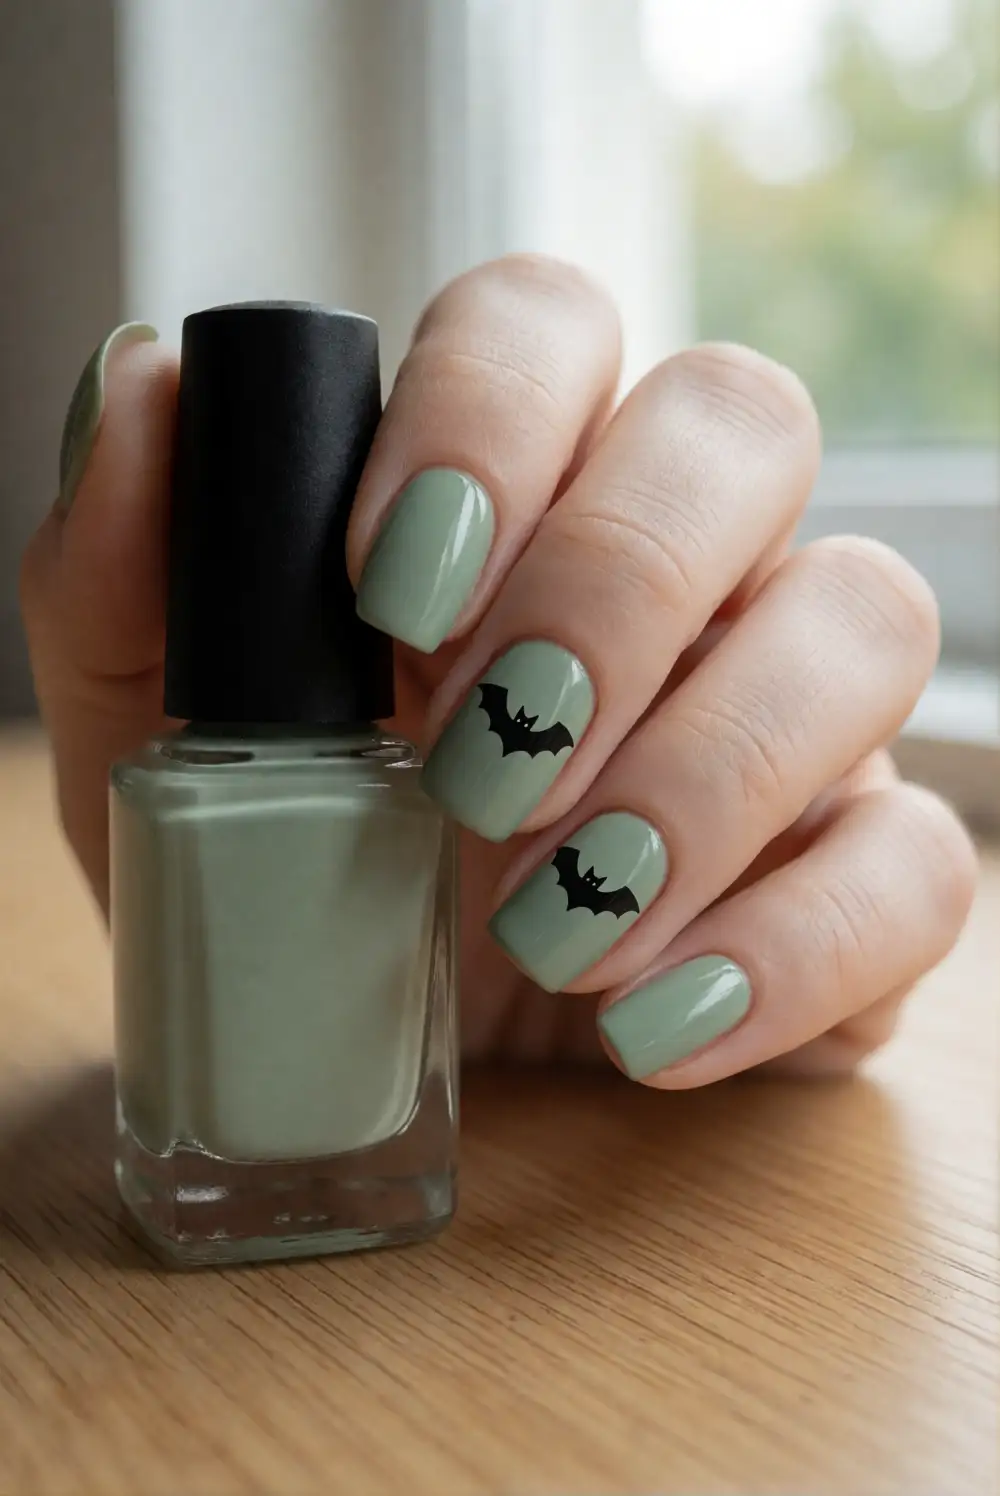
For a gentler take on Halloween color, use muted sage green as the base for tiny black bat accents. Apply two thin coats of sage polish and let them dry. With a fine brush, paint a small central shape and add two simple curved wings on selected nails, keeping the silhouettes clean and compact. A dotting tool can help form the bodies. Finish with clear top coat after the artwork has set for a smooth, lasting shine.
Keep the bats to one accent nail on each hand, or place a small silhouette near the tip for a little seasonal detail. A matte top coat gives the sage a soft, modern finish, while glossy polish keeps the design crisp. If intricate painting is challenging, use a simple winged outline rather than adding extra features. Pair the manicure with cream, denim, or olive clothing to make the muted green feel especially wearable.
Warm Nude Nails with Gold Starbursts
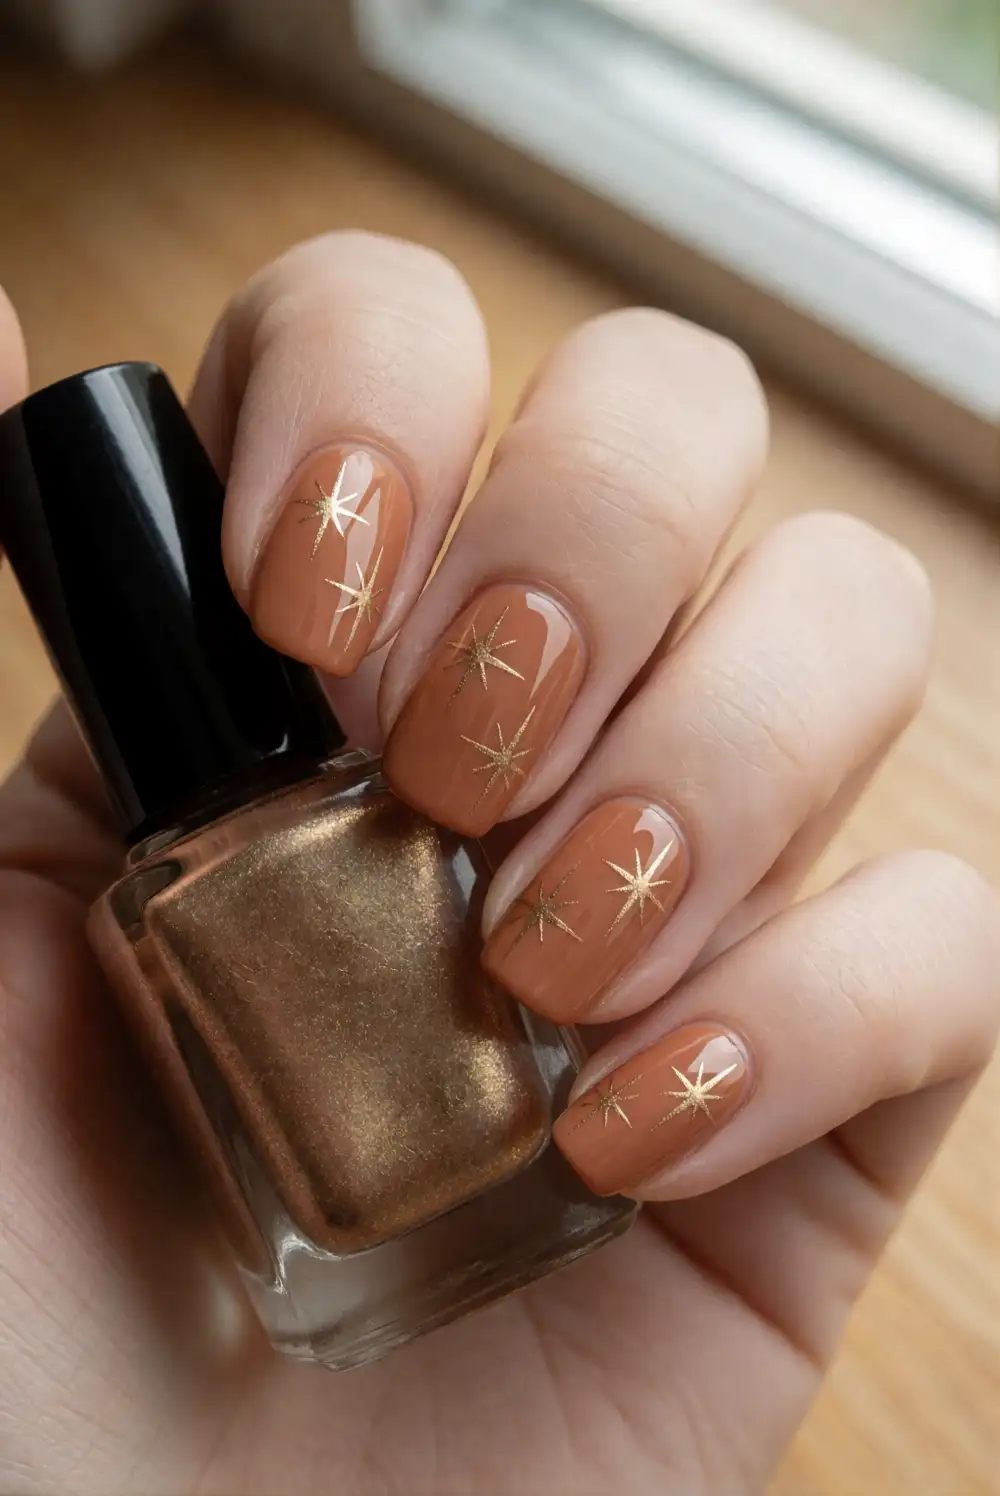
Build a subtle Halloween manicure around warm nude polish and fine gold starbursts. Apply a beige or caramel-toned base that complements your skin tone, then let it dry thoroughly. Use a fine liner brush to draw small crosses with tapered ends on a few nails, adding tiny dots nearby if desired. Metallic gold polish gives the details a soft gleam. Finish with a clear top coat, taking care not to drag the brush across the artwork.
Place the starbursts near the cuticle, along a side edge, or spaced lightly across an accent nail. A sheer nude base creates a delicate effect, while a richer caramel shade feels cozy and more autumnal. Keep the design sparse so the metallic details remain visible and elegant. This manicure transitions easily from Halloween gatherings into the rest of the season and looks lovely with gold jewelry, warm knits, and neutral everyday outfits.
Candy-Corn Color Fade Nails
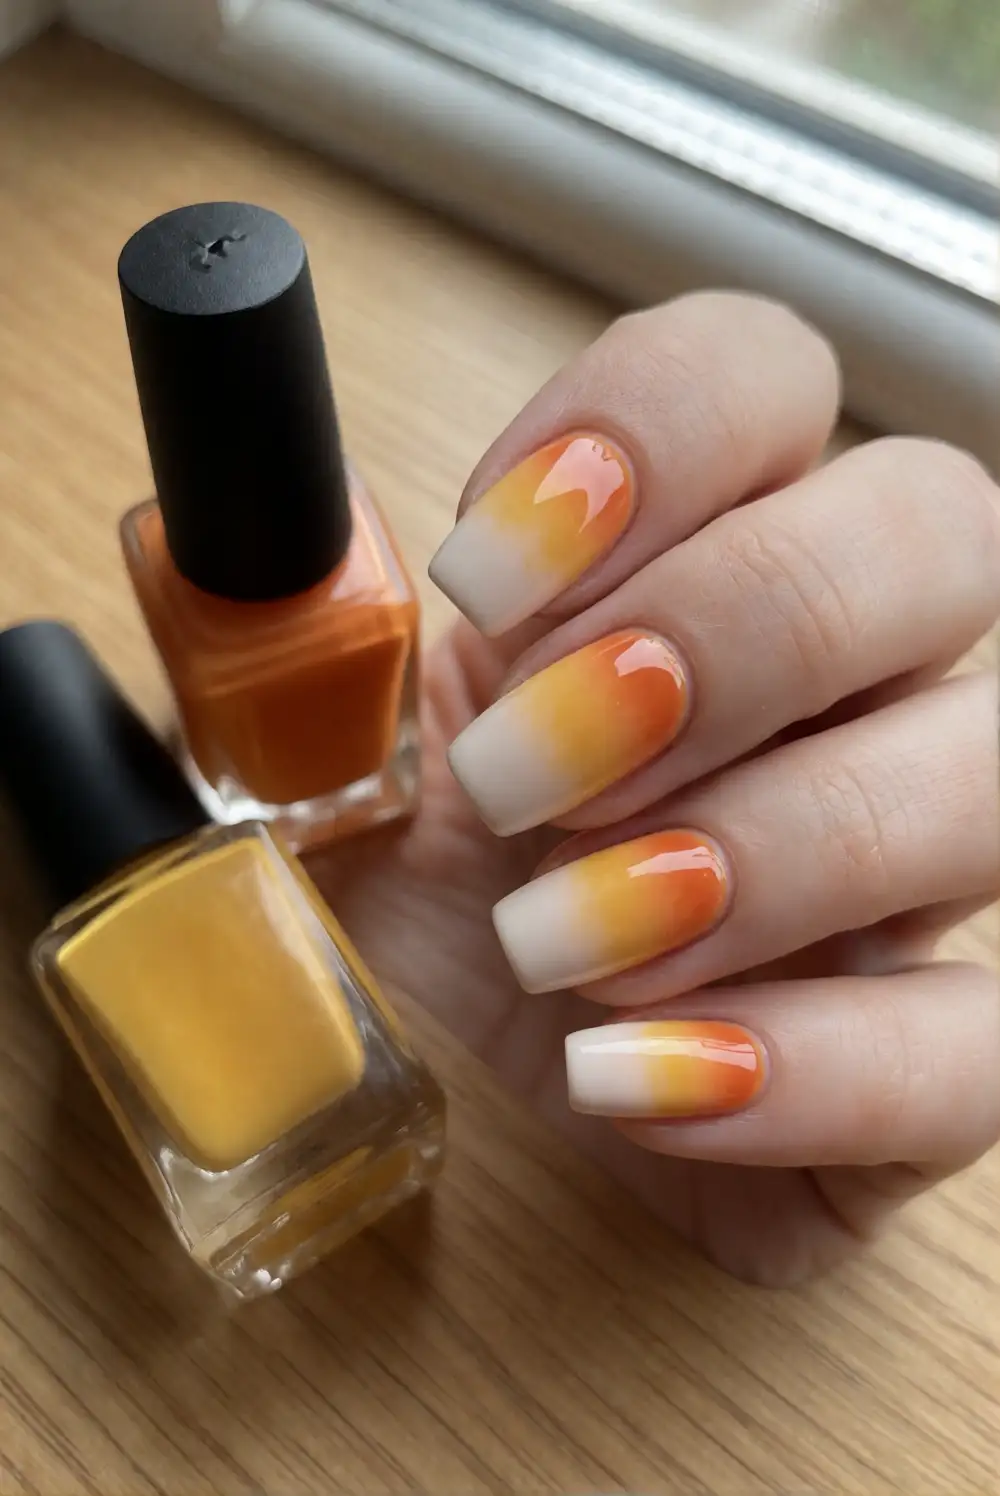
Recreate candy-corn colors with a cheerful fade of creamy white, golden yellow, and orange. Paint a pale base coat, then use a small sponge to dab yellow across the middle of each nail and orange near the tips, blending the borders with light taps. Build the shades gradually rather than applying a thick layer at once. Once the gradient has dried, smooth the surface with glossy top coat for a bright, glassy finish.
For a graphic alternative, divide each nail into three curved color bands instead of blending them. Keep the palette soft and creamy for a more understated look, or choose vivid shades for a playful statement. The gradient is easy to adapt to short nails by concentrating the colors in narrow bands. If you want a balanced manicure, use the color fade on a few nails and wear solid orange or warm ivory on the rest.
Whether you prefer glossy orange tips, delicate gold details, or a darker magnetic finish, these Halloween nail designs make it easy to find a seasonal look that suits your style. Choose a simple accent for everyday wear or combine richer colors and artwork for a more expressive manicure. Save your favorite idea to guide a home manicure or your next salon visit.








