
Bring a little Halloween charm to your manicure with nail designs featuring cheerful pumpkins, flying bats, and moonlit details. These ideas range from simple accent nails to coordinated seasonal sets, with color combinations and decorating tips to help you make each look your own. Choose a design that suits your nail length and style, then gather polish and a fine nail art brush for a festive manicure that feels polished, playful, and easy to wear.
Pumpkin French Tip Nails
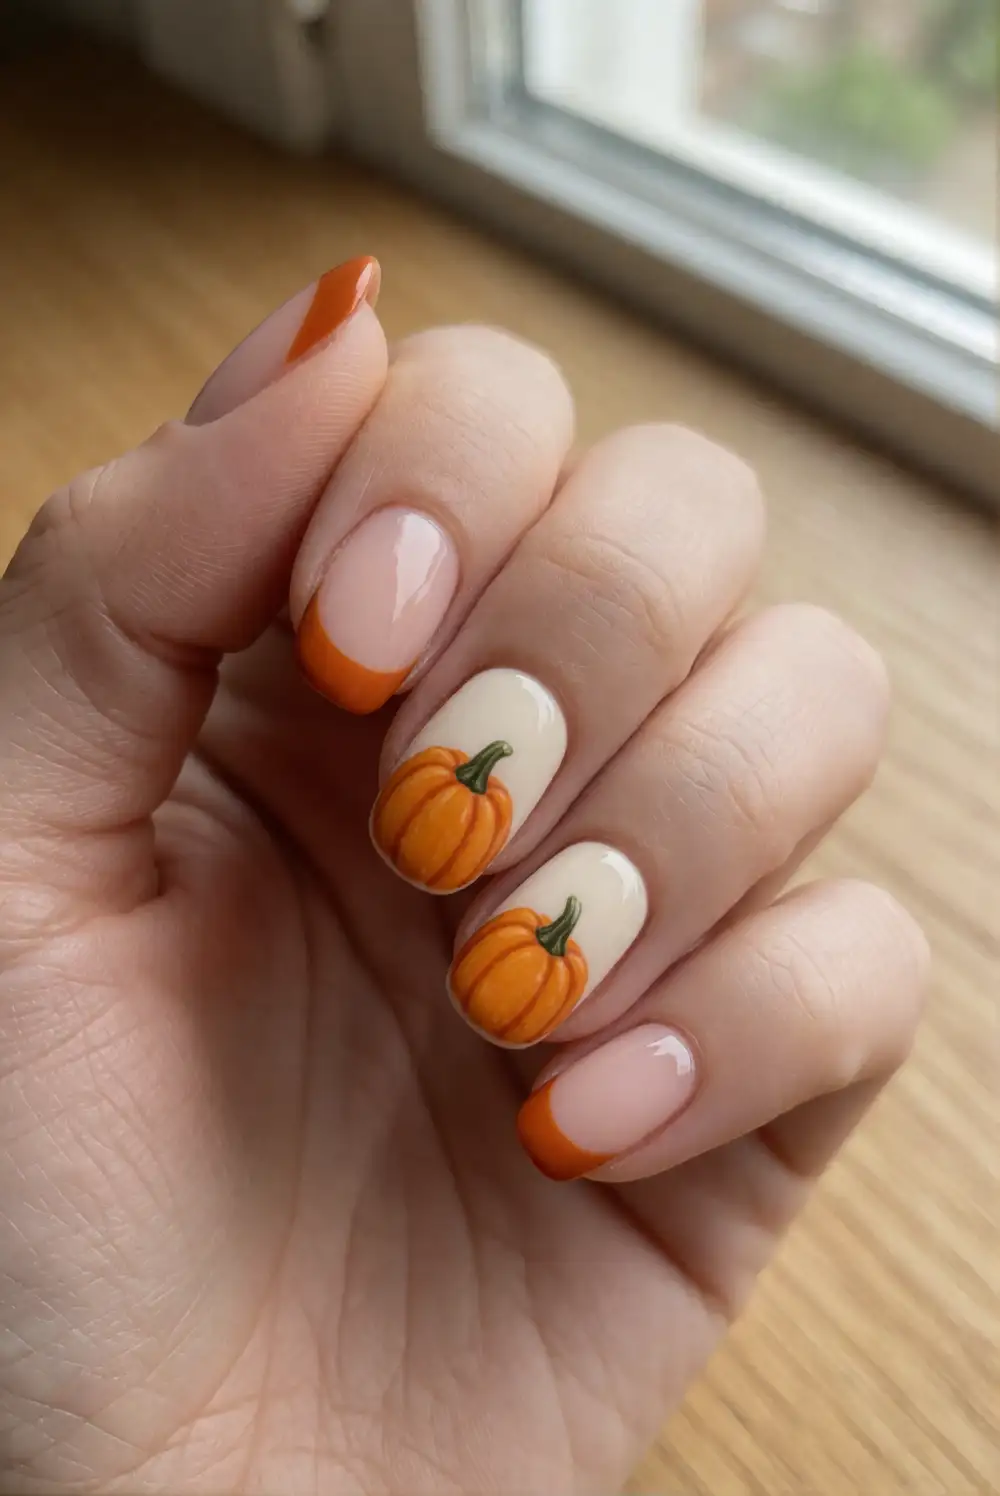
Give a classic French manicure an autumn update with pumpkin-orange tips and tiny pumpkin accents. Apply a base coat, then paint the tips orange using a curved guide or a fine brush. Once dry, add a small rounded pumpkin shape to one or two accent nails and use a thin brush to draw delicate grooves and a short green stem. Finish with a clear top coat to smooth the design and help the color last.
Keep the remaining nails sheer nude or creamy white so the orange tips stand out without making the set feel busy. A short, rounded nail shape works especially well, but the design also suits longer almond nails. If detailed pumpkins feel tricky, use a single orange accent tip and add just a small green stem. Let each layer dry fully before adding the next to keep the curves crisp and prevent colors from smudging.
Tiny Bat Accent Nails
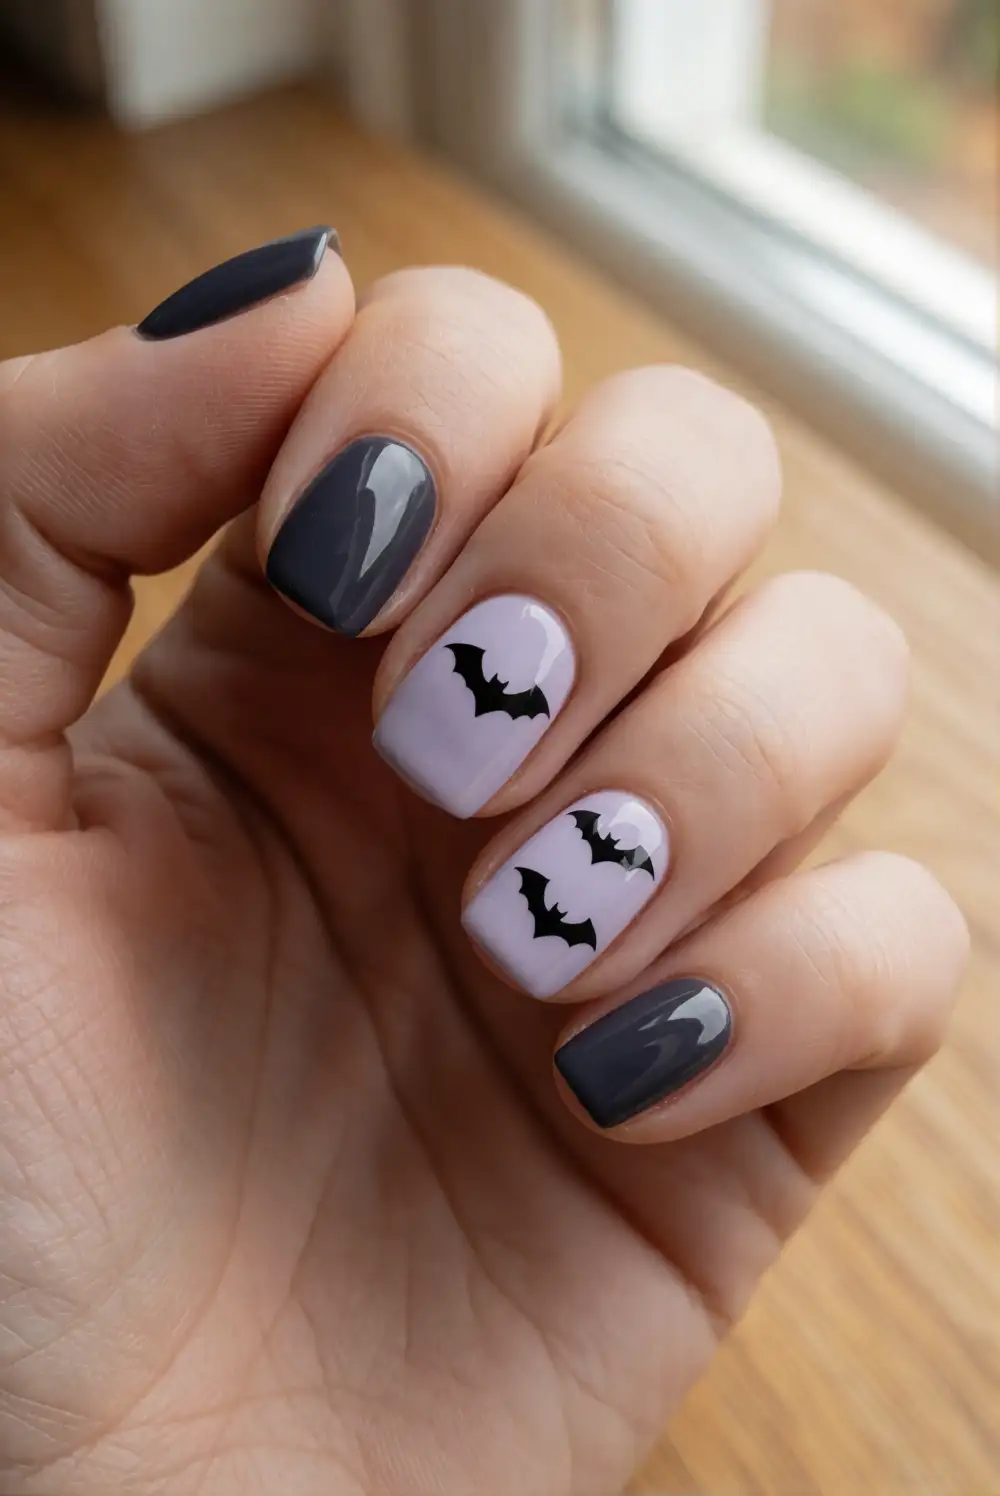
Paint a tiny bat on a pale or warm-toned accent nail for a neat Halloween detail. Start with a smooth base coat and two thin coats of cream, beige, or muted lavender polish. With a fine nail art brush and black polish, make a small central body, then draw two angular wings extending outward. Keep the shape simple and compact, and finish the other nails in glossy charcoal or a coordinating sheer shade.
Place the bat near the cuticle or toward one side of the nail to give the design a little movement. On shorter nails, use just one bat accent and leave the surrounding manicure uncomplicated. A matte top coat creates a softer finish, while glossy polish makes the black silhouette stand out against a light base. For a coordinated set, add tiny black dots to one neighboring nail, keeping enough open space for every detail to remain clear.
Crescent Moon And Star Nails
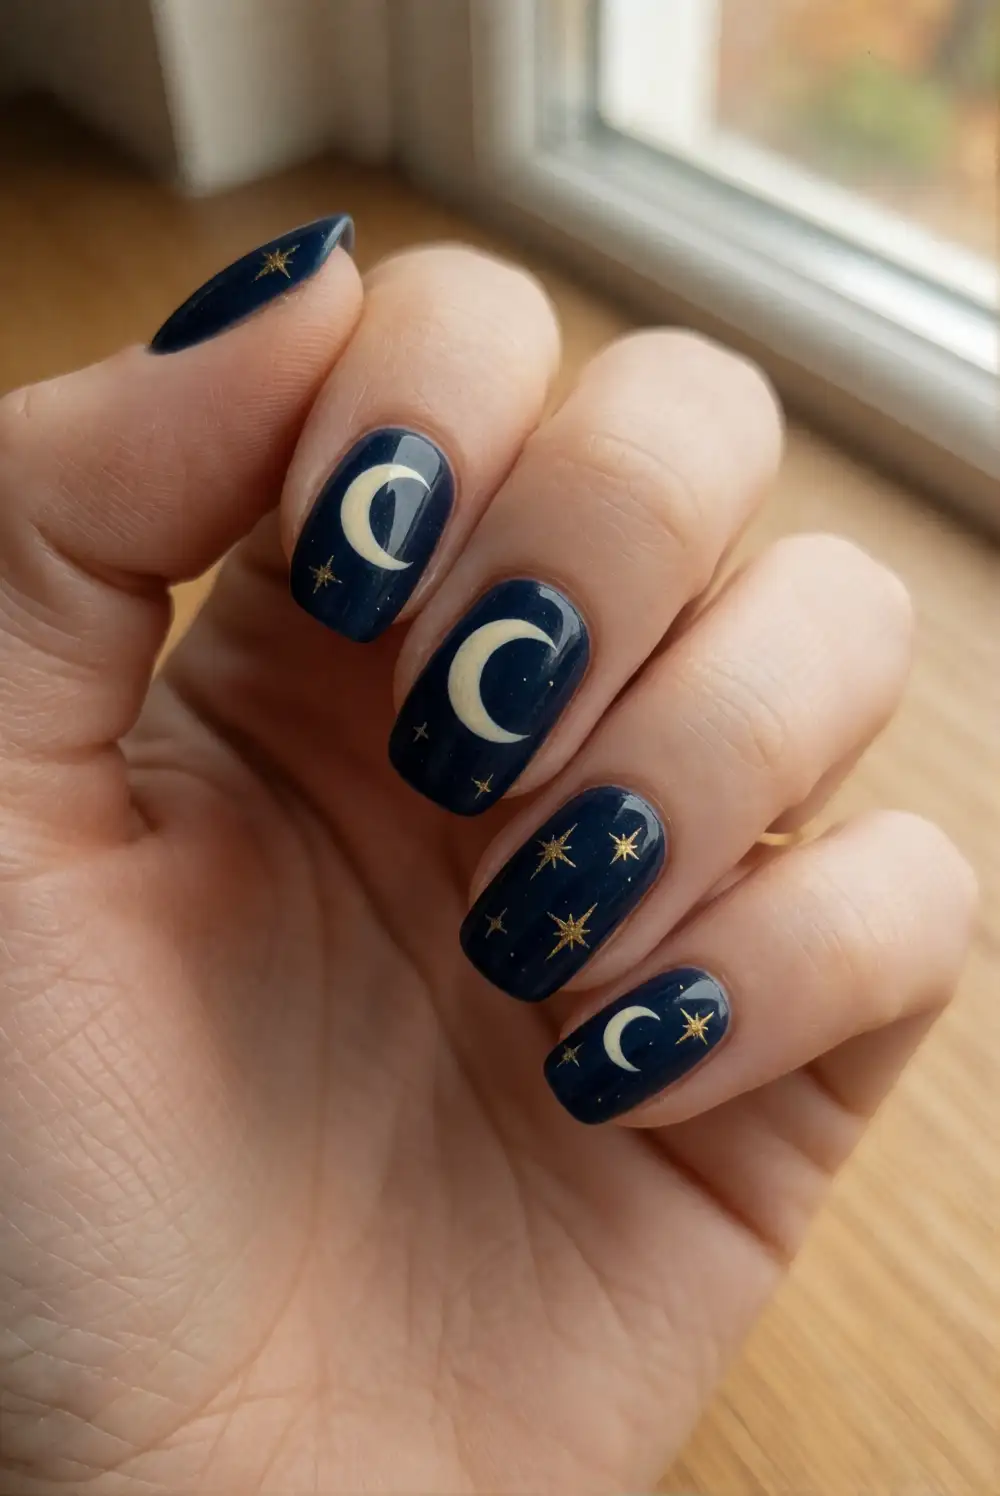
Create a moonlit manicure with slim crescent shapes and scattered stars over a midnight-blue base. Apply a base coat, then build the background with two even coats of deep navy or near-black polish. When it is dry, use a fine brush to paint crescent moons in pale cream or metallic gold. Add a few small four-point stars nearby, varying their placement across the nails, and seal the finished design with a clear top coat.
For a quieter look, decorate only the ring fingers and wear solid navy polish on the rest. A sheer smoky base can make the moons feel delicate, while a glossy dark background gives the set a richer nighttime effect. Keep the moon shapes slender and the stars spaced apart so the details do not crowd the nail. Gold foil polish adds a subtle shimmer, but opaque cream creates a crisp contrast that photographs beautifully.
Pumpkin And Moon Mix And Match Nails
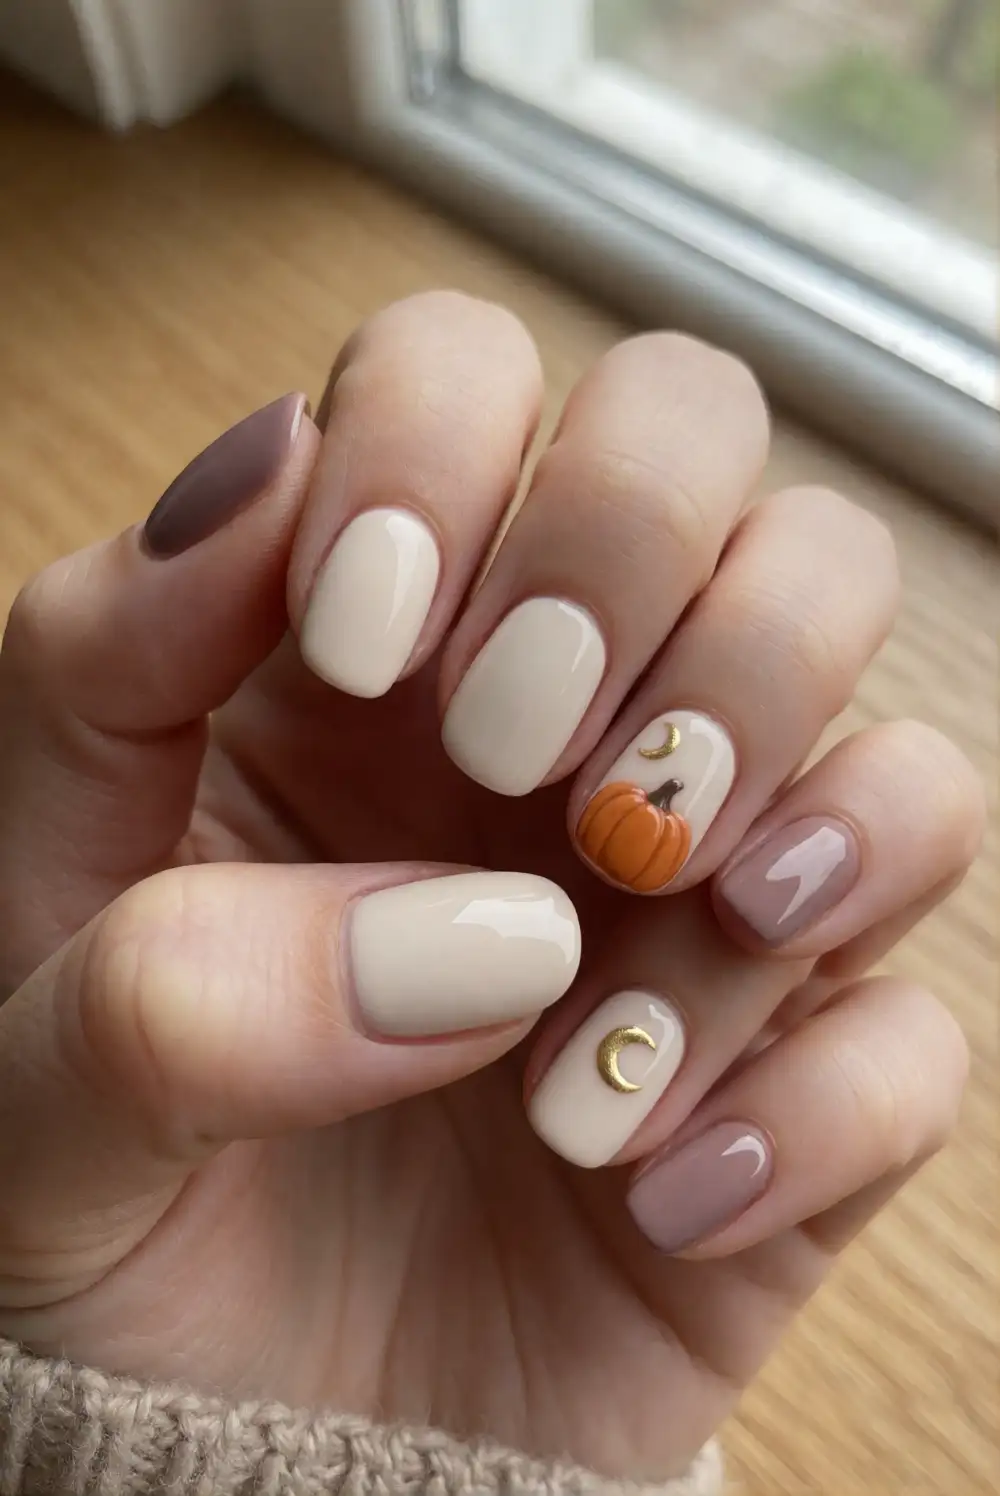
Combine pumpkins and crescent moons in a coordinated manicure by assigning a small motif to selected nails. Paint a warm cream or dusty mauve base, then use orange polish for a rounded pumpkin on one nail and gold or pale yellow polish for a crescent on another. Add fine pumpkin grooves and a tiny stem with a detail brush. Keep the other nails a solid coordinating color, and finish the set with clear top coat.
Choose a consistent scale for the artwork so each accent feels connected, even when the motifs differ. Two decorated nails can make a balanced everyday version; add more accents for a bolder seasonal look. Try a charcoal base beneath the moon for a night-sky effect, while a warm neutral background makes the pumpkin especially prominent. If you are painting with your non-dominant hand, start with the simplest shapes and let each accent dry before sealing.
Minimalist Bat Silhouette Nails
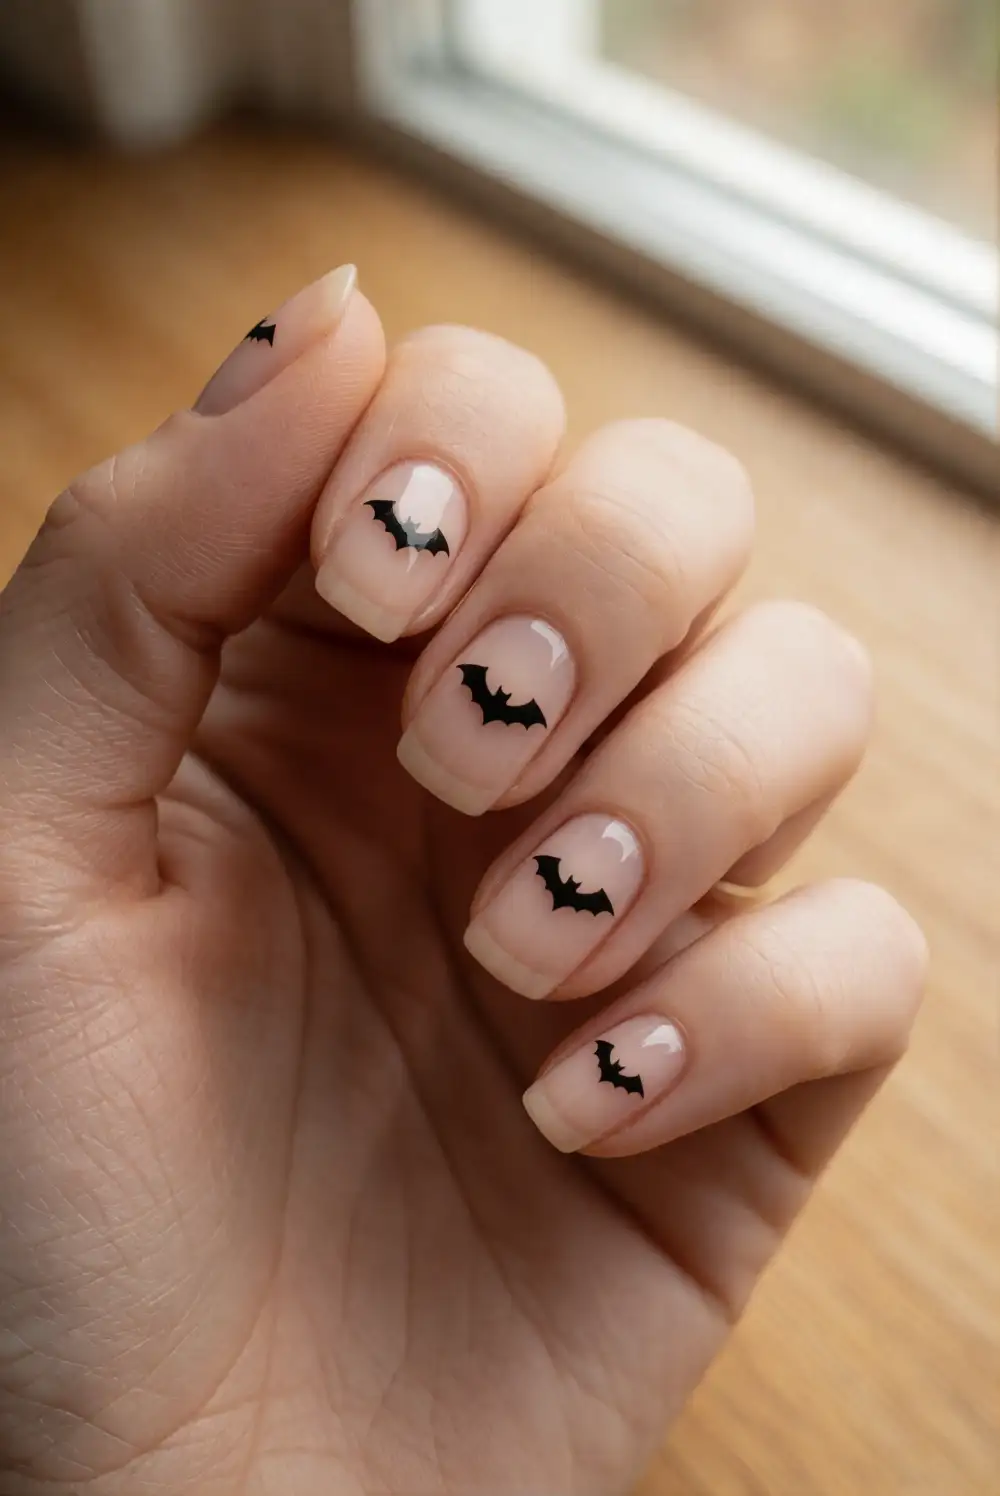
Make a clean, graphic manicure with black bat silhouettes set against a translucent nude or milky base. After applying base coat, brush on a sheer neutral polish and let it dry completely. Use a fine liner brush to paint each bat as a small central diamond-like body with two simple, pointed wings. Put one silhouette on each accent nail, or vary the placement across a couple of nails. A glossy top coat protects the fine shapes.
This restrained design works well for anyone who wants Halloween details without a full themed manicure. Keep the bats small and leave plenty of bare space around them for a polished, airy result. A soft gray base offers a cooler alternative to nude, while a matte top coat gives the silhouettes a modern finish. If the wing shapes are difficult to draw freehand, practice the outline on paper first, then simplify the design rather than crowding the nail.
Milky White Ghost And Moon Nails
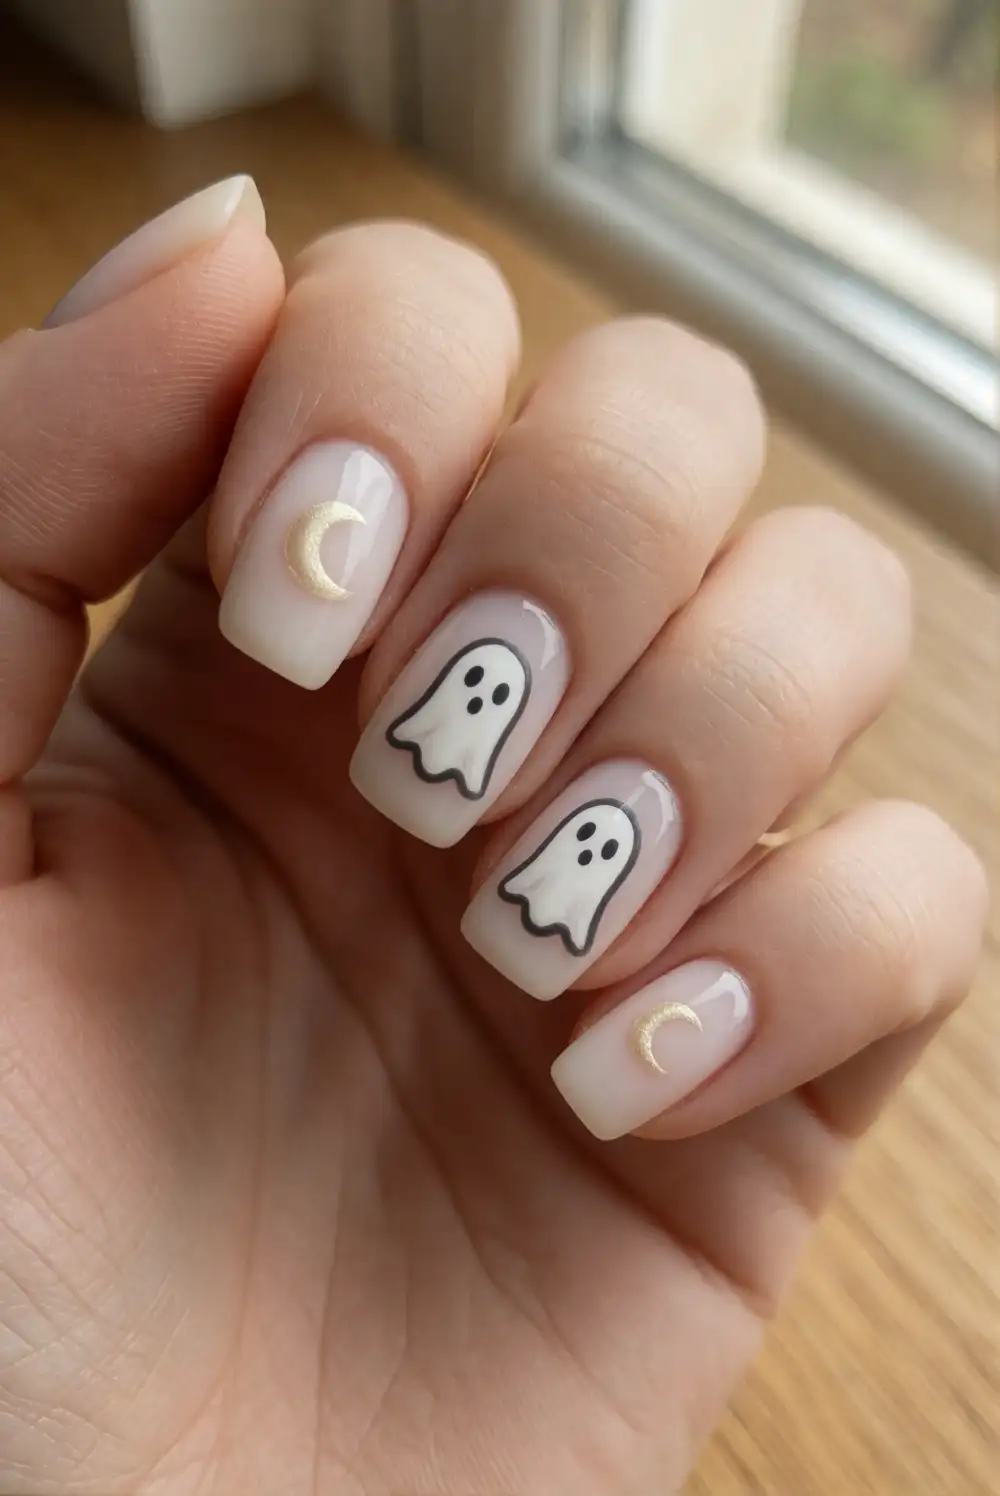
Pair tiny friendly ghosts with crescent moons over a milky white manicure for a soft seasonal set. Apply two thin coats of translucent white or pale cream polish, allowing the base to dry between coats. On an accent nail, paint a small ghost shape with white polish and outline it lightly in charcoal. Add a cream or gold crescent on another nail using a fine brush. Let the art set, then protect the design with a smooth clear top coat.
Keep the ghost expression simple with tiny dark eyes and a small curved smile, or skip facial details for an especially minimal look. A pale lavender background can add a gentle twilight mood without overpowering the artwork. Place the moon near the cuticle and the ghost closer to the tip to create visual variety. This design looks especially tidy on short oval nails, but the motifs can be enlarged slightly for longer nails.
Burnt Orange Ombre Pumpkin Nails
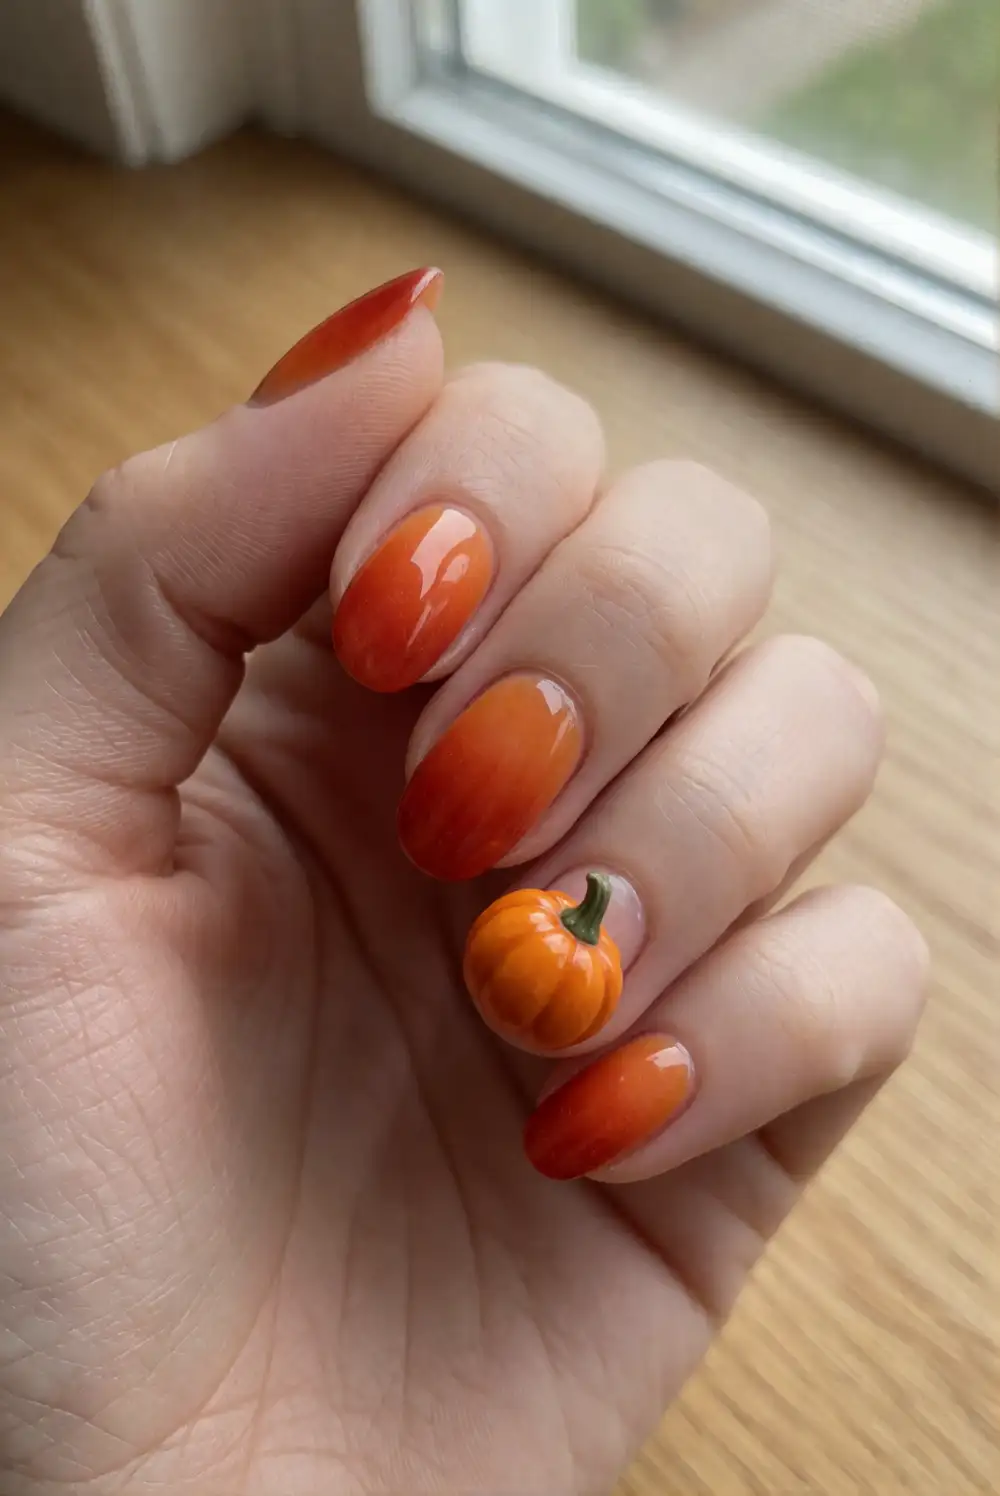
Blend warm orange polish into a soft nude base, then add a small pumpkin accent for a glowing autumn manicure. Apply a base coat and sponge orange polish onto the tips, gently building color with light dabs until the gradient looks smooth. Allow it to dry, clean the skin around each nail, and paint a tiny pumpkin on one accent nail with a fine brush. Add a short stem and finish everything with clear top coat.
Use burnt orange for a rich seasonal result or a lighter apricot shade for a softer effect. A makeup sponge can leave texture, so apply a final thin layer of sheer polish to blend the gradient before adding the top coat. Keep the pumpkin on a nail with enough space for its outline and grooves. For a simpler variation, leave the ombre plain and add only a tiny orange pumpkin to the thumb or ring finger.
Midnight Sky Starry Nails
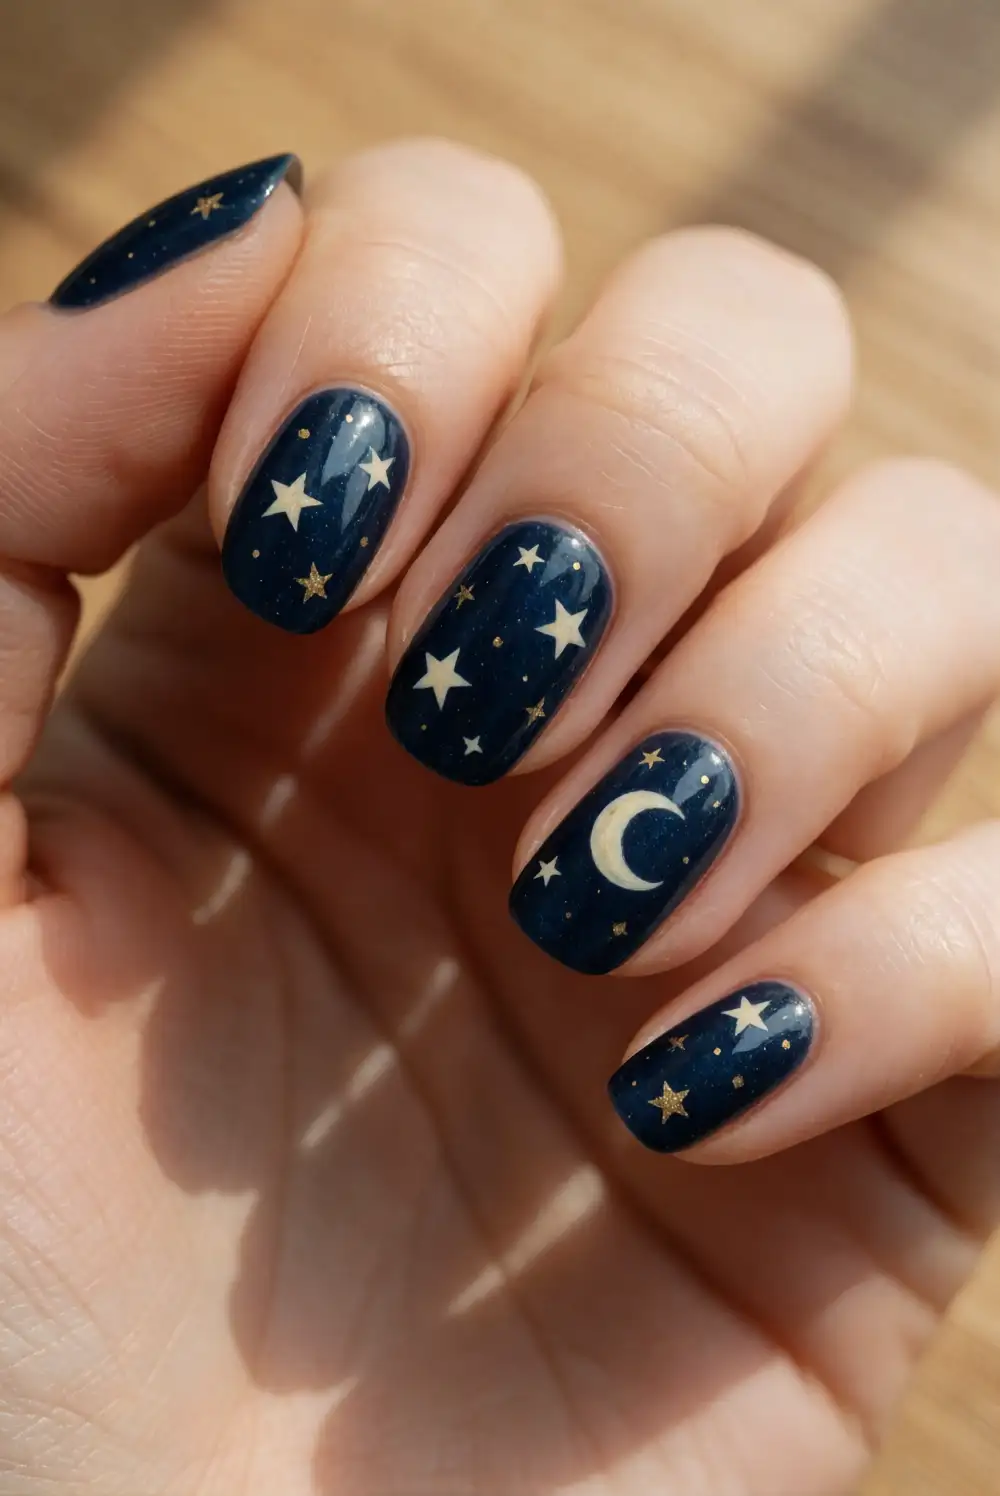
Turn a deep navy manicure into a Halloween night sky with scattered stars and a single pale moon. Apply two coats of navy polish over a base coat, letting the surface dry before decorating. Use a fine brush to paint small gold or cream stars, leaving generous gaps between them. Add one crescent moon to an accent nail, then finish with a glossy top coat. The simple palette makes the tiny celestial details easy to see.
Vary the stars in size, but keep them small enough to preserve the calm, open feel of the design. A charcoal or deep plum base can replace navy, while silver polish gives the artwork a cooler finish. If fine points are challenging, make simple dots and short crossing strokes instead of intricate stars. Wear the moon on the ring finger as a focal point, or repeat small crescents across the set for a more coordinated look.
Matte Black And Copper Moon Nails
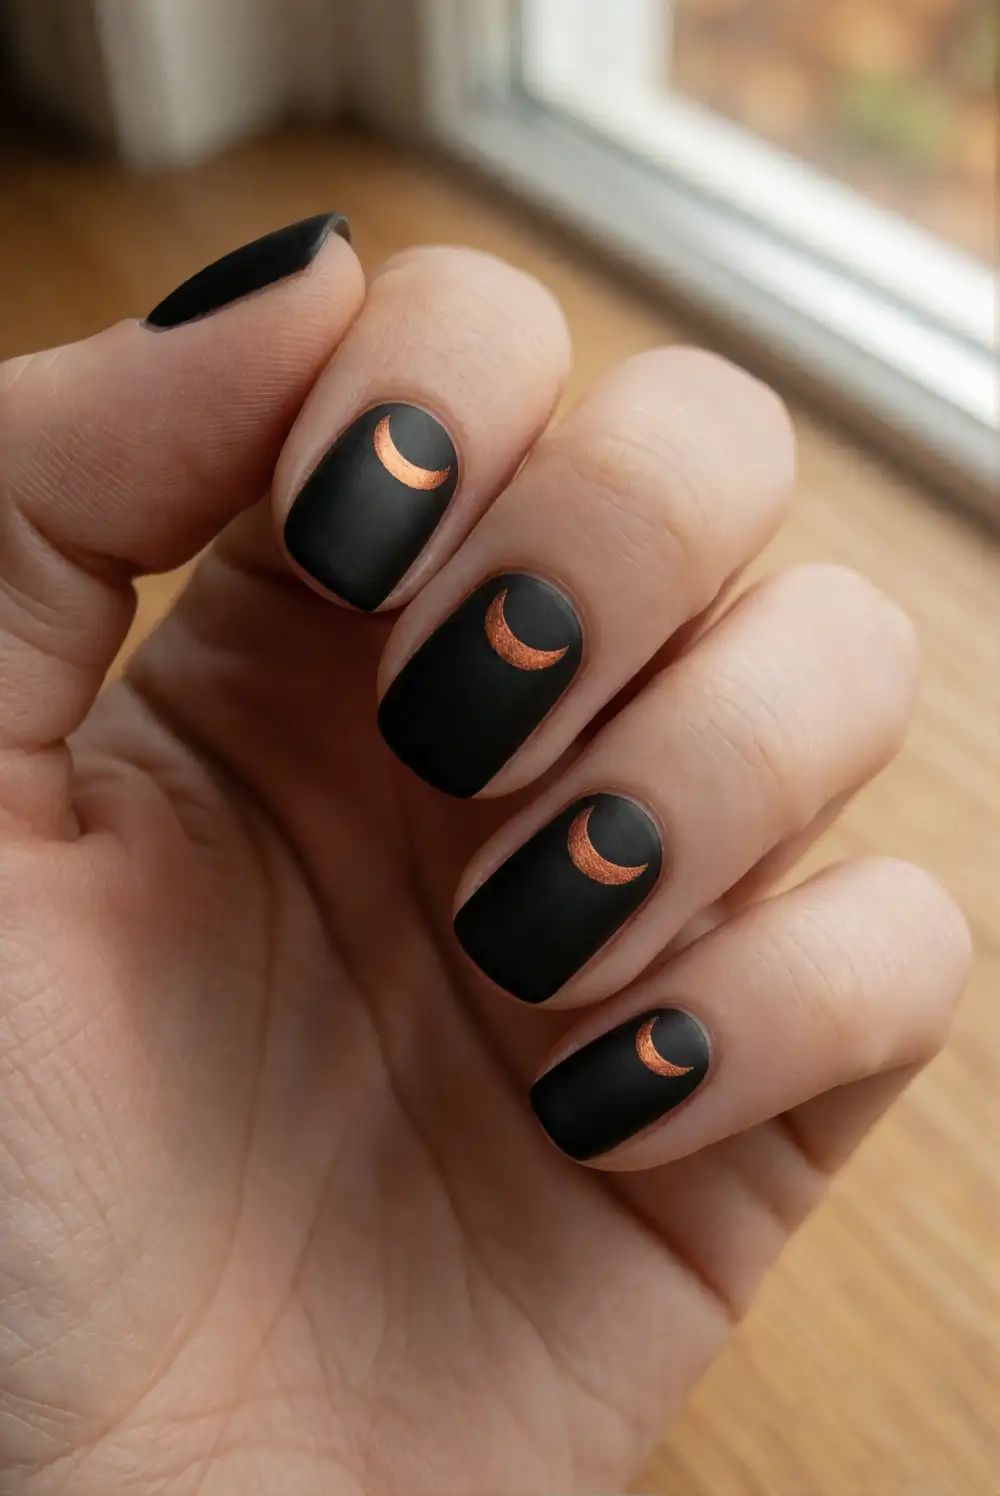
Pair velvety black polish with copper crescent moons for a striking, elegant Halloween manicure. Apply a base coat and two thin coats of black polish, allowing each layer to dry. With a detail brush, paint a small copper crescent near the cuticle on selected nails, keeping the curves fine and consistent. Once the artwork is set, apply a matte top coat over the black and moons, or leave the metallic details glossy for a subtle finish contrast.
Try a single copper moon on each hand for an understated look, or add moons to several nails for a more decorative set. A warm bronze shade pairs beautifully with autumn clothing, while rose gold creates a softer variation. Use a glossy black base if matte polish is not available, and place the moon against a bare sheer nail for a lighter design. Keep the metallic shapes small so they read as delicate accents rather than heavy blocks of color.
Orange And Black Pumpkin Bat Nails
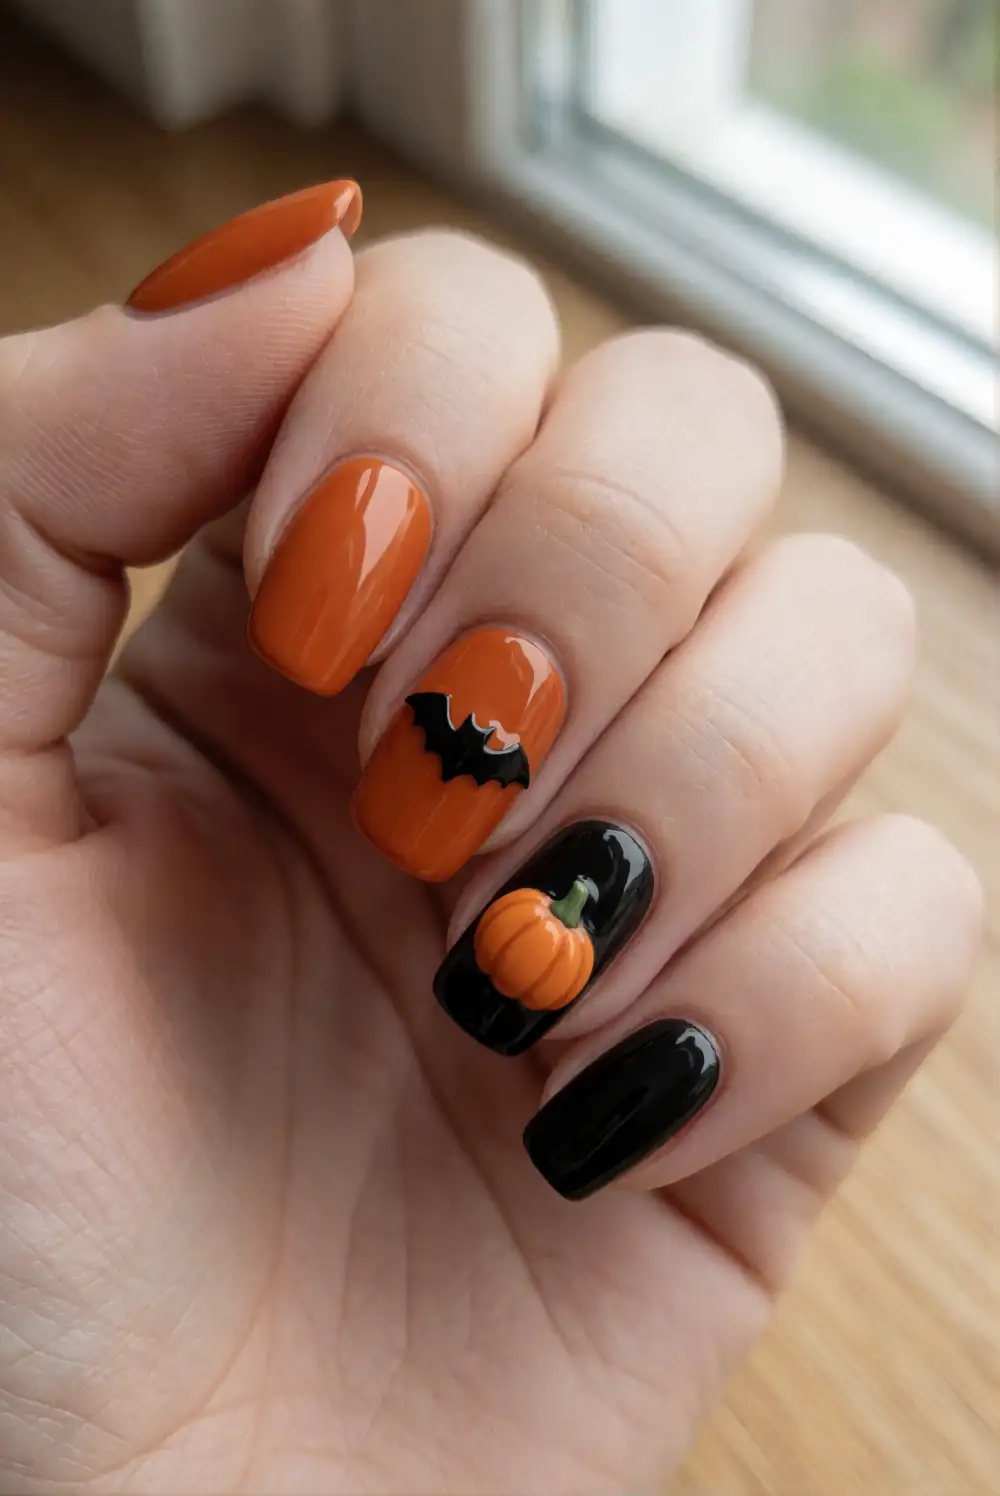
Bring pumpkins and bats together in a bold orange-and-black manicure. Paint alternating nails in pumpkin orange and glossy black, beginning with a base coat and allowing the polish to dry between layers. On an orange accent nail, add a small black bat silhouette; on a black accent nail, paint a rounded orange pumpkin with fine grooves and a green stem. Finish the artwork with clear top coat, using a detail brush to keep each motif neat.
For a more balanced set, use orange as the main color and reserve black for two accent nails. A cream nail between the stronger shades can give the manicure extra breathing room. If detailed artwork feels difficult, paint a tiny pumpkin on one nail and keep the bat as a simple silhouette on another. The combination works on short and long nails alike, and a glossy finish helps the contrasting colors look crisp and dimensional.
Whether you prefer tiny bat accents, glowing pumpkin details, or crescent moons against midnight polish, these Halloween nail designs make it easy to find a seasonal look that fits your style. Pick one motif for a simple manicure or combine a few across coordinating accent nails. With thoughtful color choices, fine brushes, and a protective top coat, your finished set can feel festive, polished, and ready for autumn outings.








