
Give long coffin nails a seasonal makeover with Halloween designs that balance dramatic color and wearable detail. These manicure ideas range from glossy orange accents to delicate webs, moons, and playful candy-inspired patterns. Each look can be adapted with polish and simple nail-art tools, whether you are doing your own nails at home or bringing inspiration to a salon.
Glossy Black Nails with Pumpkin Orange French Tips
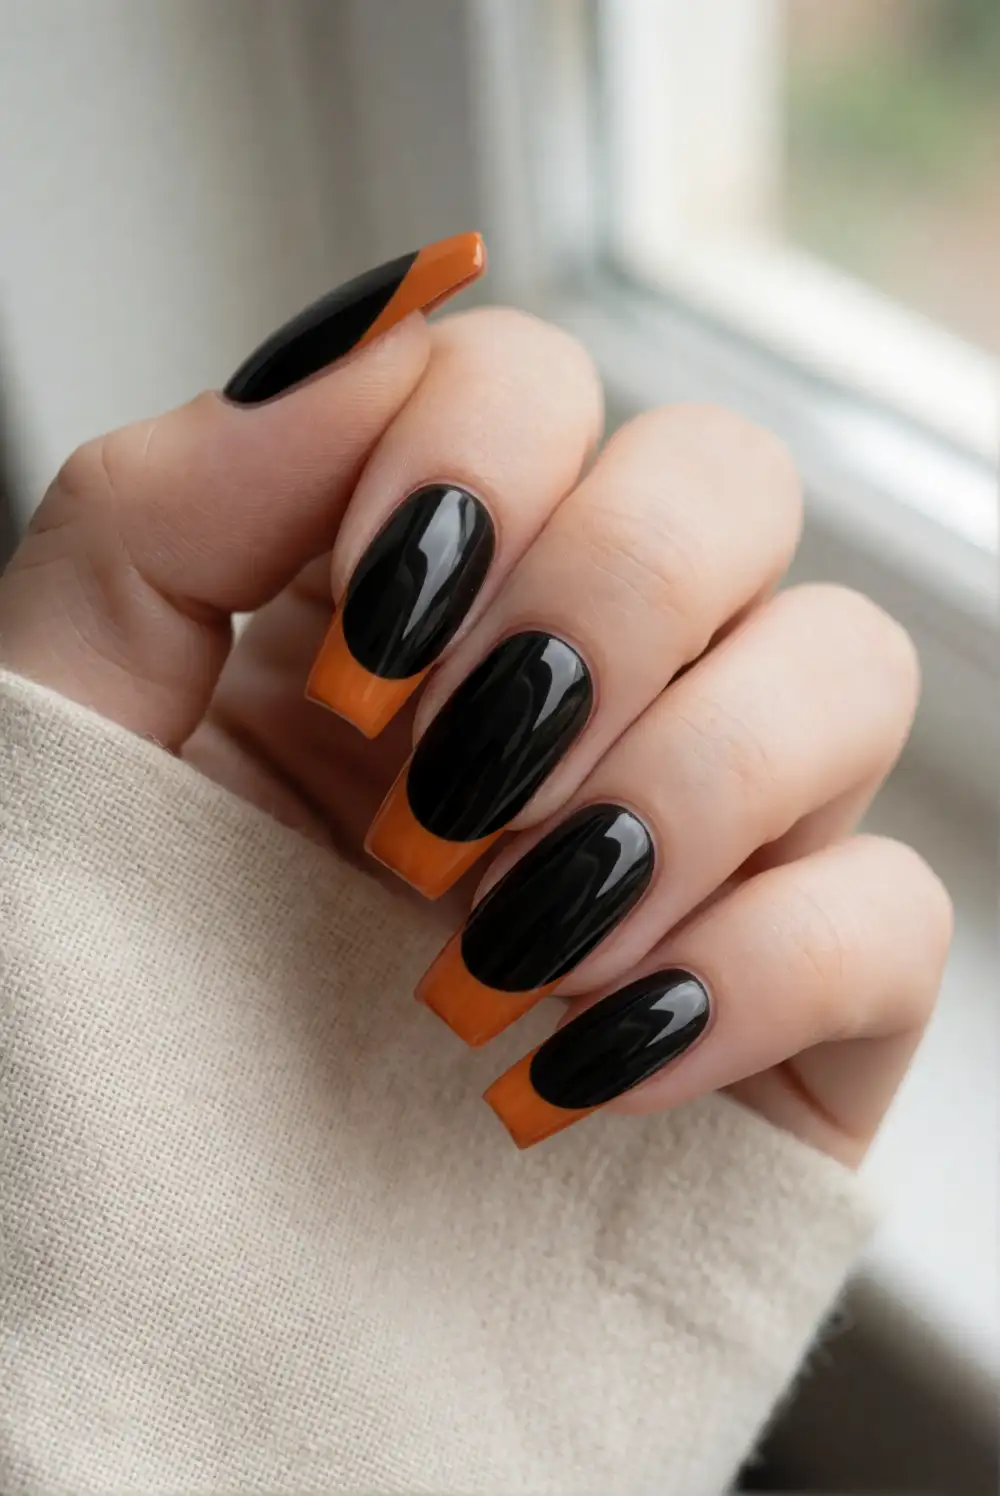
Paint each long coffin nail with a smooth, opaque black base and let it dry fully. Use a fine liner brush to sweep pumpkin-orange polish across each squared tip, following the nail’s natural shape to create a crisp French edge. A small piece of nail guide tape can help keep the curves even. Finish with a glossy top coat, carefully sealing the free edges so the dark polish and vivid tips look polished and last longer.
Keep the orange line slim for a sleek finish, or make it wider when you want the color to stand out. A sheer base under the black can soften the contrast, while a single accent nail with a full orange tip adds variety without changing the look. Let every layer dry before adding top coat to avoid dragging the color. This manicure pairs especially well with simple black clothing and warm-toned accessories.
Violet Nails with Fine Spiderweb Accents
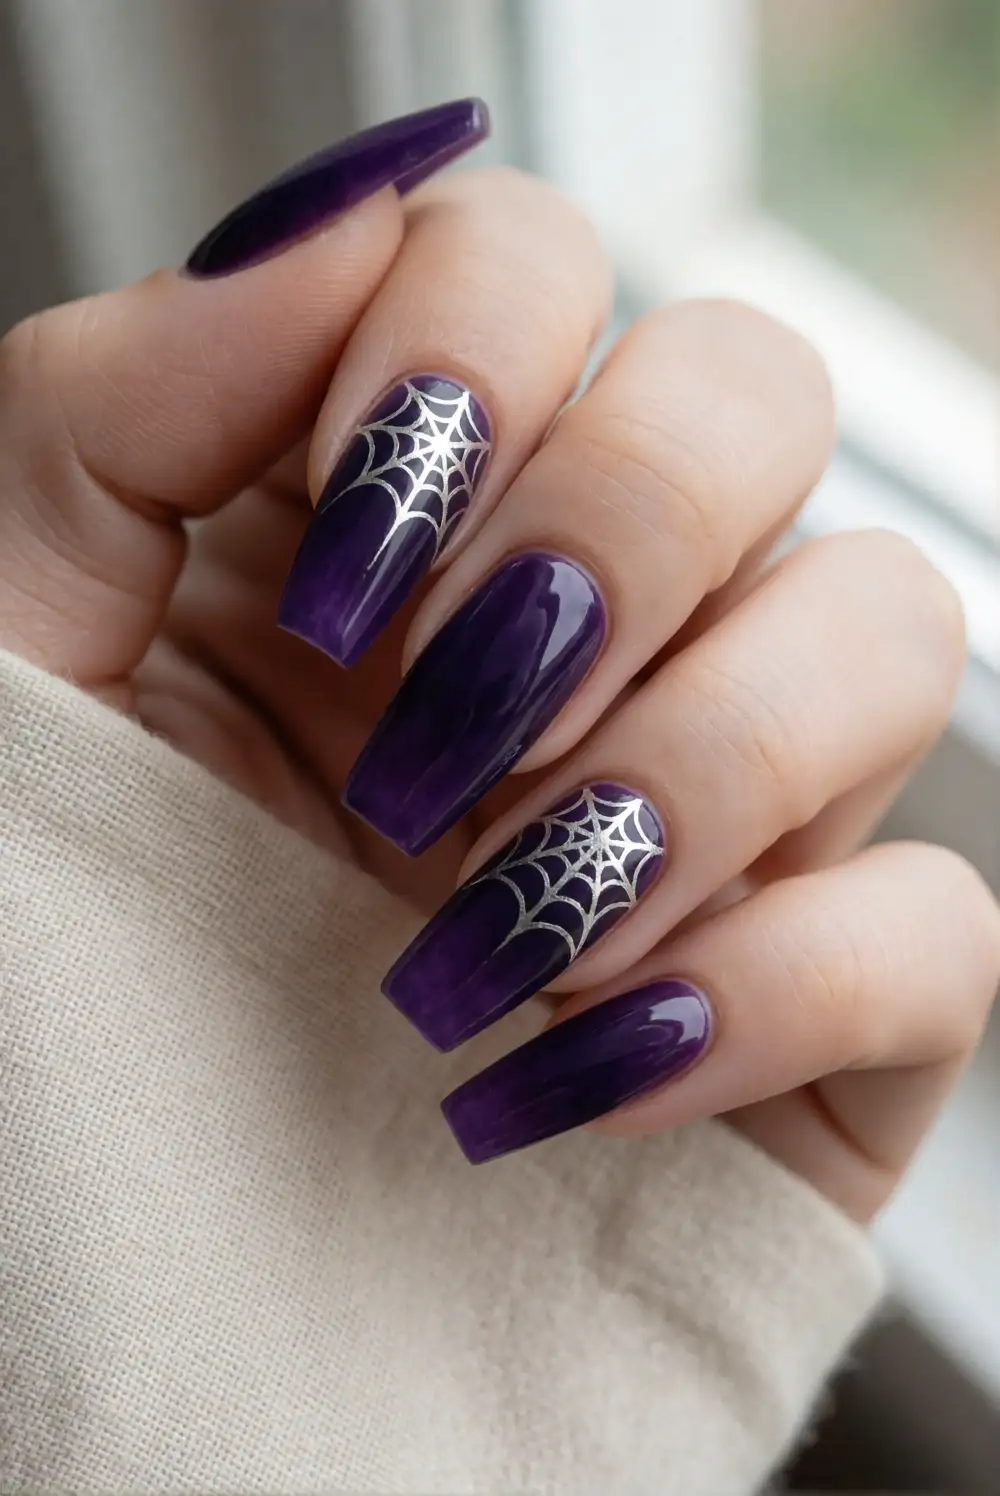
Apply a deep violet polish across the nails and allow the base to dry completely. Choose a fine nail-art brush and draw several delicate silver or pale gray lines from one corner of an accent nail, then connect them with gently curved cross-lines to form a small web. Repeat the detail on one or two nails, leaving the others solid violet. Finish with a clear top coat to smooth the artwork and give the saturated color a reflective shine.
Keep the web small and positioned near a corner so the design feels airy rather than crowded. For a softer variation, use lilac polish and a pearly white web; for a bolder look, choose vivid violet with metallic silver details. A dotting tool can help create a neat starting point, but a fine brush is enough for the whole pattern. Use the same accent placement on each hand for a balanced salon-inspired finish.
Blood Red Ombre on Coffin-Shaped Nails
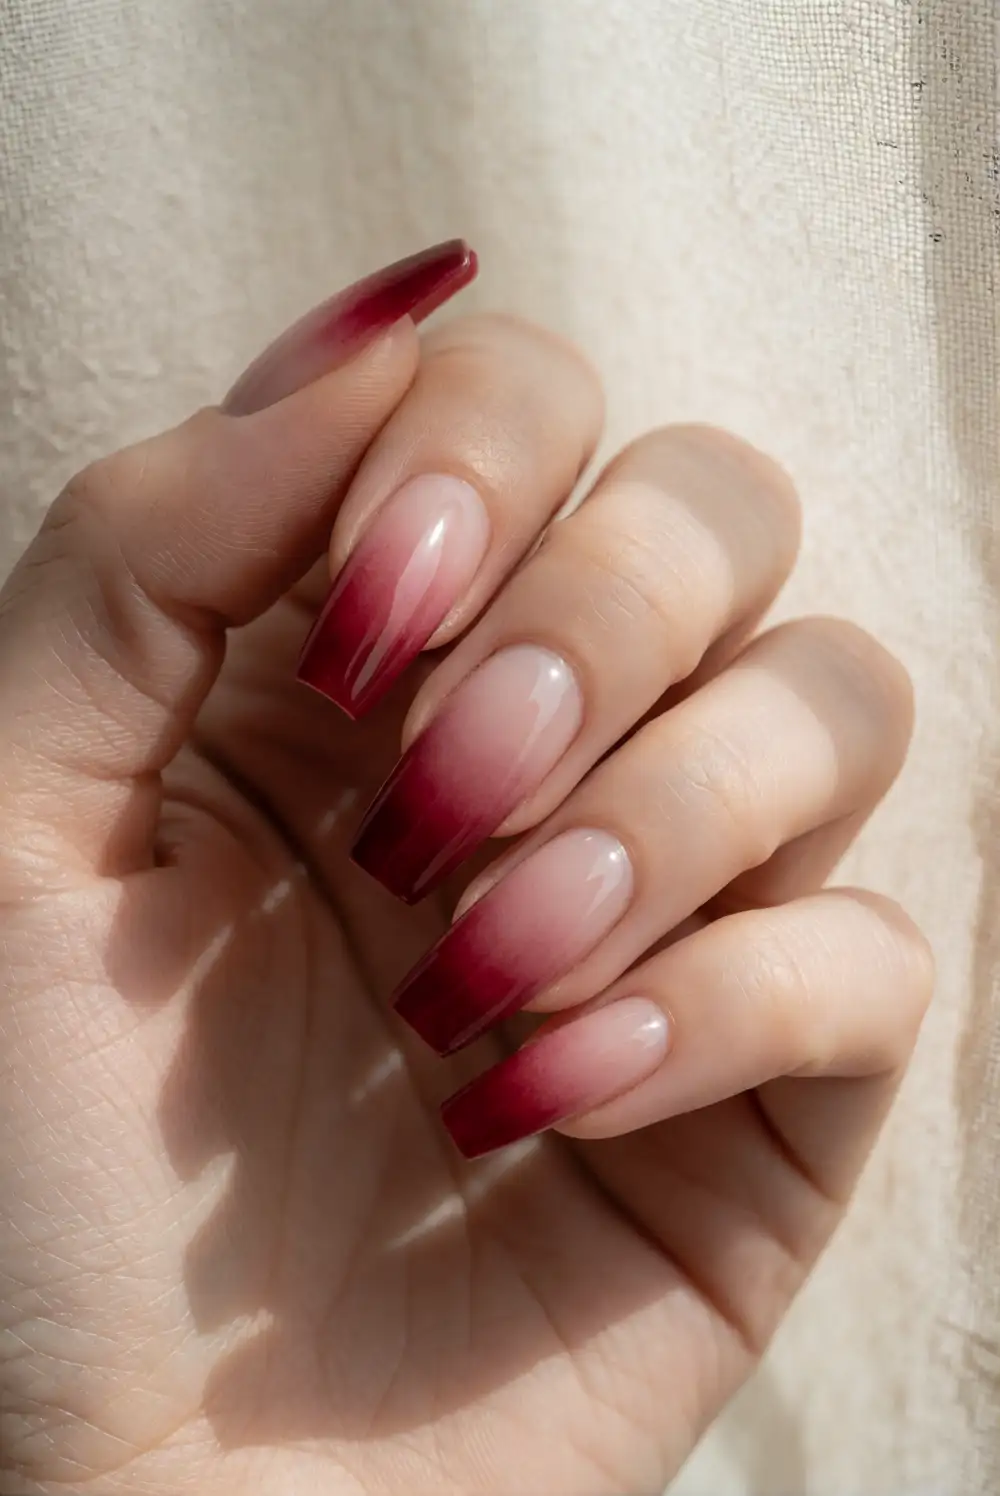
Start with a clear or pale nude base on each nail, then blend deep red polish upward from the squared tips. Dab the color gently with a small cosmetic sponge, using light layers so the transition stays gradual instead of forming a hard stripe. Let each pass dry before adding another, concentrating the richest red near the edges. Once the gradient looks even, apply a glossy top coat to merge the finish and emphasize the long coffin silhouette.
For a softer effect, choose cherry red and a milky nude base; for more drama, blend black into the very tips before applying the red. Use a fresh corner of the sponge for each nail to prevent muddy color, and protect the surrounding skin with liquid latex or careful cleanup. A glitter-free glossy finish keeps the gradient as the focus, while a single solid-red accent nail ties the manicure together.
Matte Black Nails with Silver Crescent Moons
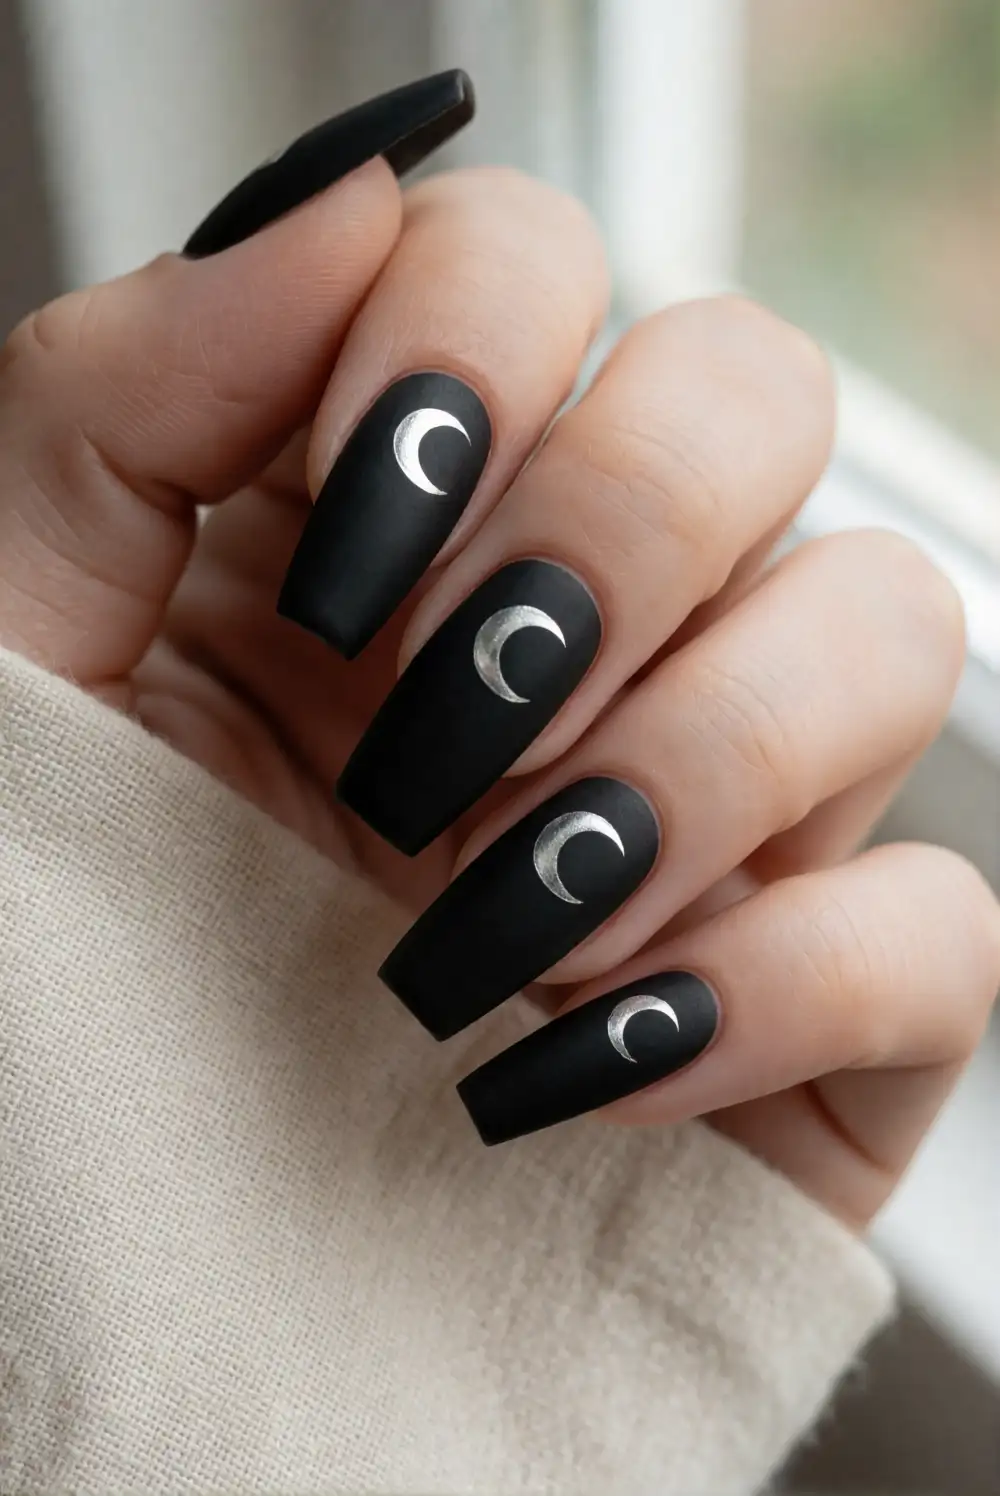
Cover the nails with opaque black polish and allow it to dry before brushing on a matte top coat. On an accent nail, place a small silver crescent near the cuticle using a fine brush or a shaped nail sticker. Repeat the moon on a few nails, keeping the remaining surfaces plain and velvety. If using loose metallic polish, apply it in thin strokes and finish with a compatible top coat that preserves the matte effect around the design.
Vary the moons from slim crescents to slightly fuller curves for a celestial feel, or use a pale gold accent for a warmer contrast. Keep the metallic details close to the cuticle so they do not compete with the distinctive coffin tips. A matte base can show fingerprints more easily, so let the top coat cure thoroughly and handle the nails gently at first. This design looks striking with silver jewelry and dark, minimal outfits.
Green and Black Checkerboard Nail Art
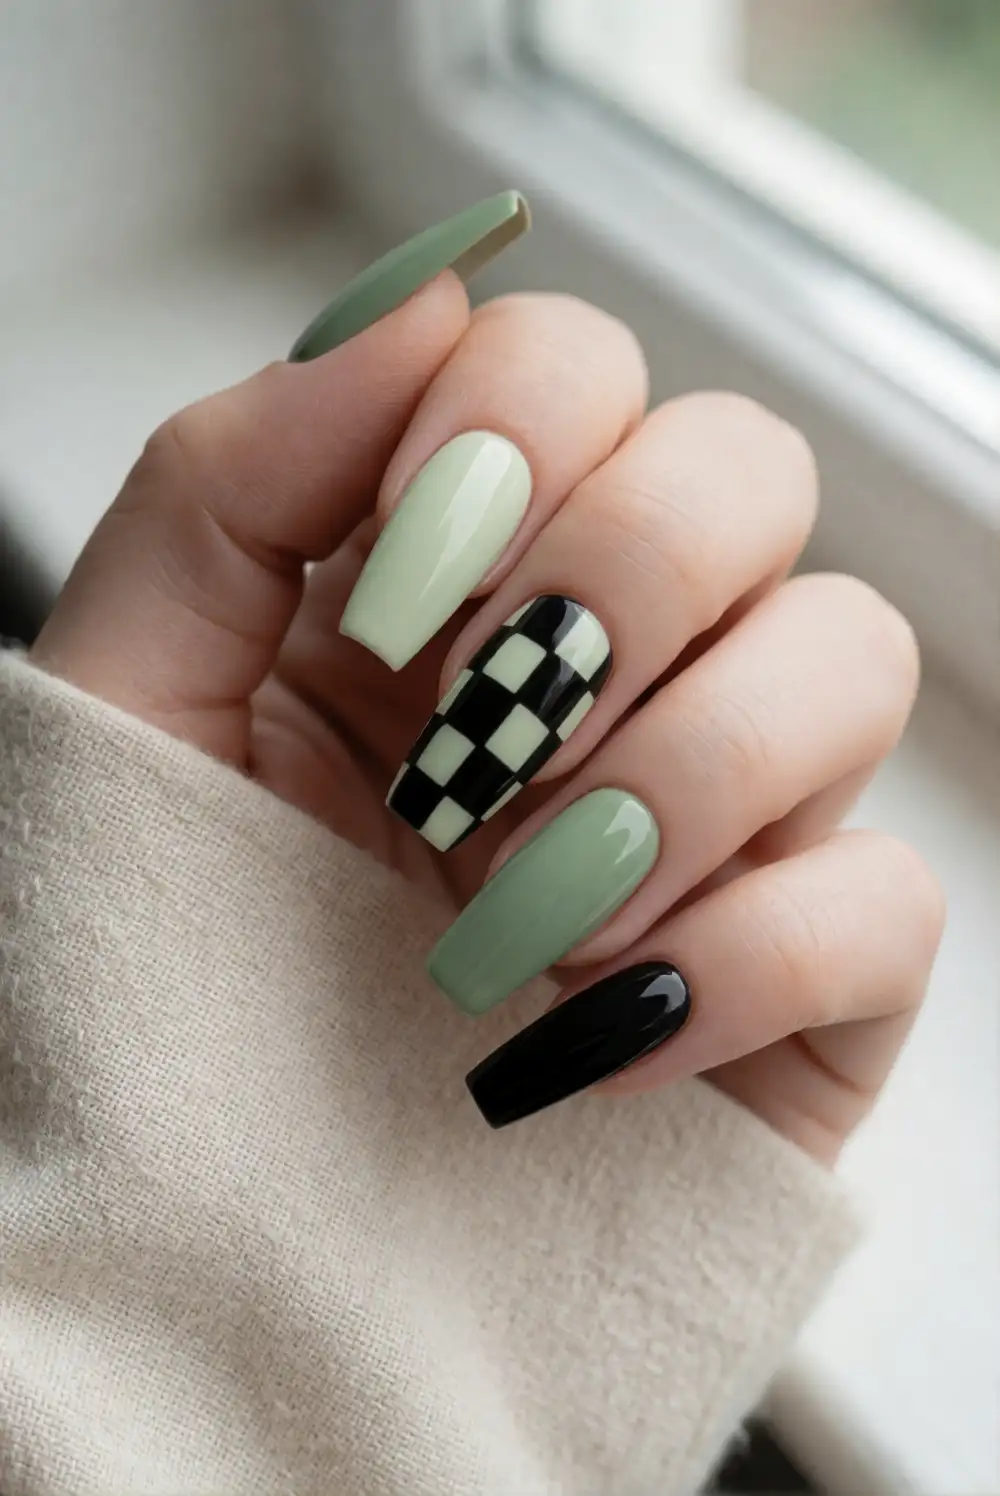
Paint the nails with a creamy green base and let it dry well. Use thin nail-art tape to map a small checkerboard on one or two accent nails, then fill alternating spaces with black polish using a fine brush. Remove the tape while the polish is still slightly tacky for cleaner edges. Leave the other nails solid green or black, and finish the complete set with a glossy top coat after the pattern has dried.
Choose acid green for a punchy, playful look or a deeper moss shade for a more muted palette. Smaller checks suit the long nail surface without overwhelming it, while a single checkerboard accent keeps the design easy to wear. If tape feels tricky, paint the squares freehand with a detail brush and correct uneven lines with the base color. Keep the pattern centered on each accent nail to make the manicure feel intentional and balanced.
Milky White Nails with Tiny Black Bats
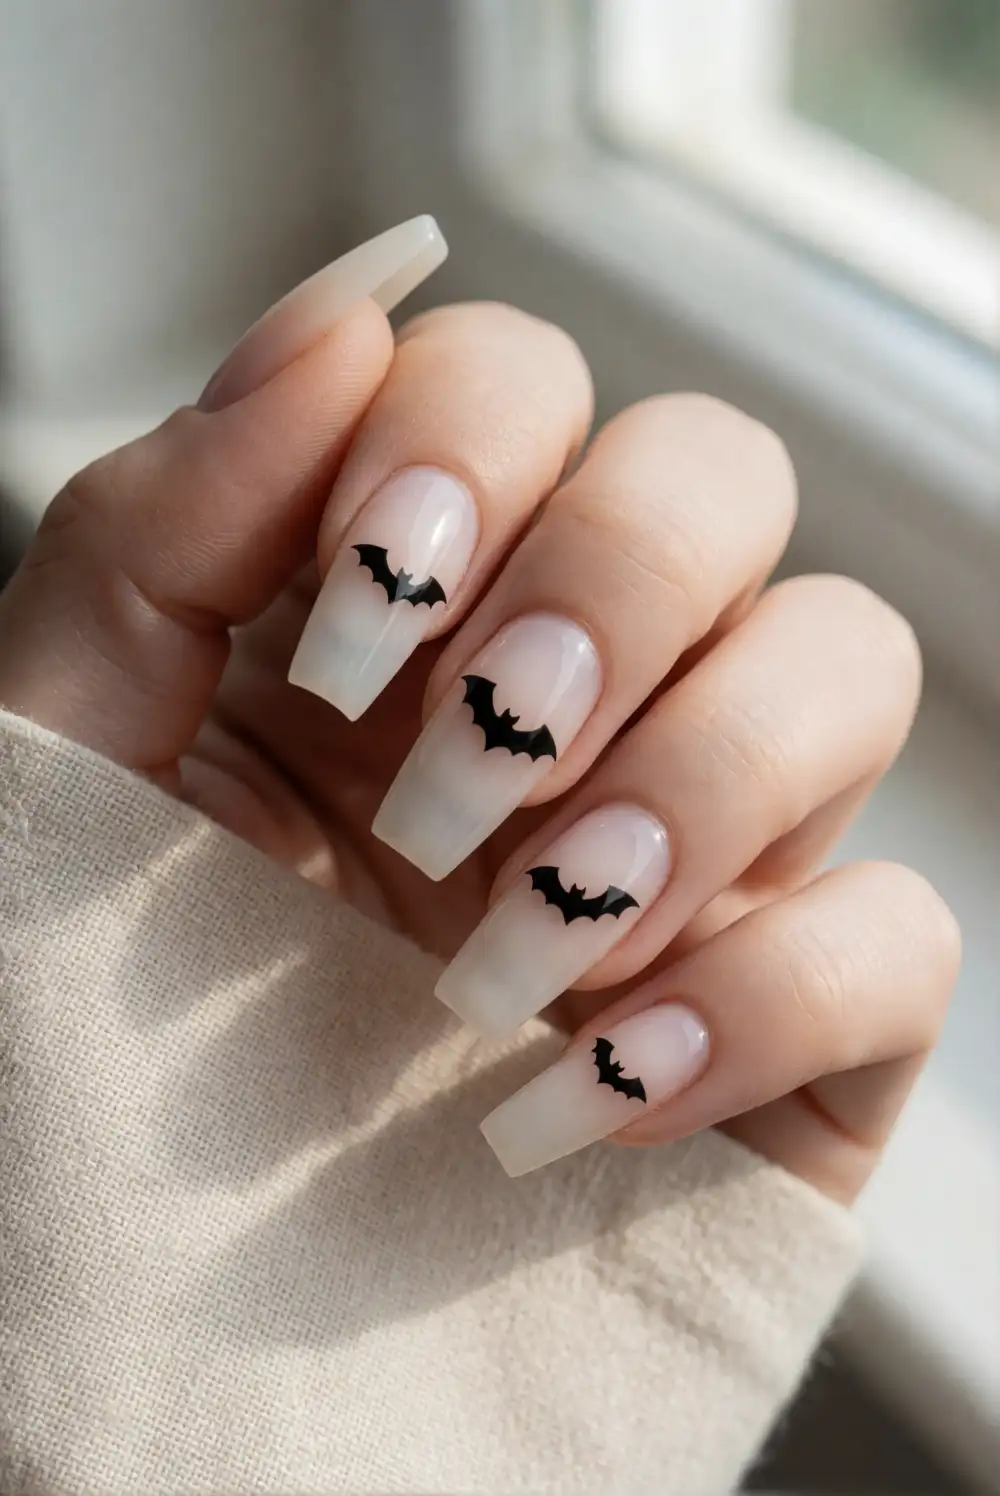
Apply a translucent milky-white polish to create a soft, luminous base. Once it is dry, use a fine brush and black polish to paint simple bat silhouettes on selected nails: make a small central body, then add two angular wings on either side. Keep the shapes compact and leave plenty of open space around them. Let the artwork dry completely before adding a clear glossy top coat, which helps the pale base look smooth and bright.
Place one bat near the tip and another near the side of a different nail to create a gentle sense of movement. For a delicate variation, use charcoal instead of jet black and choose a sheer blush-white base. A nail-art pen can make the small shapes easier to control, while a detail brush allows more freedom with wing angles. Keep most nails plain so the little silhouettes remain easy to see against the milky finish.
Burnt Orange Nails with Tortoiseshell Accents
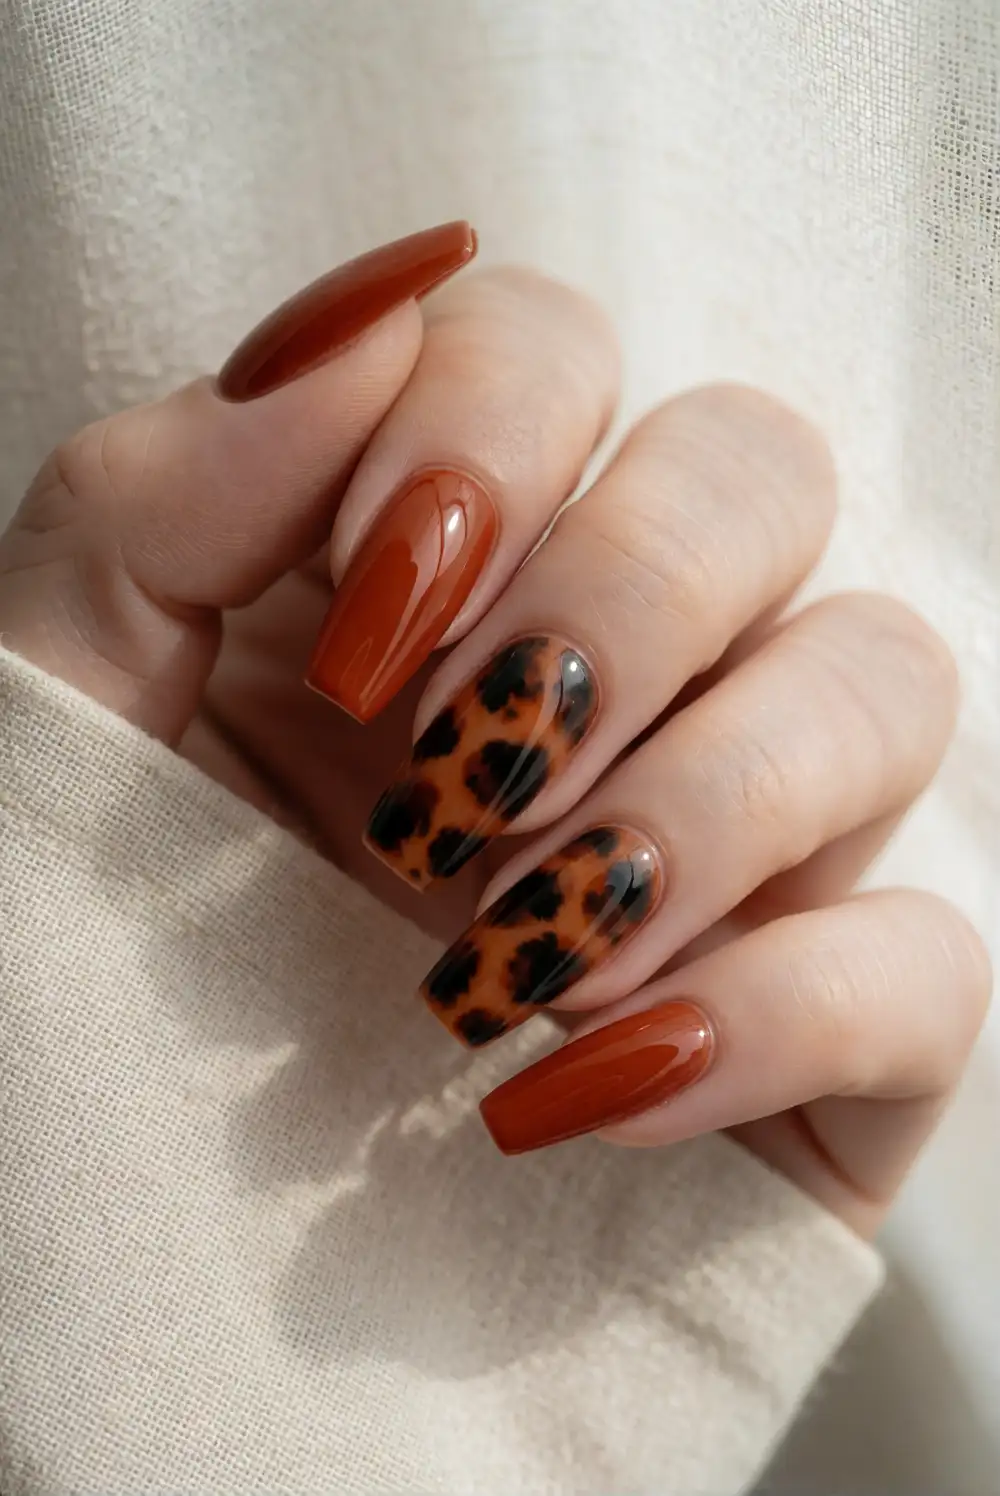
Paint most nails in a rich burnt-orange shade, reserving one or two for a tortoiseshell effect. On those accents, apply a translucent amber base, then dab on irregular patches of dark brown and black polish while the layer is slightly tacky. Soften some patch edges with a little amber polish on a brush, allowing the colors to overlap like layered resin. Once dry, seal every nail with a glossy top coat for depth and a smooth finish.
Use a light hand with the dark patches so the warm amber remains visible between them. Each accent can have a different pattern, which gives the set a natural, varied look without needing exact symmetry. If the effect becomes too dark, add a thin amber layer before sealing. For a simpler manicure, keep just one tortoiseshell nail on each hand and let the solid orange nails carry the seasonal color.
Deep Plum Nails with Copper Foil Accents
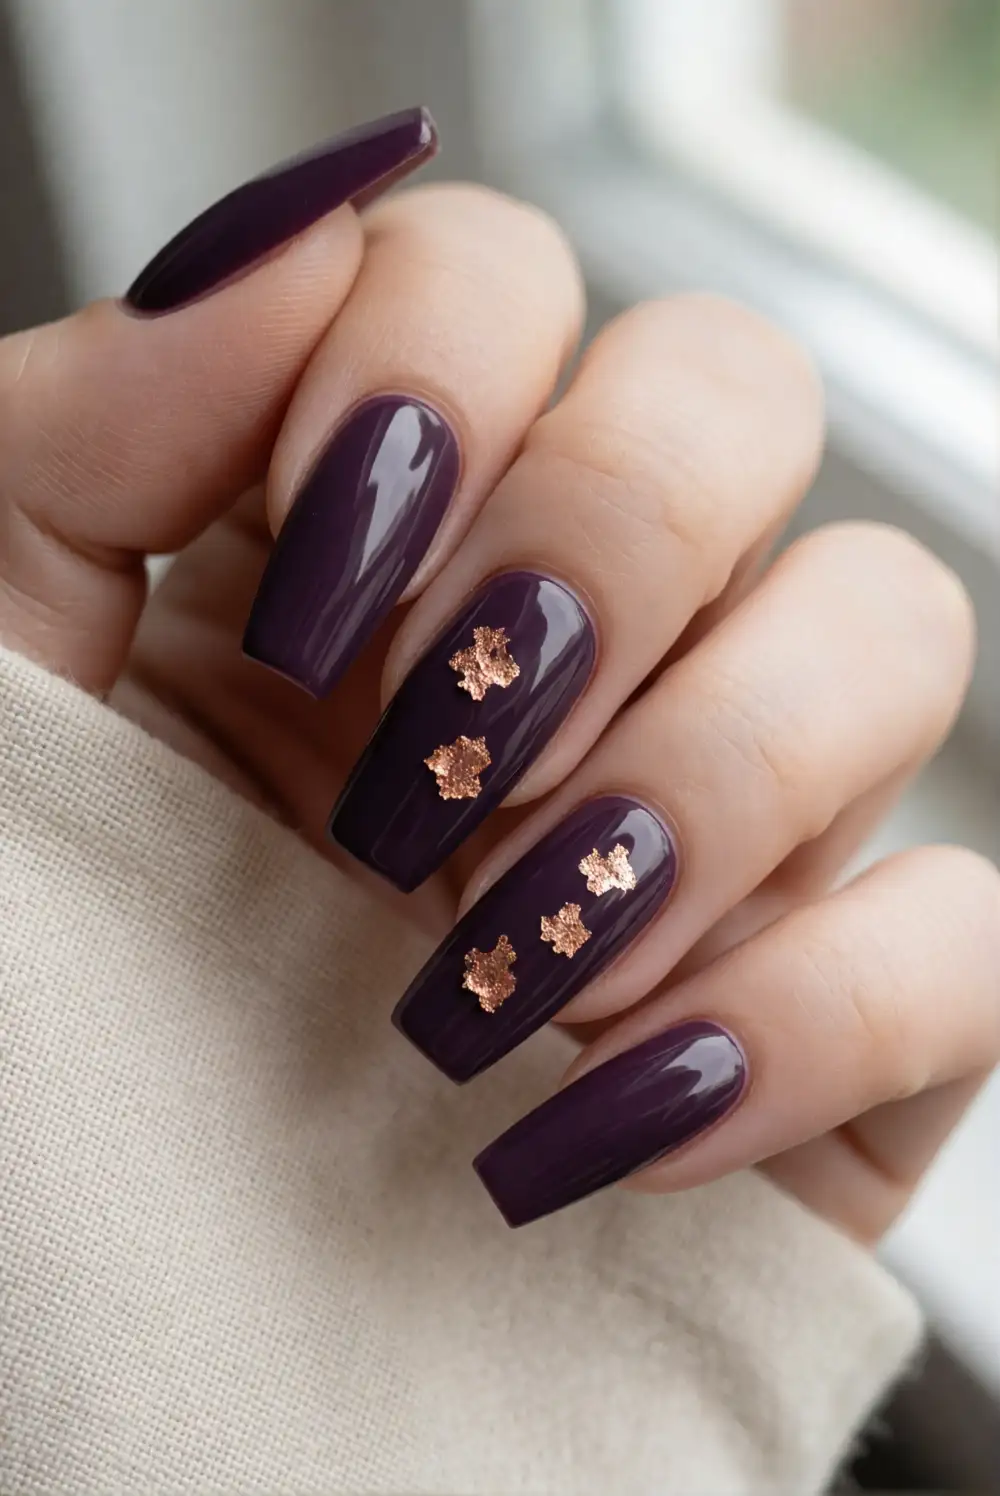
Apply two thin coats of deep plum polish and wait until the surface is dry to the touch. Add small pieces of copper nail foil to one or two accent nails, pressing them gently onto a tacky foil adhesive or a layer designed for transfer foil. Arrange the pieces as loose, broken accents rather than full coverage, then brush away any excess. Finish with a top coat made for foil designs so the metallic details stay smooth.
Place the copper near the tips for a warm French-inspired accent, or scatter a few small pieces down the center of each accent nail. Rose gold foil gives the design a softer finish, while brighter copper creates stronger contrast against the plum. Avoid covering the whole nail if you want the rich base color to remain prominent. This combination works beautifully with cozy knits and simple gold-toned rings.
Sheer Nude Nails with Black Drip Tips
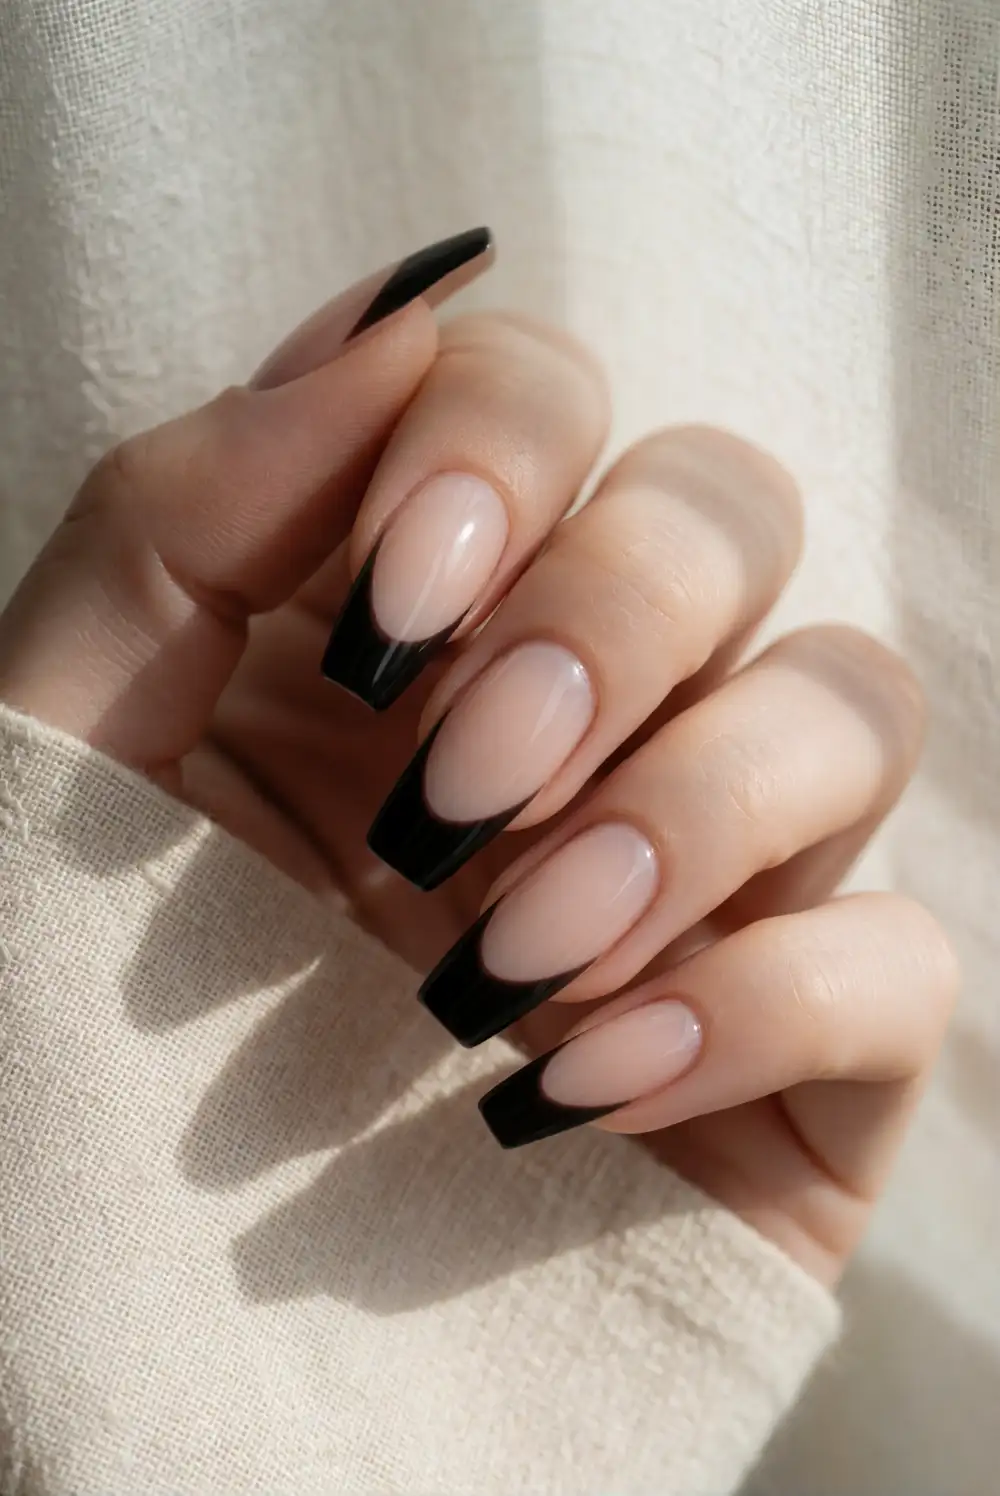
Begin with a sheer nude or blush base coat and let it dry completely. Using a fine brush loaded with black polish, paint a dark band along each squared tip, then draw a few rounded drips of varied lengths downward into the nude area. Keep the shapes smooth and separated so they read clearly on the long nail. Once the black is fully dry, apply a glossy top coat, guiding the brush lightly over the raised drip edges.
Use a translucent beige base for a subtle contrast or a pale pink base for a softer look. Make the drip shapes uneven rather than identical to give the manicure a loose, hand-painted quality. If working with a brush feels difficult, place small dots along the tip and connect them into rounded drips. Leave one or two nails plain nude to balance the graphic details and keep the overall set from feeling too busy.
Orange Glitter Nails with Black Accent Tips
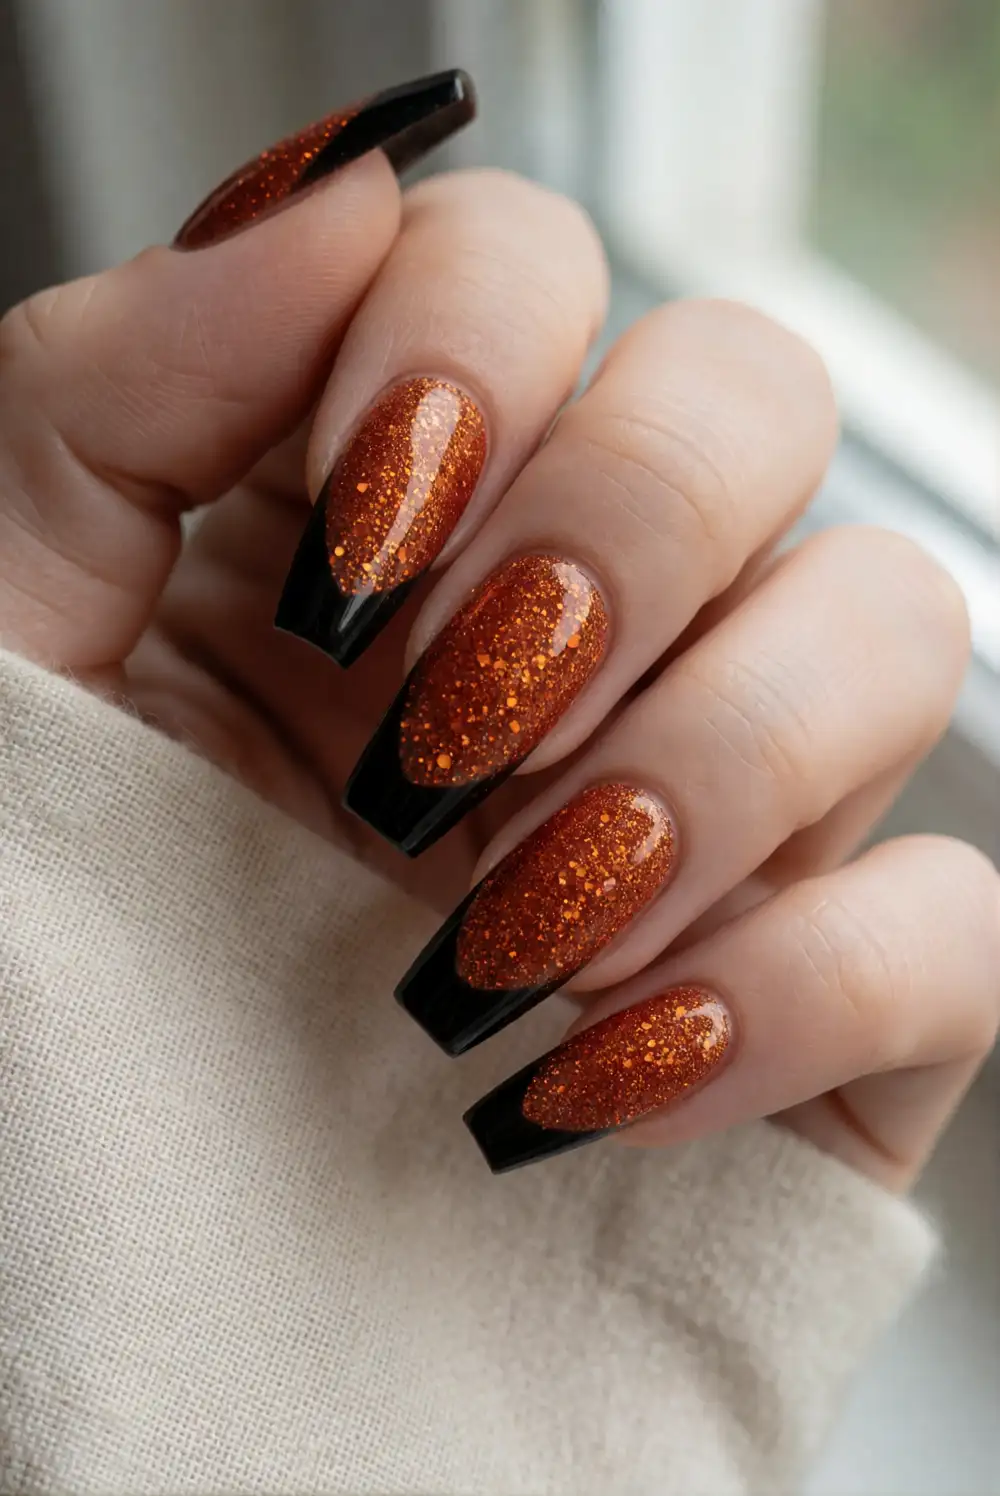
Brush on a rich orange polish, then layer a fine orange or copper glitter coat over most of the nails. Let the glitter dry before painting black French tips on one or two accent nails, following the wide coffin edge for a crisp finish. A detail brush helps shape the corners neatly. Apply a smoothing top coat over the glitter and accents, using an extra layer if needed to create an even, comfortable surface.
Choose fine shimmer for a subtle glow or a denser glitter polish for a more festive finish. Keeping the black tips on just a couple of nails preserves the bright orange as the main feature. If the glitter texture feels rough, use a ridge-filling top coat beneath the final glossy layer. Pair the manicure with simple accessories so the sparkle stays prominent, or wear it with a plain dark outfit for an easy seasonal contrast.
Long coffin nails offer plenty of room to explore Halloween color, texture, and tiny hand-painted details. Try a full set in one polished style or combine a favorite accent design with simpler solid nails for a look that feels personal and wearable. With careful layering and a glossy or matte finish, these seasonal manicures can make a statement from the first fall gathering through Halloween night.








