
Bring a playful mix of spooky details and sweet seasonal color to your manicure with these Halloween nail designs. From tiny ghosts and charming black cats to cobwebs and candy-corn shades, each idea offers a different way to make a festive set at home. Choose a design that suits your nail-art comfort level, gather a few polish colors and fine brushes, and add cute or creepy details one nail at a time.
Ghost French Tips
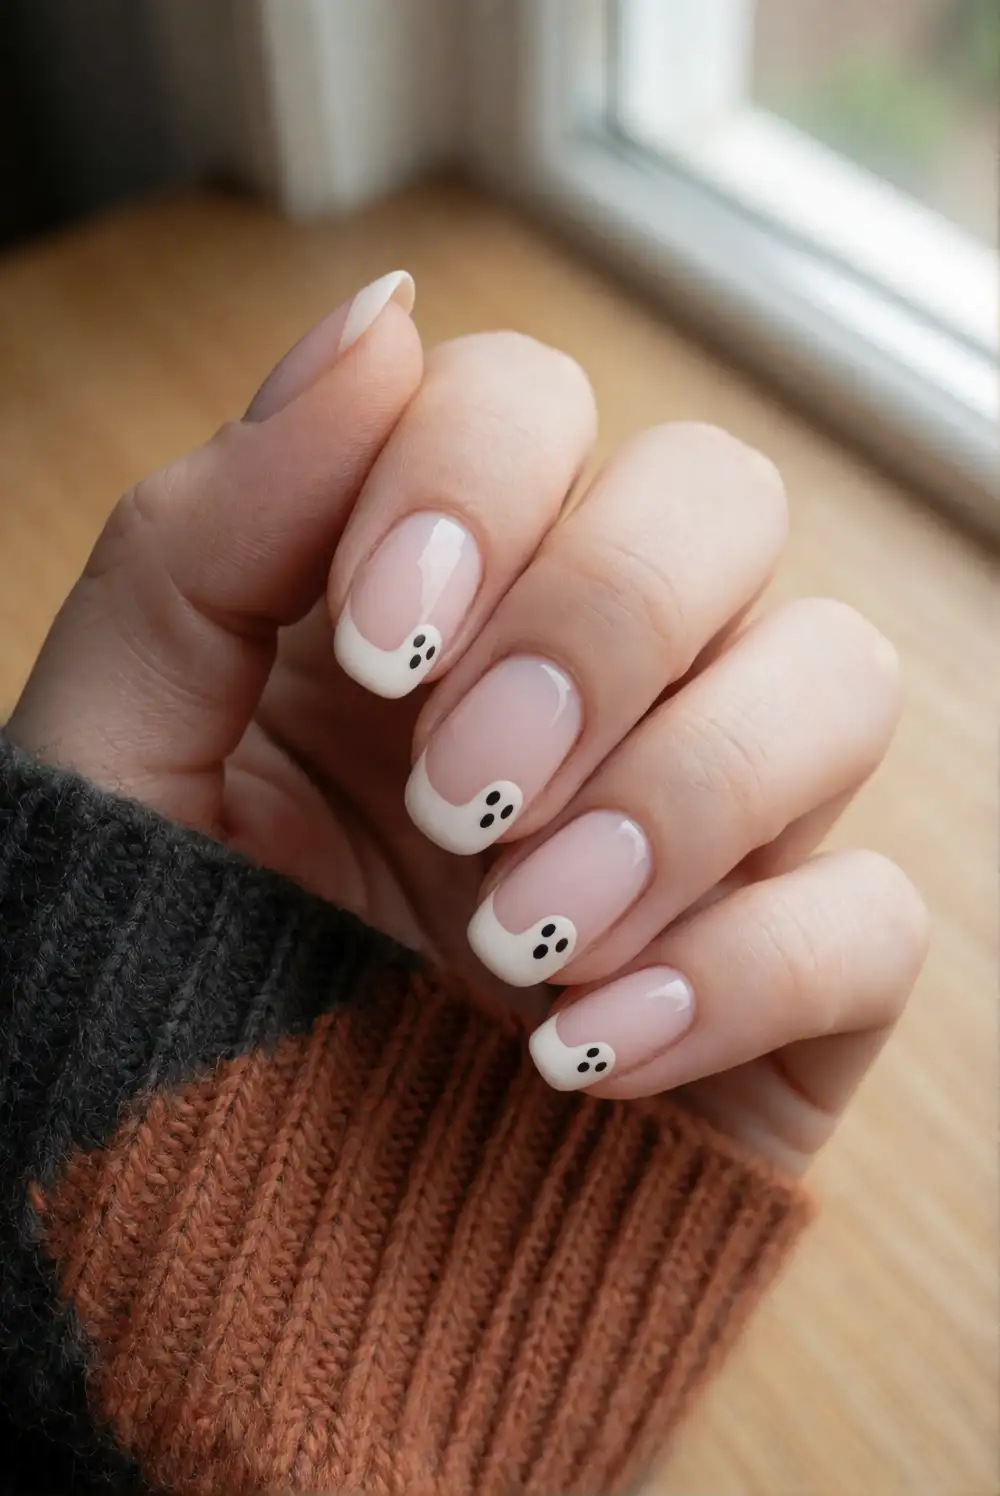
Give a classic French manicure a Halloween twist with little white ghosts along the tips. Apply a sheer nude or pale pink base coat and let it dry. Use a small brush to paint rounded white shapes across the free edge, then pull down two short curves to form each ghost’s wavy hem. Once the shapes are dry, add tiny black eyes with a fine nail-art brush. Finish with a clear top coat to smooth the design and protect the details.
Keep the ghosts small and spaced apart so the French-tip shape remains visible. A pale lavender base adds a gentle seasonal touch, while a charcoal base makes the white figures stand out more. If painting both hands feels tricky, decorate just the ring fingers and leave the remaining tips plain. Let each layer dry before adding the next, and use a dotting tool or the end of a fine brush for neat eyes.
Charming Black Cat Accents
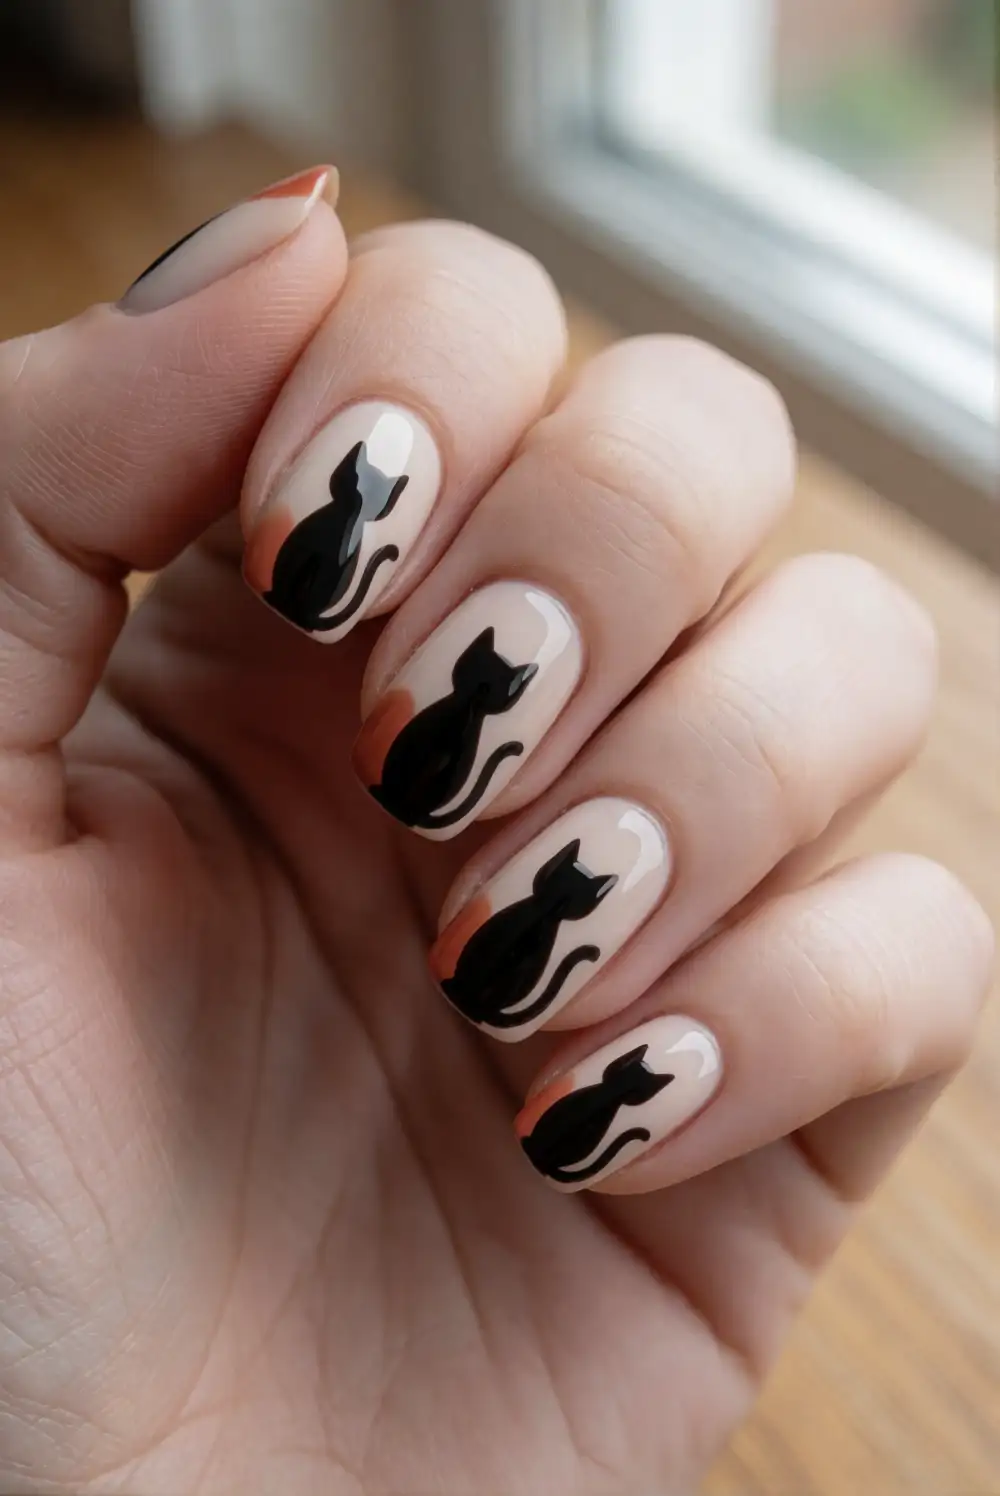
Paint glossy black cat silhouettes against a warm cream or dusty pink base for a sweet-meets-spooky manicure. Apply the base color and let it dry completely. With black polish and a fine brush, make a small oval for the body, add a round head, and draw two pointed ears and a curved tail. Finish with tiny pale eyes or leave the cats as simple silhouettes. Seal the finished artwork with a clear top coat.
Place a cat on one or two accent nails and use solid black polish on the others for a balanced look. A tiny crescent moon painted beside a silhouette adds a little nighttime charm without crowding the design. If freehand shapes are difficult, use a small detail brush and work with thin layers rather than trying to form the whole cat at once. This design looks especially polished on short, rounded nails.
Candy Corn Color Fade
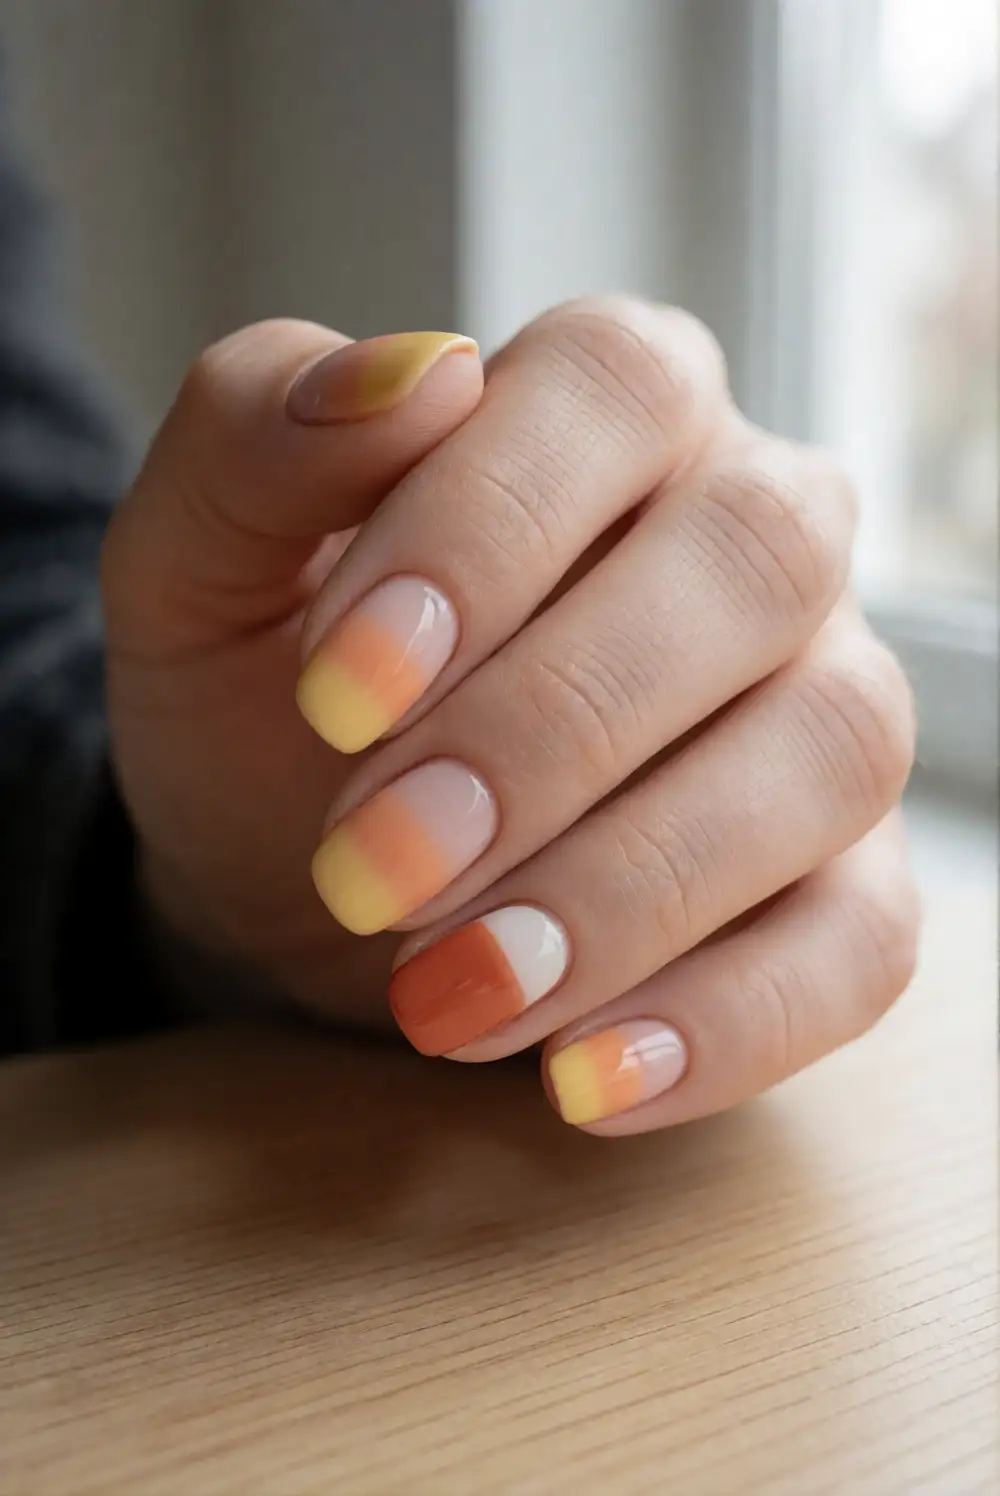
Capture the familiar candy-corn palette with a soft fade of yellow, orange, and white. Start with a pale base coat, then paint the lower portion of each nail yellow and the tip white. Blend orange polish across the middle while the colors are still slightly workable, using a small sponge to soften the transitions. Apply thin coats so the layers dry evenly, then finish with a glossy top coat to bring the three seasonal shades together.
For a crisp version, paint clean color bands instead of blending them, keeping the white section near the tip. You can vary the direction of the colors across the nails or use the fade on just a couple of accent nails. A makeup sponge gives a softer gradient, while a fine brush helps tidy the edges. Wipe away polish around the cuticles before it dries for a neat finish.
Delicate Spiderweb Corners
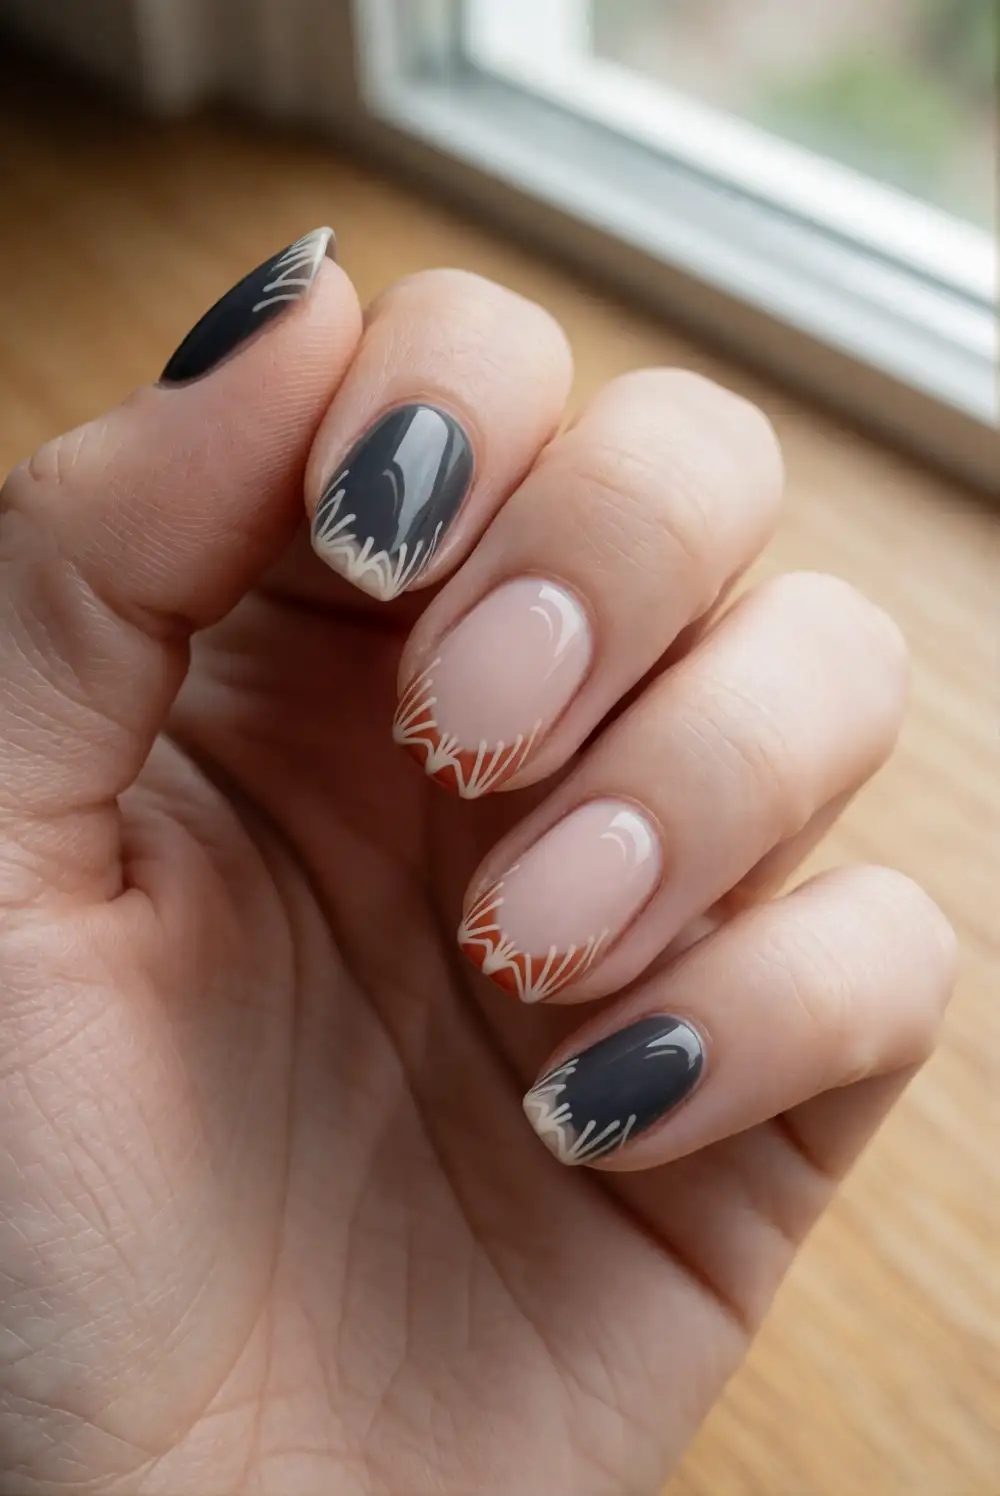
Paint a fine spiderweb in one corner of a dark, glossy nail for a dramatic detail that stays easy to wear. After applying a deep plum or charcoal base, let it dry. Use white or silvery polish and a thin nail-art brush to draw several lines radiating from one corner. Connect them with short curved strokes to create the web. Keep the lines delicate, allow the artwork to dry, and add a clear top coat for a smooth finish.
A single web on an accent nail keeps the manicure from feeling too busy, while a pale base gives the design a lighter, more graphic look. Add a tiny black spider near the web only if you are comfortable painting small details. Work with a small amount of polish on the brush and rest your painting hand on a table to steady it. The open space around the web helps every line read clearly.
Smiling Pumpkin Faces
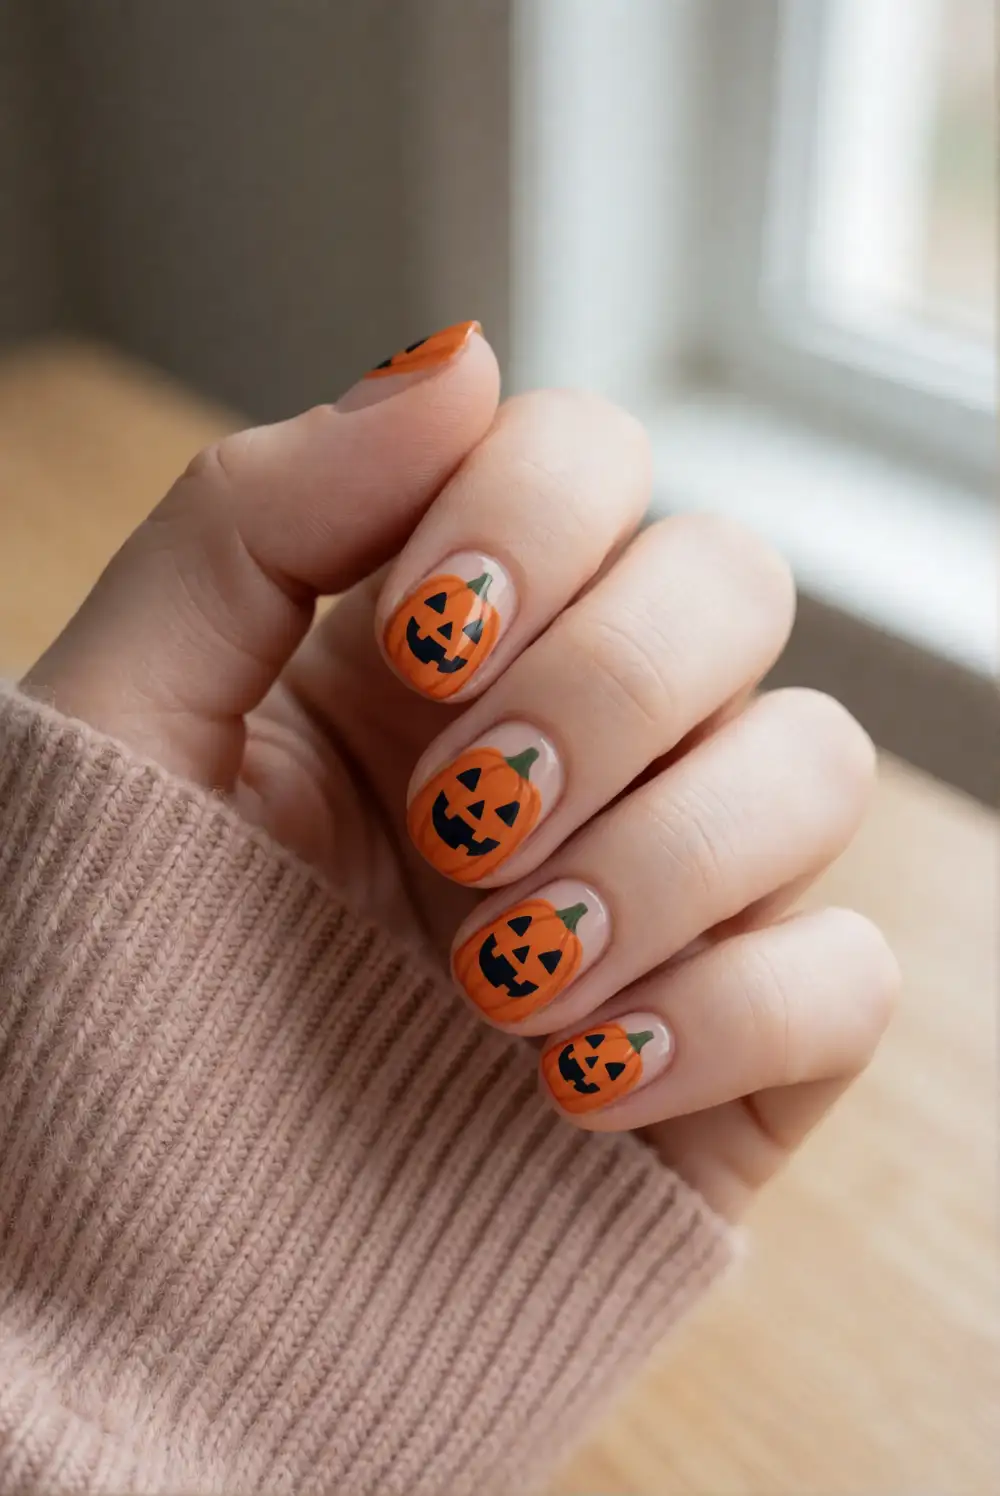
Make cheerful pumpkin faces with orange polish, a fine brush, and a dark accent color. Paint each selected nail orange and let the color dry. Add a small green stem near the cuticle, then use dark brown or black polish to draw a curved smile and simple eyes. For a softer expression, make the eyes round and the mouth small. Finish with a clear top coat after the painted features are fully dry.
Try a pumpkin face on one accent nail and use orange polish on the remaining nails for an uncomplicated seasonal set. A muted sage base behind the pumpkin can suggest leaves without adding much detail. Keep the expressions varied by changing the shape of the smile, or leave a few pumpkins plain for a clean, modern effect. A fine brush makes it easier to keep the face details distinct against the bright orange polish.
Bat Silhouettes on Moonlit Nails
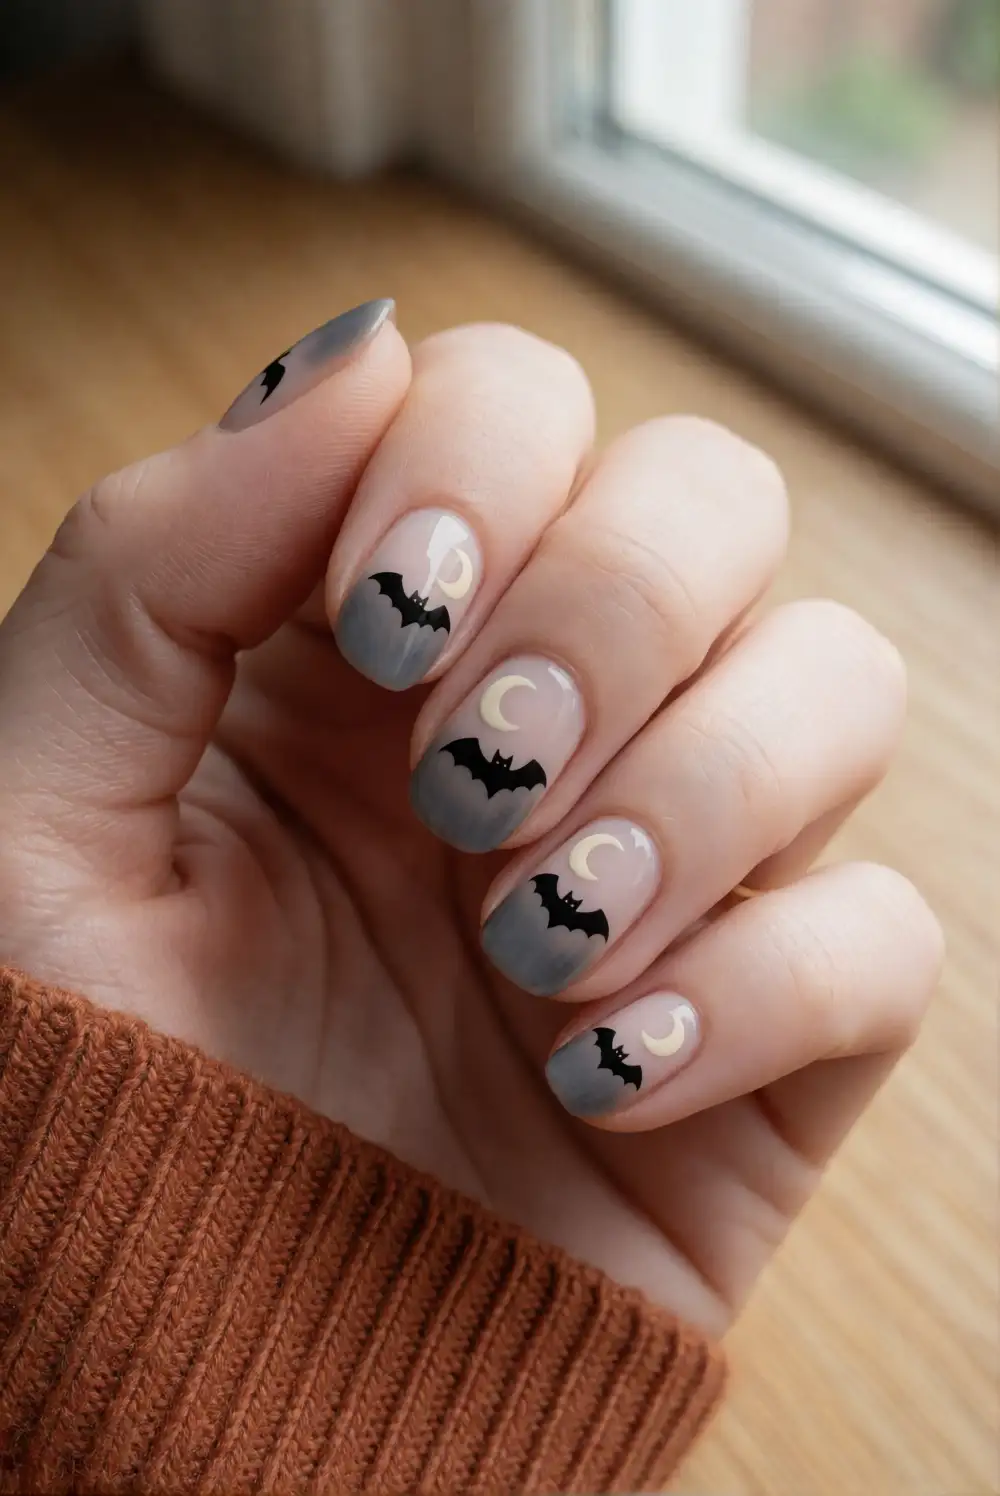
Create a nighttime manicure with black bat silhouettes set against a pale moonlit background. Apply a deep navy or soft gray base and allow it to dry. With black polish, paint a small central body and add two angular wings on either side, using a fine brush to shape the edges. A small cream moon near the bat adds contrast. Let the design dry fully before applying a clear top coat to protect the artwork.
Use only one bat per accent nail so the wings remain clear and recognizable. A dusty blue base feels softer than navy, while a sheer gray gives the set a more understated finish. If drawing wings freehand is challenging, make simple curved triangles rather than adding extra scallops. Keep the moon small and off-center to leave breathing room around the silhouette. This design pairs nicely with solid navy or charcoal nails.
Glossy Eyeball Accents
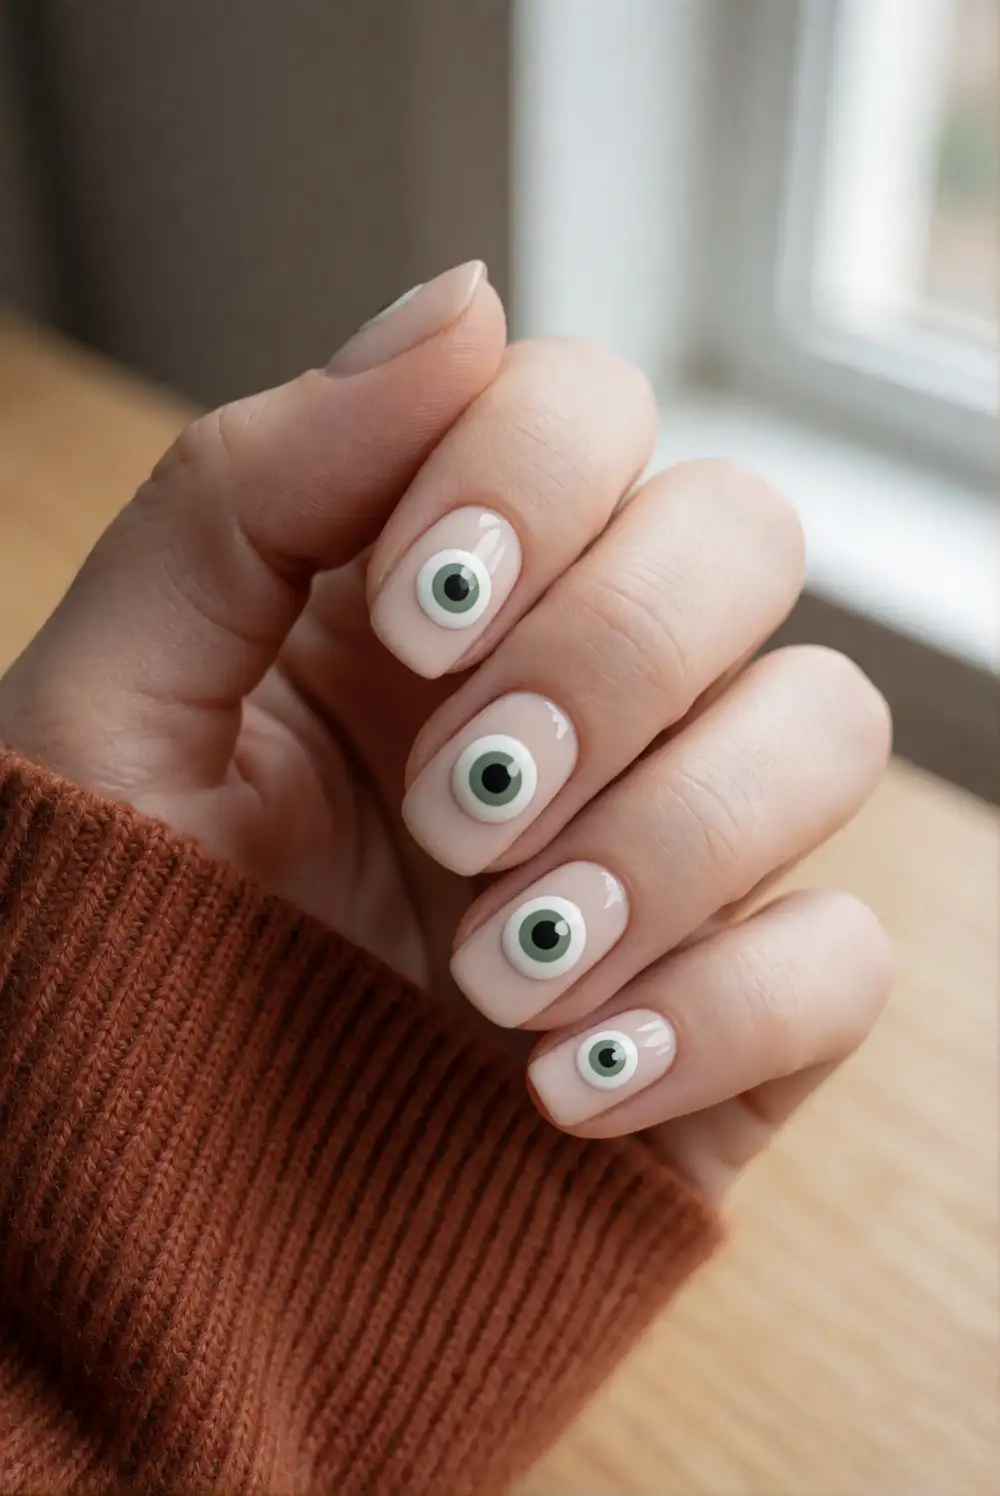
Add a playful creepy detail with painted eyeballs on a pale base. Start with cream or light gray polish and let it dry. Use a small brush to paint a rounded white oval, then add a colored iris and a dark pupil in its center. A few fine red lines at the sides suggest a cartoonish, wide-awake eye. Allow the layers to dry between colors and finish with clear polish for a glossy, smooth surface.
Keep the eyeball design to an accent nail or two so the manicure feels more playful than busy. Choose a blue, green, or lilac iris to coordinate with the other polish colors in your set. For a simpler version, skip the red details and paint only the white shape, iris, and pupil. Make each eye face a slightly different direction for a whimsical look, and use a fine brush for controlled, tidy edges.
Dripping Berry French Tips
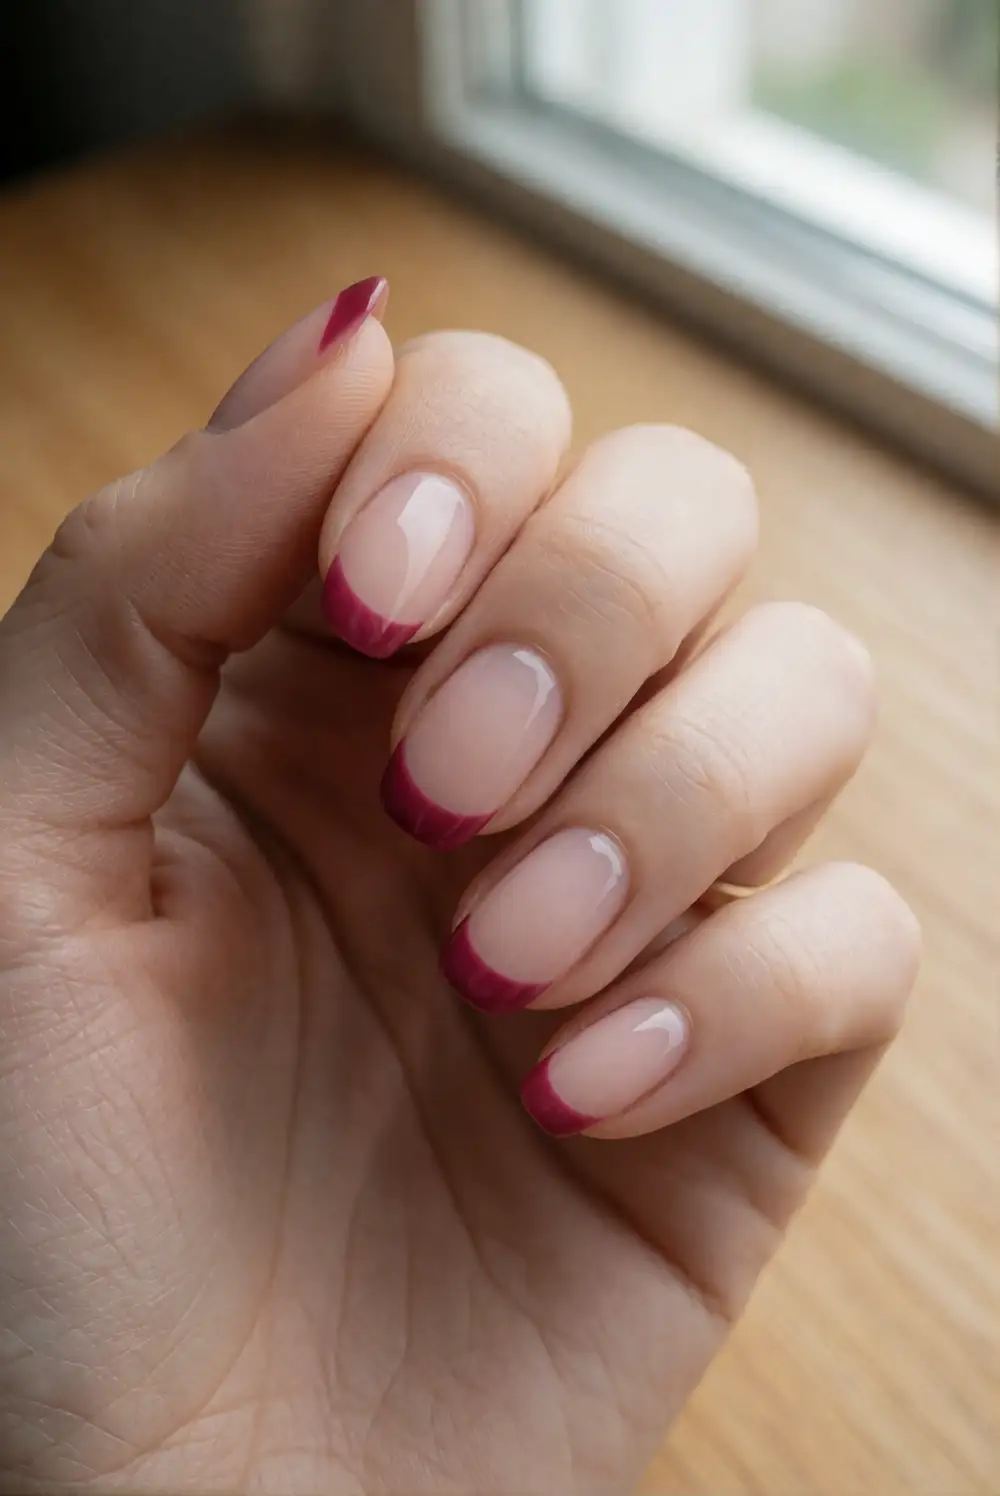
Give a French manicure a moody Halloween finish with berry-red drips across the tips. Paint the nails with a sheer nude base and let it dry. Brush a berry or deep red polish along each free edge, then pull a few rounded drips downward with a fine brush. Keep the lengths varied for a natural liquid effect. Once the color is dry, apply a clear top coat to smooth the surface and bring out the shine.
Use a dark plum shade for a subtle interpretation or a bright berry polish for stronger contrast. The design works well on every nail, but it also looks striking on just the tips of two accent nails. Make the drips rounded rather than sharp to keep the look polished. If the line near the nail edge becomes uneven, a clean detail brush dipped in polish remover can help refine the curve before the color dries.
Gothic Rose Accent Nails
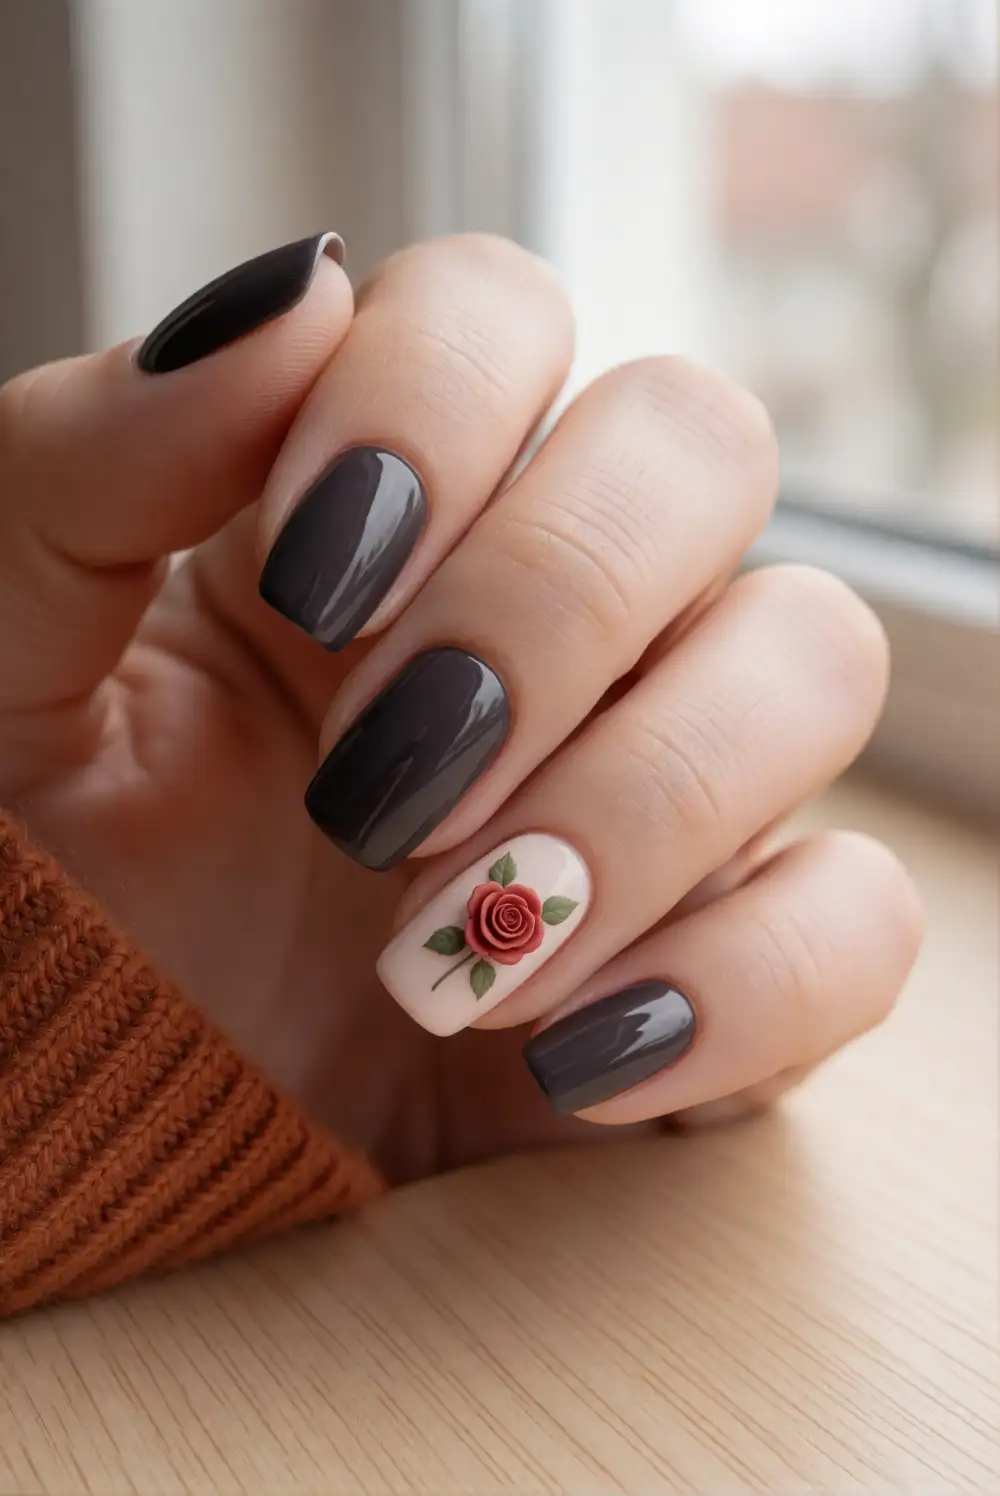
Pair a small red rose with dark polish for a romantic manicure with a spooky edge. Paint the nails black, deep plum, or charcoal, leaving one accent nail for a pale background if you want more contrast. With a fine brush, paint a small red spiral at the center of the rose and add short curved petals around it. Add a slim green leaf or two, allow the art to dry, and seal everything with a clear top coat.
A single rose makes the design feel elegant, while a cluster of tiny blooms gives it a more decorative look. Choose burgundy polish for a muted, vintage-inspired flower or classic red for a stronger pop against black. Keep the petals compact so the design remains readable on a small nail. For a coordinated finish, use a sheer nude accent nail and repeat the dark color across the other nails.
Colorful Potion Swirl Nails
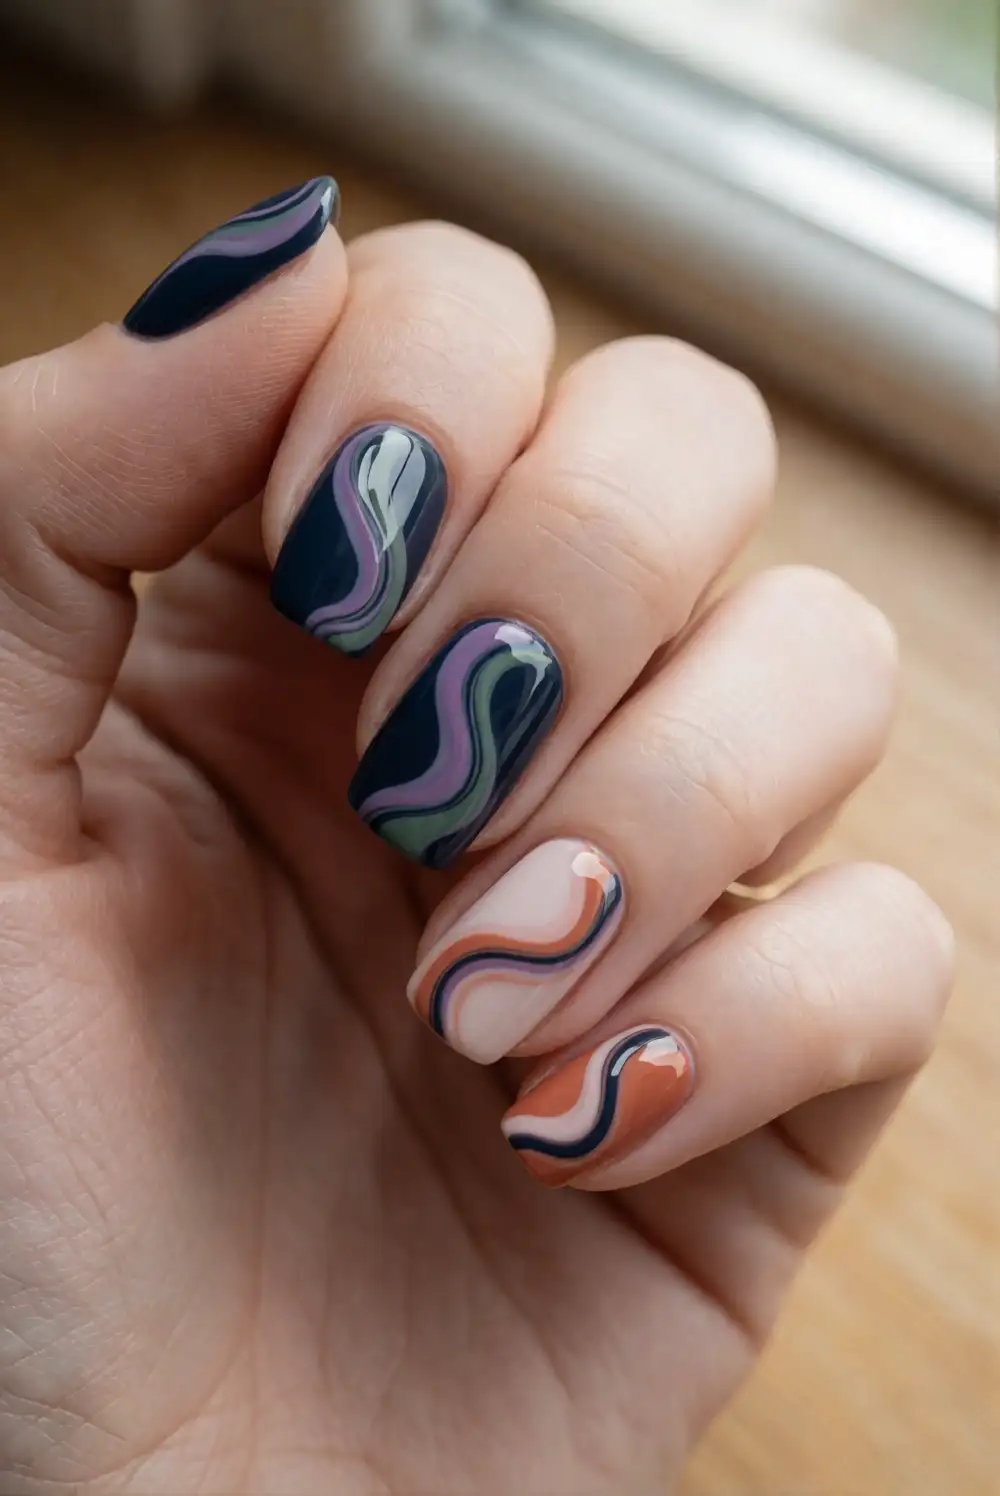
Paint dreamy potion-like swirls with violet, green, and midnight-blue polish. Begin with a dark base and let it dry, then place small drops of the brighter colors onto the nail. Use a fine brush to curve the colors into loose, flowing ribbons, leaving some of the dark base visible between them. Work gently so the shades remain distinct rather than mixing into one color. Finish with clear polish once the layered design has dried.
Choose two bright shades instead of three for a cleaner swirl, or add a small silver accent for a subtle shimmer. Keep the lines curved and irregular so the finished nails feel fluid rather than perfectly geometric. This design can cover every nail or serve as an accent against solid plum polish. A thin brush gives you control over the swirls, and a glossy top coat helps the color layers look deep and glassy.
Whether you prefer a sweet ghost, a tiny cat, or a rich berry drip, these Halloween nail designs make it easy to tailor your manicure to your style. Choose a single accent idea or combine complementary details across a set. Let each polish layer dry before adding the next, then finish with a clear top coat for a glossy seasonal look.








