
Give your Halloween manicure a polished, salon-inspired look with simple designs you can create at home. These wearable nail ideas pair seasonal colors and playful details with practical techniques, from glossy pumpkin accents to sleek black French tips. Choose a design that suits your style, gather a few familiar nail essentials, and follow the steps for a neat finish that feels festive without looking overdone.
Glossy Pumpkin Accent Nails
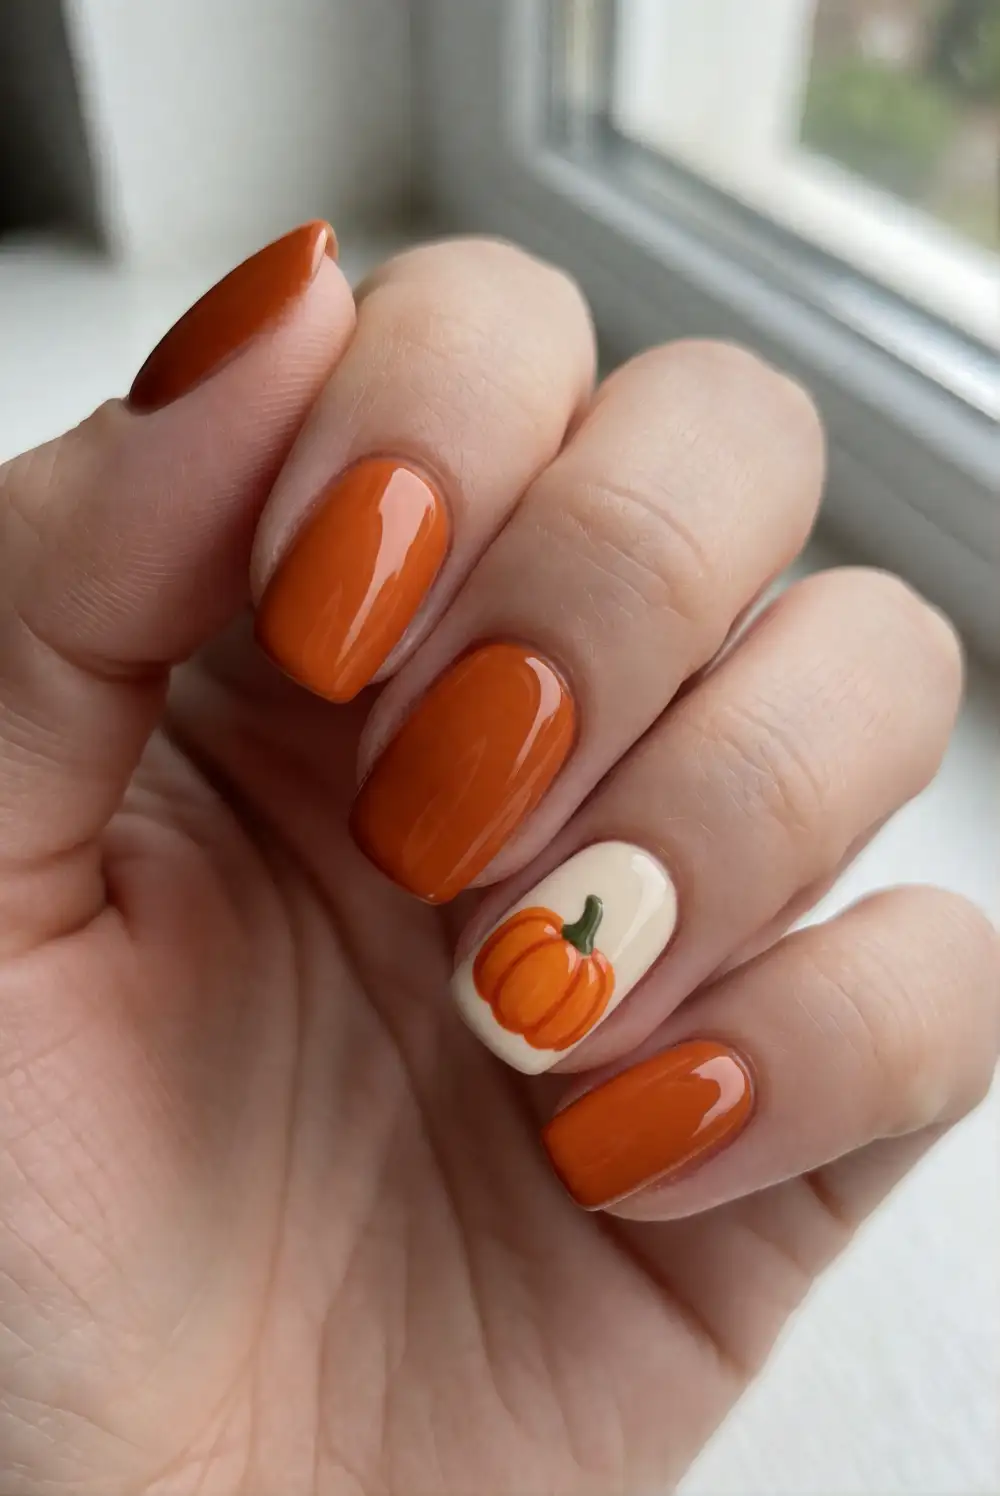
Paint most nails a warm pumpkin orange, leaving one accent nail on each hand for a tiny pumpkin design. Apply a clear base coat, then two thin coats of orange polish and let them dry. On the accent nail, use a fine nail-art brush to add a rounded pumpkin shape in a slightly deeper orange, followed by a slender green stem. Finish every nail with a glossy top coat, taking care to seal the free edge for a smooth, lasting shine.
Keep the pumpkin small and centered so the design looks intentional rather than crowded. A neutral cream base on the accent nail can make the orange motif stand out, while a deep brown stem offers a softer alternative to green. For a tidy result, steady your painting hand on a table and use a toothpick to refine the pumpkin’s curved lines. Pair the manicure with simple jewelry or let it complement a cozy autumn outfit.
Black French Tips With Orange Cores
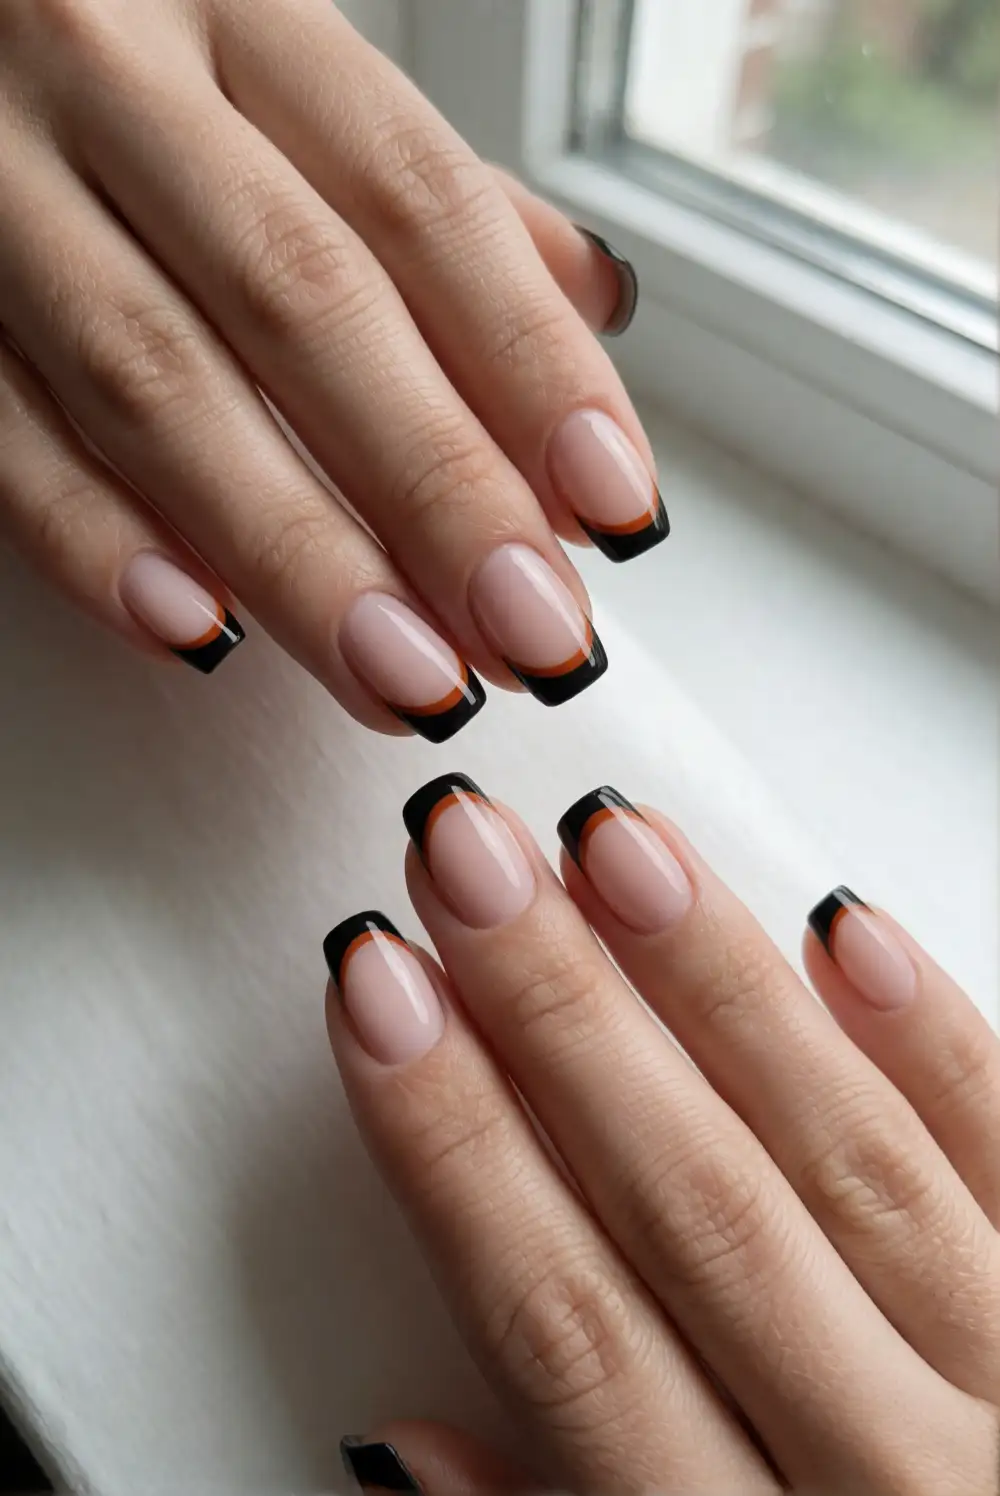
Start with a sheer nude or pale pink base and allow it to dry completely. Paint a slim black tip across each nail, following its natural curve with a fine brush or French-tip guide. Add a narrow stripe of orange just beneath the black edge, keeping the colors separate for a crisp layered effect. Clean up any uneven lines with a small brush dipped in remover, then apply a glossy top coat to unify the finish.
A rounded tip creates a softer, more classic manicure, while a slightly angled tip gives the colors a modern graphic feel. Choose a muted burnt orange for a refined look or a brighter shade for extra Halloween energy. Keep the accent stripe narrow so the black remains the main detail. If your natural nails are short, place the color close to the edge and avoid thick bands, which can make the nail appear shorter.
Smoky Purple Ombré Nails
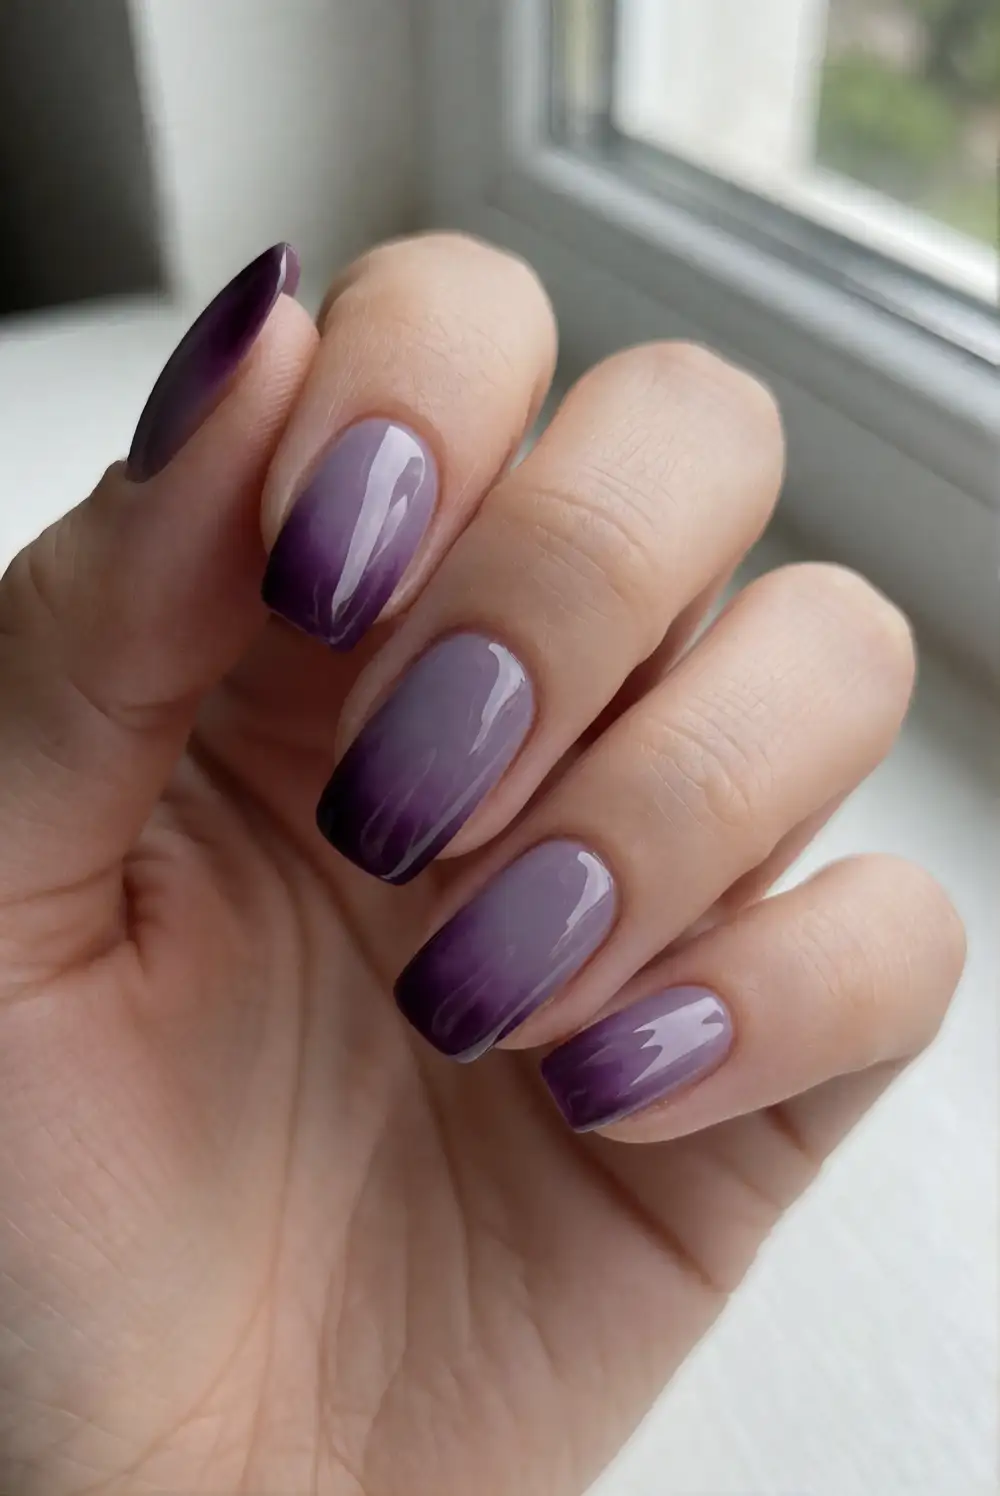
Blend deep plum into a translucent lavender or smoky gray for a moody, polished Halloween manicure. Apply a base coat and one light layer of the palest shade. Dab plum polish onto a small makeup sponge, then gently press it onto the tips, moving slightly toward the center to soften the boundary. Repeat with thin layers until the gradient looks even, letting each pass dry before adding another. Finish with a glossy top coat to smooth the texture left by the sponge.
Use very little polish on the sponge at first; several sheer layers create a more controlled fade than one heavy application. A dark charcoal base can replace lavender for a dramatic evening version, while a touch of shimmer at the transition adds dimension. Protect the skin around your nails with removable barrier film or clean the edges with a fine brush and remover. This gradient works especially well on oval or almond-shaped nails, where the color has room to blend.
Minimal Spiderweb Corner Nails
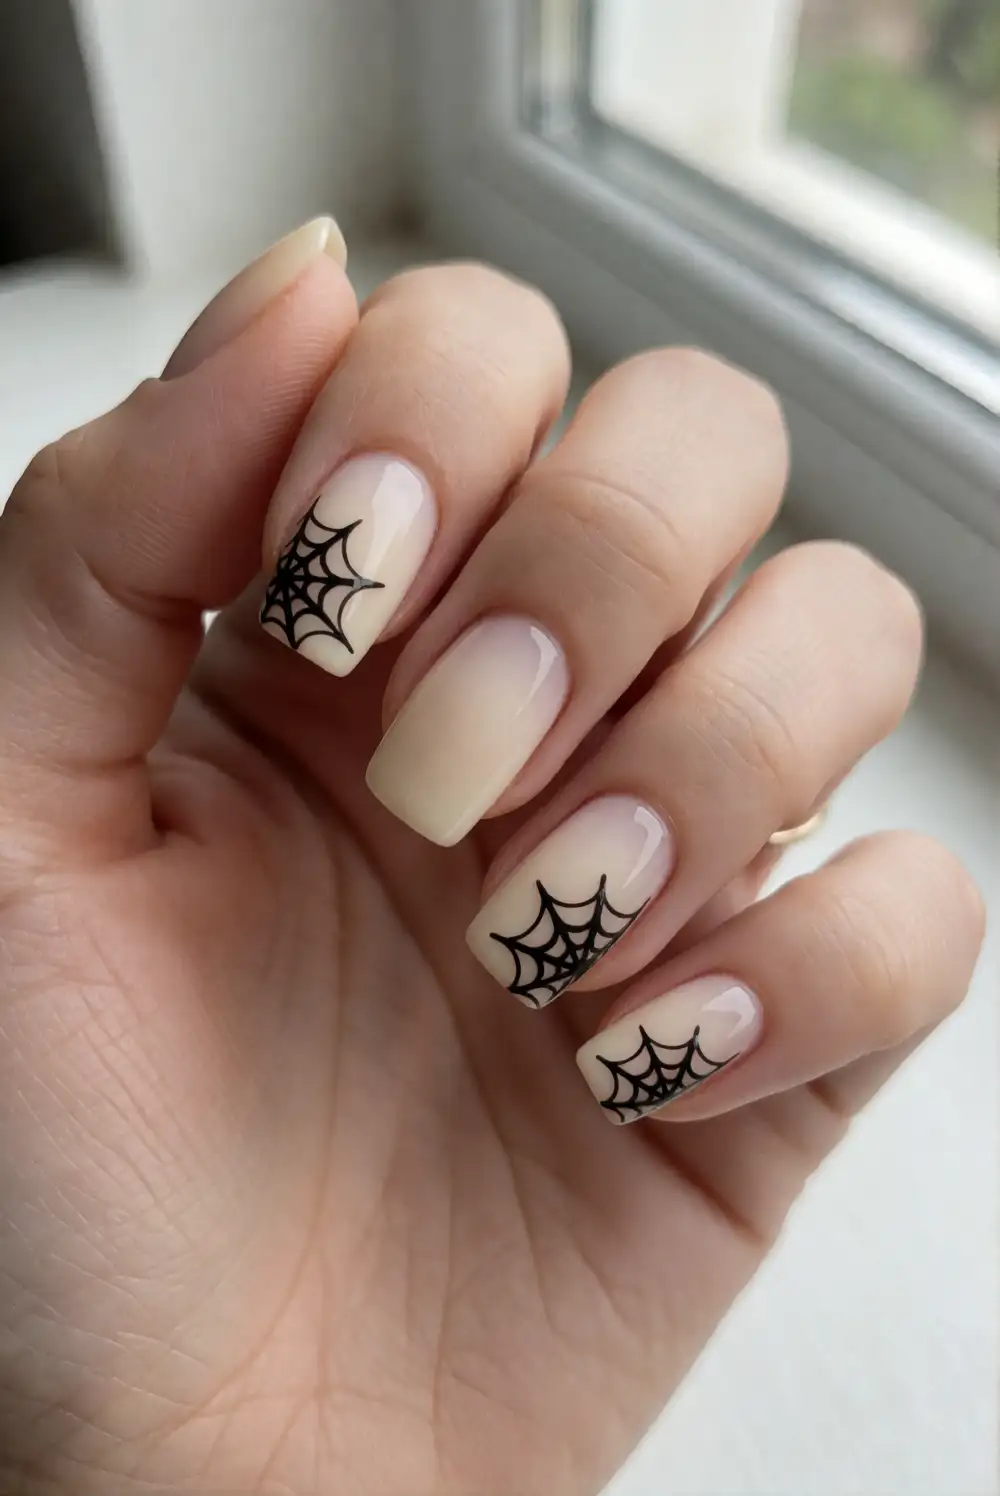
Choose a sheer nude, milky white, or soft gray base and let it dry fully. With a fine nail-art brush and black polish, draw three delicate lines that meet at one corner of an accent nail. Connect the lines with small curved strokes to form a partial web, keeping the motif confined to the corner. Leave the remaining nails plain or add a single black tip. A careful top-coat layer protects the design and gives the manicure an even, salon-like shine.
Partial webs feel cleaner and more wearable than covering the entire nail, especially when the lines are thin and spaced apart. Practice the shape on a piece of paper before painting, and wipe excess polish from the brush to avoid thick marks. A metallic silver polish can replace black for a softer contrast against a dark base. Keep the web on one or two nails and use the same corner placement on both hands for a balanced finish.
Matte Black Nails With Glossy Moons
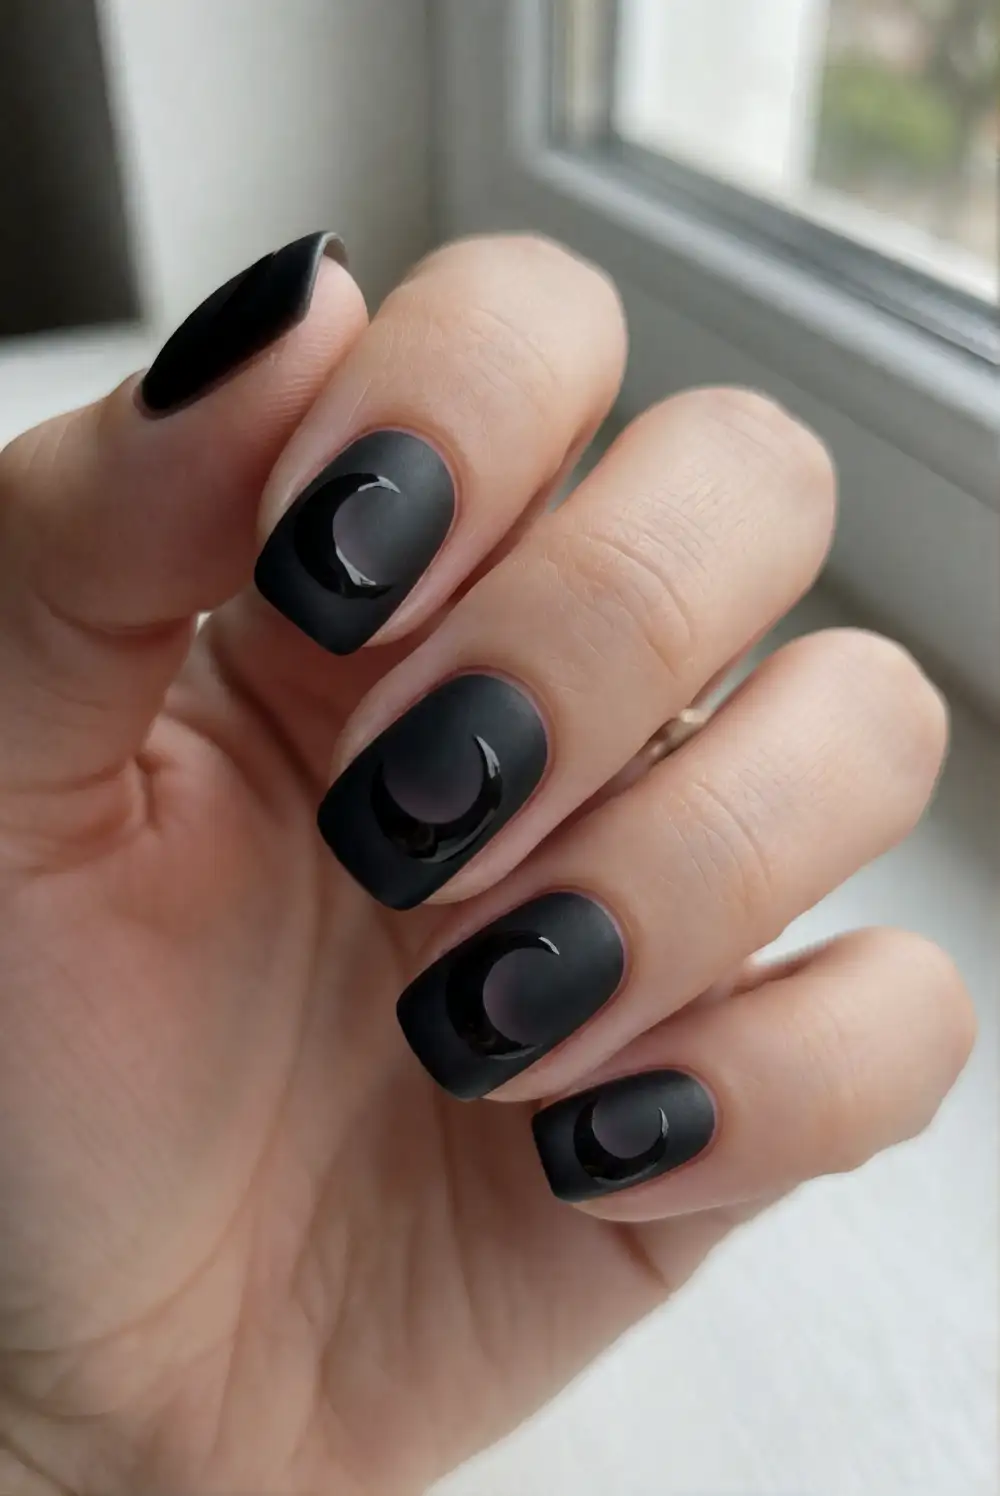
Apply a black base coat of color in thin, even layers, allowing each coat to dry before continuing. Once the polish is fully dry, brush a matte top coat over every nail and let it set. Use a fine brush and clear glossy top coat to paint a small crescent near the base of each nail, or place a single moon on an accent nail. The difference between matte and shine creates a refined detail without requiring extra colors or elaborate nail art.
For the cleanest crescent shape, use a curved nail guide or a small stencil designed for nail art, pressing it onto completely dry polish before applying the glossy layer. Keep the moon subtle and consistent in size, or vary its direction for a more relaxed look. If the matte surface catches fingerprints, let it cure fully before handling fabrics. This monochrome design pairs easily with both casual outfits and dressier Halloween plans.
Cream Nails With Tiny Black Bats
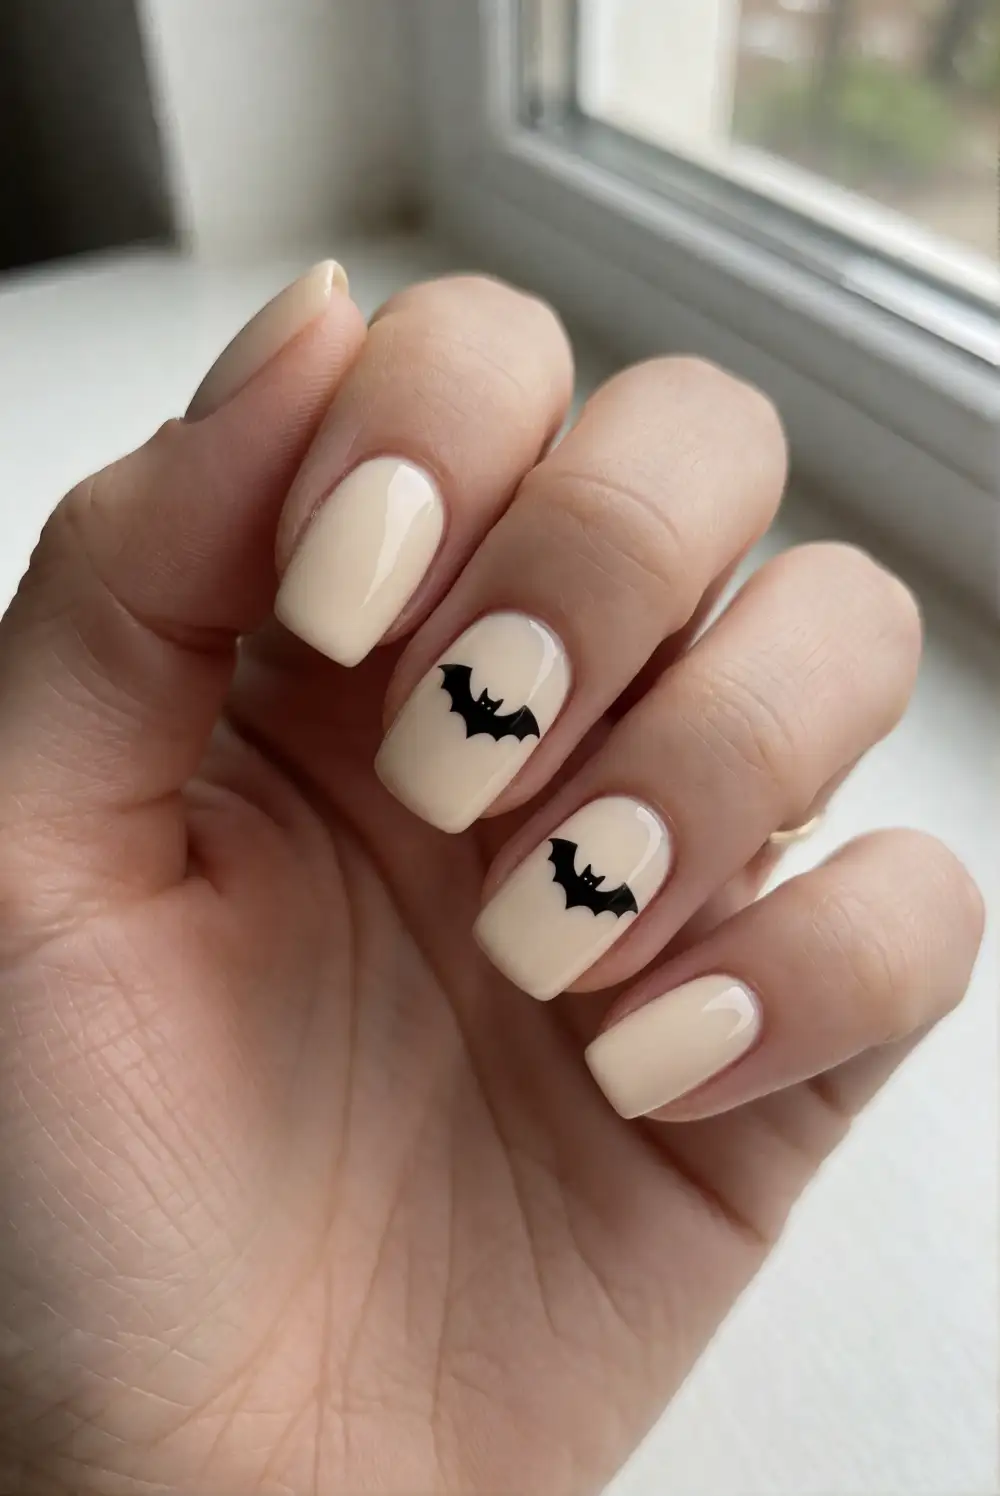
Paint each nail with two thin coats of warm cream polish and allow the color to dry. On one or two accent nails, create a small bat using black polish and a fine brush: make a compact central shape, then add two simple pointed wings. Keep the silhouette bold enough to read clearly but small enough to leave open space around it. Once the artwork is dry, apply a glossy top coat over the entire manicure to protect the design and create a smooth finish.
A single bat on each hand gives the manicure a balanced look, while plain cream nails keep the overall effect light and wearable. For an even simpler motif, use two short strokes for the wings and a tiny dot for the body. Practice the silhouette on paper first, and avoid adding extra tiny details that may blur as the polish dries. A soft ivory base looks especially polished beside black clothing or warm autumn knits.
Burnt Orange Swirl Nail Art
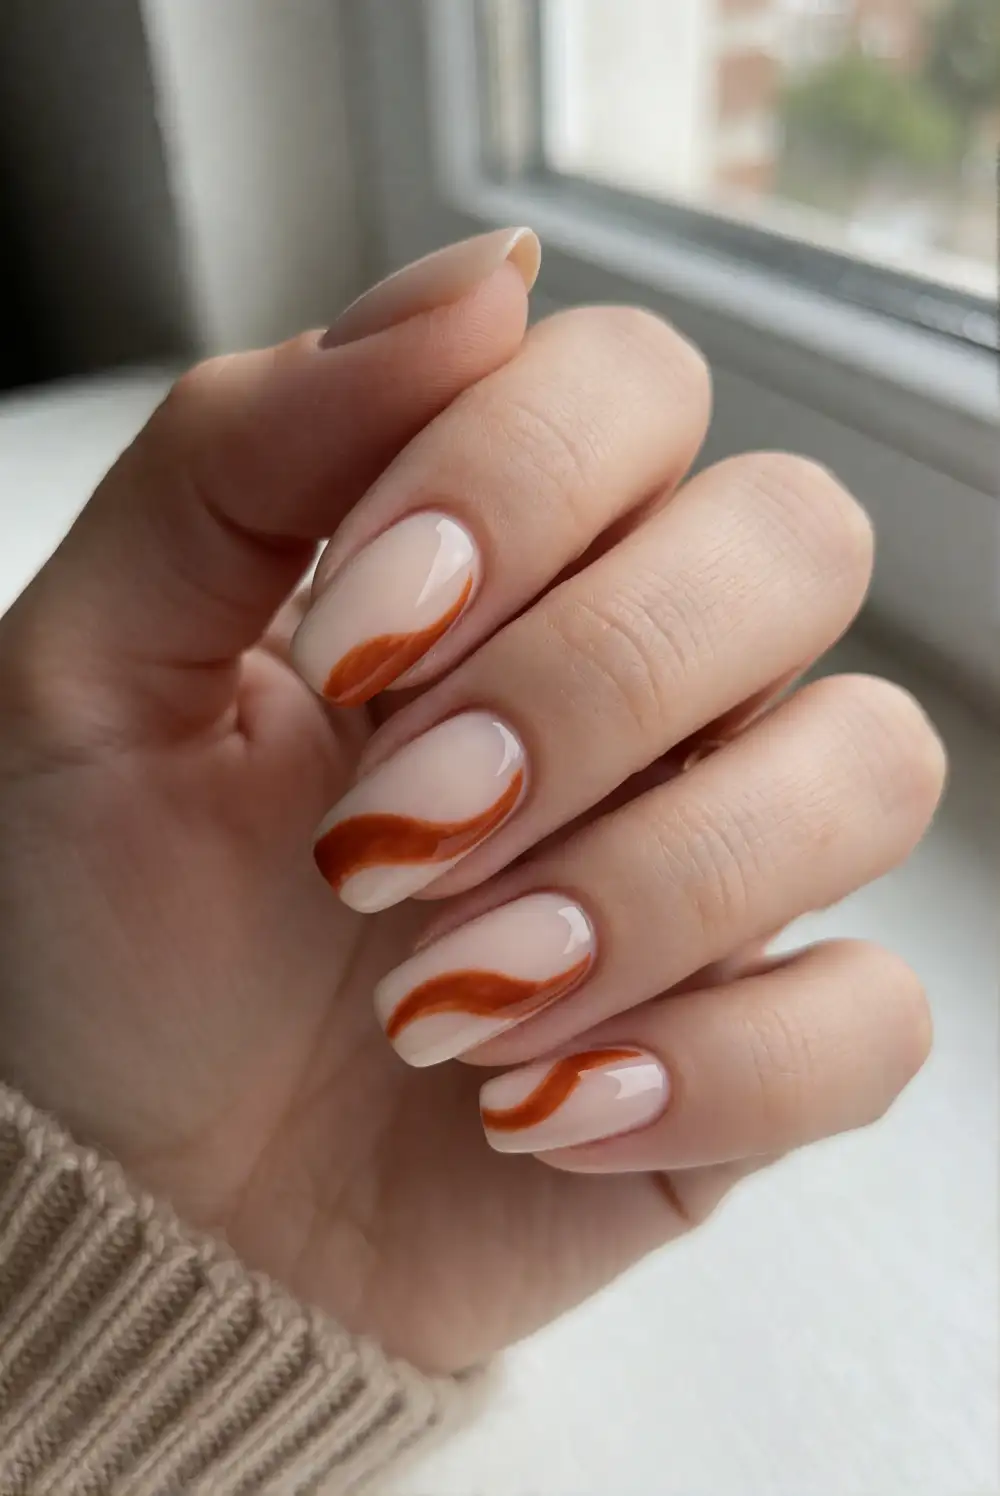
Use a nude or pale beige base so flowing burnt-orange lines stand out cleanly. Once the base is dry, load a fine liner brush with orange polish and draw a loose S-shaped curve across one accent nail. Add a second thinner curve alongside it, leaving a narrow gap rather than filling the whole nail. Repeat on another nail if you like, then finish with a glossy top coat after the lines have dried. The airy pattern makes a seasonal statement while keeping the manicure light.
Let the curves vary slightly from nail to nail so the set feels hand-painted, but keep the same orange shade throughout for cohesion. If freehand lines feel difficult, use a dot of polish as a starting point and gently pull it into a curve. A deeper rust shade gives the design a muted, elegant finish; bright orange looks more playful. Leave several nails plain to balance the detail and make the swirls feel deliberate.
Deep Plum Nails With Gold Foil Flecks
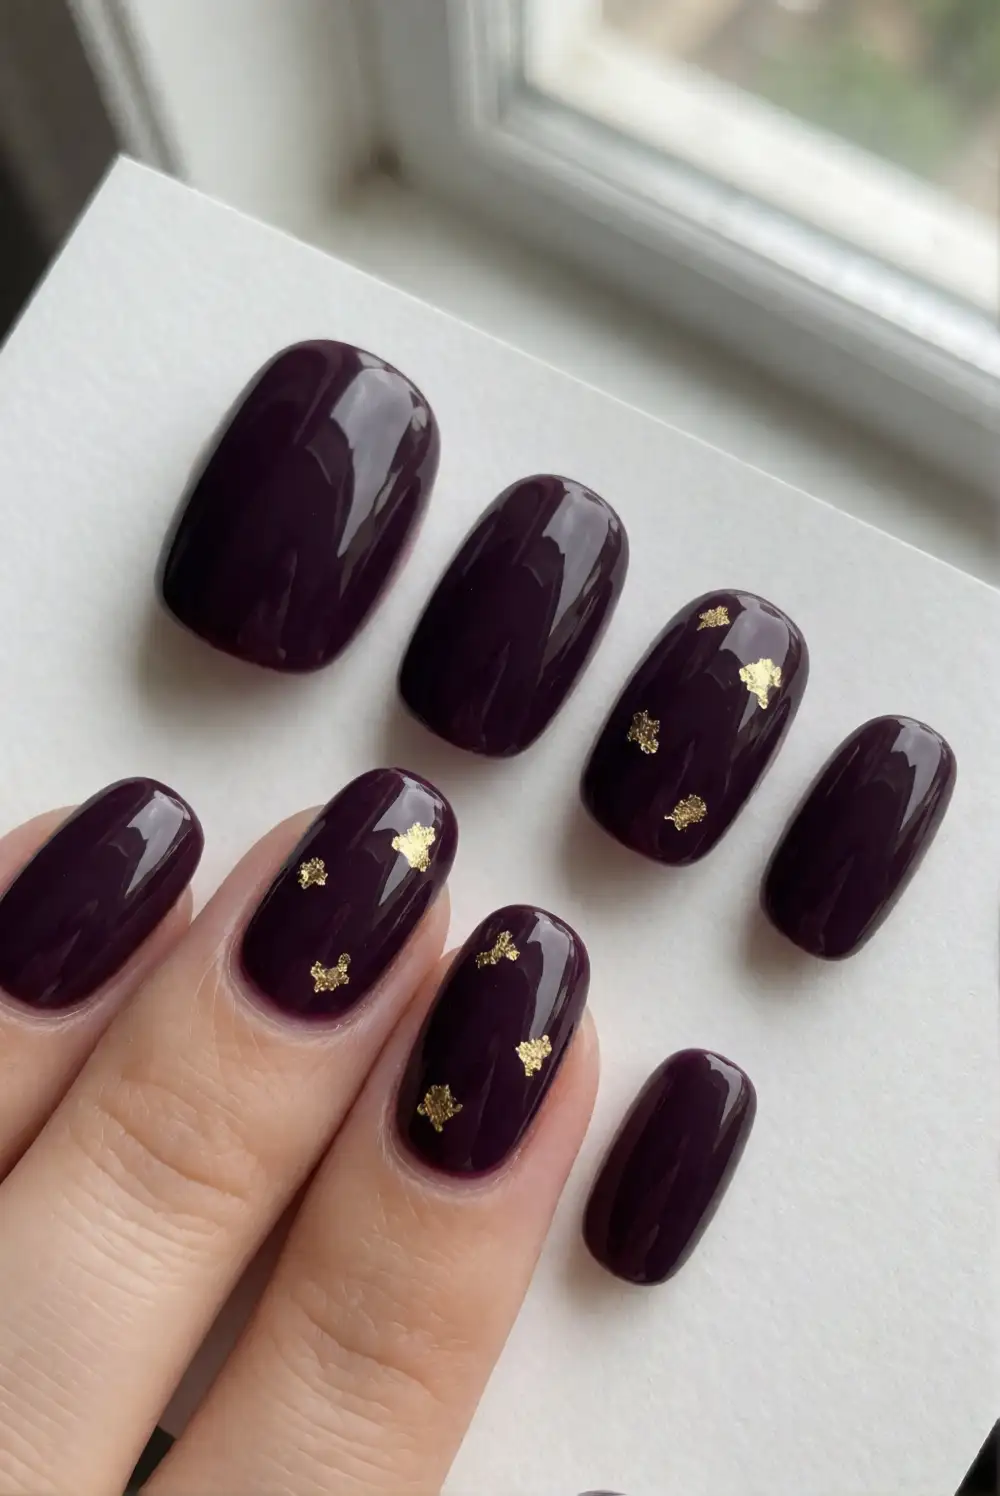
Apply a base coat followed by two smooth coats of deep plum polish, letting the color dry between layers. While the final color layer is slightly tacky, place a few tiny pieces of nail-art foil near the cuticle or toward one side of an accent nail. Press them gently into place with a silicone tool, then seal the surface with a generous glossy top coat. The rich purple and scattered metallic touches create a dressed-up Halloween manicure without intricate painting.
Use foil sparingly so the color remains the star and the nails keep a refined finish. Concentrating the flecks on one accent nail per hand can make the design feel especially balanced. If the foil edges lift, add another thin layer of top coat and smooth the surface before it dries. Burgundy or near-black polish also works well with gold, while a matte top coat offers a softer contrast if you prefer less shine.
Charcoal Nails With Copper Crescent Accents
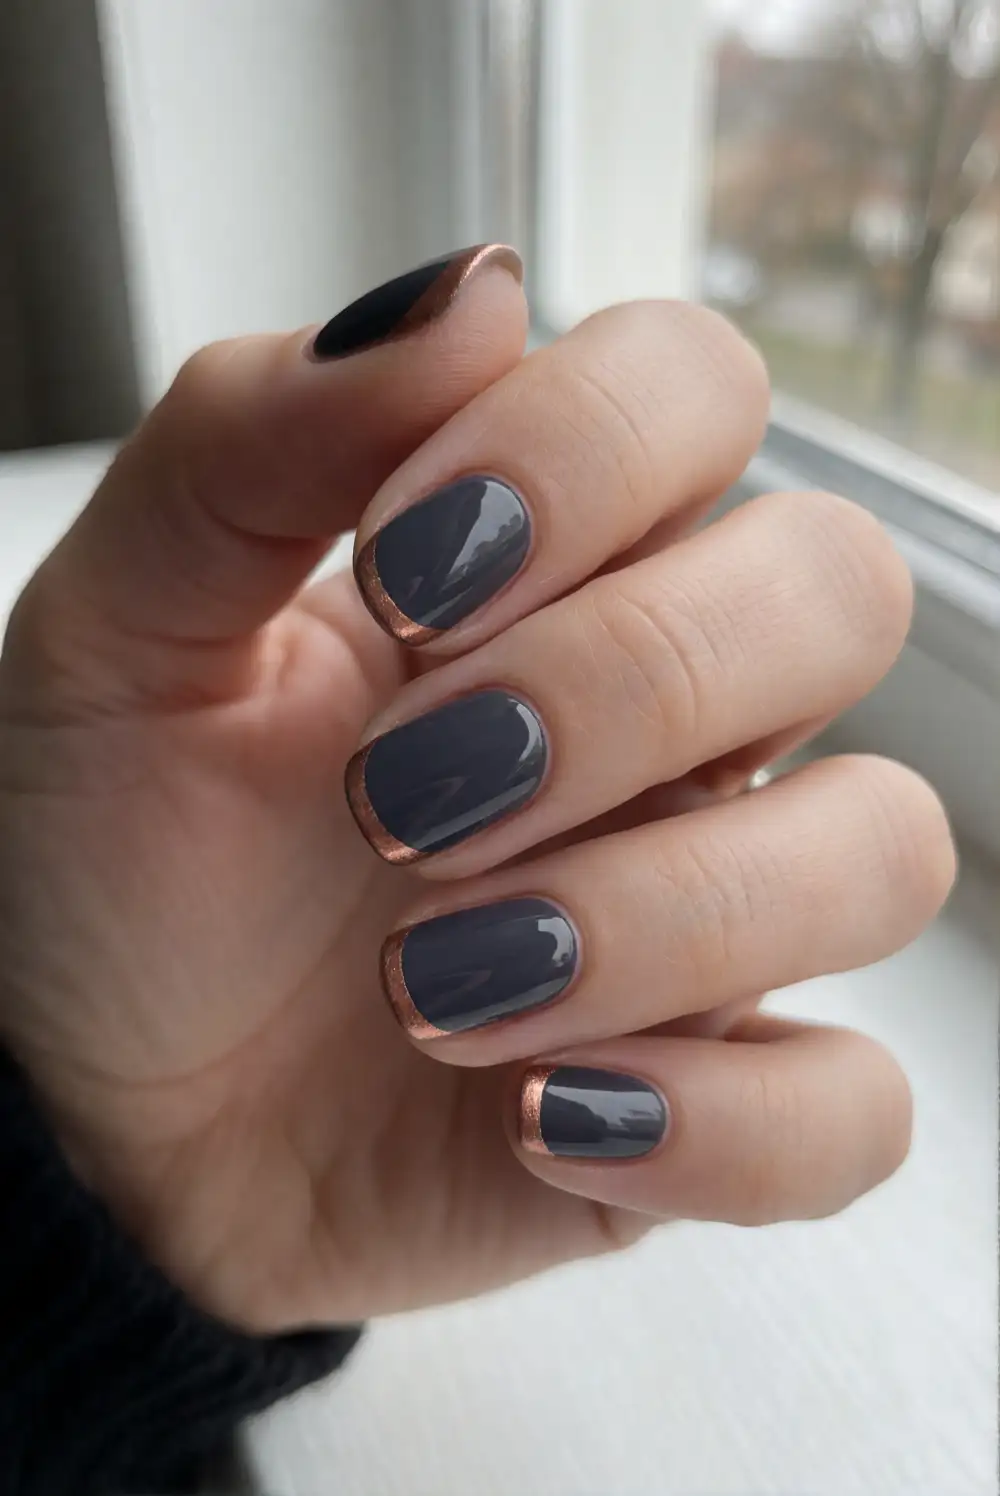
Paint nails with a smooth charcoal polish, using thin coats for an even, deep finish. After the color dries, add a narrow copper crescent near the base of each nail with a fine brush, following the curve of the cuticle without touching the skin. If you prefer a simpler approach, place the crescent on just the ring fingers. Finish with a glossy top coat to bring out the metallic warmth and protect the design from chips.
A muted copper shade complements charcoal without looking overly bright, while bronze gives the manicure a softer autumn feel. Keep the crescents delicate and similar in size so the look stays polished. A French-tip guide with a curved edge can help create a neat outline, but remove it slowly after the polish is applied. This pairing looks striking on short nails and offers a more understated Halloween option than an all-black manicure.
Glossy Black Nails With Orange Side Swoops
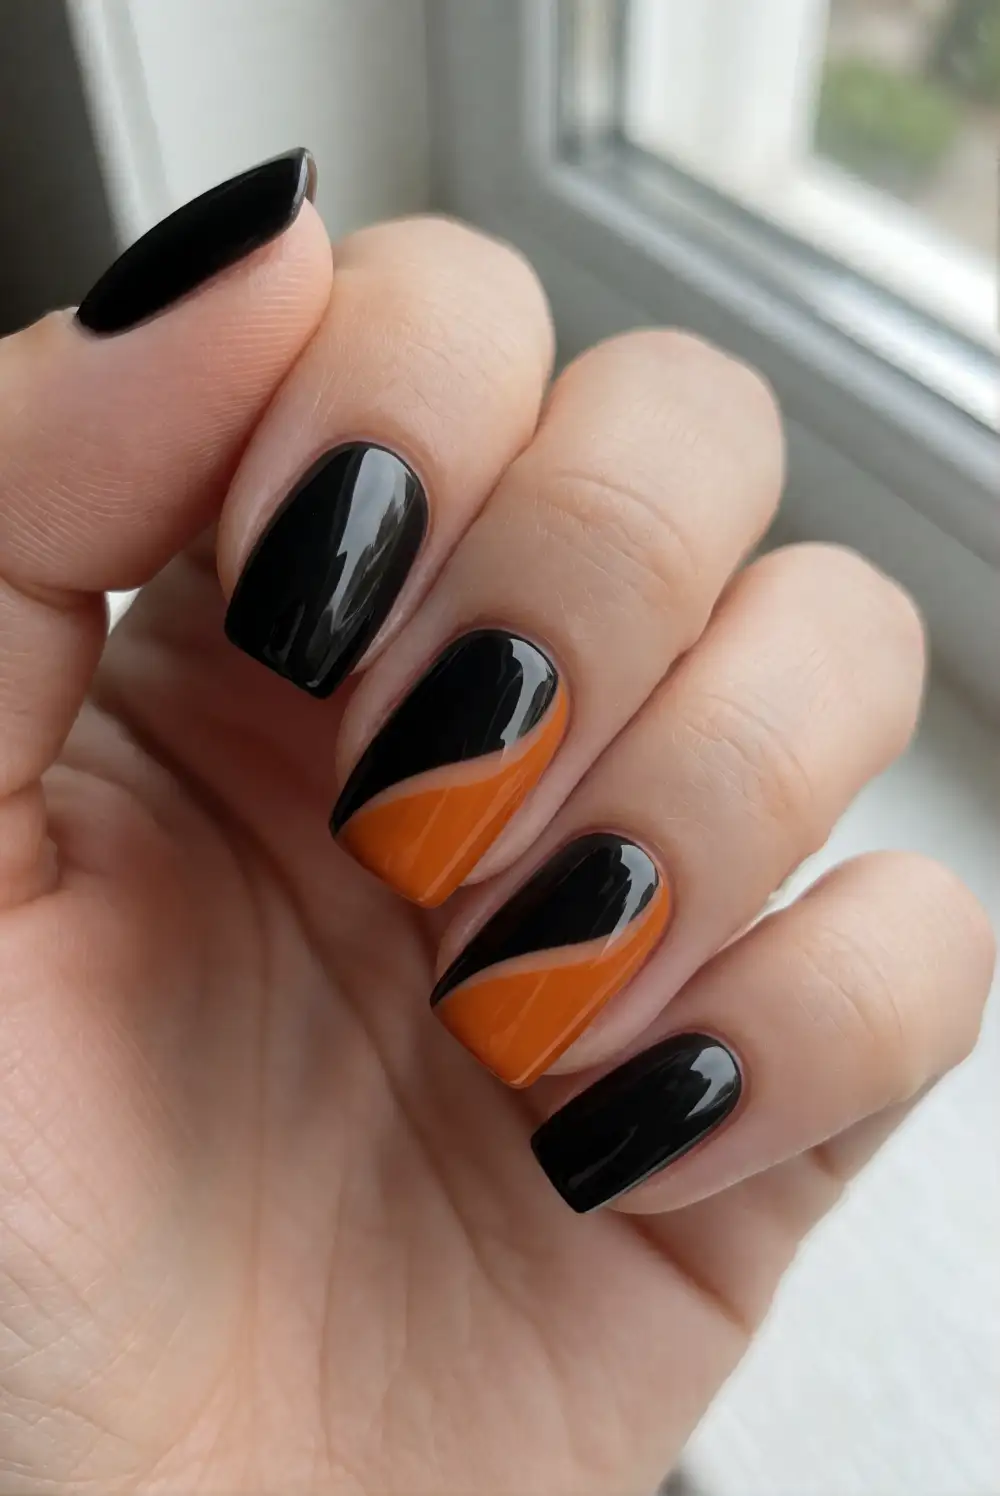
Apply two thin coats of glossy black polish and wait until the surface is fully dry. On each accent nail, use a fine brush to draw a curved orange line that sweeps from one side of the tip toward the opposite edge, creating an open, flame-like swoop without filling the nail. Repeat the curve in a second thin stroke if you want more definition. Seal the finished design with a clear top coat, brushing gently so the orange lines stay crisp.
Keep the orange detail to one or two nails per hand for a graphic look that remains easy to wear. A muted pumpkin tone feels classic, while a bright orange gives the black base extra contrast. Use a steady hand and wipe the liner brush between strokes to prevent uneven edges. If you make a small mistake, let the design dry and tidy it with a fine brush dipped in remover before applying the final top coat.
With a glossy finish, considered color choices, and a few carefully placed details, a Halloween manicure can look polished without complicated tools or salon appointments. Pick the design that fits your comfort level, work in thin layers, and allow each coat to dry before moving on. Whether you choose a simple accent or a graphic color combination, these ideas make it easy to give your nails a seasonal finish that feels personal and put together.








