
Bring a festive touch to your manicure with easy Halloween nails that use orange as the star accent. These approachable designs pair cheerful pumpkin shades with classic black, cream, and subtle seasonal details, so you can create a look that feels polished without complicated tools or salon-level techniques.
Classic Orange French Tips
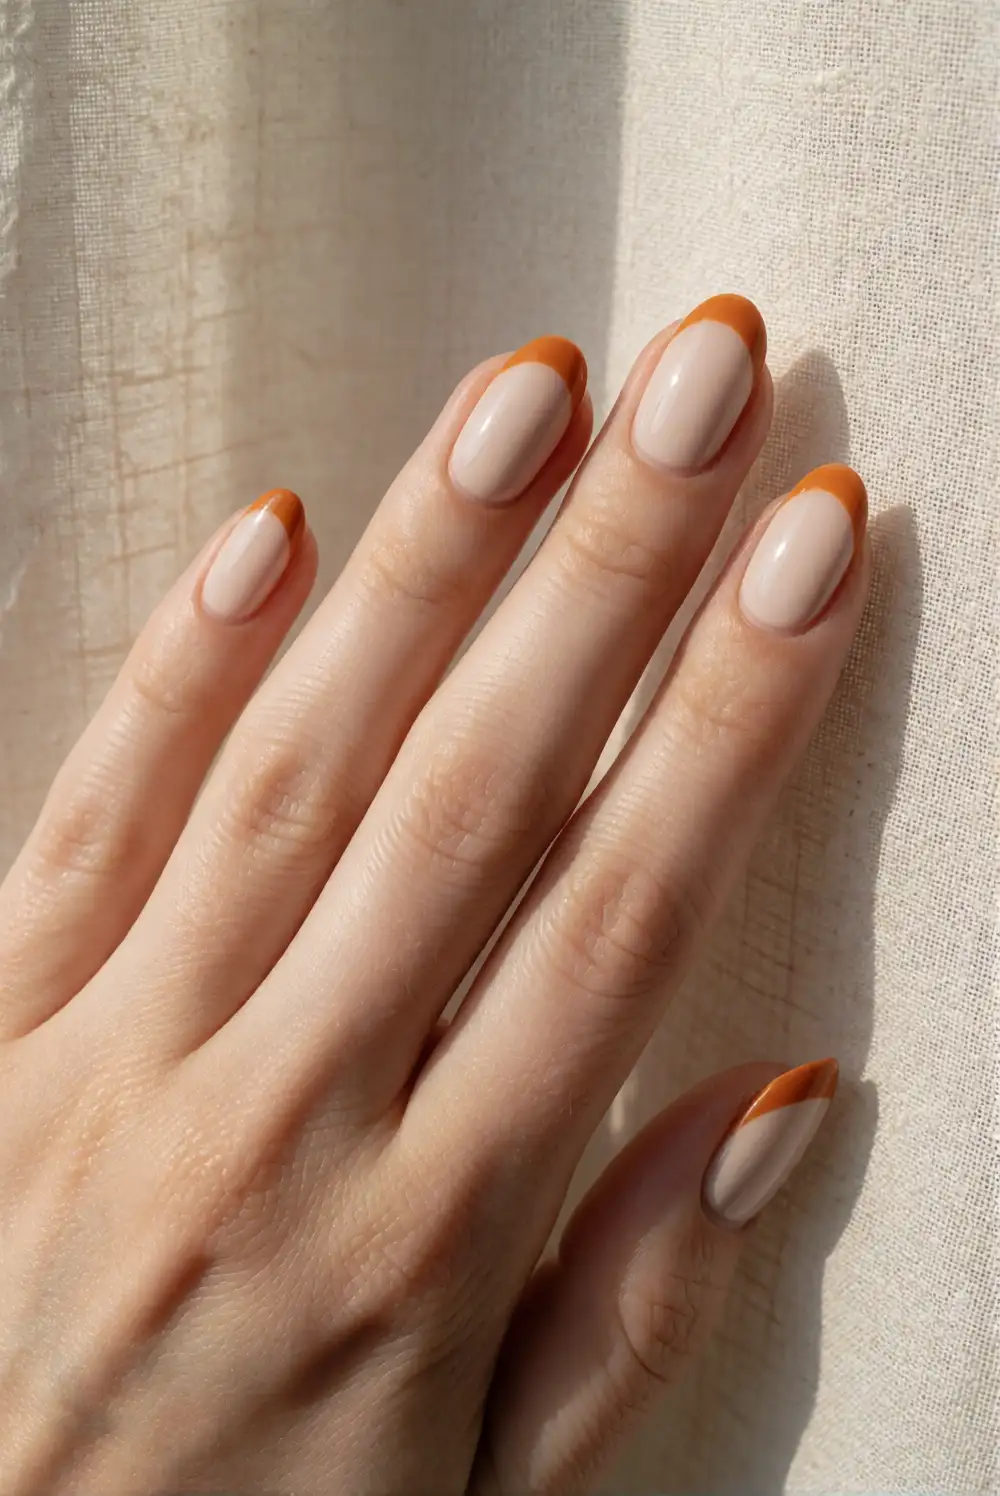
Give a familiar French manicure a Halloween-ready twist with orange tips. Apply a sheer nude or milky cream base coat and let it dry fully. Use a thin nail brush to paint a curved orange band across each tip, keeping the line narrow for a clean look. If a brush feels tricky, place a small piece of curved manicure guide tape near each nail tip, paint above it, then peel it away before the polish sets.
Choose vivid pumpkin orange for a bold seasonal finish, or use a softer burnt orange for something more understated. Keep the rest of the design minimal so the tips remain the focal point. A glossy top coat helps smooth the color and adds shine, while a matte finish gives the manicure a modern feel. This design looks especially coordinated with a single orange accent nail or a simple black outfit.
Mini Pumpkin Accent Nails
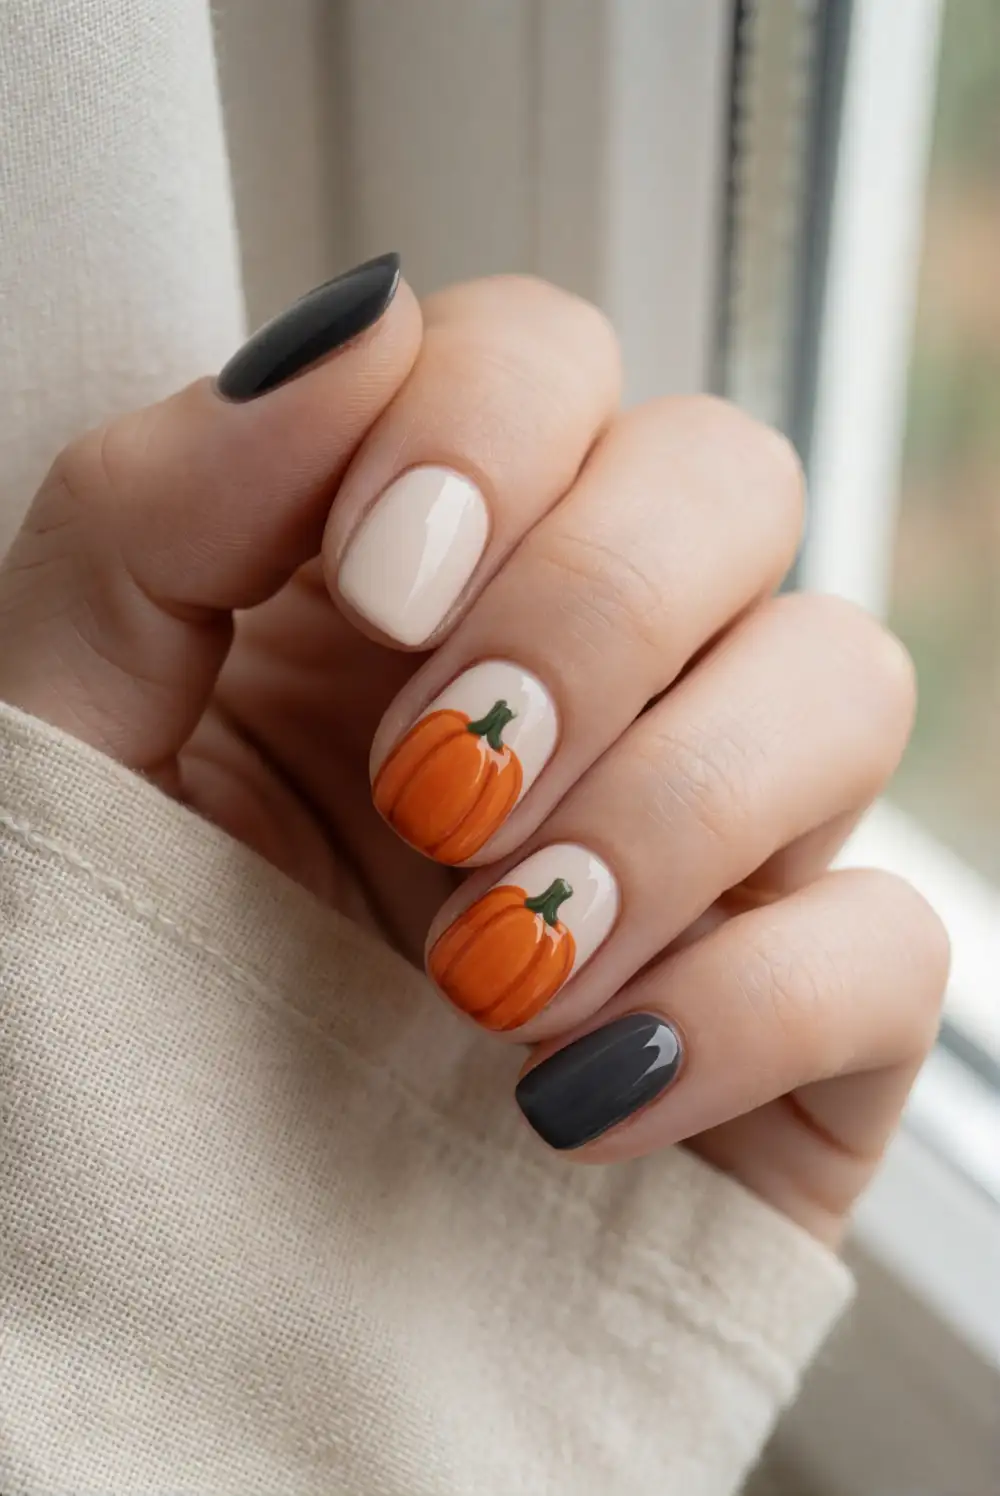
Paint most nails a warm cream or deep charcoal, then reserve one or two nails for tiny pumpkins. On the accent nails, apply an orange base and let it dry. Use a fine brush to shape small rounded pumpkin lobes with slightly curved strokes, then add a short green stem when the orange polish is set. A dotting tool or the end of a clean bobby pin can help form the pumpkin body without needing detailed freehand painting.
Place each pumpkin near the cuticle or toward one side of the nail to keep the design airy. Add a few thin curved lines in a deeper orange if you want extra dimension, but the simple silhouette works beautifully on its own. Keep pumpkins on only a couple of nails so the manicure stays easy to wear. A glossy top coat protects the artwork and makes the orange look bright and smooth.
Orange and Cream Candy Corn Tips
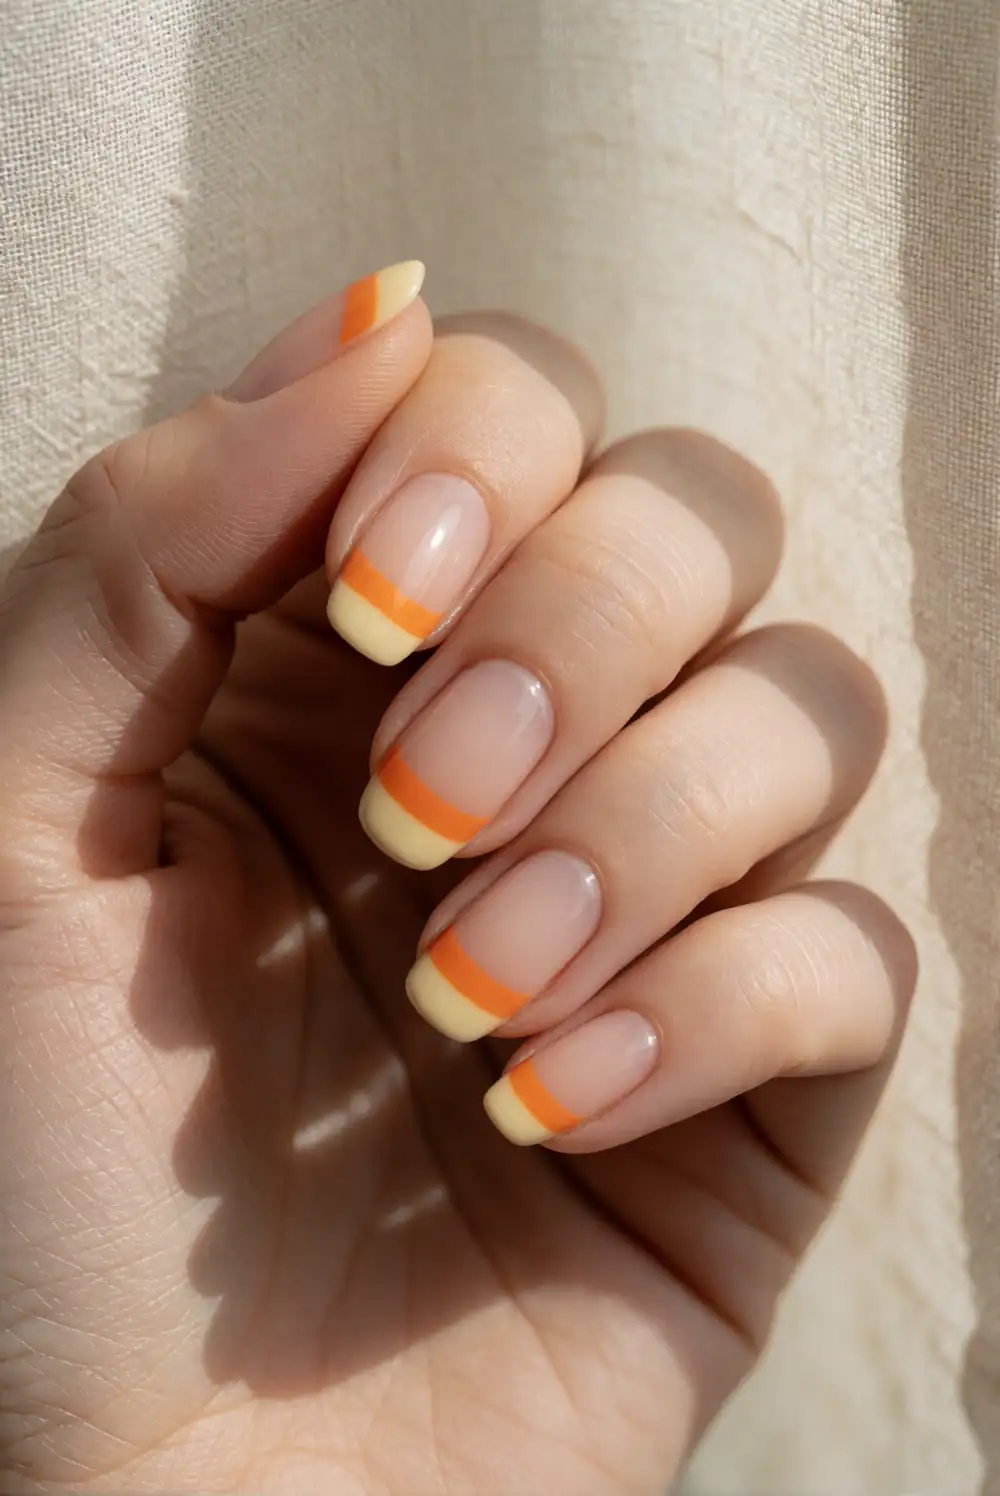
Create a candy-corn-inspired manicure with neat bands of cream, orange, and pale yellow at the nail tips. Start with a sheer nude base and let it dry. Paint a narrow pale-yellow stripe along each free edge, followed by a wider orange band just above it, then add cream polish toward the center of the nail. Use thin manicure tape between colors if you prefer crisp borders, removing it while the polish is still slightly tacky.
For a simpler version, use the three colors on one accent nail and paint the remaining nails solid cream or orange. Keep each stripe slim so the manicure does not feel visually crowded, especially on shorter nails. A fine detail brush makes it easier to adjust the curves and clean the edges. Finish with a clear top coat once every layer is completely dry, giving the striped tips a smooth, unified shine.
Burnt Orange Crescent Moons
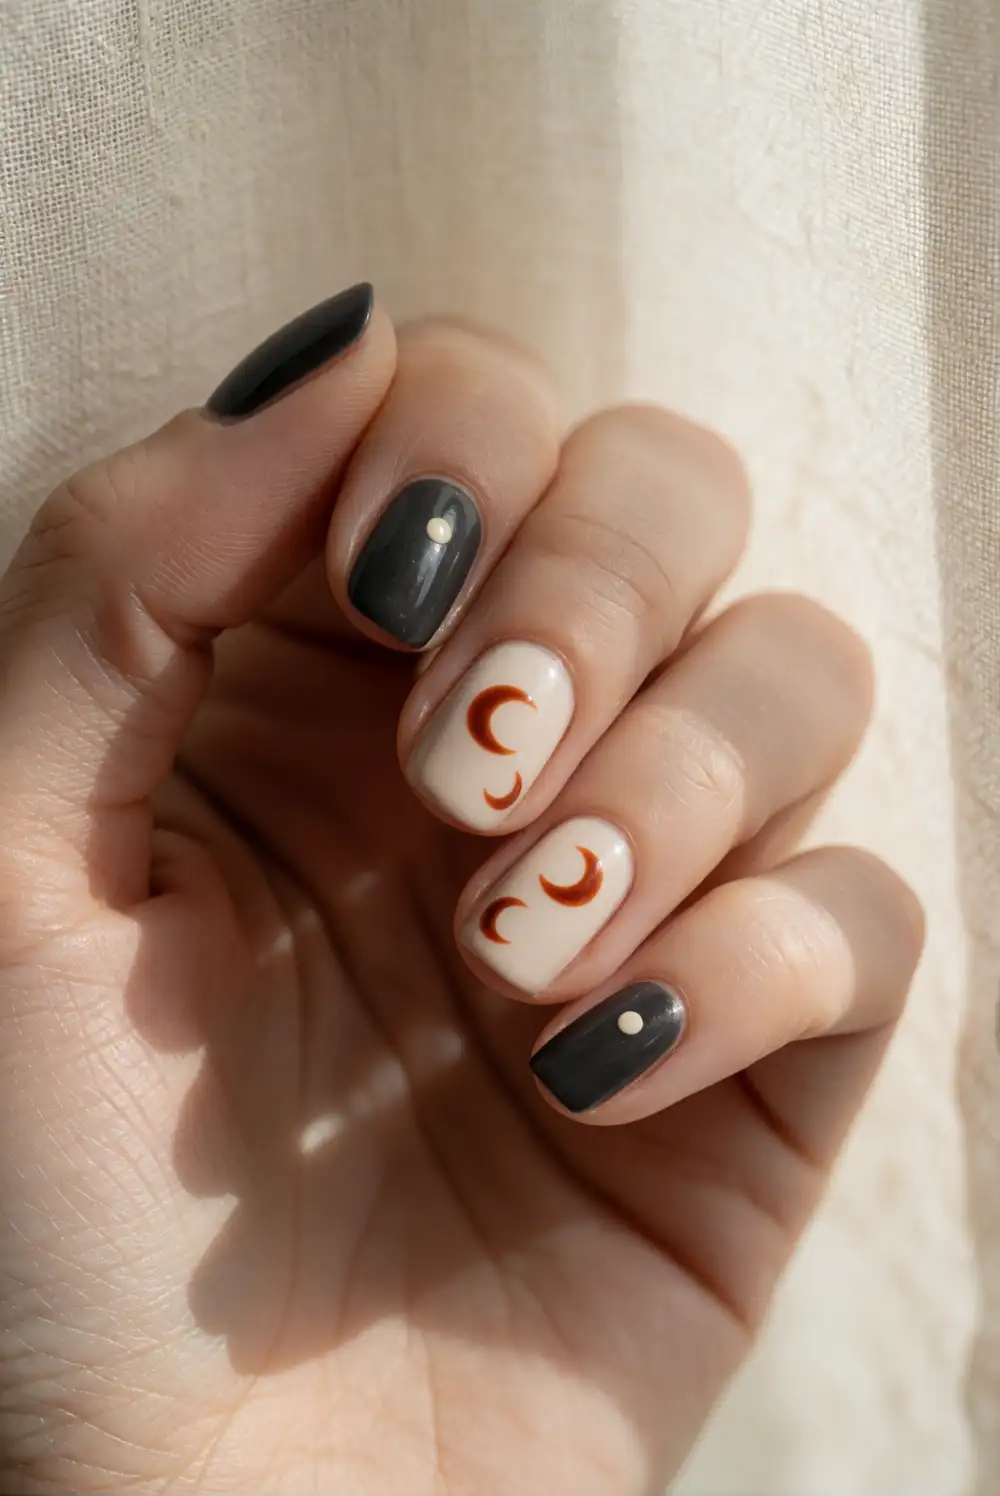
Use a warm burnt-orange polish to create small crescent shapes against a cream or nearly black base. After the base color dries, load a fine nail-art brush with orange polish and paint a curved crescent near the cuticle or along one side of the nail. Build the shape with two careful strokes, leaving a slim opening in the middle. If freehand curves are difficult, apply a small round guide sticker, paint around its edge, and remove it gently.
Keep the moons small and repeat them on one or two accent nails, leaving the rest of the manicure solid for an uncluttered result. A few tiny cream dots can suggest stars without making the design fussy. Choose a glossy top coat for contrast against dark polish, or use a matte finish with cream for a softer effect. This moon detail pairs well with cozy sweaters and other warm autumn colors.
Simple Orange Swirl Nails
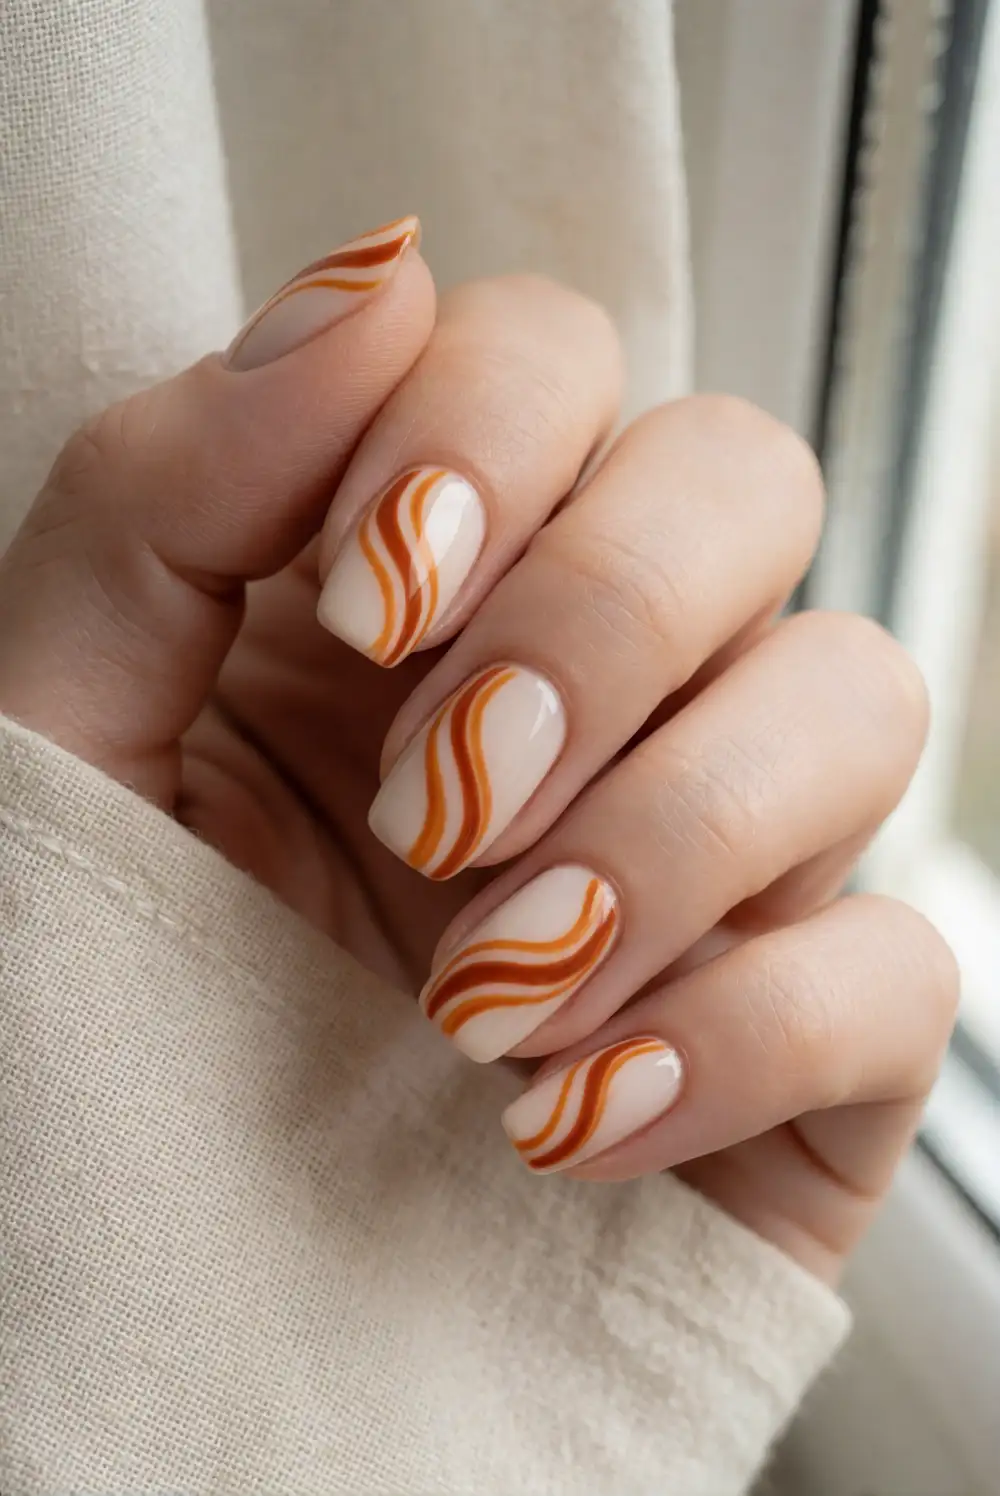
Paint a neutral cream base, then add loose orange curves for an easy abstract Halloween manicure. Once the base coat is completely dry, use a fine liner brush to draw a flowing S-shaped line from one side of the nail toward the tip. Add a second, shorter curve in a deeper orange if you like, leaving plenty of open space between the lines. Work on one nail at a time and wipe the brush clean between strokes for smooth, controlled marks.
Vary the direction of the swirls from nail to nail so the design feels relaxed rather than identical. For a restrained look, decorate only the ring fingers and keep the remaining nails a solid orange or cream. A very thin black curve can add contrast, though the orange lines are enough to make the manicure feel seasonal. Seal the finished design with a clear top coat after the artwork dries fully.
Orange and Black Checkerboard Nails
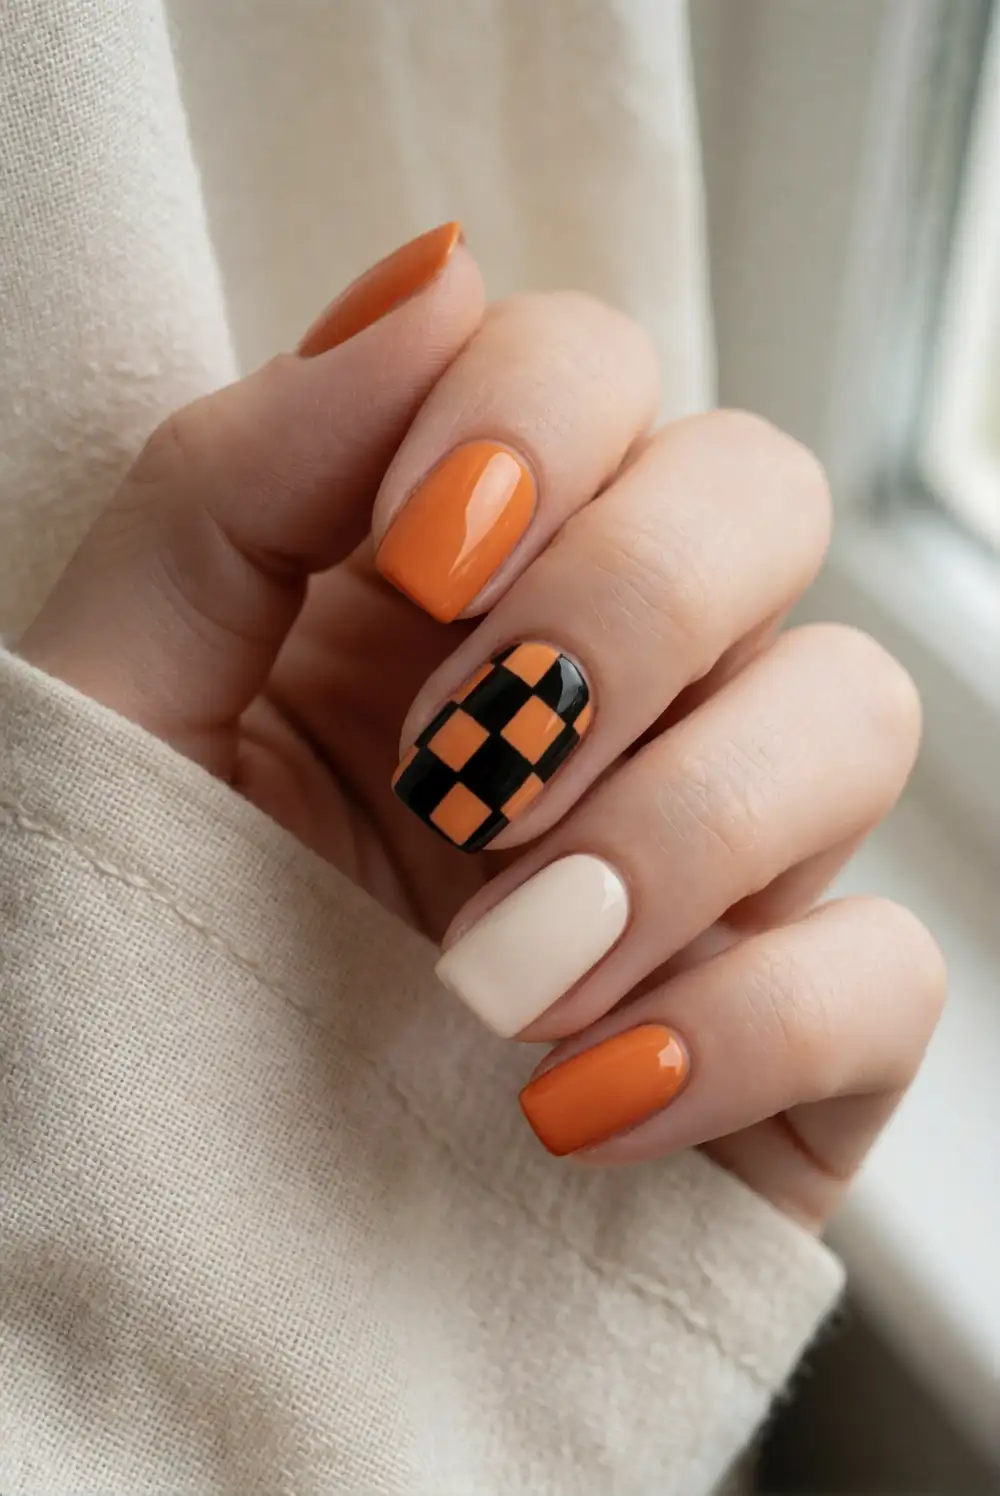
Make a playful checkerboard accent with orange and black polish on one or two nails. Apply an orange base coat and allow it to dry thoroughly. Place narrow strips of manicure tape across the nail in one direction, paint the exposed spaces black, and remove the tape while the polish is still wet. After that layer dries, repeat with tape placed in the opposite direction to form a tidy grid of alternating squares.
Shorter nails can use a small checkerboard patch near the tip instead of a full grid, which keeps the pattern clear and manageable. For a softer variation, pair orange squares with cream rather than black. Keep the other nails solid to balance the graphic accent, and use a clear top coat to smooth the surface. Let the design dry well before applying the finishing layer so the squares stay crisp.
Black Cat Silhouette Accent
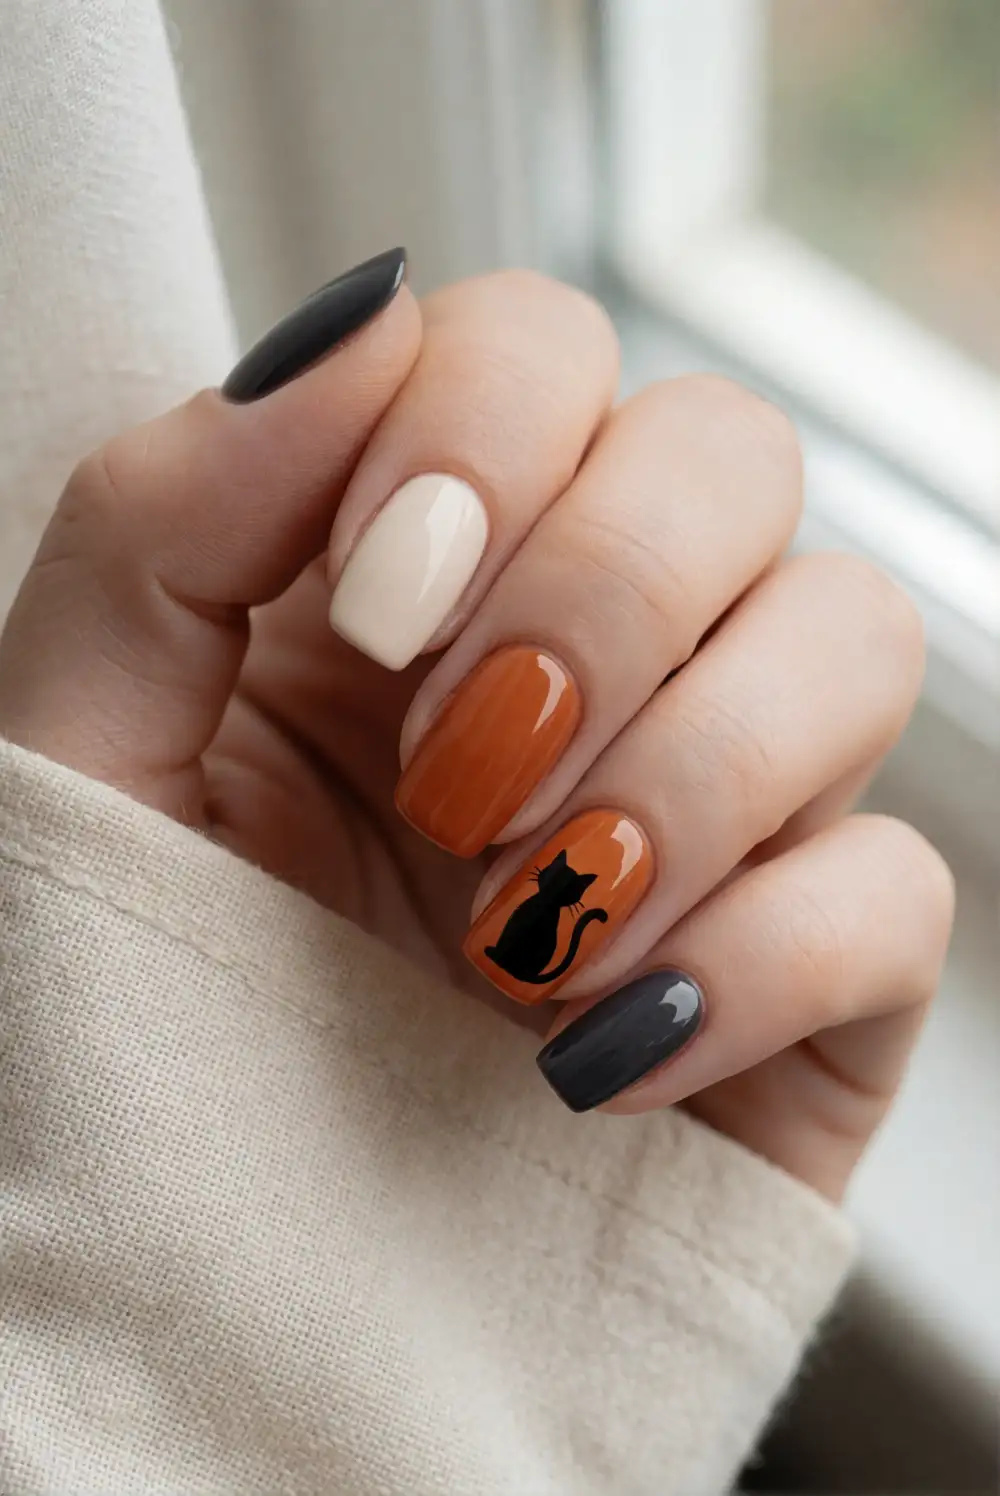
Add a simple black cat silhouette to an orange accent nail for a classic Halloween detail. Paint one nail pumpkin orange and let it dry completely. With a fine brush and black polish, make a small rounded head, then add two pointed ears using short angled strokes. Extend a curved line for the back and tail, keeping the body shape simple rather than trying to draw fur or facial details. Paint the remaining nails cream, black, or a coordinating orange.
Place the cat low on the nail or near one side so its shape has room to read clearly. A solid silhouette is easier to create than a detailed face and gives the manicure a neat, graphic finish. If your brush is too wide, use a toothpick to refine the ear points and tail curve before the polish sets. A glossy top coat brings the contrasting colors together and helps protect the accent artwork.
Tiny Spiderweb Corner Detail
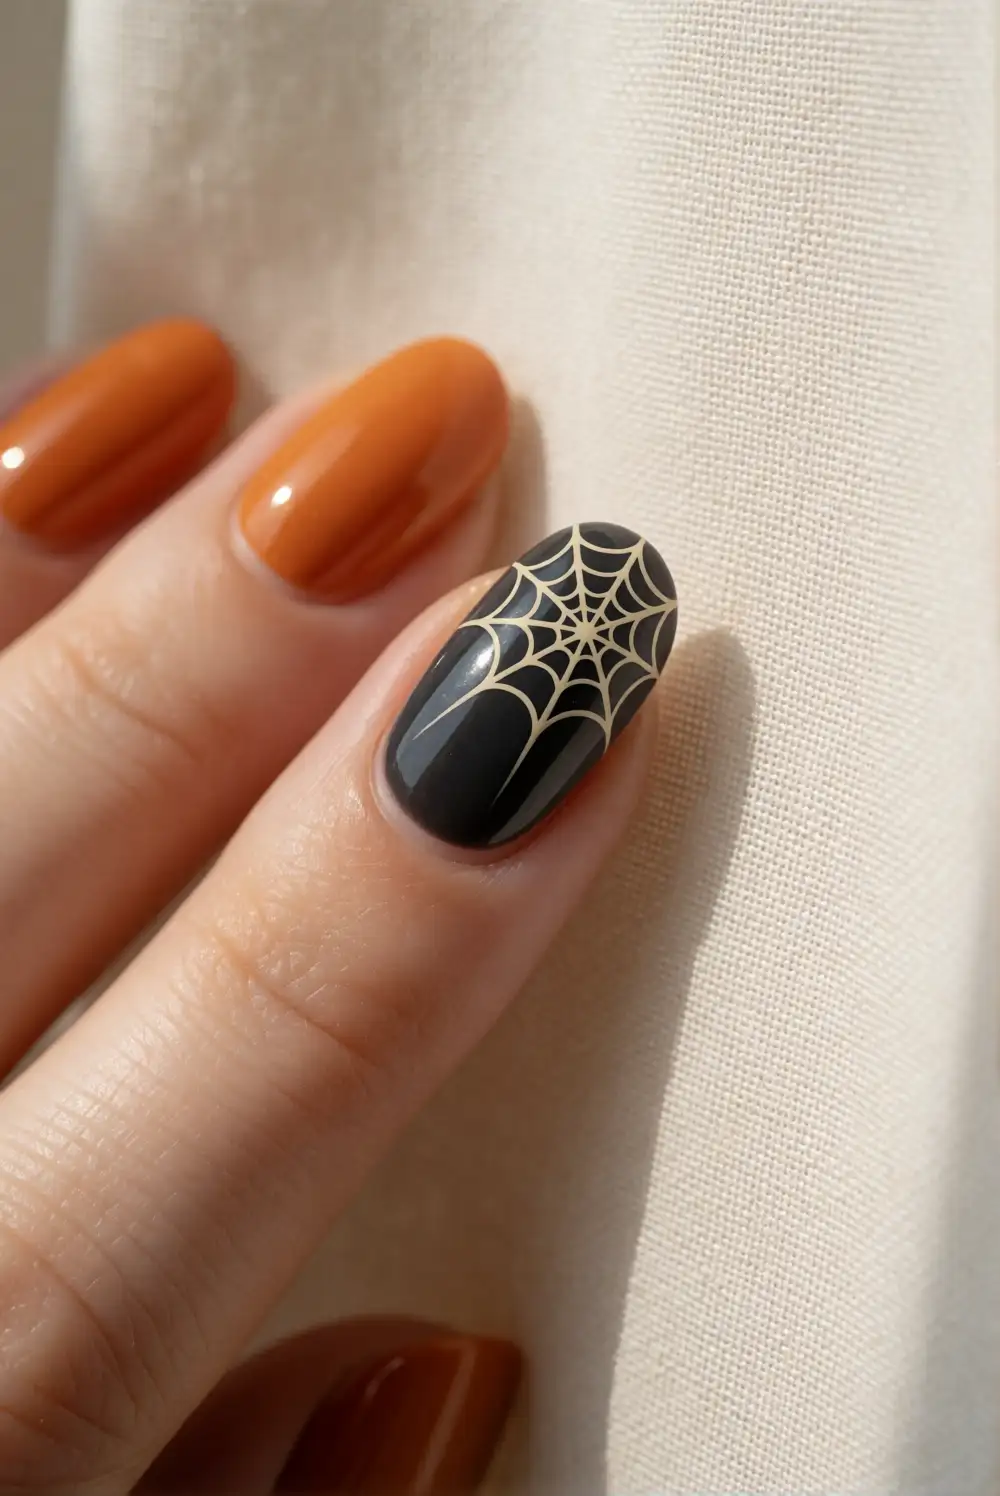
Paint a small spiderweb in one corner of a dark or cream nail using a thin white or orange liner brush. Begin with three short lines that meet at a corner, like a small fan. Connect the lines with two or three shallow curved strokes to suggest the web. Keep the web compact and leave the rest of the nail plain, which makes the detail easier to paint and prevents the design from looking crowded.
Use white polish on black for crisp contrast, or choose black lines over a pale cream base for a softer version. An orange background gives the web a brighter Halloween feel. Paint the lines lightly rather than pressing hard, and let each stroke settle before adding the next. You can repeat the web on a second nail, but a single accent often looks more balanced. Finish with a clear top coat once the lines are dry.
Negative-Space Pumpkin Shapes
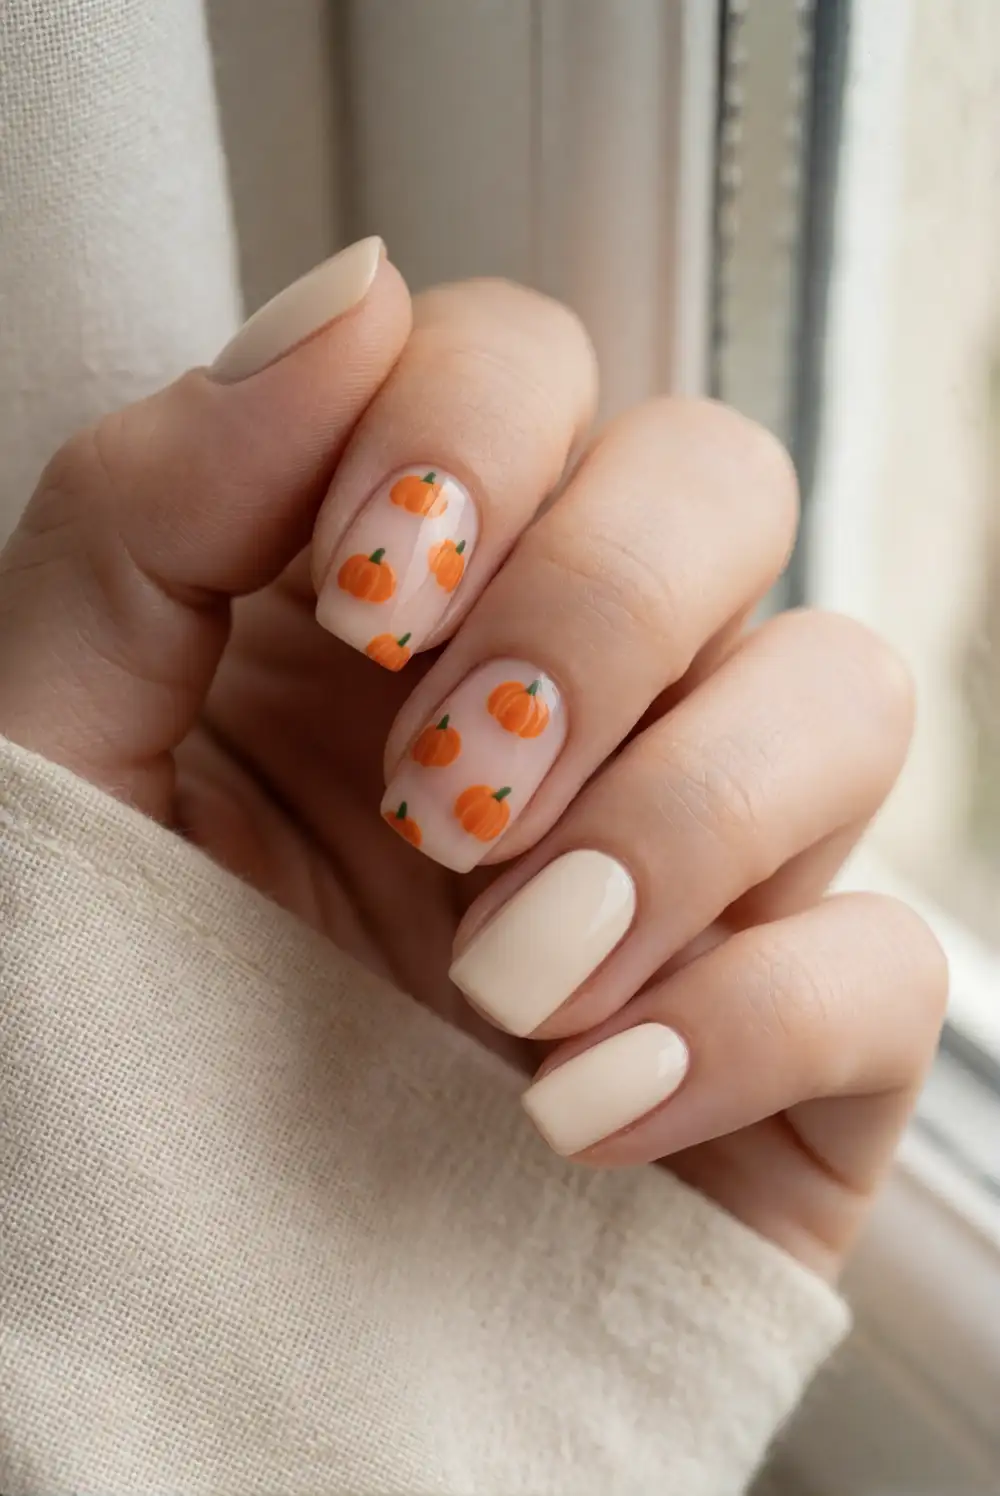
Let the natural nail show through the center of a pumpkin shape for a light, modern accent. Apply a clear or sheer nude base and wait until it dries. Use orange polish to paint two or three rounded lobes around a small unpainted center, joining them into a pumpkin outline. Add a short green stem at the top with a fine brush. Keep the shape compact and work with a light touch so the clean open center remains visible.
This design works well on one accent nail paired with solid orange or cream on the others. If outlining the pumpkin feels difficult, paint three curved orange lobes and let the natural space between them suggest the shape. A sheer base coat helps the negative-space area look intentional and polished. Once the orange and green details are dry, apply a clear top coat carefully to avoid dragging the artwork across the nail.
Orange Glitter Gradient Tips
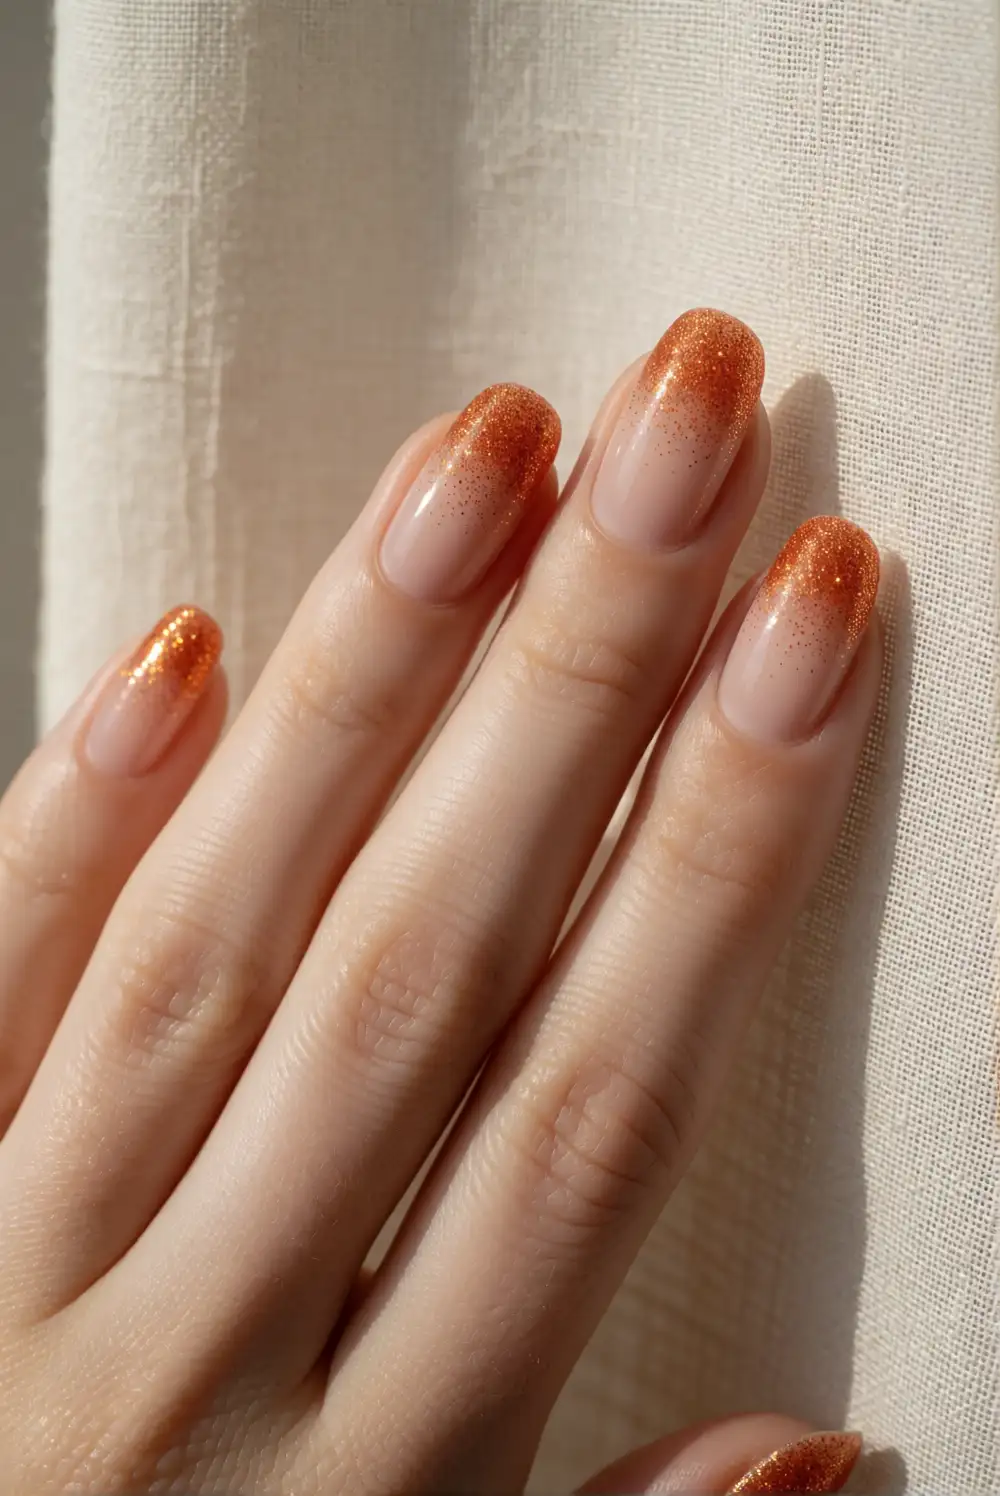
Create a sparkling finish by concentrating orange glitter near the tips and fading it toward the center of each nail. Apply a sheer nude base and allow it to dry. Dab orange glitter polish onto a makeup sponge, then gently press the sponge onto the nail tip in light layers. Use a clean area of the sponge to soften the edge as you move upward, adding less glitter with each pass. A small brush can tidy polish around the nail.
Choose fine glitter for a subtle glow or a mix of fine and larger flecks for a more festive look. Keep the glitter on one or two nails if you want a quieter manicure, or repeat it across every tip for extra sparkle. Apply a smooth clear top coat to seal the texture and help the gradient catch the light. Let the polish dry fully between coats for a cleaner fade.
Orange accents make Halloween nails easy to personalize, whether you prefer crisp French tips, tiny seasonal artwork, graphic patterns, or a little sparkle. Start with the design that suits your polish skills and nail length, keep the details simple, and finish with a top coat for a polished manicure that feels festive and wearable.








