
Give your Halloween manicure a playful little spirit with these cute ghost nail designs. From delicate French tips to pastel accents and glossy midnight shades, each idea offers an approachable way to bring charming ghost art to your nails. Choose a look that suits your polish collection and comfort with nail art, then adapt the colors and details to make it your own.
Soft White Ghost French Tips
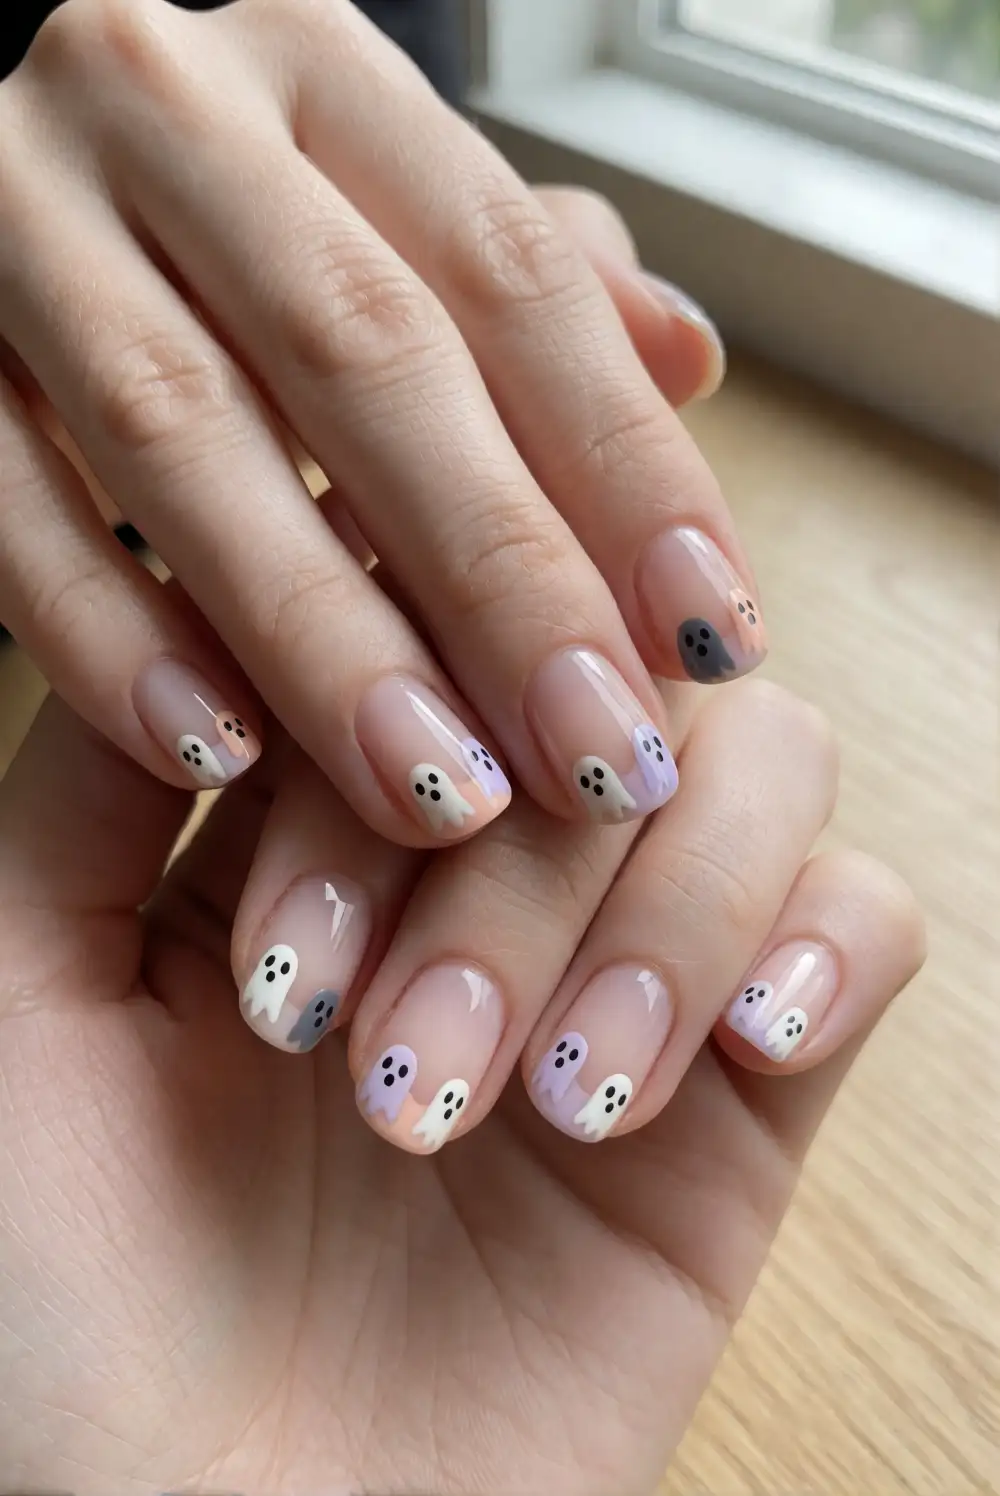
Give a classic French manicure a Halloween twist with tiny white ghosts perched along the tips. Apply a sheer pink or nude base coat and let it dry completely. Use white polish to paint a few rounded shapes at the free edge, then gently pull each shape into a tapered tail with a fine nail art brush. Add small black eyes with a dotting tool or the tip of a fine brush, and seal everything with a clear top coat.
Keep the ghost shapes small and spaced out so the French-tip effect stays airy rather than crowded. A milky base looks especially soft, while a sheer peach shade adds warmth. If detailed accents feel tricky, place the ghosts on just one or two accent nails and paint the remaining tips in simple white curves. This design pairs nicely with everyday outfits and can be refreshed with a new top coat to maintain its glossy finish.
Milky Ghost Silhouette Nails
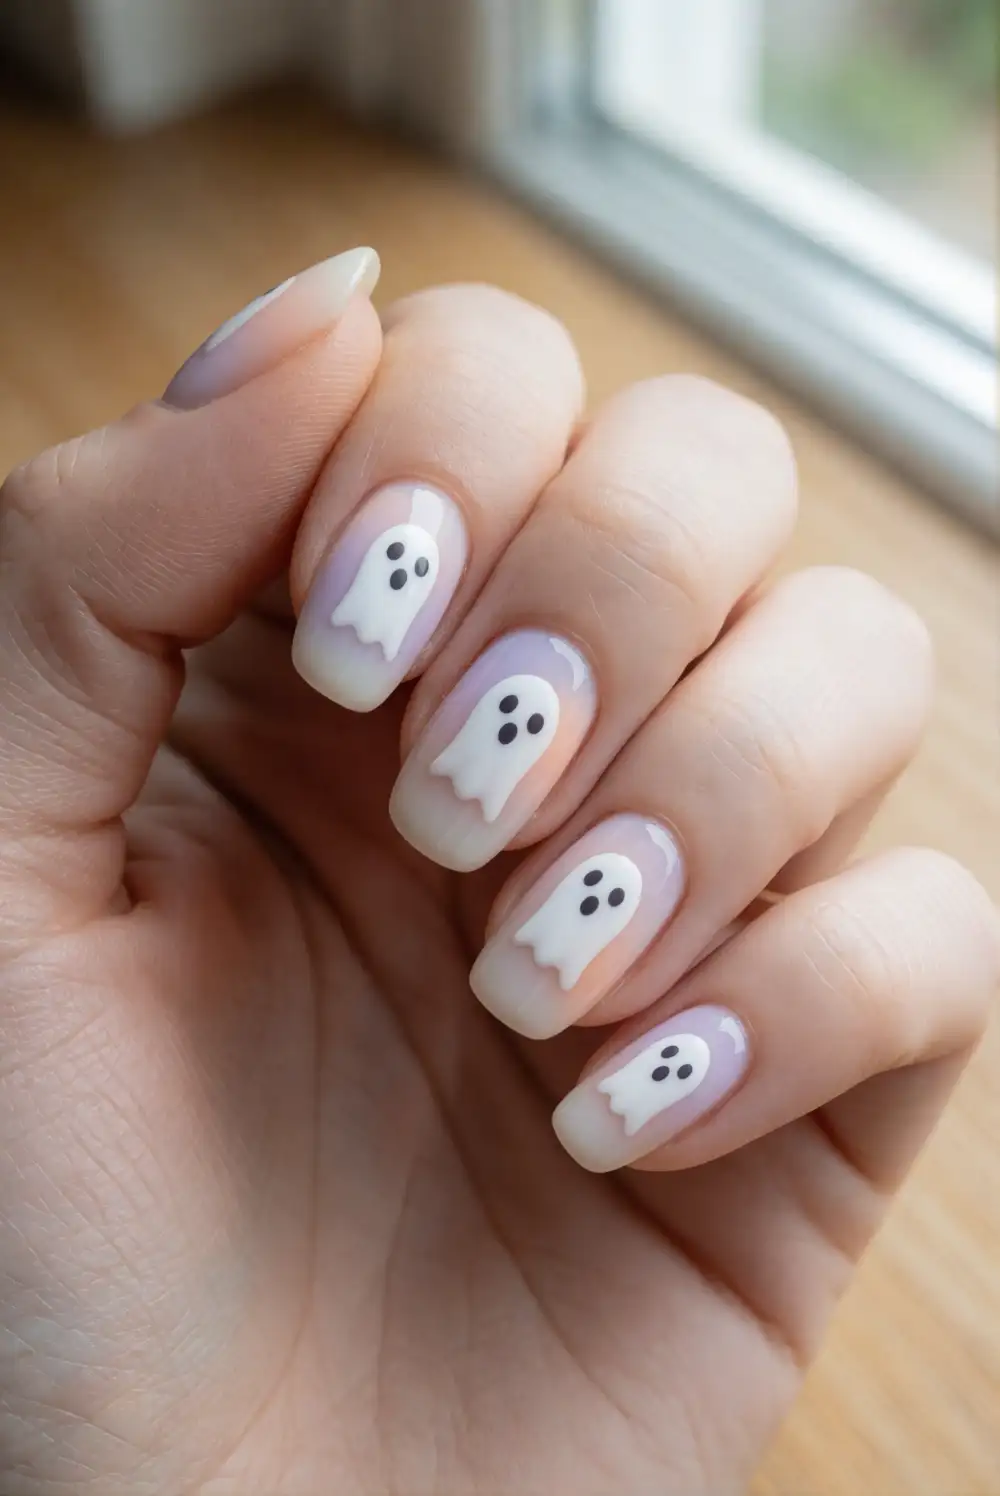
Create a clean, delicate manicure by painting ghost silhouettes over a milky white base. Apply two thin coats of translucent white polish, allowing each coat to dry before continuing. With a small brush, make each ghost from a rounded dab of opaque white polish and draw a gently wavy lower edge. Add tiny charcoal eyes after the shapes have set, then finish with a glossy top coat. The milky background keeps the white figures visible without making the design feel stark.
Vary the ghost shapes slightly so the nails look hand-painted and lively. For a subtle finish, put a silhouette on only a couple of nails and leave the others sheer. A matte top coat changes the look into a soft, velvety manicure, while glossy polish gives it a glassy shine. Use a fine detail brush or nail art pen for the eyes, and let the dark polish dry thoroughly before sealing to prevent smudging.
Lavender Ghost Accent Nails
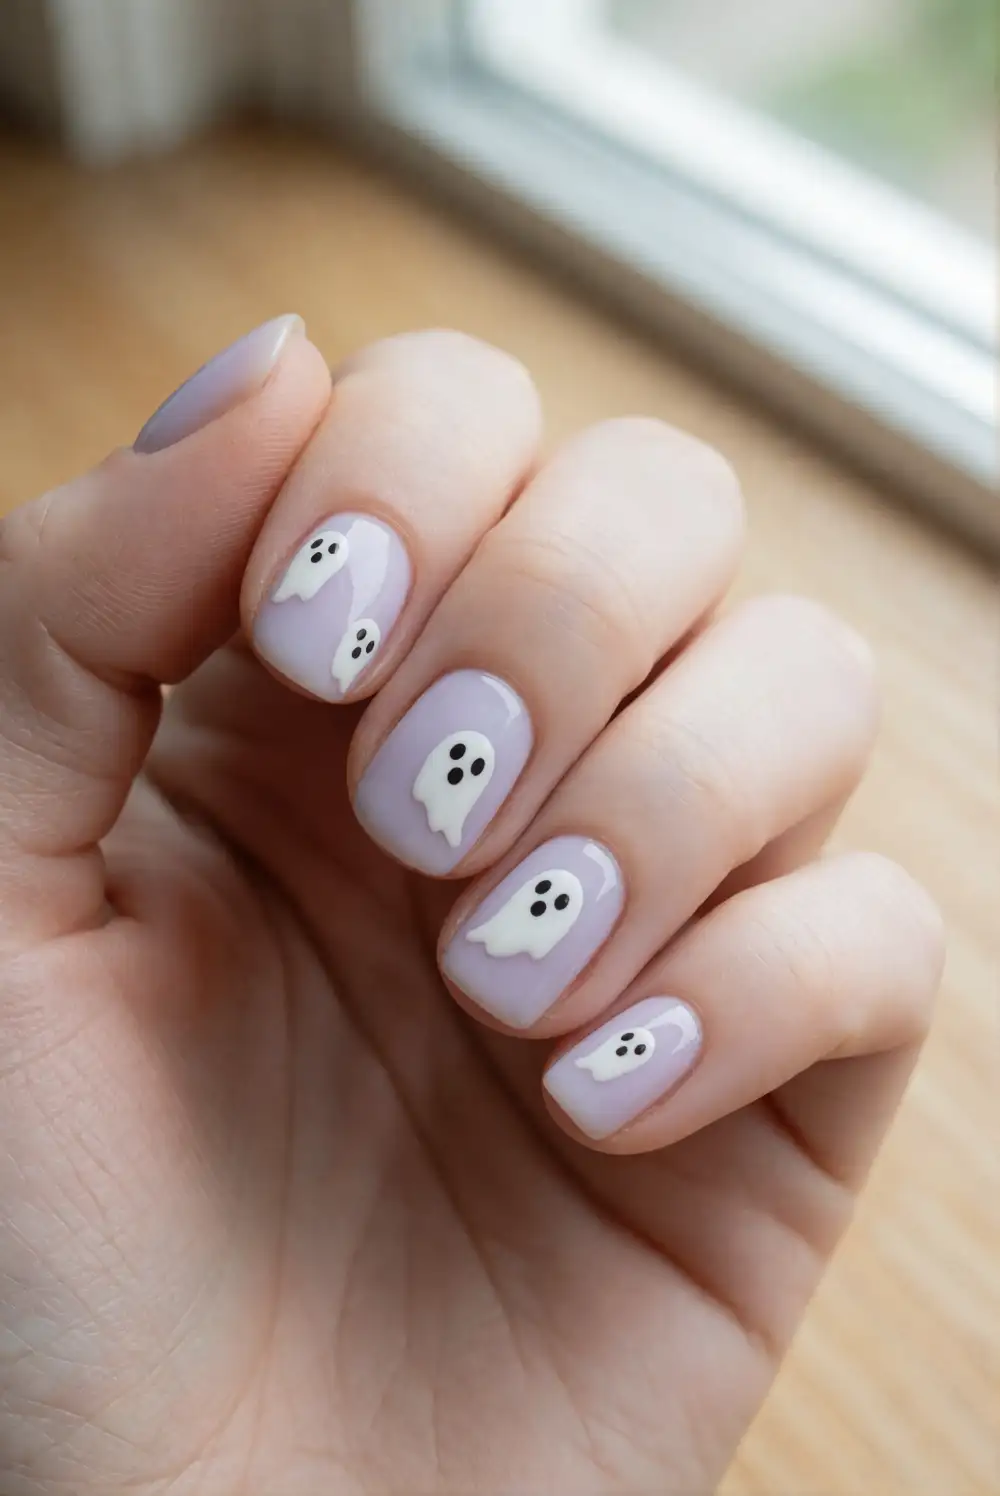
Set tiny white ghosts against a lavender manicure for a sweet color combination that feels festive but gentle. Paint the nails with two thin coats of lavender polish and allow them to dry. On an accent nail, use a fine brush to form a small white ghost with a rounded top and a softly scalloped base. Add a pair of tiny dark eyes once the white polish is dry, then protect the artwork with clear top coat. Repeat the accent on another nail if desired.
Choose a pale lilac for a light, delicate effect or a deeper lavender for stronger contrast. Keep the other nails solid to let the ghost detail stand out, or add a few tiny white dots near the cuticle for a little extra decoration. A pearly lavender polish gives the manicure a gentle glow, while a cream finish feels more understated. If painting with your non-dominant hand is difficult, use a nail art sticker and seal its edges carefully.
Tiny Ghosts on a Sheer Nude Base
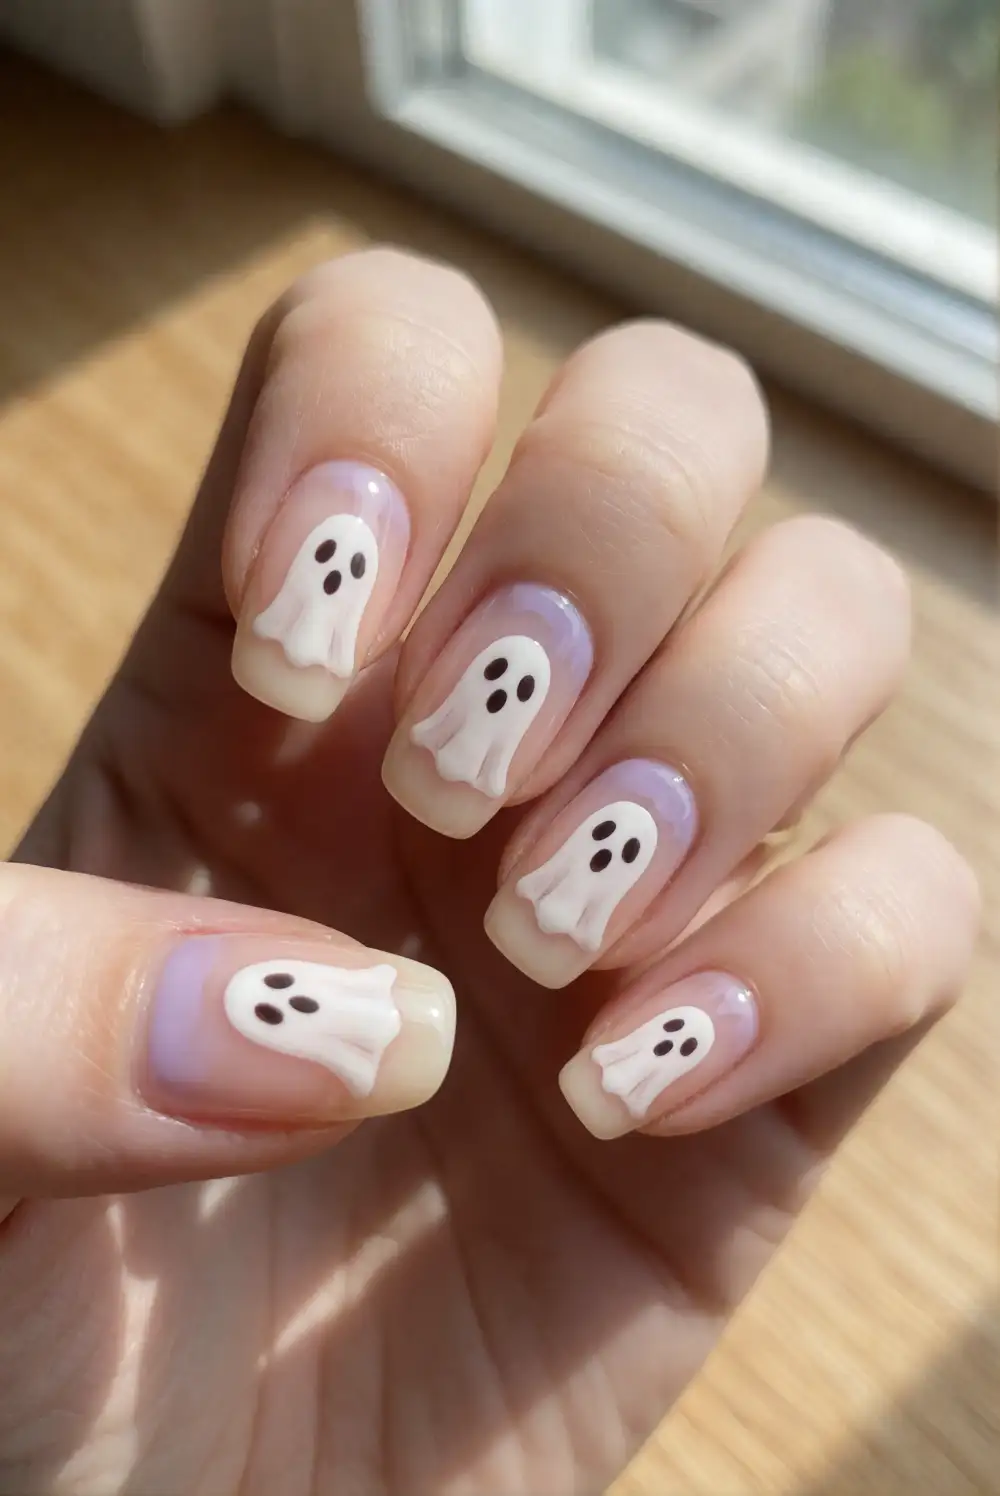
For a barely-there Halloween manicure, paint miniature ghosts over a sheer nude base. Apply a thin coat of nude or blush polish and let it dry fully. Use a fine brush to place a small white oval on each chosen nail, then pull the polish downward into a short, softly curved tail. Once the shapes are dry, add two pin-sized dark eyes and finish with a transparent top coat. The neutral background makes the small figures feel light and keeps the manicure easy to wear.
Leave plenty of open space around each ghost to preserve the minimal look. You can place one figure near the tip, close to the side, or just above the cuticle for a different arrangement across your hand. A sheer pink base complements warm skin tones, while a beige nude creates a more natural finish. Use a toothpick or fine dotting tool to make neat eyes, and wipe excess polish from the tool between details to keep each dot crisp.
Ghost and Pumpkin Accent Nails
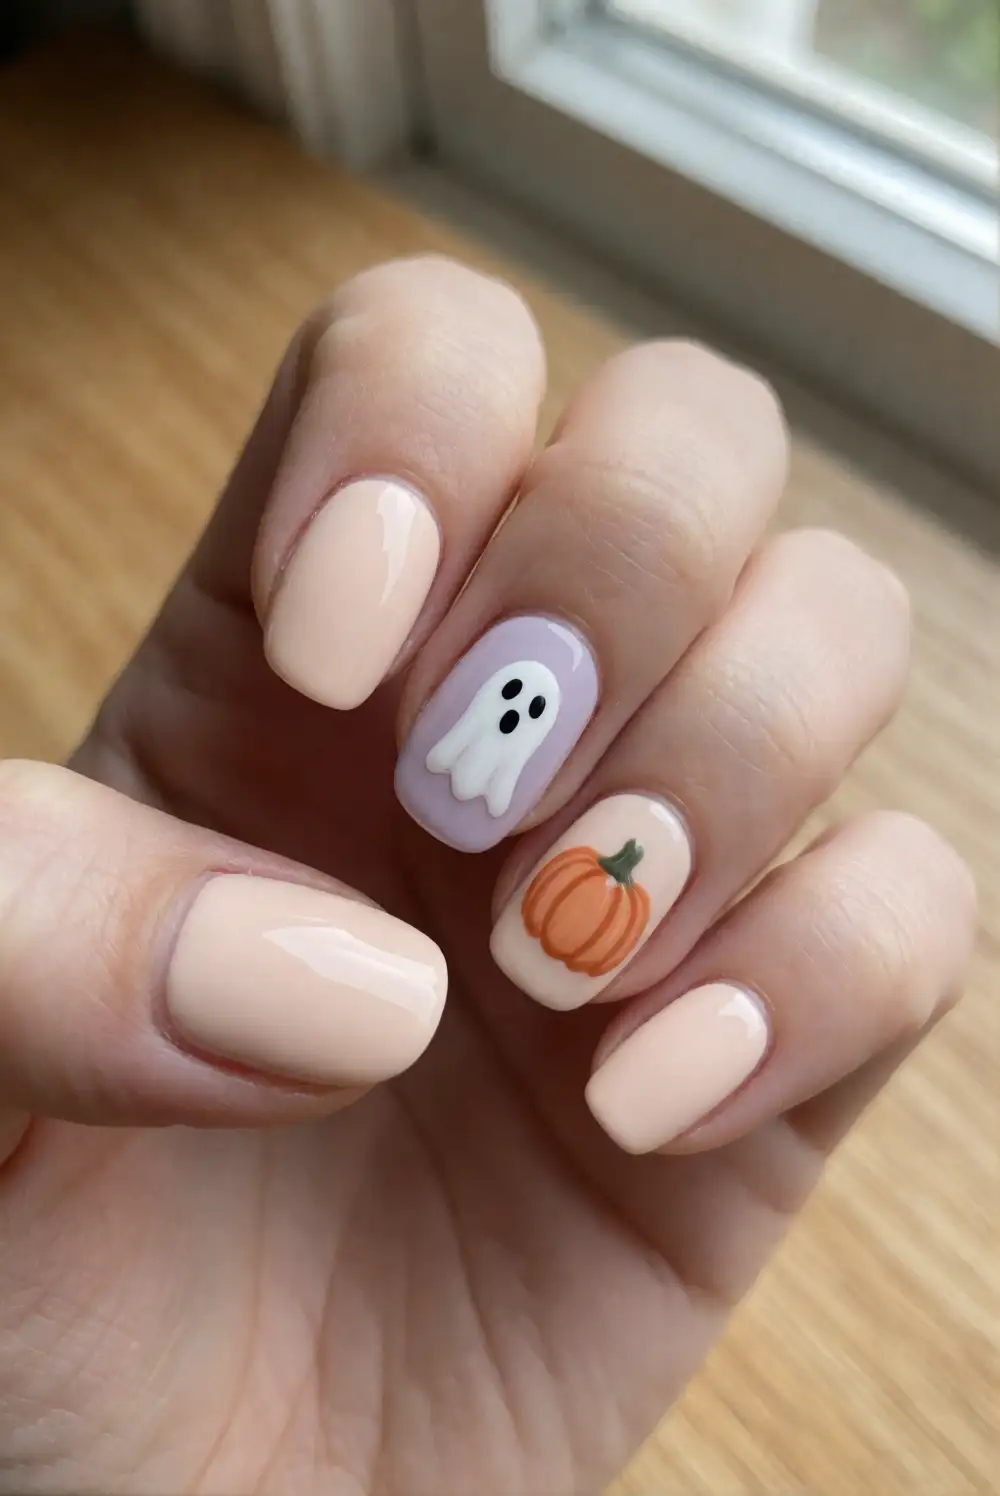
Combine two classic Halloween motifs in a cheerful accent manicure. Paint the nails a warm cream or pale peach, then choose one or two nails for small designs. Make a rounded white ghost with a tiny wavy hem, and paint a little orange pumpkin on another nail using a few curved strokes. Add small dark eyes to the ghost and a short green stem to the pumpkin with a fine brush. Once all details dry, finish with a glossy clear top coat.
Keep the artwork simple so both motifs remain easy to recognize on a small nail. If the full set feels busy, paint the ghost and pumpkin on a single accent nail and use solid orange or cream on the rest. A muted terracotta polish gives the pumpkin a softer look, while bright orange adds a playful pop. For a balanced finish, place the designs on matching fingers on both hands or vary their positions for a more relaxed, hand-painted feel.
Floating Ghosts on Midnight Nails
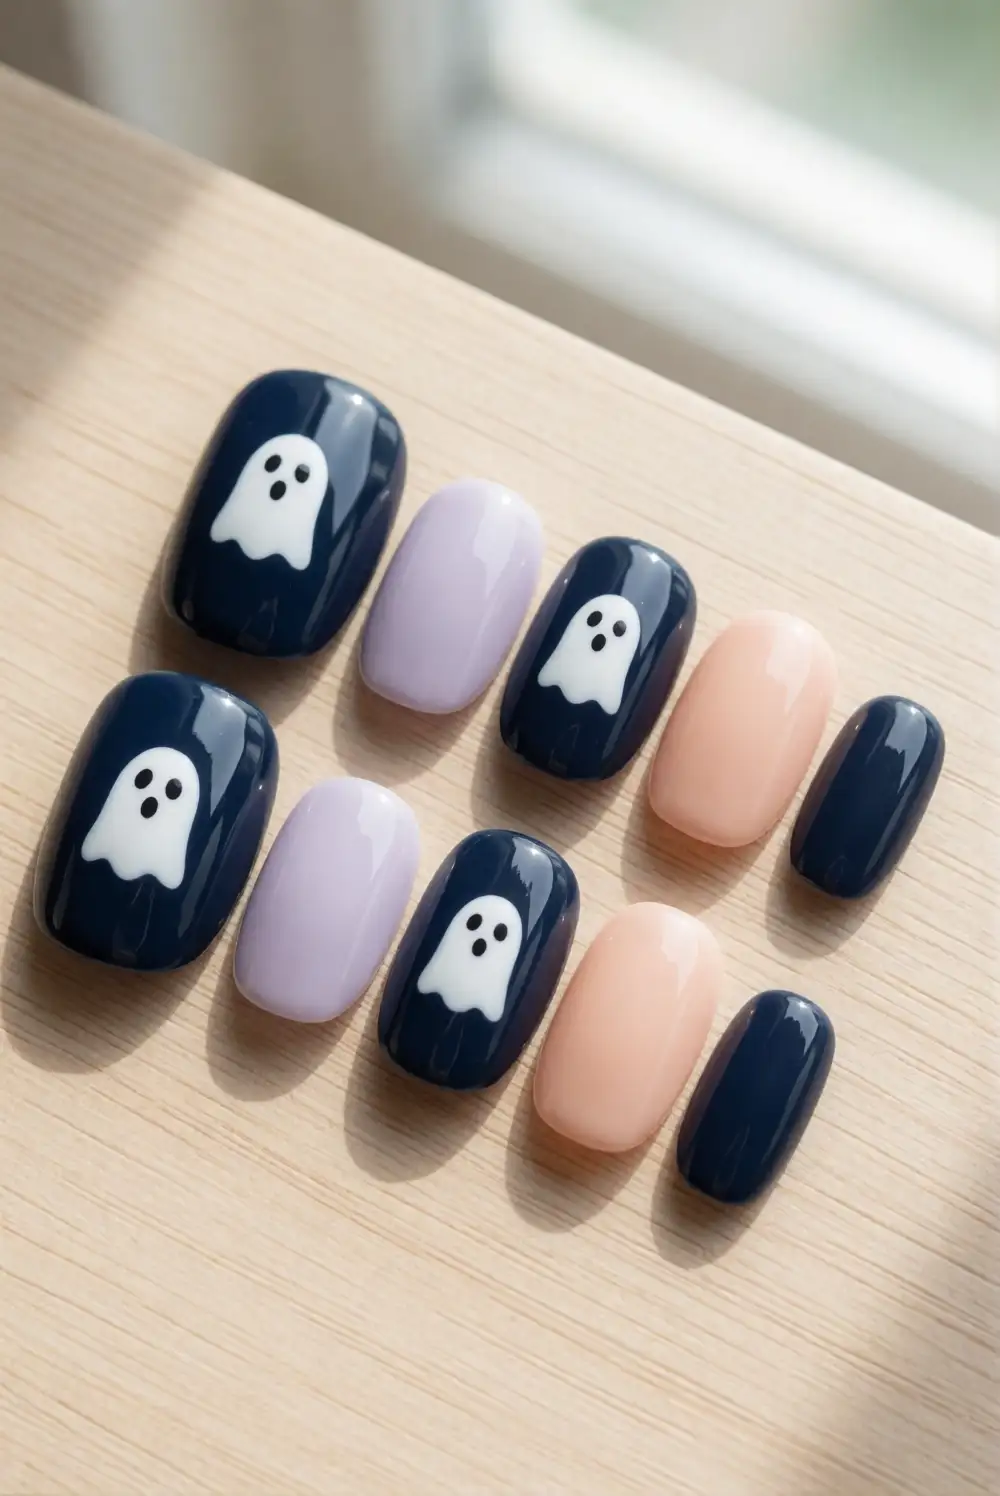
Make white ghost art pop against a deep navy or charcoal manicure. Apply two even coats of dark polish and wait until the surface is completely dry. Paint small white ghost shapes across selected nails, keeping each body rounded and giving the lower edge a slight wave. Add tiny eyes with a fine brush or dotting tool, then apply a protective top coat once the details have set. The dark base gives the playful figures a crisp outline without requiring extra decoration.
Use a single ghost on each accent nail for a tidy look, or vary the size and placement to suggest a gentle floating motion. A midnight blue base feels softer than pure black and pairs beautifully with a pearly top coat. You can add a few tiny white dots as stars, leaving clear space around the main figures. For cleaner edges, rest your painting hand on a stable surface and build the white shapes with thin layers rather than one thick stroke.
Pastel Ghost Confetti Nails
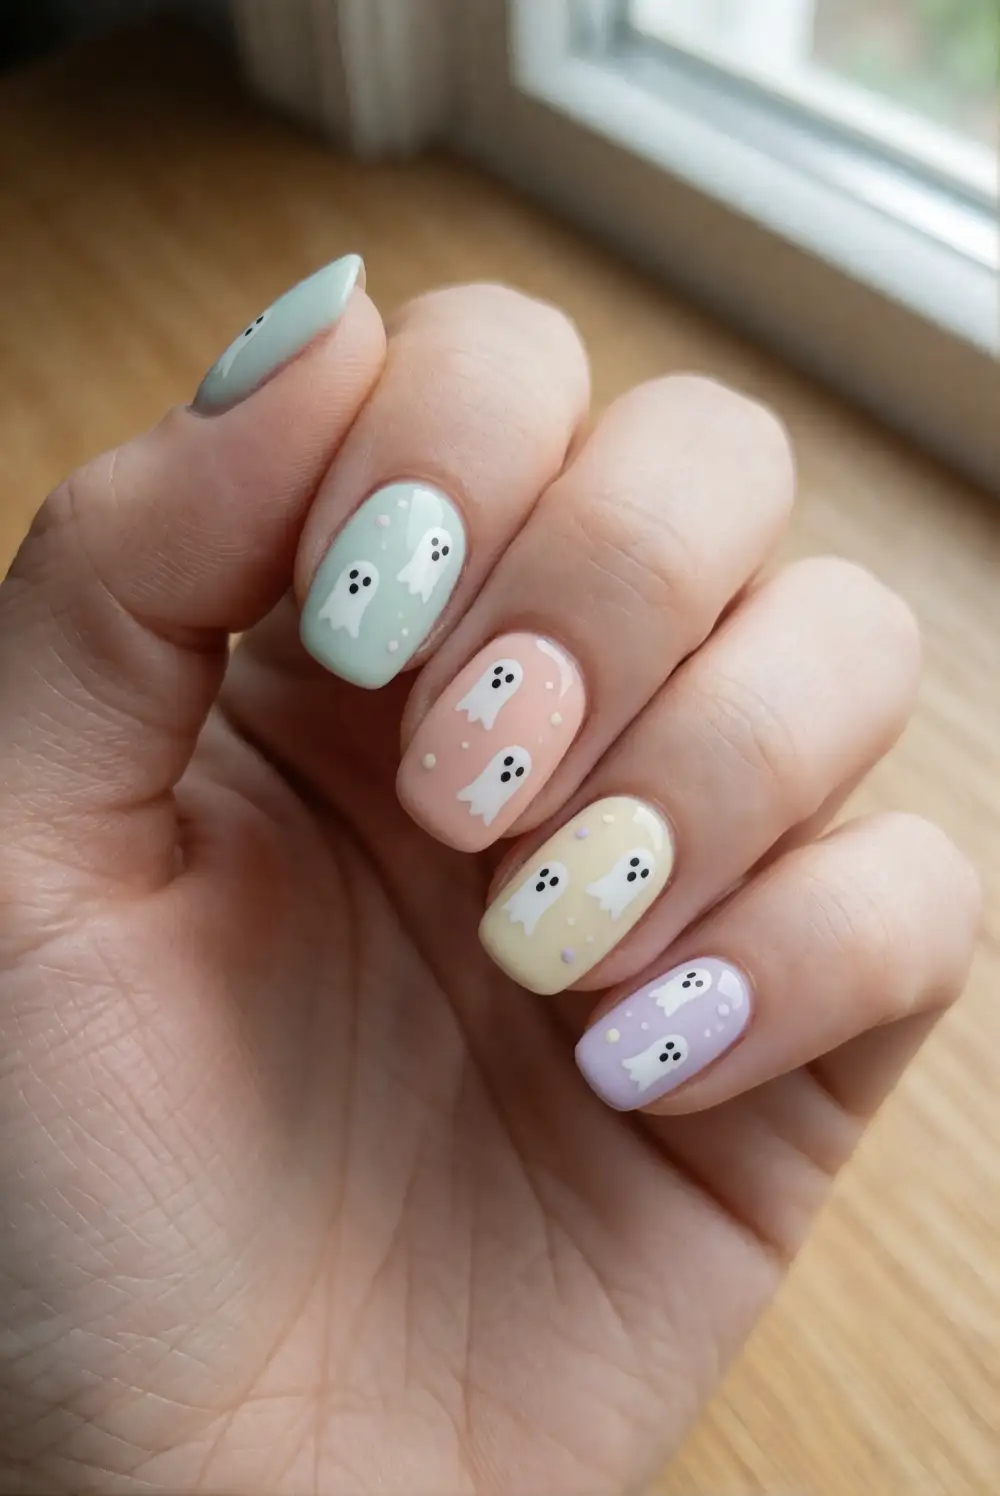
Bring a lighthearted feel to ghost nail art with a mix of pastel colors and tiny white figures. Paint each nail a different soft shade, such as mint, peach, pale yellow, and lilac, or use one pastel across the whole manicure. Once dry, add small white ghost shapes to a few nails with a fine brush. Finish each figure with dark eyes, then apply a clear top coat to smooth the artwork and bring the colors together.
Keep the palette cohesive by choosing muted shades with a similar softness, rather than combining very bright and very pale polish. Leave some nails plain so the design has room to breathe, or add scattered dots in one coordinating color for a confetti-like effect. A sheer white ghost remains visible over most pastels, while slightly opaque polish creates a stronger accent. This look works particularly well with short, rounded nails because the tiny designs feel neat and balanced.
Pearl Shimmer Ghost Nails
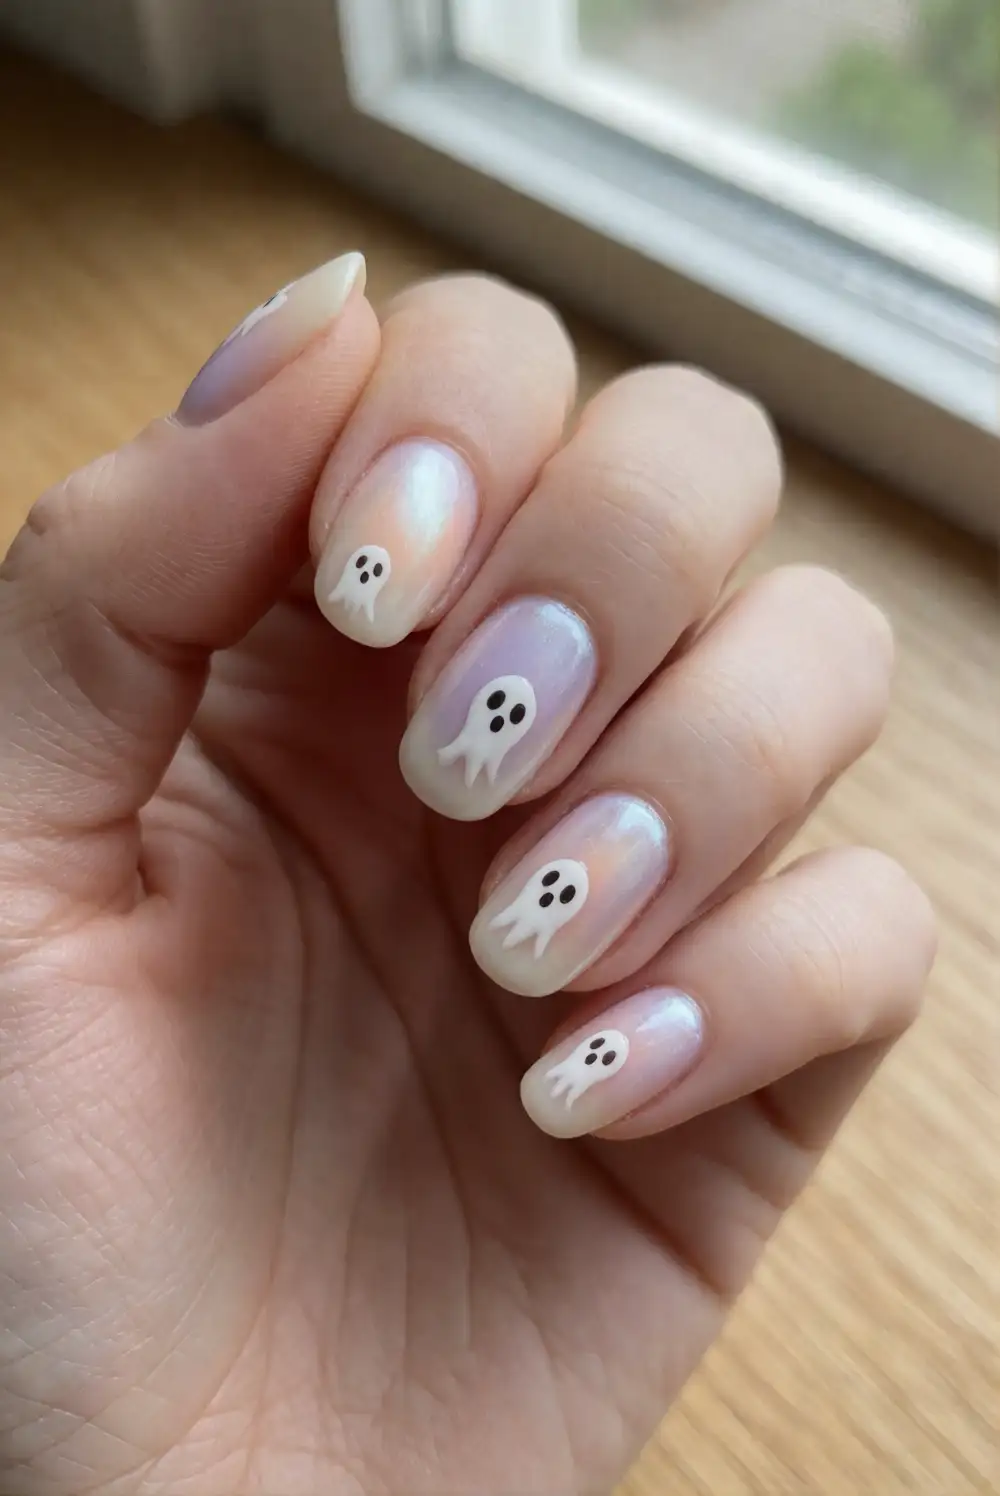
Add a luminous finish to a simple ghost manicure with pearly polish. Apply a pale ivory or soft pink base coat, then layer on a fine pearl shimmer polish and let it dry. Paint a few small white ghosts over the shimmer using a fine brush, shaping each one with a rounded head and a gently rippled base. Add tiny dark eyes after the white polish has set, and finish with a clear top coat to keep the shine smooth and even.
A delicate shimmer gives the background dimension while keeping the ghost artwork front and center. Choose a cool pearl finish over lavender or a warm champagne sheen over peach to personalize the look. If you prefer a quieter manicure, reserve the shimmer and ghost art for accent nails, leaving the remaining nails a matching cream shade. Keep the brush strokes thin, since raised layers can make fine details look less crisp. A glossy top coat helps the pearlescent surface catch soft light.
Ghostly Checkerboard Accent Nails
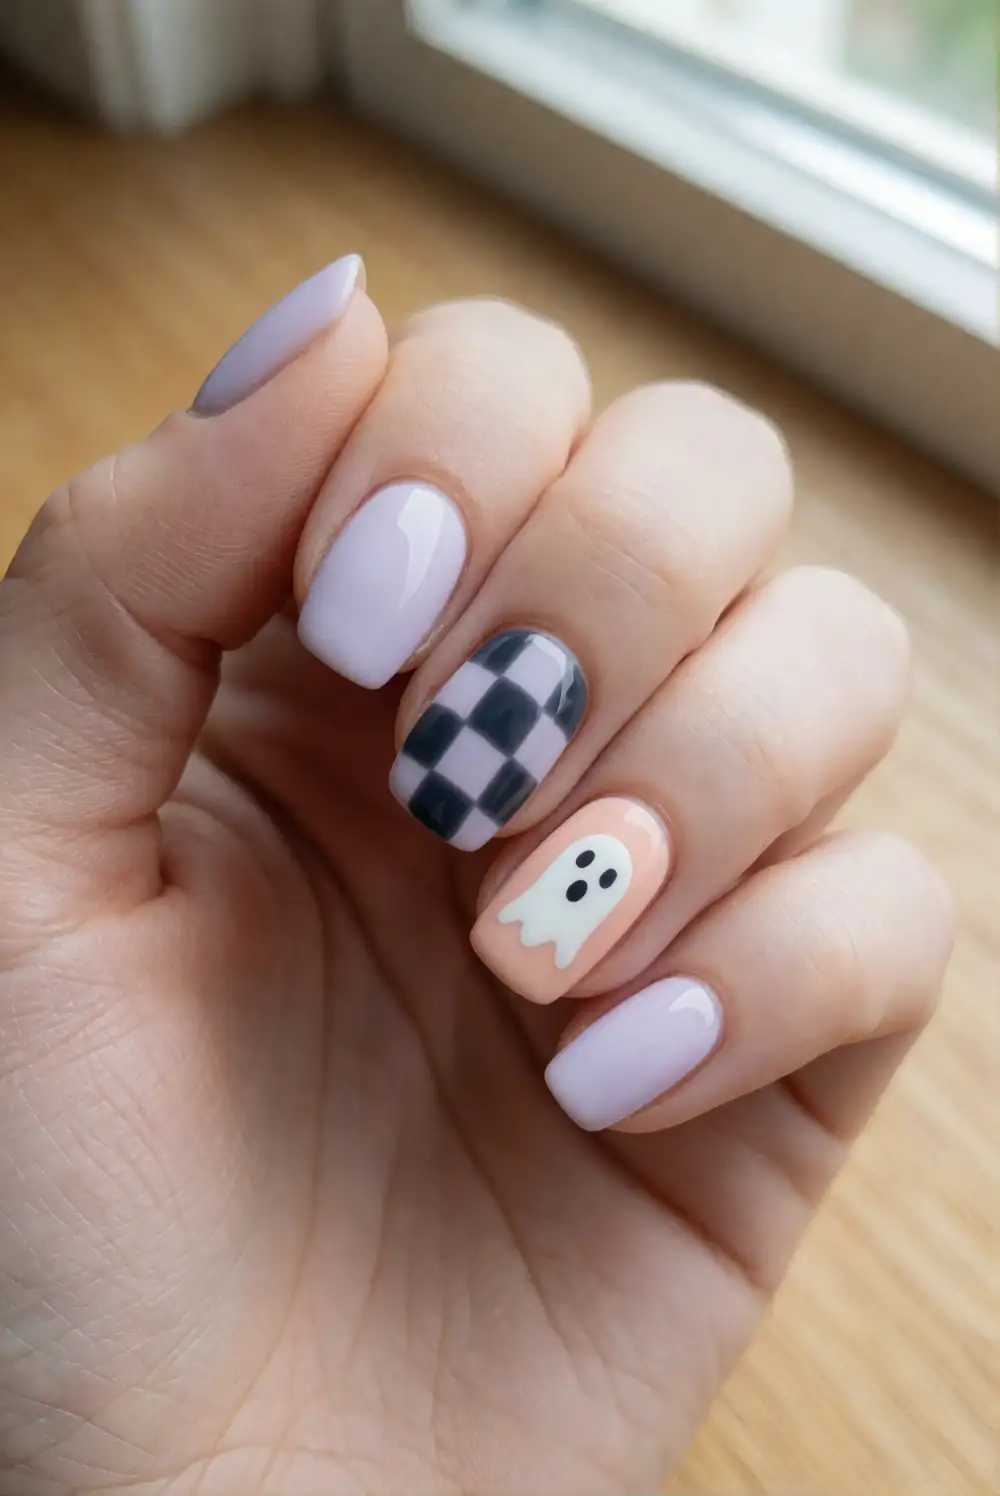
Pair a tiny ghost with a soft checkerboard accent for a playful manicure with graphic detail. Paint most nails pale lilac, cream, or another light shade, and choose one accent nail for the pattern. Use a fine brush to draw a loose grid in charcoal, then fill alternating squares once the lines are dry. On a neighboring nail, paint a small white ghost with dark eyes. Finish with clear top coat after the artwork has dried completely.
For a more delicate result, keep the checkerboard squares small and use a muted gray rather than a deep black. A single patterned nail gives the ghost detail plenty of space, while a second accent nail can repeat the pattern in a different pastel shade. Do not worry about perfectly rigid lines; a hand-painted grid looks charming when its spacing is consistent. If creating the pattern with a brush feels fiddly, use thin striping tape as a guide and remove it before the polish fully sets.
Matte Black and White Ghost Nails
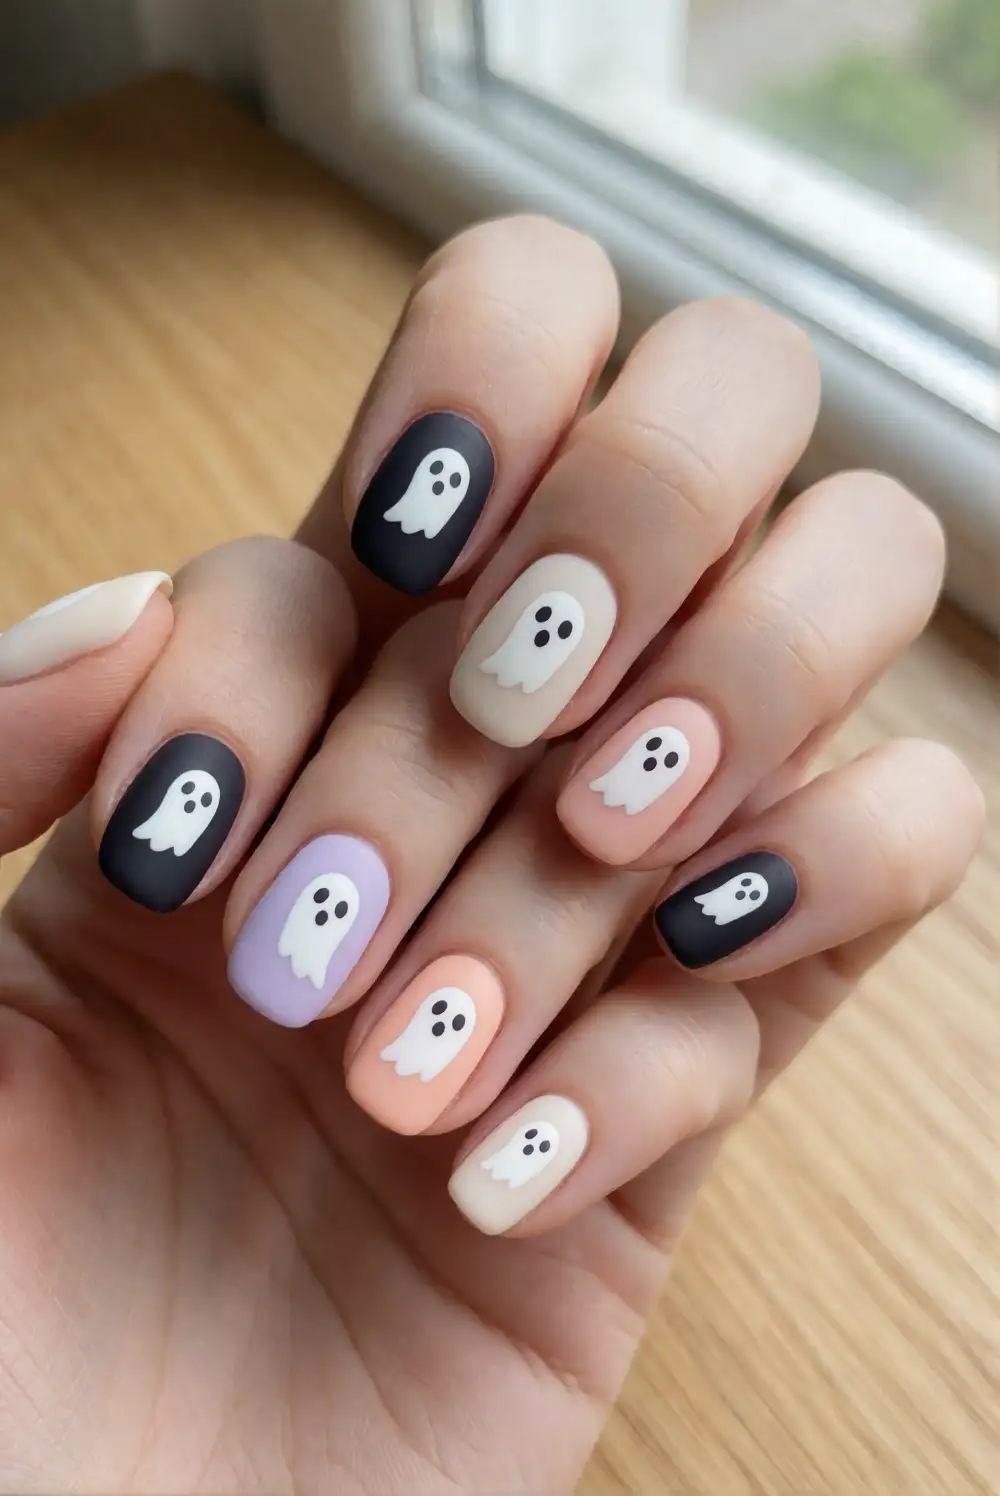
For a crisp, modern manicure, contrast small white ghosts with matte black nails. Paint selected nails with opaque black polish and others with white or a pale cream shade. On the light nails, draw simple black ghost faces; on a dark accent nail, paint a white ghost with a fine brush. Let the artwork dry fully, then apply a matte top coat across the finished manicure. The contrasting background makes the shapes clear while the softened finish keeps the design polished.
Alternate dark and light nails for a balanced pattern, or keep most nails black and feature a single white ghost accent. A charcoal polish offers a gentler contrast if solid black feels too bold. Use a glossy top coat just on the ghost shapes before applying matte finish elsewhere for a subtle difference in texture. Take care to seal the free edges so the manicure wears evenly, and allow the final coat to dry before handling fabrics or other surfaces.
Whether you prefer a sheer, pastel, or dark base, these cute ghost nail designs make it easy to give your manicure a playful Halloween update. Choose a simple accent or combine a few details, then finish with a top coat that suits your preferred shine.








