
Give your manicure a sweet, delicate Halloween-inspired look with ghost nail art on soft pink and milky white bases. These wearable designs pair sheer blush tones, creamy polish, and simple ghost details for a playful finish that feels polished rather than overdone.
Milky White Ghosts on Blush Pink
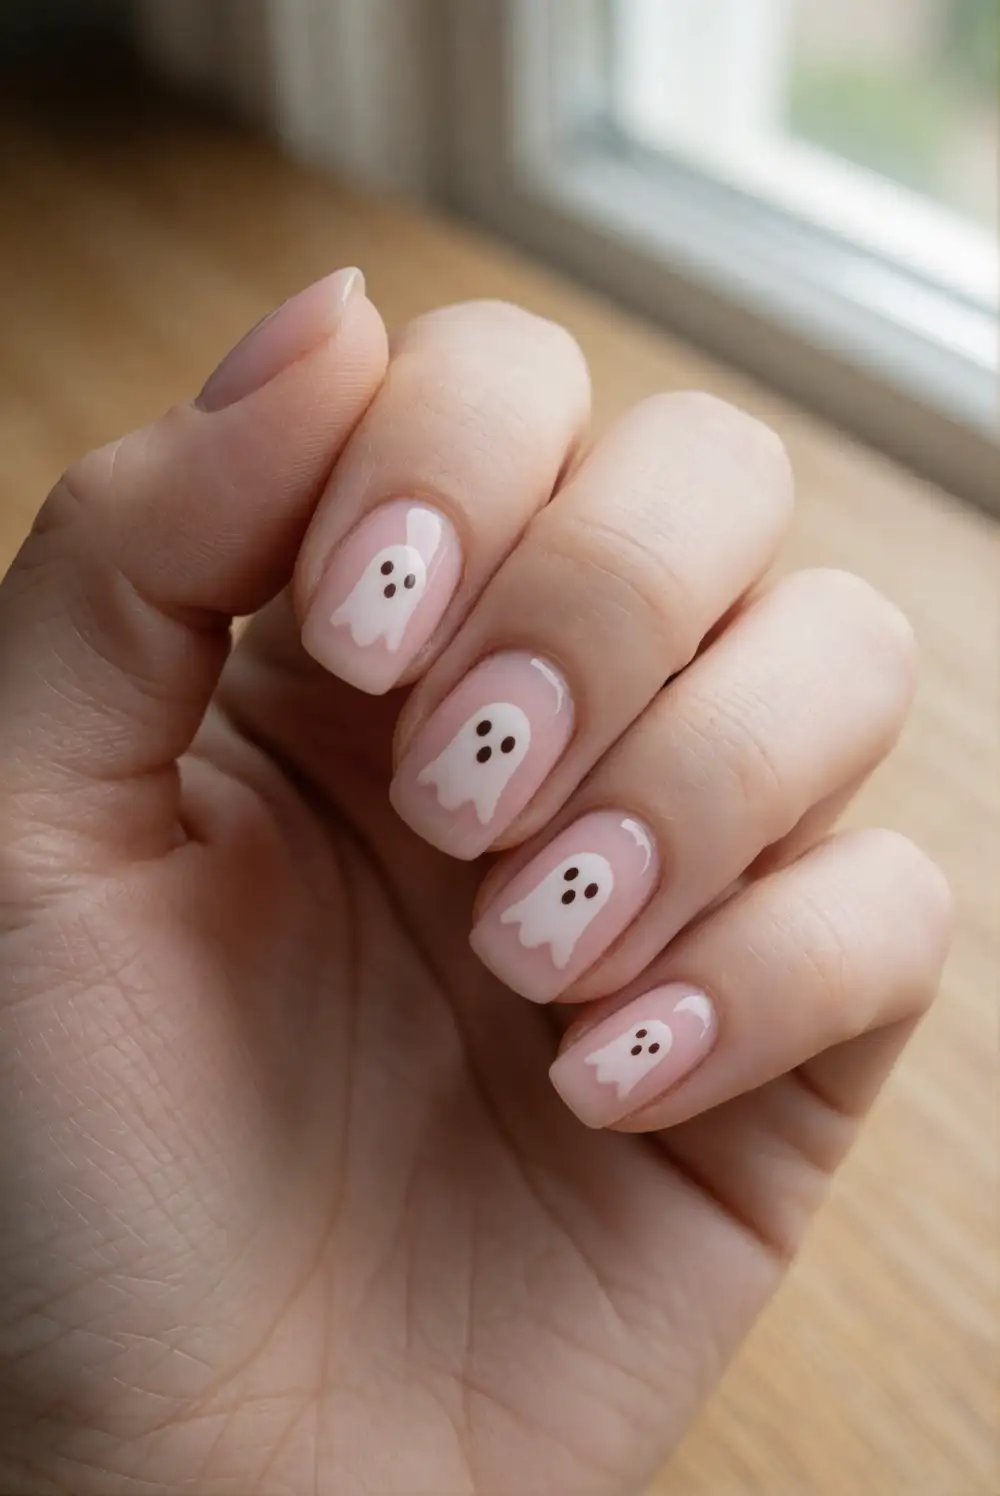
Paint each nail with a sheer soft pink polish and let it dry completely. Using a fine nail-art brush, add a small rounded ghost shape in opaque milky white, then gently pull the polish downward to form a soft, curved hem. Keep the ghost simple and centered, leaving plenty of pink visible around it. Once the design is dry, add tiny black eyes with a dotting tool or the tip of a fine brush, then finish with a clear top coat.
Try placing a single ghost on each ring finger for a quiet accent, or vary the ghost placement across the manicure for a more playful effect. A translucent blush base keeps the look airy, while a creamy white makes the little figures easy to see. Work with thin layers so the shapes dry smoothly, and clean the brush between colors. The finished manicure pairs especially well with silver rings and soft, neutral outfits.
Floating Ghosts on Milky White
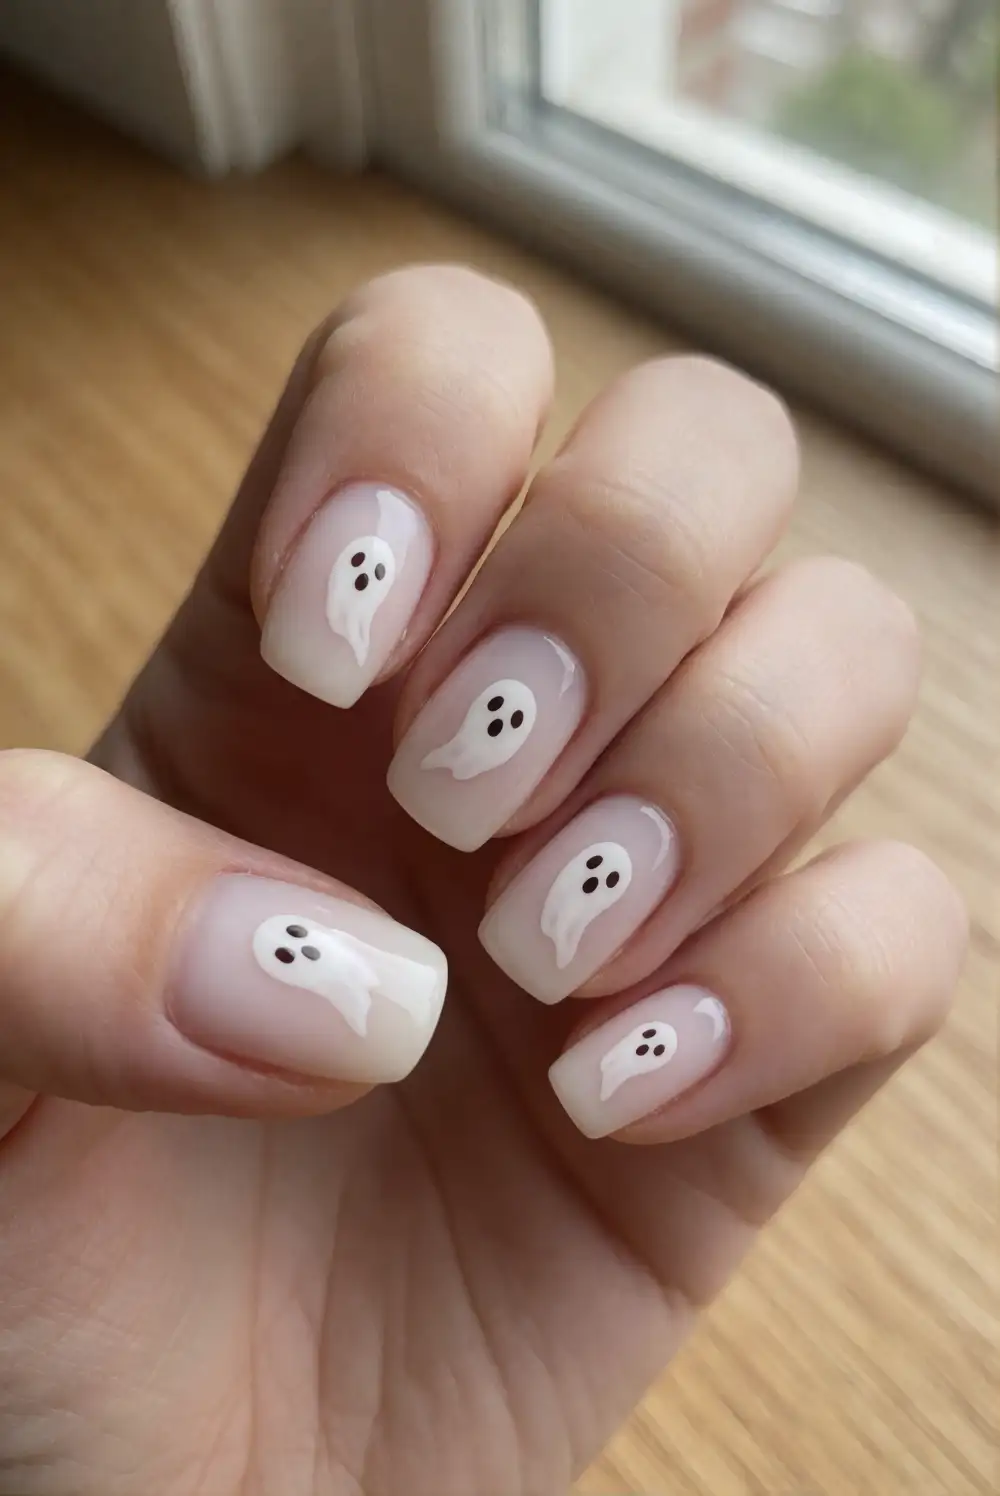
Start with an even milky white base coat and allow it to dry before adding the art. Use a slightly sheer white polish to paint tiny ghost silhouettes that seem to float across the nails. Make each figure with a rounded top and a gently rippled lower edge, using a fine brush for control. Add small black eyes only after the white shapes have set, then seal everything with a glossy top coat for a smooth, glassy finish.
Keep the ghosts small and spaced apart so the milky background stays visible and the manicure feels light. You can position the figures near the tips, along one side, or at different heights for gentle movement. If the white base looks too opaque, choose a jelly-style polish that lets the natural nail show through. This design works beautifully with short rounded nails and delicate silver jewelry.
Pink French Tips with Tiny Ghosts
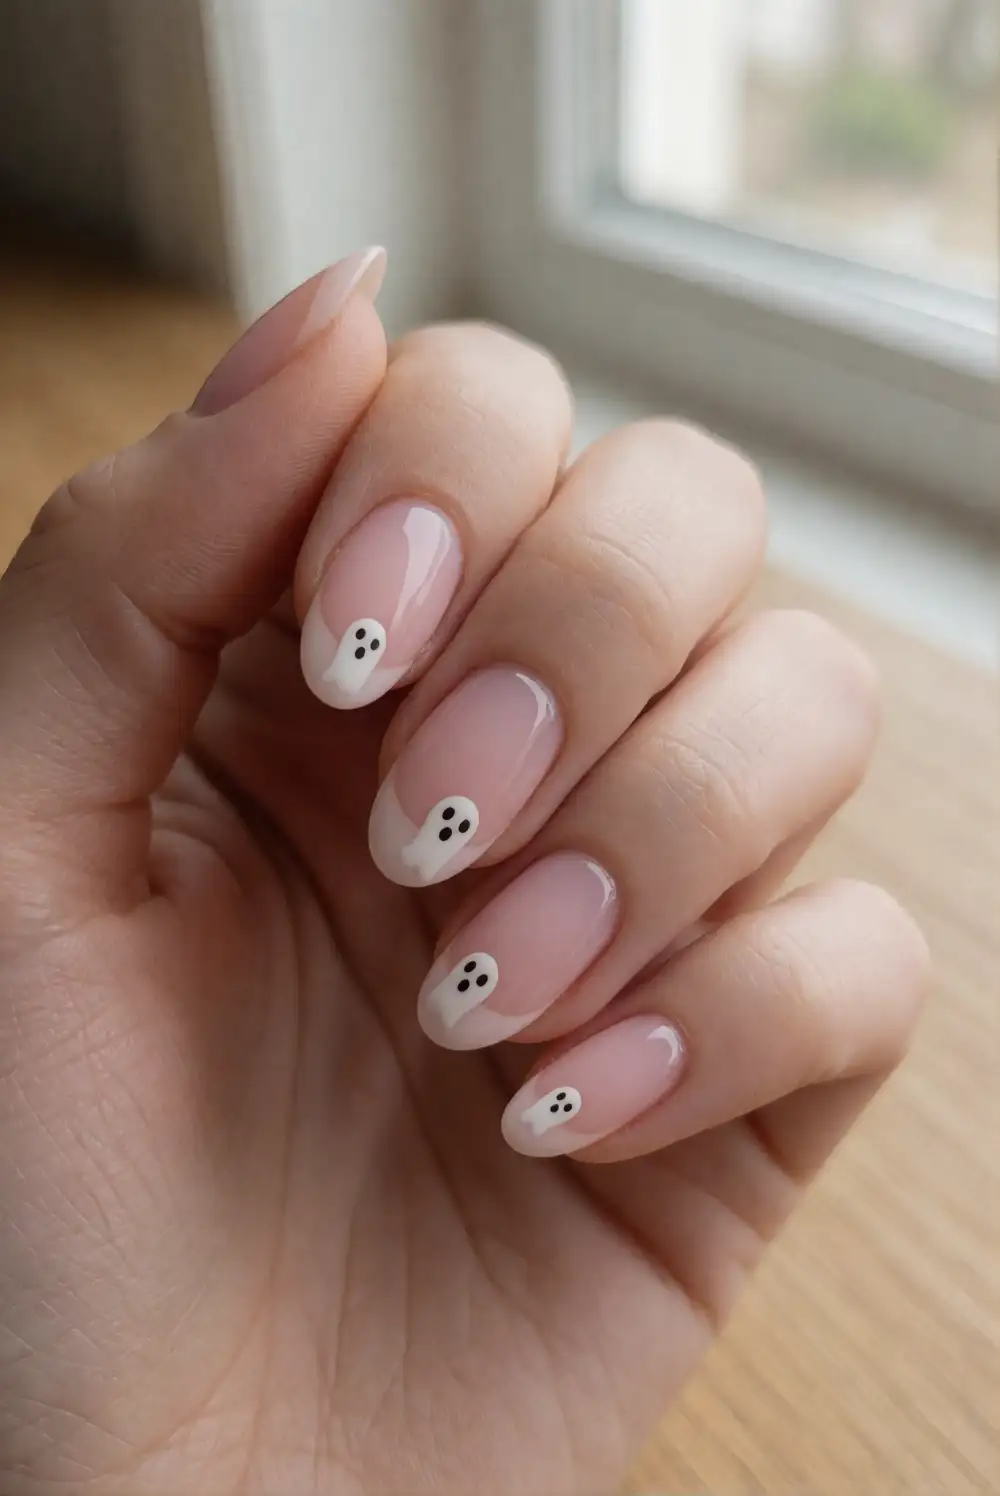
Apply a sheer pink base coat and let it dry before painting a soft milky-white French tip across each nail. Keep the tips slim and follow the natural curve of the nail for a refined finish. Once the white polish is dry, add one tiny ghost near the edge of a chosen tip with a fine brush. Give the figure a rounded head, a softly wavy base, and small dark eyes, then protect the design with clear top coat.
For a coordinated set, place a ghost on just one or two nails and leave the remaining French tips clean. A pale pink base makes the white tips look fresh without creating a sharp contrast. If painting a curved tip feels tricky, use short brush strokes from each side toward the center. Choose a glossy finish to emphasize the milky color, or use a satin top coat for a softer, understated effect.
Ghost Accent on a Milky White Manicure
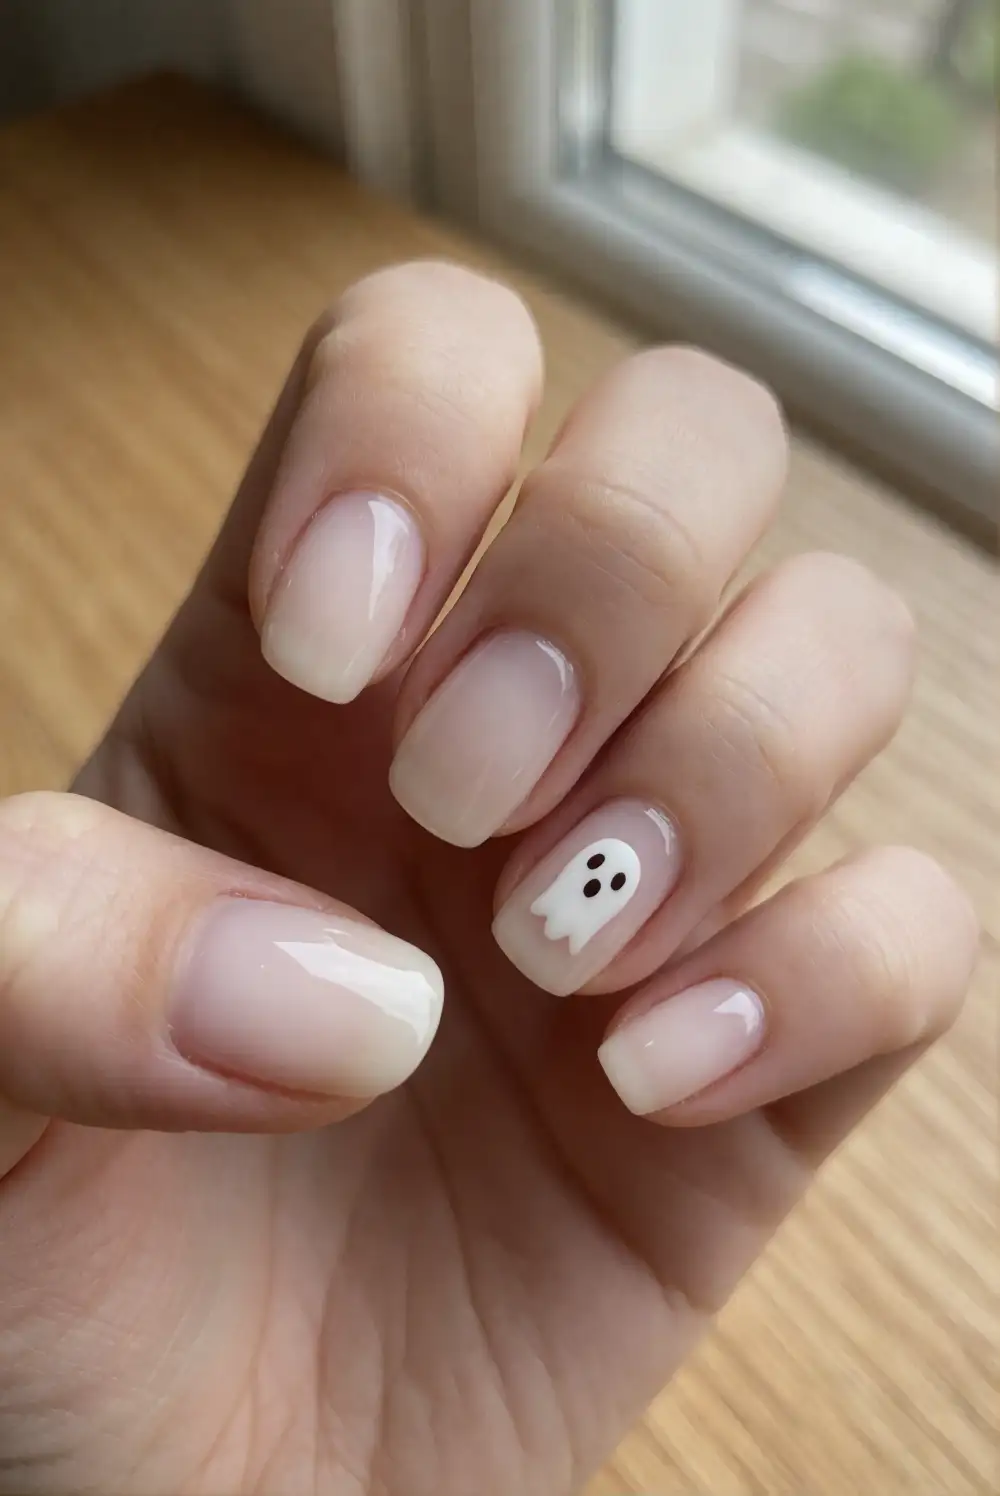
Coat the nails in a creamy, semi-sheer white polish, building the color with light coats until it looks even. Choose one accent nail and paint a small ghost near the center using opaque white polish for a slightly raised-looking silhouette. Shape the top into a rounded dome and draw a softly scalloped bottom edge. After the figure dries, add two tiny black eyes with a fine brush, then apply a clear top coat across every nail.
This restrained design is an easy choice when you want a seasonal detail without covering the whole manicure in art. Keep the accent ghost small and leave the surrounding white surface uncluttered. A sheer base coat can add depth beneath the creamy layers, while a glossy finish helps the design catch the light. For a softer effect, place the ghost on a pinky nail; for a more noticeable detail, use the ring finger.
Blush Ombré Ghost Nails
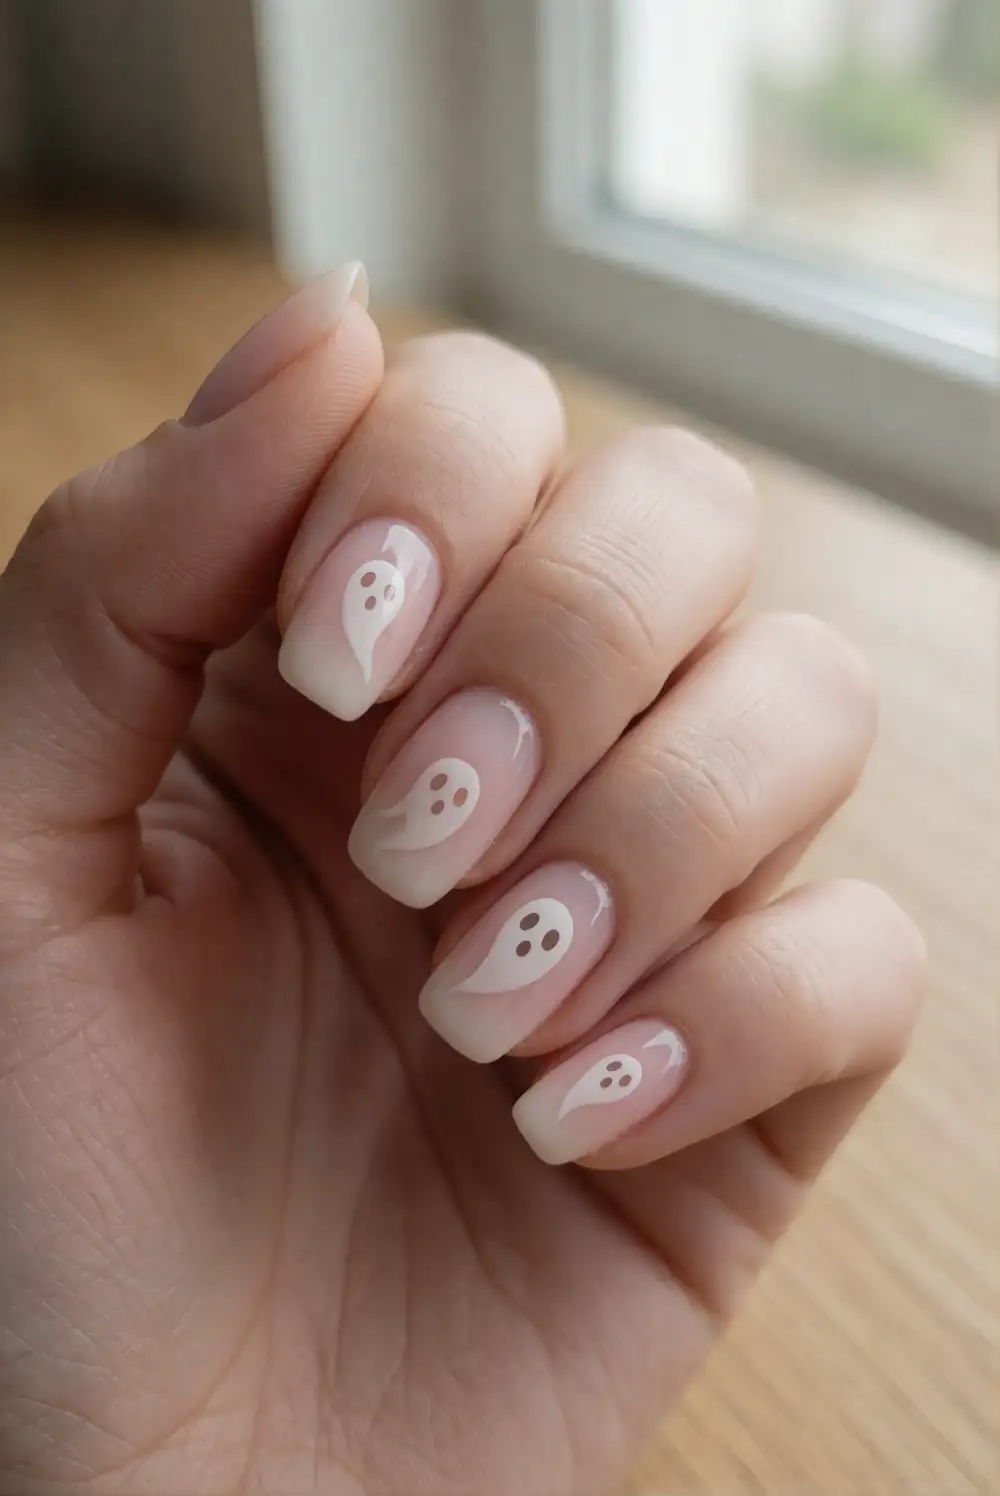
Blend soft pink and milky white polish into a gentle ombré, fading the pink from the cuticle area toward pale white tips. A small makeup sponge can help soften the transition; dab on thin layers and let each pass dry before repeating. Once the gradient is smooth, paint a delicate white ghost on one or two nails with a fine brush. Add tiny dark eyes after the shape dries, then finish with a glossy clear coat.
Keep the color shift subtle so the ghost details remain the focal point. A pale blush tone creates a romantic base, while a creamy white tip gives the gradient a cloudlike finish. Use a small amount of polish on the sponge to avoid a bulky surface, and tidy the skin around the nails before sealing. For a coordinated variation, leave some nails as plain ombré and reserve the ghost art for accent nails.
Ghosts with Tiny Silver Stars
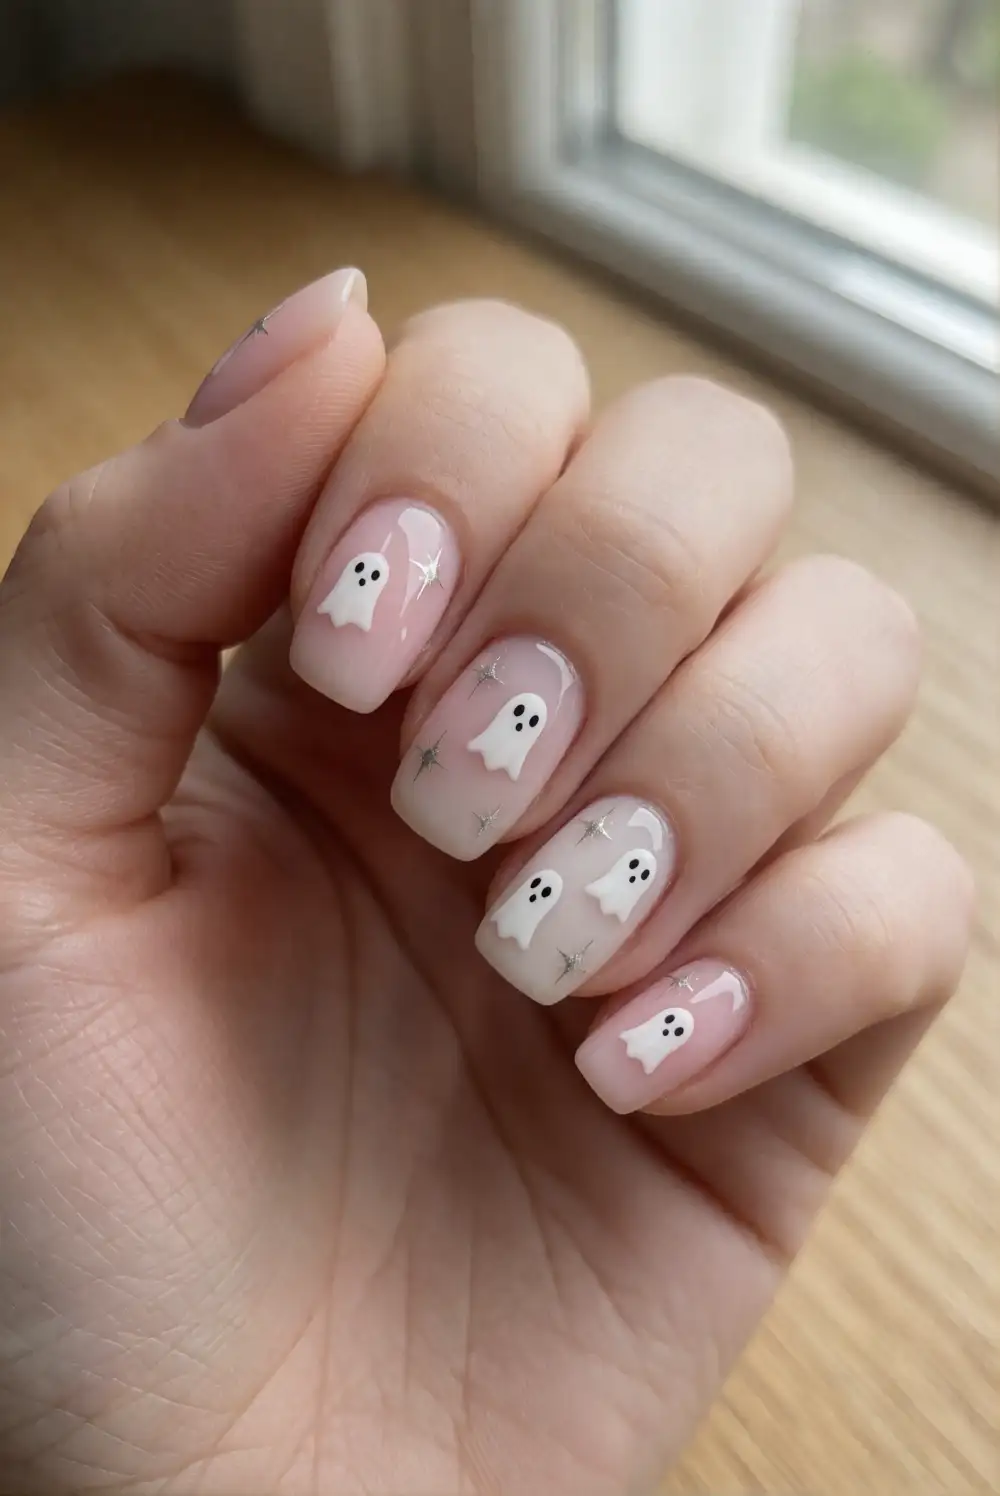
Paint the nails in a translucent pink or milky white and allow the base to dry fully. Add small white ghost shapes to a few nails, using a fine brush to create rounded heads and softly curved hems. Once the ghosts are dry, place a few tiny silver star accents nearby with a detailing brush or nail-art tool. Keep the stars sparse, then seal the entire manicure with clear top coat so the surface feels smooth and glossy.
Choose delicate silver accents rather than large decorations to preserve the airy look of the pink and white palette. Place a star above a ghost or near a nail tip, leaving open space around each detail. If you prefer a simpler manicure, add stars only to the nails without ghosts. This design looks lovely against milky white polish, while a blush base gives it a softer, more romantic feel.
Outlined Ghosts on Sheer Pink
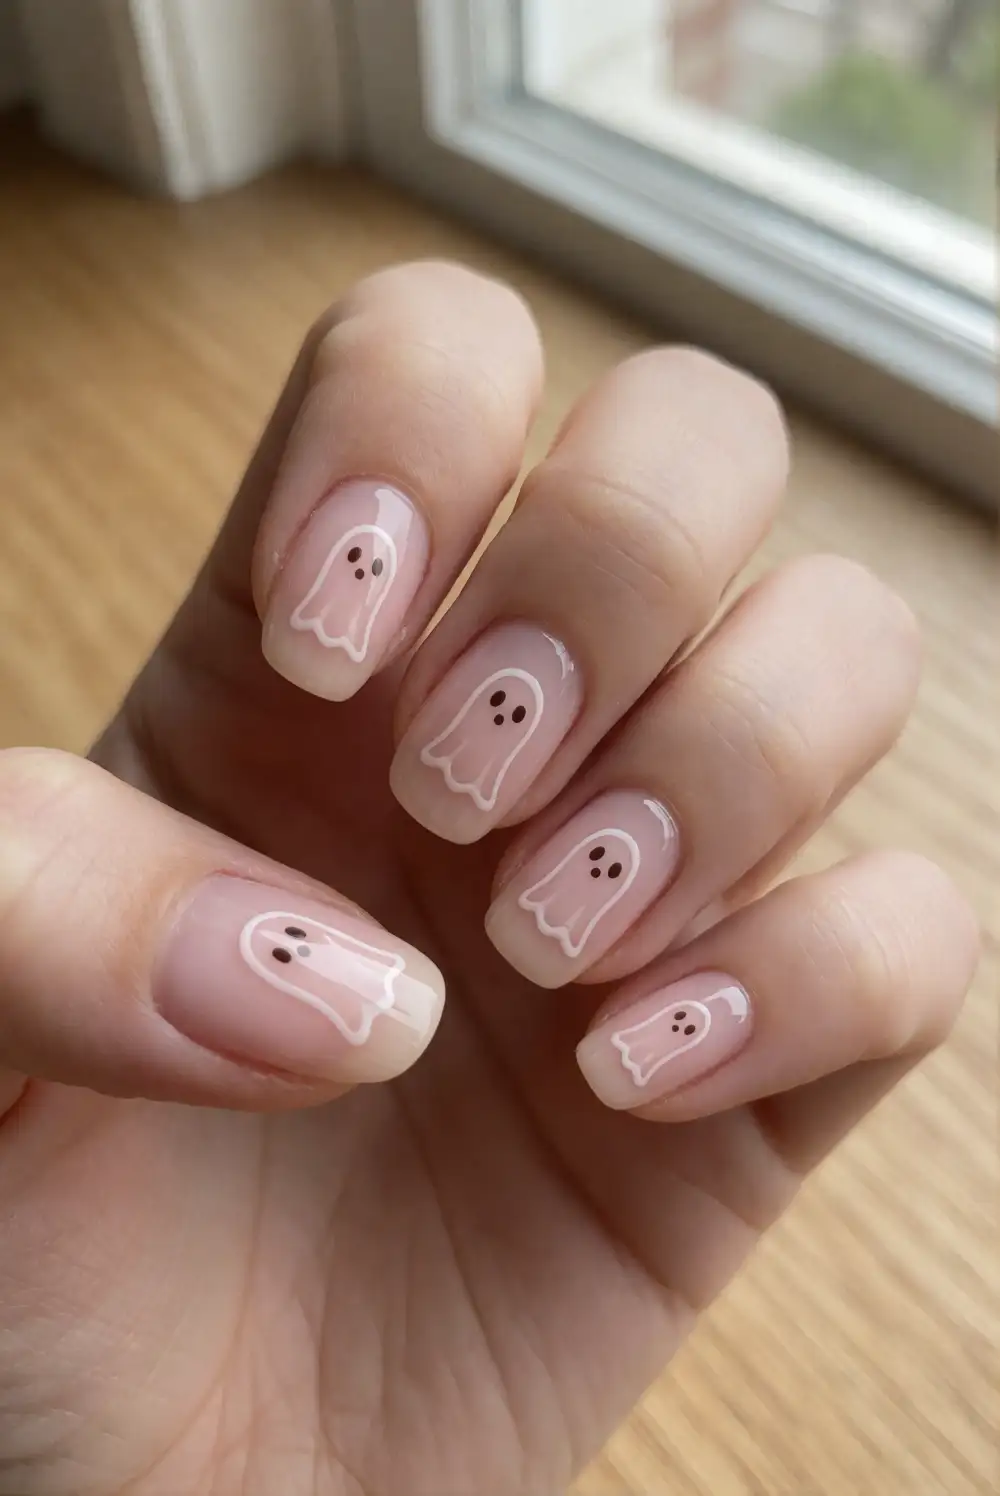
Begin with a sheer pink base coat and let it dry until smooth. Using a fine nail-art brush and milky white polish, draw a small outline shaped like a rounded ghost, leaving the center mostly pink. Fill only the lower edge or add a light white sweep inside the outline for a delicate, dimensional look. Let the design dry, add tiny dark eyes if desired, and finish with a thin layer of clear top coat.
The outlined style feels lighter than a fully filled ghost and lets the natural blush base remain part of the design. Keep the strokes fine and simple, especially on shorter nails, where a smaller silhouette reads clearly. Try a single outline on each accent nail or vary the placement for an easy, hand-drawn appearance. A glossy finish helps the white lines stand out, while a satin top coat creates a softer, velvety effect.
Milky White Ghosts with Pink Cheeks
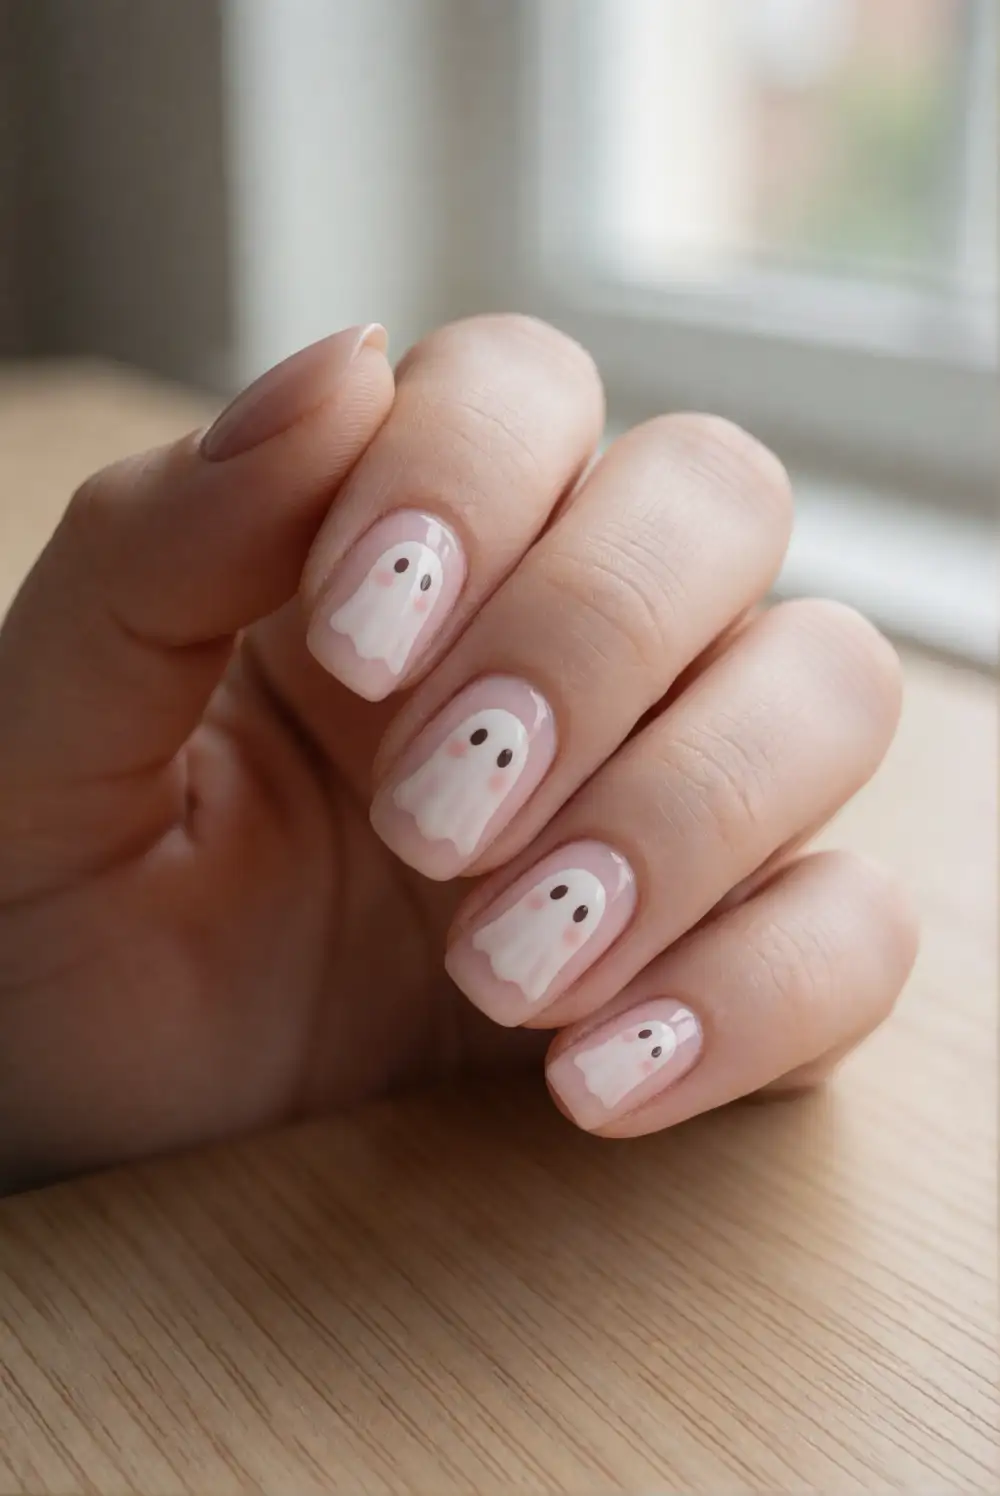
Apply a soft pink base and let it dry completely before painting small milky-white ghost shapes on selected nails. Form each figure with a rounded head and a gently rippled base using a fine brush. Once the white polish has set, add tiny black eyes and a subtle pair of blush-pink cheeks with a delicate dotting tool. Keep the cheek color sheer and light, then seal the design with a smooth clear top coat.
Make the cheeks barely visible for a sweet, understated expression that complements the pink background. If you want the figures to look especially soft, use a pale rose shade rather than a bright pink. A couple of accent ghosts can keep the manicure polished, while a ghost on every nail gives it a more playful feel. Keep all details small so the shapes remain neat and the milky white stays crisp.
Ghosts Peeking from Pink Nail Tips
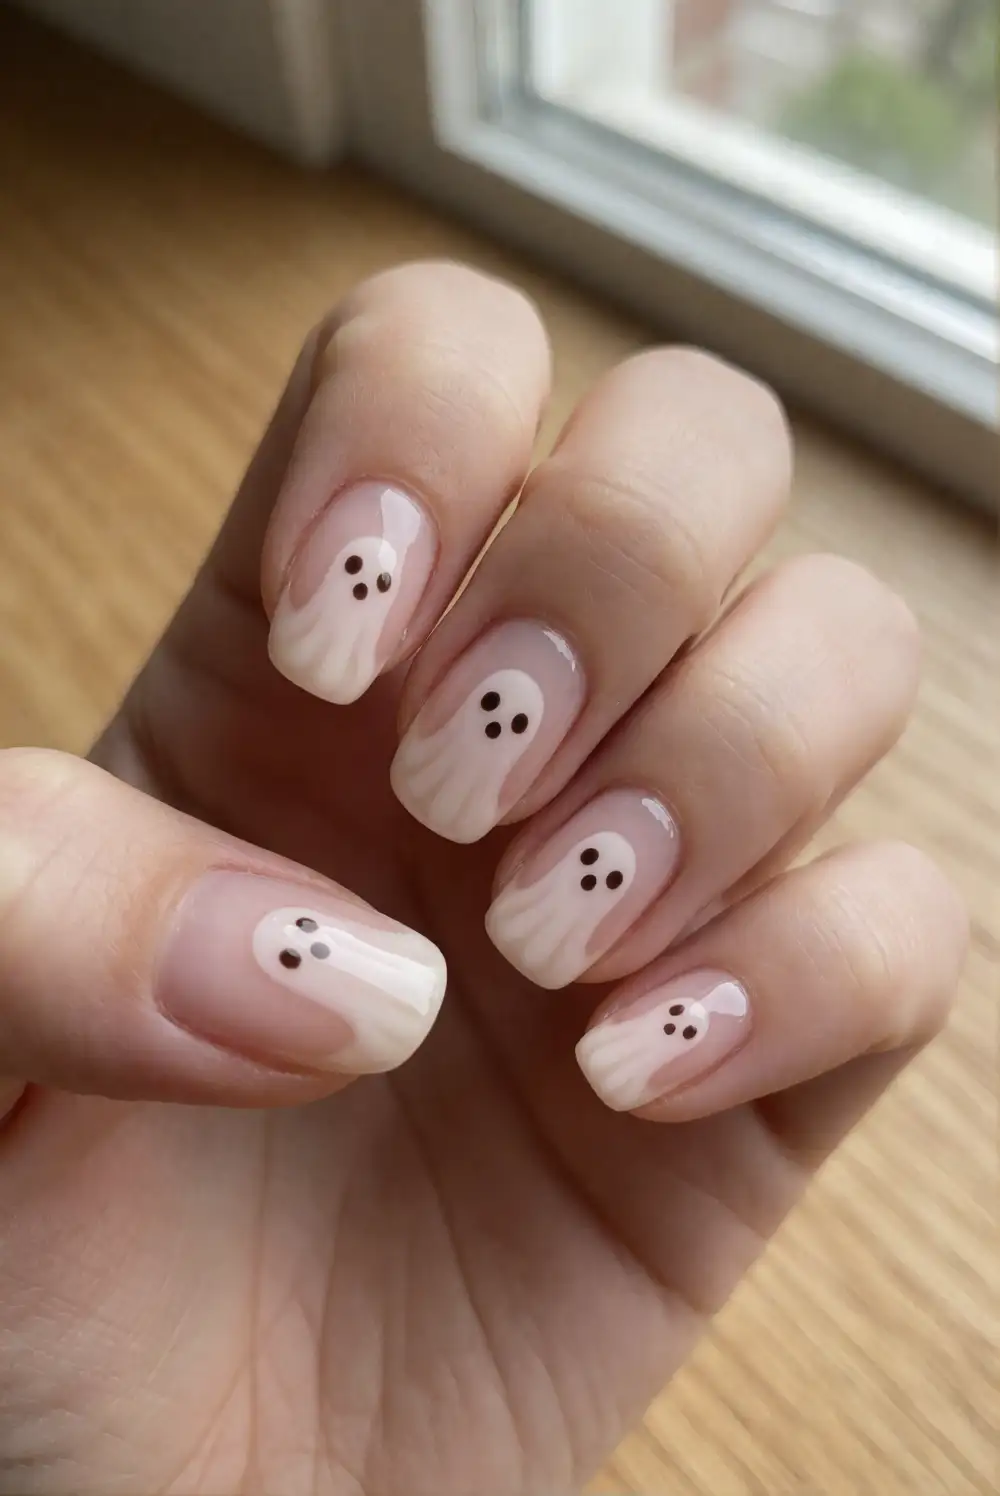
Cover the nails with sheer blush polish and allow the base to dry. Near the free edge of each chosen nail, paint a rounded milky-white shape that appears to peek up from the tip. Add a gently wavy lower edge that follows the nail tip, then place two tiny dark eyes near the rounded top. Finish with clear top coat, taking care to smooth the free edge so the design stays glossy and even.
Position the ghosts at slightly different heights to create a light, lively rhythm across the manicure. On shorter nails, keep the figures compact and avoid crowding the sidewalls; a single accent nail can make the design easier to wear. The blush base adds a soft contrast to the white silhouettes without overpowering them. Pair the manicure with simple rings or leave jewelry minimal to keep attention on the tiny details.
Minimal Ghosts on Alternating Pink and White Nails
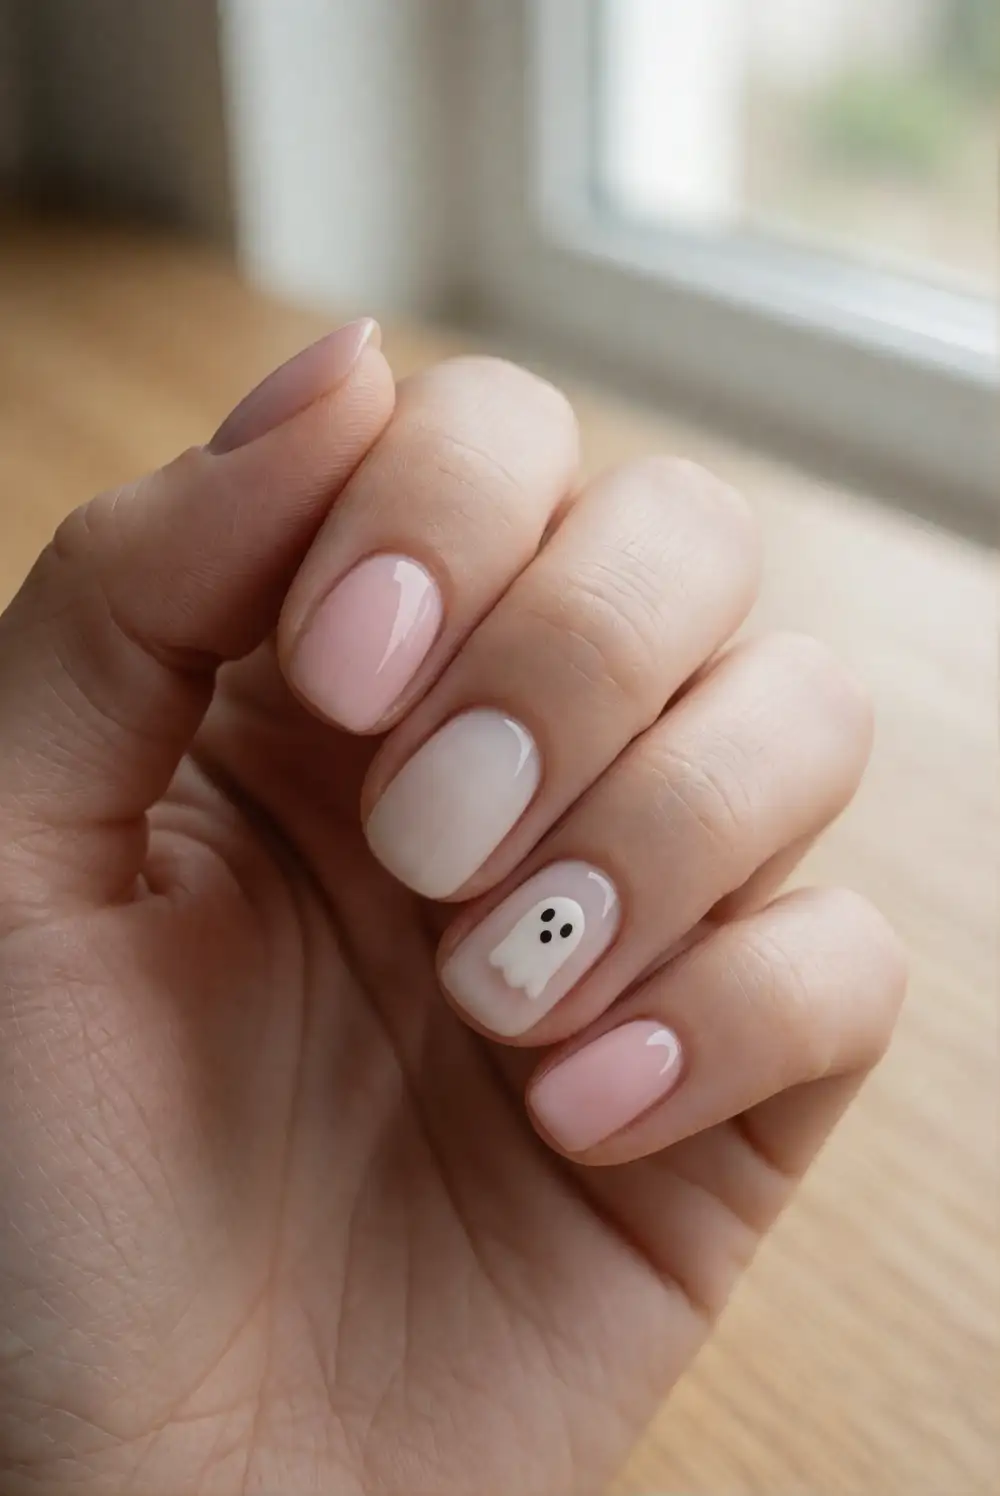
Paint alternating nails in sheer soft pink and creamy milky white, keeping each coat thin and smooth. After the colors dry, add one tiny white ghost to a pink nail and one small blush ghost detail to a white nail, using a fine brush to shape rounded tops and soft curved hems. Add minimal dark eyes where they will show clearly, then finish with a glossy clear top coat for a tidy, coordinated look.
For a quieter version, keep most nails plain and reserve the ghost art for two accent nails. Repeating the pink and white shades across the hands helps the design feel balanced, while the small silhouettes add a playful seasonal note. If the white ghost disappears against a pale base, place it on a pink nail instead. Short, rounded nail shapes make the alternating colors look especially neat and wearable.
Soft pink and milky white make a lovely base for ghost nail art that feels cute, delicate, and easy to personalize. Choose a single accent ghost, a gentle ombré, or tiny details across your manicure, then finish with a glossy top coat for a polished seasonal look.








