
Give your manicure a playful seasonal touch with ghost nails featuring tiny, charming faces. These nail art ideas range from sheer, delicate designs to colorful accents, with practical steps and finish suggestions to help you create a look that suits your style.
Classic White Ghosts on Sheer Pink Nails
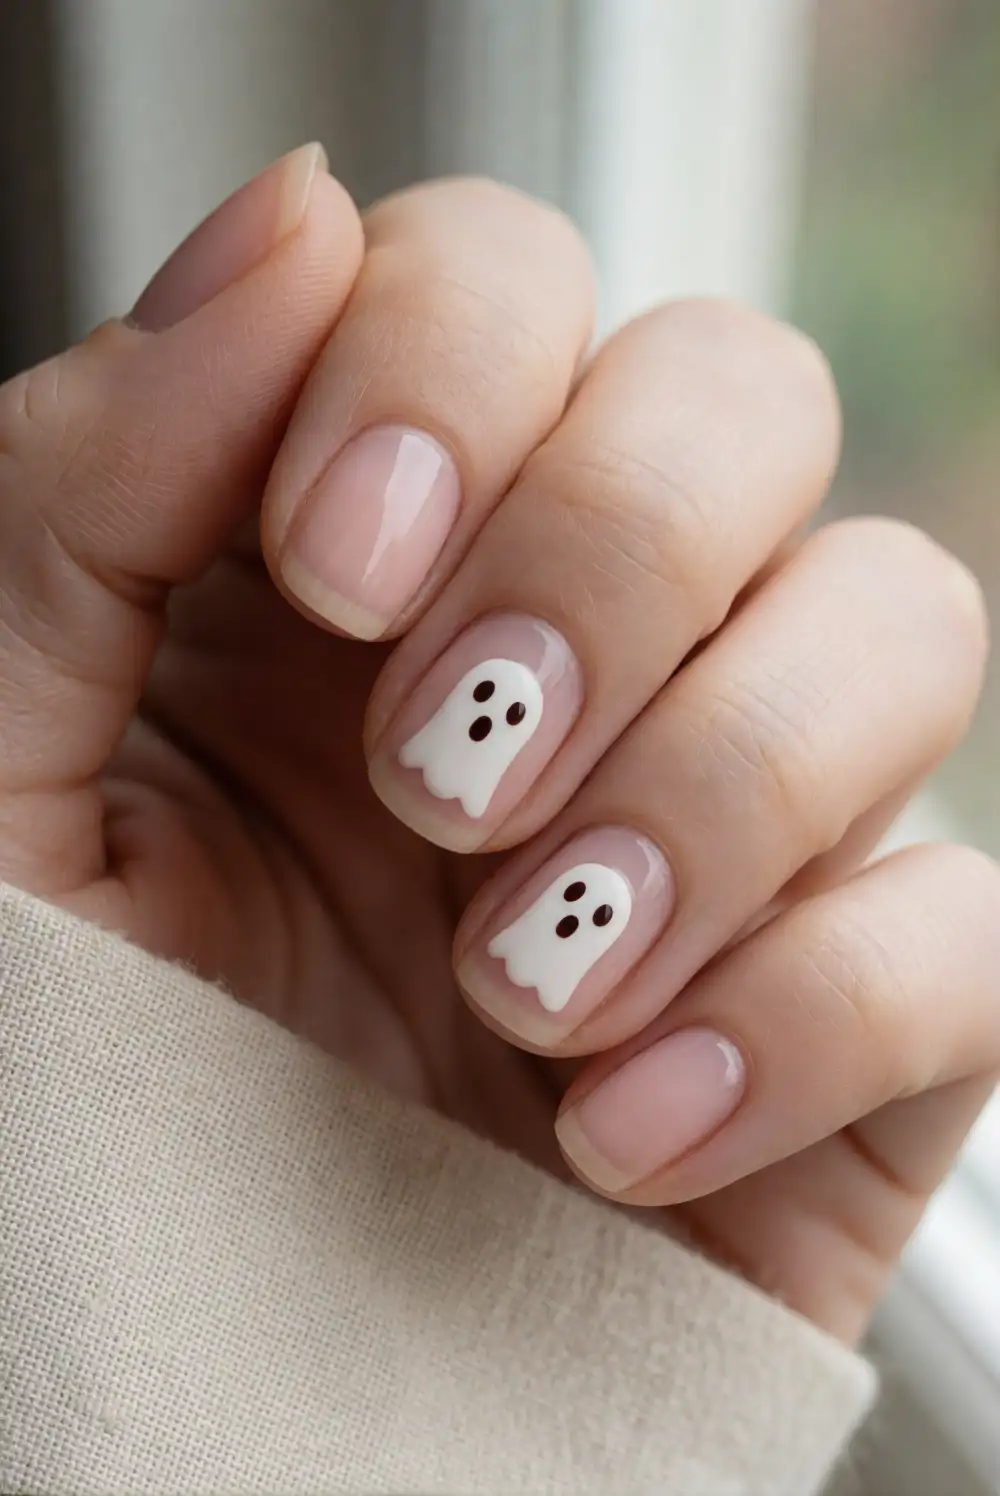
Start with a sheer pink base coat and let it dry completely. Use a small nail-art brush to paint a rounded white ghost shape on each chosen accent nail, pulling the polish slightly downward for a softly wavy hem. Once the white polish is dry, add two tiny black eyes and a small oval mouth with a dotting tool or fine brush. Finish with a clear top coat to smooth the design and help protect the details.
Keep the other nails sheer pink for a clean, balanced manicure, or add a ghost to every nail for a more playful effect. Make the faces slightly different so the ghosts feel expressive without needing complicated details. A milky pink base flatters the crisp white shapes, while a glossy finish makes the design look polished. For easier application, work on one ghost at a time and allow each layer to dry before adding the next.
Lavender Ghosts on Milky White Nails
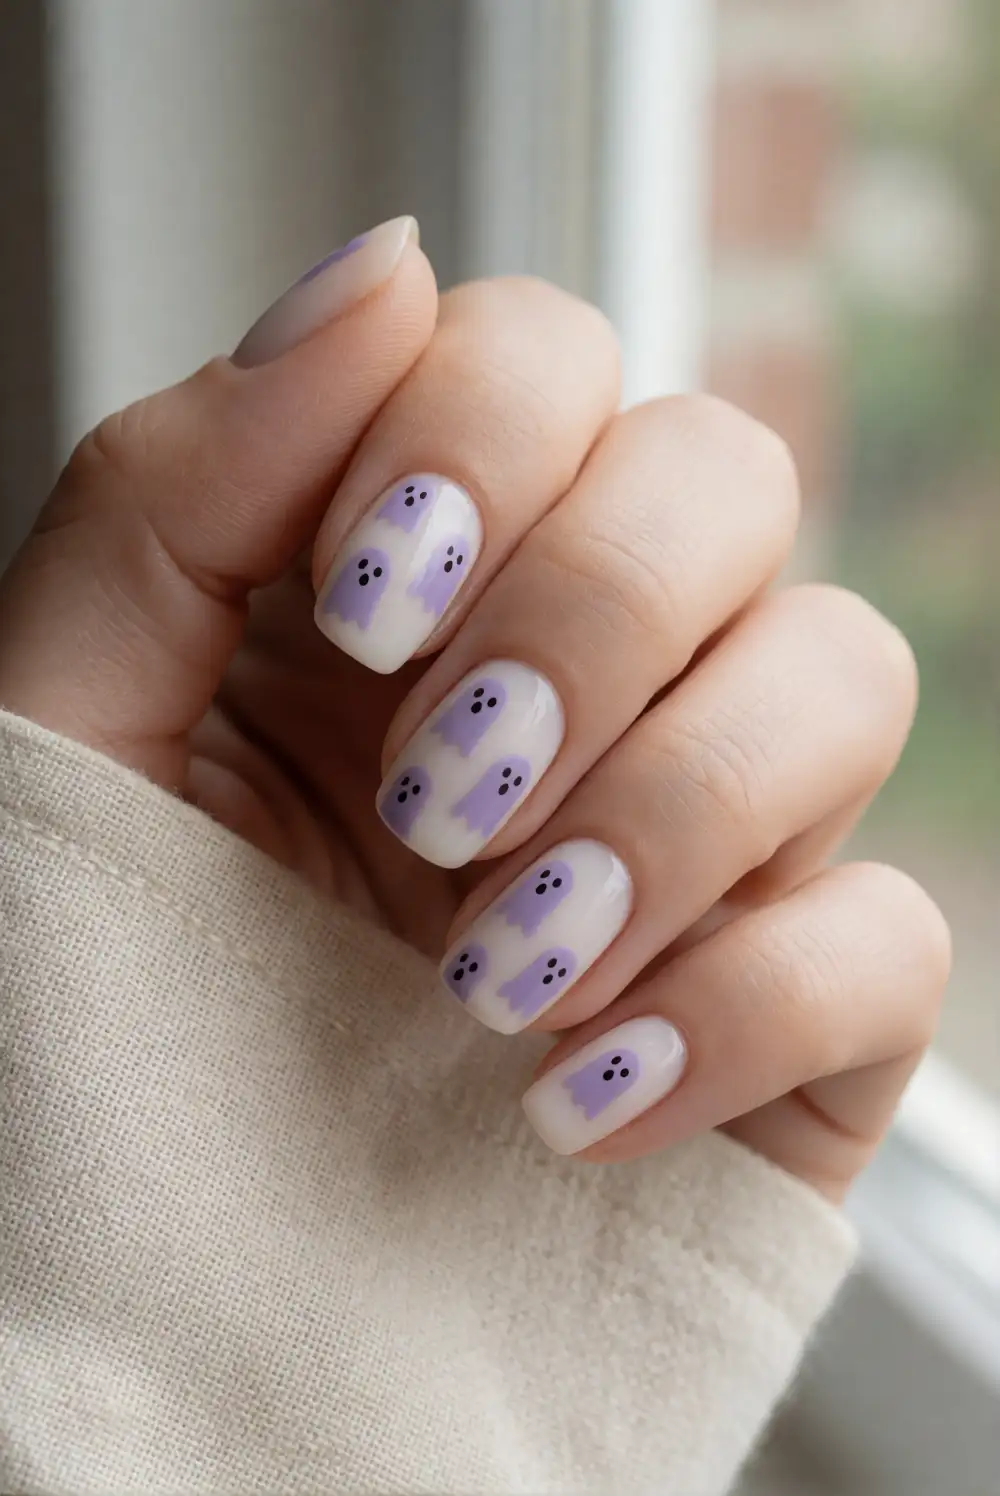
Paint the nails with two thin coats of milky white polish, allowing each coat to dry. On an accent nail, draw a small lavender ghost using a fine brush, beginning with a rounded top and finishing with a gently scalloped bottom edge. Add two tiny dark eyes after the lavender polish sets, then seal the artwork with clear top coat. If freehand shapes feel tricky, use a small dot of polish as the ghost’s head and extend its lower edge with careful brush strokes.
This color combination gives ghost art a soft, sweet look rather than a stark contrast. Place one ghost on each ring finger for a simple accent, or alternate lavender and white designs across the manicure. A pearly white base adds a delicate sheen, while a matte top coat gives the colors a velvety finish. Keep the lavender shapes small and leave open space around them so their little faces remain easy to see.
French Tip Ghosts with Tiny Faces
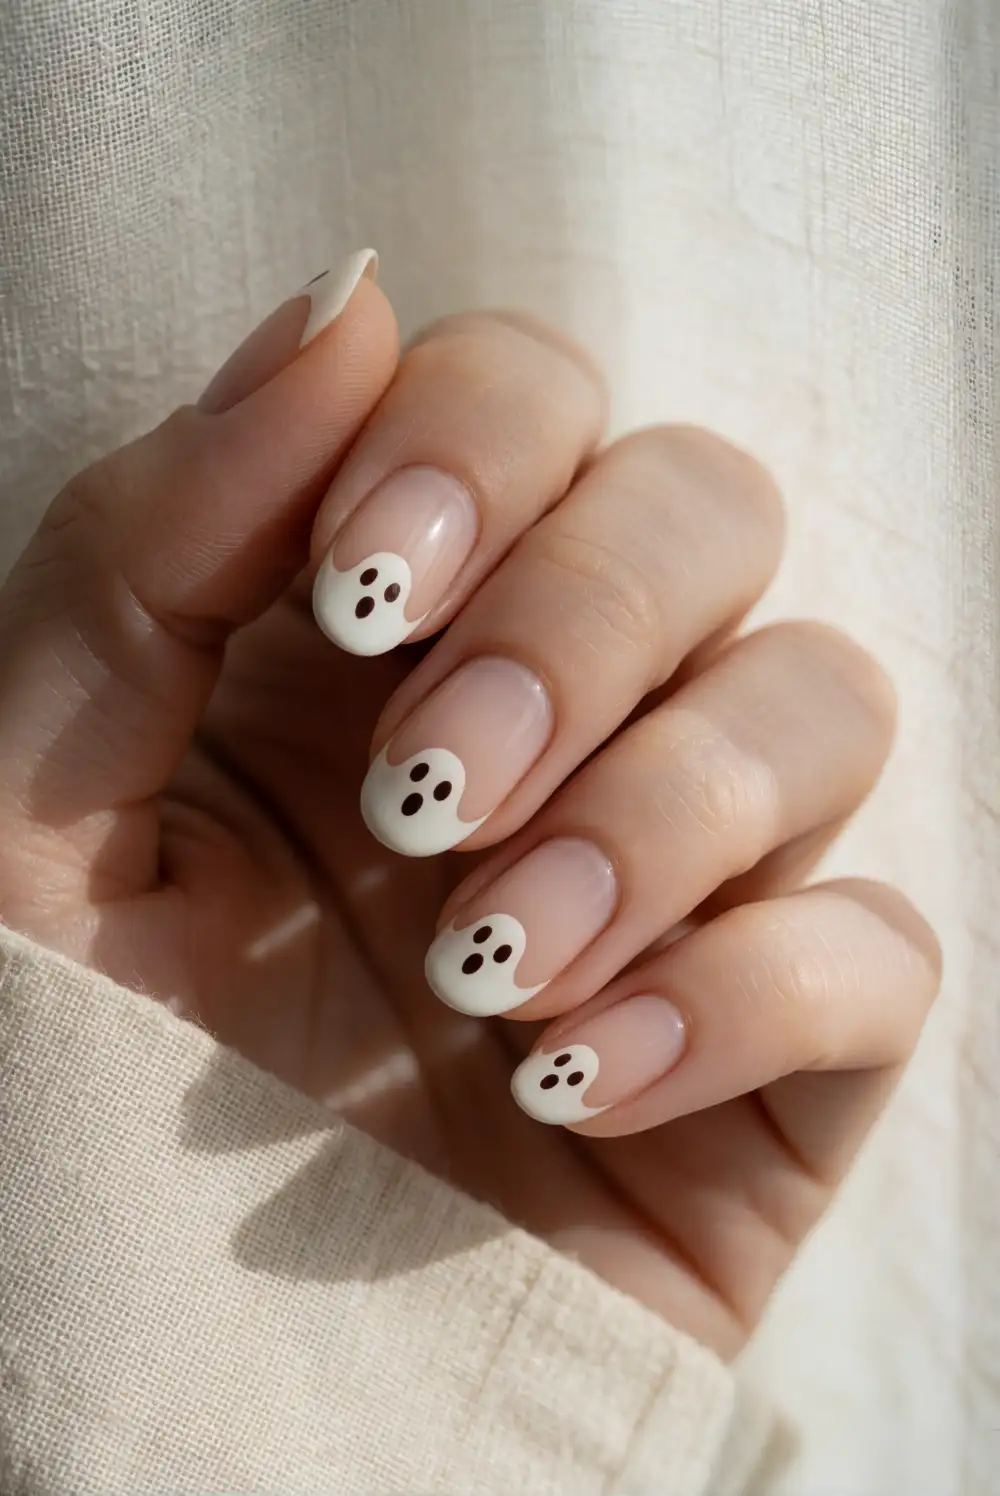
Apply a sheer nude or pale pink base and let it dry. Instead of painting a straight French tip, use white polish to make a small ghost shape at the free edge of each nail, with the curved top sitting near the nail’s center and a softly wavy hem following the tip. Add two tiny eyes and a little mouth with a fine brush once the white polish is fully dry. Finish with a clear coat to blend the design.
For a subtle manicure, put the ghost French tips on just a couple of nails and keep the rest classic. A thin nude base makes the white shapes stand out while still looking refined, and shorter nails provide a neat canvas for the miniature artwork. Vary the ghosts’ positions slightly so they look like they are peeking over the tips. If the tips are difficult to paint freehand, use a small detail brush and build each shape with light strokes.
Black Ghost Faces on Nude Nails
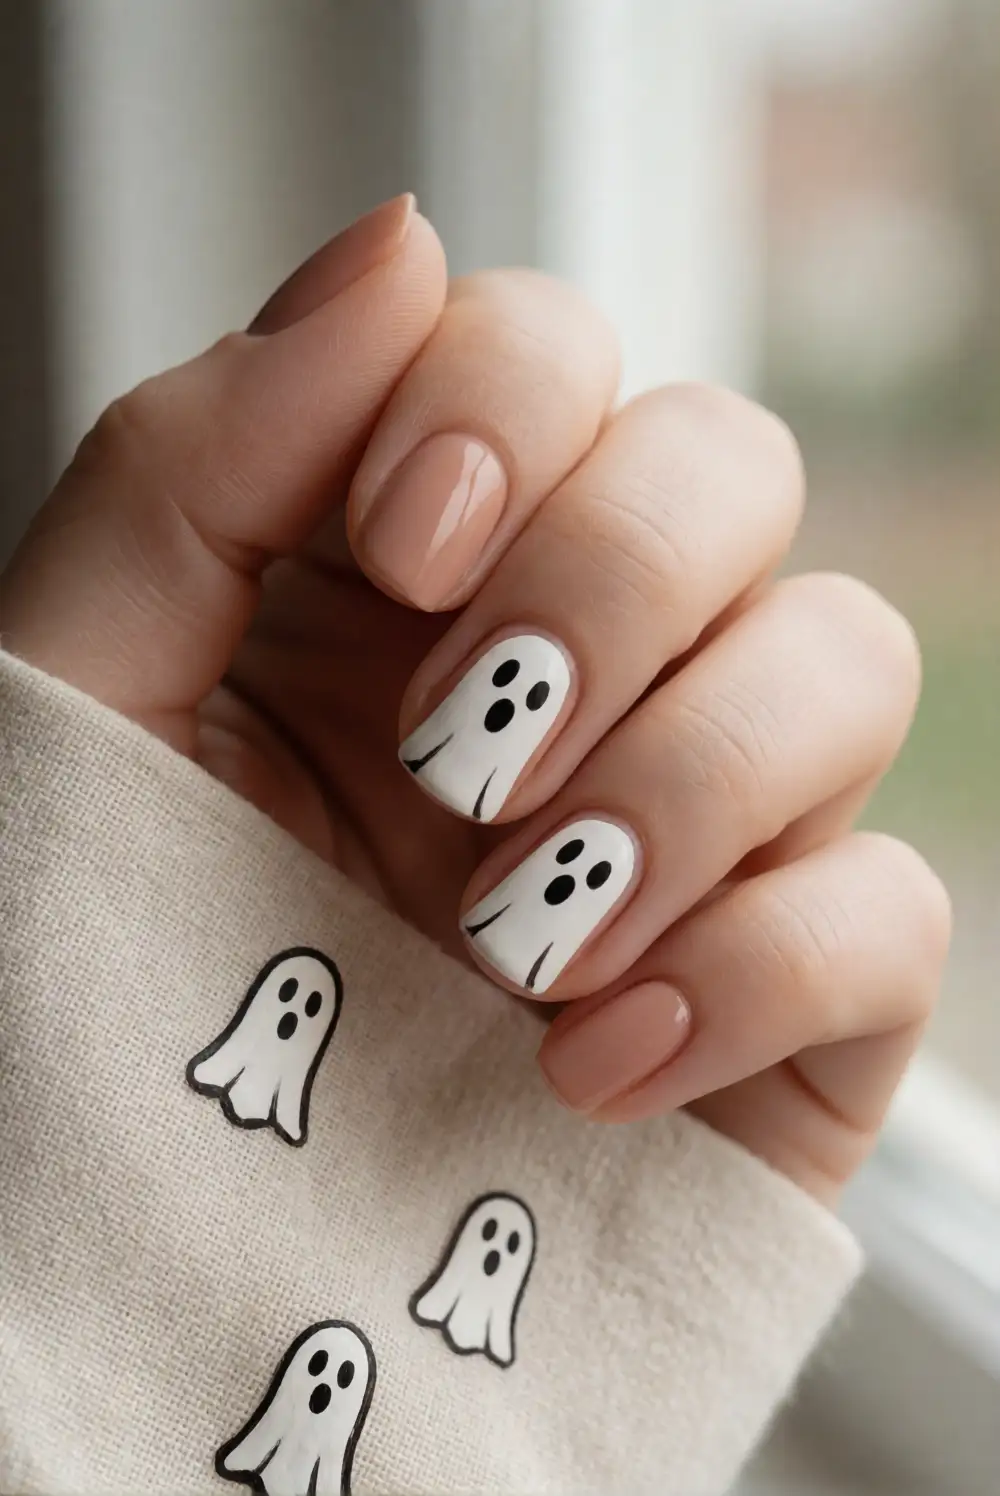
Coat the nails in a warm nude polish and wait until the surface is dry. On an accent nail, paint a small white ghost with a rounded crown and a gently uneven bottom. Let the shape dry, then use black polish and a fine brush to add two eyes and a tiny curved mouth. The dark facial details create a clear focal point against the pale shape. Apply a glossy top coat carefully to preserve the fine lines.
This design keeps the ghost’s body classic while giving its tiny expression a little extra definition. Choose a nude polish close to your skin tone for a minimal look, or use a blush-toned base for a softer contrast. Keep the black features small and spaced apart so the face stays sweet rather than crowded. A single ghost on each hand makes an understated accent, while matching ghosts across all nails creates a more noticeable seasonal manicure.
Floating Ghosts on Midnight Blue Nails
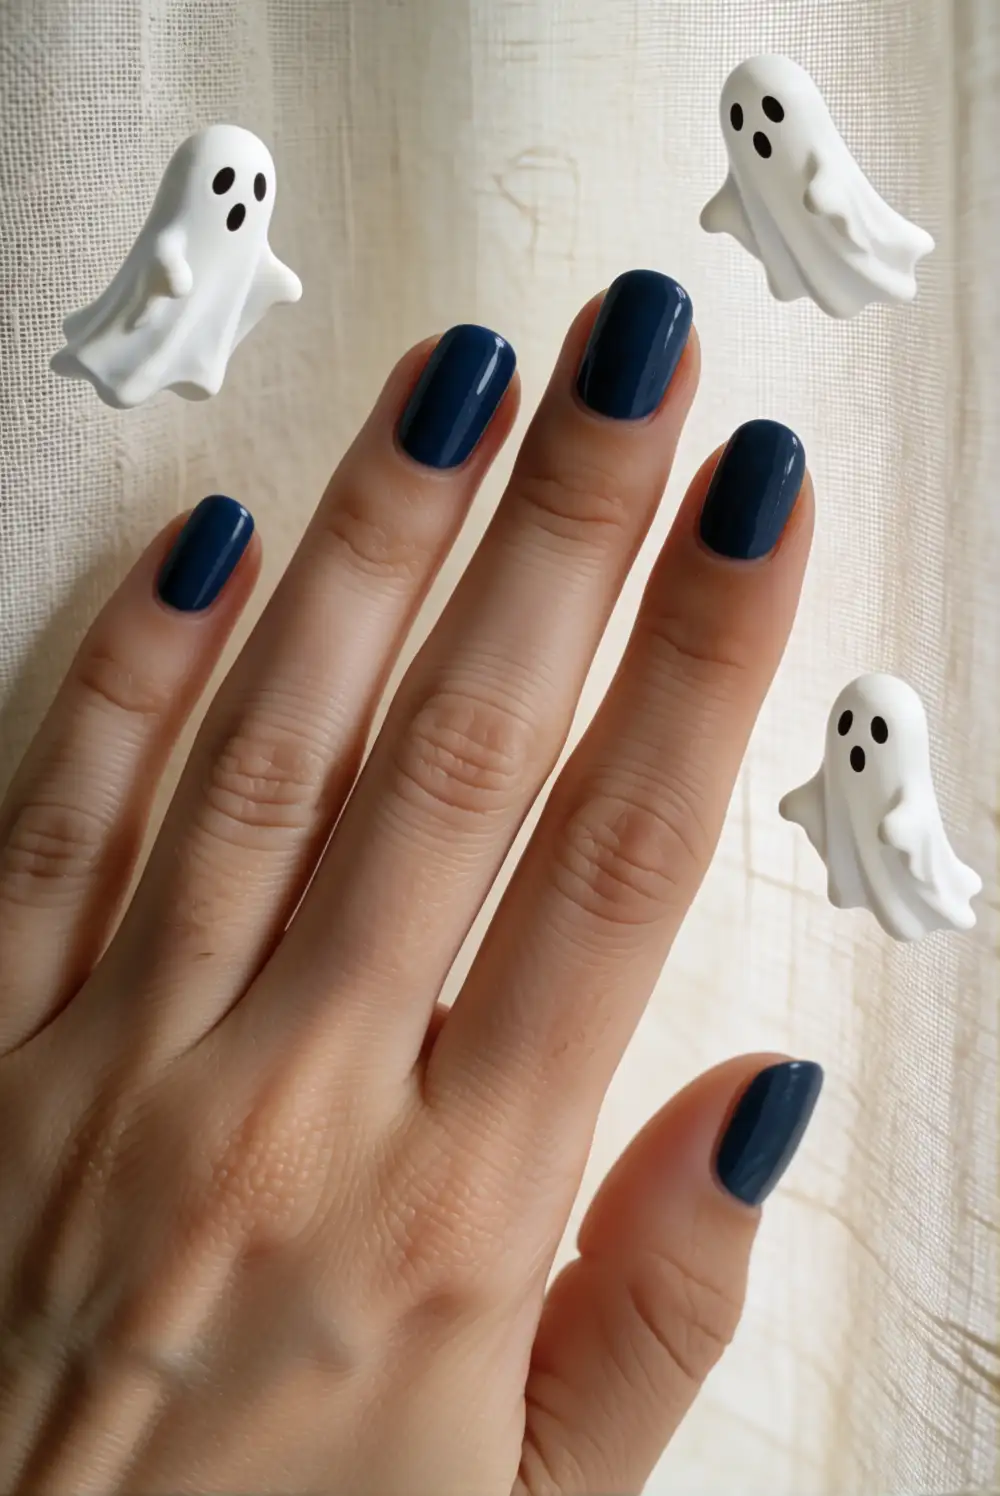
Paint the nails with a deep midnight blue polish and allow it to dry thoroughly. Use a fine brush to add small white ghost shapes at different heights on the accent nails, keeping each rounded head distinct from its softly wavy lower edge. After the white polish sets, dot on tiny dark eyes using a detail brush or dotting tool. Finish with a glossy top coat, taking care not to drag the brush across the faces.
The rich blue background makes the white ghosts easy to notice, so a few carefully placed shapes can be enough. Leave some nails solid blue to give the design breathing room, or add a ghost to every nail for a full set. A scattering of tiny white dots can suggest a starry night without competing with the faces. For a gentler effect, choose a muted navy polish and keep the ghosts rounded and friendly.
Ghosts with Blush Cheeks on Cream Nails
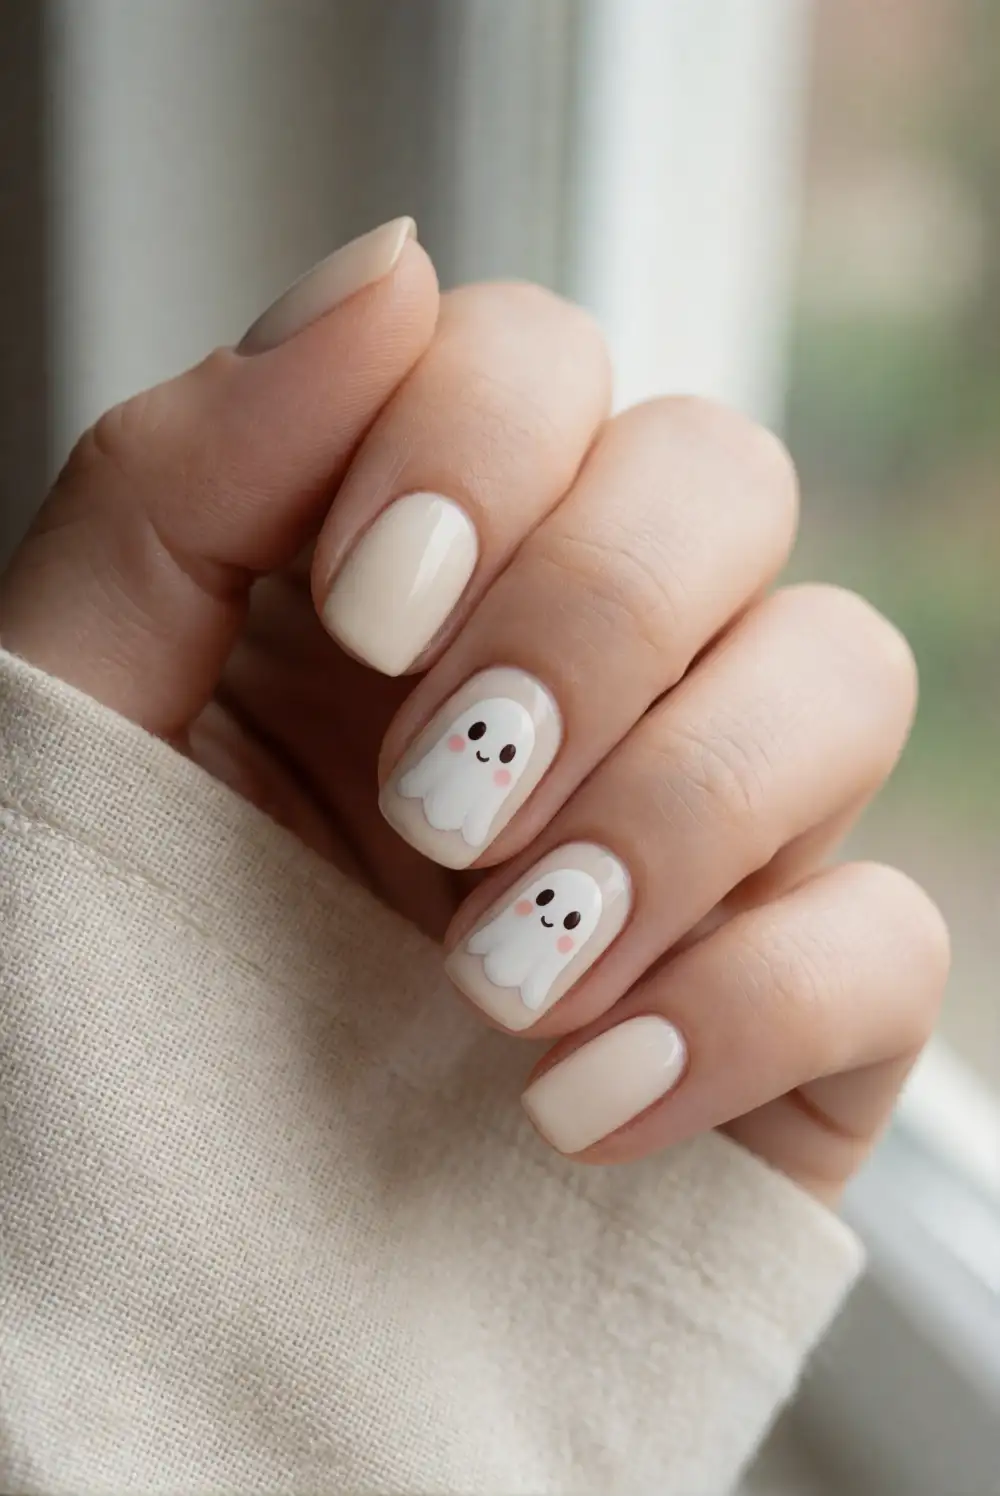
Begin with a smooth cream-colored base coat and let it dry. Paint a rounded white ghost on an accent nail with a fine nail-art brush, adding a softly wavy lower edge. Once the body is dry, place two tiny dark eyes and use a very small amount of pink polish to add blush dots beside the face. Seal the finished artwork with clear top coat. Keep the pink touches light so the cheeks look delicate against the white shape.
Blush cheeks give the ghost a cheerful expression and pair especially well with warm cream polish. Repeat the design on two accent nails and leave the remaining nails plain, or alternate ghosts with a simple pale pink nail. A sheer cream base creates a softer finish, while opaque cream makes the white artwork subtly dimensional. Use a clean detail brush for the cheek dots, and allow the face to dry before adding top coat to avoid smudging.
Glitter Outline Ghosts on Clear Nails
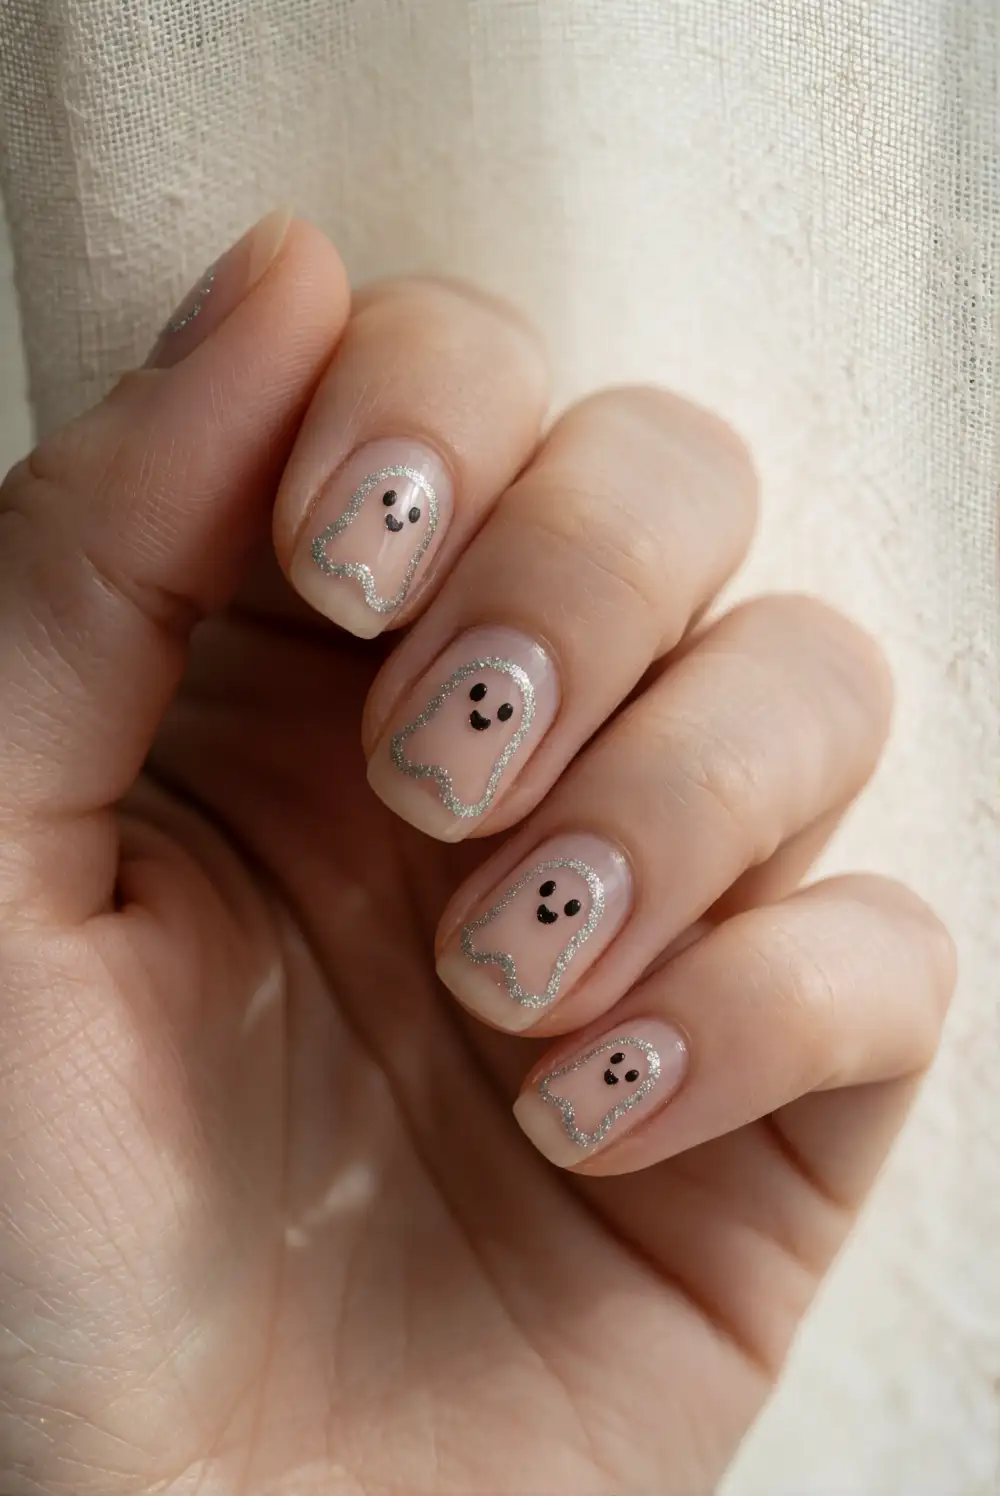
Apply a clear or sheer nude base coat and let it dry. With a fine brush, trace a small ghost outline using silver glitter polish, forming a rounded top and a gently wavy bottom. Leave the center mostly clear, then add tiny dark eyes inside the outline after the glitter has set. A thin coat of clear polish over the design helps smooth the textured edge. Work slowly so the outline stays distinct and the open center remains visible.
This airy style is a good choice if you want ghost art that feels light rather than bold. Use a fine shimmer for a delicate glint or a slightly chunkier glitter polish for a more noticeable outline. Keep the rest of the manicure clear or sheer pink to let the little faces stand out. On shorter nails, make the outline compact and simple; on longer nails, give the ghost a wider hem for a graceful floating shape.
Ghost Accent Nails with Polka Dots
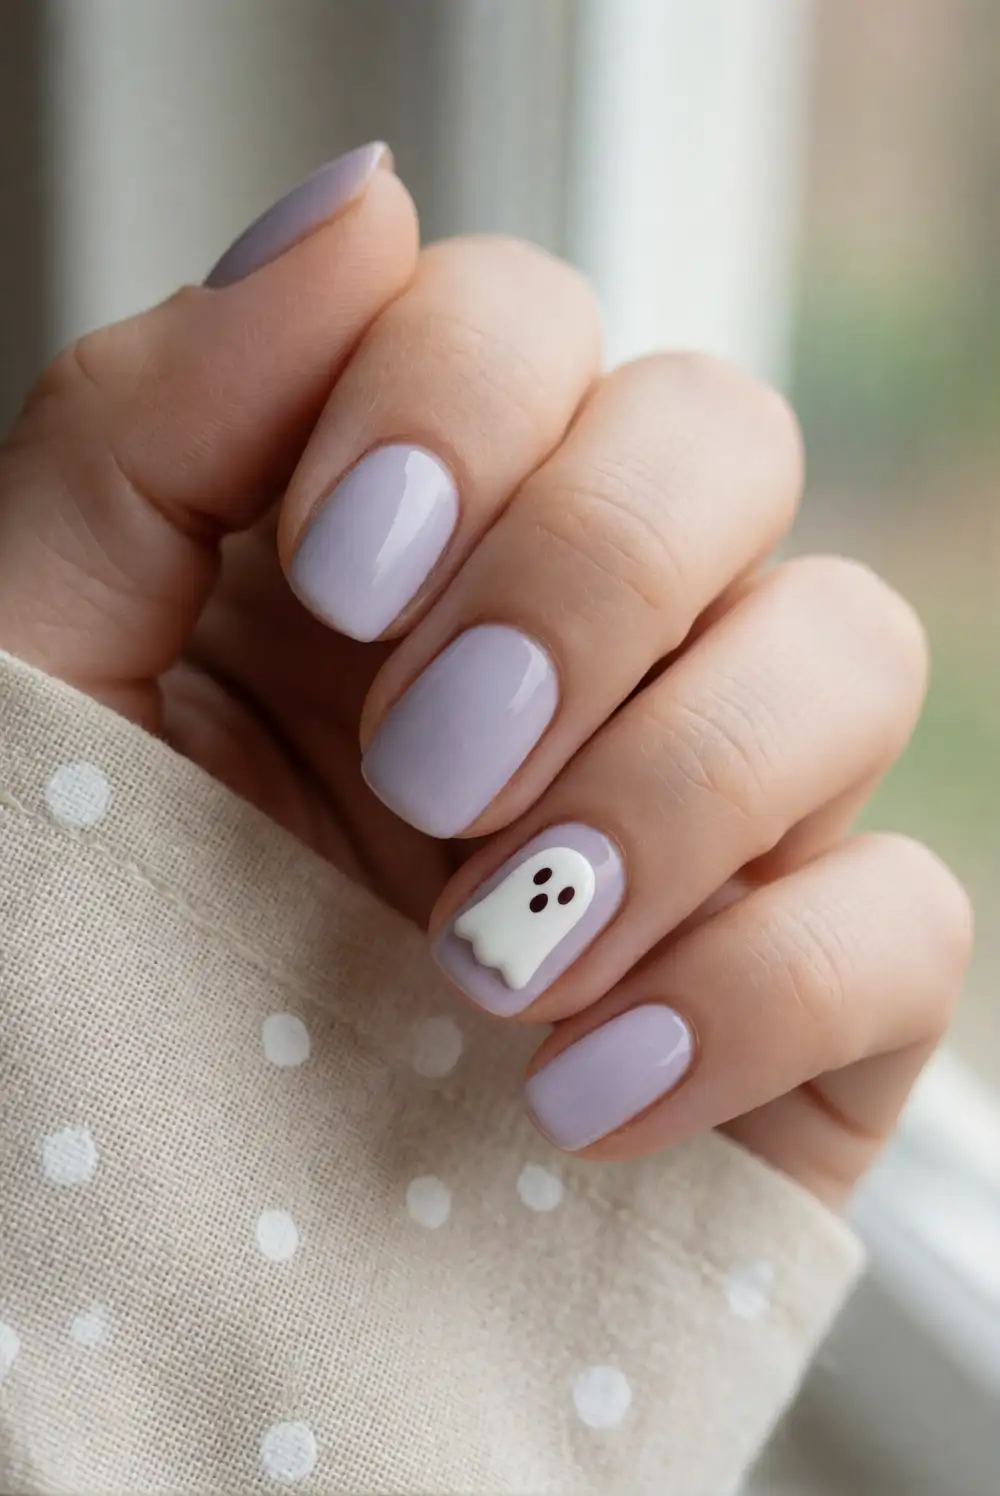
Choose a pale lavender or soft pink base and paint most nails in a solid coat. On one or two accent nails, create a small white ghost with a rounded head and a wavy bottom, then add tiny dark eyes once the white shape is dry. Use a dotting tool to place a few small white dots around the ghost, leaving clear space near its face. Finish with a glossy top coat after all the details have set.
The scattered dots add movement without making the manicure difficult to wear. Keep them sparse for a delicate effect, or vary their sizes for a more playful look. Matching the accent nail’s base to the other nails keeps the design cohesive, while using a contrasting pale shade makes the ghost easier to spot. Try one ghost per hand and place the dots asymmetrically, so the finished manicure feels lively without appearing crowded.
Mini Ghosts on Short Rounded Nails
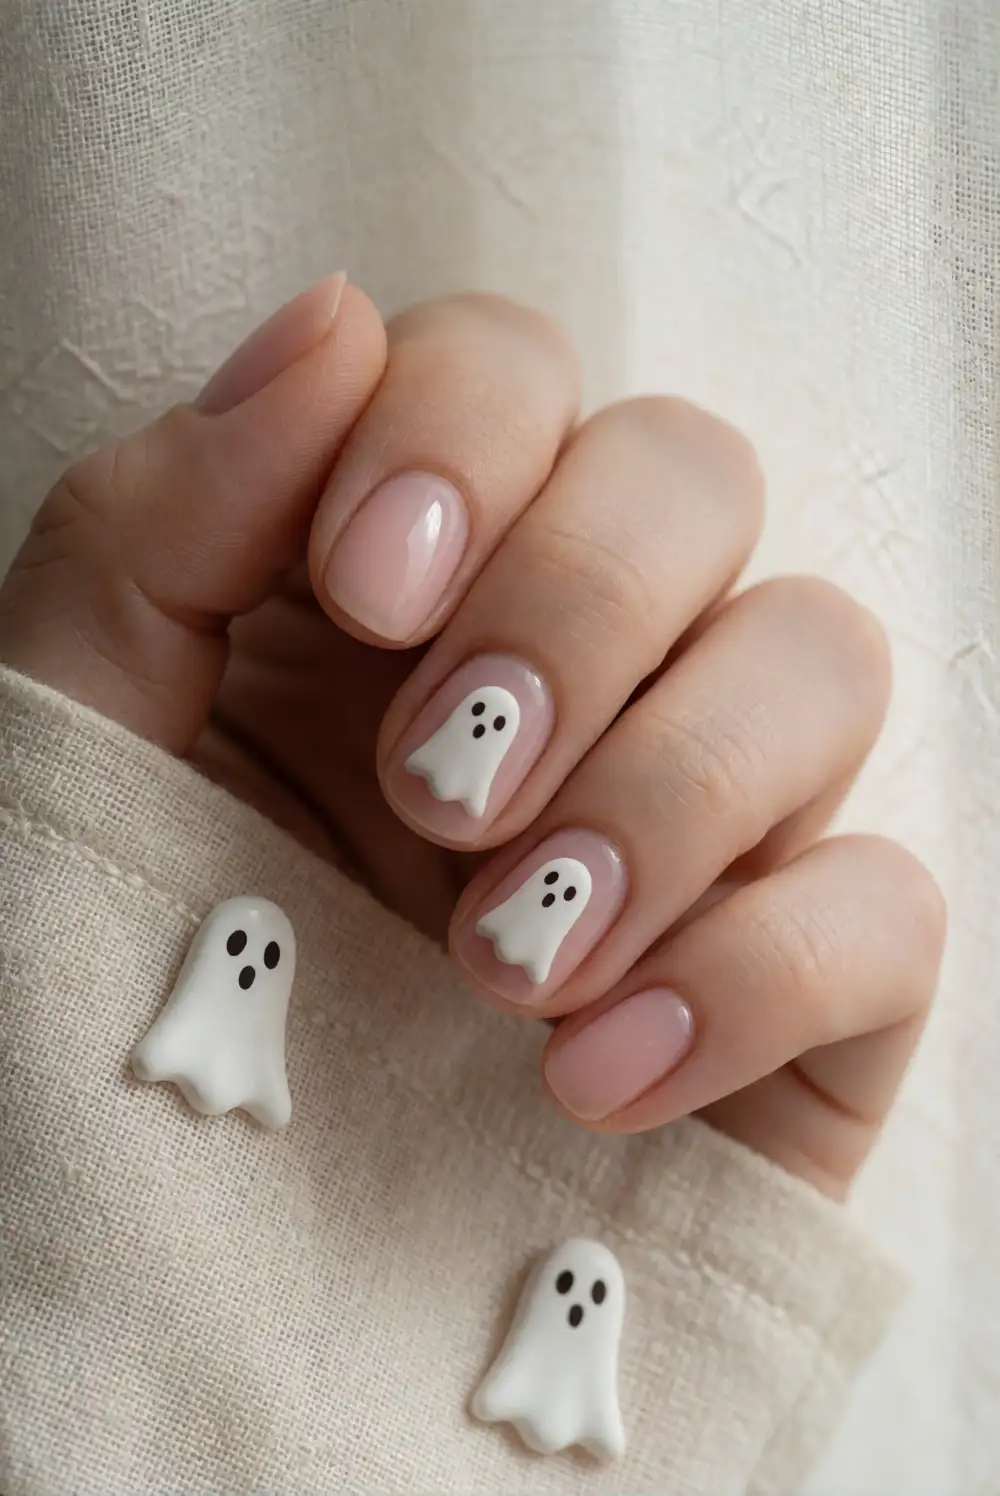
Shape short nails into a gentle rounded edge, then apply a pale nude or sheer pink base coat. On each accent nail, use a fine brush to paint a compact white ghost with a small rounded top and a softly rippled hem. Add two tiny dark eyes with a dotting tool once the shape is dry, keeping the features centered and simple. Finish with clear top coat to give the small design a smooth, even surface.
Short nails are a lovely canvas for miniature art because the small ghosts look naturally proportioned. Keep the bodies petite and avoid extra details that could crowd the nail. One ghost on each ring finger creates an easy everyday variation, while a ghost on every nail makes the manicure feel more festive. A sheer base keeps the look light, and a glossy finish brings out the crisp contrast between the white shapes and their tiny faces.
Ghosts with Crescent Moon Accents
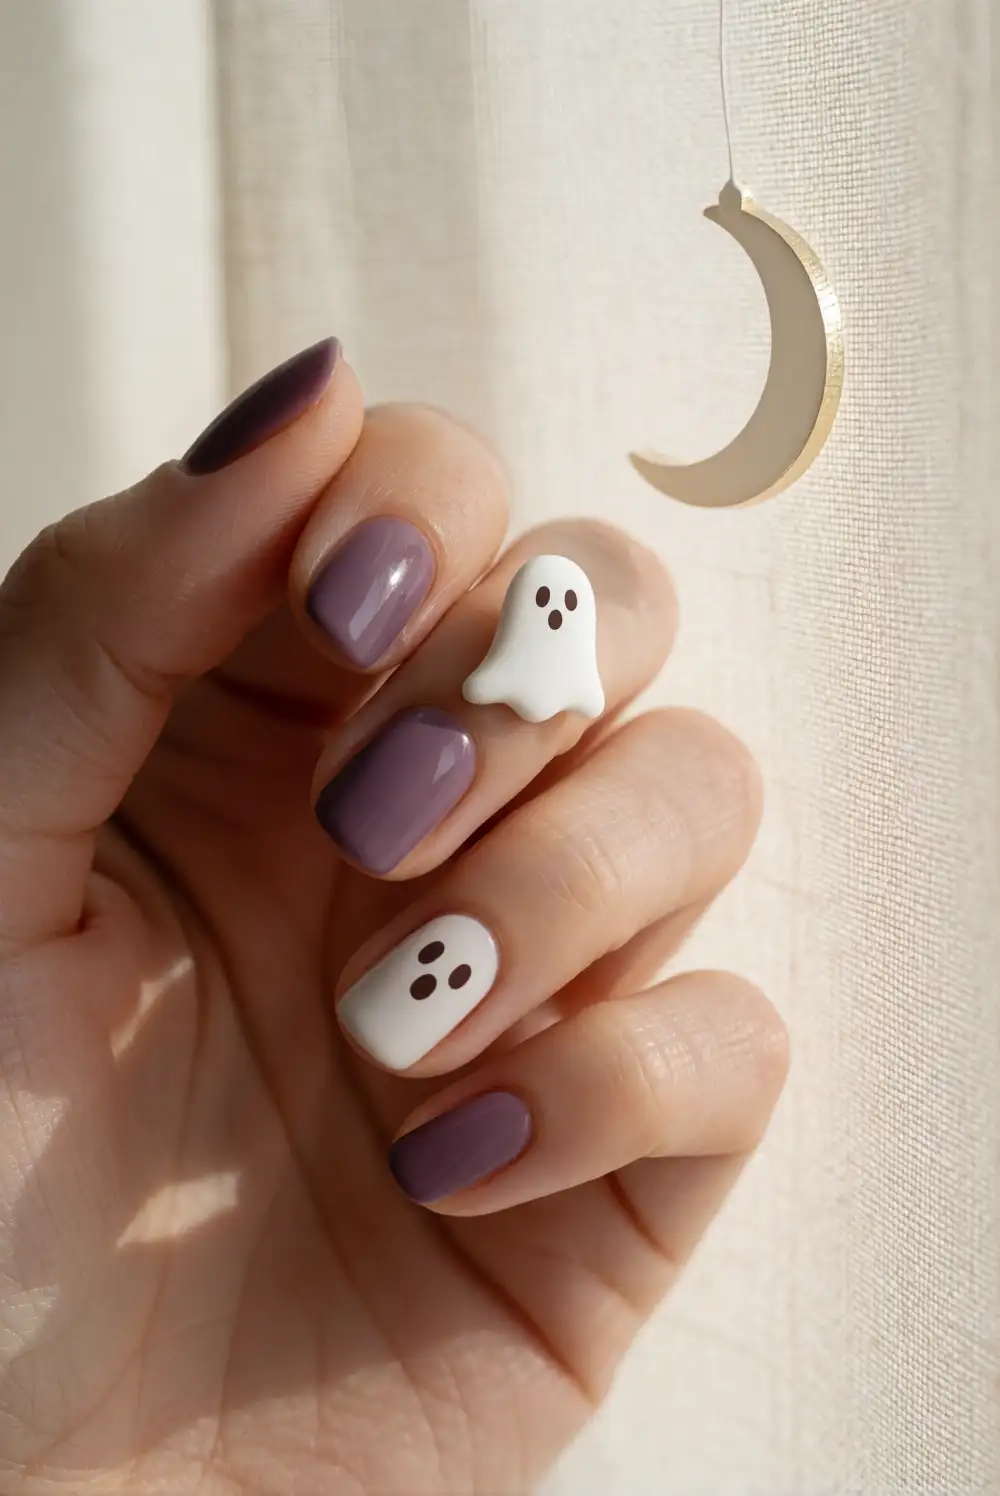
Apply a deep plum or muted lavender polish as the base and let it dry. Paint a small white ghost on an accent nail, using a rounded top and a gently scalloped hem. Add its tiny dark eyes after the shape sets. On a neighboring nail, use a fine brush to draw a slim crescent moon in pale gold or white polish. Seal both designs with clear top coat, keeping the moon simple so it complements the ghost.
The crescent gives the manicure a dreamy night-sky feel while keeping the ghost as the main attraction. Use a subdued plum base for a rich look or choose lavender for a softer palette. Place the moon on a solid-color nail beside the ghost accent, or add a small crescent near the edge of the same nail if you have more space. A delicate metallic polish adds a restrained shimmer without obscuring the tiny faces.
From sheer pink ghost tips to midnight-blue accents, these tiny-face designs make it easy to tailor a playful manicure to your preferred colors and nail length. Start with a simple accent nail, let each layer dry, and finish with a smooth top coat for a polished seasonal look.








