
Bring a moody touch to your Halloween look with short, dark nail designs that feel polished and easy to wear. From glossy black tips to smoky ombré and deep plum accents, these manicure ideas work beautifully on shorter nails and can be adapted with a few familiar polish shades and simple tools.
Glossy Black Micro French Tips
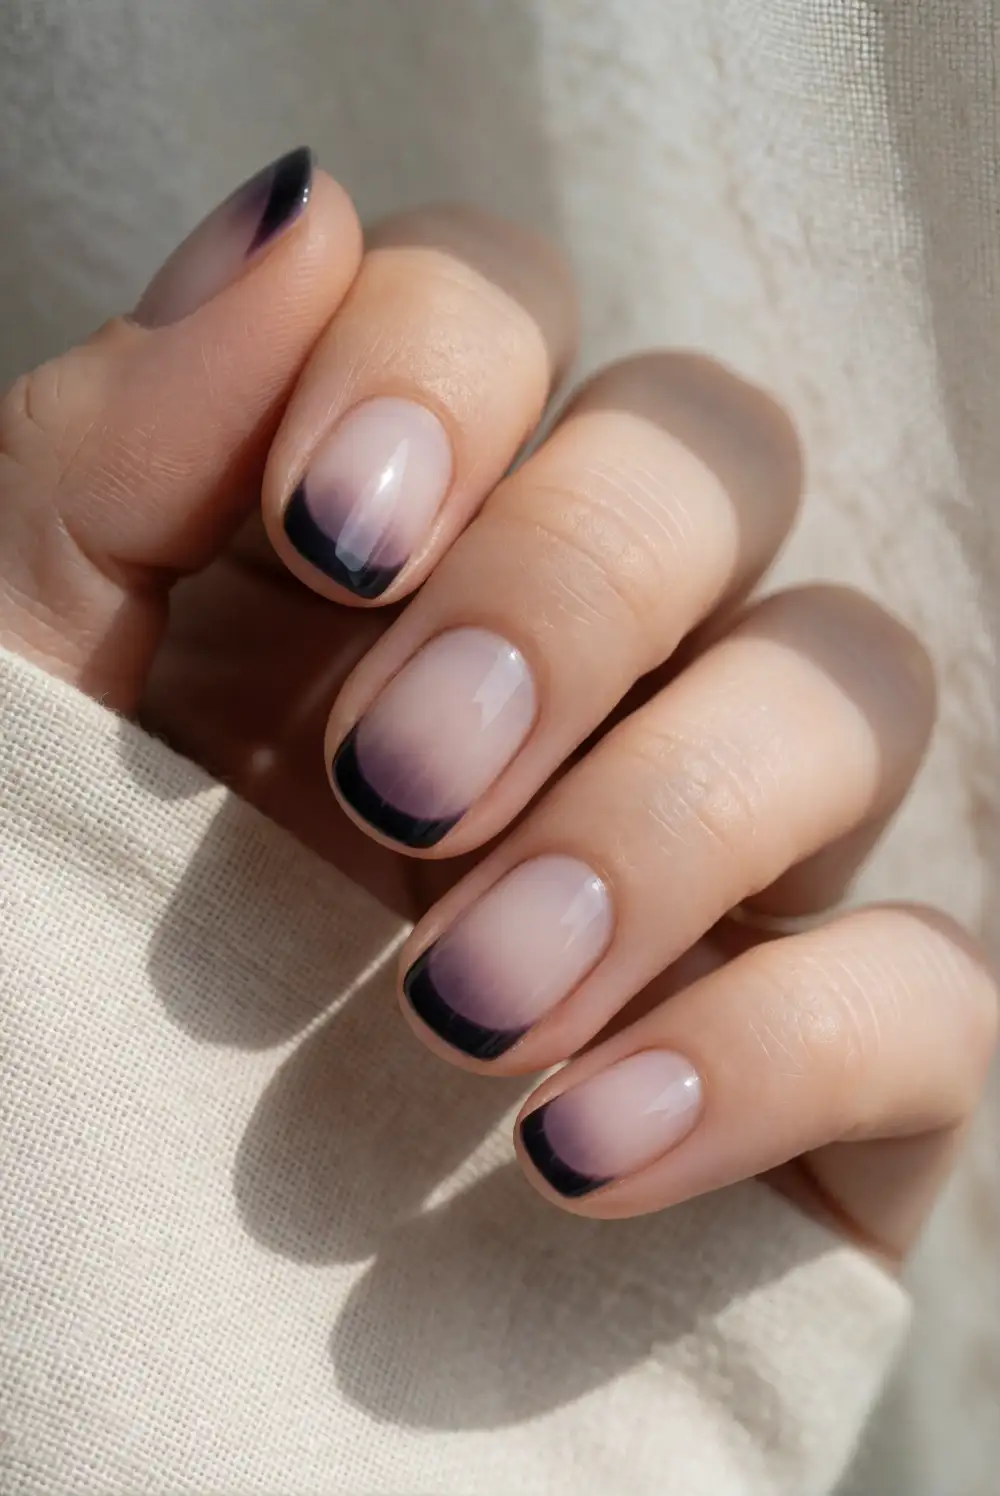
Give short nails a sleek French manicure twist with a sheer nude or milky base and fine black tips. Apply a thin layer of base coat, then add two coats of the neutral polish. Once dry, use a fine nail art brush to paint a narrow curve of glossy black along each free edge. Keep the line slim so it follows the natural nail shape, then finish with a clear top coat for a smooth, reflective surface.
For a softer look, make the tips charcoal or deep plum instead of jet black. A French tip guide can help create an even curve, while a small cleanup brush dipped in remover tidies the edges. This manicure pairs easily with dark outfits and looks especially striking when the rest of the nails stay simple. If your nails are very short, keep the tip line delicate rather than extending it far across the nail.
Charcoal Velvet Cat Eye Nails
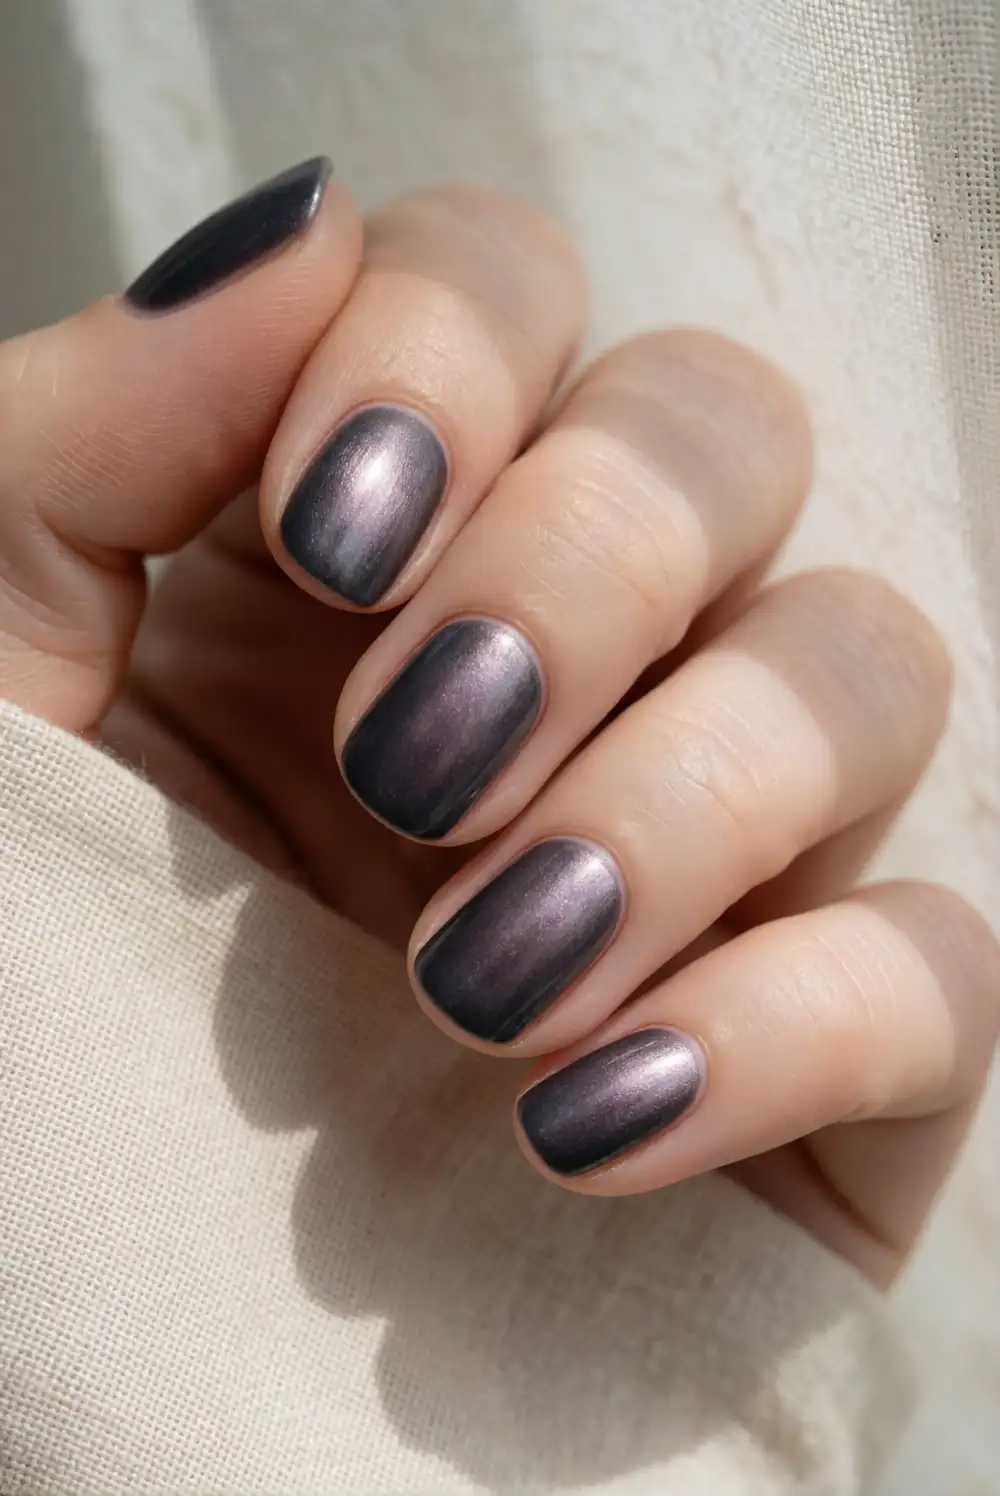
Create a soft, shifting finish with charcoal magnetic gel polish. Shape and prep the nails, apply the base coat recommended for your polish, and cure it as directed. Brush on a thin layer of charcoal cat-eye polish, then hold a nail magnet above each nail to pull the metallic particles into a bright velvet-like band. Adjust the magnet position to create a centered glow, and cure the polish before sealing everything with a glossy top coat.
A narrow diagonal glow gives the manicure more movement, while a centered stripe feels clean and understated. Work on one nail at a time so the magnetic effect does not settle before curing. Keep the length short and the shape softly rounded for a wearable finish. This design looks especially rich in dim indoor light, where the charcoal base stays dark and the magnetic shimmer catches a subtle silver gleam.
Black Cherry Aura Nails
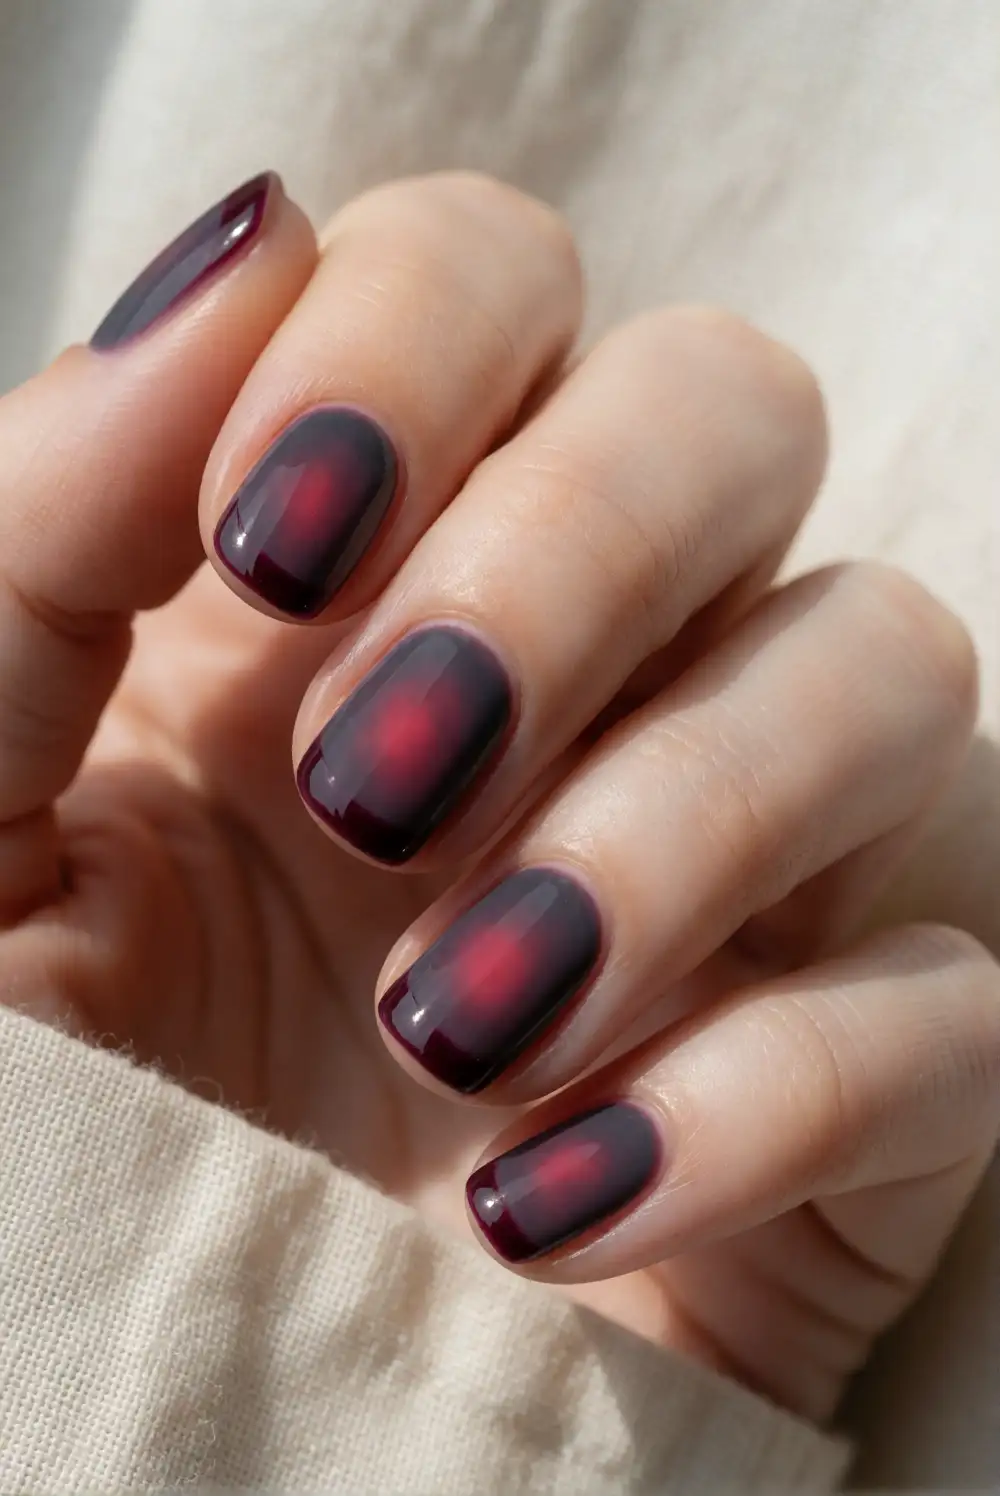
Blend a deep cherry center into a near-black border for a moody aura effect. Apply a dark burgundy base and let it dry fully. Use a small makeup sponge or a soft nail art brush to dab a brighter wine-red polish into the center of each nail, building the color gradually so the edges remain shadowy. Repeat with light layers until the transition looks diffused, then add a glossy top coat to bring out the rich, glassy color.
Choose a blackened plum base for a cooler variation, or add a tiny touch of crimson to the center for extra warmth. Keep the color halo compact so it suits a short nail plate, and let each layer dry before adding more pigment. The design works well across every nail or as an accent beside solid burgundy polish. A rounded-square shape gives the blended color a neat, modern frame.
Smoky Black Ombré Nails
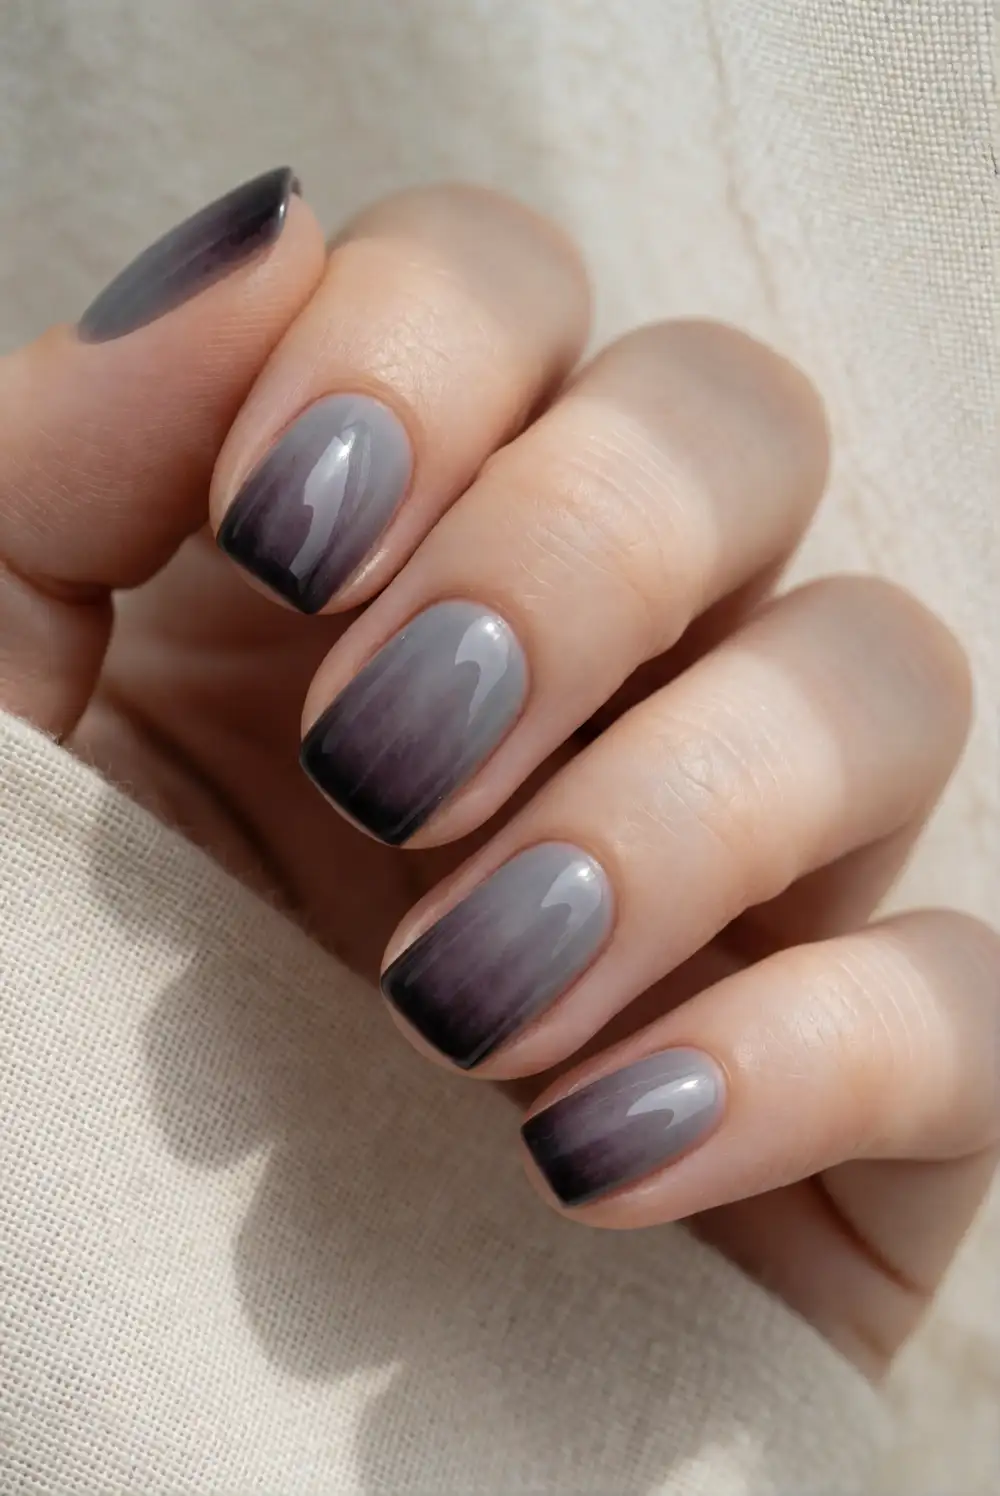
Fade soft gray into black for a smoky manicure that keeps short nails looking dimensional. Paint each nail with a light gray base and let it dry. Dab black polish onto a makeup sponge, then press it gently near the tips, moving slightly toward the center to create a gradual fade. Repeat with fresh polish until the tips look dark but the gray remains visible near the cuticle. Finish with a glossy top coat to smooth the sponge texture.
For a more muted result, use charcoal instead of pure black and blend with a light hand. Protect the skin around each nail with removable barrier product or clean the edges afterward with a small brush and polish remover. The ombré looks cohesive on every nail, but it can also complement a single smoky accent nail. Keep the fade low on very short nails so the design does not overwhelm their shape.
Matte Black Nails with Glossy Droplets
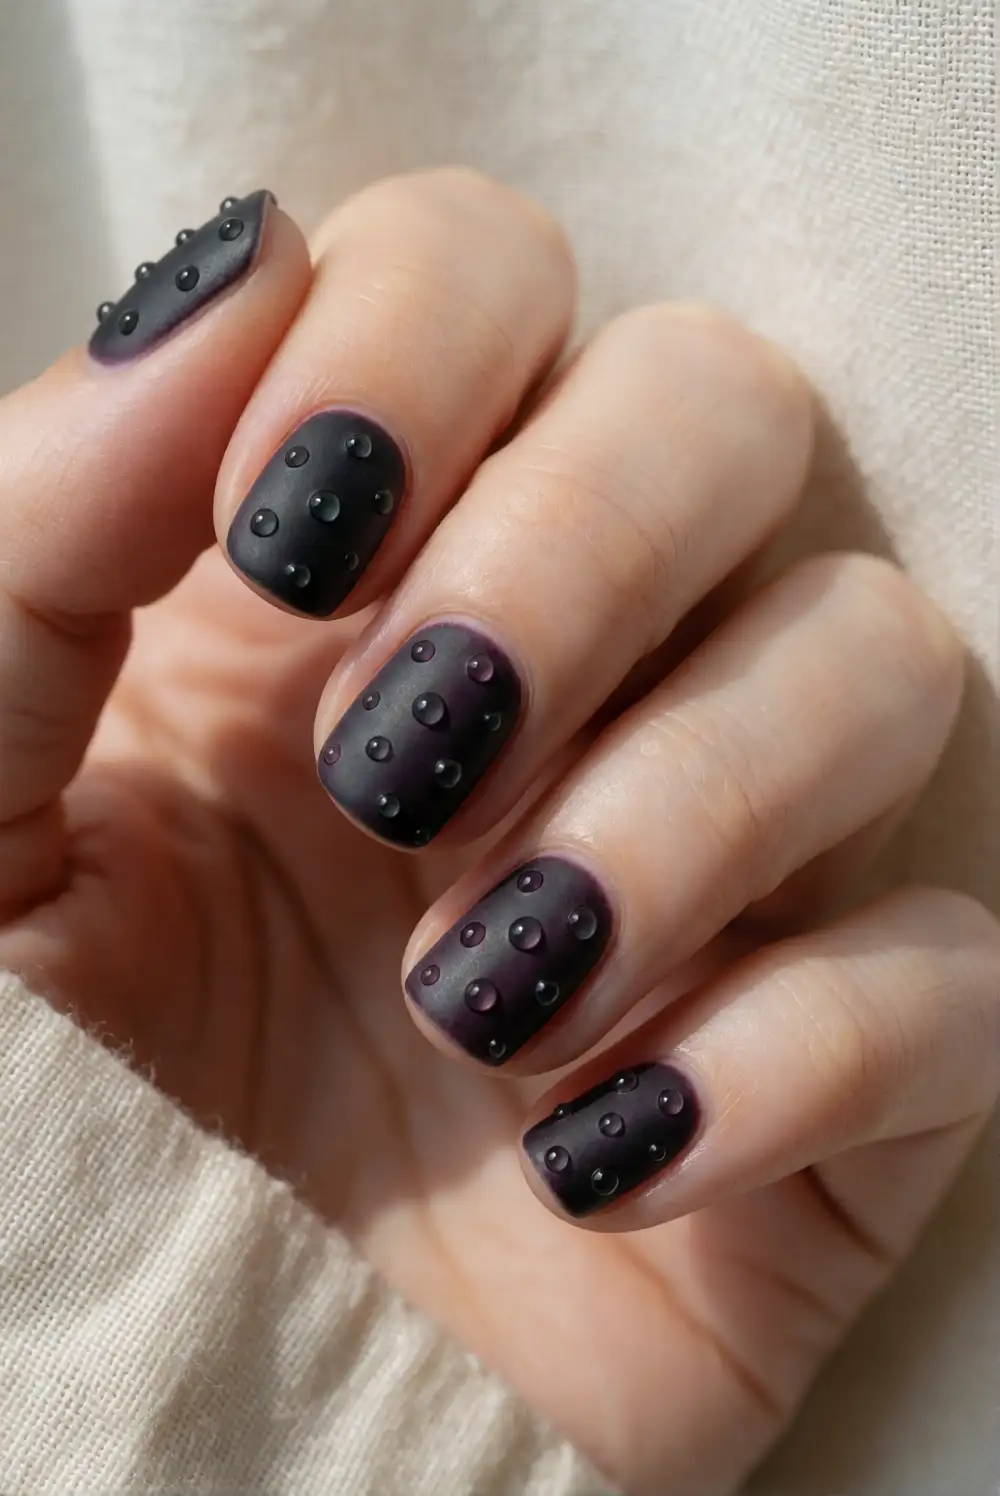
Pair a velvety black base with raised-looking glossy dots for a subtle dimensional manicure. Apply black polish to clean nails and let it dry completely. Add a matte top coat, allowing it to set before using a dotting tool or the end of a fine brush to place small clear top-coat dots across the surface. Keep the droplets spaced apart and vary their size slightly. The clear glossy finish stands out against the matte background without adding another color.
Place just a few droplets on each nail for a restrained look, or concentrate them near the tips for a scattered, rain-kissed effect. Make sure the matte layer is fully dry before adding the glossy details to preserve the contrast. A small dotting tool creates precise circles, while a fine brush can form narrow teardrops. This design looks polished on short rounded nails and works well as an accent beside plain matte black polish.
Deep Plum Crescent Moon Nails
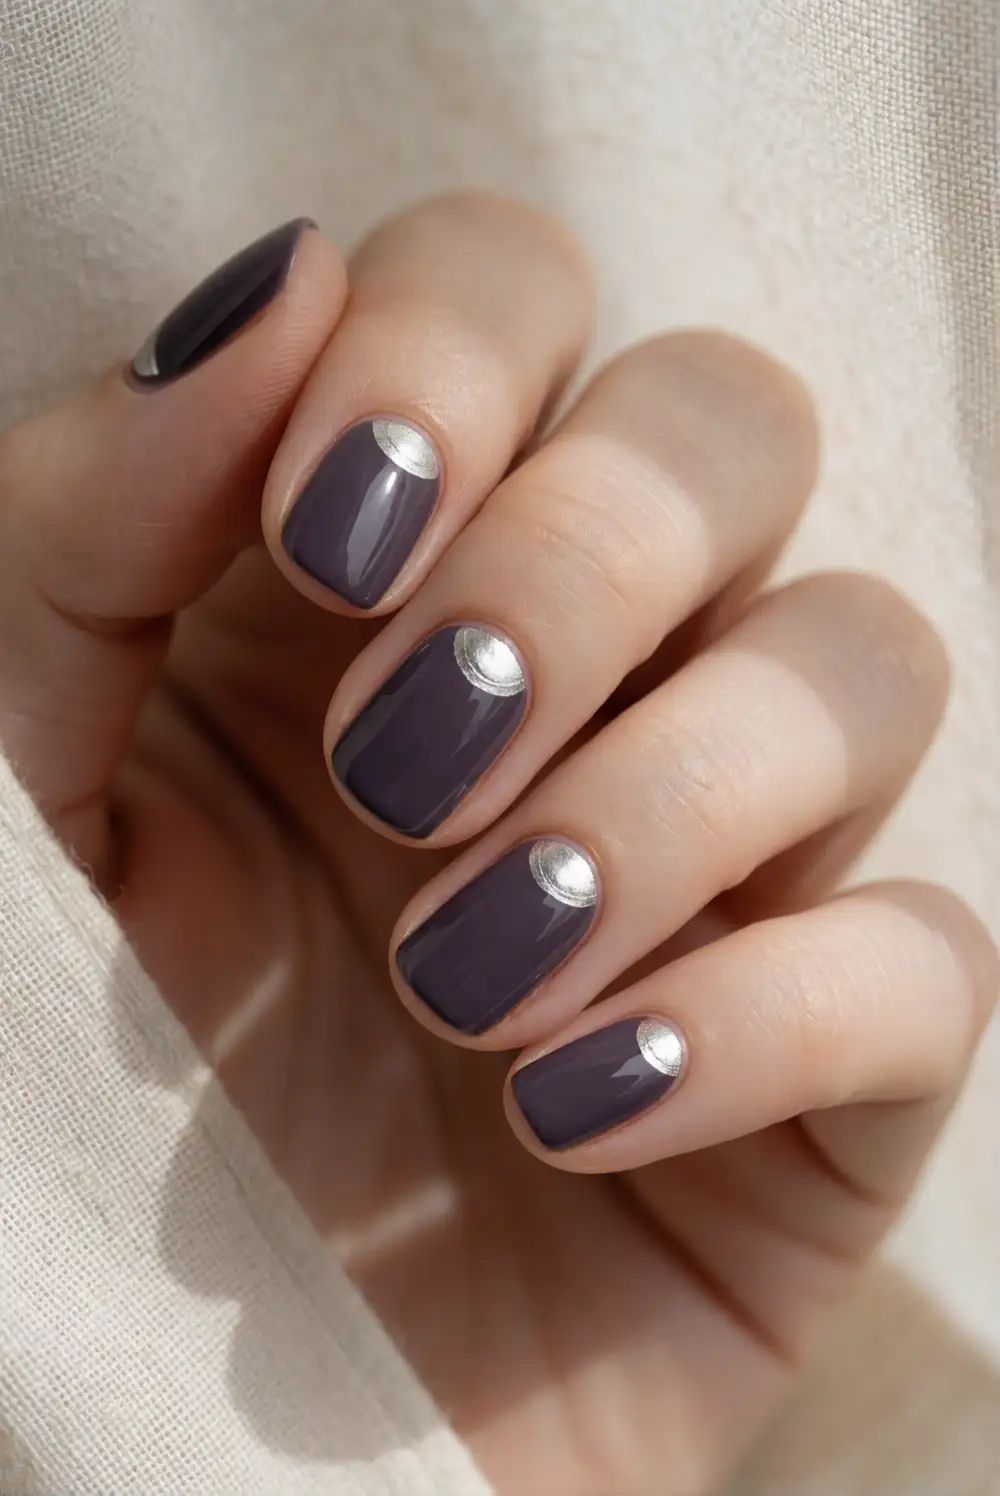
Use a deep plum base and fine silver crescent accents for a night-sky manicure. Apply two coats of plum polish, letting each coat dry before continuing. With a thin nail art brush, draw a small curved crescent near the cuticle or along one side of each nail using metallic silver polish. Keep the curves simple and delicate to suit the compact nail area. Once the details are dry, seal the design with a clear top coat.
For a quieter finish, place crescents on only a couple of nails and leave the others solid plum. A metallic charcoal polish creates a more subdued accent than bright silver, while a glossy top coat helps the dark base look smooth. If freehand curves feel tricky, use a small stencil and remove it carefully before the polish dries. The crescent detail pairs nicely with silver rings and other cool-toned accessories.
Dark Botanical Nail Accents
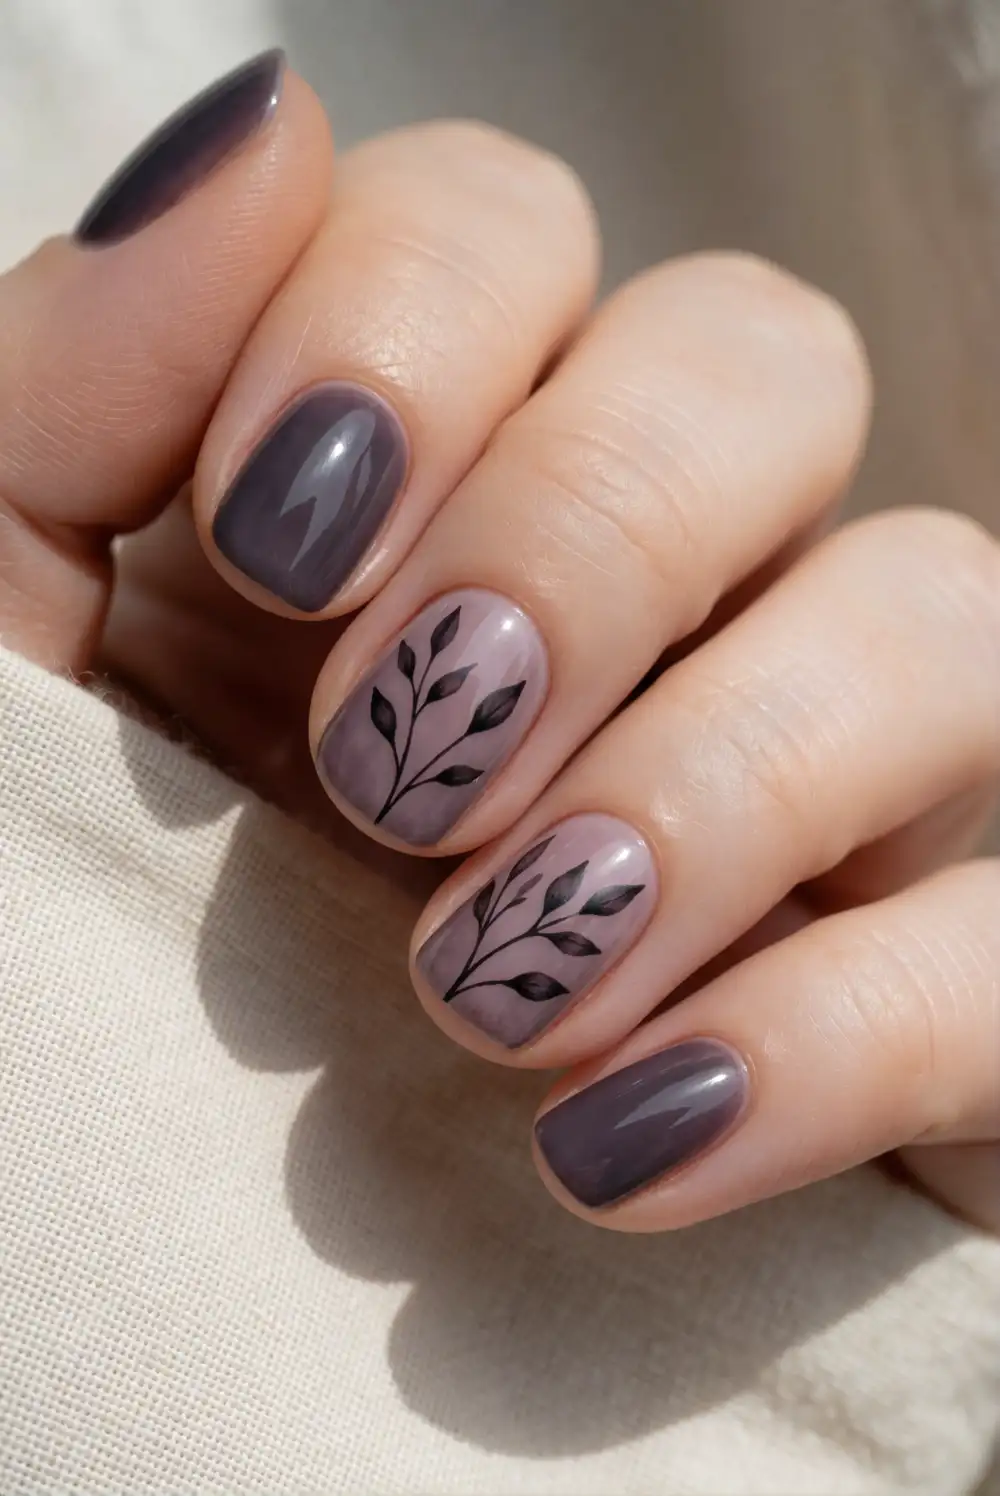
Paint delicate black leaves over a muted taupe or smoky mauve base for a dark botanical manicure. Apply the base shade and allow it to dry. Using a fine liner brush and black polish, draw a slim curved stem on an accent nail, then add small tapered leaves on either side with light brush strokes. Keep the motif centered and airy so it remains legible on short nails. Repeat on one or two nails, then finish the set with a glossy top coat.
For a moodier palette, swap the neutral base for deep olive or dusty plum. A fine brush with only a small amount of polish helps keep each leaf crisp rather than heavy. You can vary the placement by painting a sprig near the sidewall or close to the tip. Leave the other nails solid to give the botanical detail room to stand out, and choose a satin top coat for a softer finish.
Black Nails with Oxblood Tips
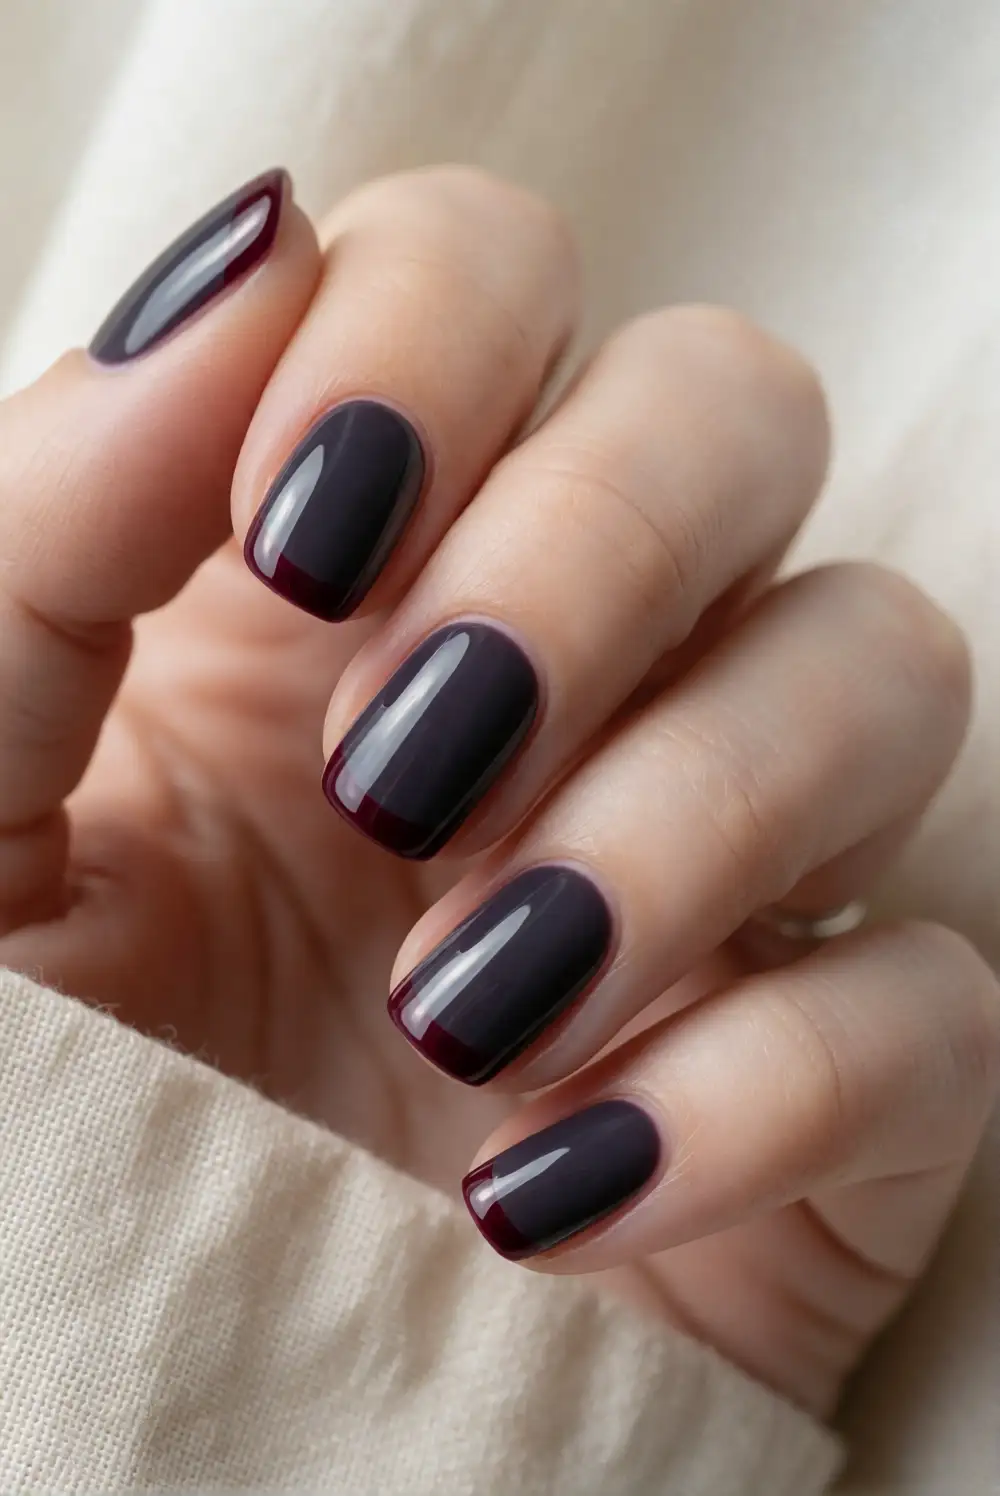
Combine glossy black nails with deep oxblood tips for a dramatic color-blocked manicure. Apply black polish as the base and let it dry. Use a fine brush to paint a curved band of oxblood red across the tips, following the natural edge of each nail. Build the red in thin coats for rich coverage, keeping the line neat and narrow so the design suits a shorter length. Seal the finished look with a glossy top coat.
A slightly angled tip adds a modern feel, while a rounded curve keeps the manicure classic. If you prefer a more understated contrast, use a dark wine shade close to the black base. Apply the accent to every nail for a coordinated look or reserve it for alternate nails. A cleanup brush dipped in remover makes it easier to sharpen the border, and a fresh top coat helps both dark shades look smooth.
Black Lace Accent Nails
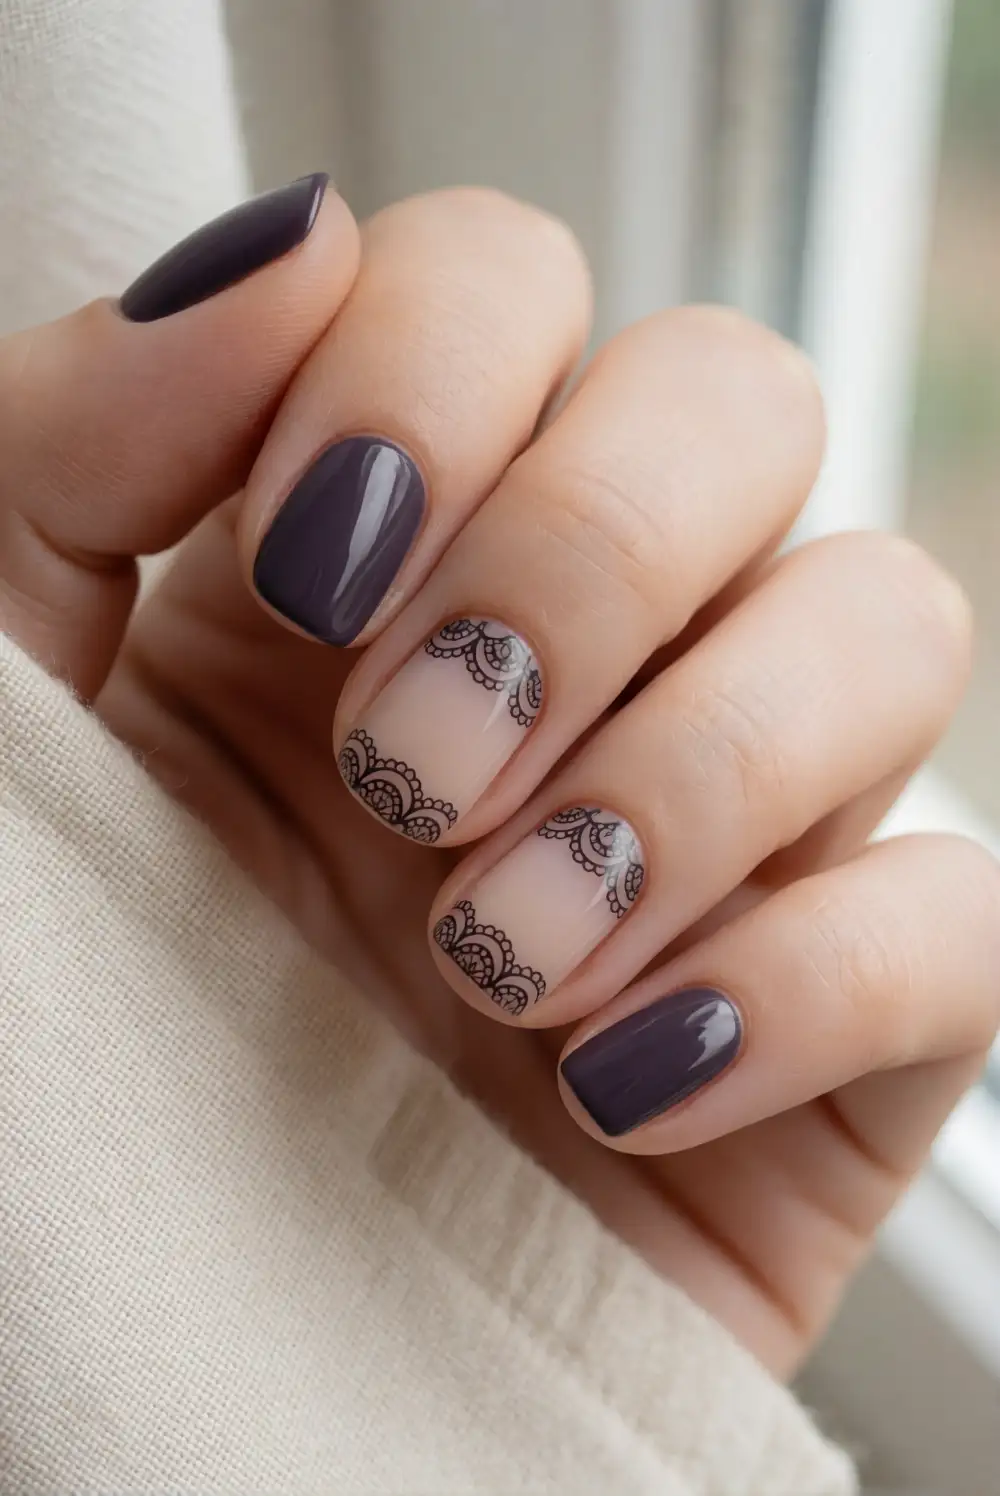
Create a delicate lace effect over a sheer beige or smoky mauve base using black polish and a fine liner brush. Once the base coat is dry, paint small curved lines near the tip or one side of an accent nail. Add tiny loops and scalloped edges along the curve, keeping the pattern open rather than filling the entire nail. Let the artwork dry thoroughly, then apply a clear top coat with a light touch to preserve the fine details.
Choose one or two accent nails so the lace pattern remains crisp on a short canvas. A stamping plate can help create an even motif if freehand detailing feels challenging; use a dark polish and transfer only a small section of the design. Pair the accents with solid black or plum nails for balance. A sheer base keeps the manicure airy, while a charcoal base makes the lace feel more dramatic and atmospheric.
Pewter Chrome Accent Nails
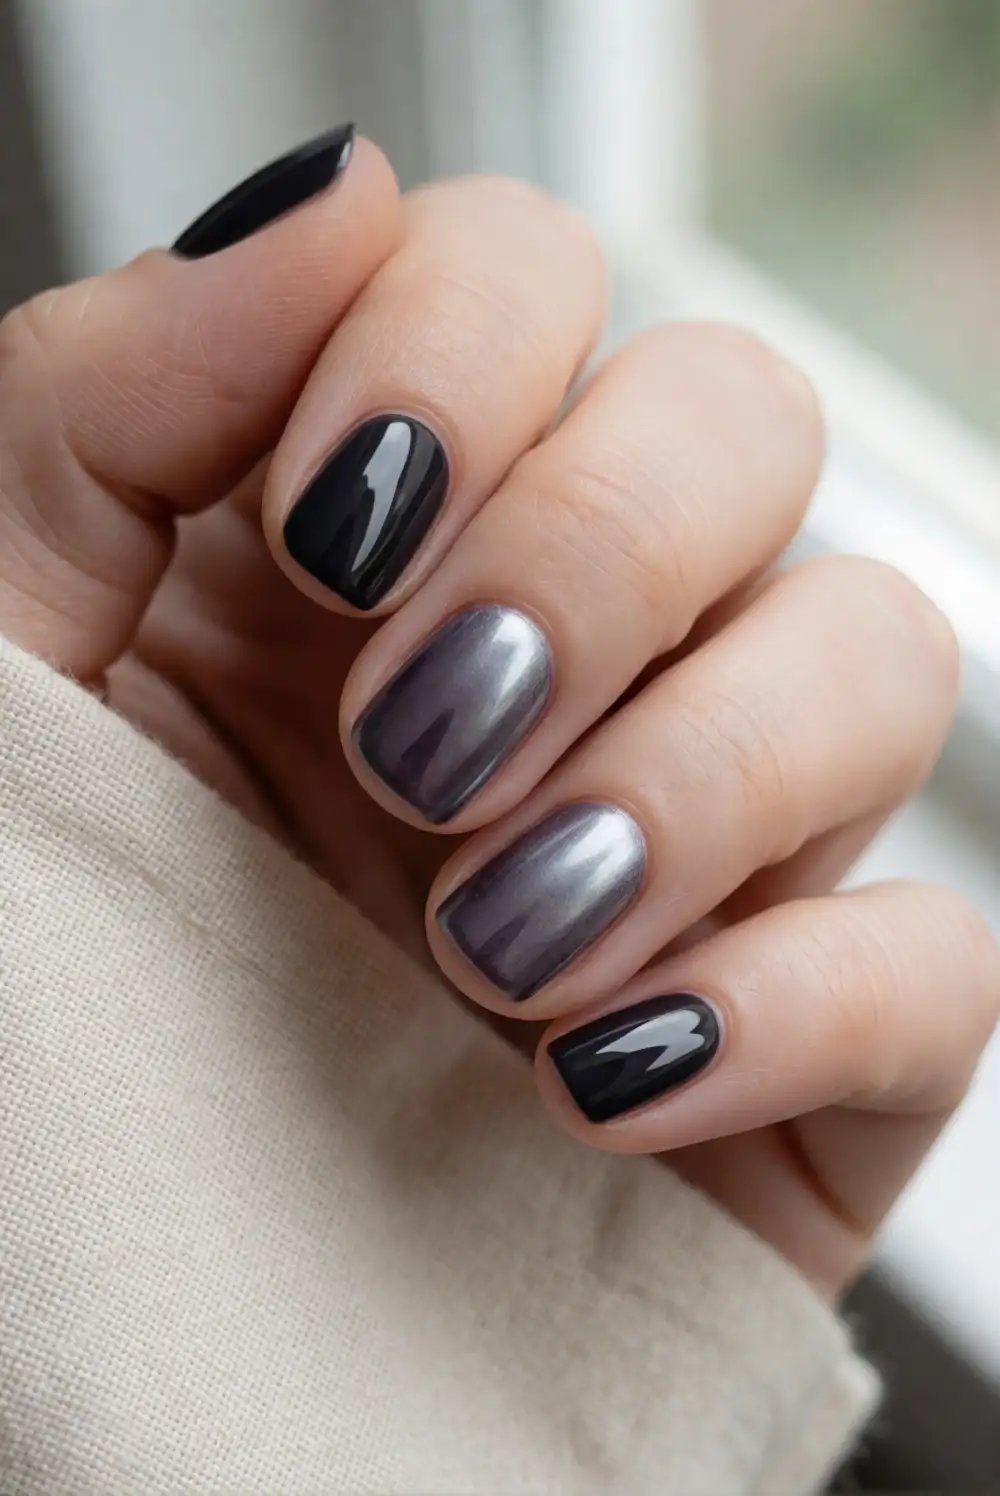
Add a cool metallic glint to a dark manicure with pewter chrome accent nails. Paint most nails glossy black or deep charcoal, leaving one or two bare for the metallic finish. Apply the chrome powder over the compatible gel layer according to its product directions, then buff gently until the surface looks reflective and smooth. Seal the chrome with the recommended top coat and finish the dark nails with a glossy coat for a cohesive, polished set.
For a subtle look, keep the chrome accents limited to one nail on each hand; for more contrast, use pewter on the thumb and ring nail. A dark silver shade feels moodier than bright mirror chrome and complements black, plum, and burgundy polish. Follow the instructions for the specific chrome product, since application methods vary. Short, softly squared nails help the metallic finish read as a refined detail rather than a bold statement.
Short nails can still carry plenty of Halloween mood with deep shades, soft metallic details, and easy-to-wear finishes. Try glossy black tips for a refined look, or mix velvet charcoal, smoky ombré, and plum accents for a more atmospheric manicure. Choose the design that suits your style and make it your own with a favorite dark polish palette.








