
Give your Halloween manicure a playful, polished twist with ghost face nail art that balances eerie inspiration with wearable style. These designs range from clean French tips and minimalist accents to glitter, chrome, and moody finishes, with practical ideas for adapting each look to your nail length and favorite polish colors.
Classic Ghost Face French Tip Nails
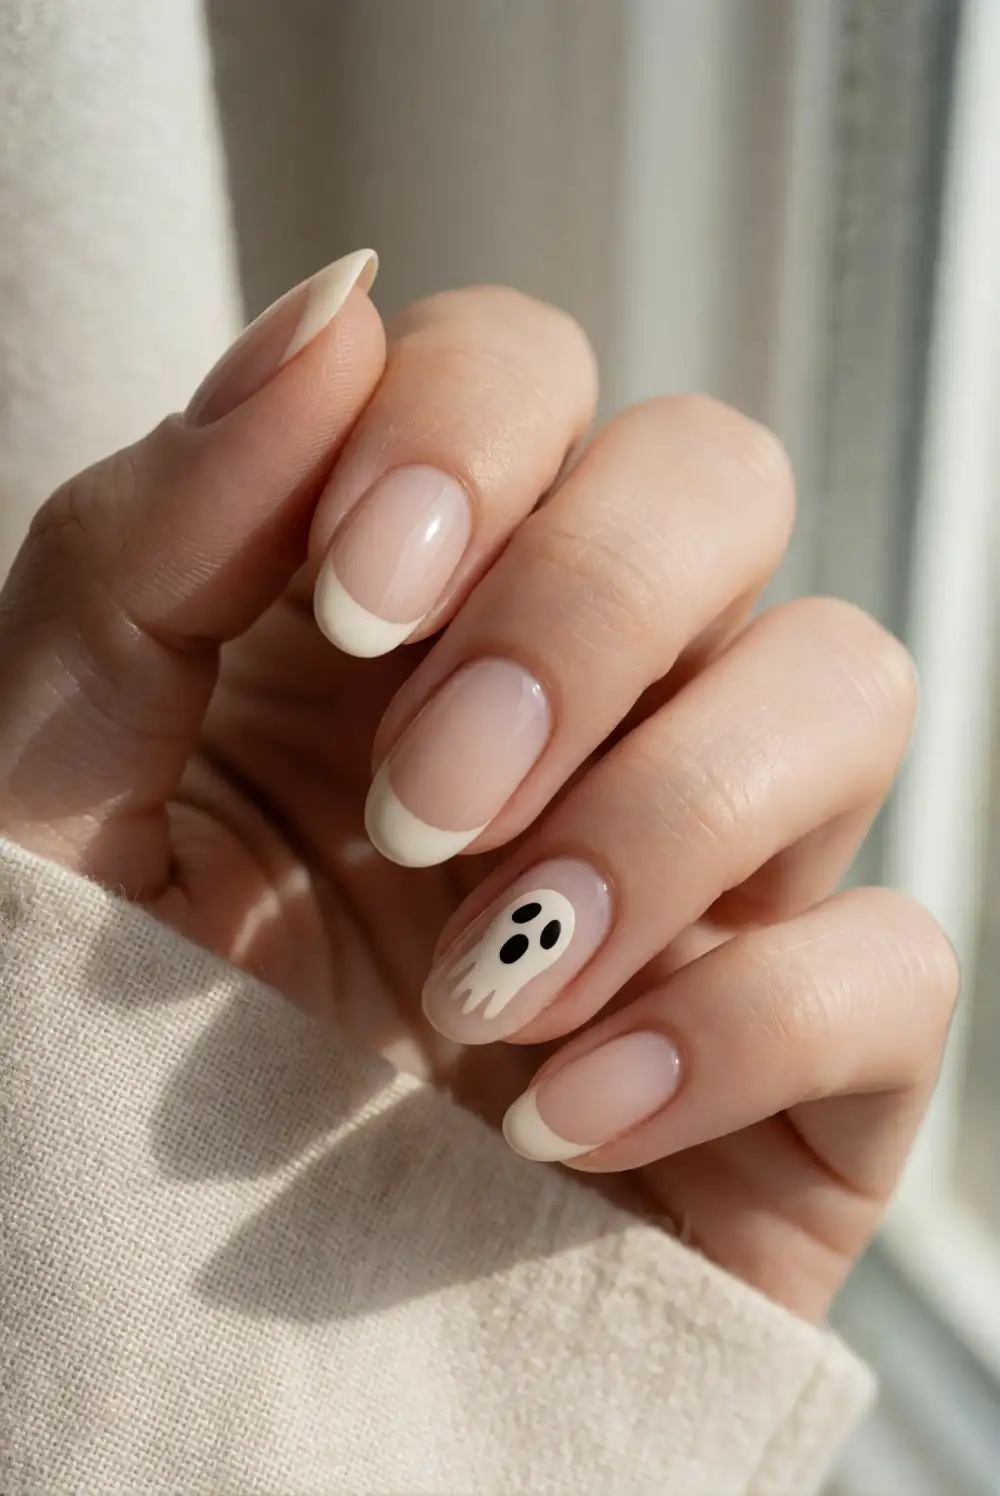
Pair a sheer nude or milky base with crisp ivory tips and tiny black ghost face details for a manicure that feels polished rather than costume-like. Apply your base color, shape the French tips with a fine brush, and let the polish dry before adding small oval eyes and a tapered mouth. A dotting tool or the tip of a toothpick helps keep the features neat. Finish with a glossy top coat to smooth the design.
Keep the ghost faces on just one or two accent nails if you prefer a quieter look, and leave the remaining tips plain. On short nails, make the faces especially small and place them near the tip so the design has room to breathe. A sheer pink base softens the contrast, while a cool beige base gives the manicure a modern, understated feel. Use a fine detail brush to tidy any uneven edges before sealing everything.
Black And Ivory Ghost Face Accent Nails
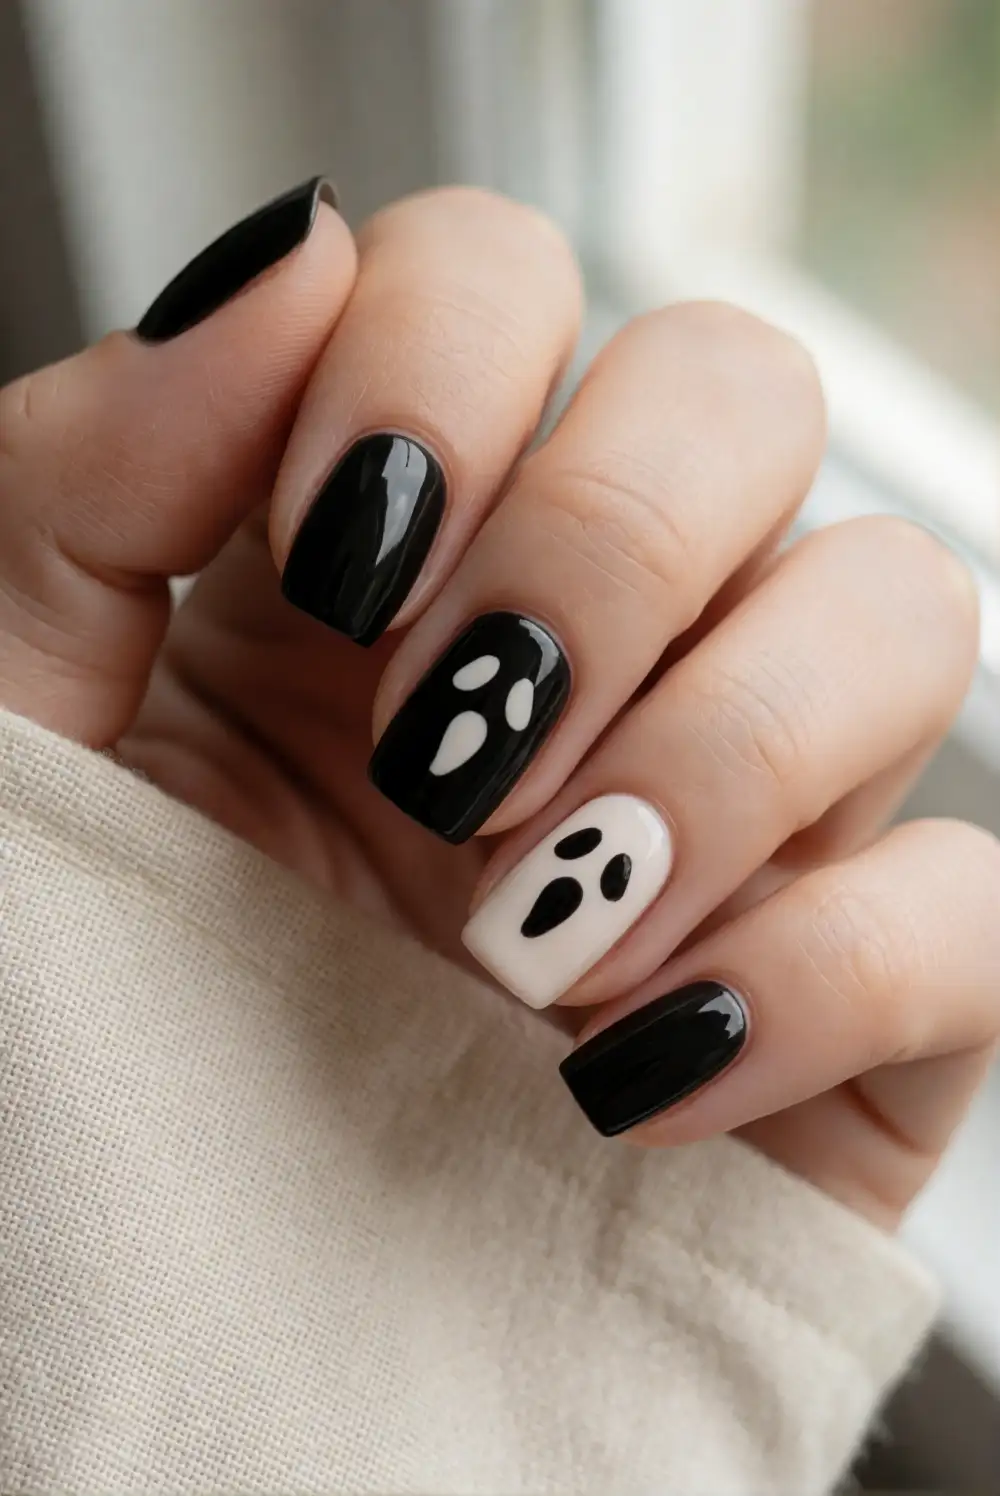
Build a graphic manicure with glossy black polish on most nails and a single ivory ghost face accent on each hand. Apply a protective base coat, paint the dark nails black, and let them dry fully. On the accent nails, use an ivory polish to create a smooth pale shape, then add simple black eyes and a narrow mouth with a detail brush. A glossy top coat on every nail brings the contrasting colors together.
For a softer take, use charcoal instead of jet black and choose a creamy off-white for the faces. You can place the accent art on the ring fingers or spread it across alternating nails for more visual movement. Keep the face features simple so they remain readable on smaller nail beds. If freehand painting feels tricky, practice the shapes on a piece of paper first, then work slowly with a lightly loaded brush.
Negative Space Ghost Face Nail Art
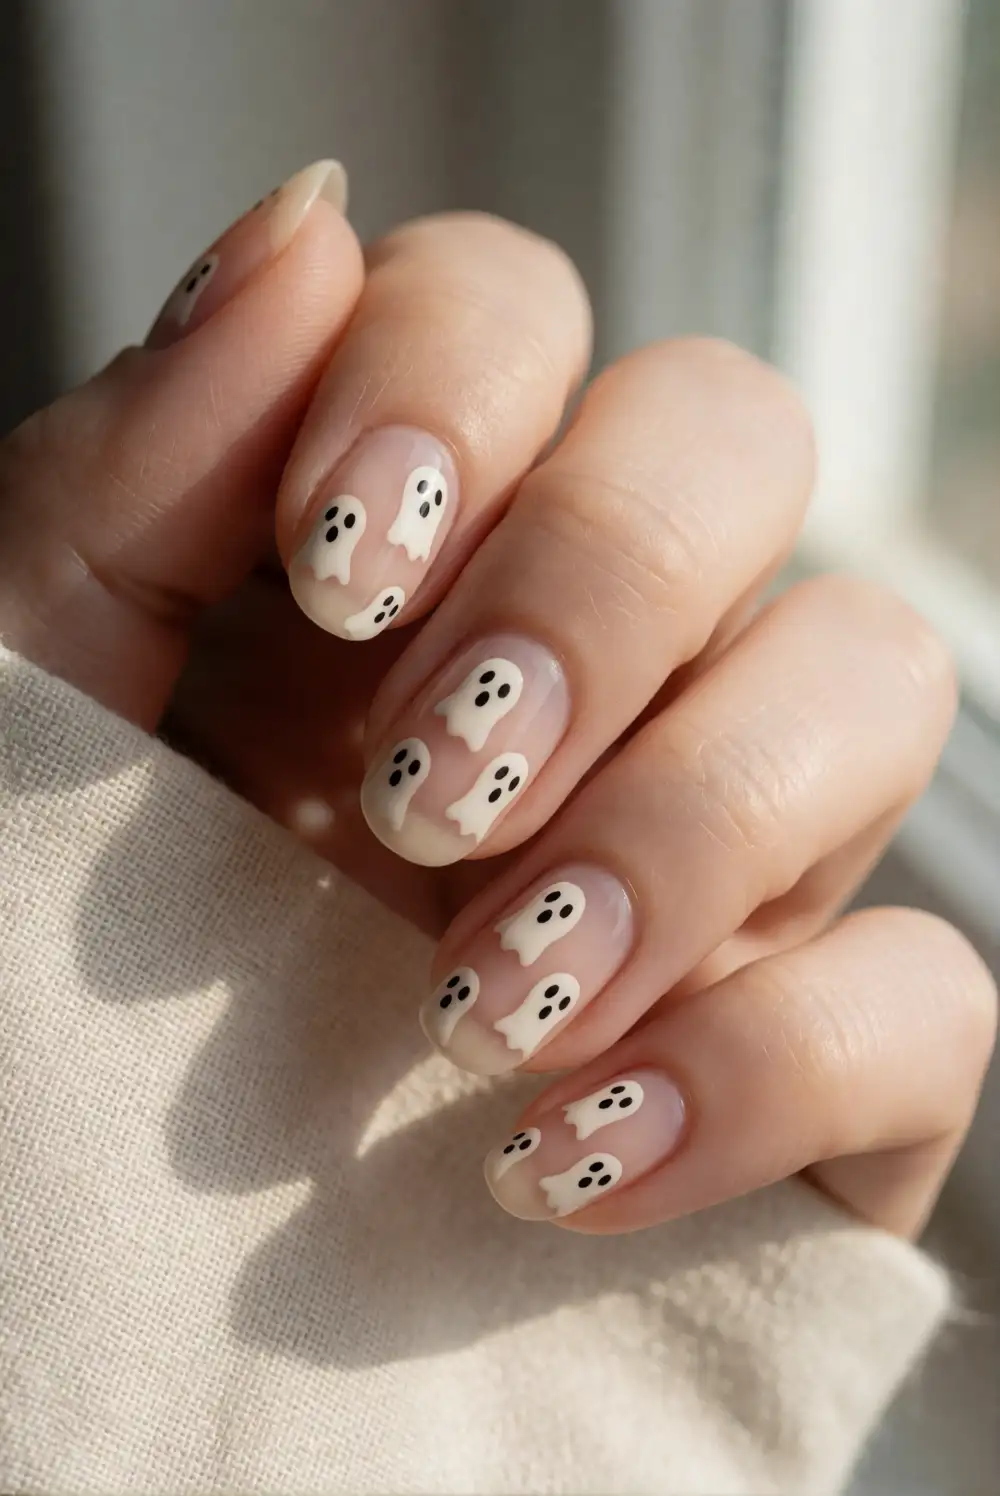
Let the natural nail show through in a sleek negative-space design with pale ghost faces and delicate black outlines. Apply a clear or sheer base coat, then paint a small ivory mask shape on each chosen nail. Once dry, outline only part of the shape with a fine black brush and add simple eyes and a mouth. Leaving open space around the design keeps the manicure airy and graphic. Finish with a clear top coat for a smooth, lasting shine.
This look works well on both short and long nails because the open background keeps the art from feeling crowded. Try one face near the cuticle and another near the tip to vary the placement without changing the palette. A soft beige sheer polish can even out the nail tone while preserving the negative-space effect. Keep the outlines thin, and use a clean detail brush to correct stray polish before applying the top coat.
Glitter Ghost Face Halloween Nails
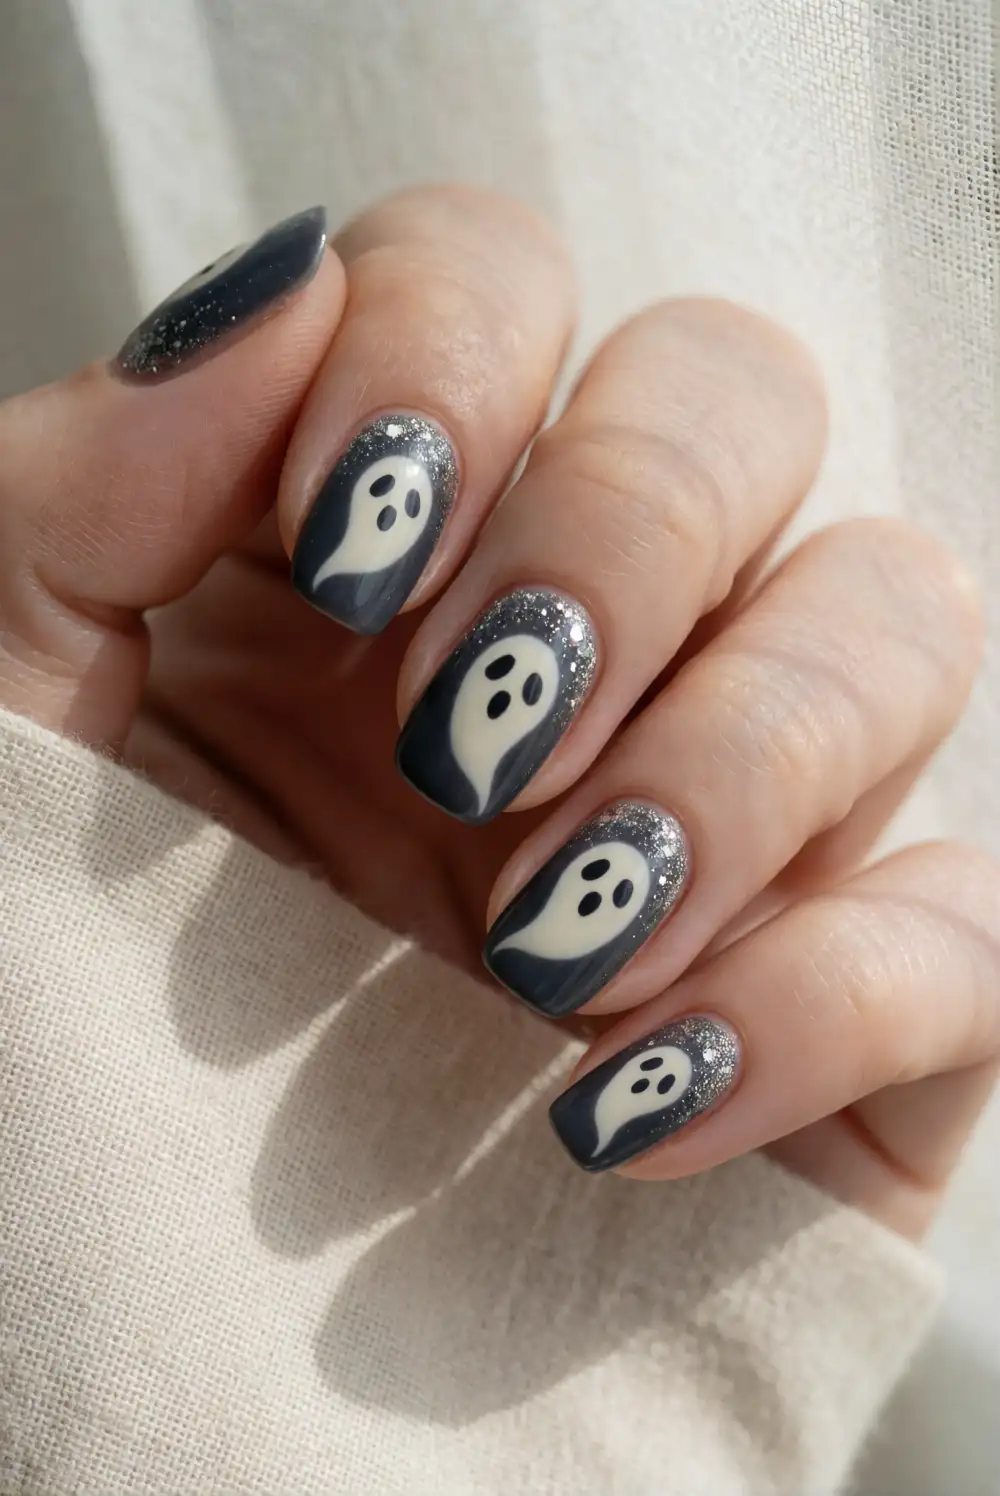
Add a festive glimmer by setting pale ghost faces against a charcoal or deep plum background with fine silver glitter. Paint the nails in your chosen dark shade and allow them to dry completely. Use ivory polish to form a small ghost-inspired face on one or two nails, then add black eyes and a mouth with a fine brush. Place a little glitter near the cuticle or along the side of each nail, and seal the finished design with top coat.
Choose fine shimmer rather than chunky glitter for a smoother, more refined finish that is easier to wear day to day. A single glitter accent nail can balance detailed face art without making the whole manicure feel busy. For a softer variation, use a translucent shimmer over a nude base and keep the ghost features minimal. Apply glitter with a small brush so it stays exactly where you want it, then cap the nail tips with top coat.
Matte Black Ghost Face Nails
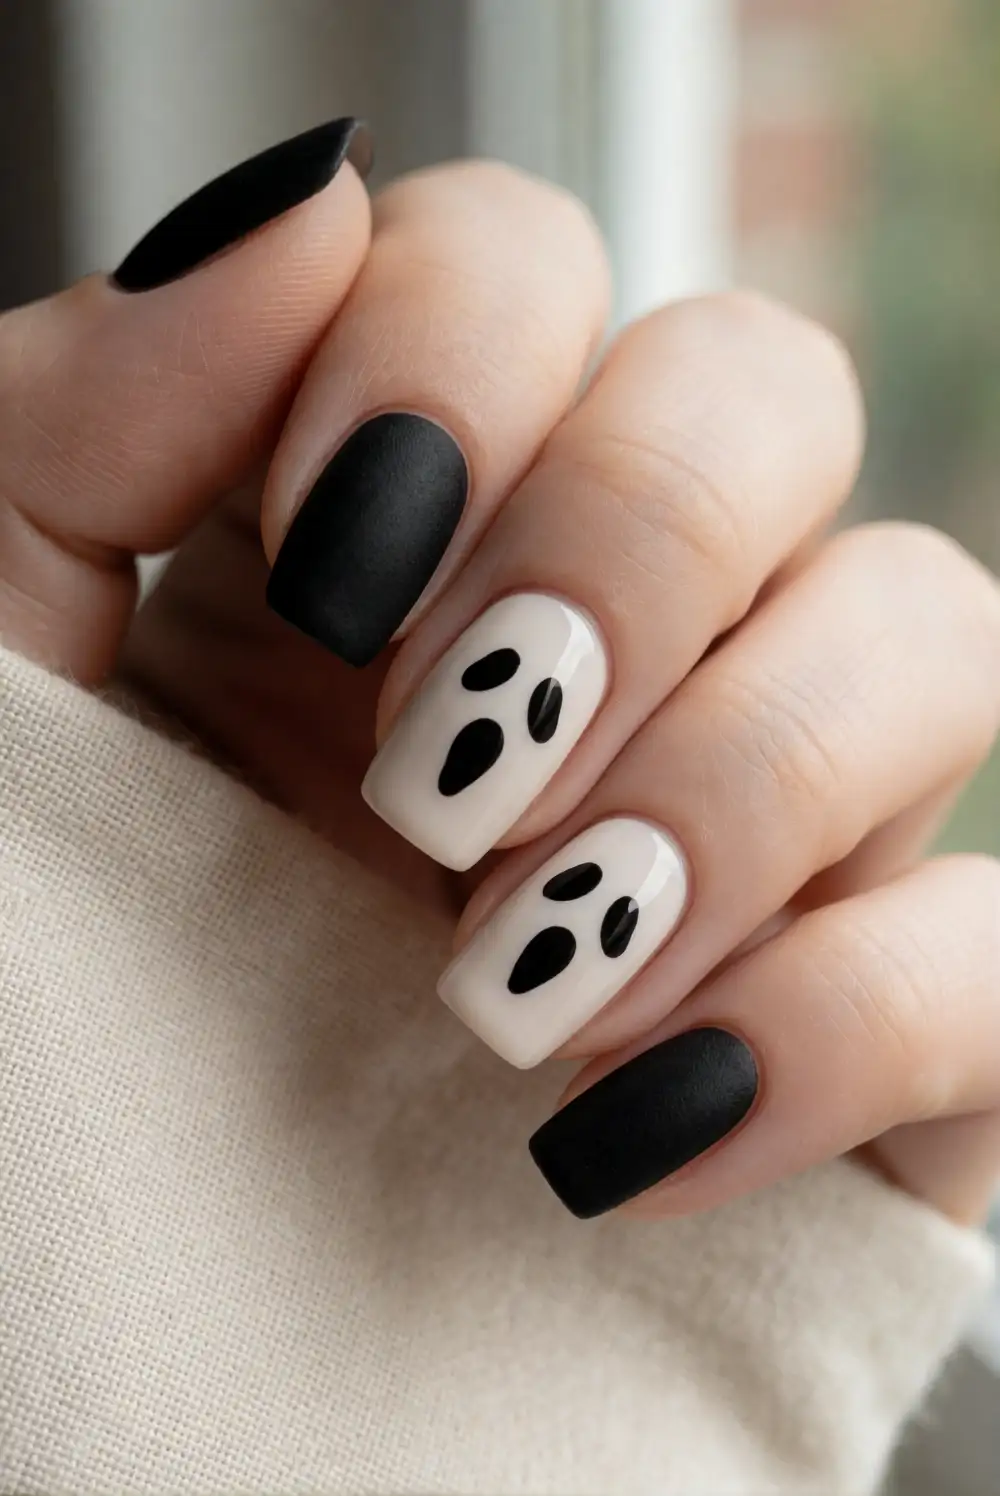
Use a velvety matte finish to give ghost face nail art a modern, editorial look. Apply black polish across the nails and let it dry, then paint ivory faces on selected accent nails with a small detail brush. Add simple dark eyes and mouths, keeping the shapes bold enough to show against the pale polish. Once the art is dry, apply a matte top coat over the dark nails and a glossy top coat over the faces for a subtle finish contrast.
If you want a more coordinated set, paint every nail black and place one small ivory face near the tip of each. For a softer balance, keep several nails plain and use the face art sparingly. Matte polish can show fingerprints, so let the manicure cure fully before handling fabrics or applying hand cream. A glossy face detail against a matte background adds dimension without needing extra colors or complicated decoration.
Silver Chrome Ghost Face Nails
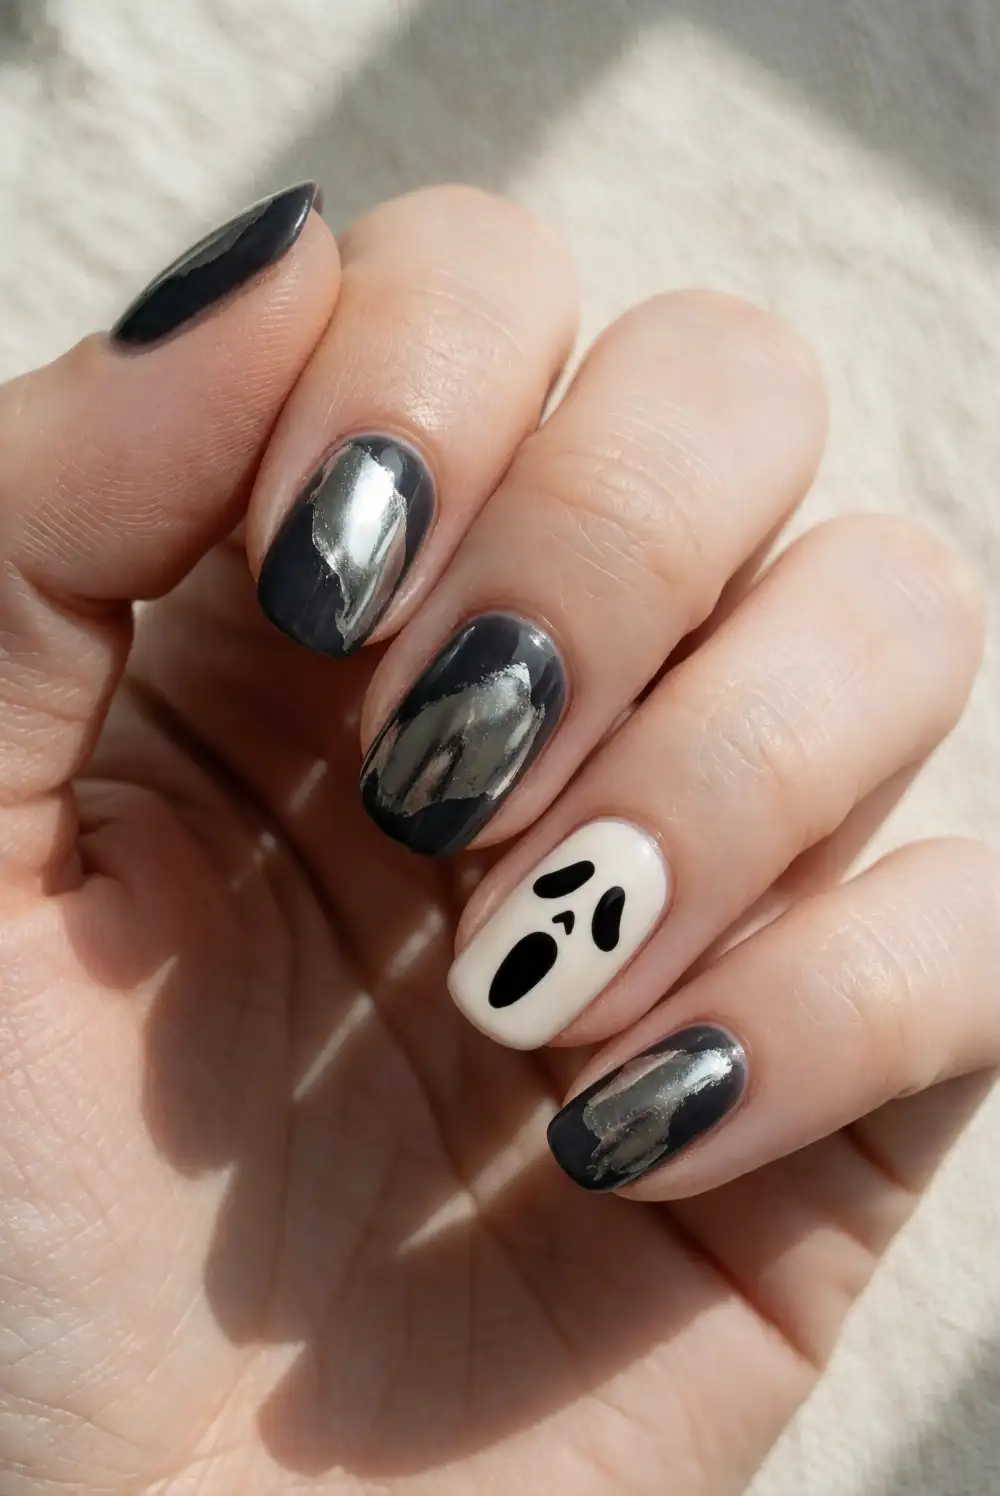
Give a ghost face manicure a cool metallic accent with a silver chrome effect over a dark base. Paint the nails charcoal or black, then add an ivory ghost face to one accent nail on each hand. After the polish dries, use a chrome-effect product according to its packaging directions on the plain nails, keeping the pale artwork clean and distinct. Finish with a compatible top coat to protect the metallic surface and bring the manicure together.
For a more wearable result, limit the chrome to a narrow stripe or a single nail rather than covering every finger. Silver pairs especially well with black, slate, and cool nude polish, while a small white face keeps the Halloween theme clear. Follow the product instructions closely, since chrome finishes can require a particular base and top coat. Clean around the cuticles before sealing the design for a crisp, salon-inspired appearance.
Minimal Ghost Face Nails For Short Nails
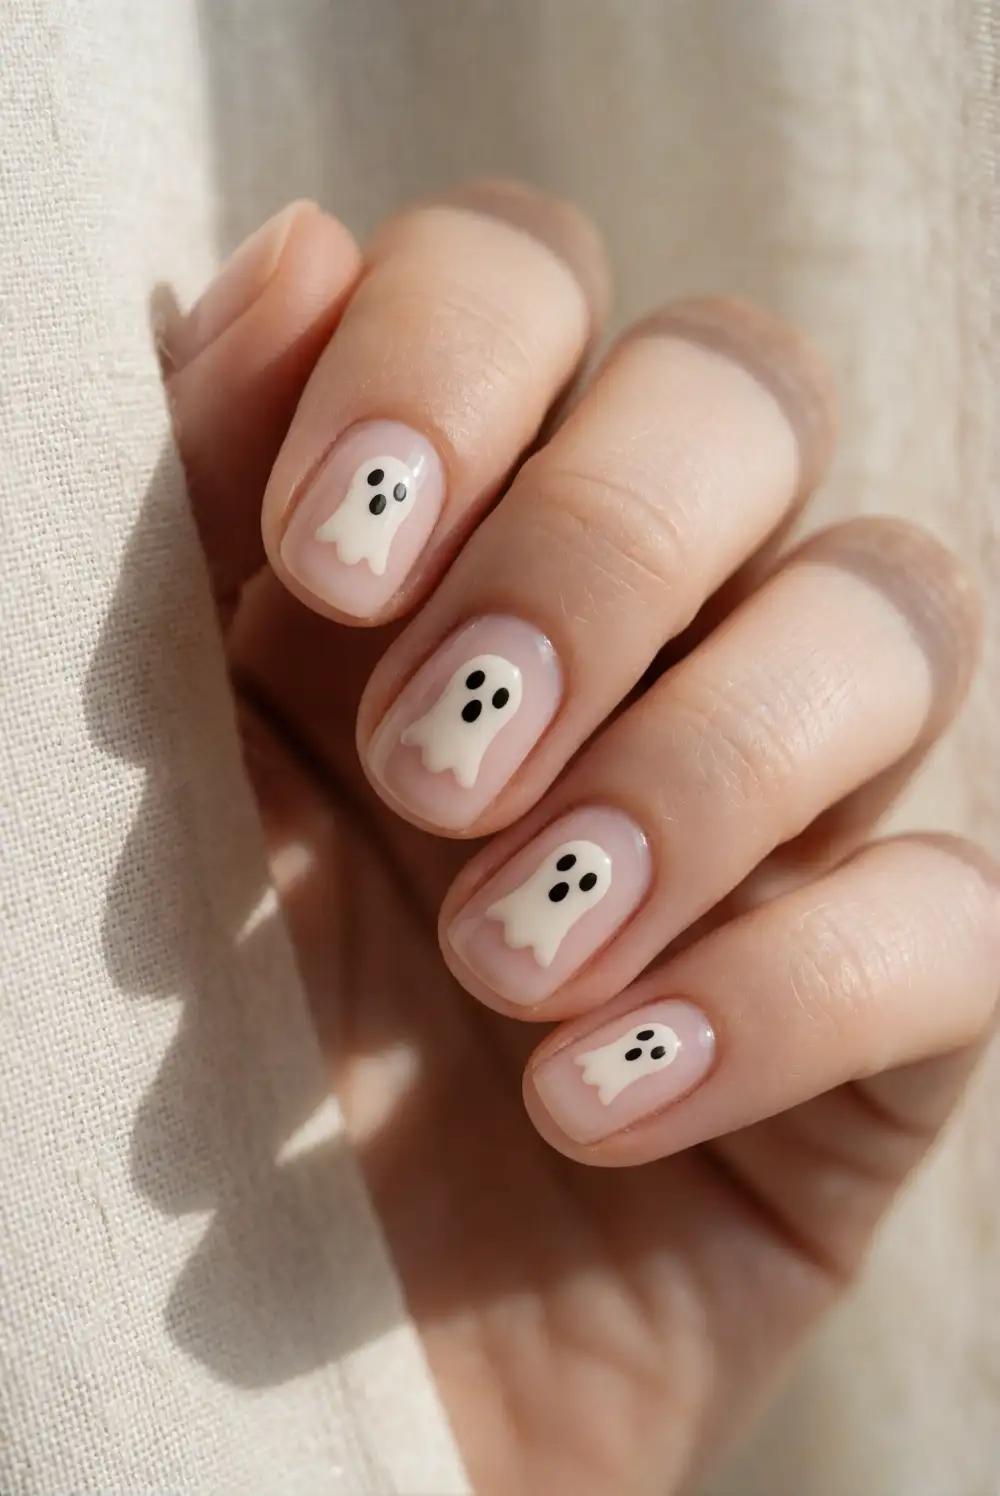
Short nails are a lovely canvas for a pared-back ghost face manicure. Apply a clear, pale pink, or milky nude base, then use a fine brush to paint tiny ivory mask shapes on a few nails. Add only small black eyes and a short mouth, leaving plenty of bare space around each detail. Work in thin layers and let them dry before adding a clear top coat. The compact design stays neat and easy to wear.
Place each face slightly off-center rather than trying to fill the nail, which helps the manicure look intentional on a smaller surface. If painting the masks feels difficult, use tiny pale brushstrokes and simplify the outline instead of adding extra detail. A glossy finish enhances the clean base, while a matte top coat creates a softer look. Keep the remaining nails plain so the miniature artwork stands out without crowding the manicure.
Glow Effect Ghost Face Nail Art
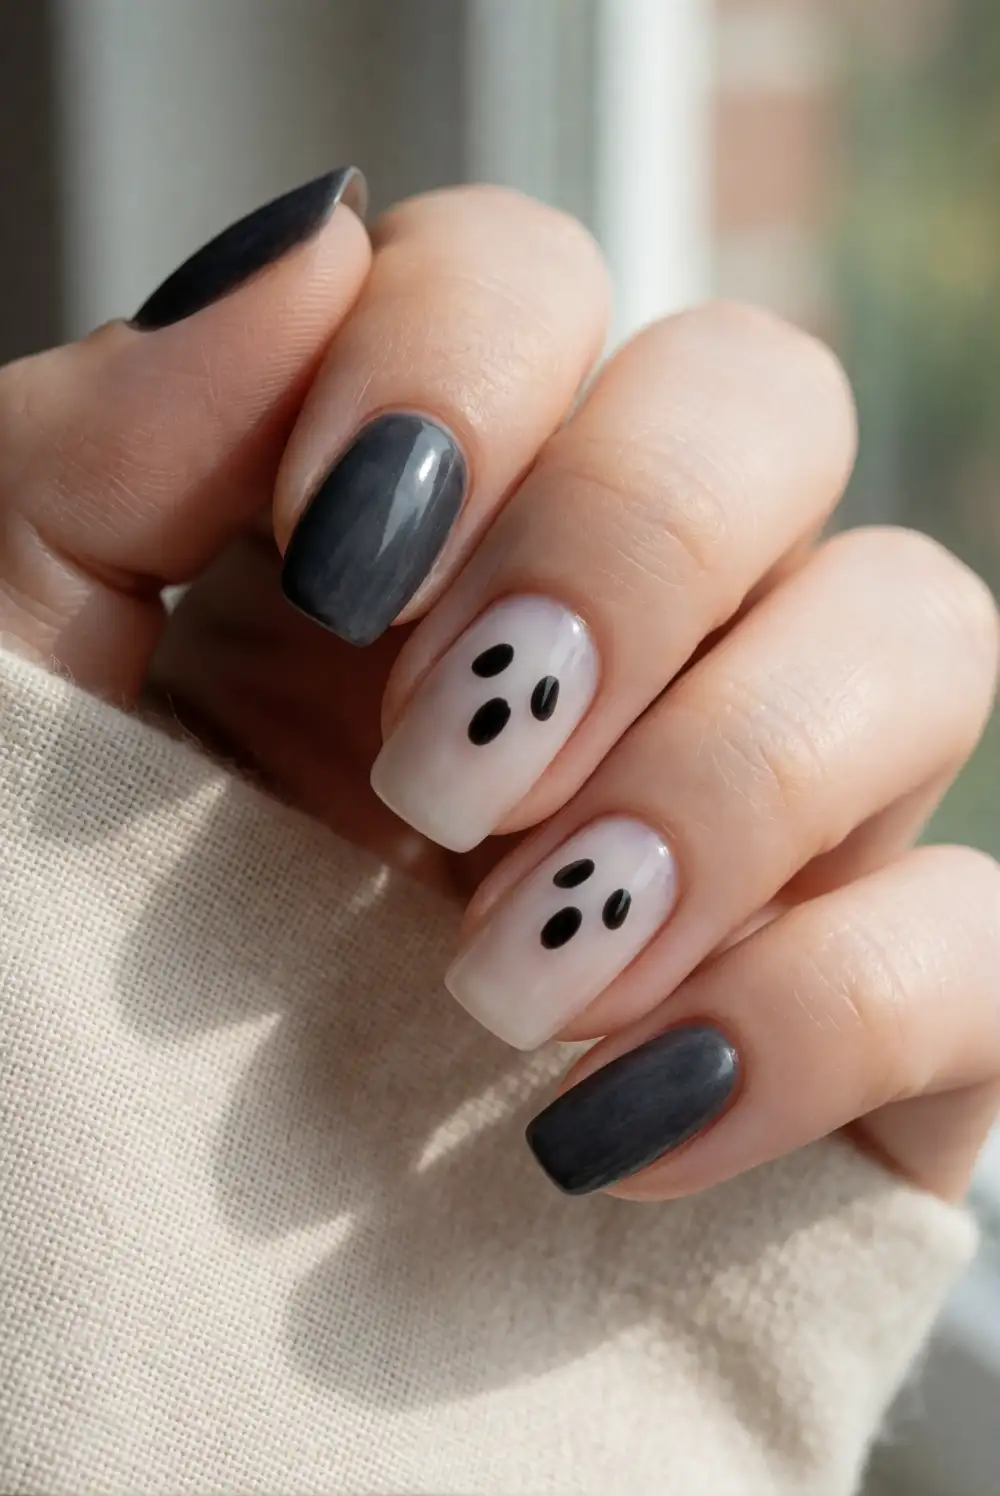
Create a luminous Halloween manicure with glow-effect polish used as an accent beneath simple ghost face details. Apply a dark polish to most nails and a pale glow-effect shade to selected accents, following the product directions for application and charging. Once dry, use a fine brush to add black eyes and a small mouth to the light nails. Keep the shapes uncomplicated so they remain clear in daylight, then seal the manicure with a compatible top coat.
For a subtle daytime look, paint the glow shade only on the ghost shapes instead of using it across a full nail. A deep purple or charcoal base gives the pale accents strong contrast while keeping the palette cohesive. Check that your top coat works with the glow polish, and apply thin layers to avoid a thick finish. The design looks especially polished when the glowing details are limited to a few accent nails.
Ghost Face Nails With Tiny Star Accents
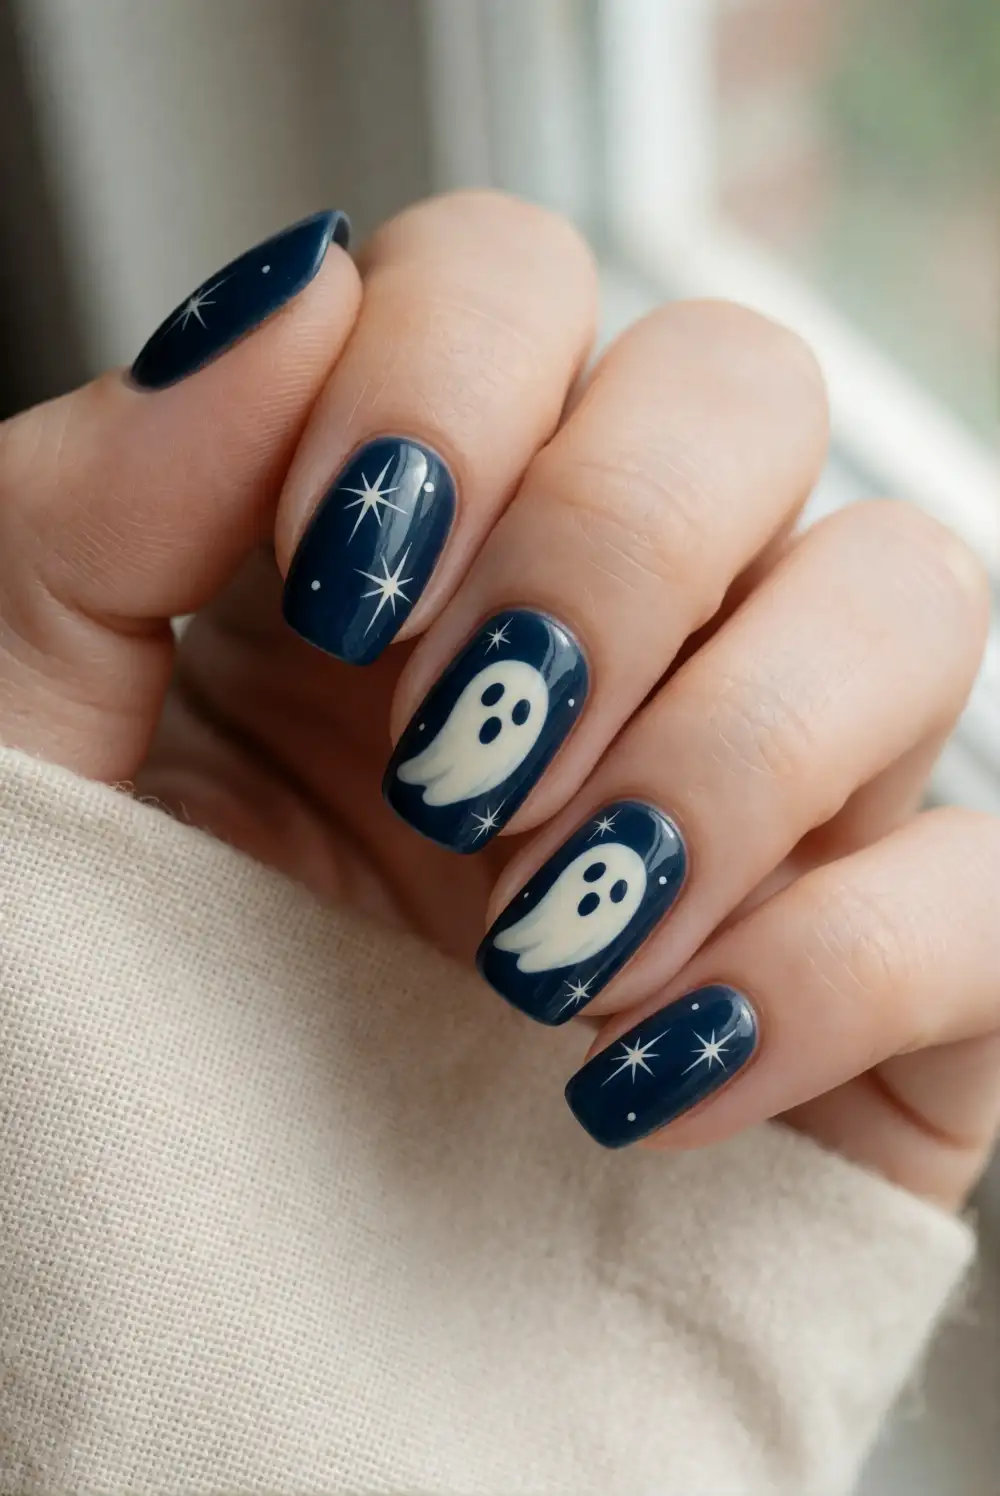
Pair tiny ghost faces with scattered painted stars for a manicure that feels playful and celestial. Start with a sheer lavender, midnight blue, or black base, then paint small ivory faces on selected nails. Use a fine detail brush to add simple starbursts in white or pale silver, keeping them away from the faces so each feature stays visible. Let the artwork dry before applying a glossy top coat to even the surface and protect the fine details.
Use only a few stars per nail to keep the pattern airy, especially if your nails are short. A midnight base feels dramatic, while lavender makes the finished look softer and more whimsical. Vary the star size slightly with a small brush, but keep the ghost faces consistent for a pulled-together set. For an easy accent, add the stars to plain nails and reserve the detailed art for one or two fingers.
Ghost Face Ombre Halloween Manicure
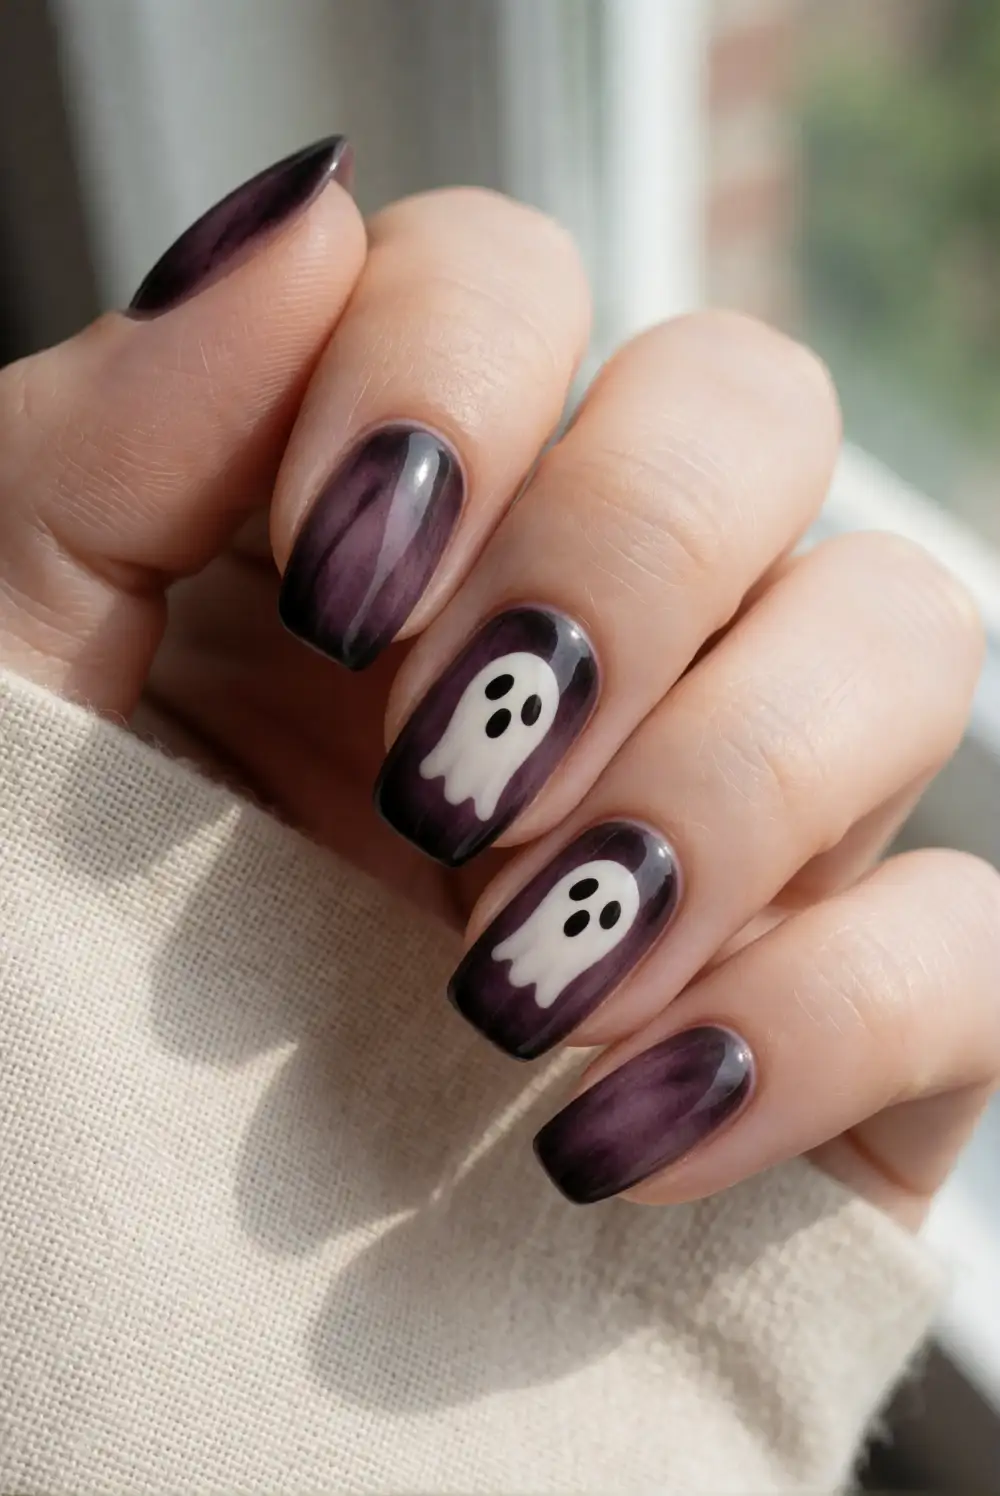
Blend a smoky black-to-plum ombre for a moody backdrop to clean ivory ghost face art. Apply a protective base coat, then place the two polish colors side by side on a makeup sponge and gently dab the gradient onto each nail. Repeat thin applications until the blend looks even, allowing each layer to dry. Paint small pale faces on selected nails with a detail brush, add black features, and finish with a glossy top coat.
Choose charcoal fading into deep violet for a softer gradient, or blend black into muted orange for a more seasonal palette. Keep the face art concentrated on accent nails so the ombre remains visible across the set. A liquid barrier around the nails can make sponge cleanup easier; remove it after the polish has dried. Apply the top coat with a light touch to avoid dragging the carefully painted facial details.
Ghost face nails can be as minimal or statement-making as you like, whether you prefer a clean French tip, a matte black finish, or a subtle metallic accent. Choose a design that suits your nail length, gather a fine brush and complementary polishes, and finish with a top coat for a neat Halloween manicure you can make your own.








